presentation zen Simple ideas on presentation design and delivery phần 7 pps
Bạn đang xem bản rút gọn của tài liệu. Xem và tải ngay bản đầy đủ của tài liệu tại đây (1.94 MB, 24 trang )
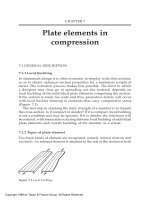
This is the original slide. The problem with this slide
is that the clip art used does not reinforce the
simple statistic, nor does it even fit the theme of
women in the Japanese labor market. The
background is a tired, overused PowerPoint
template, and the text is difficult to read.
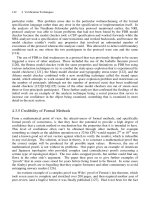
The text on this slide is easy to read, and although
the clip art is a bit more appropriate for the
subject, it still does not give the slide a strong
visual impact or overall professional look and feel.
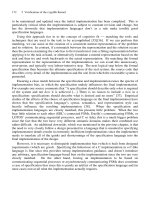
This slide is an effort to display the some
information in a pie chart. While this type of chart
is not unusual
, its 3-D effects and extra lines are
not an improvement.
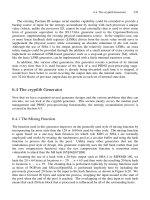
The two bullet points are easy to read in an
instant. The photo of an actual part-time female
worker in Japan
is a step in the right direction,
but it could still be much better.
136 Presentation Zen
ABOVE The four slides above are different
treatments of the some message. Any of these
slides would also work to complement the
presenter's narration. (Notice that the slides
featuring only the "72%" figure would be
virtually meaningless without the presenter's
narration.)
BELOW The slide on the left was the redesign
that was use
d in the end. All the remaining
slides in the deck were also redesigned using
Japanese stock images giving the entire
presentation a consistent visual theme that
supported the presenter's words.
Chapter 6 Presentation Design: Principles and Techniques 137
All slides on this page use images that "bleed" off
the edge, filling the entire screen. Text and image
work in harm
ony. The "masking tape and paper
note" is a jpeg image from iStockphoto that
provides an interesting effect and prevents the
text from getting lost in the background. The
masking tape and note element provide good
contrast with the text and add depth to the overall
visual. The slight angle of the note and text add
interest without being distracting.
lide images on this page from iStockphoto.com.
138 Presentation Zen
The slides on this page are from the portfolio of Jeff
Brenman, the creator of Apollo Ideas and the winner of
SlideShare's
"World's Best Presentation Contest" in 2007.
(You can see the slide deck that won him first place in the
next
chapter.) Jeff has a talent for combining images and
text in a way that is fresh and effective for augmenting the
presenter's mes
sages.
Chapter 6 Presentation Design: Principles and Techniques 139
Where Can You Get Good Images?
Getty Images may have the best quality and the greatest
selection of images for presentations, but what if you
cannot afford to make a slide presentation costing
hundreds or thousands of dollars in stock image fees? In
this case, low cost, royalty-free "micro-stock" images are
an alternative. The site I recommend most often is
iStockphoto.com
. Most of the images used in this book
are from iStockphoto.com
. iStockphoto is incredibly easy
to use and after you search you can just roll over thumbs
to get a larger view without having to open another
page.
I do not suggest you limit your image searches to iStockphoto.com
only. I have a shelf full of photo
CDs and subscribe to other photo sites as well, but iStockphoto is the best. They have over two million
images from which to choose and are adding thousands of images every week; they just keep getting
better and better. iStockphoto has a "free image of the week" so you may want to check back from
time to time to see what's new (and free). At the back of this book, you will find a special code just for
you that entitles you to 10 free credits on the iStockphoto Web site (and a discount for current
members). So take your free credits and download a few images from iStockphoto.com
.
My personal favorite photo site
iStockphoto (www.istockphoto.com)
Here are some other places to get low-cost images
Dreams Time (www.dreamstime.com)
Fotolia (www.fotolia.com)
Japanese Streets (www.japanesestreets.com)
Shutter Stock (www.shutterstocl<.com)
Shutter Map (www.shuttermap.com)
Here are a few sites that offer free images
Morgue File (www.morguefile.com)
Flickr Creative Commons Pool (www.flickr.com/creativecommons)
Image After (www.imageafter.com)
Stock.xchng (www.sxc.hu)
Everystockphoto search engine (www.everystockphoto.com)
140 Presentation Zen
Quote This
While long bullet points are not very effective as a "visual enhancer," displaying
quotations in your presentation slides can be a very powerful technique. Depending
on the presentation, I often use quite a few quotes from various fields to support
my points. The trick is not to use them too much and to make
sure they are short and legible.
When I first saw Tom Peters live a few years ago while I was working in Silicon
Valley, I was happy to see that he used a good deal of quotes from various experts,
authors, and industry leaders. Using quotes in his presentation visuals is a big deal
for Tom. In fact, it is number 18 on his "Presentation Excellence 56" article on his
Web site.
Commenting on why he uses so many PowerPoint slides containing quotes,
Tom says:
" my conclusions are much more credible when I back them up with Great
Sources. I say pr
etty radical stuff. I say 'Get radical!' That's one thing. But
then I show a quote from Jack Welch, who, after all, ran a $150 billion
company (I didn't): `You can't behave in a calm, rational manner; you've got
to be out there on the lunatic fringe.' Suddenly my radicalism is "'certified"
by a "real operator." Also, I find that people like to get beyond the spoken
word, and see a SIMPLE reminder of what I'm saying."
Quotes can indeed add credibility to your story. A simple quote is a good
springboard from
which you can launch your next topic or weave into your
narrative to support your point. Remember, quotes should be short, in most cases,
since it can become quite tedious when a presenter reads a paragraph from a
screen.
Chapter 6 Presentation Design: Principles and Techniques 141
Text within Images
I almost always get my quotes straight from
material I have read directly or from personal
interviews. My books, for example, are filled
with sticky-notes and pages full of my
comments and highlighter marks. I sketch a
star and write a note to myself next to great
passages for future reference. It's kind of
messy, but it works for me when I put the
presentation together later.
When I use a quote I sometimes use a
graphic element that targets people's
emotions, ads more visual interest, and
enhances the effect of the slide. But rather
than using a small photo or other element,
consider placing the text within a larger
photo. To do this you will want to use an
image at least as large as your slide
dimensions (e.g., 800x600) for your
background. Look for an image that supports
the point you are making with the quotation.
The image should have plenty of empty
space so that your text can fit comfortably in
the slide with good contrast.
On this page you can see two slides
displaying a quotation in a manner that is not
unusual. On the opposite page you can see
the same quote displayed
within the image
rather than simply
next to a smaller version
of the image in a slide. (Photos in these slides
from iStockph
oto.com
.)
142 Presentation Zen
Chapter 6 Presentation Design: Principles and Techniques 143
Emptiness which is conceptually liable to
be mistaken for sheer nothingness is in
fact the reservoir of infinite possibilities.
- Daisetz Suzuki
144 Presentation Zen
Empty Space
Empty space (also called negative space or white space) is a concept that is
supremely simple, yet the most difficult for people to apply. Whether people are
designing a document or a slide, the urge to fill empty areas with more elements
is just too great. One of the biggest mistakes that typical business people make
with presentation slides (and documents as well) is going out of their way to
seemingly use every centimeter of space on a page, filling it up with text, boxes,
clip art, charts, footers, and the ubiquitous company logo.
Empty space implies elegance and clarity. This is true with graphic design, but you
can see the importance of space (both visual and physical) in the context of, say,
interior design as well. High-end brand shops are always designed to create as
much open space as possible. Empty space can convey a feeling of high quality,
sophistication, and importance.
Empty space has a purpose. But those new to design may only see the positive
elements, such as text or a graphic, without ever "seeing" the empty space and
using that space to make the design more compelling. It is the empty space that
gives a design air and lets the positive elements breathe. If it were true that empty
space in a design such as a slide were "wasted space," then it would make sense to
want to remove such waste. However, empty space in a design is not "nothing," it
is indeed a powerful "something," which gives the few elements on your slide their
power. .
In the Zen arts, you will find an appreciation for empty space. A painting, for
example, may be mostly "empty" except for two to three elements, but the
placement of the elements within that space forms a powerful message. The same
approach can be applied to a room. Many Japanese homes have a washitsu, a
traditional room with tatami mats, which is simple and mostly empty. The empty
space allows for the appreciation of a single item, such as a single flower or a
single wall hanging. The emptiness is a powerful design element itself. In this case,
the more we add, the more diluted and less effective the design of our graphic, or
living space, becomes.
Chapter 6 Presentation Design: Principles and Techniques 145
Using Empty Space
The blue slide on top is a typical one with
several bullet points
and an image related
to the topic. Rather than making good use
of empty space, the blue slide has trapped
space in areas around the image. Instead of
using one busy slide, I broke the flow of the
content into six slides for the introduction
of the "Nara hachi bu" concept.
Since it is not necessary to put
all the words that are spoken by
the presenter on the screen,
much of the on-screen text was
removed. The slides have a
clean white background with
plenty of active empty space
that helps guide the viewer's
eyes. When a new slide is
revealed the eye will be
naturally drawn to the image
first (it's larger, colorful) and
then quickly go to the text
element.
146 Presentation Zen
Embedded images on this
page from iStockphoto.com
Chapter 6 Presentation Design: Principles and Techniques 147
Directing the Eye With Images
Images can be used to help guide your viewer's
eyes through a slide to the most important
elements. If you use images of people, be
careful not to have these images unintentionally
guide your viewer's eyes away from what you
want them to see. For example, if the text
element (or chart) is the highest priority, it is
important not to have images of people looking
in the opposite direction from those elements.
How do the images in these slides guide your
eyes toward or away from the other elements?
Which versions of the slides on this page look
more harmonious?
Balance
Balance in a design is important, and one way to achieve good balance and clarity
with a design is through the intelligent use of "empty space." A well-balanced
design has a clear, single, unified message. A well-designed slide has a clear
starting point and guides the viewer through the design. The viewer should never
have to "think" about where to look. A visual must never confuse anyone. What is
the most important, less important, and least important parts of the design can be
clearly expressed by having a clear hierarchy and a good balance of the display
elements.
Empty space can be dynamic and active through careful placement of positive
elements. Conscious use of empty space can even bring motion to your design. In
this way, the empty space is not passive but active. If you want to bring a more
dynamic feel and interest to your slide design, then consider using an asymmetrical
design. Asymmetrical designs activate empty space and make your design more
interesting. Asymmetrical designs are more informal and are dynamic, with a variety
of sizes and shapes.
Symmetrical designs have a strong emphasis along a central vertical axis.
Symmetrical balance is vertically centered and is equivalent on both sides.
Symmetrical designs are more static than asymmetrical designs and evoke
feelings of formality or stability. There is nothing wrong with centered,
symmetrical designs, although empty space in such designs is generally passive
and pushed to the side.
Design is about seeing and manipulating shapes, but if we do not see the empty
space in a slide as a shape, then it will be ignored and any use of empty space will
be accidental. Consequently, the results will not be as powerful. Good
presentations will incorporate a series of presentation visuals that have a mix of
slides that are symmetrical and asymmetrical.
148 Presentation Zen
Chapter 6 Presentation Design: Principles and Techniques 149
Both slides have good balance. The
top slide is a common design that is
symmetrical (and not very interesting).
The bottom slide is asymmetrical and is
simpler yet more powerful as a visual.
(Image from iStockphoto.com
.)
146 Presentation Zen
One way to activate the empty space and create
a dynamic, asymmetrical slide is to use large
images that "bleed" off the edge. Use the empty
space to place small amounts of text or other
elements. On the right is another Guy Kawasaki
quote—one of my favorites—from one of my
branding talks in Japan. The first slide (the
quote) is symmetrical. The other two slides are
examples of asymmetrical designs.
Grids and the Rule of Thirds
For centuries, artists and designers have introduced a proportion called the
"golden mean" or "golden ratio" found in nature into their works. The golden
section rectangle has a proportion of 1:1.618. There is a belief that we are naturally
drawn to images that have proportions approaching the golden section rectangle,
just as we are often drawn to many things in the natural environment with golden-
mean proportions. However, attempting to design visuals according to golden-
mean proportions is impractical in most cases. But, the "rule of thirds," which is
derived from the golden mean, is a basic design technique that can help you add
balance (symmetrical or asymmetrical), beauty, and a higher aesthetic quality to
your visuals.
The rule of thirds is a basic technique that
photographers learn for framing their shots.
Subjects placed exactly in the middle can often
make for an uninteresting photo. A viewfinder can
be divided by lines—real or just imagined—so that
you have four intersecting lines or crossing points
and nine boxes that resemble a tic-tac-toe board.
These four crossing points (also called "power
points," if you can believe it) are areas you might
place your main subject, rather than in
the center.
Remember, there is no liberty in "absolute freedom" when it comes to design.
You need to limit your choices so that you do not waste time adjusting every single
design element to a new position. I recommend that you create some sort of clean,
simple grid to build your visuals upon. Although you may not be aware of it,
virtually every Web page and every page in a book or magazine is built atop a grid.
Grids can save you time and ensure that your design elements fit more
harmoniously on the display. Using grids to divide your slide "canvas" into thirds,
for example, is an easier way to at least approach golden-mean proportions, and
you can use the grids to align elements that give the overall design balance, a clear
flow and point of focus, and a natural overall cohesiveness and aesthetic quality that
is not accidental but is by design.
Chapter 6 Presentation Design: Principles and Techniques 151
152 Presentation Zen
152 Presentation Zen
On this page you cos see five samples
of
simple slides in
which elements were arranged with the help of the "rule
of thirds" grid (you can easily create your own using the
guides in Keynote or PowerPoint). The rule of thirds is
not a rule at all, it is only a guideline. But it is a very
useful guideline to use when you are aiming to achieve a
balanced look.
You'll also notice that the images themselves have
pretty good "rule of third" proportions. The iStockphoto
images were chosen in part based on the photo's
proportions and how the image guided the eye and
contained empty space for text or other design
elements. (Images used for the slides on this page are
from iStockphoto.com
.)
The Big Four: Contrast,
Repetition, Alignment, Proximity
These four principles are not all there is to know about graphic design, but
understanding these simple related concepts and applying them to slide design can
make for far more satisfying and effective designs.
Contrast
Contrast simply means difference. And for whatever reason perhaps our brains
think they are still back in the savannah scanning for wild predators we are all wired
to notice differences. We are not conscious of it, but we are scanning and looking
for similarities and differences all the time. Contrast is what we notice, and it's what
gives a design its energy. So you should make elements that are not the same
clearly different, not just slightly different.
Contrast is one of the most powerful design concepts of them all because really
any design element can be contrasted with another. You can achieve contrast in
many ways—for example, through the manipulation of space (near and far, empty
and filled), through color choices (dark and light, cool and warm), by text selection
(serif and sans serif, bold and narrow), by positioning of elements (top and
bottom, isolated and grouped), and so on.
Making use of contrast can help you create a
design in which one item is clearly dominant.
This helps the viewer "get" the point of your
design quickly. Every good design has a strong
and clear focal point and having a clear contrast
among elements (with one being clearly
dominant) helps. If all items in a design are of
equal or similar weight with weak contrast and
with nothing being clearly dominant, it is difficult for the viewer to know where to
begin. Designs with strong contrast attract interest, and help the viewer make
sense of the visual. Weak contrast is not only boring, but it can be confusing.
Every single element of a design such as line, shape, color, texture, size, space,
type, and so on can be manipulated to create contrast. On the next page are
some slides that make good use of contrast compared with slides that
Chapter 6 Presentation Design: Principles and Techniques 153
WEAK CONTRAST BETTER CONTRAST
154 Presentation Zen
Repetition
The principle of repetition simply means the reusing of the same or similar
elements throughout your design. Repetition of certain design elements in a slide
or among a deck of slides will bring a clear sense of unity, consistency, and
cohesiveness. Where contrast is about showing differences, repetition is about
subtly using elements to make sure the design is viewed as being part of a larger
whole. If you use a stock template from your software application, then repetition
is already built into your slides. For example, a consistent background and
consistent use of type adds unity across a deck of slides.
However, you must be careful not to have too much repetition among your
slides. Most of the built-in templates have been seen many times before and may
not suit your unique situation. Many of the standard templates also have
background elements that will soon become tiring, rather than generating
interest the tenth time a different slide is shown but with the same repetitive
element. For example, a starfish in the lower right (not my favorite but perhaps
appropriate for a presentation on marine biology) is an element that would be a
stronger repetitive element if its size and location occasionally shifted in harmony
with the content of different slides and in a way that was subtle and did not
interfere with the primary message.
The slides on the next page are a good
example of repetition. In these slides from a
presentation on the process of designing a
book, Swiss designer and photographer
Markuz Wernli Saito used his own full bleed
photos for all his slides. To help give the
entire presentation a unified look, he used a
similar red note and paperclip to "hold" his
text in each slide. The placement of the note
and paperclip image was not always in the
same location in every slide, nor was the size
always the same, but the consistent use of
this one element and the red color served to
ad a subtle repetitive element that gave his
visuals a professional and unified look.
Chapter 6 Presentation Design: Principles and Techniques 155
156 Presentation Zen
Alignment
The whole point of the alignment principle is that nothing in your slide design
should look as if it were placed there randomly. Every element is connected visually
via an invisible line. Where repetition is more concerned with elements across a
deck of slides, alignment is about obtaining unity among elements of a single slide.
Even elements that are quite far apart on a slide should have a visual connection,
something that is easier to achieve with the use of grids. When you place elements
on a slide, try to align them with another element.
Many people fail to make an effort to apply the alignment principle, which often
results in elements being almost aligned but not quite. This may not seem like a big
deal, but these kinds of slides look less sophisticated and overall less professional.
The audience may not be conscious of it, but slides that contain elements in
alignment look cleaner. And assuming other principles are applied harmoniously as
well, your slides should be easier to understand quickly.
Proximity
The principle of proximity is about moving things closer or farther apart to achieve
a more organized look. The principle says that related items should be grouped
together so that they will be viewed as a group, rather than as several unrelated
elements. Audiences will assume that items that are not near each other in a
design are not closely related. Audiences will naturally tend to group similar items
that are near to each other into a single unit.
People should never have to "work" at trying to figure out which caption goes
with which graphic or whether or not a line of text is a subtitle or a line of text
unrelated to the title. Do not make audiences think. That is, do not make them
"think" about the wrong stuff, like trying to decipher your slide's organization and
design priority. A slide is not a page in a book or magazine, so you are not going to
have more than a few elements or groups of elements. Robin Williams, in her best-
selling book The Non-Designer's Design Book (Peachpit Press) says that we must be
conscious
of where our eye goes first when we step back and look at our design.
When you look at your slide, notice where your eye is drawn first, second, and so
on. What path does your eye take?
Chapter 6 Presentation Design: Principles and Techniques 157
158 Presentation Zen
This title slide lacks a design
priority. Due to poor use of
alignment and proximity the
slide seems to contain five
different elements.
This slide uses symmetrical
balance and better proximity,
with related items now clearly
together. Greater contrast is
also achieved by adjusting type
size and color to give the design
a clear priority.
Chapter 6 Presentation Design: Principles and Techniques 159
The two slides on this page show that by
aligning all elements flush right, a strong
invisible line is created on the right side
that ties all elements together in a way that
is more interesting than the more common
symmetrical title. Type and color ore
adjusted to create greater contrast and
interest. The red dot in the title ties in with
the red logo at the bottom.