The Hidden Power of Photoshop Elements 4 PHẦN 5 ppsx
Bạn đang xem bản rút gọn của tài liệu. Xem và tải ngay bản đầy đủ của tài liệu tại đây (3 MB, 36 trang )
Generally, you will want to choose a setting with a low threshold, which is measured in
levels. This means Photoshop Elements will look at the number of levels of difference in
the surrounding pixels, and if the number of levels is greater than the threshold, it will
apply sharpening based on the settings for Radius and Amount.
You should usually keep the Threshold setting between 0 and 5 levels—toward the
lower end of this range. In fact, you will often want to use zero tolerance. Low tolerance
levels (1 or 2) can keep Photoshop Elements from sharpening what is otherwise image
noise. Sharpening noise will only make the image noisier. With that in mind, a good rule
of thumb is to raise the threshold more for images with more image noise. This will keep
you from enhancing image noise. The only time you will set the threshold higher than 5
is when you want to limit the filter’s effect to high-contrast areas of the image to play up
existing contrast and separation of image elements.
Radius and Amount might be set quite differently depending on what you are trying
to achieve and the ppi and content of the image. In many cases, you might apply the filter
twice: once with a low radius for general sharpening and once with a higher radius for
broader enhancement of image contrast. The following sections cover these techniques.
Affecting Sharpness with the Unsharp Mask Filter
Sharpening an image with the Unsharp Mask filter depends on Elements recognizing and
enhancing existing edges in an image. In other words, if the image is too soft or blurry to
have defined edges, the filter can’t tell where the edge is, so it can’t tell what to enhance.
This is why the filter works best to sharpen images that are already characteristically sharp.
Although settings can vary depending on the type of image, the size of the image, and
the desired result, you will normally maintain the following settings in 300 ppi, 5 × 7"
images that have average busyness and contrast:
Radius: 0.5 pixels to 3 pixels
Amount: 50% to 100%
Threshold: 0 levels
Note that these are rough guidelines, but they work for a variety of situations. If the con-
tent of the image is not busy, lacks focus, and/or is lower contrast, you can tend toward the
high end of the ranges; if the image is busier, is relatively sharp, and has high contrast, you
would probably tend toward the low end. If the image has more resolution, you would tend
toward the higher end of these ranges; less resolution, tend toward the lower.
The name Unsharp Mask comes from the traditional darkroom process in which an inverted,
blurred (unsharp) duplicate of the original image was sandwiched to mask the exposure dur-
ing printing. This helped target and adjust (sharpen) contrast differences.
(un)sharpening and boosting contrast ■ 119
4456c05.qxd 3/1/06 3:05 PM Page 119
Figure 5.21 shows an image before and after sharpening. Before sharpening, the image
appears slightly soft and perhaps a bit lacking in contrast. A single application of the
Unsharp Mask filter in the midpoint for the suggested range increases the contrast and
boosts the sharpness (see Figure 5.21).
A halo effect occurs when the Unsharp Mask is applied too strongly over areas where
flatly dark portions of an image meet flatly light portions, forming a high-contrast edge
(see Figure 5.22). Often, a halo effect is more apparent when the applied Radius is short—
or not long enough to dissipate the edge of the sharpening effect without being obvious.
Not only will the halo tend to blow out (or clip) areas of images, but the image will also
distort, and the effect will become unpleasant.
You can reduce the halo effect by first undoing the Unsharp treatment and then reap-
plying it with either a broader Radius, a lower Amount, or a combination of these or by
blending the result. Methods of blending are discussed in later parts of the book. One
quick method of blending is to flatten the image (Layer
➔
Flatten Image), duplicate the
Background (Layer
➔
Duplicate Layer), apply the Unsharp Mask filter, and reduce the
Opacity of the Background copy layer in the Layers palette.
Figure 5.22
The original image
and an oversharp-
ened counterpart:
Although some
sharpening may be
desirable, a halo
effect probably will
not be.
Figure 5.21
Sharpness and con-
trast in this image
improve with an
application of
Unsharp Mask.
120 ■ chapter 5: Correcting Image Tone
4456c05.qxd 3/1/06 3:05 PM Page 120
Another option for blending the sharpening effect is to use the Fade tool in the Hidden
Power tool set. You can find the Fade tool in the Power_Extras category under Effects on
the Styles and Effects palette. Just undo the sharpening (press Command+Z/Ctrl+Z) and
double-click the Fade tool. Instructions will appear on-screen.
Staying within the guidelines helps you avoid oversharpening and creating halos in
high-contrast areas of your images. Better to sharpen a little several times, sharpen a
duplicated layer, or try other measures than to sharpen hastily and heavily and damage
the image.
Raising Local Contrast with Sharpening
Adjusting contrast with the Unsharp Mask filter has a much different effect on an image
than applying Curves or Levels, because the effect actually compares adjacent pixels rather
than adjusting based on a more predictable scheme. The results of the application will be
unique as they are dependent on the differences that already exist in the image. Applying
Unsharp Mask to increase contrast works well with low-contrast images or images that
seem to lack dynamics that increasing dynamic range (with Levels) or contrast (with
Curves or Gradient Maps) doesn’t fix.
When you are adjusting local contrast with the Unsharp Mask, the Radius might be
much higher than suggested for sharpening (50 pixels or more) and the Amount much
lower (between 10% and 50%). Again, these are just suggested ranges. The goal of these
broad settings is to increase the radius beyond the distance where a halo is noticeable and
to force objects in the image to play against one another.
Figure 5.23 shows a somewhat low-contrast image of a boat (a) and corrections using
the Unsharp Mask filter (b and c). Although it looks okay in color, the image lacks a little
pop in black-and-white. By using Unsharp Mask to raise the local contrast, the image ele-
ments have more separation from one another. Two applications of Unsharp Mask—one
to build local contrast (b) and one to sharpen (c)—make quick work of what would other-
wise be an arduous task in masking to separate this boat from its surroundings, creating a
result based on existing image differences.
The third image (c) includes slight Levels and Curve preset adjustments. Curve presets
were used to enhance the contrast that Unsharp Mask brought out, and Levels was used
to adjust the final brightness. Some tone was replaced quickly by duplicating the original,
moving it to the top of the stack, setting it to darken, and lowering the Opacity to 10%;
this filled in areas that sharpening had forced to clip (go to 0% gray). So you see that tech-
niques of using Levels, Curves, and Unsharp Mask work together—rather than separately—
to produce enhanced results.
(un)sharpening and boosting contrast ■ 121
4456c05.qxd 3/1/06 3:05 PM Page 121
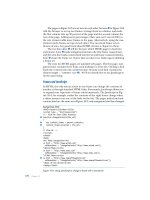
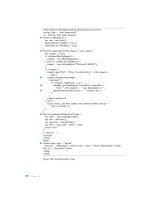
Manual Unsharp Masking: Calculations in Action
While calculations were briefly introduced in the last chapter, they have many creative and
interesting uses, most of which are not immediately obvious. One of the first really useful
layer calculations I worked with was manually creating unsharp masking effects. Unsharp
masking, as mentioned earlier, was a darkroom process before it was a filter. The photog-
rapher doing the developing would sandwich a blurred film negative copy of the image
with the original to burn in (increase exposure of) the image shadows. The blur would
target the contrasty edges, and the result after the application would be increased shadow
detail and a sharper look to the image. This Hidden Power application of unsharp is a little
different but builds on the same concept.
Imitate a modified version of the darkroom sharpening effect by using the following steps:
1. Open a flattened image to which you’d like to apply an unsharp mask calculation.
2. Duplicate the Background layer.
3. Invert the Background Copy layer (press Command+I/Ctrl+I or choose Filter
➔
Adjustments
➔
Invert), and rename the layer Unsharp Mask.
a
bc
Figure 5.23
The original boat is
a little dull (a). After
raising the local
contrast with the
Unsharp Mask
(using a broad
radius and low per-
centage), the boat
stands out better
from the surround-
ings (b). The filter is
then applied again
(c), but this time to
sharpen the image
(using a short
radius and higher
percentage).
122 ■ chapter 5: Correcting Image Tone
Copyright © 2005 photosphere.com
4456c05.qxd 3/1/06 3:05 PM Page 122
4. Blur the Unsharp Mask layer using Gaussian Blur. The size of the blur will depend
on the resolution of the image and the amount of detail. The more detailed the image,
the less blur; the higher the resolution, the greater the blur. Start with 5 pixels for a
3
× 5" image at 300 ppi; use more pixels in the radius for larger images.
5. Change the Layer mode of the Unsharp Mask layer to Overlay.
6. Reduce the opacity of the duplicate layer to 50%; adjust the opacity as desired.
The result of these steps is a sophisticated mask based on the content of your image.
The Unsharp Mask layer you have created ends up working much like the sandwiched
negative in the darkroom process, in pretty much the opposite way than the unsharp mask
filter does, reducing image contrast and pulling details from shadows and highlights.
Because the effect is nearly the opposite of the Unsharp Mask filter, the two sharpening
effects can often be used together to greatly intensify image sharpness. Alternately, you can
apply curves or other adjustments to increase contrast to offset the manual unsharpening.
The best results for the unsharp masking will often be had by applying the change just
to the image tone (or separated Luminosity). If you apply the changes to the color as well,
the change will enhance color noise. By targeting tone, color won’t be altered, and you
may achieve better results than applying sharpening to tone and color at the same time. A
means of doing this in reverse is to add back the color from the original image, which you
could do by duplicating the Unsharp Mask layer before making any changes and setting
that layer to Color mode. Other adjustments, such as increasing saturation and making a
tone adjustment, may be necessary to compensate for alterations that the Unsharp Mask
inflicts.
The Hidden Power Sharpen tool included with the Hidden Power tools (in Power_
Adjustments) will go through the simple sharpening process described above in steps 1
to 6, allowing you to select the intensity of the blur. The tool goes several steps further, to
include the option for Hue/Saturation and Levels corrections, apply the Unsharp Mask
filter to tone, and group all of these corrections into a clipping mask. To use this tool,
open the image on which you want to use the tool, and double-click the Hidden Power
Sharpen tool. You will be able to adjust the intensity of the separate sharpening applica-
tions by using layer opacity after the tool runs you through the process. You can view
Before and After images of the effect by toggling the view for the Snapshot Composite
layer, and you can adjust the whole effect by lowering the Opacity for the Snapshot
Composite.
This is layer masking and calculations working together to create a powerful tool and
repeatable result.
(un)sharpening and boosting contrast ■ 123
4456c05.qxd 3/1/06 3:05 PM Page 123
Managing Image Noise
Management of noise in your images is another way to adjust tone. Having noise in an
image can mean a number of things, from having many objects in an image to something
more akin to random digitized information—like you might get when turning on your
TV without a cable connection or antenna. The concepts in this section deal mostly with
the latter and will help you to reduce or eliminate undesirable patterning, digital image
noise, and texture in an image by controlling image noise.
At times you may want to edit out, reduce, or even add image noise to achieve particu-
lar results in your images. To do this, you will use Blur and Add Noise filters, often in con-
junction with other image editing functions, such as layer blending, selection, masking,
and perhaps a few Hidden Power tools.
The Gaussian Blur filter (Filter
➔
Blur
➔
Gaussian Blur) can blur images or image areas.
It does this by averaging the effects of pixels over a radius, which you define by using a
slider on the dialog box: the greater the radius, the more intense the blur. As a result of
averaging pixels, blurring removes or lessens image noise by lowering the contrast of adja-
cent pixels. This averaging softens image edges, smoothing hard lines between areas of
contrast, and can mitigate or obliterate image details. Essentially, this is the opposite of
sharpening, which enhances existing contrast.
The Add Noise filter (Filter
➔
Noise
➔
Add Noise) generates image noise by randomiz-
ing color assignments for pixels. There are several choices in the Add Noise dialog box for
controlling the filter. The Amount is related to Percentage, and it defines the range of vari-
ation possible in creating the noise distribution. As the Amount goes up, the application
of the noise is potentially more radical. Very strong applications of noise, like blur, can
obliterate detail—in this case by wiping it out with random behavior rather than averag-
ing. Noise applications can swiftly become something of a special effect, depending on the
ppi of the image. An image with a higher ppi, containing more pixels and resolved detail,
will be able to withstand stronger applications of the filter.
Generation of noise is affected by the Distribution Type. A Uniform distribution
changes the values of individual pixels by selecting a random number within the range
defined by the Amount. This number can be the original value plus or minus the amount
for each color component. For example, applying an Amount of 25 to a 50% gray image
(128 levels) in Grayscale will result in values between 103 and 153 levels of gray for any
pixel, each value generated at random. You can see this effect by creating a new image,
filling with a 50% gray background, and applying the Add Noise filter.
A Gaussian distribution changes the values of individual pixels by selecting a random
number based on a Gaussian function. The function creates a tendency to select from
the center of the range, but the results can also deviate more strongly from that norm.
While the quantitative effects to each pixel can extend beyond what is dictated by Amount,
124 ■ chapter 5: Correcting Image Tone
4456c05.qxd 3/1/06 3:05 PM Page 124
the total effect is the same as uniform distribution—just with greater peaks and valleys
in the deviation. Because deviations can be broader, Gaussian noise can appear to be a
stronger effect than the Uniform distribution with the same Amount setting, as shown
in Figure 5.24. Compare this to the Uniform effect by creating another gray image of the
same size, applying the Add Noise filter using the Gaussian setting, and comparing the
images side by side.
The Monochromatic option applies the filter to only the tonal elements in the image
without changing the color. For example, this would keep an RGB image that has been
desaturated from generating color noise when the filter is run.
So far, neither adding noise nor blurring may sound desirable, because either could be
damaging (or at least compromising) to an image. However, used in a controlled fashion,
both can enhance an image and make the results look more realistic. For example, an
image or image area that is damaged by JPEG compression can be restored, somewhat, by
selective blurring. In this case, blurring could potentially dissipate artifacts generated by
compression. In a similar way, some types of digital noise can be lessened or removed, as
might be effects of film grain, halftone printing, and paper texture. Selective blurring can
also help in isolating image subjects by imitating effects of focus, such as depth of field.
Original gray
Uniform Noise @ 10%
Gaussian Noise @ 10%
Figure 5.24
A magnification
of a 25% gray area
shown with Uniform
and Gaussian noise
distributions of
10% The histograms
show the flat appli-
cation of noise in the
Uniform distribution
and the bell-shaped
application in Gauss-
ian distribution.
managing image noise ■ 125
4456c05.qxd 3/1/06 3:05 PM Page 125
On the other side of the coin, most image tones that look natural in an image are not
completely flat when you look at them close up. When you attempt to add new objects or
elements to an image, such as by painting them in with flat tones or creating an area with
blends (for example, to replace a sky), the elements can tend to look too perfect. The result
is that the repair will look like a repair: skin tones will look more like a mannequin or
caricature; a replaced sky will look like a fill or gradient. Applying noise can mimic a more
natural look by randomizing and effectively dithering image information. In addition, you
can use Add Noise to create texture or graininess (for example, to mimic film grain).
As strange as it may seem, sometimes when blurring won’t solve a problem that you
may have thought required noise reduction, applying noise can. Even more often, apply-
ing both blur and noise can do the job, adding variation while mediating extremes.
Blur and Add Noise filters can be used along with other functions to produce the best
results. For example, you might make a selection of a particularly noisy area of an image
to isolate it before applying a blur. After using Blur, you may need to use the Add Noise
filter to fix the blurred areas so that they don’t seem flat. You also might use a layer mode,
mask, or other features to isolate the application so the fix is applied only to the areas
where it is intended.
Both Add Noise and Blur are best when applied lightly and in combination. Figure 5.25
shows a repair in which noise was used to make an image correction blend better after a
blur was applied. The skin on the subject is not bad in the original, but it could appear
much more youthful with smaller pores.
A selection was made of the subject’s face (mostly using the red channel as a mask—a
technique we will look at more later). With the selection loaded, the area of the subject’s
skin was copied and pasted to its own layer to isolate it. Once isolated, the copied skin
was blurred. The results smoothed the skin, but left it too flat. Noise was added, using
Uniform distribution with the Monochromatic check box selected. This returned some
of the texture to the skin without leaving it looking too flat and fake. The appearance of
the pores was softened first, using the Blur filter to remove noise. Next, the Add Noise
filter was used to gently replace some of what was lost in the texture. The result is much
smoother skin and a somewhat more youthful smile.
Several techniques, including erasing information on the new layer or masking, could
have been used to bring back the details that were getting covered. However, Blend Mask,
a Hidden Power tool, was applied to the layer to enable the character of wrinkles to blend
through based on tone. Again, combinations of tool applications and functions generally
work best in achieving goals in an image because no one tool can do it all. You’ll see more
of Blend Mask in the following section. We’ll also talk more about noise reduction in
Chapter 6 in a section called “Quelling Color Noise.”
126 ■ chapter 5: Correcting Image Tone
4456c05.qxd 3/1/06 3:05 PM Page 126
Masking with Image Tone
Masks are very much like selections, in that they can help you
isolate image areas and work on them without changing other
parts of the image. Masks can be based on tone (as we will look
at in this section), color, saturation, manual selection, or other
calculated results. Masking is quite flexible. The greatest advan-
tage of masking is that it is not permanent; masking allows you to
temporarily hide parts of specific layers in the image rather than
erasing or otherwise permanently altering the layers. If you want, you can adjust the
masking to add and subtract layer content at will by adjusting the layer masks to reveal
or hide more of the layer.
One frustration with using Photoshop Elements is that it natively uses masks only in
conjunction with adjustment layers, and it does not freely allow you to mask any layer
in an image. It also doesn’t allow you to work fluidly with alpha channels, which is
where Photoshop can store masks and selections. Although you can save a selection
in Elements 4, you still can’t attach a mask to any old layer—that is, you can’t unless
you have Hidden Power.
a
masking with image tone ■ 127
c
b
d
Figure 5.25
Original image(a)
is shown closeup (b).
Blur is added (c),
and then noise for
texture (d).
Copyright © 2005 photosphere.com
4456c05.qxd 3/1/06 3:05 PM Page 127
The Hidden Power tool set can help by offering several tools for working with masks.
We’ll explore native possibilities and the Hidden Power enhancements for masking in the
next few sections.
Native Layer Masking
Layer masks are available natively when you are using Adjustment layers (such as Levels or
Gradient Maps, found on the Layer
➔
New Adjustment Layer submenu). A layer mask is a
mask attached to a specific layer that applies to that layer only.
All this means is that the content of that layer will be targeted
at the areas that remain unmasked. Masks created with adjust-
ment layers reveal all the content of the layer by default. How-
ever, you can control layer masking of adjustment layers by
making a selection before you create the layer. Instead of trying
to explain this technique, it is best shown in an example.
1. Open a new image at 500 pixels × 500 pixels, 72 ppi, RGB, and use a white background.
2. Change the foreground color to red (R: 255, G: 0, B: 0).
3. Fill the Background layer with red. Use the Paint Bucket tool (press K).
4. Create a new Hue/Saturation Adjustment layer (Layer
➔
New Adjustment Layer
➔
Hue/Saturation).
5. Shift the Hue slider to –120 and choose OK. This should turn the image blue. The
Layer palette should look like Figure 5.26.
6. Choose the brush tool, and make the foreground color black (press D to set default
colors, and then press X to exchange the foreground and background swatches). The
foreground color should be black. Change the brush to 100 pixels in diameter using
the Options bar.
7. Paint in an M shape (for “mask”) over your image. As you paint, the black will be
applied to the layer mask for the adjustment layer, and you will reveal red from the
layer below. See the thumbnail change in Figure 5.27.
If you want, you can adjust the Hue/Saturation sliders (double-click the Hue/Saturation
layer icon to open the Hue/Saturation palette) to see how the image is affected. The black
portion of the mask will block the corresponding portion of the
layer with which it is associated.
While masking is a neat trick, it actually has many interest-
ing applications. Open any image, and then double-click the
Highlight Mask tool from the Power_Masking category of the
Hidden Power tools. This will make a selection of the shadow
areas in the image. Now make a Levels adjustment layer
128 ■ chapter 5: Correcting Image Tone
Figure 5.26
The layer mask for
the adjustment layer
is represented in the
Layers palette by
the thumbnail to the
right of the layer
thumbnail. In this
case there is nothing
masked, so the
thumbnail is white.
Figure 5.27
The mask for the
adjustment layer
will now have a
black M. The image
will show a red M
surrounded by blue.
Black masks out the
effect of the layer.
4456c05.qxd 3/1/06 3:05 PM Page 128
(Layer
➔
New Adjustment Layer
➔
Levels). The selection will be automatically transferred
to the mask for the layer, and corrections you make with the Levels sliders will apply to the
shadows in the image. If you wanted to darken the highlights in the current image, now is
your chance! Just move that middle slider to the right. That’s just one simple example of
how masking can help you accurately target corrections.
As far as what you can mask, you are really limited only by your imagination. As long
as you can envision the result and create a selection to target an area, you can convert it
into a layer mask. You might, for example, mask a layer with a separation component, or
a specific area of one of the components by altering the component with curves presets or
calculations. We’ll look more specifically at this type of targeting in creating the CMYK
separation in Chapter 10.
Adding Layer Masks to Any Layer with Hidden Power
It is nice that Adobe provides layer masking for the adjustment layers, but you may find
it comes in handy to apply masking directly to other layers as well. Elements 4 doesn’t
allow you to do this directly with the standard Elements tools, but Hidden Power pro-
vides more than one solution. In the Power_Masking category of the Hidden Power
tools, you will find the Layer Mask tool and the Selection to Layer Mask tool. The Layer
Mask tool allows you to apply a blank layer mask to any layer in your image. Just choose
the layer where you want to apply the mask, and double-click the Hidden Power tool. If
you have a selection that you want to apply as a layer mask, use the Selection to Layer
Mask Hidden Power tool rather than Layer Mask. The Selection to Layer Mask tool will
take care of converting the selection to mask content for you.
One thing to note about the layer masks applied via the Hidden Power Layer Mask tool is
that selections will not be converted into masks as a matter of course as they are with adjust-
ment layers. You will have to manually apply selections, adjust mask content with other
tools (such as painting in black or white on the mask to hide or reveal layer content), or use
the Selection to Layer Mask tool. To apply a selection as a mask manually, just make your
selection, invert it, create the layer mask, and fill with black. That is what the Selection to
Layer Mask tool does for you.
Hidden Power Blend Mask
The Blend Mask Hidden Power tool is a unique solution to masking based on layer clip-
ping and layer transparency. Essentially, it does the same thing as a layer mask, but
does it in a different way. It was originally included in the Hidden Power tools as a work-
around to layer masks in earlier versions of the program (when it seemed likely Adobe
would eliminate masking entirely). It is included here to provide another masking tech-
nique that can be used in conjunction with or instead of layer masks.
masking with image tone ■ 129
4456c05.qxd 3/1/06 3:05 PM Page 129
Blend Mask converts a layer into semitransparent pixels based on the brightness of
each pixel. The darker the pixel, the more opaque the result will be when converted to a
mask. These Blend Mask layers can then be grouped with other image content to be used
as high-tech cookie cutters to isolate the masked area in a separate layer. This allows you
to make changes either to the masked area or to all other areas of the image separately.
Figure 5.28 shows an image that could benefit from correction in just the shadow area.
To mask just the shadow, you can use the Blend Mask Hidden Power tools. Several power
tools converge in this exercise to create your image editing advantage.
1. Open the sample image (horsehead.psd) from the CD.
2. Create a Blend Mask layer that includes the tone on which you want to base the mask.
In this case, we will use a curve preset adjustment to isolate shadows. Double-click the
Luminosity Only tool in the Power_Separations to separate out the luminosity for the
image. Change the Luminosity layer mode to Normal. Open the
Hidden Power Curve
Presets file, drag the Mask Shadows layer to the Horsehead image, merge the Mask
Shadows layer with the Luminosity layer, and then change the layer name to Blend
Mask. The image should look like that shown in Figure 5.29.
3. Double-click the Blend Mask tool in the Power_Masking category of Effects. This will
convert the layer created in step 2 to a transparency mask and make a clipping layer
from that with a copy of the original image. Nothing on-screen will change, but the
highlights will be masked off from the shadows. See Figure 5.30.
Figure 5.28
This image of a giant
bronze horse was
taken with the
sun as a backlight,
without compensa-
tion, leaving the
detail of the shadow
flat and dark.
The content of the layer created in step 2 can be anything, from a shape-based fill to an
image component or a calculated result/black-and-white conversion. You want to shift the
area you are interested in masking toward white and darken or even make black the rest of
the image. Remember that this is a mask—not a permanent adjustment to the image.
130 ■ chapter 5: Correcting Image Tone
4456c05.qxd 3/1/06 3:05 PM Page 130
If you toggle the visibility for the Background layer at this
point, the shadows will show without the shadow portions of
the image. You can adjust the color or tone in the shadow area
by applying changes—either grouped layer adjustments or
changes directly to the layer content—to the Mask Content
layer. Commit the changes by flattening the image.
To quickly create masks that are based on shadows, you
can use the Transparent Grayscale Hidden Power tool. Some
users may find this more straightforward because you are creating the transparency mask
first. Just double-click Transparent Grayscale in the Power_Masking tools, and a new layer
will be created as a transparent mapping based on the image grayscale. To base the mask
on highlights, use the Inverted Transparent Grayscale tool. Each of these tools will run
through the process and create a Transparent Grayscale layer (like the Mask layer) and the
Mask Content layer. The only difference with Blend Mask is the ability to further define
what component/grayscale you want to use with the mask.
If you tried to make a transparency mask on your own in Elements without Hidden
Power tools, you would indeed have a problem. That is because the Hidden Power tools
make use of conditional blending (Blend If in Photoshop), which is a feature that is not
accessible in the Elements interface. I have included several tools in the Power_Masking
category that allow you to control layer visibility based on conditional blending. These are
listed in Table 5.2. Some will be discussed and used later in the book. All can be found in
the Power_Masking category of Effects.
Figure 5.29
After step 2, the
image should look
like the original
except in black-
and-white with the
contrast greatly
enhanced, as shown
here. This is a tem-
plate for the shadow
mask. Alternatively,
you could mask the
highlights for a very
similar (but oppo-
site) effect.
masking with image tone ■ 131
Figure 5.30
When steps 1 to 3
are complete, your
Layers palette
should have just
three layers (as
shown) and the
image should look
like the original.
Make changes to
the Mask Content
layer to adjust the
isolated area of the
image.
4456c05.qxd 3/1/06 3:05 PM Page 131
NAME DESCRIPTION USE
Clear White View conditional
transparency.
Clear Black View conditional
transparency.
Clear Grayscale View conditional
transparency.
Drop Black View conditional
transparency.
Commit Transparency Commit any conditional
transparency.
Remove Transparency Revert transparency of
a layer where the Clear
White, Clear Black, Clear
Grayscale, or Drop Black
tools have been used.
While the content of a conditional blend will become transparent, you can still apply
changes to the content of the layer. When you apply changes, all of the content of the layer
will change, even if you can’t see it, and transparency will change accordingly. Try this
quick experiment:
1. Create a new image 400 pixels × 400 pixels, RGB color mode with a white background.
2. Create a new layer and fill it with a black-to-white gradient using the Gradient tool.
3. Apply the Clear Black tool to the gradient layer. The absolute black area of the gradient
will become white, while the content of a conditional blend will become transparent,
you can still apply changes to the content of the layer. When you apply changes, all
of the content of the layer will change, even if you can’t see it, and transparency will
change accordingly. Try this quick experiment.
4. Create a Levels Adjustment layer (Layer
➔
New Adjustment Layer
➔
Levels). When the
New Layer dialog appears, check the Group With Previous Layer button before click-
ing OK.
5. Move the middle, gray Input Levels slider on the Levels dialog to the right while watch-
ing the image. An increasing amount of the black area should become white as you
move the slider.
If you move the slider back to the left, the area that became white should gradually
become black again. Just because you can’t see it doesn’t mean it’s gone and isn’t
affected—effectively, it is masked. When you get used to using conditional blending,
it ends up functioning just like another mask, but a fluid one that will change according
to changes in content.
Changes layer properties to remove
conditional blending that has not already
been applied.
Changes the content of the layer so that
transparency is applied to the pixels.
Makes absolute black pixels transparent
and pixels between 87% and 99% black
increasingly opaque.
Makes pixels in a layer transparent based on
brightness. White pixels (0% black) become
transparent, and black pixels (100% black)
remain opaque. 50% gray (50% black)
become 50% opaque.
Makes pixels that are absolute black
(100% black) transparent.
Makes pixels that are absolute white
(0% black) transparent.
Table 5.2
Power_Masking
Tools
132 ■ chapter 5: Correcting Image Tone
4456c05.qxd 3/1/06 3:05 PM Page 132
This is just a little trick and by far not what you will generally do with masking. We’ll
take a quick look at a tone-based masking effect for soft focus in the next section.
Soft Focus Effects Using Masking
An interesting effect that is easily achieved using masking in more than one way is soft
focus. Soft focus effects usually attribute a sort of glamour glow to an image, reducing the
appearance of wrinkles and flaws in portraits and imparting a dreamy quality. Soft Focus
is traditionally done during the capture, using a soft focus filter. Soft focus filters diffuse
light. The more light, or the brighter an image area, the more the light becomes diffused
and glows, softening edges; the less light, the darker and sharper the image area. Because
we can identify and isolate the highlights and shadows, we can mimic the effect.
1. Open the twins_on_beach.psd image on the CD.
2. Isolate the highlights in the image using the Shadow Mask tool in the Power_Masking
category of Effects.
3. Copy and paste to place the highlights on their own layer, and name the layer Glow.
This effectively masks the highlights into their own layer.
4. Adjust the highlights to be brighter by opening the Levels (press Command+L/Ctrl+L;
if you use an adjustment layer, group it with the Glow layer), and shift the black Out-
put Levels slider to the right. See Figure 5.31.
5. Apply a Gaussian Blur to the Glow layer
using a radius of 30 pixels. You will imme-
diately see the glow effect.
6. Create a new layer at the top of the stack,
and name it Sharpen. Merge all to the
Sharpen layer (press Shift+Command+
Option+E / Shift+Ctrl+Alt+E).
7. Apply the Shadow Mask tool to the Sharpen
layer. This masks the shadows from change.
8. Create a layer mask for the Sharpen layer
using the Layer Mask tool.
9. Fill the layer mask for the Sharpen layer with
black. This will fill the highlight area with
black and mask the highlights in the layer.
10. Apply a Levels correction to the mask to
enhance the tonal range. See Figure 5.32.
11. Apply the Unsharp Mask filter to the con-
tent of the Sharpen layer. Be sure you are
soft focus effects using masking ■ 133
Figure 5.31
This Levels adjust-
ment will shorten
the range of tones
in the Glow layer so
that everything is
50% gray or lighter.
Figure 5.32
This Levels adjust-
ment to the mask
will make sure that
darker portions
of the image in
the masked layer
appear in the image.
4456c05.qxd 3/1/06 3:05 PM Page 133
applying the sharpening to the content of the layer and not the
mask by clicking the content thumbnail in the Layers palette to
activate it. Use an Amount of 140% and a Radius of 2, while
leaving Threshold at 0.
When you are all done, the layers should look like they do
in Figure 5.33. Compare before and after by toggling the views
for the Glow and Sharpen layer simultaneously. You will see a
marked increase in the softness of the image, without losing a lot of detail. This is because
the masking dissipates the highlights, and masks sharpening to target the shadows.
You can do many variations of this effect, including simply changing the Glow layer to
Screen mode, which leaves a more contrasty result. You can add and adjust in many dif-
ferent ways, using different types of masks, but the key to this effect is that the highlights
get blurred or dispersed while the shadow detail remains intact to hold the shape of
objects in the image.
Shaping Image Elements with Light and Shadow
As you just saw in the previous section, light and shadow affect the shape of objects and
how they appear relative to one another. You can use shading and highlighting to provide
separation between objects, for example, by adding a slight drop shadow or glow behind
an object to create separation. It is light and shadow that affect depth and texture in an
image and light that gives shape and color to everything in your image.
The following provides a good, simple example of how light and shadow can create
shape. The following steps will turn a flat gray square into a shaped button that appears
to be elevated from the background:
1. Create a new grayscale image (File
➔
New) that is 500 × 500 pixels.
2. Make a marquee by using the Fixed Size option for the Marquee tool on the options
bar. Set the size to 300 × 300 pixels and click the tool at 100,100 (x,y). If you click
exactly on that point (use the rulers; if the rulers are set to inches, change the prefer-
ences to pixels), the selection will be centered exactly on the image. In this case, it
doesn’t matter if you are off by a few pixels.
3. Create a new layer named Button, and fill the selection made in the previous step
with 50% gray.
4. Select the Background layer. Create a new layer named Drop Shadow, and set the
mode to Multiply. Creating the new layer just above the Background in the layer
stack will keep the drop shadow behind/below the button.
5. Feather the current selection 20 pixels, and fill the selection with black. Change the
layer Opacity to 75%.
134 ■ chapter 5: Correcting Image Tone
Figure 5.33
This Levels adjust-
ment to the mask
will make sure that
darker portions
of the image in
the masked layer
appear in the image.
4456c05.qxd 3/1/06 3:05 PM Page 134
6. Deselect by pressing Command+D/Ctrl+D.
7. Offset the shadow layer down 20 pixels and right 20 pixels. To do this, choose the
Move tool, hold down the Shift key, and press the Right arrow and Down arrow keys
on your keyboard two times each.
8. Activate the Button layer by clicking it in the Layers palette.
9. Create a new layer, and name it Highlight. Check the Group With Previous check
box, set the layer mode to Screen, and change the Opacity to 50%.
10. Reload the previous selection by pressing Shift+Command+D / Shift+Ctrl+D. Invert
the selection (Shift+Command+I / Shift+Ctrl+I), and fill it with white.
11. Create a new layer, and name it Shadow. Check the Group With Previous check
box, set the layer mode to Multiply, fill the layer with black, and change the Opacity
to 50%.
12. Choose Select
➔
Deselect.
13. Activate the Highlight layer, choose the Move tool, and offset the layer down 20 pixels
and right 20 pixels. To do this, hold down the Shift key and press the Right arrow and
Down arrow keys two times each.
14. Activate the Shadow layer, and offset it up 20 pixels and left 20 pixels. To do this, hold
down the Shift key, and press the Left arrow and Up arrow keys two times each.
This leaves you with a square button that appears to be slightly raised and separate
from the background. Figure 5.34 shows the results: the flat square is transformed into a
shaped button with apparent contour. The drop shadow between the button and the
background creates distance between those objects; the Highlight and Shadow layers cre-
ate object shape by mimicking how a raised button might look if a light were coming from
the upper-left corner of the image. The more extreme the offset effects, the greater the
depth or distance appears.
Simple highlight and shadow creation of this sort happens when using layer effects. The
way you choose to handle shadows and highlights controls the shape of the object, but the
final image has to show some consistency with the scene
to portray the desired result and the direction of the light.
All this is to say you can create some cool effects with
light and shadow, but you can’t just drop a shadow into
an image willy-nilly and have it look correct. You have to
take existing lighting into account and adjust for angle
and direction. You also have to adjust the landscape to
make the shadow fall correctly. This attention to the
direction of light becomes imperative when you want
to composite objects from different images.
shaping image elements with light and shadow ■ 135
Figure 5.34
A flat area of flat
tone can be both
raised from the
background and
shaped with simple
application for high-
lights and shadows.
4456c05.qxd 3/1/06 3:05 PM Page 135
Other uses for adjusting highlights and shadows are dodging and burning effects where
you brighten or darken areas of an image to add or reduce emphasis, create framing, etc.
Try the following:
1. Open
Twins_on_beach2.psd.
2. Create a new layer at the top of the layer stack and name it Vignette.
3. Select All (press Command+A/Ctrl+A).
4. Modify the selection, and make it a Border (Select
➔
Modify
➔
Border). Use a Radius
of 150 pixels.
5. Fill the resulting selection with black.
6. Deselect (Command+D/Ctrl+D) and apply a Gaussian Blur using a Radius of 100.
7. Reduce the Opacity for the Vignette layer to 15%.
While the character of the image may not seem to change a lot, toggle the view for the
Vignette layer to compare before and after images. Similar framing vignettes have often
been used in the darkroom to make subtle frames around images. In this case, it may also
imitate vignetting of the image frame. These are the types of subtle changes and corrections
you may want to make in your images to keep the viewers’ focus on the subject.
There are many, many more ways to use masking, selection, and transparency to effect
change in image tone, and we will discover some of those as we move through the remain-
ing exercises. At this point, it is time to look at adjustments to color.
136 ■ chapter 5: Correcting Image Tone
4456c05.qxd 3/1/06 3:05 PM Page 136
Part III
Serious Image Correction
The term color correction suggests that there is a correct color
in your images to shoot for in the first place. You may consider
“correct” to be what you saw with your eyes when capturing an
image, but what you see isn’t a measure that you can duplicate.
However, what looks best won’t necessarily match the original
color, and in some cases matching color will not be what you’ll
want to do at all. In a similar way you may want to take control
of your image composition and alter it to make improvements
In this part of the book you’ll look at ways to apply color correc-
tion for both technical and artistic success by using techniques
that expand on those you learned in earlier chapters. We’ll
also take a look at making purposeful changes to composition.
Finally, we’ll wrap up this part by taking a good look at using
the image correction checklist to process an image.
Chapter 6 Color and Tone Enhancement
Chapter 7 Altering Composition
Chapter 8 The Image Process in Action
4456c06.qxd 3/1/06 3:05 PM Page 137
4456c06.qxd 3/1/06 3:05 PM Page 138
Chapter 6
Color and Tone Enhancement
If you look at RGB components as the basis for image color, color is just a slightly more
complex version of black-and-white. The difference ends up being that three grayscale
images are sandwiched together to make a color representation. It is interesting to note
that if you consider the three black-and-white RGB components of your color image
separately, and make basic correction to the tones, correction for color follows.
This chapter looks at all manner of color-specific correction that you will do in Elements.
Most of the tools used in working with tone from manipulations and techniques in earlier
chapters can be applied to the RGB components of a color image in order to adjust image
color. Correcting color using the techniques learned for correcting tone can solve many color
saturation and brightness problems and balance color to compensate for color shifts. In this
chapter, we’ll look at the techniques for performing color correction and color adjustment,
and we’ll learn why the techniques work.
Minor Cleanup for Color Images
Levels Correction for Color
Gradient Map Corrections for Accurate Color
Using Hue/Saturation for Color Adjustment
Color Masking with Hue/Saturation
Adjusting Color Balance
Painting in Changes: History Brush Application
4456c06.qxd 3/1/06 3:05 PM Page 139
Minor Cleanup for Color Images
The place to start in doing minor cleanup of your color image is to get rid of what absolutely
should not be in the image. Cleanup for color images is similar to the techniques already
described for cleaning tone and black-and-white images. For example, you will still use the
Clone Stamp tool to clear out spots and minor debris by stamping over them with good
replacements. But, because you are trying to match red, green, and blue tones all at the same
time, you have to be a little more careful in selecting the source for replacement color so
that it matches color as well as tone. Making the corrections in a new layer can help you
make better corrections by enabling you to fine-tune any changes. The Use All Layers
option for the Clone Stamp tool should remain turned on. You may want to experiment
with other modes for the Clone Stamp tool, such as using Color or Luminosity instead of
Normal mode to adjust color or tone separately.
Other options for cleanup can present themselves in separated components, in some
instances more readily than on a color composite. Looking at RGB tones or Luminosity
and Color separations may reveal color-specific noise or other damage (such as stains on
scanned prints). All you have to do is split the components by using Hidden Power tools,
examine the separations individually to see whether there is any damage to specific com-
ponents, and then repair that damage as black-and-white.
To view the grayscale for a specific component in a separation, make the separation
and then turn off the visibility for the other components and the color fill associated with
the component, if any (see Figure 6.1).
Figure 6.1
To view the blue
channel, turn off the
visibility for the red
and green channels
as well as the blue
color fill.
140 ■ chapter 6: Color and Tone Enhancement
4456c06.qxd 3/1/06 3:05 PM Page 140
The Prokudin-Gorskii images (see kush-beggi_sep_rgb.psd) are a great example of
how correcting in separated tones may be useful. The glass plates in Gorskii’s images have
unique information because they were taken as distinct captures through different lenses
to occupy distinct areas of the film. Because they are distinct captures, each color plate has
unique damage from dust and scratches, as the red plate shows in Figure 6.2. In that case
(certainly a rare one), it is better and easier to correct much of the damage in the separated
tones as RGB because the damage will stand out more clearly than it will in the full-color
preview.
Once you have stamped out damage in the components—and as long as you have
made each correction carefully, so it is undetectable in each of the individual tones—the
result should appear undetectable in the composite image as well. When the changes are
complete, you can merge the separated components back to a single layer by flattening the
image before moving on to other corrections. Although you can switch back and forth
between working with the separations and the composite without harming the image, you
should avoid making a lot of separation changes at this point because it wastes time. This
stage of cleanup should usually be simple and quick before getting on to the main course
of correcting color.
Before correction After correction
Figure 6.2
Defects in the com-
ponents show up
prominently in the
original scan of the
Gorskii image.
Splitting out the channels is often useful for removing color-related problems, such as stains
on scanned prints or colored blemishes. We’ll see additional advantages when looking at
more-intensive color correction later in this chapter.
minor cleanup for color images ■ 141
4456c06.qxd 3/1/06 3:05 PM Page 141
Quelling Color Noise
Digital noise can be a problem in images and is something else that you might want to
clean up at this point, before moving on to other corrections.
Figure 6.3 shows a close-up of an image that was taken in conditions that were not the
best. JPEG compression settings were not high, but they were high enough to accentuate
the color noise that accumulated in a low-light exposure. Although the image isn’t bad, it
could be much better. The separation into RGB and luminosity (use the RGBL Compo-
nents Only tool) for this image shows noisy red, green, and blue components but a much
smoother-looking luminosity. The smooth luminosity (see Figure 6.4) clearly indicates
that you have mostly color noise on your hands. You can see the original image as
vince.psd on the CD, as well as before and after results in vince_corrections.psd.
There are many more things that you can do in addition to the few steps we will present
here for correcting the color noise. For example, you might mask skin tone areas to apply
smoothing to some of the tone or sharpen the image. But that type of complex correction is
a good example of one that might be better accomplished later, after initial color correction
Figure 6.4
Looking at the luminosity, you can see that the tone is relatively
smooth. Smooth tone and rough RGB channels are telling of
color noise.
Figure 6.3
The color noise in the vince.psd image is most obvious in this
close-up of the blue channel.
Although you might want to clean up or improve such obvious problems as color noise, you
might instead wait to do it after making Levels correction (in the following section). Doing
too much before making basic corrections can potentially cause even greater problems later.
142 ■ chapter 6: Color and Tone Enhancement
4456c06.qxd 3/1/06 3:05 PM Page 142
with Levels. You will be able to better judge when to flip-flop your basic correction steps as
you gain additional experience with correction.
1. Open
vince.psd from the CD.
2. Split the luminosity and color components by double-clicking the Luminosity and
Color Hidden Power tool in the Power_Separations category of Effects.
3. Activate the Color layer by clicking it in the Layers palette.
4. Apply a Gaussian Blur (Filter
➔
Blur
➔
Gaussian Blur). For this image, try about a
10-pixel radius for the blur.
These few steps have a dramatic impact on the RGB components of the test image.
These steps blur the color information in the image while keeping the tone intact. If you
separate the RGB components for this image again after completing the steps (just flatten
the image and use the RGB Components Only tool), you’ll see a marked change in the
image. Figure 6.5 shows the result of the content of the Blue component after flattening
the image and re-separating into RGB.
Because the tone holds the detail in place, the color can be smoothed out—often
dramatically—without softening the appearance of the image. When you are finished,
flatten the image and save it with a different name before continuing any other correc-
tions. This will keep you from saving over the original if it turns out that you want to go
back and see what happens if you don’t correct the noise first.
You can use other filters to reduce the noise after
the color is separated. You may want to experiment
with the advantages of applying the Median filter,
Dust and Scratches, or the Reduce Noise filter to the
Color layer. Each will handle the color adjustment in
a somewhat different fashion.
There is a Hidden Power tool that will perform
the noise-reduction steps for you while enabling
you to choose how much Gaussian Blur or Median
filter to apply. Just click Reduce Color Noise under
the Power_Adjustments category in Effects. This
tool will automatically flatten and commit the
changes in the image so that you will be ready for
additional corrections. To use only Gaussian Blur
or only Median Filter, use the dedicated Color
Noise Reduction Blur or Color Noise Reduction
Median tool.
minor cleanup for color images ■ 143
Figure 6.5
You’ll see a great
improvement in the
color channels if you
flatten the image
again and separate
the RGB. Note the
dramatic change in
the blue channel.
Surprisingly, you
lose almost nothing
in sharpness or
detail.
4456c06.qxd 3/1/06 3:05 PM Page 143