AJAX and PHP Building Responsive Web Applications phần 5 pptx
Bạn đang xem bản rút gọn của tài liệu. Xem và tải ngay bản đầy đủ của tài liệu tại đây (640.45 KB, 28 trang )
Server-Side Techniques with PHP and MySQL
102
Each column has a data type, which describes its size and behavior. There are three important
categories of data types (numerical types, character and string types, and date and time types),
and each category contains many data types. For complete details on this subject refer to the
official MySQL 5 documentation at
When creating a new data table you must decide which values are mandatory, and mark them with
the
NOT NULL property, which says the column isn't allowed to store NULL values. The
definition of
NULL is undefined. When reading the contents of the table you see NULL, it means a
value has not been specified for that field. Note that an empty string, or a string containing spaces,
or a value of "0" (for numerical columns) are real (non-
NULL) values. The primary key field can't
allow
NULLs.
Sometimes instead of (or complementary to) disallowing
NULLs for a certain field, you may want
to specify a
default value. In that case, when a new record is created, if a value isn't specified for
that field, the default value will be used. For the default value you can also specify a function that
will be executed to retrieve the value when needed.
A different way of letting the system generate values for you is by using
auto_increment columns.
This is an option you will often use for primary key columns, which represent IDs that you prefer to
be auto-generated for you. You can set
auto_increment only for numerical columns, and the newly
generated values will be automatically incremented so no value will be generated twice.
Indexes are database objects used to improve the performance of database operations. An index is
a structure that greatly improves
searches on the field (or fields) it is set on, but it slows down the
update and insert operations (because the index must be updated as well on these operations). A
well-chosen combination of indexes can make a huge difference in the speed of your application. In
the examples in this book, we will rely on the indexes that we build on the primary key columns.
You can create data tables using SQL code, or using a visual interface. Here's an example of a
SQL command that creates a simple data table:
CREATE TABLE users
(
user_id INT UNSIGNED NOT NULL AUTO_INCREMENT,
user_name VARCHAR(32) NOT NULL,
PRIMARY KEY (user_id)
);
In case you don't like how you created the table, you have the option to alter it using ALTER TABLE,
or to drop (delete) it altogether using
DROP TABLE. You can use TRUNCATE TABLE to rapidly drop
and recreate the table (it has the same effect as deleting all the records, but it's much faster and
also clears the auto-increment index).
For each exercise, we will give you the SQL code that builds the necessary data tables. You can
execute this code by using a program such as phpMyAdmin (Appendix A describes the
installation procedure). To execute SQL code using phpMyAdmin, you need to connect to a
database by selecting its name in the
Database list, and clicking the SQL tab on the main panel, as
shown in Figure 3.17.
Chapter 3
Figure 3.17: Executing SQL Code Using phpMyAdmin
phpMyAdmin also gives you the possibility to create the tables visually, using forms as shown in
Figure 3.18.
Figure 3.18: Creating a New Table Using the phpMyAdmin Designer
103
Server-Side Techniques with PHP and MySQL
If you were wondering about the option, read on. MySQL is different than Table type
other database products in that it ships with several database engines, the two most
104
popular being MyISAM and InnoDB. What's interesting is that you can have tables of
different types in a single database, and you can specify the type for each table when
creating it (otherwise, the default will be used, which on most configurations is
MyISAM). Each engine has strengths and weaknesses, but probably the most powerful
one is InnoDB, which fully supports the ACID (Atomicity, Consistency, Isolation, and
Durability) properties of transactions, row-level locking, foreign keys and referential
integrity, and other features. MyISAM's significant strength compared to the other
engines is the included support for full-text searching, and (arguably) speed.
Manipulating Data
You can manipulate your data using SQL's DML (Data Manipulation Language) commands,
SELECT, INSERT, UPDATE, and DELETET , used to retrieve, add, modify, and delete records from data
tables. These commands are very powerful, and flexible. Their basic syntax is:
SELECT <column list>
FROM <table name(s)>
[WHERE <restrictive condition(s)>]
INSERT INTO <table name> [(column list)]
VALUES (column values)
UPDATE <table name>
SET <column name> = <new value> [, <column name> = <new value> ]
[WHERE <restrictive condition>]
DELETE FROM <table name>
[WHERE <restrictive condition>]
A few basic things to keep in mind:
• The
SQL code can be written in one or more lines, however you feel it looks nicer.
SQL
• If you want to execute several
commands at once, you must separate them
using the semicolon (;).
• The values written between square brackets in the syntax are optional. (Be careful
with the
DELETE statement though; if you don't specify a restrictive condition, all
elements will be deleted.)
• With
SELECT, you can specify *, instead of the column list, which includes all the
existing table columns.
SQL is not case sensitive, but we will try to write the SQL statements in uppercase,
and the table and field names in lowercase. Consistency is always good.
•
You can test how these commands work by practicing on the
users table that was described
earlier. Feel free to open a
SQL tab in phpMyAdmin and execute commands such as:
INSERT INTO users (user_name) VALUES ('john');
INSERT INTO users (user_name) VALUES ('sam');
INSERT INTO users (user_name) VALUES ('ajax');
Chapter 3
SELECT user_id, user_name FROM users;
UPDATE users SET user_name='cristian' WHERE user_id=1;
SELECT user_id, user_name FROM users;
DELETE FROM users WHERE user_id=3;
SELECT * FROM users WHERE user_id>1;
During the course of this book, you will meet much more complicated query examples, which will
be explained as necessary. Please remember that SQL is a big subject, so you will likely need
additional resources if you haven't written much SQL code so far.
Connecting to Your Database and Executing Queries
In our examples, the code that connects to the database will be written in PHP. As Figure 3.19
shows, the database will never be accessed directly by the client, but only by the business logic
written in the PHP code on the server.
Figure 3.19: User Connecting to MySQL through Layers of Functionality
To get to the necessary data, your PHP code will need to authenticate to the database.
Database security—as with any other kind of security system—involves two important concepts:
authentication and authorization. Authentication is the process in which the user is uniquely
identified using some sort of login mechanism (usually by entering a username and password).
Authorization refers to the resources that can be accessed (and actions that can be performed) by
the authenticated user.
If you configured MySQL security as shown in Appendix A, you will connect to your local
MySQL server, to the database called
ajax, with a user called ajaxuser, with the password
practical. These details will be kept in a configuration file called config.php, which can be easily
updated when necessary. The
config.php script will look like this:
<?
// defines database connection data
define('DB_HOST', 'localhost');
define('DB_USER', 'ajaxuser');
define('DB_PASSWORD', 'practical');
define('DB_DATABASE', 'ajax');
?>
105
Server-Side Techniques with PHP and MySQL
106
This data will be used when performing database operations. Any database operation consists of
three mandatory steps:
1. Opening the database connection
2. Executing the
SQL queries and reading the results
3. Closing the database connection
It's a good practice to open the database connection as late as possible, and close it as soon as
possible, because open database connections consume server resources. The following code
snippet shows a simple PHP script that opens a connection, reads some data from the database,
and closes the connection:
// connect to the database
$mysqli = new mysqli(DB_HOST, DB_USER, DB_PASSWORD, DB_DATABASE);
// what SQL query you want executed?
$query = 'SELECT user_id, user_name FROM users';
// execute the query
$result = $mysqli->query($query);
// do something with the results
//
// close the input stream
$result->close();
// close the database connection
$mysqli->close();
Note that we use the mysqli library to access MySQL. This is a newer and improved
version of the mysql library, which provides both object-oriented and procedural
interfaces to MySQL, and can access more advanced features of MySQL. If you have
older versions of MySQL or PHP that don't support mysqli, use mysql instead.
The exercise that follows doesn't contain AJAX-specific functionality; it is just a simple example
of accessing a MySQL database from PHP code.
Time for Action—Working with PHP and MySQL
1. Connect to the ajax database, and create a table named users with the following code:
CREATE TABLE users
(
user_id INT UNSIGNED NOT NULL AUTO_INCREMENT,
user_name VARCHAR(32) NOT NULL,
PRIMARY KEY (user_id)
);
2. Execute the following INSERT commands to populate your T users table with some
sample data:
INSERT INTO users (user_name) VALUES ('bogdan');
INSERT INTO users (user_name) VALUES ('filip');
INSERT INTO users (user_name) VALUES ('mihai');
INSERT INTO users (user_name) VALUES ('emilian');
INSERT INTO users (user_name) VALUES ('paula');
INSERT INTO users (user_name) VALUES ('cristian');
Because user_id is an auto_increment column, its values will be generated by the database.
Chapter 3
3. In your foundations folder, create a new folder named mysql.
4. In the
mysql folder, create a file named config.php, and add the database
configuration code to it (change these values to match your configuration):
<?php
// defines database connection data
define('DB_HOST', 'localhost');
define('DB_USER', 'ajaxuser');
define('DB_PASSWORD', 'practical');
define('DB_DATABASE', 'ajax');
?>
5. Now add the standard error-handling file, error_handler.php. Feel free to copy this
file from the previous exercises:
<?php
// set the user error handler method to be error_handler
set_error_handler('error_handler', E_ALL);
// error handler function
function error_handler($errNo, $errStr, $errFile, $errLine)
{
// clear any output that has already been generated
if(ob_get_length()) ob_clean();
// output the error message
$error_message = 'ERRNO: ' . $errNo . chr(10) .
'TEXT: ' . $errStr . chr(10) .
'LOCATION: ' . $errFile .
', line ' . $errLine;
echo $error_message;
// prevent processing any more PHP scripts
exit;
}
?>
6. Create a new file named index.php, and add this code to it:
<!DOCTYPE html PUBLIC "-//W3C//DTD XHTML 1.1//EN"
"
<html>
<head>
<title>Practical AJAX: Working with PHP and MySQL</title>
</head>
<body>
<?php
// load configuration file
require_once('error_handler.php');
require_once('config.php');
// connect to the database
$mysqli = new mysqli(DB_HOST, DB_USER, DB_PASSWORD, DB_DATABASE);
// the SQL query to execute
$query = 'SELECT user_id, user_name FROM users';
// execute the query
$result = $mysqli->query($query);
// loop through the results
while ($row = $result->fetch_array(MYSQLI_ASSOC))
{
// extract user id and name
$user_id = $row['user_id'];
$user_name = $row['user_name'];
// do something with the data (here we output it)
echo 'Name of user #' . $user_id . ' is ' . $user_name . '<br/>';
}
// close the input stream
107
Server-Side Techniques with PHP and MySQL
108
$result->close();
// close the database connection
$mysqli->close();
?>
</body>
</html>
7. Test your script by loading
http://localhost/ajax/foundations/mysql/index.php with a web browser.
Figure 3.20: These User Names are Read from the Database
What Just Happened?
First of all, note that there is no AJAX going on here; the example is demonstrating plain PHP
data access functionality. All the interesting things happen in
index.php. The real functionality
starts by loading the error handler, and the configuration scripts:
<?php
// load configuration file
require_once('error_handler.php');
require_once('config.php');
Then, just as mentioned, we create a new database connection:
// connect to the database
$mysqli = new mysqli(DB_HOST, DB_USER, DB_PASSWORD, DB_DATABASE);
Note that a database connection contains a reference to a specific database inside the database
server, not to the database server itself. The database we connect to is
ajax, which contains the
users table that you created earlier. When performing queries on the created connection, you can
count on having access to the
users table:
// the SQL query to execute
$query = 'SELECT user_id, user_name FROM users';
// execute the query
$result = $mysqli->query($query);
Chapter 3
After these commands execute, the $result variable contains a pointer to the results stream,
which we read line by line using the
fetch_array method. This method returns an array with the
fields of the current result row, and moves the pointer to the next result row. We parse the results
row by row in a
while loop until reaching the end of the stream, and for each row we read its
individual fields:
// loop through the results
while ($row = $result->fetch_array(MYSQLI_ASSOC))
{
// extract user id and name
$user_id = $row['user_id'];
$user_name = $row['user_name'];
// do something with the data (here we output it)
echo 'Name of user #' . $user_id . ' is ' . $user_name . '<br/>';
}
At the end, we close the open database objects so we don't consume any resources unnecessarily,
and we don't keep any database locks that could hurt the activity of other queries running at the
same time:
// close the input stream
$result->close();
// close the database connection
$mysqli->close();
?>
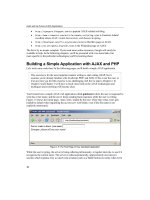
Wrapping Things Up and Laying Out the Structure
In this final section of the chapter, we are establishing the scheme of a basic code structure, which
we will use in all the following case studies. Most of the basic building blocks have already been
presented, except for separating the sever-side business logic in a separate class, which will be
demonstrated in a new exercise.
So far, the server-side code was always built as a single PHP file. In order to achieve better
flexibility and a more powerful design, we will split the server-side PHP functionality in two files:
• One script, called
appname.php (where appname is the name of your application) will
be the main access point for the client-side JavaScript code. It will deal with the
input parameters received through
POST and GET, and will make decisions based on
these parameters.
• The second script, called
appname.class.php, will contain a helper class named
Appname, which encapsulates the real functionality that needs to be processed. The
methods of this class will be called by
appname.php depending on the requested action.
To fully understand the code you need to know the basics of OOP, and how this works with PHP.
We don't cover these aspects in this book, but here are a few major things to keep in mind:
• OOP is based on the notion of classes, which are the blueprints for objects. Classes
are formed of class members, which include methods (functions inside a class), the
constructor, the destructor, and class fields (other OOP languages include even
more class member types). Class fields are just like variables, but they have a
class-wide scope.
109
Server-Side Techniques with PHP and MySQL
110
• In classes, you can implement two special methods called the constructor and
destructor. The constructor is called
__construct(), and is executed automatically
when you create new instances of a class. The constructor is useful when you have
code that initializes various class members, because you can rely on it always
executing as soon as a new object of the class is created.
• The destructor is named
__destruct(), and is called automatically when the object
is destroyed. Destructors are very useful for doing housekeeping work. In most
examples, we will close the database connection in the destructor, ensuring that we
don't leave any database connections open, consuming unnecessary resources.
• It is true that it may be a bit better for performance to create the database connection
just before needing it, instead of the class constructor, and to close it right after using
it, instead of the class destructor. However, we choose to use the constructor and
destructor because we get cleaner code where we are less likely to cause errors by
forgetting to close the connection, for example.
When referring to any class member, you must specify the object it is a part of. If you want
to access a local class member, you must use the special
$this object, that refers to the current
class instance.
The public interface of a class consists of its public members, which are accessible from the
outside, and can be used by programs that create instances of the class. Class members can be
public, private, or protected. Private members can be used only internally by the class, and
protected members can be used by derived classes.
Separating the various layers of functionality of an application is important, because it allows you
to build flexible and extensible applications that can be easily updated when necessary. In Cristian
Darie and Mihai Bucica's PHP e-commerce books, you even learn how to use a templating engine
called Smarty that allows you to further separate presentation logic from the HTML template, so
that designers are not bothered with the programming part of the site.
When preparing the design of your code, keep in mind is that the power, flexibility, and
scalability of the architecture is directly proportional to the time you invest in designing it
and writing the foundation code. Reference to these issues is available for free download
at http:// ajaxphp.packtpub.com/ajax/
For this final exercise, we will build a simple but complete AJAX application called friendly, that
implements many of the practices and techniques shown so far. The application will have a
standard structure, composed of these files:
•
index.html is the file loaded initially by the user. It contains the JavaScript code that
makes asynchronous requests to
friendly.php.
•
friendly.css is the file containing the CSS styles to be used in the application.
•
friendly.js is the JavaScript file loaded together with index.html on the client
side. It makes asynchronous requests to a PHP script called
friendly.php to
perform various functionality required to support the rich client interface.
Chapter 3
• friendly.php is a PHP script residing on the same server as index.html, and it offers
the server-side functionality requested asynchronously by the JavaScript code in
index.html. Remember that it is important for these files to reside on the same server,
because the JavaScript code, when executed by the client, may not be allowed to access
other servers. In most cases,
friendly.php will make use of the functionality of yet
another PHP file, named
friendly.class.php, to perform its duties.
•
friendly.class.php is a PHP script that contains a class called Friendly, which
contains the business logic and database operations to support the functionality of
friendly.php.
•
config.php will be used to store global configuration options for your application,
such as database connection data, etc.
•
error_handler.php contains the error-handling mechanism that changes the text of
an error message into a human-readable format.
The Friendly application, at configurable intervals (by default, of 5 seconds), reads two random
records from the
users table that you have created at the MySQL exercise, and reads a random
number from the random number generator service that you have also met earlier in this chapter.
Using this data, the server composes a message like "
User paula works with user emilian at project
#33", which is read by the client and displayed as shown in Figure 3.21.
Figure 3.21: Friendly Web Application
The application will display "Reading the new message from server…" while making the
asynchronous request (you get to read this message because the server adds an artificial delay to
simulate some more complex server-side functionality).
In the case of an error, the application can be configured to display a detailed error message
(useful when debugging), as shown in Figure 3.22, or a more user friendly error message as shown
in Figure 3.23.
111
Server-Side Techniques with PHP and MySQL
112
Figure 3.22: What Happens When you Lose the Database Password—A Detailed Error Page
Figure 3.23: A Friendlier Error Page
Now that you know what we are up to, it's time for action…
Time for Action—Building the Friendly Application
1. This exercise makes use of the users table that is created in the previous exercise. If
you haven't already, please follow steps 1 and 2 of the
Working with PHP and
MySQL
exercise.
2. Create a new folder named
friendly as a child of the foundations folder.
3. Create a new file named index.html with this code in it:
<!DOCTYPE html PUBLIC "-//W3C//DTD XHTML 1.1//EN"
"
<html>
<head>
<title>Practical AJAX: Friendly Web Application</title>
Chapter 3
<link href="friendly.css" rel="stylesheet" type="text/css"/>
<script type="text/javascript" src="friendly.js"></script>
</head>
<body onload="process()">
<noscript>
<strong>
This example requires a JavaScript-enabled browser!<br/><br/>
</strong>
</noscript>
<div class="project">
<span class="title">Welcome to AJAX Friendly!</span>
<br/><br/>
<div class="news">
Your news for today:
<div id="myDivElement" />
</div>
</div>
</body>
</html>
4. Add a new file named friendly.css:
body
{
font-family: Arial, Helvetica, sans-serif;
font-size: small;
background-color: #fffccc;
}
input
{
margin-bottom: 3px;
border: #000099 1px solid;
}
.title
{
font-size: x-large;
}
div.project
{
background-color: #99ccff;
padding: 5px;
border: #000099 1px solid;
}
div.news
{
background-color: #fffbb8;
padding: 2px;
border: 1px dashed;
}
5. Now add the JavaScript source file, friendly.js:
// holds an instance of XMLHttpRequest
var xmlHttp = createXmlHttpRequestObject();
// holds the remote server address and parameters
var serverAddress = "friendly.php?action=GetNews";
// variables that establish how often to access the server
var updateInterval = 5; // how many seconds to wait to get new message
var errorRetryInterval = 30; // seconds to wait after server error
// when set to true, display detailed error messages
var debugMode = true;
113
Server-Side Techniques with PHP and MySQL
114
// creates an XMLHttpRequest instance
function createXmlHttpRequestObject()
{
// will store the reference to the XMLHttpRequest object
var xmlHttp;
// this should work for all browsers except IE6 and older
try
{
// try to create XMLHttpRequest object
xmlHttp = new XMLHttpRequest();
}
catch(e)
{
// assume IE6 or older
var XmlHttpVersions = new Array("MSXML2.XMLHTTP.6.0",
"MSXML2.XMLHTTP.5.0",
"MSXML2.XMLHTTP.4.0",
"MSXML2.XMLHTTP.3.0",
"MSXML2.XMLHTTP",
"Microsoft.XMLHTTP");
// try every prog id until one works
for (var i=0; i<XmlHttpVersions.length && !xmlHttp; i++)
{
try
{
// try to create XMLHttpRequest object
xmlHttp = new ActiveXObject(XmlHttpVersions[i]);
}
catch (e) {}
}
}
// return the created object or display an error message
if (!xmlHttp)
alert("Error creating the XMLHttpRequest object.");
else
return xmlHttp;
}
// function that displays a new message on the page
function display($message)
{
// obtain a reference to the <div> element on the page
myDiv = document.getElementById("myDivElement");
// display message
myDiv.innerHTML = $message + "<br/>";
}
// function that displays an error message
function displayError($message)
{
// display error message, with more technical details if debugMode is true
display("Error retrieving the news message! Will retry in " +
errorRetryInterval + " seconds." +
(debugMode ? "<br/>" + $message : ""));
// restart sequence
setTimeout("process();", errorRetryInterval * 1000);
}
// call server asynchronously
function process()
{
// only continue if xmlHttp isn't void
if (xmlHttp)
{
Chapter 3
// try to connect to the server
try
{
// remove this line if you don't like the 'Receiving ' message
display("Receiving new message from server ")
// make asynchronous HTTP request to retrieve new message
xmlHttp.open("GET", serverAddress, true);
xmlHttp.onreadystatechange = handleGettingNews;
xmlHttp.send(null);
}
catch(e)
{
displayError(e.toString());
}
}
}
// function called when the state of the HTTP request changes
function handleGettingNews()
{
// when readyState is 4, we are ready to read the server response
if (xmlHttp.readyState == 4)
{
// continue only if HTTP status is "OK"
if (xmlHttp.status == 200)
{
try
{
// do something with the response from the server
getNews();
}
catch(e)
{
// display error message
displayError(e.toString());
}
}
else
{
// display error message
displayError(xmlHttp.statusText);
}
}
}
// handles the response received from the server
function getNews()
{
// retrieve the server's response
var response = xmlHttp.responseText;
// server error?
if (response.indexOf("ERRNO") >= 0
|| response.indexOf("error") >= 0
|| response.length == 0)
throw(response.length == 0 ? "Server error." : response);
// display the message
display(response);
// restart sequence
setTimeout("process();", updateInterval * 1000);
}
6. It's time to write the server-side scripts now. Start by creating friendly.php:
<?php
// load the error handling module
require_once('error_handler.php');
require_once('friendly.class.php');
115
Server-Side Techniques with PHP and MySQL
116
// make sure the user's browser doesn't cache the result
header('Expires: Wed, 23 Dec 1980 00:30:00 GMT'); // time in the past
header('Last-Modified: ' . gmdate('D, d M Y H:i:s') . ' GMT');
header('Cache-Control: no-cache, must-revalidate');
header('Pragma: no-cache');
// read the action parameter
$action = $_GET['action'];
// get news
if ($action == 'GetNews')
{
// create new instance of the Friendly class
$friendly = new Friendly();
// use Friendly functionality to retrieve the news message
$news = $friendly->getNews();
// echo the message to be read by the client
echo $news;
}
else
{
echo 'Communication error: server doesn\'t understand command.';
}
?>
7. Create the friendly.class.php script with the following contents:
<?php
// load error handling sequence
require_once ('error_handler.php');
// load configuration
require_once ('config.php');
// class stores Friendly web application functionality
class Friendly
{
// stores the database connection
private $mMysqli;
// constructor opens database connection
function __construct()
{
$this->mMysqli = new mysqli(DB_HOST, DB_USER, DB_PASSWORD,
DB_DATABASE);
}
// generate news message
public function getNews()
{
// this will store the news line
$news = 'No news for today.';
// SQL that selects two random users from the database.
$query = 'SELECT user_name FROM users ' .
'ORDER BY RAND() ' .
'LIMIT 2';
// execute the query
$result = $this->mMysqli->query($query);
// retrieve the user rows
$row1 = $result->fetch_array(MYSQLI_ASSOC);
$row2 = $result->fetch_array(MYSQLI_ASSOC);
// close the input stream
$result->close();
// generate the news
if (!$row1 || !$row2)
{
$news = 'The project needs more users!';
}
else
{
Chapter 3
// create HTML-formatted news message
$name1 = '<b>' . $row1['user_name'] . '</b>';
$name2 = '<b>' . $row2['user_name'] . '</b>';
$randNum = $this->getRandomNumber();
$news = 'User ' . $name1 . ' works with user ' . $name2 .
' at project #' . $randNum . '.';
}
// output the news line
return $news;
}
// returns a random number between 1 and 100
private function getRandomNumber()
{
// delays execution for quarter of a second
usleep(250000);
// holds the remote server address and parameters
$serverAddress = '
$serverParams = 'num=1&min=1&max=100';
// retrieve the random number from remote server
$randomNumber = file_get_contents($serverAddress . '?' .
$serverParams);
// output the random number
return trim($randomNumber);
}
// destructor closes database connection
function __destruct()
{
$this->mMysqli->close();
}
}
?>
8. Add the configuration file, config.php:
<?php
// defines database connection data
define('DB_HOST', 'localhost');
define('DB_USER', 'ajaxuser');
define('DB_PASSWORD', 'practical');
define('DB_DATABASE', 'ajax');
?>
9. Finally, add the error-handler script, error_handler.php:
<?php
// set the user error handler method to be error_handler
set_error_handler('error_handler', E_ALL);
// error handler function
function error_handler($errNo, $errStr, $errFile, $errLine)
{
// clear any output that has already been generated
if(ob_get_length()) ob_clean();
// output the error message
$error_message = 'ERRNO: ' . $errNo . chr(10) .
'TEXT: ' . $errStr . chr(10) .
'LOCATION: ' . $errFile .
', line ' . $errLine;
echo $error_message;
// prevent processing any more PHP scripts
exit;
}
?>
10. Load http://localhost/ajax/foundations/friendly/.
117
Server-Side Techniques with PHP and MySQL
118
What Just Happened?
Most of the principles implemented in the application were covered earlier in the book, so we will
quickly analyze what's new here, starting from the client-side code. The novelty in
index.html
consists in using the
<noscript> element to offer a minimal support for browsers that don't
support JavaScript, or for ones whose JavaScript support has been disabled:
<body onload="process()">
<noscript>
<strong>
This example requires a JavaScript-enabled browser!<br/><br/>
</strong>
</noscript>
Browsers that have JavaScript enabled will ignore everything between <noscript> and
</noscript>, while the others will parse and display that HTML code.
The client-side JavaScript file,
friendly.js has a few surprises of its own:
• We grouped common functionality that handles displaying user messages into the
display and displayError functions. Both receive as parameter the message to be
displayed, but
displayError displays the message only if debugMode is true (this
variable is defined at the beginning of the file).
•
displayError is called in the catch blocks after an exception has been thrown
somewhere, and it uses
setTimeout to restart the sequence that makes server
requests. You can set how much time the script should wait before attempting
a new server request when an error happens by modifying the value of the
errorRetryInterval variable.
• You can change how often the news message should be displayed by changing the
updateInterval variable.
• In
getNews(), we have a simplistic mechanism that checks whether the text received
from the server was a server-side error instead of the message we are waiting for.
This mechanism verifies if the response contains "
ERRNO" (which is generated by
our server-side custom error handler), or "error" (which is generated automatically
by PHP in the case of fatal errors or parse errors), or if the response is empty (if the
displayErrors option is set to Off in php.ini, no error text is generated). In any
of these cases, we throw an error manually, which is then received by our
error-handling mechanism that informs the users that an error has happened.
At the server side, everything starts in
friendly.php, which is called from the client. The most
important part of
friendly.php is the one where it creates a new instance of the Friendly class
(defined in
friendly.class.php), and calls its getNews method:
// read the action parameter
$action = $_GET['action'];
// get news
if ($action == 'GetNews')
{
// create new instance of the Friendly class
$friendly = new Friendly();
// use Friendly functionality to retrieve the news message
$news = $friendly->getNews();
// echo the message to be read by the client
echo $news;
}
Chapter 3
On the server side, all the interesting things happen in friendly.class.php, which is called from
friendly.php to do the interesting part of the work. In friendly.class.php you can find the
Friendly class, which has the following four members:
•
$mMysqli: A private field that stores an open database connection during the life of
the object.
•
__construct(): The class constructor initializes $mMysqli by opening a database
connection. Because the constructor is executed automatically when an instance of
the class is created, you can safely assume to have the connection available in all
methods of the class.
•
__destruct(): The class destructor closes the database connection. The destructor is
executed automatically when the class instance is destroyed.
•
getRandomNumber(): This is a private helper method that returns a random number.
Private methods can't be called from programs that create instances of the class, and
are meant to provide internal functionality only. The code in
getRandomNumber is
familiar from the previous exercises, as it calls the external
random.org server to
retrieve new random numbers. The
usleep PHP function is used to artificially add a
quarter of a second delay, so that you can admire the "Receiving new message from
server…" message on the client for a little longer.
•
getNews(): This is a public method that an external program can access to get a
new "news" message. The method gets two random user names from the database,
uses the
getRandomNumber method to retrieve a random number, and composes a
message such as "User x works with user y at project #z". (Yes that's not very
imaginative but we couldn't think of anything more interesting—sorry!) Note the
$this special object that is used to access $mMysqli and getRandomNumber().
Class members can only be accessed using an instance of the class and in PHP
$this refers to the current class instance.
Summary
Hopefully, you have enjoyed the little examples of this chapter, because many more will follow!
This chapter walked you through the technologies that live at the server side of a typical AJAX
application. We have done a few exercises that involved simple server functionality, and PHP did
a wonderful job at delivering that functionality. You have also learned the basics of working with
databases, and simple database operations with the first table created in this book.
In the following chapters, you'll meet even more interesting examples that use more advanced
code to implement their functionality. In Chapter 4, you'll build an AJAX-enabled form validation
page, which is safe to work even if the client doesn't support JavaScript and AJAX.
119
4
AJAX Form Validation
Validating input data is an essential requirement for quality and secure software applications. In
the case of web applications, validation is an even more sensitive area, because your application is
widely reachable by many users with varying skill sets and intentions.
Validation is not something to play with, because invalid data has the potential to harm the
application's functionality, and even corrupt the application's most sensitive area: the database.
Input data validation means checking whether the data entered by the user complies with
previously defined rules, which are established according to the business rules of your application.
For example, if you require dates to be entered in the YYYY-MM-DD format, then a date of
"February 28" would be considered invalid. Email addresses and phone numbers are other
examples of data that should be checked against valid formats.
Carefully define the input data validation rules in the software requirements document of
the application you're developing, and then use them consistently to validate your data!
Historically, web form validation was implemented mostly at the server side, after the form was
submitted. In some cases, there was also some JavaScript code on the client that performed simple
validation such as checking whether the email address was valid, or if a user name had been entered.
The problems encountered with traditional web form validation techniques are:
• Server-side form validation meets the limits of the HTTP protocol, which is a
stateless protocol. Unless special code is written to deal with this issue, after
submitting a page containing invalid data, the user is shown back an empty form that
has to be filled from scratch.
• When submitting the page, the user needs to wait for a full page reload. For every
mistake that is made when filling the form, a new page reload happens.
In this chapter, we will create a form-validation application that implements the good old traditional
techniques and adds an AJAX flavor, thereby making the form more user-friendly and responsive.
Even if you implement AJAX validation, server-side validation is mandatory, because the server is
the last line of defense against invalid data. The JavaScript code that gets to the client can not only be
disabled permanently from the browser's settings, but it also can be easily modified or bypassed.
AJAX Form Validation
122
The code in this chapter can be verified online at .
Implementing AJAX Form Validation
The form-validation application we will build in this chapter validates the form at the server side
on the classic form submit, and also implements AJAX validation while the user navigates through
the form. The final validation is performed at the server, as shown in Figure 4.1.
Figure 4.1: Validation Being Performed Seamlessly while Users Continue Their Activity
Doing a final server-side validation when the form is submitted is always a must. If someone
disables JavaScript in the browser settings, AJAX validation on the client side won't work,
exposing sensitive data, and thereby allowing an evil-intended visitor to harm important data back
on the server (e.g. through SQL injection).
Chapter 4
Always validate user input on the server.
The application you are about to build validates a registration form, as shown in Figure 4.2, using
both AJAX validation (client side) and typical server-side validation:
• AJAX-style—when each form field loses focus (
onblur). The field's value is sent to
the server, which validates the data and returns a result (0 for failure, 1 for success).
If validation fails, an error message will
unobtrusively show up and notify the user
about the failed validation as shown in Figure 4.3.
• PHP-style—when the entire form is submitted. This is the usual validation you
would do on the server, by checking user input against certain rules. If no errors are
found and the input data is valid, the browser is redirected to a success page as
shown in Figure 4.4. If validation fails, however, the user is sent back to the form
page with the invalid fields highlighted as shown in Figure 4.3.
Both AJAX validation and PHP validation check the entered data against these rules:
• Username must not already exist in the database
• Name field cannot be empty
• A gender must be selected
• Month of Birth must be selected
• Birthday must be a valid date (between 1-31)
• Year of birth must be a valid year (between 1900-2000)
• The date must exist taking into consideration the number of days for each month
• Email address must be written in a valid email format, such as or
• Phone number must be written in standard US form: xxx-xxx-xxxx
• "
I've read the Terms of Use" must be checked
Watch the application in action in the following screenshots:
123
AJAX Form Validation
124
Figure 4.2: The User Registration Form
Figure 4.3: Form Validation in Action
Chapter 4
Figure 4.4: Successful Submission
Thread-Safe AJAX
A piece of code is thread-safe if it functions correctly during simultaneous execution by multiple
threads. This chapter contains the first example where an external factor—the user—directly
influences the AJAX requests. We need to make an asynchronous request to the server to validate
the entered data every time the user leaves an input box or changes a selection.
The hidden danger behind this technique is only revealed if the user moves very quickly through
the input fields, or the server connection is slow; in these cases, the web application would attempt
to make new server requests through an
XMLHttpRequest object that is still busy waiting for the
response to a previous request (this would generate an error and the application would stop
functioning properly).
Depending on the circumstances at hand, the ideal solution to this problem may be:
• Create a new
XMLHttpRequest instance for every message you need to send to the
server. This method is easy to implement, but it can degrade server's performance if
multiple requests are sent at the same time, and it doesn't guarantee for the order in
which you receive the responses.
• Record the message in a
queue and send it later when the XMLHttpRequest object is
able to make new requests. The requests are made in the expected order. Using a queue
is particularly important in applications where the order of the messages is important.
• Schedule to automatically retry making the request after a specified amount of time.
This method is similar to the one with the queue in that you don't make more than
one server request at a time, but it doesn't guarantee for either the order in which the
requests are made, or for the order in which the responses are received.
• Ignore the message.
In this chapter, for the first time in the book, we'll choose to implement a message queue. When
the user leaves an input element, a message to validate its value is added to the queue. When the
XMLHttpRequest object is clear to make a new request, it takes the first message from the queue.
The queue is a
First-In, First-Out (FIFO) structure, which guarantees that the messages are sent
in the proper order. To get a feeling about how this works, go to the demo page for this chapter (or
implement the code), and press tab quickly multiple times, and then wait to see how the validation
responses show up one by one.
125
AJAX Form Validation
Note that dealing with these problems only makes sense in scenarios where elements outside
your control can trigger the server requests. Otherwise, in scenarios such as the Friendly
application from Chapter 3, where you initiated new requests only after the response was
received, implementing thread-safe code doesn't make a huge difference.
It's time to code.
Time for Action—AJAX Form Validation
If you have read the previous chapter then you should already have the users table set
up. If you do, you may skip steps 1 and 2.
1. Connect to the ajax database, and create a table named users with the following code:
CREATE TABLE users
(
user_id INT UNSIGNED NOT NULL AUTO_INCREMENT,
user_name VARCHAR(32) NOT NULL,
PRIMARY KEY (user_id)
);
2. Execute the following INSERT commands to populate your users table with some
sample data (because
user_id is an auto_increment column, its values will be
generated by the database):
INSERT INTO users (user_name) VALUES ('bogdan');
INSERT INTO users (user_name) VALUES ('filip');
INSERT INTO users (user_name) VALUES ('mihai');
INSERT INTO users (user_name) VALUES ('emilian');
INSERT INTO users (user_name) VALUES ('paula');
INSERT INTO users (user_name) VALUES ('cristian');
3. In your ajax folder, create a new folder named validate.
4. Let's start writing the code with the presentation tier. Create a file named
validate.css, and add the following code to it:
body
{
font-family: Arial, Helvetica, sans-serif;
font-size: 0.8em;
color: #000000;
}
label
{
float: left;
width: 150px;
font-weight: bold;
}
input, select
{
margin-bottom: 3px;
}
.button
{
font-size: 2em;
}
126