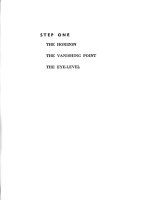
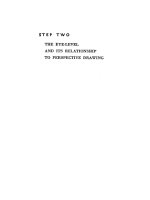
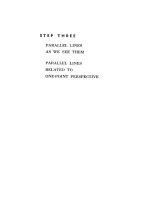
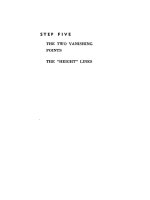
Drawing-teaching Perspective Foundations
Bạn đang xem bản rút gọn của tài liệu. Xem và tải ngay bản đầy đủ của tài liệu tại đây (2.27 MB, 133 trang )
Drawing lessons - illustrated lesson notes for teachers and students
ILLUSTRATED LESSON NOTES FOR TEACHERS
INTRODUCTION
preamble for all lessons
1) cityscape
2) cityscape up
3) cityscape down
4) room interior two point
5) railway
6) room interior CVP
6b) room interior cont.
7) letters
8) shadows basic
9) shadows 2
10) archway
10b) completed arch
11) road
11b) road continuded
12) book
12b) book continued
PART TWO INTRODUCTION
1) 'quick sketch page'
2) methods of shading
3) tennis and shadows
4) reference sheet
5) in three dimensions
6) a 'fork' in the road
7) portraiture
8) portraiture cont.
9) drawing roses
Send me a short message with the phrase "please e-mail" if you'd like to read news of new free
drawing lessons as they occur and as the pages are updated (no more often than weekly!) NEW
John Hagan CD now available!
COWDISLEY HOME SITE
Peek into a corner of the John Hagan studio ...!
[08.12.2002 12:36:41]
Learning to draw - lesson notes for teachers
LESSON NOTES FOR TEACHERS
LEARN HOW TO DRAWEssential and elementary lessons on learning how to draw for 9-14year
olds who have interests in becoming;
Artists,
Architects,
Video game designers,
Cartoon artists,
Special effects artists,
Interior Designers,
Draughtsmen,
Fashion Designers,
Surveyors, Engineers, Builders,
Illustrators,
Graphic designers,
Computer designers,
Set designers for film, opera, ballet, stage etc.
Time
- Lessons are separated into approx. 40 min segments.
Homestudy
- 10 to 20 minutes per lesson - set work proposals suggested at end of each lesson.
Materials:
30x45cms or 12"x18" standard cartridge paper (thick, white, plain) sketchpad.
2H, HB and 4B pencils
Ruler and eraser
General lesson structure:
5-10
min. revision and homework assessment.
5
min. new page, draw margin and add title (bottom rh corner).
20
min. demo and child practical drawing.
5
min. summary and suggested homework.
NOTES
*These lessons are designed using basic skills already learned by students; to measure and to draw
straight lines using a ruler. Elements of self-expression are based on familiarity and habit and will
come gradually - particularly when the student grows comfortable with the lesson structure. Such
self-expression is first emphasised in the homestudy area.
*The second part of the lessons will deal with the freehand elements of drawing but it has been my
experience that these freehand lessons come easier with confidence, enthusiasm, discipline and a
general understanding of the principles of perspective and the drawing of regular solids. For those
who think good drawing has nothing to do with the understanding of basic structure need not read
much further. Be warned that it is my way to teach that basic structure first.
*If the lessons are conducted as I have designed them the teacher will find most children will tend
to neglect more formal homework and concentrate on expressing themselves by completing their
drawings in their own time. I have taught these lessons to all ages including disturbed children,
intelligent young adults, three different cultures, and to individuals completely disinterested in
education generally. The end results were universal, the students became more perceptive and
desired a career change. Be prepared to be besieged by parents at parent teacher nights.
The Classroom teacher
needs a good clean chalkboard, white chalk and a long straight edge
(a board tee square for the less adept). The home educator needs the same equipment as the
student.
(1 von 2) [08.12.2002 12:36:53]
Learning to draw - lesson notes for teachers
GO TO ... PREAMBLE LESSON
(2 von 2) [08.12.2002 12:36:53]
preamble
ALL LESSONS - THE PREAMBLE
Lesson preamble
- Pencil control for the start of all lessons
Aim:
To teach the importance of eye to hand coordination, pencil control.
Materials:
the sketch pad,
the HB pencil,
ruler.
PENCIL CONTROL
A) The pupil will be asked to rule a light horizontal line 1cm or 1/2 inch from the top of the page.
The word lightly must be stressed and the student's task will be to draw the line so it is visible at
half a meter but invisible at a meter.
B) Have the student hold these up and the teacher will discover that only one or two students will
be able to achieve this result. Praise those two and demonstrate to the whole class the correct
method of holding a pencil for a long light line is to drag the pencil across the page lightly holding it
between thumb and index finger. The trick is to move your ARM and shoulder and not your fingers!
C) Have the class draw a light line across the bottom of the page using this technique and get their
next-door neighbour to check it for visibility at a yard.
D) If this proves satisfactory have the student complete the verticals two verticles in the same
manner.
E) Hold these up for inspection and then ask the students to firm in the margin with their pencil
leaving the corners so they can discern the difference between their light and heavy lines.
F) Lightly construct a little box 2cmx6cm (1" x2") in the bottom right hand corner for a title, then
firm it in as shown below.
(1 von 2) [08.12.2002 12:37:04]
preamble
This exercise is to be done at the beginning of every drawing class for every page as it
slots the students mind into line control (allow 5 min. maximum).
GO TO ... LESSON ONE
or ... lesson menu
(2 von 2) [08.12.2002 12:37:04]
Lesson one
LESSON ONE - ELEMENTARY PERSPECTIVE
TIME: Allow one hour for this initial lesson - if combined with previous lesson 80min. It is strongly
suggested the teacher prepares by completing the lesson sometime before attempting to teach.
Particular measurements can then be given to those who need them.
Aim:
To introduce the student to the notion of creating a three dimensional vista on a two
dimensional plane. This lesson is particularly important as its intent is have the student create a
picture of great depth by merely copying the lines the teacher makes on the chalkboard. The aim is
to generally promote confidence in the student.
Materials;
The sketch pad,
HB pencil, ruler.
We will carry on from the page prepared in the preamble lesson using the
ruler and HB pencil ...
a) Quarter the page as shown with light lines. Teacher should do this on the chalkboard, then wait
for the students to catch up.
b) Where the middle line touches the border mark two points - these are called .... RVP and LVP
(Right and Left Vanishing Points).
(1 von 8) [08.12.2002 12:37:23]
Lesson one
c) Approximate the next four light lines as shown - if the students are unsure then give absolute
measurements 50mm (2") down - 75mm(3") up from the center.
d) Add the verticals as light construction lines. Note to the students that only three types of lines to
be made, vertical lines or lines to the right VP or let VP ... there are none other. Again, give
measurements if considered necessary. 35mm (1-1/2") right 50mm (2") left of center.
(2 von 8) [08.12.2002 12:37:23]
Lesson one
e) Construct the next set of verticals to approximate (below) then join the tops to RVP and LVP.
f) Firm in the lines shown.
(3 von 8) [08.12.2002 12:37:23]
Lesson one
g) Do again on the left of the centre as demonstrated.
h) Firm in the lines as in my drawing.
(4 von 8) [08.12.2002 12:37:23]
Lesson one
i) Add another lightly.
j) Firm in ...
(5 von 8) [08.12.2002 12:37:23]
Lesson one
k) and a fifth ...
l) Shade the right hand side of the buildings as shown.
(6 von 8) [08.12.2002 12:37:23]
Lesson one
m) Add some light lines as shown to suggest road and pavement - then firm in when satisfied.
Demonstrate how to add some suggestions of windows and signs. Have the children hold up their
pads at the completion of a particular time. Those who have never drawn in three dimensions will
be encouraged and quite keen to continue.
Home work;
Complete the drawing adding more windows, pedestrians, cars, background or more buildings...
encourage innovation.
(7 von 8) [08.12.2002 12:37:23]
Lesson one
Press here to go to a master painter's oil painting using two point perspective as shown above.
Press back to return.
GO TO ... LESSON TWO
lesson menu
(8 von 8) [08.12.2002 12:37:23]
perspective two - city street up
LESSON - PERSPECTIVE TWO - CITY STREET (UP)
TIME:
Allow 40min - teacher prepartation: prepare sketch beforehand with measurements.
Aim:
To introduce the student to the notion of creating a three dimensional vista on a two dimensional
plane. This lesson follows on and develops the theme of the previous lesson.
Materials:
The sketch pad,
HB pencil, ruler, eraser
Prepare a new page with the margin as in the previous lesson using the ruler
and HB pencil ...
a) Quarter the page as shown with light lines. Teacher should do this on the chalkboard then wait
for the students to catch up.
b) In this lesson we are going to use only one vanishing point (CVP) and it is in the certer of the
page. Place in the lines approximately as shown. Parallel lines are 20mm (3/4") down and 30mm
(1,1/4") up from dead center.
(1 von 6) [08.12.2002 12:37:43]
perspective two - city street up
c) Firm in the lines shown.
d) Add the next two radiating light lines as demonstrated.
(2 von 6) [08.12.2002 12:37:43]
perspective two - city street up
e) Firm in the next skyscraper - note to the student that all lines in this drawing are either
horizontal, vertical or radiate out from the center. There are no others!
f) Add the next building as shown.
(3 von 6) [08.12.2002 12:37:43]
perspective two - city street up
g) Some more light construction lines ...
h) ... and firm in the lines as shown.
(4 von 6) [08.12.2002 12:37:43]
perspective two - city street up
i) The essential 'structure' is complete.
j) Now for a little shading.
(5 von 6) [08.12.2002 12:37:43]
perspective two - city street up
Print in the title, add some light lines as shown to suggest windows, then firm in when satisfied.
Further shading and details can be completed at home.
Home work;
Complete the drawing adding clouds, birds, more windows etc ... to your satisfaction.
GO TO ... LESSON THREE
lesson menu
For those folk who have enquired a CD version of these 'painting' as well as 'drawing lessons' and
'advanced painting' lessons will soon, I hope, be available to everyone. It will be an updated,
reformatted for easy printing version so you can create you own reference handbook in your own
time, or just browse the CD.
It is anticipated the CD will be available at around $15 (plus posting) for students and $19 (plus
posting) for others. The CD's will be distributed on a first come first served basis. Isn't that always
the way?
To be added to the list just send me a simple
email with the words 'please notify CD' and your name
and status (only if a student or teacher).
(6 von 6) [08.12.2002 12:37:43]
perspective three - city street down
LESSON - PERSPECTIVE THREE - CITY STREET (DOWN)
TIME: Allow 40min - teacher preparation minimal.
Aim:
This lesson follows on and develops the theme of the previous lesson and intends to
introduce the notion that views may differ but structural elements of perspective (and drawing)
remain very similar.
Materials:
The sketch pad,
HB pencil, ruler.
Prepare as in the previous lesson using the ruler and HB pencil
a) Quarter the page as shown with diagonal light lines. Teacher should do this on the chalkboard,
then wait for the students to catch up. Add the extra light lines. In this lesson we are again going to
use only one vanishing point (CVP) and it is in the certer of the page. Place in the lines
approximately as shown.
(1 von 6) [08.12.2002 12:38:01]
perspective three - city street down
b) Add the two extra light lines.
c) Firm in the lines shown.
(2 von 6) [08.12.2002 12:38:01]
perspective three - city street down
d) Add the next series of horizontal light lines and the two extra radiating lines. Give measurements
of students are unsure about the position of the horizontal lines as some students become nervous
about mistakes - again note to the student that all lines in this drawing are either horizontal,
vertical or radiate out from the center.
e) Firm in as shown.
(3 von 6) [08.12.2002 12:38:01]
perspective three - city street down
f) Add the extra.
h) Now the vertical lines and the structure begins to take shape.
(4 von 6) [08.12.2002 12:38:01]
perspective three - city street down
i) The essential 'structure' is done - now two horizontal lines show the pavement edges.
j) Now for a little shading.
Print in the title add some light lines as shown to suggest windows - then firm in when satisfied.
Further shading and details can be completed at home.
Homework:
Complete the drawing adding cars, pedestrians, heli-pads, more windows etc ...
(5 von 6) [08.12.2002 12:38:01]
perspective three - city street down
GO TO ... LESSON FOUR
lesson menu
(6 von 6) [08.12.2002 12:38:01]