ASP.NET Bible 2002 PHẦN 9 ppsx
Bạn đang xem bản rút gọn của tài liệu. Xem và tải ngay bản đầy đủ của tài liệu tại đây (1 MB, 68 trang )
Field Name Data Type
TopicID (Primary Key) AutoNumber
Name Text
The Threads table is a little more complicated, but not much (see Table 30-2).
Table 30-2: The Threads table
Field Name Data Type
ThreadID (Primary Key) AutoNumber
Name Text
Topic Number
The Topic column holds the TopicID of the row in the Topics table with which this thread
is associated.
The Name column holds the name of the thread. It should have some specific attributes
set, as specified in Table 30-3.
Table 30-3: The Thread's Name column attributes
Attribute Value
Required Yes
Allow Zero Length No
Indexed Yes
(No
Duplica
tes)
By setting these attributes, you assure that whenever a new row is added, the Name
field is filled in and that it is filled in with a value that is different from any of the other
names already in the table. In other words, all threads must have a unique name.
The same attributes could have been set for the Topics table's Name field, but because
it's the site administrator (and not users) who will be filling that table in, you can probably
assume that the administrator will assure that the topics are right.
The Messages table has the most columns (see Table 30-4).
Table 30-4: The Messages table
Field Name Data Type
MessageID (Primary Key) AutoNumber
Subject Text
Message Memo
Author Text
Posted Date/Time
Thread Number
As in an e-mail message, the Subject line is used to title and summarize the contents of
the message itself. The author of the message will be stored in Chatty as the e-mail
address they enter. If your site authenticates its users, then you'll be able to put their
username or their chosen handle into the Author field instead.
The Posted column is important. It enables you to organize the messages in the right
order within a thread.
Finally, Thread holds the ThreadID of the row in the Threads table with which this
message is associated.
Creating the Database
Once you've decided to go with a relational database, you're going to have to figure out
how you want to organize the information into tables and columns.
Chatty has two levels of organization for its messages:
§ Topics are the highest level and are chosen by the creator of the site.
§ Threads are essentially subtopics that the user can create.
Messages, then, are always posted by the user to a thread, which in turn is under a
topic.
These storage needs can be accommodated with three tables: Topics, Threads, and
Messages.
Topics is the highest level, but is also the simplest. All you have to track is the topic's
name. Table 30-1 shows the columns and data types.
Table 30-1: The Topics table
Field Name Data Type
TopicID (Primary Key) AutoNumber
Name Text
The Threads table is a little more complicated, but not much (see Table 30-2).
Table 30-2: The Threads table
Field Name Data Type
ThreadID (Primary Key) AutoNumber
Name Text
Topic Number
The Topic column holds the TopicID of the row in the Topics table with which this thread
is associated.
The Name column holds the name of the thread. It should have some specific attributes
set, as specified in Table 30-3.
Table 30-3: The Thread's Name column attributes
Attribute Value
Required Yes
Allow Zero Length No
Indexed Yes
(No
Duplica
tes)
By setting these attributes, you assure that whenever a new row is added, the Name
field is filled in and that it is filled in with a value that is different from any of the other
names already in the table. In other words, all threads must have a unique name.
The same attributes could have been set for the Topics table's Name field, but because
it's the site administrator (and not users) who will be filling that table in, you can probably
assume that the administrator will assure that the topics are right.
The Messages table has the most columns (see Table 30-4).
Table 30-4: The Messages table
Field Name Data Type
MessageID (Primary Key) AutoNumber
Subject Text
Message Memo
Author Text
Posted Date/Time
Thread Number
As in an e-mail message, the Subject line is used to title and summarize the contents of
the message itself. The author of the message will be stored in Chatty as the e-mail
address they enter. If your site authenticates its users, then you'll be able to put their
username or their chosen handle into the Author field instead.
The Posted column is important. It enables you to organize the messages in the right
order within a thread.
Finally, Thread holds the ThreadID of the row in the Threads table with which this
message is associated.
Seeding the Database
In order to test the pages as you create them, you'll want to put some of your own data in
the database to get you started. While you're in Microsoft Access creating the tables, go
ahead and add a few topics, one or more threads for each topic and a message or two
for each thread. Make sure the foreign keys (like the Topic column in the Thread table
and the Thread column in the Message table) refer to the primary keys in rows you've
already created in the associated tables.
If you decide to use this completed application in your own Web sites, you'll have to use
Microsoft Access to enter your topics. I haven't included a page to add or update topics
since the discussion topics are usually created once by the Web site administrator and
aren't often changed after that. Of course, if you do want easy access to update or add
new topics, you can always use the code I've provided here for creating threads as a
starting point for a new page that does what you want.
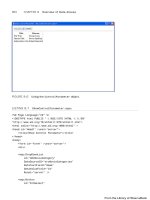
Picking a Topic
When a user visits Chatty, the first decision they have to make is which topic they want
to browse. The Topics.aspx page, shown here, provides that opportunity:
<%@ Page Explicit="True" Language="VB"
Debug="True" %>
<%@ Import Namespace="System.Data" %>
<%@ Import Namespace="System.Data.OleDb" %>
<Script Runat="Server">
Sub Page_Load( s As Object, e As EventArgs )
If Not isPostBack Then
Dim TopicConnection As OleDbConnection
Dim TopicCommand As OleDbCommand
TopicConnection = New OleDbConnection( _
"Provider=Microsoft.Jet.OLEDB.4.0;" & _
"Data Source=" & _
"c:\inetpub\wwwroot\Discuss\DiscussDB.mdb")
TopicCommand = New OleDbCommand( _
"Select TopicID, Name from Topics", _
TopicConnection )
TopicConnection.Open()
TopicDataList.DataSource = _
TopicCommand.ExecuteReader()
TopicDataList.DataBind()
TopicConnection.Close()
End If
End Sub
Sub SelectTopic(s As Object, _
e As DataListCommandEventArgs)
Dim TopicID,TopicName As String
TopicName = e.CommandArgument
TopicID = _
TopicDataList.DataKeys.Item( _
e.Item.ItemIndex).toString()
Response.Redirect("Threads.aspx?TopicID=" & _
TopicID & "&TopicName=" & TopicName)
End Sub
</Script>
<html>
<head><title>Chatty Topics</title></head>
<body>
<font face="arial">
<h1><font color="DarkRed">
Chatty Discussion Forum</font></h1>
<font size=5><i>Topics</i></font>
<form Runat="Server">
<asp:DataList id="TopicDataList"
cellpadding=10 cellspacing=0
gridlines="both" RepeatColumns="3"
RepeatDirection="Horizontal"
Width="100%" DataKeyField="TopicID"
OnItemCommand="SelectTopic"
Runat="Server">
<ItemTemplate>
<asp:LinkButton
id="TopicLink"
Text='<%# Container.DataItem("Name") %>'
CommandArgument='<%# Container.DataItem("Name") %>'
Runat="Server"/>
</Itemtemplate>
</asp:DataList>
</font>
</form>
</body>
</html>
Retrieving the topics
When the page is first retrieved, a connection is made to the Access database, and a
command object is created with a Select statement that retrieves the topic information:
If Not isPostBack Then
Dim TopicConnection As OleDbConnection
Dim TopicCommand As OleDbCommand
TopicConnection = New OleDbConnection( _
"Provider=Microsoft.Jet.OLEDB.4.0;" & _
"Data Source=" & _
"c:\inetpub\wwwroot\Discuss\DiscussDB.mdb")
TopicCommand = New OleDbCommand( _
"Select TopicID, Name from Topics", _
TopicConnection )
TopicConnection.Open()
The Command object's ExecuteReader method is called, which executes the Select
statement and then returns the results in the form of a DataReader object. This object is
immediately assigned to the DataSource property of the TopicDataList control on this
page. Calling the DataBind method of that control assures that the topics retrieved will
appear there:
TopicDataList.DataSource = _
TopicCommand.ExecuteReader()
TopicDataList.DataBind()
Displaying the topics
The DataList control is used to quickly and easily display and format the information
retrieved from the database:
<asp:DataList id="TopicDataList"
cellpadding=10 cellspacing=0
gridlines="both" RepeatColumns="3"
RepeatDirection="Horizontal"
Width="100%" DataKeyField="TopicID"
OnItemCommand="SelectTopic"
Runat="Server">
<ItemTemplate>
<asp:LinkButton
id="TopicLink"
Text='<%# Container.DataItem("Name") %>'
CommandArgument='<%# Container.DataItem("Name") %>'
Runat="Server"/>
</Itemtemplate>
</asp:DataList>
Most of the attributes specified for the DataList are concerned with how the data will be
formatted. There are two important attributes that are not concerned with formatting:
DataKeyField and OnItemCommand. I'll discuss OnItemCommand in the next section.
The DataList expects to be associated with a result set, like that retrieved from a Select
statement. The DataKeyField attribute identifies the column in the result set that is the
key.
The ItemTemplate tag is used to identify how individual items in this list should be
displayed. In this case, I only want to display one item, the name of the topic. But I want
to display it as a link. The LinkButton control makes this easy. The text is set to the value
of the Container's "Name" data item. The container, in this case, is the DataList, and
because it is bound to the Topics table result set, this will display the name of the topic.
The CommandArgument is set to the same value. This assures that the Topic name is
passed to the appropriate subroutine when the user clicks a topic.
Handling topic selection
When the user clicks a topic, the DataList's OnItemCommand attribute tells the control
what to do. In this case, it tells it to call the SelectTopic subroutine:
Sub SelectTopic(s As Object, _
e As DataListCommandEventArgs)
Dim TopicID, TopicName As String
TopicName = e.CommandArgument
TopicID =__
TopicDataList.DataKeys.Item( _
e.Item.ItemIndex).toString()
Response.Redirect("Threads.aspx?TopicID=" & _
TopicID & "&TopicName=" & TopicName)
End Sub
The topic name was passed as an argument, which comes in through the e object.
That's easy enough to retrieve. The topic ID is a little tougher. The topic ID is in the list of
DataKeys (because that column was specified as the DataKeyField for the DataList).
So I use that list to retrieve the DataKey at the current ItemIndex. With the topic ID and
name in hand, I'm ready to pass control on to another page, Threads.aspx.
The Threads page is used to display the list of threads within the selected topic. But to
do that, it must know which topic was chosen. I pass the topic ID and the topic name as
arguments on the URL line. This makes them available to be accessed by name in the
Threads page by using Request.QueryString.
Picking a Thread
Once the user has picked a topic that they're interested in, the Threads page enables
them to see all the threads that have been created in that topic. It also provides a link
that allows the user to go to a page and create a whole new thread, as show in here:
<%@ Page Explicit="True" Language="VB"
Debug="True" %>
<%@ Import Namespace="System.Data" %>
<%@ Import Namespace="System.Data.OleDb" %>
<Script Runat="Server">
Sub Page_Load( s As Object, e As EventArgs )
If Not isPostBack Then
Dim ThreadConnection As OleDbConnection
Dim ThreadCommand As OleDbCommand
ThreadConnection = New OleDbConnection( _
"Provider=Microsoft.Jet.OLEDB.4.0;" & _
"Data Source=" & _
"c:\inetpub\wwwroot\Discuss\DiscussDB.mdb")
ThreadCommand = New OleDbCommand( _
"Select ThreadID, Name from Threads " & _
"Where Topic=" & _
Request.QueryString("TopicID"), _
ThreadConnection )
ThreadConnection.Open()
ThreadDataList.DataSource = _
ThreadCommand.ExecuteReader()
ThreadDataList.DataBind()
ThreadConnection.Close()
End If
End Sub
Sub SelectThread( s As Object, _
e As DataListCommandEventArgs )
Dim ThreadID, ThreadName As String
ThreadDataList.SelectedIndex = e.Item.ItemIndex
ThreadName = e.CommandArgument
ThreadID = _
ThreadDataList.DataKeys.Item( _
e.Item.ItemIndex).toString()
Response.Redirect("Messages.aspx?TopicID=" & _
Request.QueryString("TopicID") & _
"&TopicName=" & Request.QueryString("TopicName") & _
"&ThreadID=" & ThreadID & _
"&ThreadName=" & ThreadName)
End Sub
</Script>
<html>
<head><title>Chatty Threads</title></head>
<body>
<font face="arial">
<h1><font color="DarkRed">
Chatty Discussion Forum</font></h1>
<font size="5"><u>
<%=Request.QueryString("TopicName") %>
</u> Threads</font>
<form Runat="Server">
<asp:DataList
id="ThreadDataList"
cellpadding=5 cellspacing=0
gridlines="both" Width="100%"
DataKeyField="ThreadID"
OnItemCommand="SelectThread"
Runat="Server">
<ItemTemplate>
<font size="2">
<asp:LinkButton
id="ThreadLink"
Text='<%# Container.DataItem("Name") %>'
CommandArgument='<%# Container.DataItem("Name") %>'
Runat="Server"/>
</font>
</Itemtemplate>
<FooterTemplate>
<font size="2">
<a href="NewThread.aspx?TopicID=
<%=Request.QueryString("TopicID") %>
&TopicName=
<%=Request.QueryString("TopicName")%>">
<i>[ Create a New Thread ]</i></a>
</font>
</FooterTemplate>
</asp:DataList>
<br/>
<a href="topics.aspx">
Return to list of <b>Topics</b></a>
</form>
</font>
</body>
</html>
This page is actually very similar to the Topics page. It retrieves a list of threads and
displays them in a DataList as LinkButtons, and the user may click any of the thread
names to go to the Messages page.
Using TopicID as selection criteria
There are a few differences between this page and the Topics page. This page uses the
TopicID in the query to get only the threads associated with the topic the user requested:
ThreadCommand = New OleDbCommand( _
"Select ThreadID, Name from Threads " & _
"Where Topic=" & _
Request.QueryString("TopicID"), _
ThreadConnection )
I do this simply by concatenating the information from the QueryString into my Select
statement. I could have, instead, used a parameter and filled in the parame ter with the
TopicID. I decided not to in this case because it would have made the code more
complicated and wouldn't really add any value. I do use parameters in both the
Messages and the NewThread pages, and I'll explain why in a section called "Using
parameters" later in this chapter.
The Thread DataList
Another difference from the Topics page is the DataList:
<asp:DataList
id="ThreadDataList"
cellpadding=5 cellspacing=0
gridlines="both" Width="100%"
DataKeyField="ThreadID"
OnItemCommand="SelectTopic"
Runat="Server">
This list isn't three columns. Instead, it's a single column, which means that each row
stretches across the page, allowing for long thread names.
More importantly, there's a new tag inside the DataList after the ItemTemplate tag:
FooterTemplate.
<FooterTemplate>
<font size="2">
<a href="NewThread.aspx?TopicID=
<%=Request.QueryString("TopicID") %>
&TopicName=
<%=Request.QueryString("TopicName")%>">
<i>[ Create a New Thread ]</i></a>
</font>
</FooterTemplate>
The footer template appears as the last item in the DataList. This is the perfect spot to
provide a link to a page that will allow the user to add their own thread. I pass the
TopicID and TopicName to the NewThread page.
Selecting a thread
When the user clicks one of the threads in the DataList, the SelectThread subroutine
is called. Again, this works much the same as the SelectTopic subroutine does in the
Topics page. The only real difference is that it passes the thread ID and name to the
Messages page as well as the topic ID and name as you can see here:
Response.Redirect("Messages.aspx?TopicID=" & _
Request.QueryString("TopicID") & _
"&TopicName=" & Request.QueryString("TopicName") & _
"&ThreadID=" & ThreadID & _
"&ThreadName=" & ThreadName)
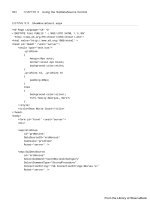
Browsing Messages
The Messages page displays all the messages posted for a particular topic and thread:
<%@ Page Explicit="True" Language="VB" Debug="True" %>
<%@ Import Namespace="System.Data" %>
<%@ Import Namespace="System.Data.OleDb" %>
<Script Runat="Server">
Sub Page_Load( s As Object, e As EventArgs )
If Not isPostBack Then
BindData
End If
End Sub
Sub BindData
Dim MessageConnection As OleDbConnection
Dim MessageCommand As OleDbCommand
MessageConnection = New OleDbConnection( _
"Provider=Microsoft.Jet.OLEDB.4.0;" & _
"Data Source=c:\inetpub\wwwroot\Discuss\DiscussDB.mdb")
MessageConnection.Open()
MessageCommand = New OleDbCommand( _
"Select MessageID, Subject, Message, " & _
"Author, Posted From Messages Where " & _
"Thread=@ThreadID Order By Posted", _
MessageConnection )
MessageCommand.Parameters.Add( _
New OleDbParameter("@ThreadID", OleDbType.Integer))
MessageCommand.Parameters("@ThreadID").Value = _
CInt(Request.QueryString("ThreadID"))
MessageRepeater.DataSource = _
MessageCommand.ExecuteReader()
MessageRepeater.DataBind()
MessageConnection.Close()
End Sub
Sub PostClick( obj As Object, e As EventArgs )
Dim MessageConnection As OleDbConnection
Dim MessageCommand As OleDbCommand
Dim InsertString as string
Dim Message As String
MessageConnection = _
New OleDbConnection("Provider=Microsoft.Jet.OLEDB.4.0;" & _
"Data Source=c:\inetpub\wwwroot\Discuss\DiscussDB.mdb")
InsertString = "Insert Into Messages (Subject, Message, " & _
"Author, Posted, Thread) VALUES (@Subject, @Message, " & _
"@Author, @Posted, @ThreadID)"
MessageCommand = _
New OleDbCommand(InsertString, MessageConnection)
MessageCommand.Parameters.Add( _
New OleDbParameter("@Subject", OleDbType.Varchar,50))
MessageCommand.Parameters.Add( _
New OleDbParameter("@Message", OleDbType.LongVarchar))
MessageCommand.Parameters.Add( _
New OleDbParameter("@Author", OleDbType.Varchar,50))
MessageCommand.Parameters.Add( _
New OleDbParameter("@Posted", OleDbType.Varchar,50))
MessageCommand.Parameters.Add( _
New OleDbParameter("@ThreadID", OleDbType.Varchar,50))
Message = MessageText.Text
Message = Replace(Message, CStr(chr(13)), "<br>")
MessageCommand.Parameters("@Subject").Value = _
SubjectText.Text
MessageCommand.Parameters("@Message").Value = Message
MessageCommand.Parameters("@Author").Value = AuthorText.Text
MessageCommand.Parameters("@Posted").Value = CStr(Now)
MessageCommand.Parameters("@ThreadID").Value = _
CInt(Request.QueryString("ThreadID"))
MessageConnection.Open()
MessageCommand.ExecuteNonQuery
MessageConnection.Close()
SubjectText.Text = ""
MessageText.Text = ""
AuthorText.Text = ""
BindData
End Sub
</Script>
<html>
<head><title>Chatty Messages</title></head>
<body>
<font face="arial">
<h1><font color="DarkRed">
Chatty Discussion Forum</font></h1>
<a href="threads.aspx?TopicID=
<%=Request.QueryString("TopicID")%>
&TopicName=<%=Request.QueryString("TopicName")%>">
<font size="5"><u>
<%=Request.QueryString("TopicName") & _
"</a></u> : <u>" & _
Request.QueryString("ThreadName") %>
</font></u>
<form Runat="Server">
<asp:Repeater
id="MessageRepeater"
Runat="Server">
<ItemTemplate>
<table width="100%" border="1" cellspacing="0"
cellpadding="3" bordercolor="DarkBlue">
<tr bgcolor="DarkBlue"><td>
<font color="White" face="arial"><b>
<%# Container.DataItem("Subject") %></b></font>
</td>
<td align="right" >
<font color="White" face="arial" size="1">
<%# Container.DataItem("Posted") %></font><br/>
</td></tr><tr><td colspan="2">
<font face="arial" size="2">
<%# Container.DataItem("Message") %><br />
<i><%# Container.DataItem("Author") %></i></font>
</td></tr>
</table><br>
</ItemTemplate>
</asp:Repeater>
<table width="100%" border="1" cellspacing="0"
cellpadding="3" bordercolor="DarkBlue">
<tr><td bgcolor="LightGrey">
<p>To post a new message to this thread, type your
message below and click Post.</p>
<p><font size="2">Subject:</font><br/>
<asp:textbox id="SubjectText" runat="server"
columns="50"/></p>
<p><font size="2">Message:</font><br />
<asp:textbox id="MessageText" runat="server"
textmode="multiline"
columns="50" rows="3"/></p>
<p><font size="2">Your Email Address:</font><br />
<asp:textbox id="AuthorText" runat="server"
columns="50"/></p>
<center>
<asp:button runat="server" text=" Post "
onclick="PostClick" /><br />
</center>
</td></tr></table>
<br />
<a href="threads.aspx?TopicID=
<%=Request.QueryString("TopicID")%>
&TopicName=<%=Request.QueryString("TopicName")%>">
Return to <b><%=Request.QueryString("TopicName") %>
</b> Threads</a><br>
<a href="topics.aspx">
Return to list of <b>Topics</b></a>
</form>
</font>
</body>
</html>
This page retrieves the messages and displays them. The user is free to browse through
and read them. At the bottom of the page is a form to fill out, if the user wishes to post
his or her own messages.
Retrieving the messages
All the messages for all the topics and threads are stored in the same table. So to
retrieve only the appropriate messages for this page, I concatenate the ThreadID sent as
a QueryString to this page:
MessageCommand = New OleDbCommand( _
"Select MessageID, Subject, Message, " & _
"Author, Posted From Messages Where " & _
"Thread=" & Request.QueryString("ThreadID") & _
" Order By Posted", MessageConnection )
MessageRepeater.DataSource = _
MessageCommand.ExecuteReader()
MessageRepeater.DataBind()
MessageConnection.Close()
The results are associated with the MessageRepeater.
The header
At the top of the page, after the standard Chatty header, I placed the topic name and the
thread name, separated by a colon. This tells the user exactly what messages they are
looking at, as you can see here:
<body>
<font face="arial">
<h1><font color="DarkRed">
Chatty Discussion Forum</font></h1>
<a href="threads.aspx?TopicID=
<%=Request.QueryString("TopicID")%>
&TopicName=<%=Request.QueryString("TopicName")%>">
<font size="5"><u>
<%=Request.QueryString("TopicName") & _
"</a></u> : <u>" & _
Request.QueryString("ThreadName") %>
</font></u>
In addition, I made the topic name a link. When you click it, you are returned to the
Threads page, showing the threads for this topic.
Displaying the messages
I use a Repeater to display the messages retrieved from the database:
<asp:Repeater
id="MessageRepeater"
Runat="Server">
<ItemTemplate>
<table width="100%" border="1" cellspacing="0"
cellpadding="3" bordercolor="DarkBlue">
<tr bgcolor="DarkBlue"><td>
<font color="White" face="arial"><b>
<%# Container.DataItem("Subject") %></b></font>
</td>
<td align="right" >
<font color="White" face="arial" size="1">
<%# Container.DataItem("Posted") %></font><br/>
</td></tr><tr><td colspan="2">
<font face="arial" size="2">
<%# Container.DataItem("Message") %><br />
<i><%# Container.DataItem("Author") %></i></font>
</td></tr>
</table><br>
</ItemTemplate>
</asp:Repeater>
This page is different from the Topics and Threads pages. I don't need to respond to
user interaction as I did on those pages. And I need to have more flexibility in the layout
to make the messages look presentable and easy to read. So I decide a Repeater would
be a better choice than the DataList.
Each message appears inside its own table. The table is as wide as the page and has a
border all the way around it. The Subject line appears white on dark blue, while the
message appears below it as the standard black text on a white background. The
author's e-mail address appears after the message.
Links to threads and topics
Typically, the user will come to the Messages page, read through the messages, and
then click one of the links at the bottom of the page to go to either the Topics page or
back to the Threads page. That's what this code provides:
<a href="threads.aspx?TopicID=
<%=Request.QueryString("TopicID")%>
&TopicName=<%=Request.QueryString("TopicName")%>">
Return to <b><%=Request.QueryString("TopicName") %>
</b> Threads</a><br>
<a href="topics.aspx">
Return to list of <b>Topics</b></a>
The new message form
However, sometimes, the reader will decide to add a message to the forum. For this, I've
provided a form at the bottom of the page.
The form itself
I could have placed a link here at the bottom of the Messages page, instead, and put the
form on a different page. But I decided that having the form readily available would make
people more likely to post and be active in the conversations.
<table width="100%" border="1" cellspacing="0"
cellpadding="3" bordercolor="DarkBlue">
<tr><td bgcolor="LightGrey">
<p>To post a new message to this thread, type your
message below and click Post.</p>
<p><font size="2">Subject:</font><br/>
<asp:textbox id="SubjectText" runat="server"
columns="50"/></p>
<p><font size="2">Message:</font><br />
<asp:textbox id="MessageText" runat="server"
textmode="multiline"
columns="50" rows="3"/></p>
<p><font size="2">Your Email Address:</font><br />
<asp:textbox id="AuthorText" runat="server"
columns="50"/></p>
<center>
<asp:button runat="server" text=" Post "
onclick="PostClick" /><br />
</center>
</td></tr></table>
Calling PostClick
After the user has filled in the subject, message, and e-mail address textboxes, they click
the Post button, which sends back the result to the server and executes the PostClick
subroutine:
Sub PostClick( obj As Object, e As EventArgs )
Dim MessageConnection As OleDbConnection
Dim MessageCommand As OleDbCommand
Dim InsertString as string
Dim Message As String
The SQL Insert statement
PostClick inserts a new row in the Message table with the information entered by the
user. A connection to the database is made, just as you normally would:
MessageConnection = _
New OleDbConnection("Provider=Microsoft.Jet.OLEDB.4.0;" & _
"Data Source=c:\inetpub\wwwroot\Discuss\DiscussDB.mdb")
In addition, a command object that holds a SQL Insert statement is created:
InsertString = "Insert Into Messages (Subject, Message, " & _
"Author, Posted, Thread) VALUES (@Subject, @Message, " & _
"@Author, @Posted, @ThreadID)"
MessageCommand = _
New OleDbCommand(InsertString, MessageConnection)
However, you'll notice that the data to be filled in isn't concatenated to the string that
contains the Insert statement. Instead of using concatenation as I did in the Select
statement of the BindData subroutine (and in the Select statement used in the Threads
page), I decided, here, to use parameters.
Using parameters
Parameters enable you to identify several placeholders in your SQL statement that are to
be filled in later. The placeholders always begin with an @ sign so that you don't miss
them or confuse them with columns from your table.
After the command object is created, you add new OleDbParameter objects to the
Parameters collection of the command — one for each placeholder in your SQL
statement:
MessageCommand.Parameters.Add( _
New OleDbParameter("@Subject", OleDbType.Varchar,50))
MessageCommand.Parameters.Add( _
New OleDbParameter("@Message", OleDbType.LongVarchar))
MessageCommand.Parameters.Add( _
New OleDbParameter("@Author", OleDbType.Varchar,50))
MessageCommand.Parameters.Add( _
New OleDbParameter("@Posted", OleDbType.Varchar,50))
MessageCommand.Parameters.Add( _
New OleDbParameter("@ThreadID", OleDbType.Varchar,50))
When you instantiate the OleDbParameter, you pass the name of the placeholder and
the data type of the information (using the OleDbType enumeration object).
Finally, after you have created all the parameters, you can fill them in with their
appropriate values:
MessageCommand.Parameters("@Subject").Value = _
SubjectText.Text
MessageCommand.Parameters("@Message").Value = Message
MessageCommand.Parameters("@Author").Value = AuthorText.Text
MessageCommand.Parameters("@Posted").Value = CStr(Now)
MessageCommand.Parameters("@ThreadID").Value = _
CInt(Request.QueryString("ThreadID"))
MessageConnection.Open()
MessageCommand.ExecuteNonQuery
MessageConnection.Close()
Why did I go to all of this trouble? Wouldn't it be simpler to just concatenate the values
into an Insert statement? Well, with this many parameters, the concatenation code would
get pretty confusing. So although this may take a little more code, it is, in the end, easier
to read and understand.
But that's not the best reason to use parameters. Suppose the user enters a subject that
looks like this:
Can't afford the migration cost
Notice the apostrophe in Can't. When you concatenate strings, VB.NET will interpret any
apostrophes as a single quote and will think you are starting a substring, which you didn't
finish. Double quotes in the string cause even worse problems. Fortunately, using
parameters to fill in your SQL statement avoids all of these problems. Your quotes will
come out looking just as they were typed.
Getting hard returns right
There's a couple of lines I skipped as I was describing the Messages page in the
previous sections:
Message = MessageText.Text
Message = Replace(Message, CStr(chr(13)), "<br>")
When the user presses the return key inside the multiline edit box, it creates a hard
return in the text, just as you'd expect it to. This is a valid character and it is saved along
with the rest of the message in the database just fine. But when it is retrieved and
displayed, the browser ignores hard returns. So, to be sure the text displayed in the
browser looks like the text the user entered, it's necessary to do a little replacement.
That's what the preceding lines do.
Preparing to return the updated page
After the user has entered a new message, and clicked Post, the new message is added
to the database and the updated Messages page appears. To make that happen, you
have to do two things: clear out the form fields and re-retrieve the messages from the
database:
SubjectText.Text = ""
MessageText.Text = ""
AuthorText.Text = ""
BindData
Creating a New Thread
One more page is needed to make this application complete: a link from the Threads
page that allows the user to create a new thread. This link sends them to the NewThread
page.
<%@ Page Explicit="True" Language="VB" Debug="True" %>
<%@ Import Namespace="System.Data" %>
<%@ Import Namespace="System.Data.OleDb" %>
<Script Runat="Server">
Sub PostClick( obj As Object, e As EventArgs )
Dim Connection As OleDbConnection
Dim ThreadCommand As OleDbCommand
Dim GetThreadCommand As OleDbCommand
Dim MessageCommand As OleDbCommand
Dim ThreadReader As OleDbDataReader
Dim InsertThread, InsertMessage As String
Dim GetThread, Message as string
Dim ThreadID As Long
Dim ThreadResult As Integer
Connection = New OleDbConnection( _
"Provider=Microsoft.Jet.OLEDB.4.0;" & _
"Data Source=c:\inetpub\wwwroot\Discuss\DiscussDB.mdb")
Feedback.Text = ""
InsertThread = "Insert Into Threads (Name, Topic) " & _
"VALUES (@ThreadName,@TopicID)"
ThreadCommand = New OleDbCommand(InsertThread, Connection)
ThreadCommand.Parameters.Add( _
New OleDbParameter("@ThreadName", OleDbType.Varchar,50))
ThreadCommand.Parameters.Add( _
New OleDbParameter("@TopicID", OleDbType.Integer))
ThreadCommand.Parameters("@ThreadName").Value = _
ThreadText.Text
ThreadCommand.Parameters("@TopicID").Value = _
Request.QueryString("TopicID")
Try
Connection.Open()
ThreadResult = ThreadCommand.ExecuteNonQuery
Catch excp As System.Data.OleDb.OleDbException
If excp.Errors(0).NativeError = -105121349 Then
Feedback.Text = "<font color=red>*** There " & _
"is already a thread with the name <b>" & _
ThreadText.Text & "</b>. Please choose a " & _
"different name and click Post.</font><br><br>"
Else
Feedback.Text = "<font color=red>*** " & _
excp.Errors(0).Message & "<br><br>"
End If
End Try
GetThread = "Select ThreadID from Threads Where Name='" & _
ThreadText.Text & "'"
GetThreadCommand = New OleDbCommand( GetThread,Connection)
ThreadReader = GetThreadCommand.ExecuteReader()
ThreadReader.Read
ThreadID = ThreadReader.Item("ThreadID")
ThreadReader.Close
InsertMessage = "Insert Into Messages (Subject, " & _
"Message, Author, Posted, Thread) VALUES (@Subject, " & _
"@Message, @Author, @Posted, @ThreadID)"
MessageCommand = _
New OleDbCommand(InsertMessage, Connection)
MessageCommand.Parameters.Add( _
New OleDbParameter("@Subject", OleDbType.Varchar,50))
MessageCommand.Parameters.Add( _
New OleDbParameter("@Message", OleDbType.LongVarchar))
MessageCommand.Parameters.Add( _
New OleDbParameter("@Author", OleDbType.Varchar,50))
MessageCommand.Parameters.Add( _
New OleDbParameter("@Posted", OleDbType.Varchar,50))
MessageCommand.Parameters.Add( _
New OleDbParameter("@ThreadID", OleDbType.Varchar,50))
Message = MessageText.Text
Message = Replace(Message, CStr(chr(13)), "<br>")
MessageCommand.Parameters("@Subject").Value = _
SubjectText.Text
MessageCommand.Parameters("@Message").Value = Message
MessageCommand.Parameters("@Author").Value = AuthorText.Text
MessageCommand.Parameters("@Posted").Value = CStr(Now)
MessageCommand.Parameters("@ThreadID").Value = ThreadID
MessageCommand.ExecuteNonQuery
Connection.Close()
Response.Redirect("Threads.aspx?TopicID=" & _
Request.QueryString("TopicID") & _
"&TopicName=" & Request.QueryString("TopicName"))
End Sub
</Script>
<html>
<head><title>Chatty New Thread</title></head>
<body>
<font face="arial">
<h1><font color="DarkRed">Chatty Discussion Forum</font></h1>
<font size="5">Create New <u>
<%=Request.QueryString("TopicName") %></u> Thread</font>
<form Runat="Server">
<table width="100%" border="1" cellspacing="0" cellpadding="3"
bordercolor="DarkBlue">
<tr><td bgcolor="LightGrey">
<p>To create a new thread, enter the name of the thread
and the information for the first message you'd like
to post to the thread. If you wish to cancel, simply click
one of the links at the bottom of this page.</p>
<asp:label id="Feedback" runat="server" />
<p><font size="2">New Thread Name:</font><br/>
<asp:textbox id="ThreadText" runat="server"
columns="50"/></p>
<p><font size="2">Subject:</font><br/>
<asp:textbox id="SubjectText" runat="server"
columns="50"/></p>
<p><font size="2">Message:</font><br />
<asp:textbox id="MessageText" runat="server"
textmode="multiline"
columns="50" rows="3"/></p>
<p><font size="2">Your Email Address:</font><br />
<asp:textbox id="AuthorText" runat="server"
columns="50"/></p>
<center>
<asp:button runat="server" text=" Post "
onclick="PostClick" />
</center>
</td></tr></table>
<br />
<a href="threads.aspx?TopicID=
<%=Request.QueryString("TopicID")%>
&TopicName=<%=Request.QueryString("TopicName")%>">
Return to <b><%=Request.QueryString("TopicName") %>
</b> Threads</a><br>
<a href="topics.aspx">
Return to list of <b>Topics</b></a>
</form>
</font>
</body>
</html>
The NewThread form
Unlike the other pages in this application, NewThread does not retrieve anything from
the database when it is first opened. Instead, it presents the user with a form that looks
very much like the form at the bottom of the Messages page:
<asp:label id="Feedback" runat="server" />
<p><font size="2">New Thread Name:</font><br/>
<asp:textbox id="ThreadText" runat="server"
columns="50"/></p>
<p><font size="2">Subject:</font><br/>
<asp:textbox id="SubjectText" runat="server"
columns="50"/></p>
<p><font size="2">Message:</font><br />
<asp:textbox id="MessageText" runat="server"
textmode="multiline"
columns="50" rows="3"/></p>
<p><font size="2">Your Email Address:</font><br />
<asp:textbox id="AuthorText" runat="server"
columns="50"/></p>
<center>
<asp:button runat="server" text=" Post "
onclick="PostClick" />
</center>
The user is here to create a new thread. However, it doesn't make much sense to create
a new thread without also posting a message to it. So to save the user the trouble, this
page allows the user to do both at once.
NewThread's PostClick: a big job
After the user has entered the thread name and the first message for the thread, he or
she clicks the Post button. The Post button causes the page to return to the server and
execute the PostClick subroutine.
PostClick has a number of responsibilities. It must do the following:
§ Open a connection to the database.
§ Insert a new row in the Threads table using the name the user entered
and associating it with the current topic.
§ Retrieve the newly created thread's ThreadID (which is assigned to it
automatically by Microsoft Access).
§ Insert a new row in the Message table using the rest of the information
the user entered in the form. That message must be associated with the
newly created thread, using the retrieved ThreadID.
Threading a new row
Aside from the primary key, the Threads table has only two columns: the thread name
and the topic the thread is associated with. I use parameters to fill in these values:
InsertThread = "Insert Into Threads (Name, Topic) " & _
"VALUES (@ThreadName,@TopicID)"
ThreadCommand = New OleDbCommand(InsertThread, Connection)
ThreadCommand.Parameters.Add( _
New OleDbParameter("@ThreadName", OleDbType.Varchar,50))
ThreadCommand.Parameters.Add( _
New OleDbParameter("@TopicID", OleDbType.Integer))
ThreadCommand.Parameters("@ThreadName").Value = _
ThreadText.Text
ThreadCommand.Parameters("@TopicID").Value = _
Request.QueryString("TopicID")
Watch for duplicates
When I created this database, I didn't want the user creating threads with the same
name, so I created an index on the Threads table's Name column that didn't allow
duplicates. But because I did that, I now have to check for that possibility in my code.
That's made relatively painless with VB.NET's new error-trapping capabilities:
Try
Connection.Open()
ThreadResult = ThreadCommand.ExecuteNonQuery
Catch excp As System.Data.OleDb.OleDbException
If excp.Errors(0).NativeError = -105121349 Then
Feedback.Text = "<font color=red>*** There " & _
"is already a thread with the name <b>" & _
ThreadText.Text & "</b>. Please choose a " & _
"different name and click Post.</font><br><br>"
Else
Feedback.Text = "<font color=red>*** " & _
excp.Errors(0).Message & "<br><br>"
End If
End Try
The Try block opens the connection and executes the query. If a database exception is
raised, I check to see if the error is because a duplicate row exists. I use the
NativeError property to see the raw error number returned from the database.
If that is the problem, I use the Feedback label to provide the user with a simple
message informing them of the problem and asking them to change the name of the
thread.
If there's some other problem, I simply drop the error message into the Feedback label.
Getting the ThreadID
When you use the AutoNumber data type with a primary key column in an Access table,
Access knows to automatically generate a new, unique number for any newly inserted
rows.
But to post the first message to this thread, you're going to need the ThreadID. How do
you get it? Just query for the unique thread name:
GetThread = "Select ThreadID from Threads Where Name='" & _
ThreadText.Text & "'"
GetThreadCommand = New OleDbCommand( GetThread,Connection)
ThreadReader = GetThreadCommand.ExecuteReader()
ThreadReader.Read
ThreadID = ThreadReader.Item("ThreadID")
ThreadReader.Close
Posting the message
Now that you have all the information you need, posting the message works much like it
did in the Messages page:
InsertMessage = "Insert Into Messages (Subject, " & _
"Message, Author, Posted, Thread) VALUES (@Subject, " & _
"@Message, @Author, @Posted, @ThreadID)"
MessageCommand = _
New OleDbCommand(InsertMessage, Connection)
MessageCommand.Parameters.Add( _
New OleDbParameter("@Subject", OleDbType.Varchar,50))
MessageCommand.Parameters.Add( _
New OleDbParameter("@Message", OleDbType.LongVarchar))
MessageCommand.Parameters.Add( _
New OleDbParameter("@Author", OleDbType.Varchar,50))
MessageCommand.Parameters.Add( _
New OleDbParameter("@Posted", OleDbType.Varchar,50))
MessageCommand.Parameters.Add( _
New OleDbParameter("@ThreadID", OleDbType.Varchar,50))
Message = MessageText.Text
Message = Replace(Message, CStr(chr(13)), "<br>")
MessageCommand.Parameters("@Subject").Value = _
SubjectText.Text
MessageCommand.Parameters("@Message").Value = Message
MessageCommand.Parameters("@Author").Value = AuthorText.Text
MessageCommand.Parameters("@Posted").Value = CStr(Now)
MessageCommand.Parameters("@ThreadID").Value = ThreadID
MessageCommand.ExecuteNonQuery
Connection.Close()
Response.Redirect("Threads.aspx?TopicID=" & _
Request.QueryString("TopicID") & _
"&TopicName=" & Request.QueryString("TopicName"))
End Sub
After the thread is created and the message is posted, the user is sent back to the
Threads page so that they can see the newly created thread in the list. If they prefer,
they can click the thread and see their message at the top of the list.
Ideas for Enhancement
The Chatty Discussion Forum is a simple application. It could be enhanced or expanded
to meet your needs in many ways. Here are a few ideas that I thought of:
§ In its current form, Chatty offers no way to add, update, or delete topics.
Because this is a site administrator task, it's assumed that they'll simply use
Microsoft Access to go in and add the topics they want when they first
begin using the application. But it would be handy if there was a topic
maintenance page that simplified the task. Keep in mind that deleting a
topic means you need to delete all the threads and all the threads'
messages!
§ Likewise, Chatty has no way to delete or archive old threads and messages.
Again, this can be done by hand in Access, but if you begin to have a lot of
active discussions going on, it'd be nice if there were maintenance pages
that made the task even easier.
§ While you're making maintenance easier, you might want to consider
automating some of the tasks. For example, you might want to
automatically archive any thread and its messages that hasn't been posted
to in over a month.
§ If you have trouble with people posting off-topic or inappropriate messages,
you might want to put newly entered messages into a holding bin to be
approved by a site administrator before they are posted.
§ Another way to combat the problem of inappropriate postings is to require
users to log in to your site or at least log in to the discussion forum
application before they post a new message. This provides you with more
information on who the user is and enables you to cancel their account if
they act antisocially.
§ Provide a new page (or modify the Threads page) so that you can see all the
Subject lines of all the messages in a thread. Then, allow the user to click
one of the Subject lines to jump directly to that message on the Messages
page.