Beginning XNA 2.0 Game Programming From Novice to Professional phần 2 doc
Bạn đang xem bản rút gọn của tài liệu. Xem và tải ngay bản đầy đủ của tài liệu tại đây (918.63 KB, 45 trang )
You probably heard about 2-D coordinate systems in school, when creating simple
graphics in geometry. Just to remind you, Figure 2-1 represents a triangle, expressed by
each of its vertices, in a 2-D coordinate system. Analyze the vertices’ coordinates to make
sure you understand the concept.
Figure 2-1. A triangle in a 2-D coordinate system
The main difference between the coordinate system presented in Figure 2-1 and the
coordinates used when creating a 2-D game—called “screen coordinates”—is that the
axis origin is not in the bottom left, but in the top left position, as depicted in Figure 2-2.
Compare the two figures to understand how this difference impacts the vertices’ defini-
tion: the higher a vertex appears onscreen, the lower its Y coordinate.
Figure 2-2. The same triangle, in screen coordinates
CHAPTER 2 ■ 2-D GRAPHICS, AUDIO, AND INPUT BASICS 19
9241CH02.qxd 4/1/08 10:17 AM Page 19
Another detail is that the screen coordinates are directly related to the screen resolu-
tion. So, if you configure your monitor to an 800
✕ 600 resolution, that means that the
X axis will have 800 pixels (each pixel is an independent point onscreen) and theY axis
will have 600 pixels, as suggested in Figure 2-2.
Drawing a Sprite Using XNA
Let’s now create a simple example in XNA to display a sprite in a given position on the
screen.
Start by creating a new project, or opening the empty project you created in the pre-
vious chapter.
To group the sprite image and some associated properties (such as position, size, and
velocity), you’ll create a simple class, which will be extended later in this chapter when
we explore new concepts. The following code listing presents a simple sprite class,
including the following properties:
•
texture: Stores the sprite image using XNA’s Texture2D class. This class has many
properties and methods to help deal with textures; you’ll see some of them in
Chapters 3 and 4. The texture is stored in this class as a 2-D grid of
texels. Similar
to pixels, which are the smallest unit that can be drawn on the screen, texels are
the smallest unit that can be stored by the graphics board, and include color and
transparency values.
•
size: Stores the sprite’s size using XNA’s Vector2 class. This class has two properties,
X and Y, which are used to store the image width and height.
•
position: Stores the position of the sprite using XNA’s Vector2 class. The X and Y
properties of the class store the screen coordinates for the sprite.
class clsSprite
{
public Texture2D texture; // sprite texture
public Vector2 position; // sprite position onscreen
public Vector2 size; // sprite size in pixels
public clsSprite (Texture2D newTexture, Vector2 newPosition, Vector2 newSize)
{
texture = newTexture;
position = newPosition;
size = newSize;
}
}
CHAPTER 2 ■ 2-D GRAPHICS, AUDIO, AND INPUT BASICS20
9241CH02.qxd 4/1/08 10:17 AM Page 20
For now, this class only stores the sprite properties, and does not include any
method. Because your goal here is to keep the code simple, you won’t create properties
using the
get/set structure, although it’s advisable to do so when creating properties in
your games. The next code sample presents an example of how to use such a structure, in
case you want to improve the code by yourself.
int _gameLevel; // Stores the current game level
public static int GameLevel
{
get
{
return _gameLevel;
}
set
{
_gameLevel = value;
}
}
The first step in creating a sprite is to include a new image in your game, so you can
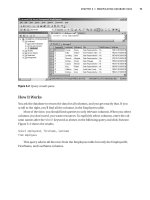
use it through the Content Pipeline. Go to the XNA Creator’s Club site (
http://creators.
xna.com) and save the XNA thumbnail image that appears on the site home page (or
download the image directly from
/>common/xna_thumbnail.png). Once you have this image in your hard drive, include it in your
project by pressing the left mouse button over the Solution Explorer window, as shown in
Figure 2-3, selecting Add
➤ Existing Item, and choosing the image you just downloaded.
CHAPTER 2 ■ 2-D GRAPHICS, AUDIO, AND INPUT BASICS 21
9241CH02.qxd 4/1/08 10:17 AM Page 21
Figure 2-3. Adding an image to the game project
After including the image in the game solution, select the image name in the
Solution Explorer window and press F4. This brings up (if it’s not already visible) the
Properties window for the recently included image, as presented in Figure 2-4.
Figure 2-4. The image properties
CHAPTER 2 ■ 2-D GRAPHICS, AUDIO, AND INPUT BASICS22
9241CH02.qxd 4/1/08 10:17 AM Page 22
The Properties window presents information such as the content importer and the
content processor used for this content (also called
asset). If you don’t remember these
concepts, refer to the previous chapter for a refresh! In this window you also can see the
Asset Name property, which defines how your code will refer to this content.
Once you have this image, the next step is including the code for drawing it on the
screen. To do this, you’ll need a
SpriteBatch (an XNA class that draws sprites onscreen)
and the texture that will be used as the sprite image (in this case, you’ll load this texture
into your
clsSprite class).
A new Windows Game project already creates a
SpriteBatch object for you, so you’ll
start by creating a
ClsSprite object in the Game1 class. Include this definition in the begin-
ning of the class, just after the device and sprite batch objects that were automatically
created for you.You’ll see something like the next code fragment:
public class Game1 : Microsoft.Xna.Framework.Game
{
GraphicsDeviceManager graphics; // The Device
SpriteBatch spriteBatch; // The Sprite renderer
clsSprite mySprite; // My Sprite Class
Obviously, you need to create these objects with valid values before using them. You
do so in the
LoadContent method because, as you saw in the previous chapter, this is the
right place to include graphics initialization. Because the project already creates the
SpriteBatch object, all you need to do is create the clsSprite object:
protected override void LoadContent()
{
// Load a 2D texture sprite
mySprite = new clsSprite(Content.Load<Texture2D>("xna_thumbnail"),
new Vector2(0f, 0f), new Vector2(64f, 64f));
// Create a SpriteBatch to render the sprite
spriteBatch = new SpriteBatch(graphics.GraphicsDevice);
}
■Note Although the previous code sample uses Vector2(0f, 0f) to define a zeroed 2-D vector, you
could use the
Vector2.Zero static property as well. The XNA Framework offers such properties to improve
the code’s readability.
CHAPTER 2 ■ 2-D GRAPHICS, AUDIO, AND INPUT BASICS 23
9241CH02.qxd 4/1/08 10:17 AM Page 23
Even though you only included a single code line, a lot of things are going on. Let’s
see: you created your sprite class by using the content manager to load the
Texture2D
based on the image asset name, xna_thumbnail. You also defined the sprite position as
(0, 0) and decided on the sprite size: 64 pixels wide and 64 pixels tall.
As for the
SpriteBatch creation, it’s worth noticing that you’re passing the graphics
device as a parameter. In the previous chapter, we mentioned that the device (repre-
sented here by the
graphics variable) is your entry point to the graphics handling layer,
and through it you would do any graphical operations. Here, you are informing the
SpriteBatch which device it should use when drawing the sprites; later in this chapter
you’ll also use the device to change the program’s window size.
It’s always a good programming practice to destroy everything you created when the
program ends. To do this, you need to dispose the
clsSprite and the SpriteBatch you
created in the
LoadContent method. As you probably guessed, you do this in the
UnloadContent method. The code for disposing the objects follows:
protected override void UnloadContent()
{
// Free the previously allocated resources
mySprite.texture.Dispose();
spriteBatch.Dispose();
}
Finally, you need to include code to draw the sprite using the SpriteBatch object you
created. You use the
SpriteBatch, as its name suggests, to draw a batch of sprites, group-
ing one or more calls to its
Draw method inside a block started by a call to Begin and
closed by a call to the
End method, as follows:
protected override void Draw(GameTime gameTime)
{
graphics.GraphicsDevice.Clear(Color.CornflowerBlue);
spriteBatch.Begin();
spriteBatch.Draw(mySprite.texture, mySprite.position, Color.White);
spriteBatch.End();
base.Draw(gameTime);
}
There are many overloads for the Draw method, which allow you to draw only part of
the original texture, to scale or rotate the image, and so on. You are using the simplest
one, which receives only three arguments: the texture to draw, the position in screen
CHAPTER 2 ■ 2-D GRAPHICS, AUDIO, AND INPUT BASICS24
9241CH02.qxd 4/1/08 10:17 AM Page 24
coordinates (both from your clsSprite object), and a color channel modulation used to
tint the image. Using any color other than white in this last parameter draws the image
with a composition of its original colors and the color tone used.
Another detail worth mentioning is that the
Begin method can also receive parame-
ters that will be used when rendering every sprite in the block. For instance, if the texture
has transparency information, you can tell the
SpriteBatch to take this into account when
drawing, by changing the
Begin code line to the following:
spriteBatch.Begin(SpriteBlendMode.AlphaBlend);
Running the program now results in a window with the sprite sitting in the upper left
corner—the (0,0) position of the program window—as shown in Figure 2-5.
Figure 2-5. The sprite rendered in the (0,0) position of the program window
If you want to change the size of the window (for example, to a 400 ✕ 400 window),
you can inform the device about the new dimensions (through the
graphics object) in the
LoadContent method, by including the following code lines:
CHAPTER 2 ■ 2-D GRAPHICS, AUDIO, AND INPUT BASICS 25
9241CH02.qxd 4/1/08 10:17 AM Page 25
graphics.PreferredBackBufferWidth = 400;
graphics.PreferredBackBufferHeight = 400;
graphics.ApplyChanges();
In fact, in these lines you’re changing the back buffer width and height, which reflects
in the window size, because you’re working in windowed mode. This back buffer is part
of the technique used to draw the game scene without image flickering, called
double
buffering
. In double buffering, you use two places, or buffers, to draw and display the
game scene: while the first one is presented to the player, the second, invisible one (the
“back buffer”) is being drawn. After the drawing is finished, the back buffer content is
moved to the screen, so the player doesn’t see only part of the scene if it takes too long to
be drawn (the bad visual effect known as “flickering”).
Fortunately, you don’t need to care about such details, because XNA hides this
complexity from you. But it’s always good to understand why the property is called
PreferredBackBufferWidth instead of something like PreferredWindowsWidth!
Moving the Sprite on the Screen
Because you work directly with screen coordinates when creating 2-D games, moving a
sprite is simple: all you need to do is draw the sprite in a different position. By increment-
ing the X coordinate of the sprite position, the sprite moves to the right; by decrementing,
you move the sprite to the left. If you want to move the sprite down onscreen, you need
to increment the Y coordinate, and you move the sprite up by decrementing the Y coordi-
nate. Keep in mind that the (0,0) point in screen coordinates is the upper left corner of
the window.
The XNA Framework basic game project provides a specific place to do the game cal-
culations: the
Update overridable method.
You can move the sprite by simply adding one line in the code, incrementing the
X position of the sprite, according to the following line of code:
mySprite1.position.X += 1;
B
ecause y
ou use the spr
ite
’s
position pr
oper
ty when r
ender
ing the sprite in the
Draw
method, b
y including this line y
ou
’
ll be able to see the sprite moving across the window,
to the r
ight, until it disappears fr
om the scr
een.
T
o cr
eate a mor
e game-like sprite, let’s do something a little more sophisticated. First,
cr
eate a new pr
oper
ty in the
clsSprite class
,
velocity, that
defines the spr
ite v
elocity on
both the X and
Y axis
.
Then, modify the class constructor to receive and store the screen
coor
dinates
, so y
ou can include a method that moves the sprite according to the given
v
elocity
, which doesn
’t let the sprite move off the screen. So, delete the code line that
changes the X position of the spr
ite
, and per
form the three following simple steps:
CHAPTER 2 ■ 2-D GRAPHICS, AUDIO, AND INPUT BASICS26
9241CH02.qxd 4/1/08 10:17 AM Page 26
1. Modify the sprite class constructor, and change the sprite creation code in the
Game1 class. In the clsSprite.cs file, make the following adjustment to the class
constructor:
private Vector2 screenSize;
public clsSprite (Texture2D newTexture, Vector2 newPosition, Vector2 newSize,
int ScreenWidth, int ScreenHeight)
{
texture = newTexture;
position = newPosition;
size = newSize;
screenSize = new Vector2(ScreenWidth, ScreenHeight);
}
Now, change the sprite creation code accordingly in the Game1.cs file, at the
LoadContent method:
mySprite1 = new clsSprite(Content.Load<Texture2D>("xna_thumbnail"),
new Vector2(0f, 0f), new Vector2(64f, 64f),
graphics.PreferredBackBufferWidth,
graphics.PreferredBackBufferHeight);
2. Create a new property in the sprite class, velocity:
public Vector2 velocity;
You can set this velocity to (1,1) in the LoadContent method, after the sprite cre-
ation code, so you’ll inform the sprite that it should move one pixel per update on
both the X and Y axes. That way the sprite will move diagonally onscreen.
mySprite1.velocity = new Vector2(1, 1);
3. Y
ou hav
e the scr
een bounds; you have the speed. Now you need to create a
method—let’s call it
Move—in the sprite class that moves the sprite according to
the sprite velocity, respecting the screen boundaries. The code for this method
follows:
public void Move()
{
// if we'll move out of the screen, invert velocity
// checking right boundary
if(position.X + size.X + velocity.X > screenSize.X)
velocity.X = -velocity.X;
CHAPTER 2 ■ 2-D GRAPHICS, AUDIO, AND INPUT BASICS 27
9241CH02.qxd 4/1/08 10:17 AM Page 27
3861e87730b66254c8b47a72b1f5cf56
// checking bottom boundary
if (position.Y + size.Y + velocity.Y > screenSize.Y)
velocity.Y = -velocity.Y;
// checking left boundary
if (position.X + velocity.X < 0)
velocity.X = -velocity.X;
// checking bottom boundary
if (position.Y + velocity.Y < 0)
velocity.Y = -velocity.Y;
// since we adjusted the velocity, just add it to the current position
position += velocity;
}
Because Vector2 classes represent both the sprite position and velocity, you could
simply add the vectors to change the sprite position. However, because you don’t want to
add the velocity if it will take the sprite off the screen, you include code to invert the
velocity in this situation.
Check the previous code: testing for left and top screen boundaries is a direct test,
because the sprite position is given by its upper left corner. However, when checking if
the sprite will leave the screen on the right, you have to sum the sprite width to the
sprite’s X position. When checking if the sprite is leaving through the bottom of the
screen, you must sum the sprite height to its Y position. Read the code carefully to be
sure you understand the tests, and then run the code. The sprite will move through the
screen and bounce on the window borders!
Coding for Collision Detection
Making the sprite bounce on the window borders is already a simple collision detection
test, but in 2-D games you usually want to test for collisions between sprites.
If you look for “collision detection algorithm” in a search engine on the Internet,
you’ll find thousands of pages presenting many different algorithms for detecting colli-
sions on 2-D and 3-D systems. We won’t enter in much detail here; we’ll just present a
simple example to help you understand the concept. Later, you’ll see some algorithms in
action in Chapter 3.
When testing for collisions, it’s usually not reasonable to test every single pixel of a
sprite against every single pixel of another sprite, so the collision algorithms are based on
approximating the object shape with some easily calculated formula. The most common
collision detection algorithm is known as
bounding boxes, which approximate the object
shape with one or more “boxes.” Figure 2-6 represents a plane sprite, whose form is
approximated by two boxes.
CHAPTER 2 ■ 2-D GRAPHICS, AUDIO, AND INPUT BASICS28
9241CH02.qxd 4/1/08 10:17 AM Page 28
Figure 2-6. Two boxes may be used to calculate collisions for a plane sprite.
An easy way to implement the bounding box test is simply to check if the X,Y posi-
tion of the upper bound corner in the first box (which wraps the first sprite you want to
test) is inside the second box (which wraps the second object to test). In other words,
check whether the X and Y of the box being tested are less than or equal to the correspon-
ding X and Y of the other box, plus the width of the other box.
In your
clsSprite class, implement a method (named Collides) that will receive a
sprite as a parameter, and test the received sprite against the current sprite. If there’s a
collision, the method will return
true.
public bool Collides(clsSprite otherSprite)
{
// check if two sprites collide
if (this.position.X + this.size.X > otherSprite.position.X &&
this.position.X < otherSprite.position.X + otherSprite.size.X &&
this.position.Y + this.size.Y > otherSprite.position.Y &&
this.position.Y < otherSprite.position.Y + otherSprite.size.Y)
return true;
else
return false;
}
Check the code against the gr
aphic example from Figure 2-7 to be sure you under-
stand the algor
ithm.
CHAPTER 2 ■ 2-D GRAPHICS, AUDIO, AND INPUT BASICS 29
9241CH02.qxd 4/1/08 10:17 AM Page 29
Figure 2-7. Two nonoverlapping boxes
According to the code sample, the two boxes will only overlap if both X and Y coordi-
nates of rectangle 2 are within range (X to X + width, Y to Y + height) of rectangle 1.
Looking at the diagram, you see that the Y coordinate for rectangle 2 is
not greater than
the Y coordinate plus the height of rectangle 1. This means that your boxes
might be col-
liding. But when checking the X coordinate of rectangle 2, you see that it’s greater than
the X coordinate plus the width of rectangle 1, which means that no collision is possible.
In Figure 2-8, you do have a collision.
Figure 2-8. Two overlapping boxes
I
n this case, you can check that both X andY positions of rectangle 2 are within the
r
ange of rectangle 1. In the code sample you also do the opposite test, checking if the X,Y
coor
dinates of rectangle 1 are within the range of rectangle 2. Because you’re checking
just one point, it
’s possible for rectangle 2’s top left corner to be outside rectangle 1, but
the top left of rectangle 1 to be inside rectangle 2.
CHAPTER 2 ■ 2-D GRAPHICS, AUDIO, AND INPUT BASICS30
9241CH02.qxd 4/1/08 10:17 AM Page 30
To test your method, you’ll create a second, standing sprite in the middle of the win-
dow. To do this, you need to replicate the sprite creation code and include the code for
testing collisions in the
Update method of the Game1 class.
At first, include the sprite’s variable definition at the beginning of the
Game1 class,
along with the previous sprite definition.
clsSprite mySprite2;
Now, in the LoadContent method, include the code for the sprite creation:
mySprite2 = new clsSprite(Content.Load<Texture2D>("xna_thumbnail"),
new Vector2(200f, 200f), new Vector2(64f, 64f),
graphics.PreferredBackBufferWidth,
graphics.PreferredBackBufferHeight);
And, in the UnloadContent method, include the code for disposing it:
mySprite2.texture.Dispose();
Finally, in the Draw method, include the code for drawing the new sprite. The code for
drawing the two sprites follows:
spriteBatch.Begin(SpriteBlendMode.AlphaBlend);
spriteBatch.Draw(mySprite1.texture, mySprite1.position, Color.White);
spriteBatch.Draw(mySprite2.texture, mySprite2.position, Color.White);
spriteBatch.End();
If you run the program now, you’ll see both sprites, but they aren’t bouncing yet.
You can make them bounce by including the call to the
Collides method in the Update
method, as follows:
// Move the sprite
mySprite1.Move();
// Test the collision
if (mySprite1.Collides(mySprite2))
mySprite1.velocity *= -1;
In this code, you invert the velocity of mySprite1 by multiplying it by –1. This inverts
the sign of (
X,Y) members of the Vector2 velocity property.
Running the code now, you’ll see the sprites moving and bouncing against each
other and against the window borders, as presented in Figure 2-9.
CHAPTER 2 ■ 2-D GRAPHICS, AUDIO, AND INPUT BASICS 31
9241CH02.qxd 4/1/08 10:17 AM Page 31
Figure 2-9. The sprites now move and collide.
Game Input
In this section we’ll explore basic concepts of dealing with user input in XNA. You’ll create
an improved version of your sample, in which you’ll move the second sprite you created
using the Xbox 360 gamepad.
Using the Xbox 360 Gamepad
When you create a new XNAWindows Game project type, the Update method of the Game1
class already includes code for dealing with user input:
// Allows the game to exit
if (GamePad.GetState(PlayerIndex.One).Buttons.Back == ButtonState.Pressed)
this.Exit();
This code presents the GamePad class: the basic entry point to get user input from the
Xbox 360 gamepad. If you explore the
GamePad properties and methods using Visual C#
Express IntelliSense, you’ll easily understand how to use the
GetState method to get the
current state of buttons (
Buttons structure), the thumbsticks (ThumbSticks structure),
Directional Pad (
DPad structure), and the controller triggers (Triggers structure). There is
also a property to inform you if the gamepad is connected (
IsConnected).
CHAPTER 2 ■ 2-D GRAPHICS, AUDIO, AND INPUT BASICS32
9241CH02.qxd 4/1/08 10:17 AM Page 32
Another interesting detail worth mentioning is that you can vibrate the gamepad by
calling the
SetVibration method of the GamePad class.
Let’s see how you can use this information to improve your example.
To make the second sprite move according to the gamepad, all you need to do is
include two new code lines in the
Update method of the Game1 class:
// Change the sprite 2 position using the left thumbstick
mySprite2.position.X += GamePad.GetState(PlayerIndex.One).ThumbSticks.Left.X;
mySprite2.position.Y -= GamePad.GetState(PlayerIndex.One).ThumbSticks.Left.Y;
Check the operations you’re doing in the previous code: you’re adding the X property
of the left thumbstick to the
X position of the sprite, and subtracting the Y property to the
corresponding sprite position. If you think it’s weird, look back at the section “2-D and
Screen Coordinate Systems” in this chapter: the X position increments from left to right,
and the Y position increments from top to bottom of the screen. The
X and Y properties of
the thumbsticks range from –1 to 1, according to how much the thumbstick is pushed to
the right or the bottom (positive values) or left and up (negative values).
To make the gamepad vibrate when
sprite1 collides with sprite2 is just as easy:
simply change the collision detection code in the
Update method of the Game1 class to
reflect the next code fragment:
if (mySprite1.Collides(mySprite2))
{
mySprite1.velocity *= -1;
GamePad.SetVibration(PlayerIndex.One, 1.0f, 1.0f);
}
else
GamePad.SetVibration(PlayerIndex.One, 0f, 0f);
Run the program now and move the sprite with the gamepad. When the sprites over-
lap, the gamepad vibrates.
■Tip The second and third arguments of the SetVibration method range from 0 to 1, and define the
speed for the left (low frequency) and right (high frequency) motors. You can include code in your program to
generate different types of vibrations depending on the game conditions—for example, if the game collision
is on the left or on the right of the player character.
CHAPTER 2 ■ 2-D GRAPHICS, AUDIO, AND INPUT BASICS 33
9241CH02.qxd 4/1/08 10:17 AM Page 33
Using the Keyboard
If, instead of the gamepad, you want to use the keyboard to control the sprite position,
you can use
KeyBoard.GetState to get the current state of any key:
KeyboardState keyboardState = Keyboard.GetState();
if (keyboardState.IsKeyDown(Keys.Up))
mySprite2.position.Y -= 1;
if (keyboardState.IsKeyDown(Keys.Down))
mySprite2.position.Y += 1;
if (keyboardState.IsKeyDown(Keys.Left))
mySprite2.position.X -= 1;
if (keyboardState.IsKeyDown(Keys.Right))
mySprite2.position.X += 1;
Using the Mouse
If, on the other hand, you want to use the mouse to control the sprite, you could use
Mouse.GetState to get the current position of the mouse, and include code to make the
sprite head to the current mouse position with the following code:
if (mySprite2.position.X < Mouse.GetState().X)
mySprite2.position.X += 1;
if (mySprite2.position.X > Mouse.GetState().X)
mySprite2.position.X -= 1;
if (mySprite2.position.Y < Mouse.GetState().Y)
mySprite2.position.Y += 1;
if (mySprite2.position.Y > Mouse.GetState().Y)
mySprite2.position.Y -= 1;
Game Audio
In this section you’ll improve your example by including background sound and a
bouncing sound effect, thus exploring basic audio concepts in XNA.
XNA deals with sound using the same structure it uses to manage graphics: the Con-
tent Pipeline
.
T
o XNA, sound is just another type of game content.
B
ut ther
e is a differ
ence
, in fact: although you can directly add graphics content in a
XNA game pr
oject, the sound content to be added must be in a specific file for
mat, gen
-
er
ated b
y the M
icr
osoft Cross-Platform Audio Creation Tool, known as XACT.
CHAPTER 2 ■ 2-D GRAPHICS, AUDIO, AND INPUT BASICS34
9241CH02.qxd 4/1/08 10:17 AM Page 34
Creating Audio Content with XACT
You use XACT to create sound banks and wave banks, compiled into an XAP file, which
the game can then use through the content manager.
In this section you’ll learn the basics of how to create audio content with XACT and
use it in a program, so you’ll be ready to include audio content in your games. In the fol-
lowing chapters you’ll see how to do this when creating real games!
The first step is to run XACT. Look for it in Start
➤ Programs ➤ XNA Game Studio
Express
➤ Tools ➤ Cross-Platform Audio Creation Tool (XACT). The XACT main window
displays, and a new XACT project is automatically created for you.
In the left side of the window, you can see a tree with New Project as a root and many
types of child nodes below it. Right-click Wave Bank and select NewWave Bank in the
presented pop-up menu, as shown in Figure 2-10.
Figure 2-10. Creating a new wave bank in XACT
A new, blank window with the new wave bank is created in the right side of the
window. Right-click this window now, and a new pop-up menu is presented (see
Figure 2-11).
CHAPTER 2 ■ 2-D GRAPHICS, AUDIO, AND INPUT BASICS 35
9241CH02.qxd 4/1/08 10:17 AM Page 35
Figure 2-11. Operations available for wave banks
In the operations available for wave banks, choose Insert Wave File(s). To stick with
easily found wave files, search for
chord.wav and notify.wav files on your hard disk. These
files are installed by default in Windows, as system event sounds. If you don’t find these
files, feel free to pick up any wave files available. The two files are inserted in your wave
bank.
You’ll also need to create a sound bank. Right-click the Sound Banks item, in the left
menu, and insert a new sound bank. A new window, with the newly created sound bank,
is created in the right side of the main window.
To better see the windows, let’s take a moment to organize them: in the Windows
menu, choose the Tile Horizontally option. The resulting window is presented in
Figure 2-12.
Select both the file names in the wave bank now (by clicking each one while pressing
the Ctrl key) and drag them to the second panel in the left of the Sound Bank window—
the panel with Cue Name and Notes columns. The file names in the wave bank turn from
red to green, and the file names are added as contents in the sound list and cue list in the
Sound Bank window.
One last step before saving your audio project: you need a looping sound, so you can
learn how to play, pause, and stop sound to use as background music in games. To do
this
, in the sound list, click the
“
notify” sound. In the left pane, the hierarchical tree reads
T
r
ack 1
➤ P
lay
W
ave
➤ notify
. N
o
w click Play Wave, and refer to the properties window
that is display
ed in the bottom r
ight of the main windo
w. You’ll see a check box named
I
nfinite in the Looping pr
oper
ties group. Mark this check box, as seen in Figure 2-13.
CHAPTER 2 ■ 2-D GRAPHICS, AUDIO, AND INPUT BASICS36
9241CH02.qxd 4/1/08 10:17 AM Page 36
Figure 2-12. The XACT tool, after organizing its windows
Figure 2-13. S
etting PlayWave properties in the XACT tool
CHAPTER 2 ■ 2-D GRAPHICS, AUDIO, AND INPUT BASICS 37
9241CH02.qxd 4/1/08 10:17 AM Page 37
Now, save the project as MySounds.xap. You’re ready to use the sounds in your
program!
■Note To hear the sound samples from the sound bank or from the wave bank inside XACT by pressing
the Play button on the toolbar, the XACT Auditioning Utility must be running. Run it by choosing Start
➤
Programs ➤ Microsoft XNA Game Studio ➤ Tools ➤ XACT Auditioning Utility.
Using Audio in Games
XNA makes using audio content in games as simple as using graphics and dealing with
player input.
As a first step, you need to include the audio content in the solution, so you can use
it through the Content Pipeline. Then, you’ll define the audio-related objects, initialize
these objects, and finally, use the content in the game code.
You include the audio content in the game in the same way you included graphics
content earlier in this chapter: by right-clicking the Solution Explorer and choosing Add
New Item from the pop-up menu. Remember, when the Add Existing Item dialog box is
open, you need to choose Content Pipeline Files in the “Files of type” drop-down list, so
you can see the
MySounds.XAP file, generated in the first part of this section.
After including the
XAP file in the solution, you need to create the objects to manage
the file contents. You need three objects: the
AudioEngine, the WaveBank, and the SoundBank.
The
AudioEngine object is the program reference to the audio services in the com-
puter, and is used mainly to adjust a few general settings and as a parameter to
create the wave and sound banks. When creating an
AudioEngine object in your pro-
gram, you need to notify the name of the global settings file for the XACT content as
a parameter. This settings file name is generated when the
XAP file is compiled, and
as a default has the same name as the
XAP file, with the XGS extension.
The
WaveBank is a collection of wave files (sound files with a WAV extension). To create
this bank in your code, you’ll need to pass as parameters the audio engine object
(which must be previously created) and the compiled wave bank file, which is gener-
ated when you compile your project with the default name
Wave Bank.xwb. Although
the wave bank is not explicitly used in your program, you need to create this object
because the sound cues in the sound bank depend on the wave files in this bank.
The
SoundBank is a
collection of sound cues
. You can define cues as references to the
wav
e files stor
ed in the wave bank, along with properties that establish details on
ho
w to play these wave files, and methods that let you manage their playback.
CHAPTER 2 ■ 2-D GRAPHICS, AUDIO, AND INPUT BASICS38
9241CH02.qxd 4/1/08 10:17 AM Page 38
The next code sample shows how to extend the previous example by including code
to create and initialize the audio components:
// Audio objects
AudioEngine audioEngine;
WaveBank waveBank;
SoundBank soundBank;
protected override void Initialize()
{
audioEngine = new AudioEngine("MySounds.xgs");
// Assume the default names for the wave and sound bank.
// To change these names, change properties in XACT.
waveBank = new WaveBank(audioEngine, "Wave Bank.xwb");
soundBank = new SoundBank(audioEngine, "Sound Bank.xsb");
base.Initialize();
}
There are two ways to play a sound: a simple playback or in a playback loop. Once
you initialize the audio objects, doing a playback is a matter of calling a simple method:
PlayCue. You can improve on the previous example by playing a sound cue every time the
sprites collide. Find the collision detection test in the
Update method of the Game1 class,
and adjust it to play the “chord” sound sample, as follows:
if (mySprite1.Collides(mySprite2))
{
mySprite1.velocity *= -1;
GamePad.SetVibration(PlayerIndex.One,1.0f, 1.0f);
soundBank.PlayCue("chord");
}
else
GamePad.SetVibration(PlayerIndex.One, 0f, 0f);
}
You can also extend the sample by including the infinite looping sound you defined
in the XACT project; however, to do this, you need more control over the sound than
simply starting to play it from the sound bank. You need a way to start it, then stop,
pause, or resume it when needed, and even some way to know the current state of the
sound (playing, paused, stopped, and so on).
The
Cue object provides the methods and properties you need to accomplish this.
Let’s extend our example by creating a new
Cue object, named MyLoopingSound, in Game1:
Cue myLoopingSound;
CHAPTER 2 ■ 2-D GRAPHICS, AUDIO, AND INPUT BASICS 39
9241CH02.qxd 4/1/08 10:17 AM Page 39
In the Initialize method, read the sound cue and play it by including the following
code fragment:
myLoopingSound = soundBank.GetCue("notify");
myLoopingSound.Play();
In this code fragment you use the Play method to start the playback of the “notify”
sound, which was included in the XACT project earlier in this section. Because you set
the Looping property in the XACT interface (Figure 2-13) of this sound to Infinite, the
sound will continuously play when you start your program. Run the program now and
check for yourself.
The
Cue object offers a series of methods and properties that give you better control
over the playback. The next code sample presents an example of how to pause and
resume the cue when the “B” button is pressed in the Xbox 360 gamepad. If you don’t
have a gamepad plugged into your computer, you can change this to a keyboard key or
a mouse button, using what you learned earlier in this chapter.
// Play or stop an infinite looping sound when pressing the "B" button
if (GamePad.GetState(PlayerIndex.One).Buttons.B == ButtonState.Pressed)
{
if (myLoopingSound.IsPaused)
myLoopingSound.Resume();
else
myLoopingSound.Pause();
}
■Note The Stop method for the cue object lets you stop the sound immediately or “as authored,” which
means that the audio engine will wait for the end of the current sound phase or the next transition to stop
the sound gracefully. But remember: if you stop a sound, you can’t play it again, unless you call the
GetCue
method once a
gain.
Summary
I
n this chapter y
ou lear
ned the basic 2-D gr
aphics v
ocabular
y, and how to create a simple
XNA pr
ogr
am that enables y
ou to load, display
, and mo
v
e images.
I
t
’
s impor
tant to r
emember ho
w to load a
Texture2D fr
om the C
ontent Pipeline:
Texture2D MyTexture = Content.Load<Texture2D>("xna_thumbnail")
CHAPTER 2 ■ 2-D GRAPHICS, AUDIO, AND INPUT BASICS40
9241CH02.qxd 4/1/08 10:17 AM Page 40
and how to display this texture using a SpriteBatch object:
spriteBatch.Begin();
spriteBatch.Draw(MyTexture, new Vector2(0f, 0f), Color.White);
spriteBatch.End();
You also saw that with a few lines of code, you can not only create sprites that collide
in XNA, but also deal with player input and playing sounds.
When reading player input, remember the basic objects:
GamePad, Keyboard, and Mouse.
These three objects provide a
GetState method that allows you to get the player input,
returning, respectively, a
GamePadState, a KeyboardState, and a MouseState object, each one
with the information from the corresponding input device.
As for the audio, you need to remember that before using any sound in your game,
you need to create a project in XACT, which generates the XAP content file that can be
included in your game solution. Once the content is in place and the proper audio
object’s initialization is done, you can play sounds directly from the sound bank using
the
Play method, or get a Cue from the sound bank and use its properties and methods to
play, pause, resume, or stop playing a sound.
With this knowledge, you’re now prepared to put it all together in a real game. That’s
exactly what you’ll do in the next chapter. Get your umbrella and prepare for the Rock
Rain—the complete game you’ll create in the next chapter!
CHAPTER 2 ■ 2-D GRAPHICS, AUDIO, AND INPUT BASICS 41
9241CH02.qxd 4/1/08 10:17 AM Page 41
9241CH02.qxd 4/1/08 10:17 AM Page 42
Creating Your First 2-D Game
Now let’s start the fun. In this chapter you’re going to create your first game and explore
some of the techniques seen in the previous chapter. Your first game will be both simple
and fun. By the end you will have exercised many principles of 2-D games, not only
acquiring answers, but more importantly, discovering the questions that must be
answered before starting a game project. Let’s go.
Designing an XNA Game
Before anything, as trivial as the game might seem, it must be well planned. Many proj-
ects fail because of too little effort in this phase, which leads to projects without a defined
end, or even projects that are finished but with a completely different result from the ini-
tial project. This book intends to teach making games the right way, so let’s start right.
Design for the First Game: Rock Rain
“You’re an intergalactic explorer and you’re stuck in an endless asteroid field! How long
will you resist this rock rain?” This is the main “theme” of your game, a frenetic challenge
where you need to dodge a lot of asteroids that pass rapidly across the screen. It’s like an
Asteroids clone (a popular classic game).
This is a simple and old game concept, where players need to dodge a group of
obstacles on the screen, and the longer they remain without a collision, the more points
they get. Additionally, the quantity of meteors increases as time goes by, making the chal-
lenge harder and harder. To satisfy your curiosity, Figure 3-1 shows the screen of your first
game.
43
CHAPTER 3
9241CH03.qxd 2/21/08 12:10 PM Page 43