build your own ajax web applications PHẦN 6 pptx
Bạn đang xem bản rút gọn của tài liệu. Xem và tải ngay bản đầy đủ của tài liệu tại đây (702.83 KB, 32 trang )
Next, there’s a while loop, which ensures that we’re returning the element we
expect. Despite the fact that we’ve attached the event handler to the entry’s main
div, the srcElement or target property will contain a reference to the actual
element on which the user clicked. For example, consider the following markup.
If the user clicks on the text in the paragraph, the p element will be returned—not
the main1 div you might have expected.
<div id="main1">
<div id="title1" class="entryTitle">
Stargate SG-1
</div>
<div id="body1" class="entryBody">
<p>Is that actually sci-fi? Or just a bunch of guys in Army
uniforms?</p>
</div>
</div>
To get around this behavior, we inspect the innermost element to see if it has an
id attribute. If it doesn’t, we check its parent, and if its parent doesn’t, we check
its parent, and so on. The first element we find with an id attribute should be
the main, title, or body div, any of which will be just fine for our purposes in
toggleEditInPlace.
Getting the Entry’s ID
Now that we have one of the entry’s divs in toggleEditInPlace, we use the id
of the returned element to work out the ID of the entry to edit:
File: blog.js (excerpt)
elem = self.getSrcElem(e);
id = elem.id.replace(/main|title|body/, '');
This code pulls out the ID of the entry from the id of the div. To do so, the code
uses replace to strip the main, title, or body prefix from the ID of the div
element, which leaves us with the entry’s ID.
This technique of using event listeners, and taking specific actions according to
the ID of the clicked interface element, is a very powerful one. We’ll expand on
it further a little later in the book.
139
Getting the Entry’s ID
Licensed to
Changing the State
The last chunk of toggleEditInPlace is the part that actually turns the editable
state on and off. The code looks like this:
File: blog.js (excerpt)
if (id != 'editCancel' && !self.isInputDisabled) {
self.editId = id;
self.editInPlaceOn();
self.disableEnableMainWinInput(false);
}
else if (id == 'editCancel') {
if (self.editId == 'NewEntryTemp') {
self.removeEntryDiv();
}
else {
self.editInPlaceOff(false);
}
self.editId = '';
self.disableEnableMainWinInput(true);
}
The if clause switches the entry to edit-in-place mode. It saves to editId the
ID value of the entry we want to edit, and activates the editable state for that
double-clicked blog entry. It then uses the disableEnableMainWinInput method
to disable the New Entry button, so the user can’t try to add a new entry while
they’re editing an existing one.
The else clause is executed when the user clicks an entry’s Cancel button while
in edit-in-place mode. You’ll see where the Cancel button comes from in just a
moment. If you hit Cancel while creating a new entry, you’ll remove that new
entry completely. If you hit Cancel while you’re working with an already-saved
entry, the code switches the entry back to a non-editable state by calling
editInPlaceOff with a parameter of false. This call ensures that the entry will
revert to its original state. toggleEditInPlace then clears out the saved ID value
for the entry we were editing, and re-enables the New Entry button, again using
the disableEnableMainWinInput method.
Turning on Editable State
Actually making the entry editable is a fairly easy process. Here’s how we do it:
140
Chapter 5: Broader AJAX with Edit-in-place
Licensed to
1. Store the text in the title and body div elements for the entry.
2. Replace the text in the div elements with form fields.
3. Set the values of the form fields to the saved text.
We use DOM methods (with just a pinch of innerHTML) to achieve all this, which
makes the code a little verbose. However, if you break it into chunks, you’ll find
that it’s still fairly manageable.
File: blog.js (excerpt)
this.editInPlaceOn = function(id) {
var self = Blog;
var id = self.editId;
var entryDiv = null;
var titleDiv = null;
var bodyDiv = null;
var titleInput = null;
var bodyArea = null;
var cancelButton = null;
var saveButton = null;
var leftButtonDiv = null;
var rightButtonDiv = null;
var clearBothDiv = null;
entryDiv = document.getElementById('main' + id);
titleDiv = document.getElementById('title' + id);
bodyDiv = document.getElementById('body' + id);
self.origTitle = titleDiv.innerHTML;
self.origBody = bodyDiv.innerHTML;
while(titleDiv.firstChild) {
titleDiv.removeChild(titleDiv.firstChild);
}
while(bodyDiv.firstChild) {
bodyDiv.removeChild(bodyDiv.firstChild);
}
titleInput = document.createElement('input');
bodyArea = document.createElement('textarea');
titleInput.id = 'titleText';
titleInput.name = 'titleText';
bodyArea.id = 'bodyText';
bodyArea.name = 'bodyText';
bodyArea.cols = "36";
bodyArea.rows = "8";
titleInput.className = 'titleInput';
bodyArea.className = 'bodyArea';
titleDiv.appendChild(titleInput);
141
Turning on Editable State
Licensed to
bodyDiv.appendChild(bodyArea);
titleInput.value = self.origTitle;
bodyArea.value = self.origBody;
cancelButton = document.createElement('input');
saveButton = document.createElement('input');
leftButtonDiv = document.createElement('div');
rightButtonDiv = document.createElement('div');
clearBothDiv = document.createElement('div');
leftButtonDiv.className = 'leftButton';
rightButtonDiv.className = 'rightButton';
clearBothDiv.className = 'clearBoth';
clearBothDiv.style.paddingBottom = '12px';
cancelButton.type = 'button';
cancelButton.className = 'inputButton';
cancelButton.id = 'editCancel';
cancelButton.onclick = self.toggleEditInPlace;
cancelButton.value = 'Cancel';
saveButton.type = 'button';
saveButton.className = 'inputButton';
saveButton.id = 'updateSave';
saveButton.onclick = self.doSave;
saveButton.value = 'Save';
entryDiv.appendChild(leftButtonDiv);
leftButtonDiv.appendChild(cancelButton);
entryDiv.appendChild(rightButtonDiv);
rightButtonDiv.appendChild(saveButton);
entryDiv.appendChild(clearBothDiv);
};
Well, I did say it was verbose! Let’s break it down and examine what’s going on
here.
Here’s the first chunk, which comes just after our variables are declared and ini-
tialized:
File: blog.js (excerpt)
entryDiv = document.getElementById('main' + id);
titleDiv = document.getElementById('title' + id);
bodyDiv = document.getElementById('body' + id);
self.origTitle = titleDiv.innerHTML;
self.origBody = bodyDiv.innerHTML;
while(titleDiv.firstChild) {
titleDiv.removeChild(titleDiv.firstChild);
}
while(bodyDiv.firstChild) {
142
Chapter 5: Broader AJAX with Edit-in-place
Licensed to
bodyDiv.removeChild(bodyDiv.firstChild);
}
The first three lines simply get references to the div elements we want to swap
out for editable form elements. Next, we grab the title and body text from those
divs. Here, we’re using innerHTML instead of DOM methods so that we can in-
clude markup along with the text to preserve our links, paragraphs, and other
nice formatting (DOM methods would treat all of these as separate elements).
We then strip all text and other DOM nodes from the title and body divs using
removeChild with a while loop.
Now we’re ready to add the form elements:
File: blog.js (excerpt)
titleInput = document.createElement('input');
bodyArea = document.createElement('textarea');
titleInput.id = 'titleText';
titleInput.name = 'titleText';
bodyArea.id = 'bodyText';
bodyArea.name = 'bodyText';
bodyArea.cols = "36";
bodyArea.rows = "8";
titleInput.className = 'titleInput';
bodyArea.className = 'bodyArea';
titleDiv.appendChild(titleInput);
bodyDiv.appendChild(bodyArea);
titleInput.value = self.origTitle;
bodyArea.value = self.origBody;
As we’ve seen before, adding elements to a document takes three steps: first, we
create the elements using createElement; then, we set all the element properties
and styles; finally, we stick them into an appropriate place in the document using
appendChild. Once the form elements are there on the page, we can set their
values using the values we recorded before.
We end up with the equivalent of the following markup, the new parts of which
are emphasized in bold:
<div id="main1">
<div id="title1" class="entryTitle">
<input id="titleText" name="titletext" class="titleInput"
value="Stargate SG-1" />
</div>
<div id="body1" class="entryBody">
<textarea id="bodyText" name="bodyText" cols="36" rows="8"
143
Turning on Editable State
Licensed to
class="bodyArea"><p>Is that actually sci-fi? Or just a
bunch of guys in Army uniforms?</p></textarea>
</div>
</div>
Now we have our edit-in-place form fields on the page, and set with the original
title and body text of that entry. This is nice, but we also need to provide some
way for users to save their changes, or to forget them and leave the entry the way
it was. We need to add some buttons beneath the form fields. We’ll use DOM
methods to add those buttons inside div elements floated left and right, giving
us a proper form layout for the editable entry:
File: blog.js (excerpt)
cancelButton = document.createElement('input');
saveButton = document.createElement('input');
leftButtonDiv = document.createElement('div');
rightButtonDiv = document.createElement('div');
clearBothDiv = document.createElement('div');
leftButtonDiv.className = 'leftButton';
rightButtonDiv.className = 'rightButton';
clearBothDiv.className = 'clearBoth';
clearBothDiv.style.paddingBottom = '12px';
cancelButton.type = 'button';
cancelButton.className = 'inputButton';
cancelButton.id = 'editCancel';
cancelButton.onclick = self.toggleEditInPlace;
cancelButton.value = 'Cancel';
saveButton.type = 'button';
saveButton.className = 'inputButton';
saveButton.id = 'updateSave';
saveButton.onclick = self.doSave;
saveButton.value = 'Save';
entryDiv.appendChild(leftButtonDiv);
leftButtonDiv.appendChild(cancelButton);
entryDiv.appendChild(rightButtonDiv);
rightButtonDiv.appendChild(saveButton);
entryDiv.appendChild(clearBothDiv);
Again, adding the div elements and buttons with DOM methods is a three-step
process. In effect, you’ll end up with the following document:
<div id="main1">
<div id="title1" class="entryTitle">
<input id="titleText" name="titletext" class="titleInput"
value="Stargate SG-1" />
144
Chapter 5: Broader AJAX with Edit-in-place
Licensed to
</div>
<div id="body1" class="entryBody">
<textarea id="bodyText" name="bodyText" cols="36" rows="8"
class="bodyArea"><p>Is that actually sci-fi? Or just a
bunch of guys in Army uniforms?</p></textarea>
</div>
</div>
Note that the CSS declaration clear: both; has been applied to the final div
we added, to clear the left and right button divs.
The Cancel button is assigned an onclick event handler tied to the
toggleEditInPlace method, which reverts the text, putting it back into a normal
state on the page. The Save button’s onclick event handler points to doSave,
which submits the changed text to the server for “saving,” and kicks off the pro-
cessing animation.
Enabling and Disabling Other Input
Our Blog class is capable of keeping track of only a single editable entry at any
one time. It would be possible to design this application to allow multiple entries
to be edited simultaneously, but this would blow out the complexity of the code,
so, for now, we’ll keep it simple. Once an entry is being edited, we don’t want
the user to be able to edit any other entries, so we need to temporarily disable
the double-click event handler’s functionality on all other entries. Similarly, we
don’t want the user to be able to add any entries while they’re in edit mode, so
we need to disable the New Entry button as well. Once the entry returns to its
natural state, these handlers need to be reinstated.
Enabling and disabling these handlers is the responsibility of
disableEnableMainWinInput:
File: blog.js (excerpt)
this.disableEnableMainWinInput = function(enable) {
var self = Blog;
var but = document.getElementById('newEntryButton');
self.isInputDisabled = !enable;
if (enable) {
but.onclick = self.addNewEntry;
but.disabled = false;
}
else {
but.onclick = null;
145
Enabling and Disabling Other Input
Licensed to
but.disabled = true;
}
};
After declaring and initializing some variables, this method sets the
isInputDisabled flag, which is checked in toggleEditInPlace before an entry
can be switched to its editable state. If this flag is set to true, toggleEditInPlace
will not allow the entry to be switched.
Next, this method deals with the New Entry button. If enabled is set to true,
the onclick event handler is set and the button is enabled. If enabled is false,
the onclick event handler is removed and the button is disabled.
All this code works together to create a nice, editable form for the editable state
of the blog entry. Once you have it all working, the effect you see when you
double-click on a blog entry is great—it morphs quickly into a little form that
you can edit. This is a huge improvement over having to launch another window
or navigate to some other location to change a small scrap of text. Figure 5.4
shows an entry toggled into its editable state.
Returning to Display State
You can return an entry to its normal state in two ways: by saving a change, or
by canceling a change. The only difference between these two actions is in deciding
whether to use the new text, or to revert back to the original text that was dis-
played previously.
The editInPlaceOff method changes an entry back to its normal, un-editable
state. It takes one parameter: acceptChanges, which tells the method whether
we’re saving or canceling the changes. Here’s the code for this method:
File: blog.js (excerpt)
this.editInPlaceOff = function(acceptChanges) {
var self = Blog;
var id = self.editId;
var entryDiv = null;
var titleDiv = null;
var bodyDiv = null;
var t = null;
var b = null;
entryDiv = document.getElementById('main' + id);
titleDiv = document.getElementById('title' + id);
bodyDiv = document.getElementById('body' + id);
146
Chapter 5: Broader AJAX with Edit-in-place
Licensed to
Figure 5.4. Blog entry toggled to editable state
entryDiv.removeChild(entryDiv.lastChild);
entryDiv.removeChild(entryDiv.lastChild);
entryDiv.removeChild(entryDiv.lastChild);
if (acceptChanges) {
t = titleDiv.firstChild.value;
b = bodyDiv.firstChild.value;
}
else {
t = self.origTitle;
b = self.origBody;
}
titleDiv.removeChild(titleDiv.firstChild);
bodyDiv.removeChild(bodyDiv.firstChild);
titleDiv.innerHTML = t;
147
Returning to Display State
Licensed to
bodyDiv.innerHTML = b;
};
After declaring and initializing the variables used in this method, and getting
references to the main, title, and body divs, editInPlaceOff strips the last three
elements from the main div. Those three elements are the divs that contain the
Cancel and Save buttons and the float-clearing div. These div elements are ap-
pended to the end of the main div, so we know that they come last. We strip
the last element from the list of children by running removeChild; we run the
method repeatedly to strip all the elements from the list.
Next, the code uses the acceptChanges parameter to decide which text it will
use to replace each form element. If the changes are being saved, the code uses
the changed text in the form fields. If the changes are being canceled, it reverts
to the values stored in origTitle and origBody. Once it knows which text to
use, it removes the form elements from the title and body div elements using
removeChild, and uses innerHTML to replace those elements with the appropriate
text.
Saving Changes
When you click the Save button, you should return to the entry’s display state
and see some kind of notification that indicates that the changes you made to
the entry are being submitted to the server. It’s with the doSave method that we
submit the changes and start up a “processing” animation to notify the user that
the save is in progress:
File: blog.js (excerpt)
this.doSave = function() {
var self = Blog;
var postData = '';
self.form.editEntryId.value = self.editId;
postData = formData2QueryString(self.form);
self.ajax.doPost('/blog_process.php', postData, self.handleSave);
self.editInPlaceOff(true);
self.proc = 'proc';
self.startStatusAnim();
};
Since there are only a couple of elements in our form, it would be fairly easy to
pull the data out of the form elements manually and format it for submission,
but it’s even easier to pull data from the form using the formData2QueryString
148
Chapter 5: Broader AJAX with Edit-in-place
Licensed to
function we saw in the last chapter. That function automatically grabs the data
out of the form and formats it into the query string style that we need for POSTing
the data.
Note that just before getting the data from the form, we’re setting the hidden
input, editEntryId, to the value of editId. This is how we place the ID of the
entry that’s being saved into the form data.
Once we have the form data in postData, we send the changes to the server by
calling doPost and passing it the address of the page to POST to, the data, and
the handler handleSave, which will be called when the response is received.
After submitting the changes to the server, we restore the entry to its display
state using the editInPlaceOff method we saw above. We pass it a true value
to tell it that we’re keeping the changes the user has made.
Lastly, the code starts up the animation that indicates the server is busy saving
the changes. It also sets the proc property to proc to indicate that the app is in
processing state. We’ll also be using this value to control the animation.
Let’s take a look at how that status animation works before we move on to discuss
the “saving” process and explore the task of handling the response from the
server.
The Status Animation
As we’ve already discussed, it’s really important to let the user know what the
application is doing. An AJAX application gives users new ways to interact with
the app—ways that are different from what users might expect from an old-
fashioned web application. Those new interactions may be somewhat confusing
to users, so it’s vital that you take the necessary steps to give them good feedback,
and make them feel that the application is responding to them.
This animation works very similarly to the ones we saw in previous chapters,
with a couple of exceptions. First, rather than changing opacity or appending
dots to a string, this animation changes the CSS background color of a div.
The other big difference is that we won’t always animate the same div. We could
animate a div for any of the entries on the page, including a new entry.
149
The Status Animation
Licensed to
Starting the Animation
We start the animation by initializing an incrementing variable, performing the
first step of the animation, and kicking off a setInterval process:
File: blog.js (excerpt)
this.startStatusAnim = function() {
var self = Blog;
self.fadeIncr = 0;
self.doStatusAnim();
self.statusInterval = setInterval(self.doStatusAnim, 200);
};
The setInterval process calls doStatusAnim once every 200 milliseconds until
the server finishes processing the submission. As before, we save the interval ID
in a property—called statusInterval—so we can stop the process later.
The animation process works by setting the CSS background color of the anima-
tion div with integer RGB values instead of the usual hexadecimal values. The
syntax for this is a bit different from the normal pound-sign-plus-six-character
string you may be used to seeing in web programming—it’s set using rgb and
three numbers between 0 and 255, which occur in parentheses. These numbers
represent values for the red, green, and blue colors, respectively, which will be
used in the animated background.
Table 5.1 a few examples in both RGB and hex values:
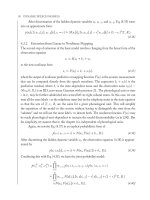
Table 5.1. Examples of colors in both RGB and hexadecimal
notation
#ff0000rgb(256, 0, 0)Red
#c8c8ffrgb(200, 200, 255)Light Blue
#808080rgb(128, 128, 128)Gray
I decided to use a nice blue for this animation. One way to achieve a fading blue
color is to set the blue value to the maximum of 255, set both red and green to
a lower number (in this case I used 235), and to increase the red and green values
together in increments of five until each value reaches 255. As the red and green
values get closer to 255 (the maximum value), the blue color grows lighter and
lighter, until it’s completely white. Repeating this process over and over in a tight
150
Chapter 5: Broader AJAX with Edit-in-place
Licensed to
loop creates a nice fading color effect. Figure 5.5 shows, step by step, what this
effect looks like.
Figure 5.5. Creating animation that uses a CSS color fade
The doStatusAnim Method
Here’s the doStatusAnim method that executes the color change:
File: blog.js (excerpt)
this.doStatusAnim = function() {
var self = Blog;
var r = 235;
var g = 235;
var fadeDiv = null;
fadeDiv = document.getElementById('main' + self.editId);
if (self.fadeIncr < 20) {
self.fadeIncr += 5;
}
else {
if (self.proc == 'proc') {
self.fadeIncr = 0;
}
else {
self.fadeIncr = 20;
self.stopReset();
}
}
r += self.fadeIncr;
g += self.fadeIncr;
fadeDiv.style.background = 'rgb(' + r + ', ' + g + ', 255)';
};
151
The doStatusAnim Method
Licensed to
The top part of the code retrieves a reference to the div that we’re going to an-
imate so that we can manipulate that div’s properties. The editId property will
either have as its value an ID number (for existing entries), or NewEntryTemp (for
new entries). We’ll discuss the use of NewEntryTemp as a placeholder for the entry
ID in more detail later, when we talk about creating new entries.
Once we have a reference to the div to be animated, we calculate the value of
fadeIncr, which controls the value of the red and green components of the div’s
color. fadeIncr cycles through the values 0, 5, 10, and 20 each time doStatusAnim
is called, until the value of the proc property is changed.
Finally, the value of fadeIncr is added to 235 to produce the value of both the
red and green components of the div’s color; this value is then applied to the
div using the CSS rgb(red, green, blue) syntax.
The Fake Back-end Page
In most blog applications, new entries, or changes to existing entries, are posted
to some processing code that saves your text on the back end (often in a database
such as MySQL or PostgreSQL). For the purposes of our simple blog page, we’re
going to use a fake back-end page called blog_process.php. Though it doesn’t
really save anything, it does return to the browser the same kind of data that a
real page would return after any content changes were saved.
Using YAML
Since we’re using the same page to handle both new entries and edits to existing
ones, the response from the page will need to be a bit more complicated than the
plain text response we’ve seen in previous chapters.
Our needs are still not complex enough to need all the extra overhead of XML,
though, so for this page I chose a structured data format called YAML (this stands
for YAML Ain’t Markup Language, and rhymes with “camel”), which is simple,
easily parsed, and human-readable.
Here’s an example of some YAML data—the summary information for an episode
of the sci-fi TV show Farscape:
title: Throne for a Loss
order: season 1, episode 2
airdate: 1999-04-09
152
Chapter 5: Broader AJAX with Edit-in-place
Licensed to
actors:
- name: Ben Browder
character: John Crichton
- name: Claudia Black
character: Aeryn Sun
- name: Anthony Simcoe
character: Ka D'Argo
synopsis: >
Rygel is abducted by Tavleks, aggressive soldiers with
gauntlet weapons on their forearms that inject them full of
stimulants.
quote: >
That's your plan? Wile E. Coyote would come up with a better
plan than that!
Read more about YAML’s syntax rules on the YAML web site.
2
You can see how easy it is to read, and how little “ink” it uses on the page.
Compare it with the XML markup for the same data, which uses more characters
and is less readable than it’s YAML counterpart:
<episode>
<title>Throne for a Loss</title>
<order>season 1, episode 2</order>
<airdate>1999-04-09</airdate>
<actors>
<actor>
<name>Ben Browder</name>
<character>John Crichton</character>
</actor>
<actor>
<name>Claudia Black</name>
<character>Aeryn Sun</character>
</actor>
<actor>
<name>Anthony Simcoe</name>
<character>Ka D'Argo</character>
</actor>
</actors>
<synopsis><![CDATA[Rygel is abducted by Tavleks, aggressive
soldiers with gauntlet weapons on their forearms that
inject them full of stimulants.]]></synopsis>
<quote><![CDATA[That's your plan? Wile E. Coyote would come up
2
/>153
Using YAML
Licensed to
with a better plan than that!]]></quote>
</episode>
The PHP Code
Here’s the code for the back-end page:
File: blog_process.php (excerpt)
<?php
$editEntryId = $_POST["editEntryId"];
sleep(3);
header("Content-Type: text/plain");
print " \n";
print "status: success\n";
if ($editEntryId == "NewEntryTemp") {
print "type: new\n";
print "id: " . time() . "\n";
}
else {
print "type: edit\n";
print "id: " . $editEntryId . "\n";
}
print " ";
?>
This fairly short chunk of PHP basically does the same thing whether you’re
saving a new entry or editing an existing one.
In both cases, it returns the ID of the entry—either the ID for an edited entry
that’s passed in from the browser, or a pretend ID that’s generated by the PHP
time function to mimic the value that would be returned if this code were actually
saving something to a database (like a MySQL auto_increment field, or a Post-
greSQL serial). The main difference is whether the type is set to new or edit.
Response Examples
Here’s an example of the response for a newly-created entry:
status: success
type: new
id: 1138946552
154
Chapter 5: Broader AJAX with Edit-in-place
Licensed to
And an example of a response for an edit:
status: success
type: edit
id: 1138946597
These plain text results are handed back to the response handler function,
handleSave, for parsing.
Parsing YAML in JavaScript
The first thing we’ll need to do in our AJAX app is parse the YAML result text
into a form that JavaScript can use. We could use a parsing library like YAML
JavaScript
3
to take care of this step for us, but in this case, the returned result is
very simple—it doesn’t seem to make much sense to include an entire library just
for that!
Instead, we’ll just write a small method, parseYamlResult, which will parse into
an associative array the name-value pair results that appear in the returned text:
File: blog.js (excerpt)
this.parseYamlResult = function(str) {
var arr = [];
var res = [];
var pat = /(\S+): (\S+)\n/g;
while (arr = pat.exec(str)) {
res[arr[1]] = arr[2];
}
return res;
};
parseYamlResult receives the YAML document as a string in the str parameter.
Since we know our result string contains only the header and footer lines, and a
few lines of name-value pairs separated by a colon and a space, it’s pretty easy
to parse it into an associative array using the exec method of a regular expression
and two sets of capturing parentheses. The keys of the hash will be the names
that start each line of the result, and the values will be the values that appear
after the colon. For example, type: new will result in an array item res['type']
with a value of new.
3
/>155
Parsing YAML in JavaScript
Licensed to
If you use the g flag with the regular expression, you can use exec multiple times
on a string to find all the matches of a certain pattern. Each time you call exec,
it starts its search immediately after the position of the last match (which is stored
in the lastIndex property of the regular expression object). Doing this in a while
loop lets you pull out all the matches for your desired pattern.
Handling the Response
Because so much of the code is the same whether you’re adding a new entry or
editing an existing entry, we’ll use the same method, handleSave, to deal with
the server response in both cases.
Here’s the code for handleSave:
File: blog.js (excerpt)
this.handleSave = function(str) {
var self = Blog;
var res = [];
var err = '';
res = self.parseYamlResult(str);
switch (res['type']) {
case 'new':
if (res['status'] != 'success') {
err = 'Could not save the new entry.';
}
else {
self.saveId = res['id'];
}
break;
case 'edit':
if (res['status'] != 'success') {
err = 'Could not save changes to entry.';
}
break;
default:
err = 'Unknown error.';
break;
}
self.proc = 'done';
if (err) {
alert(err);
}
};
156
Chapter 5: Broader AJAX with Edit-in-place
Licensed to
The str parameter is the result that’s passed back to our page from the server;
we pass it straight to parseYamlResult for parsing into an associative array.
Next, we handle the different response types using a switch statement. When
type has a value of new and the response’s status property is success, we record
the new entry’s ID in the saveId property, which we can use to replace the
placeholder ID we set originally. You’ll see more about how this works when we
talk about creating a new entry. However, if an error is returned from the server,
or the value of type is unrecognized or missing, we record an error message and
move on.
Next, we disable the processing notification animation by setting proc to done,
then display any error that was recorded in a simple alert box. If this were a
real application, you’d want to present the error in a more attractive and helpful
way, for instance, writing it out to a specially formatted div element on the page.
Stopping the Status Animation
Once the edits have been saved on the server, it’s time to stop the status anima-
tion. The process works much the same as the status animation code we saw in
previous chapters.
Just as before, our application checks the processing status of the request between
each completed cycle of the animation by looking at one of the object’s proper-
ties—in this case, the proc property. Having the animation check status between
cycles like this ensures that it ends smoothly after a request completes, instead
of cutting suddenly, mid-fade.
Once the request comes back from the server, and proc is set to done,
doStatusAnim will call stopReset, which will stop the animation, and perform
some other cleanup that’s needed after a request completes.
Cleaning Up with stopReset
Here’s the code for stopReset:
File: blog.js (excerpt)
this.stopReset = function() {
var self = Blog;
clearInterval(self.statusInterval);
self.disableEnableMainWinInput(true);
self.editId = '';
157
Stopping the Status Animation
Licensed to
self.proc = 'ready';
if (self.saveId) {
self.setNewEntryRealId();
}
};
The first thing on the agenda for this method is to kill the processing animation,
which it does by calling clearInterval on the interval ID stored in
statusInterval. Making sure this is called at the end of an animation cycle,
when the color of the animated div is completely white, ensures the animation
appears to stop smoothly.
Once the animation has stopped, we need to re-enable user input in the main
window; we do so with a call to disableEnableMainWinInput. This enables the
New Entry button at the exact moment at which the animation stops.
Next, this method performs some final cleanup, clearing out the value for editId,
and setting the proc property back to ready, which tells us that the app is not
processing any requests and the processing animation has stopped.
For new entries, it also calls setNewEntryRealId, which changes the placeholder
divs’ IDs to their permanent values. We’ll see how this works in the next section.
Adding a New Entry
As I mentioned at the beginning of this chapter, the code we’ll use to add a new
blog entry leverages much of the code we use to editing existing entries, with just
a few differences:
❑
The code must add the div elements for the new entry.
❑
The div elements must be removed if the user cancels the new entry’s addition.
❑
The div elements use a placeholder ID until they receive a real ID from the
server.
Clicking the New Entry button calls the addNewEntry method. That code takes
care of two tasks: it adds the div elements for the new entry and toggles the entry
to edit-in-place mode. Here’s the code:
File: blog.js (excerpt)
this.addNewEntry = function() {
var self = Blog;
158
Chapter 5: Broader AJAX with Edit-in-place
Licensed to
if (self.insertEntryDiv()) {
self.editId = 'NewEntryTemp';
self.editInPlaceOn();
self.disableEnableMainWinInput(false);
}
};
After calling insertEntryDiv to add the new div elements to the page, the
method sets editId to NewEntryTemp—a placeholder value for the ID. When
this new entry is submitted back to the server, the server will use that placeholder
value to identify the submission as a brand-new blog entry, rather than an edit
to an existing entry.
Next, addNewEntry goes through the steps we saw in the toggleEditInPlace
method: it calls editInPlaceOn to make the entry editable, and
disableEnableMainWinInput to disable the New Entry button.
Adding the New Entry divs
The insertEntryDiv method puts the div elements for the new entry onto the
page. As it uses DOM methods to add the divs, it’s quite verbose, but despite
its length, it’s fairly simple. Here’s the code:
File: blog.js (excerpt)
this.insertEntryDiv = function() {
var self = Blog;
var allEntryDiv = null;
var entryFirst = null;
var newEntryDiv = null;
var titleDiv = null;
var bodyDiv = null;
allEntryDiv = document.getElementById('allEntryDiv');
newEntryDiv = document.createElement('div');
titleDiv = document.createElement('div');
bodyDiv = document.createElement('div');
newEntryDiv.id = 'mainNewEntryTemp';
titleDiv.id = 'titleNewEntryTemp';
bodyDiv.id = 'bodyNewEntryTemp';
titleDiv.className = 'entryTitle';
bodyDiv.className = 'entryBody';
titleDiv.appendChild(document.createTextNode('New entry'));
bodyDiv.appendChild(
document.createTextNode('Type body here '));
newEntryDiv.appendChild(titleDiv);
159
Adding the New Entry divs
Licensed to
newEntryDiv.appendChild(bodyDiv);
entryFirst = allEntryDiv.firstChild;
if (entryFirst) {
allEntryDiv.insertBefore(newEntryDiv, entryFirst);
}
else {
allEntryDiv.appendChild(newEntryDiv);
}
return true;
};
The bulk of this code sets up all the div elements we need to add to the page for
a new blog entry. Note that all three of the div elements’ ids end in
NewEntryTemp—the placeholder we’re using instead of an actual ID number.
When the server “saves” an entry, it will pass back an actual ID for that entry;
we’ll use this ID to replace the placeholder.
Once we’ve created the elements, we use DOM methods to add the placeholder
text that you’ll see when you create a new blog entry. We’ll use (New entry) for
the title placeholder text and Type body here for the body placeholder.
Figure 5.6 shows what a brand-new blog entry looks like.
Next, the code adds the title and body divs as children of the new entry’s main
div.
We want new entries to appear at the top of the page, so we can’t use the
appendChild DOM method to add the main div to the page: this approach would
add the new entry to the end of the list of child nodes, making it appear at the
bottom of the page. If entries already exist on the page, our code uses
insertBefore to place the new div in front of the existing first entry. If there
are no divs inside the allEntryDiv div, we can simply append our new main
div as a child of the allEntryDiv div.
Once the new div is in place, the rest of the editing process is exactly the same
as that for editing an existing blog entry, with one exception: the process for
canceling a new entry is different from canceling an edit.
160
Chapter 5: Broader AJAX with Edit-in-place
Licensed to
Figure 5.6. Entering a new blog entry
Canceling the New Entry
When you cancel a new entry, the only sensible thing to do is to make that new
entry disappear—there’s no “previous state” to which the entry can revert. When
you click the Cancel button after you start to create a new entry, the
removeEntryDiv method is called:
File: blog.js (excerpt)
this.removeEntryDiv = function() {
var self = Blog;
var allEntryDiv = document.getElementById('allEntryDiv');
var entryDiv = document.getElementById('main' + self.editId);
allEntryDiv.removeChild(entryDiv);
};
161
Canceling the New Entry
Licensed to
It’s very simple. You can see it in action by clicking the Cancel button on a new
entry and watching it vanish.
The Placeholder ID
Each div element in an existing entry has a unique identifier that allows us to
edit it. This ID does two things for us:
❑
It tells us which div elements we’re working with when we toggle edit-in-place
and display the status animation.
❑
It tells the server which blog entry we’re editing when we save changes to the
app’s back end.
However, in the case of new entries, there’s one tiny problem with this scenario.
A newly-created entry has no ID. But, once it’s been saved, we want the div that
contains the entry to be linked to a unique ID, as are all the other existing entries.
The solution is actually fairly simple. When we first create the placeholder div,
we give it a placeholder ID. And, when the server returns a response that contains
the ID of the newly-saved entry, we just replace that entry’s placeholder value
with the real one.
At that point, your placeholder div is no longer just a placeholder: once it has a
real ID, it’s a normal blog entry div among the other existing entries.
Be Careful Messing with the id Attribute
Be aware that changing the id of a DOM element has the potential to cause
problems with code that assumes that the ID will never change. Some external
JavaScript libraries might not deal with changing IDs very well, so exercise
some care and judgement when messing with a DOM element’s id.
The setNewEntryRealId Method
The setNewEntryRealId method that switches the ID is pretty straightforward:
File: blog.js (excerpt)
this.setNewEntryRealId = function() {
var self = Blog;
var entryDiv = null;
var titleDiv = null;
var bodyDiv = null;
162
Chapter 5: Broader AJAX with Edit-in-place
Licensed to
entryDiv = document.getElementById('mainNewEntryTemp');
titleDiv = document.getElementById('titleNewEntryTemp');
bodyDiv = document.getElementById('bodyNewEntryTemp');
entryDiv.id = 'main' + self.saveId;
titleDiv.id = 'title' + self.saveId;
bodyDiv.id = 'body' + self.saveId;
entryDiv.ondblclick = self.toggleEditInPlace;
self.saveId = '';
};
This method grabs references to the div elements to which we need to make
changes, then resets their ids based on the ID values that are passed back from
the server and stored in saveId. Once the div elements have their permanent
id values, the method clears out saveId.
Timing the ID Change
Changing the id this way is really easy; however, we can’t just make this change
as soon as the new entry is saved. (Remember how I said you have to be careful
when you do this?)
The status animation in the new entry div is likely to be in progress when the
result comes back from the server. We’ve chosen to let the animation turn itself
off when it’s finished the current fade cycle, to avoid an abrupt cutoff of the fade
effect; this means that the animation may continue for a few more rounds after
the result comes back.
The animation code is pointed at the div’s original placeholder ID, and if you
change the ID while the animation is in the middle of a cycle, your code will
break. Thus, we perform the ID switch last, after all the other cleanup in the
stopReset method has taken place.
Future Enhancements
This is a pretty basic, bare-bones blog page. The edit-in-place functionality works
pretty well, but there are countless other enhancements you could add to make
this a fully-fledged working application.
Loading Existing Entries
If you were storing real blog entries, you’d want them to load from the applica-
tion’s back end as the page loaded in users’ browsers. You’d need some kind of
163
Future Enhancements
Licensed to