Beginning PHP and Postgre SQL 8 From Novice to Professional phần 5 pptx
Bạn đang xem bản rút gọn của tài liệu. Xem và tải ngay bản đầy đủ của tài liệu tại đây (1.85 MB, 90 trang )
328
CHAPTER 14
■ AUTHENTICATION
<?php
header('WWW-Authenticate: Basic Realm="Book Projects"');
header("HTTP/1.1 401 Unauthorized");
?>
Note that unless output buffering is enabled, these commands must be executed before
any output is returned. Neglecting this rule will result in a server error, because of the violation
of the HTTP specification.
isset()
boolean isset(mixed var [, mixed var [, ]])
The isset() function determines whether or not a variable has been assigned a value. It returns
TRUE if the variable contains a value, and FALSE if it does not. Applied to user authentication, the
isset() function is useful for determining whether or not the $_SERVER['PHP_AUTH_USER'] and
$_SERVER['PHP_AUTH_PW'] variables are properly set. Listing 14-1 offers a usage example.
Listing 14-1. Using isset() to Verify Whether a Variable Contains a Value
<?php
if (isset($_SERVER['PHP_AUTH_USER']) and isset($_SERVER['PHP_AUTH_PW'])) {
// execute additional authentication tasks
} else {
echo "<p>Please enter both a username and a password!</p>";
}
?>
Authentication Methodologies
There are several ways you can implement authentication via a PHP script. You should consider the
scope and complexity of each way when the need to invoke such a feature arises. In particular, this
section discusses hard-coding a login pair directly into the script, using file-based authentica-
tion, using IP-based authentication, using PEAR’s HTTP authentication functionality, and
using database-based authentication.
Hard-Coded Authentication
The simplest way to restrict resource access is by hard-coding the username and password
directly into the script. Listing 14-2 offers an example of how to accomplish this.
Gilmore_5475.book Page 328 Friday, November 11, 2005 1:16 PM
CHAPTER 14 ■ AUTHENTICATION
329
Listing 14-2. Authenticating Against a Hard-Coded Login Pair
if (($_SERVER['PHP_AUTH_USER'] != 'specialuser') ||
($_SERVER['PHP_AUTH_PW'] != 'secretpassword')) {
header('WWW-Authenticate: Basic Realm="Secret Stash"');
header('HTTP/1.0 401 Unauthorized');
print('You must provide the proper credentials!');
exit;
}
The logic in this example is quite simple. If $_SERVER['PHP_AUTH_USER'] and
$_SERVER['PHP_AUTH_PW'] are set to “specialuser” and “secretpassword,” respectively, the
code block will not execute, and anything ensuing that block will execute. Otherwise, the user
is prompted for the username and password until either the proper information is provided or
a 401 Unauthorized message is displayed due to multiple authentication failures.
Although using a hard-coded authentication pair is very quick and easy to configure, it has
several drawbacks. First, as this code currently stands, all users requiring access to that resource
must use the same authentication pair. Usually, in real-world situations, each user must be
uniquely identified so that user-specific preferences or resources can be made available.
Although you could allow for multiple login pairs by adding additional logic, the ensuing code
would be highly unwieldy. Second, changing the username or password can be done only by
entering the code and making the manual adjustment. The next two methodologies satisfy
this need.
File-based Authentication
Often you need to provide each user with a unique login pair, making it possible to log user-
specific login times, movements, and actions. You can do this easily with a text file, much like
the one commonly used to store information about Unix users (/etc/passwd). Listing 14-3
offers such a file. Each line contains a username and an encrypted password pair, with the two
elements separated by a colon (:).
Listing 14-3. The authenticationFile.txt File Containing Encrypted Passwords
jason:60d99e58d66a5e0f4f89ec3ddd1d9a80
donald:d5fc4b0e45c8f9a333c0056492c191cf
mickey:bc180dbc583491c00f8a1cd134f7517b
A crucial security consideration regarding authenticationFile.txt is that this file should
be stored outside the server document root. If it is not, an attacker could discover the file
through brute-force guessing, revealing half of the login combination. In addition, although
you have the option to skip encryption of the password and store it in plain-text format, this
practice is strongly discouraged, because users with access to the server might be able to view
the login information if file permissions are not correctly configured.
Gilmore_5475.book Page 329 Friday, November 11, 2005 1:16 PM
330
CHAPTER 14
■ AUTHENTICATION
The PHP script required to parse this file and authenticate a user against a given login pair
is only a tad more complicated than the script used to authenticate against a hard-coded
authentication pair. The difference lies in the fact that the script must also read the text file into
an array, and then cycle through that array searching for a match. This involves the use of
several functions, including the following:
• file(string filename): The file() function reads a file into an array, with each element
of the array consisting of a line in the file.
• explode(string separator, string string [, int limit]): The explode() function
splits a string into a series of substrings, with each string boundary determined by a
specific separator.
• md5(string str): The md5() function calculates an MD5 hash of a string, using RSA Data
Security Inc.’s MD5 Message-Digest algorithm ().
■Note Although they are similar in function, you should use explode() instead of split(), because
split() is a tad slower due to its invocation of PHP’s regular expression parsing engine.
Listing 14-4 illustrates a PHP script that is capable of parsing authenticationFile.txt,
potentially matching a user’s input to a login pair.
Listing 14-4. Authenticating a User Against a Flat File Login Repository
<?php
// Preset authentication status to false
$authorized = FALSE;
if (isset($_SERVER['PHP_AUTH_USER']) && isset($_SERVER['PHP_AUTH_PW'])) {
// Read the authentication file into an array
$authFile = file("/usr/local/lib/php/site/authenticate.txt");
// Cycle through each line in file, searching for authentication match
foreach ($authFile as $login) {
list($username, $password) = explode(":", $login);
// Remove the newline from the password
$password = trim($password);
if (($username == $_SERVER['PHP_AUTH_USER']) &&
($password == md5($_SERVER['PHP_AUTH_PW']))) {
$authorized = TRUE;
break;
}
}
}
Gilmore_5475.book Page 330 Friday, November 11, 2005 1:16 PM
CHAPTER 14 ■ AUTHENTICATION
331
// If not authorized, display authentication prompt or 401 error
if (! $authorized) {
header('WWW-Authenticate: Basic Realm="Secret Stash"');
header('HTTP/1.0 401 Unauthorized');
print('You must provide the proper credentials!');
exit;
}
// restricted material goes here
?>
Although the file-based authentication system works great for relatively small, static
authentication lists, this strategy can become somewhat inconvenient when you’re handling a
large number of users, when users are regularly being added, deleted, and modified, or when
you need to incorporate an authentication scheme into a larger information infrastructure
(into a pre-existing user table, for example). Such requirements are better satisfied by imple-
menting a database-based solution. The following section demonstrates just such a solution,
using a PostgreSQL database to store authentication pairs.
Database-based Authentication
Of all the various authentication methodologies discussed in this chapter, implementing a
database-based solution is the most powerful methodology, because it not only enhances
administrative convenience and scalability, but also can be integrated into a larger database
infrastructure. For purposes of this example, we’ll limit the data store to four fields—a primary
key, the user’s name, a username, and a password. These columns are placed into a table that
we’ll call userauth, shown in Listing 14-5.
■Note If you’re unfamiliar with the PostgreSQL server and are confused by the syntax found in the following
example, consider reviewing the material found in Chapter 30.
Listing 14-5. A User Authentication Table
create table userauth (
rowid serial,
commonname varchar(35) not null,
username varchar(8) not null,
pswd varchar(32) not null,
CONSTRAINT userauth_id PRIMARY KEY(rowid)
);
Listing 14-6 displays the code used to authenticate a user-supplied username and password
against the information stored within the userauth table.
Gilmore_5475.book Page 331 Friday, November 11, 2005 1:16 PM
332
CHAPTER 14
■ AUTHENTICATION
Listing 14-6. Authenticating a User Against a PostgreSQL Table
<?php
/* Because the authentication prompt needs to be invoked twice,
embed it within a function.
*/
function authenticate_user() {
header('WWW-Authenticate: Basic realm="Secret Stash"');
header("HTTP/1.0 401 Unauthorized");
exit;
}
/* If $_SERVER['PHP_AUTH_USER'] is blank, the user has not yet been prompted for
the authentication information.
*/
if (! isset($_SERVER['PHP_AUTH_USER'])) {
authenticate_user();
} else {
// Connect to the PostgreSQL database
$conn=pg_connect("host=localhost dbname=corporate
user=authentication password=secret") or die(pg_last_error($conn));
// Create and execute the selection query
$query = "SELECT username, pswd FROM userauth
WHERE username='$_SERVER[PHP_AUTH_USER]' AND
pswd=md5('$_SERVER[PHP_AUTH_PW]')";
$result = pg_query($conn, $query);
// If nothing was found, reprompt the user for the login information
if (pg_num_rows($result) == 0) {
authenticate_user();
}
else {
echo "Welcome to the secret archive!";
}
}
?>
Although PostgreSQL authentication is more powerful than the previous two methodologies,
it is really quite trivial to implement. Simply execute a selection query against the userauth
table, using the entered username and password as criteria for the query. Of course, such a
solution is not dependent upon specific use of a PostgreSQL database; any relational database
could be used in its place.
Gilmore_5475.book Page 332 Friday, November 11, 2005 1:16 PM
CHAPTER 14 ■ AUTHENTICATION
333
IP-based Authentication
Sometimes you need an even greater level of access restriction to ensure the validity of the
user. Of course, a username/password combination is not foolproof; this information can be
given to someone else, or stolen from a user. It could also be guessed through deduction or
brute force, particularly if the user chooses a poor login combination, which is still quite common.
To combat this, one effective way to further enforce authentication validity is to require not
only a valid username/password login pair, but also a specific IP address. To do so, you only
need to slightly modify the userauth table used in the previous section, and make a tiny modi-
fication to the query used in Listing 14-6. First the table, displayed in Listing 14-7.
Listing 14-7. The userauth Table Revisited
create table userauth (
rowid serial,
commonname varchar(35) not null,
username varchar(8) not null,
pswd varchar(32) not null,
ipaddress varchar(15) not null,
CONSTRAINT userauth_id PRIMARY KEY(rowid)
);
The code for validating both the username/password and IP address is displayed in
Listing 14-8.
Listing 14-8. Authenticating Using a Login Pair and an IP Address
<?php
function authenticate_user() {
header('WWW-Authenticate: Basic realm="Secret Stash"');
header("HTTP/1.0 401 Unauthorized");
exit;
}
if(! isset($_SERVER['PHP_AUTH_USER'])) {
authenticate_user();
} else {
// Connect to the PostgreSQL database
$conn=pg_connect("host=localhost dbname=corporate
user=authentication password=secret")
or die(pg_last_error($conn));
// Create and execute the selection query
$query = "SELECT username, pswd FROM userauth
WHERE username='$_SERVER[PHP_AUTH_USER]' AND
pswd=MD5('$_SERVER[PHP_AUTH_PW]') AND
ipaddress='$_SERVER[REMOTE_ADDR]'";
Gilmore_5475.book Page 333 Friday, November 11, 2005 1:16 PM
334
CHAPTER 14
■ AUTHENTICATION
$result = pg_query($conn, $query);
// If nothing was found, reprompt the user for the login information
if (pg_num_rows($result) == 0) {
authenticate_user();
}
else {
echo "Welcome to the secret archive!";
}
}
?>
Although this additional layer of security works quite well, you should understand that it is
not foolproof. The practice of IP spoofing, or tricking a network into thinking that traffic is
emanating from a particular IP address, has long been a tool in the savvy attacker’s toolbox.
Therefore, if such an attacker gains access to a user’s username and password, they could
conceivably circumvent your IP-based security obstacles.
Taking Advantage of PEAR: Auth_HTTP
While the approaches to authentication discussed thus far work just fine, it’s always nice to
hide some of the implementation details within a class. The PEAR class Auth_HTTP satisfies this
desire quite nicely, taking advantage of Apache’s authentication mechanism and prompt (see
Figure 14-1) to produce an identical prompt but using PHP to manage the authentication infor-
mation. Auth_HTTP encapsulates many of the messy aspects of user authentication, exposing the
information and features we’re looking for by way of a convenient interface. Furthermore,
because it inherits from the Auth class, Auth_HTTP also offers a broad range of authentication
storage mechanisms, some of which include the DB database abstraction package, LDAP, POP3,
IMAP, RADIUS, and SAMBA. In this section, we’ll show you how to take advantage of Auth_HTTP
to store user authentication information in a flat file.
Installing Auth_HTTP
To take advantage of Auth_HTTP’s features, you need to install it from PEAR. Therefore, start
PEAR and pass it the following arguments:
%>pear install -o auth_http
Because auth_http is dependent upon another package (Auth), you should pass at least the
-o option, which will install this required package. Execute this command and you’ll see output
similar to the following:
downloading Auth_HTTP-2.1.6.tgz
Starting to download Auth_HTTP-2.1.6.tgz (9,327 bytes)
done: 9,327 bytes
downloading Auth-1.2.3.tgz
Starting to download Auth-1.2.3.tgz (24,040 bytes)
done: 24,040 bytes
Gilmore_5475.book Page 334 Friday, November 11, 2005 1:16 PM
CHAPTER 14 ■ AUTHENTICATION
335
skipping Package 'auth' optional dependency 'File_Passwd'
skipping Package 'auth' optional dependency 'Net_POP3'
skipping Package 'auth' optional dependency 'DB'
skipping Package 'auth' optional dependency 'MDB'
skipping Package 'auth' optional dependency 'Auth_RADIUS'
skipping Package 'auth' optional dependency 'File_SMBPasswd'
Optional dependencies:
package 'File_Passwd' version >= 0.9.5 is recommended to utilize some features.
package 'Net_POP3' version >= 1.3 is recommended to utilize some features.
package 'MDB' is recommended to utilize some features.
package 'Auth_RADIUS' is recommended to utilize some features.
package 'File_SMBPasswd' is recommended to utilize some features.
install ok: Auth 1.2.3
install ok: Auth_HTTP 2.1.6
%>
Once installed, you can begin taking advantage of Auth_HTTP’s capabilities. For purposes of
demonstration, we’ll consider how to authenticate against a PostgreSQL database.
Authenticating Against a PostgreSQL Database
Because Auth_HTTP subclasses the Auth package, it inherits all of Auth’s capabilities. Because
Auth subclasses the DB package, Auth_HTTP can take advantage of using this popular database
abstraction layer to store authentication information in a database table. To store the informa-
tion, we’ll use a table identical to one used earlier in this chapter:
create table userauth (
rowid serial,
commonname varchar(35) not null,
username varchar(8) not null,
pswd varchar(32) not null,
CONSTRAINT userauth_id PRIMARY KEY(rowid)
);
Next we need to create a script that invokes Auth_HTTP, telling it to refer to a PostgreSQL
database. This script is presented in Listing 14-9.
Listing 14-9. Validating User Credentials with Auth_HTTP
<?php
require_once("Auth/HTTP.php");
// Designate authentication credentials, table name,
// username and password columns, password encryption type,
// and query parameters for retrieving other fields
Gilmore_5475.book Page 335 Friday, November 11, 2005 1:16 PM
336
CHAPTER 14
■ AUTHENTICATION
$dblogin = array (
'dsn' => "pgsql://corpweb:secret@localhost/corporate",
'table' => "userauth",
'usernamecol' => "username",
'passwordcol' => "pswd",
'cryptType' => "md5"
'db_fields' => "*"
);
// Instantiate Auth_HTTP
$auth = new Auth_HTTP("DB", $dblogin) or die("blah");
// Begin the authentication process
$auth->start();
// Message to provide in case of authentication failure
$auth->setCancelText('Authentication credentials not accepted!');
// Check for credentials. If not available, prompt for them
if($auth->getAuth())
{
echo "Welcome, $auth->commonname<br />";
}
?>
Executing Listing 14-9, and passing along information matching that found in the userauth
table, will allow the user to pass into the restricted area. Otherwise, he’ll receive the error
message supplied in setCancelText().
The comments should really be enough to guide you through the code, perhaps with one
exception regarding the $dblogin array. This array is passed into the Auth_HTTP constructor
along with a declaration of the data source type. See the Auth_HTTP documentation at http://
pear.php.net/package/Auth_HTTP for a list of the accepted data source types. The array’s first
element, dsn, represents the Data Source Name (DSN). A DSN must be presented in the
following format:
datasourcetitle:username:password@hostname/database
Therefore, we use the following DSN to log in to a PostgreSQL database:
pgsql://corpweb:secret@localhost/corporate
If it were a MySQL database and all other things were equal, datasourcetitle would be set
to mysql. See the DB documentation at for a complete list of
accepted datasourcetitle values.
Gilmore_5475.book Page 336 Friday, November 11, 2005 1:16 PM
CHAPTER 14 ■ AUTHENTICATION
337
The next three elements, namely table, usernamecol, and passwordcol, represent the table
that stores the authentication information, the column title that stores the usernames, and the
column title that stores the passwords, respectively.
The cryptType element specifies whether the password is stored in the database in plain
text or as an MD5 hash. If it is stored in plain text, cryptType should be set to none, whereas if is
stored as an MD5 hash, it should be set to md5.
Finally, the db_fields element provides the query parameters used to retrieve any other
table information, such as the commonname field.
Auth_HTTP, its parent class Auth, and the DB database abstraction class provide users with a
powerful array of features capable of carrying out otherwise tedious tasks. Definitely take time
to visit the PEAR site and learn more about these packages.
User Login Administration
When you incorporate user logins into your application, providing a sound authentication
mechanism is only part of the total picture. How do you ensure that the user chooses a sound
password, of sufficient difficulty that attackers cannot use it as a possible attack route? Further-
more, how do you deal with the inevitable event of the user forgetting his password? Both
topics are covered in detail in this section.
Password Designation
Passwords are often assigned during some sort of user registration process, typically when the
user signs up to become a site member. In addition to providing various items of information
such as the user’s given name and e-mail address, the user often is also prompted to designate
a username and password, to use later to log in to the site. You’ll create a working example of
such a registration process, using the following table to store the user data:
create table userauth (
rowid serial,
commonname varchar(35) not null,
email varchar(55) not null,
username varchar(8) not null,
pswd varchar(32) not null,
CONSTRAINT userauth_id PRIMARY KEY(rowid)
);
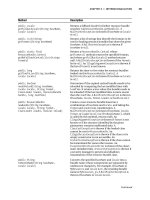
Listing 14-10 offers the registration code. For sake of space conservation, we’ll forego
presenting the registration form HTML, as it is assumed by now that you’re quite familiar with
such syntax. This form, shown in Figure 14-2, is stored in a file called registration.html, and
is displayed using the file_get_contents() function.
Gilmore_5475.book Page 337 Friday, November 11, 2005 1:16 PM
338
CHAPTER 14
■ AUTHENTICATION
Figure 14-2. The registration form
The user provides the necessary input and submits the form data. The script then confirms
that the password and password verification strings match, displaying an error if they do not.
If the password checks out, a connection to the PostgreSQL server is made, and an appropriate
insertion query is executed.
Listing 14-10. User Registration (registration.php)
<?php
/*
Has the user submitted data?
If not, display the registration form.
*/
if (! isset($_POST['submitbutton'])) {
echo file_get_contents("/templates/registration.html");
/* Form data has been submitted. */
} else {
$conn=pg_connect("host=localhost dbname=corporate
user=corpweb password=secret")
or die(pg_last_error($conn));
/* Ensure that the password and password verifier match. */
if ($_POST['pswd'] != $_POST['pswdagain']) {
echo "<p>The passwords do not match. Please go back and try again.</p>";
/* Passwords match, attempt to insert information into userauth table. */
} else {
Gilmore_5475.book Page 338 Friday, November 11, 2005 1:16 PM
CHAPTER 14 ■ AUTHENTICATION
339
try {
$query = "INSERT INTO userauth (commonname, email, username, pswd)
VALUES ('$_POST[name]', '$_POST[email]',
'$_POST[username]', md5('$_POST[pswd]'));
$result = pg_query($query);
if (! $result) {
throw new Exception(
"Registration problems were encountered!"
);
} else {
echo "<p>Registration was successful!</p>";
}
} catch(Exception $e) {
echo "<p>".$e->getMessage()."</p>";
} #endCatch
}
}
?>
The registration script provided here is for demonstration purposes only; if you want to
use such a script in a mission-critical application, you’ll need to include additional error-checking
mechanisms. Here are just a few items to verify:
• All fields have been completed.
• The e-mail address is valid. This is important because the e-mail address is likely to be
the main avenue of communication for matters such as password recovery (a topic
discussed in the next section).
• The password and password verification strings match (done in the preceding example).
• The user does not already exist in the database.
• No potentially malicious code has been inserted into the fields. This matter is discussed
in some detail in Chapter 21.
• Password length is adequate and password syntax is correct. Shorter passwords consisting
solely of letters or numbers are much more likely to be broken, given a concerted attempt.
Testing Password Guessability with the CrackLib Library
In an ill-conceived effort to prevent forgetting their passwords, users tend to choose something
easy to remember, such as the name of their dog, their mother’s maiden name, or even their
own name or age. Ironically, this practice often doesn’t help users to remember the password
and, even worse, offers attackers a rather simple route into an otherwise restricted system, either
by researching the user’s background and attempting various passwords until the correct one
is found, or by using brute force to discern the password through numerous repeated attempts.
In either case, the password typically is broken because the user has chosen a password that is
Gilmore_5475.book Page 339 Friday, November 11, 2005 1:16 PM
340
CHAPTER 14
■ AUTHENTICATION
easily guessable, resulting in the possible compromise of not only the user’s personal data, but
also the system itself.
Reducing the possibility that such easily guessable passwords could be introduced into
the system is quite simple, by turning the procedure of unchallenged password creation into
one of automated password approval. PHP offers a wonderful means for doing so via the CrackLib
library, created by Alec Muffett ( CrackLib is intended
to test the strength of a password by setting certain benchmarks that determine its guessability,
including:
• Length: Passwords must be longer than four characters.
• Case: Passwords cannot be all lowercase.
• Distinction: Passwords must contain adequate different characters. In addition, the
password cannot be blank.
• Familiarity: Passwords cannot be based on a word found in a dictionary. In addition, the
password cannot be based on a reversed word found in the dictionary. Dictionaries are
discussed further in a bit.
• Standard numbering: Because CrackLib’s author is British, he thought it a good idea to
check against patterns similar to what is known as a National Insurance (NI) Number.
The NI Number is used in Britain for taxation, much like the Social Security Number
(SSN) is used in the United States. Coincidentally, both numbers are nine characters
long, allowing this mechanism to efficiently prevent the use of either, if a user is stupid
enough to use such a sensitive identifier for this purpose.
Installing PHP’s CrackLib Extension
To use the CrackLib extension, you need to first download and install the CrackLib library,
available at If you’re running a Linux/Unix variant,
it might already be installed, because CrackLib is often packaged with these operating systems.
Complete installation instructions are available in the README file found in the CrackLib tar
package.
PHP’s CrackLib extension was unbundled from PHP as of version 5.0.0, and moved to the
PHP Extension Community Library (PECL), a repository for PHP extensions. Therefore, to use
CrackLib, you need to download and install the crack extension from PECL. PECL is not covered
in this book, so please consult the PECL Web site at for extension instal-
lation instructions if you want to take advantage of CrackLib.
Once you install CrackLib, you need to make sure that the crack.default_dictionary
directive in php.ini is pointing to a password dictionary. Such dictionaries abound on the
Internet, so executing a search will turn up numerous results. Later in this section you’ll learn
more about the various types of dictionaries at your disposal.
Using the CrackLib Extension
Using PHP’s CrackLib extension is quite easy. Listing 14-11 offers a complete usage example.
Gilmore_5475.book Page 340 Friday, November 11, 2005 1:16 PM
CHAPTER 14 ■ AUTHENTICATION
341
Listing 14-11. Using PHP’s CrackLib Extension
<?php
$pswd = "567hejk39";
/* Open the dictionary. Note that the dictionary
filename does NOT include the extension.
*/
$dictionary = crack_opendict('/usr/lib/cracklib_dict');
// Check password for guessability
$check = crack_check($dictionary, $pswd);
// Retrieve outcome
echo crack_getlastmessage();
// Close dictionary
crack_closedict($dictionary);
?>
In this particular example, crack_getlastmessage() returns the string “strong password”
because the password denoted by $pswd is sufficiently difficult to guess. However, if the pass-
word is weak, one of a number of different messages could be returned. Table 14-1 offers a few
other passwords, and the resulting outcome from passing them through crack_check().
By writing a short conditional statement, you can create user-friendly, detailed responses
based on the information returned from CrackLib. Of course, if the response is “strong password,”
you can allow the user’s password choice to take effect.
Dictionaries
Listing 14-11 uses the cracklib_dict.pwd dictionary, which is generated by CrackLib during
the installation process. Note that in the example, the extension .pwd is not included when
referring to the file. This seems to be a quirk with the way that PHP wants to refer to this file,
and could change some time in the future so that the extension is also required.
Table 14-1. Password Candidates and the crack_check() Function’s Response
Password Response
mary it is too short
12 it’s WAY too short
1234567 it is too simplistic/systematic
street it does not contain enough DIFFERENT characters
Gilmore_5475.book Page 341 Friday, November 11, 2005 1:16 PM
342
CHAPTER 14
■ AUTHENTICATION
You are also free to use other dictionaries, of which there are many freely available on the
Internet. Furthermore, you can find dictionaries for practically every spoken language. One
particularly complete repository of such dictionaries is available on the University of Oxford’s
FTP site: ftp.ox.ac.uk. In addition to quite a few language dictionaries, the site offers a number of
interesting specialized dictionaries, including one containing keywords from many Star Trek
plot summaries. At any rate, regardless of the dictionary you decide to use, simply assign its
location to the crack.default_dictionary directive, or open it using crack_opendict().
One-Time URLs and Password Recovery
As sure as the sun rises, your application users will forget their passwords. All of us are guilty of
forgetting such information, and it’s not entirely our fault. Take a moment to list all the different
login combinations you regularly use; my guess is that you have at least 12 such combinations.
E-mail, workstations, servers, bank accounts, utilities, online commerce, securities and mortgage
brokerages We use passwords to manage nearly everything these days. Because your applica-
tion will assumedly be adding yet another login pair to the user’s list, a simple, automated
mechanism should be in place for retrieving or resetting the user’s password when he or she
forgets it. Depending on the sensitivity of the material protected by the login, retrieving the
password might require a phone call or sending the password via the postal service. As always,
use discretion when you devise mechanisms that may be exploited by an intruder. This section
examines one such mechanism, referred to as a one-time URL.
A one-time URL is commonly given to a user to ensure uniqueness when no other authen-
tication mechanisms are available, or when the user would find authentication perhaps too
tedious for the task at hand. For example, suppose you maintain a list of newsletter subscribers
and want to know which and how many subscribers are actually reading each monthly issue.
Simply embedding the newsletter into an e-mail won’t do, because you would never know how
many subscribers were simply deleting the e-mail from their inboxes without even glancing at
the contents. Rather, you could offer them a one-time URL pointing to the newsletter, one of
which might look like this:
/>In order to know exactly which users showed interest in the newsletter issue, a unique ID
parameter like the one shown in the preceding URL has been assigned to each user, and stored
in some subscriber table. Such values are typically pseudorandom, derived using PHP’s md5()
and uniqid() functions, like so:
$id = md5(uniqid(rand(),1));
The subscriber table might look something like the following:
CREATE TABLE subscriber (
rowid serial,
email varchar(55) not null,
uniqueid varchar(32) not null,
readNewsletter char,
CONSTRAINT subscriber_id PRIMARY KEY(rowid)
);
Gilmore_5475.book Page 342 Friday, November 11, 2005 1:16 PM
CHAPTER 14 ■ AUTHENTICATION
343
When the user clicks this link, taking her to the newsletter, a function similar to the
following could execute before displaying the newsletter:
function read_newsletter($id) {
$query = "UPDATE subscriber SET readNewsletter='Y' WHERE uniqueid='$id'";
return pg_query($query);
}
The result is that you will know exactly how many subscribers showed interest in the
newsletter, because they all actively clicked the link.
This very same concept can be applied to password recovery. To illustrate how this is
accomplished, consider the revised userauth table shown in Listing 14-12.
Listing 14-12. A Revised userauth Table
create table userauth (
rowid serial,
commonname varchar(35) not null,
username varchar(8) not null,
pswd varchar(32) not null,
uniqueidentifier varchar(32) not null,
CONSTRAINT userauth_id PRIMARY KEY(rowid)
);
Suppose one of the users found in this table forgets his password and thus clicks the Forgot
password? link, commonly found near a login prompt. The user will arrive at a page in which
he is asked to enter his e-mail address. Upon entering the address and submitting the form, a
script is executed similar to that shown in Listing 14-13.
Listing 14-13. A One-Time URL Generator
<?php
// Create unique identifier
$id = md5(uniqid(rand(),1));
// Set user's unique identifier field to a unique id
$query = "UPDATE userauth SET uniqueidentifier='$id' WHERE email=$_POST[email]";
$result = pg_query($query);
$email = <<< email
Dear user,
Click on the following link to reset your password:
/>email;
Gilmore_5475.book Page 343 Friday, November 11, 2005 1:16 PM
344
CHAPTER 14
■ AUTHENTICATION
// Email user password reset options
mail($_POST['email'],"Password recovery","$email","FROM:");
echo "<p>Instructions regarding resetting your password have been sent to
$_POST[email]</p>";
?>
When the user receives this e-mail and clicks the link, he is taken to the script
lostpassword.php, shown in Listing 14-14.
Listing 14-14. Resetting a User’s Password
<?php
// Create a pseudorandom password five characters in length
$pswd = substr(md5(uniqid(rand(),1),5));
// Update the userauth table with the new password
$query = "UPDATE userauth SET pswd='$pswd' WHERE uniqueidentifier=$_GET[id]";
$result = pg_query($query);
// Display the new password to the user
echo "<p>Your password has been reset to $pswd. Please log in and change
your password to one of your liking.</p>";
?>
Of course, this is only one of many recovery mechanisms. For example, you could use a
similar script to provide the user with a form for resetting his own password.
Summary
This chapter introduced PHP’s authentication capabilities, features that are practically guar-
anteed to be incorporated into many of your future applications. In addition to discussing the
basic concepts surrounding this functionality, we investigated several common authentication
methodologies, including authenticating against hard-coded values, file-based authentication,
database-based authentication, IP-based authentication, and using PEAR’s HTTP authentication
functionality. We also examined decreasing password guessability by using PHP’s CrackLib
extension. Finally, we offered a discussion of recovering passwords using one-time URLs.
The next chapter discusses another set of commonly used PHP functionality—handling
file uploads via the browser.
Gilmore_5475.book Page 344 Friday, November 11, 2005 1:16 PM
345
■ ■ ■
CHAPTER 15
Handling File Uploads
While most people tend to equate the Web with Web pages only, the HTTP protocol actually
facilitates the transfer of any kind of file, such as Microsoft Office documents, PDFs, executables,
MPEGs, zip files, and a wide range of other file types. Although FTP historically has been the
standard means for uploading files to a server, such file transfers are becoming increasingly
prevalent via a Web-based interface. In this chapter, you’ll learn all about PHP’s file-upload
handling capabilities. In particular, chapter topics include:
• PHP’s file-upload configuration directives
•PHP’s $_FILES superglobal array, used to handle file-upload data
• PHP’s built-in file-upload functions: is_uploaded_file() and move_uploaded_file()
• A review of possible values returned from an upload script
As always, numerous real-world examples are offered throughout this chapter, providing
you with applicable insight into this topic.
Uploading Files via the HTTP Protocol
The way files are uploaded via a Web browser was officially formalized in November 1995,
when Ernesto Nebel and Larry Masinter of the Xerox Corporation proposed a standardized
methodology for doing so within RFC 1867, “Form-based File Upload in HTML” (http://
www.ietf.org/rfc/rfc1867.txt). This memo, which formulated the groundwork for making
the additions necessary to HTML to allow for file uploads (subsequently incorporated into
HTML 3.0), also offered the specification for a new Internet media type, multipart/form-data.
This new media type was desired, because the standard type used to encode “normal” form
values, application/x-www-form-urlencoded, was considered too inefficient to handle large
quantities of binary data such as that which might be uploaded via such a form interface. An
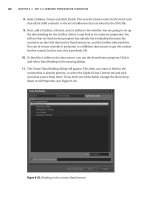
example of a file-upload form follows, and a screenshot of the corresponding output is shown
in Figure 15-1:
<form action="uploadmanager.html" enctype="multipart/form-data" method="post">
Name:<br /> <input type="text" name="name" value="" /><br />
Email:<br /> <input type="text" name="email" value="" /><br />
Homework:<br /> <input type="file" name="homework" value="" /><br />
<p><input type="submit" name="submit" value="Submit Homework" /></p>
</form>
Gilmore_5475.book Page 345 Friday, November 11, 2005 1:16 PM
346
CHAPTER 15
■ HANDLING FILE UPLOADS
Figure 15-1. HTML form incorporating the “file” input type tag
Understand that this form offers only part of the desired result; whereas the file input
type and other upload-related attributes standardize the way files are sent to the server via an
HTML page, no capabilities are offered for determining what happens once that file gets there!
The reception and subsequent handling of the uploaded files is a function of an upload handler,
created using some server process, or capable server-side language like Perl, Java, or PHP. The
remainder of this chapter is devoted to this aspect of the upload process.
Handling Uploads with PHP
Successfully managing file uploads via PHP is the result of cooperation between various
configuration directives, the $_FILES superglobal, and a properly coded Web form. In the
following sections, all three topics are introduced, concluding with a number of examples.
PHP’s File Upload/Resource Directives
Several configuration directives are available for fine-tuning PHP’s file-upload capabilities.
These directives determine whether PHP’s file-upload support is enabled, the maximum
allowable uploadable file size, the maximum allowable script memory allocation, and various
other important resource benchmarks. These directives are introduced in this section.
file_uploads (boolean)
Scope: PHP_INI_SYSTEM; Default value: 1
The file_uploads directive determines whether PHP scripts on the server can accept file uploads.
max_execution_time (integer)
Scope: PHP_INI_ALL; Default value: 30
The max_execution_time directive determines the maximum amount of time, in seconds, that
a PHP script will execute before registering a fatal error.
Gilmore_5475.book Page 346 Friday, November 11, 2005 1:16 PM
CHAPTER 15 ■ HANDLING FILE UPLOADS
347
memory_limit (integer)M
Scope: PHP_INI_ALL; Default value: 8M
The memory_limit directive sets a maximum allowable amount of memory, in megabytes, that
a script can allocate. Note that the integer value must be followed by M for this setting to work
properly. This prevents runaway scripts from monopolizing server memory, and even crashing
the server in certain situations. This directive takes effect only if the enable-memory-limit
flag was set at compile-time.
upload_max_filesize (integer)M
Scope: PHP_INI_SYSTEM; Default value: 2M
The upload_max_filesize directive determines the maximum size, in megabytes, of an uploaded
file. This directive should be smaller than post_max_size (introduced in the section following
the next section), because it applies only to information passed via the file input type, and not
to all information passed via the POST instance. Like memory_limit, note that M must follow the
integer value.
upload_tmp_dir (string)
Scope: PHP_INI_SYSTEM; Default value: Null
Because an uploaded file must be successfully transferred to the server before subsequent
processing on that file can begin, a staging area of sorts must be designated for such files as the
location where they can be temporarily placed until they are moved to their final location. This
location is specified using the upload_tmp_dir directive. For example, suppose you wanted to
temporarily store uploaded files in the /tmp/phpuploads/ directory. You would use the following:
upload_tmp_dir = "/tmp/phpuploads/"
Keep in mind that this directory must be writable by the user owning the server process.
Therefore, if user nobody owns the Apache process, then user nobody should be made either
owner of the temporary upload directory or a member of the group owning that directory. If
this is not done, user nobody will be unable to write the file to the directory, unless world write
permissions are assigned to the directory.
post_max_size (integer)M
Scope: PHP_INI_SYSTEM; Default value: 8M
The post_max_size directive determines the maximum allowable size, in megabytes, of infor-
mation that can be accepted via the POST method. As a rule of thumb, this directive setting
should be larger than upload_max_filesize, to account for any other form fields that may be
passed in addition to the uploaded file. Like memory_limit and upload_max_filesize, note that
M must follow the integer value.
Gilmore_5475.book Page 347 Friday, November 11, 2005 1:16 PM
348
CHAPTER 15
■ HANDLING FILE UPLOADS
The $_FILES Array
The $_FILES superglobal is special in that it is the only one of the predefined EGCPFS (Environ-
ment, Get, Cookie, Put, Files, Server) superglobal arrays that is two-dimensional. Its purpose is
to store a variety of information pertinent to a file (or files) uploaded to the server via a PHP
script. In total, five items are available in this array, each of which is introduced in this section.
■Note Each of the items introduced in this section makes reference to userfile. This is simply a placeholder
for the name assigned to the file-upload form element. Therefore, this value will likely change in accordance
to your chosen name assignment.
$_FILES['userfile']['error']
The $_FILES['userfile']['error'] array value offers important information pertinent to the
outcome of the upload attempt. In total, five return values are possible, one signifying a successful
outcome, and four others denoting specific errors that arise from the attempt. The names and
meanings of each return value are introduced in the later section, “Upload Error Messages.”
$_FILES['userfile']['name']
The $_FILES['userfile']['name'] variable specifies the original name of the file, including
the extension, as declared on the client machine. Therefore, if you browse to a file named
vacation.jpg and upload it via the form, this variable will be assigned the value vacation.jpg.
$_FILES['userfile']['size']
The $_FILES['userfile']['size'] variable specifies the size, in bytes, of the file uploaded from
the client machine. Therefore, in the case of the vacation.jpg file, this variable could plausibly
be assigned a value like 5253, or roughly 5KB.
$_FILES['userfile']['tmp_name']
The $_FILES['userfile']['tmp_name'] variable specifies the temporary name assigned to the file
once it has been uploaded to the server. This is the name of the file assigned to it while stored
in the temporary directory (specified by the PHP directive upload_tmp_dir).
$_FILES['userfile']['type']
The $_FILES['userfile']['type'] variable specifies the MIME-type of the file uploaded from the
client machine. Therefore, in the case of the vacation.jpg file, this variable would be assigned
the value image/jpeg. If a PDF were uploaded, then the value application/pdf would be assigned.
Because this variable sometimes produces unexpected results, you should explicitly verify
it yourself from within the script.
Gilmore_5475.book Page 348 Friday, November 11, 2005 1:16 PM
CHAPTER 15 ■ HANDLING FILE UPLOADS
349
PHP’s File-Upload Functions
In addition to the host of file-handling functions made available via PHP’s file system library
(see Chapter 10 for more information), PHP offers two functions specifically intended to aid in
the file-upload process, is_uploaded_file() and move_uploaded_file(). Each function is intro-
duced in this section.
is_uploaded_file()
boolean is_uploaded_file(string filename)
The is_uploaded_file() function determines whether a file specified by the input parameter
filename was uploaded using the POST method. This function is intended to prevent a potential
attacker from manipulating files not intended for interaction via the script in question. For
example, consider a scenario in which uploaded files were made immediately available for viewing
via a public site repository. Say an attacker wanted to make a file somewhat juicier than boring
old class notes available for his perusal, say /etc/passwd. So rather than navigate to a class
notes file as would be expected, the attacker instead types /etc/passwd directly into the form’s
file-upload field.
Now consider the following uploadmanager.php script:
<?php
copy($_FILES['classnotes']['tmp_name'],
"/www/htdocs/classnotes/".basename($classnotes));
?>
The result in this poorly written example would be that the /etc/passwd file is copied to a
publicly accessible directory. (Go ahead, try it. Scary, isn’t it?) To avoid such a problem, use the
is_uploaded_file() function to ensure that the file denoted by the form field, in this case
classnotes, is indeed a file that has been uploaded via the form. Here’s an improved and revised
version of the uploadmanager.php code:
<?php
if (is_uploaded_file($_FILES['classnotes']['tmp_name'])) {
copy($_FILES['classnotes']['tmp_name'],
"/www/htdocs/classnotes/".$_FILES['classnotes']['name']);
} else {
echo "<p>Potential script abuse attempt detected.</p>";
}
?>
In the revised script, is_uploaded_file() checks whether the file denoted by
$_FILES['classnotes']['tmp_name'] has indeed been uploaded. If the answer is yes, the file is
copied to the desired destination. Otherwise, an appropriate error message is displayed.
move_uploaded_file()
boolean move_uploaded_file(string filename, string destination)
Gilmore_5475.book Page 349 Friday, November 11, 2005 1:16 PM
350
CHAPTER 15
■ HANDLING FILE UPLOADS
The move_uploaded_file() function was introduced in version 4.0.3 as a convenient means for
moving an uploaded file from the temporary directory to a final location. Although copy() works
equally well, move_uploaded_file() offers one additional feature that this function does not: It will
check to ensure that the file denoted by the filename input parameter was in fact uploaded via
PHP’s HTTP POST upload mechanism. If the file has not been uploaded, the move will fail and a
FALSE value will be returned. Because of this, you can forego using is_uploaded_file() as a
precursor condition to using move_uploaded_file().
Using move_uploaded_file() is quite simple. Consider a scenario in which you want to
move the uploaded class notes file to the directory /www/htdocs/classnotes/, while also
preserving the file name as specified on the client:
move_uploaded_file($_FILES['classnotes']['tmp_name'],
"/www/htdocs/classnotes/".$_FILES['classnotes']['name']);
Of course, you could rename the file to anything you wish when it’s moved. It’s important,
however, that you properly reference the file’s temporary name within the first (source)
parameter.
Upload Error Messages
Like any other application component involving user interaction, you need a means to assess
the outcome, successful or otherwise. How do you definitively know that the file-upload procedure
was successful? And if something goes awry during the upload process, how do you know what
caused the error? Thankfully, sufficient information for determining the outcome, and in the
case of an error, the reason for the error, is provided in $_FILES['userfile']['error'].
UPLOAD_ERR_OK (Value = 0)
A value of 0 is returned if the upload is successful.
UPLOAD_ERR_INI_SIZE (Value = 1)
A value of 1 is returned if there is an attempt to upload a file whose size exceeds the value specified
by the upload_max_filesize directive.
UPLOAD_ERR_FORM_SIZE (Value = 2)
A value of 2 is returned if there is an attempt to upload a file whose size exceeds the value of the
MAX_FILE_SIZE directive, which can be embedded into the HTML form.
■Note Because the MAX_FILE_SIZE directive is embedded within the HTML form, it can easily be modified by
an enterprising attacker. Therefore, always use PHP’s server-side settings (upload_max_filesize,
post_max_filesize) to ensure that such predetermined absolutes are not surpassed.
Gilmore_5475.book Page 350 Friday, November 11, 2005 1:16 PM
CHAPTER 15 ■ HANDLING FILE UPLOADS
351
UPLOAD_ERR_PARTIAL (Value = 3)
A value of 3 is returned if a file was not completely uploaded. This might occur if a network
error occurs that results in a disruption of the upload process.
UPLOAD_ERR_NO_FILE (Value = 4)
A value of 4 is returned if the user submits the form without specifying a file for upload.
File-Upload Examples
Now that the groundwork has been set regarding the basic concepts, it’s time to consider a few
practical examples.
A First File-Upload Example
The first example actually implements the class notes example referred to throughout this
chapter. To formalize the scenario, suppose that a professor invites students to post class notes
to his Web site, the idea being that everyone might have something to gain from such a collab-
orative effort. Of course, credit should nonetheless be given where credit is due, so each file upload
should be renamed to the last name of the student. In addition, only PDF files are accepted.
Listing 15-1 (uploadmanager.php) offers an example.
Listing 15-1. A Simple File-Upload Example
<form action="uploadmanager.php" enctype="multipart/form-data" method="post">
Last Name:<br /> <input type="text" name="name" value="" /><br />
Class Notes:<br /> <input type="file" name="classnotes" value="" /><br />
<p><input type="submit" name="submit" value="Submit Notes" /></p>
</form>
<?php
/* Set a few constants */
define ("FILEREPOSITORY","/home/www/htdocs/class/classnotes/");
/* Make sure that the file was POSTed. */
if (is_uploaded_file($_FILES['classnotes']['tmp_name'])) {
/* Was the file a PDF? */
if ($_FILES['classnotes']['type'] != "application/pdf") {
echo "<p>Class notes must be uploaded in PDF format.</p>";
} else {
/* move uploaded file to final destination. */
$name = $_POST['name'];
$result = move_uploaded_file($_FILES['classnotes']['tmp_name'],
FILEREPOSITORY."/$name.pdf");
Gilmore_5475.book Page 351 Friday, November 11, 2005 1:16 PM
352
CHAPTER 15
■ HANDLING FILE UPLOADS
if ($result == 1) echo "<p>File successfully uploaded.</p>";
else echo "<p>There was a problem uploading the file.</p>";
} #endIF
} #endIF
?>
■Caution Remember that files are both uploaded and moved under the guise of the Web server daemon
owner. Failing to assign adequate permissions to both the temporary upload directory and the final directory
destination for this user will result in failure to properly execute the file-upload procedure.
Listing Uploaded Files by Date
The professor, delighted by the students’ participation in the class notes project, has decided
to move all class correspondence online. His current project involves providing an interface
that will allow students to submit their daily homework via the Web. Like the class notes, the
homework is to be submitted in PDF format, and will be assigned the student’s last name as its
file name when stored on the server. Because homework is due daily, the professor wants both
a means for automatically organizing the assignment submissions by date and a means for
ensuring that the class slackers can’t sneak homework in after the deadline, which is 11:59:59 p.m.
daily.
The script offered in Listing 15-2 automates all of this, minimizing administrative over-
head for the professor. In addition to ensuring that the file is a PDF and automatically assigning
it the student’s specified last name, the script also creates new folders daily, each following the
naming convention MM-DD-YYYY.
Listing 15-2. Categorizing the Files by Date
<form action="homework.php" enctype="multipart/form-data" method="post">
Last Name:<br /> <input type="text" name="name" value="" /><br />
Homework:<br /> <input type="file" name="homework" value="" /><br />
<p><input type="submit" name="submit" value="Submit Notes" /></p>
</form>
<?php
# Set a constant
define ("FILEREPOSITORY","/home/www/htdocs/class/homework/");
if (isset($_FILES['homework'])) {
if (is_uploaded_file($_FILES['homework']['tmp_name'])) {
Gilmore_5475.book Page 352 Friday, November 11, 2005 1:16 PM