Adobe Creative Classroom Suite 5 Design Premium Digital classroom phần 6 docx
Bạn đang xem bản rút gọn của tài liệu. Xem và tải ngay bản đầy đủ của tài liệu tại đây (1.4 MB, 137 trang )
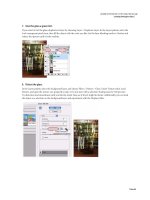
2 Click and drag to draw a rectangle to the upper left of your
fish. It’s okay if it goes off the Stage into the pasteboard. If
you’d like to match the sample file, in the Property Inspector
make sure the Lock width and height button ( ) is disabled
and set the rectangle’s size to 200 pixels wide by 130 pixels
high.
3 In the Property Inspector, locate the Rectangle Options
section; you’ll see four text fields and a slider. Here is where
you set the corner radius for all or each of your rectangle’s
corners. By default, the four corners are locked together and
use the same value.
Click and drag the slider to the right until the corner values
read about 40—you see the corners of the rectangle begin to
round out.
686
Add a corner radius to the rectangle primitive using the slider
in the Property Inspector.
4 Next, you’ll modify the corner radius using a slightly
different technique. Instead of using the slider in the Property
Inspector, you can grab the points adjacent to any corner and
drag them to reshape the corner radius.
687
5 Switch to the Selection tool ( ), then click and drag the
point in the upper-left corner of your rectangle to the left and
right. As you can see, this modifies the corners of your
rectangle—move slightly to the right to reduce the corner
radius.
Using the Selection tool can be a more tactile way
to modify corners.
6 Choose File > Save to save your work.
You’ll now add the stem to make this a true word
balloon—however, you may have noticed that primitive
shapes behave unlike any other shape you’ve used so far.
While they appear to look and function much like Drawing
Objects, they actually can’t be modified in the way that
Drawing Objects can.
Neither the Selection nor Subselection tool will allow you to
modify them in the way you’ve been able to do with Drawing
688
Objects and mergeable artwork. To accomplish this, you need
to break the shape down to artwork that you can manipulate
freely. Keep in mind, however, that doing this is a one-way
street: You can’t convert a shape or Drawing Object back into
a primitive once it’s been broken apart.
7 If it’s not already active, switch to the Selection tool ( ) and
click once to select the rectangle primitive.
8 You’ll now break this out of a primitive down to artwork
you can manipulate further. Choose Modify > Break Apart,
and the shape now appears with the dotted pattern that
indicates it is now a mergeable shape. Keep in mind that you
cannot go back.
Use Modify > Break Apart to convert the
primitive shape to a mergeable shape.
689
Choose the Subselection tool ( ) from the Tools panel and
click once on the edge of the shape to reveal its points and
paths.
9 Switch to the Add Anchor Point tool ( ). In the
lower-right corner of the rectangle, click to create two new
consecutive anchor points before the corner.
10 Switch to the Subselection tool, again, then click on the
second point (the one closest to the corner) and drag it down
and to the right to form the stem of your word balloon.
Form a stem by pulling out the second of the two
new points you created.
11 With the shape still selected, choose Modify > Combine
Objects > Union to convert the shape to a Drawing Object,
which you can easily move and stack later on.
690
12 Choose File > Save to save your work.
Adding text to your artwork
Flash allows you to create and style text to include in your
movies, which can also be incorporated into animations or
rendered in 3D. In addition, text is one of a few objects in
Flash that can have filters applied to enhance its appearance.
New & Improved: Flash TLF Text
A significant new improvement in Flash typography is the
TLF Text engine, which supersedes and vastly adds upon the
capabilities of the “classic” Flash Text tool. TLF Text boasts
features such as multi-column text and threaded text frames,
which most designers have become accustomed to working
with in other Adobe applications such as InDesign and
Illustrator. In addition, many subtle but advanced text options
such as character rotation and vertical orientation are now
available through an expanded character options panel in the
Property Inspector.
You can continue to use Flash’s older text model (now
labeled as the Classic Text option in the Property Inspector),
but for the purpose of the following exercises you’ll be using
the new TLF Text engine for all tasks.
In this lesson, you’ll use the Text tool to add and style some
cool text inside of your fish’s word balloon and alongside the
edge of the stage.
1 Select the Text tool ( ) from the Tools panel. Click once
and drag within your word balloon to create a new text box
691
that’s slightly smaller than the balloon itself. The box appears
with a blinking cursor in the upper left-hand corner,
indicating that you’re ready to type.
2 Type the words A Fish’s Story: within the text box. Click
and drag across all the text within the box to select it.
Use the Text tool to add some text to your word balloon.
3 In the Property Inspector, locate the Character options,
which include menus for Family, Color, and Size. Choose
Arial (or equivalent) from the Family menu to change the
typeface. Move your cursor above the Size value, and drag to
set the type size to 24 points. Click the Color swatch and set
the type color to black (#000000).
692
Specify typeface, size, and color options for your new text
from the Property Inspector.
4 Press the Escape key twice to exit the current text box and
make the Text tool active again. You’ll now add some text
along the left side of the stage for more visual impact.
693
5 At the top of the Property Inspector, locate the Change
orientation of text drop-down menu. Click it and select the
Vertical option. This will create vertically-oriented text next
time you use the Text tool.
The Change orientation of text drop-down menu.
6 Click (but don’t drag) near the left edge of the stage to
create a new text box, and type the words Go Fish! You’ll see
that the text now is created vertically alongside the left edge
of the stage.
You’ll notice that you’ve created text on the stage
using two slightly different techniques: Clicking and
dragging to create a pre-sized text box, or simply
clicking on the stage to begin a new type path. The
former of the two will result in a text box that can take
advantage of advanced type options and such as
text-flow, multi-column text. The single click approach
is a good way to create single lines of text for more
basic and aesthetic purposes.
694
New: Working with Threaded and Multi-Column
Text
The new TLF Text Engine brings a wealth of new capabilities
to Flash type, many of which designers have become
accustomed to in other Adobe applications such as Illustrator
and InDesign. This includes the ability to flow (thread) text
across multiple text boxes, multi-column text and a variety of
advanced character and paragraph options.
Next, you’ll add more text to your fish’s word balloon, and to
catch the additional words you’ll add a second text box on the
stage. You’ll also take a look at splitting large blocks of type
it into columns for better presentation.
1 If it’s not already active, select the Text tool ( ) from the
Tools panel. Also, make sure that the orientation of your text
is set back to Horizontal (select Horizontal from the Change
orientation of text drop-down menu toward the top of the
Property Inspector).
2 Click and drag in the lower-right hand corner of the stage
to create a second, empty text box (it should take up roughly
the entire lower-right quarter of the stage).
3 To resize the new text box, hover over any of the box
handles on the sides or corners until you see a double-arrow.
Click and drag to resize the text box until it’s just right.
695
You can easily resize text boxes by dragging any of the four
corners.
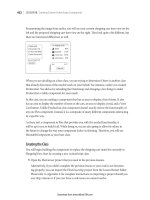
4 Now, you’ll get some text to add to the first text box in the
upper-left corner. Choose File > Open, and browse to this
lesson’s folder in the dialog box that appears. Select the
story.txt file and click Open/Select to open it in Flash.
Note that you may need to enable All Files in the dialog box
in order to select a .txt file.
You may need to make certain that All Files are set to display
in the dialog box in order to view and select a .txt file.
5 Select all the text within the text file you opened by
triple-clicking within any point in the document, and choose
Edit > Copy or Ctrl+C (Windows) or Command+C (Mac OS)
to copy the selected contents.
6 Return to your Flash file by selecting its tab at the top of
the workspace. Your text tool should still be active. Click
within the first text box you created over the word balloon,
and position your cursor behind the words A Fish’s Story:.
696
Choose Edit > Paste or Ctrl+V (Windows) or Command+V
(Mac OS) to paste the text into the frame.
7 You’ll notice that the text is likely too long for the box, and
gets cut off. You’ll also note a small box with a red plus sign
in the lower-right corner; this is the text frame’s out port, and
the red plus sign indicates an overrun, which means there’s
too much text for the box. You’ll correct this by “flowing” the
text from this box to the one you created on the bottom right
corner of the stage.
The newly added text overflows the text box, indicated
by the red plus sign in the lower-right corner.
8 Click on the red plus sign, which is the out port of the text
box; your icon should change to show a block of text
attached. You are now carrying the overrun text, and can
place it, or “flow” it to another text frame.
9 Choose the Selection tool within the Tools panel, then
locate the text box you created in the lower quarter of the
stage. Hover your cursor over the text box until you see a
chain link icon ( ), and click. The text from the word balloon
697
should now continue in this text frame, and you’ll see a line
going from one to the other to indicate the frames are
threaded together.
The final touch will be splitting that new text box with some
attractive columns. Displaying text in multiple columns is a
clean, easy way to read large blocks of text, and a technique
commonly used in print publications and web sites.
10 Using your Text tool, click within the new text box you
created on the lower-right hand corner of the stage. In the
Property Inspector, locate the Columns value under the
Container and Flow options (the default value should read 1).
11 Click and drag over the columns value until the value
reads 2. This will split your text box into two columns.
12 If you’d like to adjust the gap between the two columns,
locate the gap width value directly to the right of the Columns
value (the default value should read 20px). Click and drag to
the left or right to decrease or increase the gap, respectively.
13 Choose File > Save to save your document.
Now, if you add text to the frame within the word balloon, the
text in the lower corner of the stage will continue to adjust as
needed, and format the overflowed text into two nice
columns!
Adding filters
To enhance the appearance of text, you can add popular live
filters such as drop shadows, blurs, glows, and more. Filters
698
can also be applied to other objects in your movie, such as
button and movie clip symbols (covered later in this book).
For now, you’ll add some basic filters to make your text stand
out.
1 Switch to the Selection tool ( ), and click once on your text
box to select it.
Pressing the V key while editing text simply types a v
in the text box; it doesn’t switch to the Selection tool as
anticipated. To exit a text box, use the Esc (escape)
key, and then press the V key to jump to the Selection
tool.
2 At the bottom of the Property Inspector, locate and expand
the Filters section. (Try collapsing the Container and Flow
options to give your filter options more space.)
3 In the lower-left hand corner of the Filters section, press
the Add Filter button ( ) to add a new filter. A menu
appears, showing you the various filters you can apply to your
text. Select the Drop Shadow filter.
699
Apply filters to selected text from the
Filters section of the Property Inspector.
4 Options appear for the new Drop Shadow filter, which you
can fine-tune. To start, click and drag the Strength value to
reduce the strength (opacity) to 30 percent.
5 Click and drag the Distance value to increase the distance
to 10 pixels. Under the Quality setting, select High.
700
Set specific options for your filter, including color,
strength, and distance.
6 Choose File > Save to save your file.
Working with colors
Flash offers a lot of options for creating, saving, and working
with colors and gradients. In addition, the panels and
workspace make it easy to choose and apply colors from
virtually anywhere, or to save color sets that you can share
between multiple Flash documents and projects.
Getting set up
1 First you’ll want to make sure that the Color and Swatches
panels are visible. Choose Window > Color. By default, the
Color and Swatches panels are already grouped together.
701
The Swatches and Color panels are
grouped together by default.
2 Drag the panel group by its title bar over the Property
Inspector and Library panel on the right-hand side, releasing
the mouse when you see a light blue line. The two panels
should now appear docked in the panel group above the
Property Inspector and Library panel.
702
Move the Color and Swatches panel group to the Properties
and Libraries panel group.
Creating gradients
A gradient is a gradual blend between two or more colors, and
is often used for complex color transitions or to imply lighting
effects. You can create and save gradients and apply them to
fills or strokes within your artwork. Flash supports linear
gradients and radial gradients. Both types can include any
number of colors.
Linear gradients blend in a uniform manner and, as the
name implies, in a straight line going in any direction or
angle.
Radial gradients blend in a circular manner, either from the
inside out or the outside in (depending on your perspective, of
course).
703
On the left, a linear gradient; on the right, a radial gradient.
Your fish is almost complete, so it’s time to bring it to life
with some dynamic and exciting colors.
1 Choose your Selection tool ( ), and click once on your fish
to select it. Choose Modify > Break Apart to separate the fish
and its parts, and then choose Edit > Deselect All. Click once
on the body of the fish.
2 Locate the Color type drop-down menu at the top-right
corner of the Color panel. This allows you to choose a solid
color or gradient for the currently active color. Choose Radial
gradient to set a radial gradient to your fill. The fish displays
the default black-to-white gradient.
704
Choose Radial to switch your shape’s
fill to a radial gradient.
3 At the bottom of the Color panel, you see the color ramp,
which now appears with two color stops (sliders), one for
each color that forms your gradient. You’ll need to assign a
new color to each stop.
4 Double-click the right slider, and the Swatches panel
appears. Choose the dark orange color marked #CC6600.
Double-click the left slider, and from the Swatches panel,
choose the light orange color marked #FF9900.
705
Set a unique value for each color stop on your gradient.
5 The position and distance between the two sliders
determines the blend point. Moving one slider closer to the
other changes the balance between the two colors.
Click and drag the left slider slightly toward the middle—this
makes the lighter orange more prominent than the dark
orange.
6 To add colors to your gradient, you’ll add more color stops.
Add a new color stop by clicking on the far left edge of the
color ramp. A new stop should appear below the color ramp.
Double-click the stop, and choose white (#FFFFFF) from the
Swatches panel.
706
Now, you’ll save this gradient for use later on.
7 Locate and open the Color panel menu ( ) in the
upper-right corner of the panel. Choose Add Swatch to add
your new gradient swatch to the existing swatch presets.
Save your new gradient as a preset that you can recall
later on from the Swatches panel.
8 Choose File > Save to save your file.
Using opacity with gradient colors
A cool feature in Flash is the ability to set a unique opacity
level for each individual color in a gradient. This can create
some interesting effects, and add cool lighting-style effects to
your illustrations. In this next exercise, you’ll create and color
some underwater bubbles using this interesting effect.
707
1 Choose the Oval tool ( ) from the Tools panel. If it’s not
already enabled, activate Object Drawing mode by pressing
the button at the bottom of the Tools panel.
2 From the bottom of the Tools panel, choose white
(#FFFFFF) for your stroke color, and choose the
black-to-white radial gradient preset for your fill color.
3 While holding the Shift key down (to constrain
proportions), click and drag to draw a small circle to the left
of your fish. Leave the circle selected.
4 If it’s not already open, choose Window > Color to open
the Color panel.
5 Double-click the black color stop to open the Swatches
panel, and choose white (#FFFFFF).
6 With the stop still active, locate the Alpha slider; this sets
the opacity of the selected color in the current gradient. Click
and drag the slider downward until the value reads 0 percent.
This produces an interesting light flare effect inside the
bubble.
708
Draw a new oval, and use the Color panel to reduce the
opacity of one
of your oval’s gradient colors.
7 Choose File > Save to save your file.
Creating custom colors
As you may have discovered, creating and saving a solid
color swatch is nearly identical to creating and saving a
gradient swatch. In this case, you’ll set specific RGB values
to create a color that you can apply to your artwork, as well as
add to your existing swatches.
709
1 Choose the Selection tool ( ) and double-click once on
your fish to select it. In the Property Inspector, set the stroke
color style to solid and the color to black (#000000).
2 Locate the R, G, and B text fields on the Color panel, click
the stroke icon ( ) to make certain the stroke (and not the
fill) is selected, and type 250, 100, and 16, respectively. This
creates a dark orange color that is immediately applied to the
stroke.
3 From the Color panel menu located in the upper-right
corner, select Add Swatch to add your new color to the
Swatches panel.
4 Choose File > Save to save your file.
Saving a custom color set
Once you’ve added new color swatches, you’ll want to save
that set for use with other projects and documents. If you’ve
ever created and saved custom color swatches in applications
like Photoshop or Illustrator, you’ll find that saving color sets
in Flash is very similar.
1 Press the Swatches panel tab located next to the Color
panel tab to open the Swatches panel. Press the panel menu
button ( ) in the upper-right corner of the Swatches panel.
2 From the panel menu, choose Save Colors.
710