HOW TO DESIGN AND WRITE WEB PAGES TODAY phần 8 docx
Bạn đang xem bản rút gọn của tài liệu. Xem và tải ngay bản đầy đủ của tài liệu tại đây (3.52 MB, 33 trang )
PAGE LAYOUT 209
Even if you decide to try a simple two-column layout consisting of
a 475-pixel-wide area for your content, and a 200-pixel-wide area for
your navigation, separated by 25 pixels of space (as in this chapter’s
example), a column structure will help guide you in your image
editor mockup—particularly if you opt to enhance your pages with
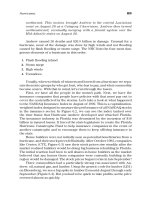
background images to give it a unique look and feel. Figure 17.3 shows
an image-editor mockup of the page for this chapter; different areas
were sliced from it and saved as separate image fi les to create the back-
ground images in the actual page.
Note that the 700-pixel width of the design for this chapter was
chosen only because it would work well for images in this book;
as in Smith’s 960 Grid System (see “Grid Systems” sidebar), it’s
common to build fixed-width pages that are closer to 1000 pixels
across.
GRID SYSTEMS
Do a Google search for Web design grid system and you will fi nd links to the work
of many different Web designers who have released their own grid system that
others may use.
One of my favorite grid systems is Nathan Smith’s 960 Grid System,
which includes templates for 12- and 16-column grids in the formats of a
number of different image editors. It also includes a PDF file for printing out
ready-made grid pages to sketch on. As Smith, the 960 Grid System creator,
notes:
“All modern monitors support at least 1024 × 768 pixel resolution. 960 is
divisible by 2, 3, 4, 5, 6, 8, 10, 12, 15, 16, 20, 24, 30, 32, 40, 48, 60, 64, 80, 96,
120, 160, 192, 240, 320 and 480. This makes it a highly fl exible base number
to work with.”*
Although the 960 Grid System and others like it include XHTML and CSS,
they are usually not structurally meaningful the way the RPK is. So try working
with some of the sketch sheets and column layouts, but stick to writing your own
XHTML and CSS.
*Nathan Smith, 960 Grid System,
210 HOW TO DESIGN AND WRITE WEB PAGES TODAY
CSS POSITIONING
CSS includes the position property, which is often used in conjunc-
tion with properties for dimensions (especially widths) and left-, right-,
top-, and bottom-offsets to produce all kinds of page layouts from the
same XHTML structure.
By default, block elements are positioned by the browser statically
(
position: static;). Two other position values, relative and
absolute, are what provide designers the ability to create compelling
page designs.
When you need to position something far away from where it
appears by default, such as the navigation in this chapter’s examples,
position it absolutely. Absolute positioning removes the element
from the document fl ow—meaning that the rest of the page’s content
behaves as though, for example, the navigation is simply gone (see
Figure 17.4).
To determine what needs to be positioned absolutely, compare where
it appears in the normal fl ow of things (as in Figure 17.1) with where it
Figure 17.3. Another image-editor mockup, with images that can be used for
the actual design.
PAGE LAYOUT 211
needs to appear (as in the sketches in Figures 17.2 and 17.3). Because
this chapter’s example header is 85 pixels tall, and the design speci-
fi es a space of 10 pixels between the header and the navigation (and
content), we write a style like:
ul#navigation {
width: 200px; /*200px wide navigation area*/
position: absolute; /*Pull from fl ow to
position*/
left: 0px; /*Keep with left edge of design*/
top: 95px; /*Appear 10px below 85px-high
header*/
}
At this point, though, the page is a mess; the navigation and the
content appear layered over the top of one another. So the next task
is to move other elements out of the navigation’s way. In Figure 17.5,
some left margin on the content area is all that it takes. This margin
will also be the only sizing on the content area (that is, no width will
Figure 17.4. The navigation positioned absolutely, and over the content,
which must be moved out of the way.
Figure 17.5. With the content pushed out of the way, a two-column layout
begins to develop.
Figure 17.6. To create a layout with right-hand navigation is just a matter of
a few CSS adjustments.
PAGE LAYOUT 213
need to be specifi ed for div#content; it will become clear why in a
moment):
div#content {
margin-left: 225px; /*200px nav + 25px between
nav and content*/
}
The great thing about CSS-based layouts is that they are easily
revised. Figure 17.6 shows roughly the same layout as Figure 17.5, but
with the navigation on the right rather than the left (and with the
content moved off to the right).
Refi ning the Whole Page Design
With the navigation and content areas looking roughly as they should,
it’s possible to move on to the less drastic CSS to make the page design
work.
The rough sketch called for a 700-pixel-wide design; to achieve that,
the CSS just needs
div#page { width: 700px; }. With everything
appearing inside the page division, the whole page is now 700 pixels wide.
The content area, which is offset from the left by 225 pixels, automati-
cally fi lls the remaining space (575 pixels wide, if you are keeping count);
that’s why there is no need to specify a width on
div#content.
Because 700 pixels is a rather narrow design, it might appear better
on larger screens if the page were centered horizontally, an effect
achieved by adding
margin: 0 auto; to the div#page style. But
Figure 17.7 reveals a problem with that style: everything is centered
except the navigation, which is still at
left: 0px and therefore hug-
ging the edge of the browser window.
Here is where relative positioning becomes useful. The reason the
navigation appears all the way to the left despite the centered page
division is that, lacking a positioning context, the navigation is
positioned with regard to the browser window. By adding
position:
relative; to the div#page style declaration, navigation will then
be positioned with regard to the page division—not the window.
That is, because the page division is now positioned, it becomes the
positioning context for the navigation, meaning that the navigation’s
left: 0px property will be the 0px position relative to the relatively
positioned container (Figure 17.8).
Figure 17.8. The navigation positioned absolutely, but with the container
division as its positioning context.
Figure 17.7. Centering the page works for all of the nonpositioned elements;
the navigation, which is positioned, is stuck on the left, though.
PAGE LAYOUT 215
Designing the Content Area
Suppose someone wanted to design this page’s supporting content as a
second column within the content area, by making another 200-pixel-
wide column for the supporting content and positioning it absolutely
(see Figure 17.9).
While it would be possible to position the supporting content 95
pixels from the top, a more easily modifi ed design would come from
setting the content area itself as a positioning context:
div#content { position: relative; }
That way, any changes to the content area’s design (particularly its
width and distance from the top of the page) would be refl ected on the
supporting content as well; see Figure 17.10.
A corrective measure to the supporting content spilling over the
footer would be to add more text or media content to the content
area. But assuming some pages might need to be short, a designer could
Figure 17.9. Supporting content positioned absolutely; its positioning con-
text should be the content area, rather than the page.
216 HOW TO DESIGN AND WRITE WEB PAGES TODAY
add a minimum height of 500 pixels to the main content area in this
design:
div#main {
padding-right: 210px;
/*Move content out of the way of supporting,
but use padding to keep background color*/
min-height: 500px;
/*The main content area should be
at least 500 pixels tall*/
}
Figure 17.11 shows the page with the spill-over problem corrected. If
there is more than 500 pixels worth of content, the area will automati-
cally expand.
Figure 17.10. Supporting content positioned absolutely, but with the content
area as its positioning context. Note that the supporting content now spills over
the footer.
PAGE LAYOUT 217
Figure 17.11. A minimum height on the main content area keeps supporting
content from spilling over the footer. Additional content in the main area would
have the same effect.
CONDITIONAL COMMENTS
Internet Explorer has a feature, known as conditional comments, that enables
you to target XHTML markup to particular versions of IE. If, for example, you need
to load a style sheet that corrects some of the idiosyncrasies of IE, conditional
comments enable IE to load it; other browsers will see the content as just another
XHTML comment. The form of conditional comments looks something like:
<! [if IE]>
<link rel="stylesheet" type="text/css"
href="screen-ie.css" />
<![endif] >
Visit QuirksMode.org* for additional information on targeting IE using condi-
tional comments.
*QuirksMode.org, “Conditional Comments,” />218 HOW TO DESIGN AND WRITE WEB PAGES TODAY
Note that because of a problem with min-height in Internet
Explorer (IE) prior to version 8,
1
you would have to add div#main
{ height: 500px; }
to an IE-only style sheet loaded via condi-
tional comments (the RPK details their use in its
screen-ie.css fi le;
see also the “Conditional Comments” sidebar). IE expands the value
specifi ed for
height to fi t longer content, but other browsers, such as
Firefox, cut the content off. But that is an acceptable workaround for
IE’s inability to understand the
min-height property.
FINISHING TOUCHES WITH BACKGROUND IMAGES
Background images help to make a design really shine beyond simple
boxes. Once your positioning is more or less in place, you can begin to
experiment adding in background images.
Figure 17.12 shows the positioned page along with the branding and
navigation styles from previous chapters. The design looks very boxy
and does not seem to fi t together very well.
One of the easier ways to pull a design together is to tile an image
on the background that anticipates, for example, the content area. The
Figure 17.12. Positioned page with the branding and navigation styles from
previous chapters.
PAGE LAYOUT 219
Figure 17.13. A background image to tile on the body to help pull the design
together. (The space around the image is due to how Firefox displays images
directly.)
use of gradients, or areas of color that shift from one color to another,
is just one means for bringing one area (such as the header) into a
polished-looking relationship with another area (such as the content);
Figure 17.13 shows the background image that will tile horizontally on
the example design in this chapter.
Remember that, by default, background images tile horizontally and
vertically; to limit an image tiling on the horizontal axis only, be sure
to include
background-repeat: repeat-x; in your CSS style
declarations that use tiled images (to tile vertically, use the
repeat-y
value). This one background image addition helps pull the design
together, as in Figure 17.14.
Fixing What Doesn’t Work
The major problem with Figure 17.14 is the supporting content; the
content area itself is too narrow to accommodate a second column.
With a few revisions to the CSS (including another background image
with a gradient on the content area), the supporting content now
appears beneath the main content (see Figure 17.15).
Figure 17.15. A revised layout on the content area, plus a gradient on the
content area itself and a darker background color on the supporting content,
further improve the page.
Figure 17.14. The page design with the background image from Figure 17.13
appears less boxy and more complete.
PAGE LAYOUT 221
Figure 17.16. The footer as styled in previous chapters; it looks unfi nished.
That is a strength of CSS-based design: it’s possible to experiment
with these kinds of revisions without ever touching the XHTML of a
page. Tools like Chris Pederick’s Web Developer Add-on for Firefox
also let you experiment with the design right in your browser window.
The footer also looks unfi nished still; like the header before the addition
of the background image on the body, it still looks boxy in Figure 17.16.
Remember that there can only be one background image loaded per
element in CSS 2; while one has been added to the
<body> tag, the
<html> tag has none. So here’s a bit of CSS trickery to get the same
effect from the header and body to work on the footer.
First, position the footer absolutely:
div#footer { position: absolute; }
All this does is pull the footer out of the document fl ow, and in this
case, cause the
<body> area to behave as though the footer no longer
exists. Because of that, the footer now appears over the
<html> area
of the page.
Next, we can add a background image—actually the same back-
ground image as the original footer—to the
html selector in CSS, and
222 HOW TO DESIGN AND WRITE WEB PAGES TODAY
have the image positioned at the bottom of the <html> element and
repeated on the horizontal, fi lling the entire page width just like we
did for the header (see Figure 17.17). (Once that’s been done, remove
the background image from the
div#footer style declaration.) To
make sure the image on
html displays on longer pages, it’s necessary
to put some padding on its bottom. The complete style looks like:
html {
background-image: url('gfx/footer-
background.png');
background-repeat: repeat-x; /*Tile horizontally*/
background-position: left bottom;
/*Show image at bottom of html element*/
padding-bottom: 110px;
/*Make room for the footer, and ensure that the
html area always displays, even on longer
pages*/
}
Figure 17.17. The footer positioned absolutely puts it over the top of the tiled
image on the html area.
PAGE LAYOUT 223
Figure 17.18. The page looks incomplete because of the white area at the
bottom.
The Large-Screen Problem
When designing CSS layouts, it is important to test them on a variety
of screen sizes. As Figure 17.18 shows, the page looks incomplete on
larger screens, as the bottom of the page is white.
The fi x for this is an easy one. Although we could use the trick from
earlier and set a min-height on the page, effectively pushing the
html
area to the bottom of even very large screens, that would cause scroll bars
to appear on smaller screens—falsely suggesting content below (when
in fact only empty space would appear). So a better fi x here is to set a
background color of black on the
html selector, so the entire page back-
ground matches the black on the tiled background image. Just to be safe,
add a different background color (in this case, white) to the
body selec-
tor, as the majority of the body area should be white (see Figure 17.19):
html { background-color: black; }
body { background-color: white; }
Chapter 19 will look at how DOM scripting can be used to alter your
design for larger screens.
224 HOW TO DESIGN AND WRITE WEB PAGES TODAY
NEXT STEPS
Using CSS to position elements into a layout is a matter of creating the
illusion of columns and boxes. Remember, also, when you work with
background images that they sometimes work better on elements other
than the element you’re actually trying to style, as with the header and
footer examples in this chapter. You can fi nd additional positioning
techniques and solutions at the book’s companion Web site,
http://
sustainablewebdesign.com/book/
.
The next chapter looks at adding images, video, and other media
to your pages. But expect to return to your page layout often to make
adjustments, particularly as you work to include media like images and
video that might need a wider area than your layout accounts for.
NOTE
1. Microsoft Developer Network, “CSS Compatibility and Internet
Explorer,” />Figure 17.19. A simple background color fi x makes the page look more
complete, even on large screens.
CHAPTER 18
Multimedia Content
Chapter 3 provided an overview of gathering and preparing multimedia
content, including images, audio, and video. This chapter looks at how to
display those media elements and integrate them with the design of your
page. Particularly for audio and video, there are many different ways to
load media elements on your page; this chapter will suggest only the most
accessible and sustainable methods for doing so. But because the precise
details of those methods change frequently and are a little too complex
to go into here in the book, they are available at the book’s companion
Web site,
.
The Rapid Prototyping Kit (RPK) includes a media folder with sub-
folders for images, audio, and video, as well as for Flash movies and Porta-
ble Document Files (PDFs). If you decide to host media content on your
own server (versus, for example, using YouTube for video hosting, as this
chapter recommends), take advantage of the RPK’s folders or a structure
like them to keep your media content organized and manageable.
CONTENT IMAGES
All content images—that is, all images that appear on your pages when
you mean, “Have a look at this!”—should be loaded in the XHTML
image tag,
<img /> . In addition to the <img /> tag being self-closing,
there are two important attributes that it must include,
src and alt .
•
src : the path to and name of your image fi le; remember that
Web-friendly formats include JPEG fi les (
.jpg , sometimes
226 HOW TO DESIGN AND WRITE WEB PAGES TODAY
.jpeg ), PNG fi les ( .png ), and GIF fi les ( .gif , though usu-
ally
.png is preferable to .gif ). Never try and load TIFF fi les,
or the native fi les from your image editor (e.g., the
.psd fi les
from Adobe Photoshop).
•
alt : the short alternate text for your image; I prefer to include
the text “A photo of . . . ,” or “An illustration of . . . ,” or even
“A pie graph showing . . .” to describe the nature of the image,
as well as a few words to describe its content. Web accessibility
guidelines suggest that alt text be less than 100 characters, so
do keep it brief. Also, it is good practice to include descriptive
text somewhere on your page, such as in captions, to clarify the
purpose of your images. Markup such as:
<p class="caption">
<span class="access-label">Photo caption:
</span>We took this photograph of the Thomas
Jefferson memorial during our visit to
Washington, D.C. in November of 2010.
</p>
OUTSOURCING MEDIA HOSTING
While it is possible to host all of your multimedia content on your own site, you
might consider outsourcing your media hosting—particularly video—to a third-
party service such as YouTube. The benefi t to this is not limited to reduced load on
your server for transferring big video fi les. By using YouTube or some of the other
services listed below, you also establish an account that provides yet another way
to build your identity on the Web, and another place to link back to your Web site.
Explore these and other video-hosting sites (just do a Google search for video
hosting), and try them out for picture, quality, sound sync, video length or size
limits, and, most important, the ability to load videos into your own Web pages:
• Viddler,
/>• Vimeo, />• YouTube, />Always check the terms of service for these and other video sites; some sites
prohibit commercial uses for free accounts—meaning that you probably cannot
promote your business using them.
MULTIMEDIA CONTENT 227
and accessible CSS for hiding the access label, such as:
.access-label {
display: block;
/*Display as a block for positioning*/
position: absolute; /*Pull from document fl ow*/
left: -10000px;
/*Move way left of the screen*/
}
can provide additional image descriptions for all users, while hiding
(if you’d like) the obvious “Photo caption” label that would be made
clearer in your design.
The
<img /> tag should also include height and width attributes for
your images. The values are in pixels, but you do not put the pixel unit
in the value. For example, a 200-pixel-wide by 300-pixel-tall image
would be specifi ed with
width="200" height="300" . While height
and width attributes are not required, they tell the Web browser to save
the space for your images, even before the image is done loading. That
can keep your page content from moving around as the images load.
Note that you should never resize images with the height and width
attributes; do that with your image editor’s resize or resample function
instead. The height and width attributes on your
<img /> tags should
always match the actual pixel dimensions of the images that they load.
Developing a Consistent and Attractive
Image Presentation
The <img /> tag must appear in some sort of block-level element; that
is, according to the XHTML specifi cation,
<img /> cannot be a child
of the
<body> tag. The content divisions in the RPK address this issue,
but you can go a step further to structure and display your images with
an attractive, consistent design.
One approach to designing around your images is to create a little
chunk of XHTML markup for reuse each time you want to present an
image. For example:
<div class="photograph">
<img src="" height="300" width="400" alt="Add
alt text"/>
228 HOW TO DESIGN AND WRITE WEB PAGES TODAY
<! Note the space before </span>: >
<p class="caption><span class="access-label">
Photo caption: </span>
Image description
</p>
</div>
A little bit of CSS can turn that chunk of markup into a design
that complements the photograph and its caption. This example (see
Figure 18.1) uses the CSS
fl oat: property to enable caption text to
appear alongside and, if the text is long enough, wrap around the image:
div.photograph {
background: #333; /*Photos often show up well
against darker backgrounds.*/
color: #FFF; /*White text*/
width: 678px; /*Allow for padding and border
to total 700px*/
padding: 10px; /*Add a bit of padding*/
}
div.photograph img {
border: 1px solid black; /*Give defi nition to
lighter edges of photos*/
fl oat: left; /*Float image to allow text to
appear alongside of it*/;
margin-right: 10px; /*Keep text away from the
image*/
margin-bottom: 10px; /*Also away from the
bottom, should the text wrap around.*/
}
div.photograph p.caption {
font-size: medium;
font-weight: bold;
}
As with video, images and their presentation elements (a containing
division, a caption) must be sized to work with page layout; this particular
MULTIMEDIA CONTENT 229
example image presentation would require at least a 700-pixel-wide con-
tent area. For this reason, work with your images as you develop your
page design (see Chapter 17) until you have reached a design and an
element-sizing scheme that are in harmony with each other. Images
should be large enough to be worth loading and looking at—while text
content in the same area should not be so wide as to be diffi cult to read.
Additionally, it is essential to provide accessible, alternative content
on all forms of media, usually in the form of descriptive text but also,
in the case of sound and video, transcripts of any narration or dialogue.
There are examples of embedding accessible content in the
<object>
tag (for audio and video, covered next) at this book’s companion Web
site,
.
SOUND
Perhaps more than any other media element, sound must be treated
with care if you’re not going to drive your audience away with it. For
Figure 18.1. Even minor design enhancements, such as background colors
and borders, can improve the presentation of photographs and other media—
especially if they are used consistently.
230 HOW TO DESIGN AND WRITE WEB PAGES TODAY
that reason, here is a list of the Three Deadly Sins of misusing sound
on the Web:
• Deadly Sin #1: Sound that plays automatically when some-
one loads a page. People view Web sites at work, in their of-
fi ces, or other places where sound would be embarrassing or
unwelcome if it started playing unannounced. Other people
prefer to have music playing on their computers while brows-
ing the Web. If sound starts automatically, it creates either em-
barrassment or an unnerving fi eld of sonic chaos—introducing
the potential for people to justifi ably hate your site.
• Deadly Sin #2: Sound that cannot be stopped once it begins
playing. If the only way to stop sound on a Web site is to close
it or go to another site, that is exactly what site visitors will do.
And they will be very wary of listening to any sound on your
site in the future, should they ever come back. It’s also best to
provide some mechanism to pause sound, rather than just stop
it, in case someone needs to step away from the computer but
would want to pick up where the sound left off.
• Deadly Sin #3: Sound that is recorded at low levels. Sound
that is recorded at low levels (that is, sound that is very
quiet relative to other sounds, including music and system
sounds) will force visitors to turn up their speakers as high
as they can. Such an accommodating move can just about
send people out of their minds with fright when music or
operating-system sounds—like a new email alert—play at
their higher levels. Pretty self-explanatory; computers will
play other sounds besides yours, and with the audio cranked,
poor old Uncle Ed’s ticker doesn’t stand a chance if he re-
ceives a new email or logs off his computer. Refer to the
audio section in Chapter 3 and this book’s companion Web
site at
to
learn more about ensuring proper sound levels when you
record and edit sound fi les.
There are many different plugins and players for sound (see “Audio
Players” sidebar), but the best players will build unobtrusively over
MULTIMEDIA CONTENT 231
links to your audio fi les. That is, to include sound on your page, just
link to the fi le, for example,
<a href="/media/audio/mysound.
mp3"> . That will, at the very minimum, allow someone to download
the sound fi le and play it on whatever media player the person has
available.
Going a step further, there are a few good choices for unobtrusive
JavaScript-based audio players that use Flash: the Yahoo! Media Player
is probably the easiest to add. You only have to link to it from the
<head> area of your XHTML pages, and it will detect all of the audio
fi les you link to, put a play button next to them, and add a playlist and
customizable player to the bottom of your page.
1
VIDEO AND FLASH
Depending on the region of the world, Flash is reportedly installed on
more than 90 percent (and up to 99%) of all desktop computers.
2
That
has made Flash a very popular platform for delivering video; not surpris-
ingly, YouTube, Viddler, Vimeo, and many other video-hosting services
AUDIO PLAYERS
Somewhat remarkably, there is no reliable way to play audio natively in most
Web browsers (however, HTML5 will eventually change that; see the book’s com-
panion Web site at
But in addition to enabling your users to download your audio for use on their
own MP3 players, you can try out a number of audio players for your site that
work using ordinary links to audio fi les. All of these players require the Flash
player and JavaScript, but they also leave links to your audio intact, so that
JavaScript-less users can still download your audio fi les and listen to them on
their own players:
• Yahoo! Media Player,
/>• WordPress Audio Player, />• 1 Bit Audio Player, />Even as HTML5 continues to gain in popularity, it will likely be necessary to
provide audio players such as those for users of older Web browsers.
232 HOW TO DESIGN AND WRITE WEB PAGES TODAY
use Flash to deliver video content. However, new mobile devices are
challenging the use of Flash, so it is likely that other methods for deliv-
ering video—probably coupled with HTML5—will become more im-
portant to learn in the future. Again, refer to this book’s companion
site for the latest information.
As with images, you’ll need to determine the dimensions that you
want your videos to appear at; sites like YouTube will give you differ-
ent options along these lines, but note that there are two different as-
pect ratios that are common to video. The old ratio is 4:3, which is
shared with older television sets; the newer ratio is 16:9, sometimes
16:10, which is the ratio of widescreen televisions. The aspect ratio
matters because a 4:3 video run at 640 pixels wide will be 480 pixels
tall, whereas a 16:9 video that is 640 pixels wide will appear only 360
pixels tall. That matters if you are adding additional XHTML structure
and CSS, including background images, to increase the visual appeal
of your videos.
You can also, if you have access to the proper software, author your
own Flash animations for inclusion in your Web pages. (However, as
Chapter 19 shows, you can accomplish animation by using JavaScript
and a library such as jQuery, especially for interface elements such
as the navigation.) Regardless of whether you’re loading Flash-based
video or a Flash movie of your own construction, SWFObject is one
of the better open-source JavaScript libraries for embedding Flash
content in a way that is browser-neutral and standards-compliant.
SWFObject is included with the RPK.
The SWFObject markup is too involved to show here in the book,
but there are excellent tutorials available on, for example, using
SWFObject to load YouTube videos.
3
I also have provided examples
and detailed instructions at this book’s companion Web site.
NEXT STEPS
This chapter has covered some of the core concepts and challenges
of loading media content into your Web pages. The next chapter
looks at page performance and interaction enhanced by unobtrusive
JavaScript.
MULTIMEDIA CONTENT 233
NOTES
1. Yahoo! Media Player, “How to Link,” ia
.com/wiki/How_to_link
2. Adobe, “Flash Player Version Penetration,” />products/player_census/fl ashplayer/version_penetration.html
3. Heidi Cool, “Embedding YouTube Videos the Standards Compli-
ant Way—SFWobject 2.0” [ sic ], />embedding-youtube-videos-the-standards-compliant-waysfwobject-20/