ASP.NET 4.0 in Practice phần 8 potx
Bạn đang xem bản rút gọn của tài liệu. Xem và tải ngay bản đầy đủ của tài liệu tại đây (15.35 MB, 50 trang )
325TECHNIQUE 72 Ajaxize a page using the update panel
PROBLEM
For this scenario, we’re using the same page from the previous example. You need to
update the territories list in the second drop-down list without causing a full PostBack
of the page each time the region is changed.
SOLUTION
The solution to this problem is partial rendering. The idea behind partial rendering is
pretty simple: you divide your page into different parts that are independently
updated via Ajax. When a control inside a part causes page PostBack, JavaScript on
the client intercepts it and transforms it into an Ajax call. When the call hits the
server, it’s processed as a classic full PostBack; you don’t have to change a single line of
code. When the processing is finished and the server generates
HTML for the page, it
sends to the client only the HTML code for the areas that have been updated.
The JavaScript on the page receives HTML for each updated area and uses it to
update them. Because only some areas are refreshed, this technique is called partial
rendering. Figure 12.3 illustrates partial rendering.
There’s one little caveat you must be aware of: in addition to sending the
HTML for
an area, the server sends the
ViewState
to the client. This state of affairs explains why
the PostBacks are executed normally.
At the base of partial rendering is the
UpdatePanel
control. It’s the server control
that delimits an area.
UpdatePanel
is pretty simple to use; it has a
ContentTemplate
property that contains the HTML of the area. In our sample, the
UpdatePanel
includes
both drop-down lists, as shown in this snippet:
<asp:ScriptManager Id="sm" runat="server" />
<asp:UpdatePanel runat="server">
<ContentTemplate>
<asp:DropDownList runat="server" ID="Regions" > </asp:DropDownList>
<asp:DropDownList ID="Territories" ></asp:DropDownList>
</ContentTemplate>
</asp:UpdatePanel>
We haven’t included the complete markup of the drop-down lists, but it’s the same as
you saw in the previous section. The
ScriptManager
control is the center of ASP.NET
Panel 1 Panel 2
Panel 4Panel 3
Panel 2 causes PostBack
Updates panel 1 and panel 2
with HTML from server
Sends HTML
for panel 1
and panel 2
Sends
asynchronous
PostBack
b
e
d
c
JS
Server
Figure 12.3 Panel 2 contains a button that causes a PostBack. The JavaScript on the page
intercepts the PostBack and invokes the server, simulating a PostBack with an Ajax call. The
server sends HTML for panels 1 and 2, and the JavaScript updates them.
326 CHAPTER 12 Ajax and RIAs with ASP.NET 4.0
Ajax. This control sends necessary JavaScript files to the page and enables the use of
UpdatePanel
. It also enables downloading JavaScript files from the content delivery
network (CDN), and so on.
The markup changes slightly, and the server code doesn’t change at all. With just
this small change in the markup, we’ve enabled Ajax behavior. Isn’t that awesome?
DISCUSSION
Using the update panel is a great choice when you need to do things fast and when
you have to add Ajax behavior to existing applications. But it does pose some prob-
lems, especially with performance. The update panel optimizes performance when
you compare it to the classic PostBack model, but you can optimize it even more. In
the next section, you’ll discover some additional tricks.
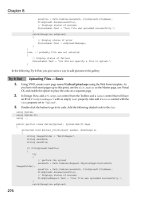
Optimizing UpdatePanel using triggers
If you use an HTTP logger (for example, Fiddler2, Firebug for FireFox, Internet
Explorer 9, or WebKit developer tools) to trace data that goes over the wire, you see
that the server sends
HTML for all controls in the
UpdatePanel
. This behavior is cor-
rect, but we need to update only the second drop-down list; sending HTML for both
lists is a waste of resources.
PROBLEM
We need to optimize the traffic between the client and server when
UpdatePanel
is
used. In particular, we need the server to send HTML to the client for only the first
drop-down list.
SOLUTION
By default, the ASP.NET Ajax JavaScript intercepts the submit triggered by the controls
inside the
UpdatePanel
. We can modify this behavior and cause an
UpdatePanel
to be
updated even when an external control triggers the PostBack. The PostBack will be
intercepted and transformed into an Ajax call, and everything works the same. Such a
workflow is shown in figure 12.4.
TECHNIQUE 73
Server
Panel 1
Panel 4Panel 3
Button1 causes PostBack
intercepted because of trigger
Updates panel 1 with HTML
from server
Sends HTML
for panel 1
Sends
asynchronous
PostBack
b
e
d
c
JS
Button1
Trigger on
Button1
Figure 12.4 The button outside panel 1 causes a PostBack. The JavaScript on the page
intercepts the PostBack (because panel 1 has a trigger on the button) and invokes the server,
simulating a PostBack with an Ajax call. The server sends HTML for panel 1 (because of the
trigger), and the JavaScript updates it.
327TECHNIQUE 74 Optimizing a page with multiple UpdatePanels
We can strip the first drop-down list off the
UpdatePanel,
leaving only the second
one. We can then instruct the
UpdatePanel
to refresh when the first list value is
changed. This instruction is known as a trigger and is shown in the next snippet.
<asp:DropDownList runat="server" ID="Regions" > </asp:DropDownList>
<asp:UpdatePanel runat="server">
<Triggers>
<asp:AsyncPostBackTrigger ControlID="Regions"
EventName="SelectedIndexChanged" />
</Triggers>
<ContentTemplate>
<asp:DropDownList ID="Territories" ></asp:DropDownList>
</ContentTemplate>
</asp:UpdatePanel>
The
Triggers
property of the
UpdatePanel
contains the external controls that cause
the panel to be updated. A trigger can be one of two types:
■
AsyncPostBackTrigger
—Causes the Ajax PostBack
■
PostBackTrigger
—Causes the classic PostBack
Each class has two properties:
■
ControlId
—Represents the name of the control that triggers PostBack
■
EventName
—The control event that triggers PostBack
After you’ve made this modification, run the page and look at the logger result. Now
each time the
Regions
drop-down list is changed, the page is submitted asynchro-
nously, and only the
Territories
drop-down list is sent to the client (along with
ViewState and other minor information).
DISCUSSION
This modification is a little tweak that makes no difference in a demo. But, if you
think about a real-world application, you’ll understand that triggers can spare you a
lot of vital resources, especially for a web application.
Using triggers isn’t the only way to optimize performance. When you have multiple
UpdatePanel
s in a page, you can granularly choose which panels you want to be
updated after an asynchronous PostBack.
Optimizing a page with multiple UpdatePanels
Let’s do a little experiment: let’s duplicate all controls so that now we have two
UpdatePanel
s in the page. Then run the sample and change the drop-down list that
causes the first panel to be updated. Now if you take a look at the HTTP logger, you’ll
notice that even if only the first
UpdatePanel
is changed, the server sends the HTML
for the second panel to the client, too. This result is a useless waste of resources.
PROBLEM
Suppose that you have a page with multiple update panels. You need to figure out how
to optimize it. When the server is invoked and only one
UpdatePanel
is updated, the
server has to send to the client only the HTML for the modified panel, not for all of them.
TECHNIQUE 74
328 CHAPTER 12 Ajax and RIAs with ASP.NET 4.0
SOLUTION
By default, the server sends the HTML for the all
UpdatePanel
s in the page to the cli-
ent. Why is this the outcome? Suppose that you have two
UpdatePanel
s. When a but-
ton is clicked in the first one, a value in the second one is updated. If the server sent
HTML for the first panel only, the second one would never be updated and you would
end up showing stale data.
Sometimes this behavior is unnecessary and causes a significant performance slow-
down. For those cases, you can set the
UpdateMode
property to
Conditional
. This set-
ting instructs the
UpdatePanel
to be updated only when a control inside it or one
specified in the
Triggers
collection causes a PostBack.
<asp:UpdatePanel runat="server" UpdateMode="Conditional">
Now, when a control in an
UpdatePanel
issues a PostBack, the server sends to the cli-
ent the HTML code for that
UpdatePanel
only, and you get a big performance boost.
Depending on the runtime condition, you might need to update another panel. In
these cases, you can programmatically cause the other panel to be updated by invok-
ing the
Update
method of the
UpdatePanel
class:
C#:
otherPanelField.Text = "Value";
otherPanel.Update();
VB:
otherPanelField.Text = "Value"
otherPanel.Update()
The result of this code is that the first panel is updated because a control inside it
caused the PostBack, and the second one is updated because it was explicitly marked
via code.
DISCUSSION
When you’re working with multiple
UpdatePanel
s in a page, you have several options
for increasing optimization. Doing nothing is the best way to do the worst thing.
Always keep in mind the tricks you’ve learned in this section; they can make a big dif-
ference, especially if the page gets a lot of traffic.
So far we’ve been talking only about the server code. The
ASP.NET Ajax JavaScript
enables you to intercept the Ajax call pipeline and perform any arbitrary code before
and after the call to the server. Let’s look at that more closely.
Intercepting client-side pipeline
The ASP.NET Ajax framework has a server control named
UpdateProgress
. This con-
trol lets you define an HTML template that shows a wait message while the Ajax Post-
Back is being processed on the server. To do that, the control injects JavaScript code
on the page that shows the
HTML template before the call to the server and hides the
HTML template after the response from server has been received. The pipeline isn’t a
black box; we can use it to inject our logic.
TECHNIQUE 75
329TECHNIQUE 75 Intercepting client-side pipeline
PROBLEM
Suppose you’re working on orders. Each time you perform an action that causes a
PostBack, you also have to check whether a new order has been added. If one has
been added, you have to show a message to the user.
SOLUTION
You used the
UpdatePanel
to send HTML to modify the panels on the page. Now
you’re going to use the
ScriptManager
to send additional custom information that
can be processed on the client. When a PostBack occurs, you can perform a query on
the database to check for new orders and then send a boolean to the client. The client
receives the data and shows a message if new orders have come in. Figure 12.5 shows
the flow.
The method of the
ScriptManager
class that lets you add custom information is
RegisterDataItem
. This method accepts a
Control
instance and the value associ-
ated with it. The value can even be a class. The value will be serialized on the client
in
JSON format.
C#:
sm.RegisterDataItem(this, "true");
VB:
sm.RegisterDataItem(Me, "true")
When data returns on the client, you intercept it the moment the PostBack result is
processed and inject your code. Intercepting the result of the client-side PostBack pro-
cessing is pretty easy. When the page is initially loaded, you retrieve the
PageRequest-
Manager
object through its static
getInstance
method, which is the component that
intercepts the page PostBack and transforms them into Ajax calls. Then you use the
add_endRequest
method to pass a method that’s invoked when the client has finished
processing the server data:
Server
Panel
Panel causes PostBack
Updates panel and shows or
hides message based on
boolean value
Sends HTML
for panel and
boolean to
show message
Sends
asynchronous
PostBack
b
e
d
c
JS
Message
Figure 12.5 The panel contains a button that causes a PostBack. The JavaScript on the page
intercepts the PostBack and invokes the server, simulating a PostBack with an Ajax call. The
server sends HTML for the panel and a boolean that specifies whether the message should be
shown. The JavaScript updates the panel and either shows or hides the message, depending on
the value from the server.
330 CHAPTER 12 Ajax and RIAs with ASP.NET 4.0
<script type="text/javascript">
Sys.Application.add_init(function () {
var prm = Sys.WebForms.PageRequestManager.getInstance();
prm.add_endRequest(function (form, handler) {
(handler._dataItems.__Page);
});
});
</script>
The
Sys.Application
gives you access to page events. By using the
add_init
method,
you can be sure that the function inside it is invoked as soon as the page is loaded.
The main thing to notice is that you have to put this method at the bottom of the page
and not in the
Head
section of the HTML.
DISCUSSION
By using this approach wisely, you can reduce
UpdatePanel
controls in your pages and
highly optimize performance because only data, and not HTML, goes over the wire.
Even if this approach is somewhat complicated because it requires you to write more
JavaScript code, it’s flexible and offers the best possible performance.
If you take this client-centric approach to the extreme, you can completely elimi-
nate the
UpdatePanel
. The server just returns data and doesn’t care about its HTML
representation—that’s client-side business. To remove the
UpdatePanel,
you have to
radically change your approach and deal with tons of JavaScript code. But there is a
better way.
ASP.NET Ajax has a rich client-side framework that enables you to simplify
JavaScript coding. But jQuery is even more powerful and easier to use. Now you’re
going to discover how to follow the client-centric pattern to enable Ajax behavior in
ASP.NET applications using jQuery instead of ASP.NET Ajax.
12.3 Focusing on the client: jQuery
Let’s face it: developing JavaScript code is one of the most annoying things in the
programming world. There’s no compile-time checking, different browsers are sub-
tly different, and editors offer limited features compared with what they offer for
server-side code.
jQuery isn’t a magic wand. It won’t solve all your problems, but it can surely miti-
gate them. It abstracts differences between browsers, has great support for autocom-
plete in Visual Studio, and lets you write very little code (sometimes just one line) to
create powerful features. It also has other advantages: it lets you query the page Docu-
ment Object Model (
DOM) using a correctly formatted string, has fluent APIs and,
maybe most important, it’s free!
Thanks to all these great features, Microsoft has made an agreement with the
jQuery team, and now jQuery is integrated into Visual Studio templates. When you
create a web application using Visual Studio, jQuery files are already in your applica-
tion (this is true for both Web Forms and
MVC applications)—you don’t need any
external files. Let’s find out how to use jQuery.
331TECHNIQUE 75 Focusing on the client: jQuery
12.3.1 jQuery Basics
Before delving into specific features of jQuery, let’s cover the basics of this powerful
framework. At the base of jQuery is the magic
$
character. If you’re not an experienced
JavaScript developer, you might be surprised to know that this character is a method. The
$
method is the entry point for all jQuery features. In this section, we’re going to
explore the most important features so that next sections will be easier to understand.
QUERYING THE DOM
When the browser receives HTML, the browser parses it and renders it on screen. Dur-
ing parsing, it also creates an internal representation of the controls and organizes
them hierarchically. This internal representation is called the
DOM.
When you have to refer to a control in JavaScript, you have to use the
GetElement-
ById
method of the
Document
class. Doing this isn’t hard, but it requires a long state-
ment. jQuery makes things much faster. Take a look at the next snippet to get an idea
of the power of jQuery:
Classic JavaScript:
document.getElementById("objId");
jQuery:
$("#objId");
In this case, the
$
method accepts a string representing the object to retrieve. The fan-
tastic part is that although
getElementById
lets you find only one object, jQuery offers
a pattern to retrieve as many objects as you need in many ways. Here we used the
#
character to specify that we’re searching for an object by its ID. If you’re familiar with
CSS, you know that the
#
character is used to identify an object by its ID. jQuery lever-
ages CSS syntax to enable you to query the DOM by using just a string. In classic
JavaScript, you would need tons of lines of code to do the same thing.
Now you can retrieve all objects of a given type using the next snippet:
$("span");
You can also apply additional filters. For example, if you have to search all
span
tags
that have the
red
CSS class, you have to write the following snippet:
$("span.red");
Once again, if you’re familiar with CSS, this syntax is clear to
you; if you’re not, this syntax is simple to understand, so
fear not.
The searches we’ve performed so far have looked for an
object in the whole
DOM. Sometimes you need to start from
a known object and then traverse the DOM to look for its
immediate children, its indirect children, or its siblings.
Let’s see how that works.
Suppose that you have a form with a set of options. Each
option is represented by a check box and a
span
, like in fig-
ure 12.6.
Figure 12.6 A form
with several options. Each
check box is followed by a
span with the option label.
332 CHAPTER 12 Ajax and RIAs with ASP.NET 4.0
The following HTML renders the result shown in figure 12.6:
<div id="checkContainer">
<input type="checkbox" /><span>Option 1</span><br />
<input type="checkbox" /><span>Option 2</span><br />
<input type="checkbox" /><span>Option 3</span><br />
<input type="checkbox" /><span>Option 4</span><br />
<input type="checkbox" /><span>Option 5</span><br />
<input type="checkbox" /><span>Option 6</span><br />
<input type="checkbox" /><span>Option 7</span><br />
<input type="button" value="check" onclick="checkOptions()" />
</div>
If you want to retrieve the options that the user selects, issue the following query:
$(":checkbox:checked");
The
:checkbox
command is a shortcut to retrieve check boxes;
:checked
is another
shortcut to retrieve only the checked items.
If you want to show a message to the user with selected options, you need to
retrieve the span next to the check box; in other words, you need the siblings of the
selected check boxes:
$(":checkbox:checked + span");
The
+
character instructs jQuery to retrieve
span
tags that are next to the check box.
As before, you would have to write a lot of code to do this in classic JavaScript.
Now suppose that you have a treeview built using
ul
and
li
tags. The HTML of the
treeview is represented by the code in the next snippet.
<ul id="tree">
<li>Node1
<ul>
<li>Subnode1</li>
<li>Subnode2</li>
</ul>
</li>
<li>Node2
<ul>
<li>Subnode1</li>
<li>Subnode2</li>
</ul>
</li>
</ul>
If you want to extract all nodes of the treeview, you need to issue this query:
$("#tree li");
The query simply retrieves the element with id
tree
and then takes all its direct and
indirect children
li
tags. If you need only the direct children, you need to modify the
query slightly:
$("#tree > li");
333TECHNIQUE 75 Focusing on the client: jQuery
The
>
char does the trick of taking only the direct children. This query returns only
the
Node1
and
Node2
elements of the HTML shown in previous snippet.
You can retrieve objects in other ways using jQuery. Discussing all of them is
outside the scope of this book. If you’re interested in deepening your knowledge,
read jQuery in Action by Manning Publications or browse the online docs at
www.jQuery.com.
Besides using a formatted string to query the
DOM, jQuery lets you use methods,
too. Read on.
QUERYING THE DOM USING METHODS
Many times you already have an instance of an object and you need to use it to find
others. Revisiting the previous example about the treeview, you might have a method
that receives the tree object and then needs to retrieve all its children. To do this, you
need methods that work with the object you’ve received. Using strings is still feasible,
but harder to work out; for that reason, we don’t recommend that solution. jQuery
methods are pretty easy to use and have a one-to-one mapping with characters in the
string syntax.
Suppose that you receive an object and need to find all the spans inside it. The
best way to find them is to wrap the object inside a jQuery object and then use the
find
method to pass in a string query:
$(obj).find("span");
If
obj
is the JavaScript
document
object, this statement retrieves all the spans in the
page. Pretty easy, isn’t it? If you need to find all the check boxes that have been
selected in a list, you’ll probably have to search inside their container element. In this
case, nothing changes because you encapsulate the container element in a jQuery
object and then use the same query we’ve used previously:
$(obj).$(":checkbox:checked");
If you need to find all the children of the treeview starting from the
tree
element, you
can use the
find
method once again:
$(tree).find("li");
The
find
method searches recursively between the children; if you need only direct
children, you have to use the
children
method:
$(tree).children("li");
jQuery has plenty of methods to traverse the DOM; showing all of them isn’t possible
for the sake of brevity. It’s our experience that the
find
and
children
methods are
the most used, along with the
parent
method (which returns the parent element of
the object).
So far you’ve seen that if you pass a string to the
$
method, you perform a query; if
you pass an object, it’s included in a jQuery object that you can then query using
methods. Now let’s discover what happens if you pass a method.
334 CHAPTER 12 Ajax and RIAs with ASP.NET 4.0
HANDLING THE PAGE LOADED EVENT
In ASP.NET Ajax, you use the
Application
object to execute some code when the page
is loaded. In jQuery, you can write a method and then pass it to the
$
method:
$(function () {
alert("Page loaded");
});
You can put any logic you need inside the method. If you compare this code with the
code required by ASP.NET Ajax, you’ll realize that jQuery requires much less code to
get the same result.
So far we’ve been querying the
DOM. The last basic task we’re going to face is mod-
ifying DOM objects that were retrieved using jQuery.
MANIPULATING THE DOM
When you manipulate the DOM, you’re modifying an object of the page. You can mod-
ify objects in several ways. For instance, you can add or remove an element; add, mod-
ify, or remove an attribute; and so on.
Working with attributes is probably the easiest thing to do. Building on the previ-
ous example about check boxes, suppose that you have a button that checks or
unchecks all of them. To select all check boxes, you can use the
attr
method:
$(":checkbox").attr("checked", "checked");
This method retrieves all check boxes and, for each of them, invokes the
attr
method.
attr
adds an attribute to the DOM element using the first parameter as the
name and the second as the value. The result is that all check boxes will have the fol-
lowing
HTML:
<input type="checkbox" checked="checked" />
What’s great about this method is that if the attribute already exists, it doesn’t write it
again, but modifies the existing one. The result is that a single method can be used for
both adding and modifying attributes.
Coming back to the example, to unselect all check boxes, we have to remove the
checked
attribute. You can do this by using the
removeAttr
method:
$(":checkbox").removeAttr("checked");
The
removeAttr
method is pretty simple because it accepts only the name of the attri-
bute to remove.
Let’s change the subject a bit and talk about adding elements. Again, going back to
the treeview example, sometimes you need to add a new element to a node. To do
that, you have to create a new element and then append it to the node. You’ll be
amazed by the simplicity of the jQuery code that does seemingly complicated stuff like
this. Take a look:
$("#tree li:first > ul").append($("<li>").html("last node"));
335TECHNIQUE 75 Focusing on the client: jQuery
The initial query retrieves the element to which the new element must be added. First,
the query gets the
tree
element; then it takes the first
li
children and goes to the
ul
direct child. This example gives you a great idea of jQuery potential.
After retrieving the
treeview
node, we use the
append
method to add a DOM ele-
ment. The
append
method accepts a parameter that contains a jQuery object contain-
ing one or more DOM elements. We build a new jQuery object with an
li
tag and set
the inner HTML coding to
last node
.
NOTE The <tag> syntax is special syntax that tells the $ method that although
we’re passing a string, we don’t need to issue a query; rather, we’re just creat-
ing an object with that tag.
To solve this problem, we could have taken the opposite approach: create the new
object and append it to the
treeview
element. In this case, we would use the
appendTo
method:
$("<li>").html("last node").appendTo($("#tree li:first > ul"));
Both methods work in the same way, so choosing one way or the other is just a matter
of personal taste.
Suppose that now you want to remove the element you just added. You have to
retrieve the element through a query and then invoke the
remove
element:
$("#tree li:first > ul > li:last").remove();
The query is similar to the one in the previous example. We’ve just added navigation
to the node we added (
:last
is a query predicate that instructs jQuery to take only the
last element). We then invoke
remove
to delete the item from the DOM.
Knowledge of DOM manipulation is vital when you’re going the Ajax way. With
jQuery, you don’t use ASP.NET built-in behaviors. Instead, you manually fetch only
data from the server and then update the interface using the jQuery manipulation
methods we’ve talked about in this section.
Now we can move on to the last jQuery building block: event management.
MANAGING AN OBJECT’S EVENTS
With jQuery, you can dynamically add a handler to the events of a control on a page.
You can add a handler that’s triggered when a button is clicked, when a drop-down
item is changed, or when the value of a text box is changed. You can also remove a
handler in the same way and even trigger a specific event. The end result is that you
can fully manage events.
Let’s take a super-easy example. Suppose that you want to show a message when
the user clicks a button. You generally write code like this:
HTML:
<input type="button" onclick="action();" />
JS:
function action(){ alert("you clicked the button"); }
336 CHAPTER 12 Ajax and RIAs with ASP.NET 4.0
The bad thing about this code is that you mix up JavaScript in the HTML code. HTML
should contain only representational data, leaving to JavaScript the task of adding
behavior. jQuery lets you strip out that ugly
onclick
from the HTML and lets you eas-
ily add a handler to the
onclick
event:
HTML:
<input type="button" id="btn"/>
JS:
$(function(){
$("#btn").click(function(){
alert("you ckicked the button");
});
});
When the page is loaded, you retrieve the button and add the event handler through
the
click
method. The code you need to write has increased, but the benefits are
enormous because the clean separation of tasks you’ve gained between the HTML and
JavaScript makes things easier to maintain.
jQuery has a method for each event type. For example, you can use the
change
method to attach a handler when a drop-down item is changed or when a text box
value changes.
focus
and
blur
are used to attach an event when a control is in and
out of focus, respectively. Other methods are also available; because we’re not going
to cover all of them here, you should take a look at jQuery in Action or use the online
documentation to get a full reference to them.
Sometimes you might want to trigger an event programmatically. To do this, you
just need to invoke the same methods you’ve already seen, without passing any param-
eters. For example, to trigger the
click
event of the button, you can write the follow-
ing statement:
$("#btn").click();
Congratulations! You just went through a fast-paced introduction to the world of
jQuery. We haven’t told you everything you can do with jQuery, but now you have a
clear idea of how jQuery simplifies development by making it easier to do and cutting
out tons of lines of code. Now we can move on and explore how to use jQuery to
enable Ajax in
ASP.NET applications.
Invoking REST web services with jQuery
jQuery lets you invoke the server in different ways. It has a low-level method named
ajax
that you can use to specify all call parameters; a set of specific high-level methods
are built on it. You have a method to perform POST, another one for GET, and other
ones for retrieving JSON data or a JavaScript file. You have a lot of choices, but the
ajax
method is the best way to go.
PROBLEM
Suppose you have a page that shows customer details. The user might want to know
the total cost of the orders placed by a particular customer. Because the query might
TECHNIQUE 76
337TECHNIQUE 76 Invoking REST web services with jQuery
be heavy, it’s performed only when the user explicitly requests it by clicking a button.
You need to intercept the click, call the server to get the total amount of the orders for
that customer, and then show it on the page.
SOLUTION
Creating this solution is pretty simple. First, you have to create a web service on the
server that exposes the function via a REST call. To do that, add an item of type Ajax-
enabled WCF Service to the project and name it
RestService
. Visual Studio automatically
creates the plumbing to expose the web service via a REST. More precisely, it inserts in
the web.config file all necessary WCF configurations, as shown in the following listing.
<system.serviceModel>
<behaviors>
<endpointBehaviors>
<behavior name="RestServiceAspNetAjaxBehavior">
<enableWebScript />
</behavior>
</endpointBehaviors>
</behaviors>
<serviceHostingEnvironment
aspNetCompatibilityEnabled="true"
multipleSiteBindingsEnabled="true" />
<services>
<service name="RestService">
<endpoint address=""
behaviorConfiguration=
"RestServiceAspNetAjaxBehavior"
binding="webHttpBinding"
contract="RestService" />
</service>
</services>
</system.serviceModel>
When web.config is ready, you need to create the method that exposes the total orders
amount for the client. You have to put this method in the
RestService
class that’s in
the
RestService.cs|vb
file inside the
App_Code
directory. The code for the whole
class is shown in the next listing.
C#:
[ServiceContract]
[AspNetCompatibilityRequirements(RequirementsMode =
AspNetCompatibilityRequirementsMode.Allowed)]
public class RestService
{
[OperationContract]
public decimal GetOrdersAmount(string CustomerId)
{
using (var ctx = new NorthwindEntities())
Listing 12.2 The web.config code needed to configure the REST service
Listing 12.3 The service class that exposes the total orders amount
Expose service
to JavaScript
Make service compatible
with ASP.NET
Expose
service
338 CHAPTER 12 Ajax and RIAs with ASP.NET 4.0
{
return ctx.Orders.Where(o => o.CustomerID == CustomerId).
Sum(o => o.Order_Details.Sum(d => d.UnitPrice * d.Quantity));
}
}
}
VB:
<ServiceContract> _
<AspNetCompatibilityRequirements(_
RequirementsMode := AspNetCompatibilityRequirementsMode.Allowed)> _
Public Class RestService
<OperationContract> _
Public Function GetOrdersAmount(CustomerId As String) As Decimal
Using ctx = New NorthwindEntities()
Return ctx.Orders.Where(Function(o) _
o.CustomerID = CustomerId).Sum(Function(o) _
o.Order_Details.Sum(Function(d) d.UnitPrice * d.Quantity))
End Using
End Function
End Class
The web service class is pretty simple. You just mark it with the
ServiceContract
(
Sys-
tem.ServiceModel
namespace) and
AspNetCompatibilityRequirements
(
System.
ServiceModel.Activation
namespace) attributes. The methods to be exposed must
be marked with the
OperationContract
attribute (
System.ServiceModel
namespace).
The method itself just calculates the total amount for the input customer.
Now that the web service is created, we need to write the JavaScript code to invoke
it. The method to use is
ajax
. It’s a low-level method that lets us specify all the param-
eters of the call. Let’s take a look at the code in the following listing.
$.ajax({
url: "RestService.svc/GetOrdersAmount",
data: '{ "CustomerId": "ALFKI" }',
type: "POST",
contentType: "application/json",
dataType: "json",
success: function (result) {
//code
}
});
We’ve got a lot to talk about in this listing. First of all, the
ajax
method accepts
just one parameter, which is a class containing all the real parameters. The first
parameter of the class is
url
, which specifies the web service URL. The URL is made of
the web service name (
RestService.svc
), plus the
/
character and the method name
(
GetOrdersAmount
).
Next, the
data
parameter contains the method parameters. This class must be a
stringified JSON class. This point is important; if this class isn’t rendered correctly, the
server won’t be able to process the information.
Listing 12.4 Invoking the server using the jQuery API for Ajax
339TECHNIQUE 77 Invoking page methods with jQuery
The
type
parameter specifies how the request is submitted to the server. WCF
REST services allow only POST calls (unless manually configured to accept GET), so
you should force a POST. The
contentType
and
dataType
parameters inform the
server about how data is serialized when they’re sent from client to server and from
server to client, respectively. In this case, data is both sent and received using the
JSON format.
Finally, the
success
parameter specifies the callback to invoke when data is
returned. Notice that the result is a class that contains several properties and the
server result is exposed via the
d
property. Other than
success
, you can use
error
to
specify the callback to execute when the server call generates an error.
Now that we have data from the server, we have to update the interface to show the
orders amount. This process is almost trivial, thanks to the manipulation methods of
jQuery. All you need to do is write the following statement in the
success
handler:
$("#amount").html(result.d);
This code retrieves the
span
tag, which shows the amount (the
span
tag that has the ID
amount
) and sets its content to the value returned by the server.
DISCUSSION
As you’ve learned in this section, manipulating the interface using server data isn’t
that difficult. In this example, the interaction has been overly simple because only one
field had to be updated. When you have to update more complex widgets (a grid, for
instance), then things get complicated. No matter what though, it’s just a matter of
retrieving the objects and setting their values—nothing more than that. More code
might be necessary, but the technique doesn’t change.
Sometimes you need a method only in a page. For these situations, placing it in a
web service might be useless. What you can do instead is create a method in the page
that requires it and then expose it to the client.
Invoking page methods with jQuery
It’s quite likely that you need the total orders amount calculation only in the page that
shows the customer. Placing the method that calculates this amount in a web service is
perfectly valid, but placing it only in the page that requires it might be a good idea,
too. In
ASP.NET terminology, such a method is called a page method.
PROBLEM
We need to create a method that calculates the total orders amount. Such a method
must not live in a web service, but only in the page that uses it. This method must be
available to the client.
SOLUTION
A page method is a method, just like all the others. It lives in the
page
class, and it must
be static and marked with the
WebMethod
attribute (
System.Web.Services
namespace). The following listing shows the code for this method.
TECHNIQUE 77
340 CHAPTER 12 Ajax and RIAs with ASP.NET 4.0
C#:
[WebMethod]
public static decimal GetOrdersAmount(string CustomerId)
{
using (var ctx = new NorthwindEntities())
{
return ctx.Orders.Where(o => o.CustomerID == CustomerId)
.Sum(o => o.Order_Details.Sum(d => d.UnitPrice * d.Quantity));
}
}
VB:
<WebMethod> _
Public Function GetOrdersAmount(CustomerId As String) As Decimal
Using ctx = New NorthwindEntities()
Return ctx.Orders.Where(Function(o) _
o.CustomerID = CustomerId).Sum(Function(o) _
o.Order_Details.Sum(Function(d) d.UnitPrice * d.Quantity))
End Using
End Function
As you can see, the code in this method is identical to what you saw in the previous
section. The only change is that the method is marked with the proper attribute and is
static. The method is now available to the client and can be invoked using the same
JavaScript code of the previous section; only the
url
parameter changes, as you can
see in the next snippet:
$.ajax({
url: "page.aspx/GetOrdersAmount",
data: '{ "CustomerId": "ALFKI" }',
type: "POST",
contentType: "application/json",
dataType: "json",
success: function (result) {
//code
}
});
The
url
parameter consists of the page name, plus the
/
character and the method
name (it’s similar to the web service URL); the rest remains identical. This code wasn’t
difficult at all!
DISCUSSION
The decision to place spare methods only where they belong is a good one. The prob-
lems occur when such a method must be used in other pages, too. The method can be
duplicated in each
page
class, the client code for all pages can invoke the method in
the original page, or you can move the method into a web service. The last choice is
definitely our favorite because each time you have a common method, it’s best to place
it in a common place.
Listing 12.5 Invoking the server using jQuery API for Ajax
341TECHNIQUE 78 Invoking MVC actions with jQuery
So far we’ve talked about how to use jQuery and the Web Form technique. Let’s
take a quick look at how to make jQuery query the server when you’re using MVC.
Invoking MVC actions with jQuery
In MVC, each action has a specific URL. Invoking a URL and passing parameters is
what we’ve been doing so far with jQuery, so using it to call MVC actions should be
pretty easy.
PROBLEM
We need to create an MVC action that retrieves the total orders amount and returns it
to the client. We then need to invoke the action the Ajax way using jQuery.
SOLUTION
Creating the action is unbelievably simple. We just need to return the amount using
the
Content
method, which is shown in the following listing.
C#:
public ActionResult GetOrdersAmount(string CustomerId)
{
using (var ctx = new NorthwindEntities())
{
return Content(
ctx.Orders.Where(o => o.CustomerID == CustomerId)
.Sum(o => o.Order_Details.Sum(d => d.UnitPrice * d.Quantity));
}
}
VB:
Public Function GetOrdersAmount(CustomerId As String) As ActionResult
Using ctx = New NorthwindEntities()
Return Content(
ctx.Orders.Where(Function(o) _
o.CustomerID = CustomerId).Sum(Function(o) _
o.Order_Details.Sum(Function(d) d.UnitPrice * d.Quantity))
End Using
End Function
When we have the action, we can invoke it using the
get
method:
$.get(
"/home/GetOrdersAmount",
{ CustomerId: "ALFKI" },
function (data) {
//code
}
);
The first parameter of the
get
method is the URL of the action, the second one
accepts the parameters of the action, and the last one represents the callback to be
invoked when data is returned.
Listing 12.6 The action that returns the total orders amount
TECHNIQUE 78
342 CHAPTER 12 Ajax and RIAs with ASP.NET 4.0
Using the
get
method is convenient because it requires less code. You can always
use the
ajax
method if the
get
method doesn’t fit your situation. If, instead of a sim-
ple number, you have more complex data, you can return it in JSON format. In that
case, you’ll have to use the
getJSON
method instead of
get
.
DISCUSSION
We’ve covered all of the ways ASP.NET exposes methods to the client and how to con-
sume them using jQuery. Although you can use other ways to invoke the methods
using jQuery, the
ajax
,
get
, and
getJSON
methods are, in our experience, the ones
used the most.
We’ve been discussing some basic behavior of jQuery. Now it’s time to talk about
the library that made jQuery a real success: jQuery
UI. jQueryUI is a set of ready-to-use
jQuery plugins that enable you to enrich your interface with so little code that you
won’t believe it.
Enriching the interface via jQueryUI
jQuery has a stable and robust core. When it was completed, jQuery was used to
develop a set of widgets that have been included in a library named jQueryUI. This
library includes widgets like a datepicker, an accordion, a tab control, a slider, an auto-
complete, and others. These widgets are not included in
ASP.NET templates, so you
have to download them as a separate package. The package is small, and, believe me,
you’ll never regret the time it took to get it.
The library is freely downloadable from the web site.
You should also download the jQuery themes because they contain a ready-to-use
CSS
classes and images.
PROBLEM
Suppose that you’re building a page to submit a new order. In this page, the user must
enter the customer, the required shipping date, the shipping address, and the order
details. The requirements state that the user must enter the customer name in a text
box where autocomplete is enabled. Filling in the date must be eased by a calendar
control, and customer and order details must be entered in a separate section. Finally,
before the data is submitted to the server, a modal dialog box must be shown to the
user for data confirmation.
SOLUTION
Wow, that’s a lot of requirements. Even so, they’re pretty common in many applica-
tions, so facing them now is going to help you in your everyday work. We’re going to
go over each of these requirements; let’s start with the autocomplete requirement.
To attach autocomplete behavior to a text box, you simply have to retrieve it using
a query and then invoke the
autocomplete
method. The best place to put such code is
in the event JavaScript fires when the browser loads the page:
$(function(){
$("#CustomerName").autocomplete();
});
TECHNIQUE 79
343TECHNIQUE 79 Enriching the interface via jQueryUI
By default, the
autocomplete
method takes the autocomplete items from a list that
you can pass as a parameter. In this case, we want the behavior to go to the server.
What we can do is add a method to the
REST service we created in the previous sec-
tion. This method returns the customer names that contain the value entered in the
text box. This method takes a string parameter whose name must be
term
and that
contains the value entered in the text box.
NOTE We’re not showing the code for this method because it’s WCF related.
You’ll find it in the source code for the book.
When that’s done, we can pass the
source
parameter to the
autocomplete
method,
specifying the REST service method URL. The next snippet shows an example of this
parameter:
$("#CustomerName").autocomplete({
source: "RestService.svc/GetCustomers",
});
In addition to the
source
parameter, we can also set
the number of characters that is necessary to issue a
call to the server. By default, that value is
3
, but we
can modify it using the
minLength
parameter. The
final result is visible in figure 12.7.
Now that we have the autocomplete, it’s time to
add datepicker behavior to the text box that holds
the required shipping date. To add a datepicker, you
have to retrieve the text boxes using a query and then
use the
datepicker
method:
$("#CustomerName").datepicker();
The
datepicker
method enables you to easily select a date, but naturally you don’t
want the user to select a date before today. To avoid such an error, we have to restrict
the range of available dates from today to forever. Passing the
minDate
parameter to
the
datePicker
method does just that. You can set this parameter to several values,
but the best way to go is to pass a date. The
datepicker
method disables all days
before that date. Because we don’t want the user to select a date before today, we’ll
pass the current date:
$("#CustomerName").datepicker({ minDate: new Date() });
To make things complete, we also have a
maxDate
parameter, which works exactly like
the
minDate
with the only difference being that it disables all days after the date you
pass to it. If you want to prevent the user from selecting a date farther in the future
than a certain number of days after the current date, you can create a new date
instance, add the number of days (we’re using 10 days), and then set the
maxDate
parameter. This solution will work, but there’s a simpler way. You can simply set the
maxDate
parameter to the string
+10D
(10 days):
$("#CustomerName").datepicker({ minDate: new Date(), maxDate: "+10D" });
Figure 12.7 The autocomplete
options are shown below the text
box. By typing the letters “al”, you
can obtain a list of all customers
whose name contains these letters.
344 CHAPTER 12 Ajax and RIAs with ASP.NET 4.0
The result is that when the text box
accepts the focus, a calendar is shown, like
in figure 12.8.
You can also limit the years (
Y
) and
months (
M
) that are shown by using the
same syntax.
We can also set other properties like
numberOfMonths
, which specifies how many
months are visible in the calendar;
day-
Names
and
dayNamesShort
, to customize
the names of the days (useful for localiza-
tion);
monthNames
and
monthNamesShort
,
to customize the name of the months (also
useful for localization); and
dateFormat
, to
specify the format of the date in the text
box. These parameters are shown in the
next snippet:
$("#CustomerName").datepicker({ minDate: new Date(), maxDate: "+10D",
monthNames: ["Jan", "Feb", "Mar", "Apr", "May", "June", "July", "Aug",
"Sept", "Oct", "Nov", "Dec"],
dayNames: ["Sun", "Mon", "Tue", "Wed", "Thurs", "Fri", "Sat"],
dateFormat: "mm/dd/yy"
});
Okay, we have the autocomplete for the customer name and the calendar for the
required shipping date. Now it’s time to separate the order information from the
details. The best way to separate content in the same page is to group data into tabs.
jQuery
UI has a component that lets you do that easily. You produce the HTML code in
a convenient way and jQuery takes care of the rest. The HTML is shown in the follow-
ing listing.
<div id="tabs">
<ul>
<li><a href="#orderData">order</a></li>
<li><a href="#details">details</a></li>
</ul>
<div id="orderData">
<!—Order data >
</div>
<div id="details">
<!—-Order details >
</div>
</div>
The HTML code is pretty simple. First, you need a container for the tabs (the
div
with
ID
tabs
). After that, you use
li
tags to create a list of tab headings. Inside each
Listing 12.7 Organizing a page using tabs
Figure 12.8 By using the jQueryUI library, you
can set the maxDate parameter so that only
the current date and the next 10 days are
available on the calendar.
345TECHNIQUE 79 Enriching the interface via jQueryUI
header, you place the
a
tag and set its
href
property to the ID of the tab it refers to
(prefixed by the
#
character). Finally, you create a
div
for each tab and place the con-
tent inside them.
When you’ve got your
HTML and it’s correctly produced, use jQuery to show it as a
tabbed structure. You can do this easily by retrieving the main container and invoking
the
tabs
method:
$("#tabs").tabs();
If you don’t believe it’s that easy, take a look at figure 12.9, which shows the result of
this code.
The last requirement we need to meet is to show a confirmation dialog box where
the user confirms the data submission. The first step toward achieving this goal is to
create a
div
tag containing the confirmation message:
<div id="dialog">Are you sure you want to save?</div>
Now we need to use jQuery to transform this
div
into a modal dialog box and show it
when the user clicks the Save button. Retrieve the
div
and use the
dialog
method:
$("#dialog").dialog({ title: "confirmation", modal: true, autoOpen: false,
buttons: { Yes: Yes_Click, No: No_Click} });
The
dialog
method has several parameters, but the ones used in this snippet are the
most important for our purposes. Let’s see them in detail in table 12.2.
Now that we have the confirmation dialog box ready, we have to open it when the user
clicks the Save button. To do that, we retrieve the button and, in its
click
event,
retrieve the
div
of the dialog box and invoke once again the
dialog
method, passing
in the
open
string:
Table 12.2 Main properties of the dialog method
Property Description
autoOpen
Specifies whether the dialog is shown immediately or only when the code explicitly
requests it
buttons
Specifies the button in the bottom part of the dialog and the code to be invoked when
it’s clicked
modal
Instructs jQuery to create a modal dialog
title
The message that’s shown in the header of the dialog message
Figure 12.9 The figure shows
the result of the HTML in listing
12.7, after we invoke the tabs
method. A little bit of code for a
big gain in the user-friendliness
of your page.
346 CHAPTER 12 Ajax and RIAs with ASP.NET 4.0
$("#Save").click(function () {
$("#dialog").dialog("open");
});
You can see the result of this method in figure 12.10.
As you probably know, at this point all we need to do is intercept the user answer
and take the appropriate action. If the user clicks the Yes button, we close the dialog
box and submit the page; if they click No, we simply close the dialog box. Closing the
dialog box is pretty simple. We retrieve the dialog
div
and call the dialog method,
passing the
close
string:
function Yes_Click(ev){
//submitForm
$("#dialog").dialog("close");
}
function No_Click(ev) {
$("#dialog").dialog("close");
}
That’s it! It took a while, but now you know how to use jQueryUI to add user-friendly
behaviors to your page without writing a lot of extra code.
DISCUSSION
jQuery and jQueryUI are a must have in your toolbox. It’s hard to imagine a mod-
ern web application that doesn’t make use of these JavaScript frameworks. You prob-
ably feel the same way now, and we hope that you’ll begin to use them in your
everyday work.
Now that you’re at the end of the chapter, you know how to create faster and
more appealing applications using the Ajax technique. You know how to use
UpdatePanel
to easily introduce Ajax behaviors without even touching existing code
and without writing a single line of JavaScript code. You also know how to take the
opposite path, creating and exposing services on the server and consuming them the
Ajax way, from JavaScript.
Figure 12.10
The confirmation dialog box is
shown when the user clicks
the Save button. The buttons
specified in the
buttons
property are placed at the
bottom of the page and the
title property is shown at
the top of the dialog box.
347Summary
12.4 Summary
Ajax is a key technology for creating user-friendly web applications. Reducing full
PostBacks to the server makes applications easier to use and more appealing to the
user. This feature alone often transforms an adequate application into a real success.
Using update panels to transform the application into a success story is the fastest
and easiest way because they let you add Ajax behavior using server-side code. In many
cases, you don’t need to write a single line of JavaScript code, which is why your pro-
ductivity can be improved so much.
Although
UpdatePanel
control enables several optimizations, in scenarios where
performance is critical, the best way to go is to invoke the server to retrieve only data
and then use JavaScript code to update the interface. jQuery makes this pattern sim-
ple to follow. What’s more, jQuery
UI further simplifies building user-friendly inter-
faces, making it easier than ever to develop better applications.
You know enough about Ajax, so we can move on to another subject that in the
stateless world of the web is vital: state management.
348
State
Web applications are stateless by nature, which means that you don’t have a native
way to handle state. If you’re familiar with desktop applications, you know that state
plays a central role in a typical application. For example, you can save your users’
preferences and let them find their preferences again next time they use the appli-
cation. Even though no native way exists to handle state as per the
HTTP protocol,
modern application frameworks (like ASP.NET) provide a lot of features in this
area. Depending on your needs, you can manage state at different levels—on the
client or on the server. Generally, state handling is performed server side, where
the data is stored.
The objectives of handling state are disparate: you can store user settings or save
frequently requested objects to avoid the cost associated with fetching them every
time. The objects can be stored with a lifetime that varies, depending on the
approach that you choose, but typically, you have a lot of possibilities.
This chapter covers
■
ViewState and new features in ASP.NET 4.0
■
Session state
■
Profile API
■
Building a custom provider for the Profile API
349TECHNIQUE 80 Per-request state
This chapter contains an overview of the most frequent scenarios, and the next
one analyzes caching strategies, which are often treated as a special kind of state. We
decided to separate these topics so that we can cover all these techniques in depth.
13.1 Handling state
The typical ASP.NET application contains different state management techniques that
are related to different scopes. Some data needs to be volatile but available for the
entire request lifecycle, on a single-user basis; other kinds of information need to be
available to all users.
13.1.1 What is state?
To make things clear and to ensure that we approach the problems presented in this
chapter with the right background, you need to understand some basic concepts. First
of all, state is the ability to manage the lifetime of an object in a given interval. When
we manage an object’s state, we can make it persistent to gain speed. In fact, most of
the time this object needs to be retrieved from a source (like a database); retrieving
the data is the most expensive part of the process. On the other hand, modern hard-
ware has a lot of memory, so it’s possible to store these objects in memory, ready to be
used. Storing objects in memory is the preferred way to store them, but they can also
be stored on disk. Disk access has a more negative impact on performance than mem-
ory access does, but disk storage is useful in situations where the object materialization
is expensive and an adequate amount of free memory isn’t available.
Generally, we’ll approach this problem by splitting state handling into three main
scenarios, depending on how we want to span the object’s lifetime. In this chapter,
we’re going to analyze the following kinds of state:
■
Per-request
■
Per-session
■
Per-application
ASP.NET provides different answers to the questions related to these scenarios. We’re
going to take a look at each of them, but per-application state is analyzed in chapter 14,
in the context of caching.
Per-request state
Per-request state is the simplest form of state handling. The state of an object is saved
across the entire request for a given page. You can share the instance of an object for
the request and re-create it on subsequent requests.
Typically, you handle per-request state using ViewState, which we introduced in
chapter 1. ViewState is important in
ASP.NET Web Forms and acts as a bag in which to
store information across the same group of requests performed on a page. It’s not a
true per-request state bag because it’s available after the request itself, but neither is it
a per-session bag because its scope is limited to a given page. If you need to store val-
ues that can be accessed in the same request, other options are available. Eventually,
we’ll talk about all of them.
TECHNIQUE 80