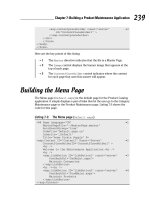
PHP for Absolute Beginners PHẦN 7 doc
Bạn đang xem bản rút gọn của tài liệu. Xem và tải ngay bản đầy đủ của tài liệu tại đây (1.25 MB, 41 trang )
CHAPTER 8 ADDING THE ABILITY TO UPLOAD IMAGES
227
In your image handling snippet, you place your object instantiation and processing within a try
block. Doing so ensures that you can output the custom error message by grabbing the message within
the catch block if any of the custom errors you define within the class are thrown.
Inside your try block, you instantiate the ImageHandler object and pass “/simple_blog” as its
argument, which sets the $save_dir property. Next, you call processUploadedImage() and pass the
uploaded file as its argument. processUploadedImage() returns the file’s path, so you store that in a
variable called $img_path, which you use (for now) to output the image for viewing via an <img> HTML
tag.
Finally, you output the image path as plain text and exit the script to prevent your test entries
from being saved to the database.
You can test your class by uploading an image. Navigate to your admin form in a browser and
fill out the form with test data (you don’t save this), then select a file to upload. When you press the Save
Entry button, you should see your image displayed, along with its path (see Figure 8-2).
Figure 8-2. An image uploaded by your
ImageHandler
class
If you look at your simple_blog folder in the file system, you’ll see that the image has been saved
(see Figure 8-3).
Download at WoweBook.Com
CHAPTER 8 ADDING THE ABILITY TO UPLOAD IMAGES
228
Figure 8-3. The uploaded image saved in the
simple_blog
folder
This isn’t necessarily bad, but it does cause clutter in your folder. You can clear this up by
creating a new folder to store images in.
Creating a New Folder
You could simply create the folder manually, but it’s better to use PHP to check whether a folder exists,
then create it if it doesn’t. This way, you have to change only the path if the folder you wish to save
images in changes in the future; the alternative is to go in and manipulate the file system directly.
You can make a new folder by creating a new method in your ImageHandler class called
checkSaveDir() that creates a directory if it doesn’t exist already.
Begin by declaring your method in ImageHandler. This method is private, so you want to make
sure you control its use. In images.inc.php, after processUploadedImage(), define your new method by
adding the code in bold:
<?php
class ImageHandler
{
public $save_dir;
public function __construct($save_dir)
{
$this->save_dir = $save_dir;
}
Download at WoweBook.Com
CHAPTER 8 ADDING THE ABILITY TO UPLOAD IMAGES
229
/**
* Resizes/resamples an image uploaded via a web form
*
* @param array $upload the array contained in $_FILES
* @return string the path to the resized uploaded file
*/
public function processUploadedImage($file, $rename=TRUE)
{
// Separate the uploaded file array
list($name, $type, $tmp, $err, $size) = array_values($file);
// If an error occurred, throw an exception
if($err != UPLOAD_ERR_OK) {
throw new Exception('An error occurred with the upload!');
exit;
}
// Create the full path to the image for saving
$filepath = $this->save_dir . $name;
// Store the absolute path to move the image
$absolute = $_SERVER['DOCUMENT_ROOT'] . $filepath;
// Save the image
if(!move_uploaded_file($tmp, $absolute))
{
throw new Exception("Couldn't save the uploaded file!");
}
return $filepath;
}
/**
* Ensures that the save directory exists
*
* Checks for the existence of the supplied save directory,
* and creates the directory if it doesn't exist. Creation is
* recursive.
*
* @param void
* @return void
*/
Download at WoweBook.Com
CHAPTER 8 ADDING THE ABILITY TO UPLOAD IMAGES
230
private function checkSaveDir()
{
// Check for the dir
}
}
?>
You’ve declared your method. Next you need to figure out which path to check. As with
processUploadedImage(), you use the $_SERVER superglobal and your $save_dir property to create your
path to check. The only difference is that you don’t attach a file name this time.
Add the lines in bold to checkSaveDir() to store your path to check:
/**
* Ensures that the save directory exists
*
* Checks for the existence of the supplied save directory,
* and creates the directory if it doesn't exist. Creation is
* recursive.
*
* @param void
* @return void
*/
private function checkSaveDir()
{
// Determines the path to check
$path = $_SERVER['DOCUMENT_ROOT'] . $this->save_dir;
// Check for the dir
}
Next, you need to see whether the $path you’ve stored exists. PHP provides a function to do
exactly this in is_dir(). If the path exists, is_dir() returns TRUE; otherwise, it returns FALSE. You want to
continue processing only if the directory doesn’t exist, so add a check to see whether is_dir() returns
FALSE before continuing. Insert the lines in bold into checkSaveDir():
Download at WoweBook.Com
CHAPTER 8 ADDING THE ABILITY TO UPLOAD IMAGES
231
/**
* Ensures that the save directory exists
*
* Checks for the existence of the supplied save directory,
* and creates the directory if it doesn't exist. Creation is
* recursive.
*
* @param void
* @return void
*/
private function checkSaveDir()
{
// Determines the path to check
$path = $_SERVER['DOCUMENT_ROOT'] . $this->save_dir;
// Checks if the directory exists
if(!is_dir($path))
{
// Create the directory
}
}
If the directory doesn’t exist, you need to create it. You accomplished in PHP with the mkdir()
function, which translates in plain English to
make directory
. You need to pass three arguments to
mkdir() for it to work properly: the path, the mode, and a value that indicates whether directories should
be created recursively.
The first argument, the path, is what you just created and stored in the $path variable.
The second argument, the mode, describes how to set the folder permissions. The default mode
is 0777, which provides the widest possible access. Your image files are not sensitive, so you display them
to any user viewing your page.
Note For more information on file permissions, check the PHP manual entry on chmod()at
chmod. Basically, you set folder permissions using an octal number, where each number represents who can
access the file (owner, owner’s group, and everyone else). Each number represents a level of permission, with
7
being the highest (
read, write, and execute).
Your third argument is a boolean value that tells the function whether directories should be
created recursively. Only one directory at a time can be created when set to FALSE (the default). This
means you need to call mkdir() twice if you want to add two subdirectories to the simple_blog folder
with the path, simple_blog/images/uploads/. If you set the third argument to TRUE, however, you can
create both directories with a single function call.
You need to control access to this method, so you allow the function to create directories
recursively.
Download at WoweBook.Com
CHAPTER 8 ADDING THE ABILITY TO UPLOAD IMAGES
232
You can create the directory in the simple_blog folder by adding the lines in bold to
checkSaveDir():
/**
* Ensures that the save directory exists
*
* Checks for the existence of the supplied save directory,
* and creates the directory if it doesn't exist. Creation is
* recursive.
*
* @param void
* @return void
*/
private function checkSaveDir()
{
// Determines the path to check
$path = $_SERVER['DOCUMENT_ROOT'] . $this->save_dir;
// Checks if the directory exists
if(!is_dir($path))
{
// Creates the directory
if(!mkdir($path, 0777, TRUE))
{
// On failure, throws an error
throw new Exception("Can't create the directory!");
}
}
}
This code includes a provision to throw an exception if mkdir() returns FALSE, which means it
failed. Your method is finally ready. You want to call it from the processUploadedImage() method before
you attempt to move the uploaded file. Implement this by adding the lines in bold lines to
processUploadedImage():
/**
* Resizes/resamples an image uploaded via a web form
*
* @param array $upload the array contained in $_FILES
* @return string the path to the resized uploaded file
*/
public function processUploadedImage($file)
{
// Separate the uploaded file array
list($name, $type, $tmp, $err, $size) = array_values($file);
Download at WoweBook.Com
CHAPTER 8 ADDING THE ABILITY TO UPLOAD IMAGES
233
// If an error occurred, throw an exception
if($err != UPLOAD_ERR_OK) {
throw new Exception('An error occurred with the upload!');
exit;
}
// Check that the directory exists
$this->checkSaveDir();
// Create the full path to the image for saving
$filepath = $this->save_dir . $name;
// Store the absolute path to move the image
$absolute = $_SERVER['DOCUMENT_ROOT'] . $filepath;
// Save the image
if(!move_uploaded_file($tmp, $absolute))
{
throw new Exception("Couldn't save the uploaded file!");
}
return $filepath;
}
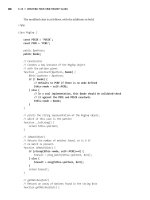
It’s time to test your new function. In update.inc.php, modify your object instantiation to use
this path as the $save_dir: /simple_blog/images/.
Your code should look like this:
<?php
// Include the functions so you can create a URL
include_once 'functions.inc.php';
// Include the image handling class
include_once 'images.inc.php';
if($_SERVER['REQUEST_METHOD']=='POST'
&& $_POST['submit']=='Save Entry'
&& !empty($_POST['page'])
&& !empty($_POST['title'])
&& !empty($_POST['entry']))
{
// Create a URL to save in the database
$url = makeUrl($_POST['title']);
Download at WoweBook.Com
CHAPTER 8 ADDING THE ABILITY TO UPLOAD IMAGES
234
if(isset($_FILES['image']['tmp_name']))
{
try
{
// Instantiate the class and set a save path
$img = new ImageHandler("/simple_blog/images/");
// Process the file and store the returned path
$img_path = $img->processUploadedImage($_FILES['image']);
// Output the uploaded image as it was saved
echo '<img src="', $img_path, '" /><br />';
}
catch(Exception $e)
{
// If an error occurred, output your custom error message
die($e->getMessage());
}
}
else
{
// Avoids a notice if no image was uploaded
$img_path = NULL;
}
// Outputs the saved image path
echo "Image Path: ", $img_path, "<br />";
exit; // Stops execution before saving the entry
// Include database credentials and connect to the database
include_once 'db.inc.php';
$db = new PDO(DB_INFO, DB_USER, DB_PASS);
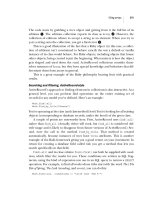
Save update.inc.php and navigate to your admin form in a browser, then fill out the form and
submit an image. After you click the Save Entry button, you should see the image you uploaded
previously, as well as its path; your script places the image in the newly created images folder (see
Figure 8-4).
Download at WoweBook.Com
CHAPTER 8 ADDING THE ABILITY TO UPLOAD IMAGES
235
Figure 8-4. The image uploaded shows that it’s been stored in the new images folder.
You can check the file system manually to see your new folder and the saved, uploaded image
(see Figure 8-5).
Download at WoweBook.Com
CHAPTER 8 ADDING THE ABILITY TO UPLOAD IMAGES
236
Figure 8-5. The images folder has been created, and the image has been saved in it.
You’re almost ready to start working with the database. First, however, you need to make sure
that your images have unique names, so you don’t accidentally overwrite older uploads with new ones.
Renaming the Image
You can’t trust that every file uploaded to your blog will be uniquely named, so you need to rename any
image that is uploaded to your blog. Otherwise, it’s possible for a user who uploads an image named to
overwrite that image later if he submits a future image with the same name. In this case, the new image
would suddenly appear for the older entry, as well as the new one, and you would lose the old image.
You can avoid this by creating a new private method in ImageHandler that generates a new,
unique name for any uploaded image. You can make sure this name is unique by using the current
timestamp and a random four-digit number between 1000 and 9999. This way, even images uploaded
during the same second will receive unique names.
Note This method is not 100% effective, but the likelihood of two images being uploaded at the exact same
second and generating the exact same random number is so slim that it will most likely never be a problem.
This method is a one-liner that accepts one argument: the file extension you want to use (we’ll
get to how you know what file extension to send in just a moment). The method returns the current
timestamp, an underscore, a random number, and a file extension.
Download at WoweBook.Com
CHAPTER 8 ADDING THE ABILITY TO UPLOAD IMAGES
237
It’s time to add your method to ImageHandler by inserting the code in boldafter
processUploadedImage() in images.inc.php:
/**
* Generates a unique name for a file
*
* Uses the current timestamp and a randomly generated number
* to create a unique name to be used for an uploaded file.
* This helps prevent a new file upload from overwriting an
* existing file with the same name.
*
* @param string $ext the file extension for the upload
* @return string the new filename
*/
private function renameFile($ext)
{
/*
* Returns the current timestamp and a random number
* to avoid duplicate filenames
*/
return time() . '_' . mt_rand(1000,9999) . $ext;
}
Determining the File Extension
Before renameFile() can work, you need to figure out the uploaded image’s extension. Do this by
accessing the image’s type with the value stored in $type in processUploadedImage().
All uploaded files have a content type, which you can use to determine the proper file extension
to use. You need to make sure you’re processing only images, so you use a switch and match the known
content types you want to accept, then set a default action to throw an error if an unexpected content
type is passed.
The content types you want to accept are:
• image/gif: A GIF image (.gif)
• image/jpeg: A JPEG image (.jpg)
• image/pjpeg: A JPEG image as it is recognized by certain browsers, which uses the same file
extension as a “normal” JPEG (.jpg)
• image/png: A PNG image (.png)
To check for content types, you create a new private method called getImageExtension(). This
method contains the switch just discussed and returns the proper file extension. Add the following code
in bold to images.inc.php just after renameFile():
Download at WoweBook.Com
CHAPTER 8 ADDING THE ABILITY TO UPLOAD IMAGES
238
/**
* Determines the filetype and extension of an image
*
* @param string $type the MIME type of the image
* @return string the extension to be used with the file
*/
private function getImageExtension($type)
{
switch($type) {
case 'image/gif':
return '.gif';
case 'image/jpeg':
case 'image/pjpeg':
return '.jpg';
case 'image/png':
return '.png';
default:
throw new Exception('File type is not recognized!');
}
}
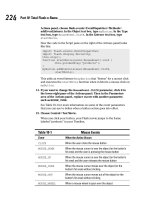
Now you can retrieve the file extension to pass to renameFile(), which means you’re ready to
implement the methods in processUploadedImage().
There might be a point at which you no longer wish to rename files, so you should add an
argument to processUploadedImage() that holds a boolean value. If set to TRUE (the default), the image is
renamed; if set to FALSE, the original filename is used.
You can add file renaming to your method by adding the following code in bold to
processUploadedImage():
/**
* Resizes/resamples an image uploaded via a web form
*
* @param array $upload the array contained in $_FILES
* @param bool $rename whether or not the image should be renamed
* @return string the path to the resized uploaded file
*/
public function processUploadedImage($file, $rename=TRUE)
{
// Separate the uploaded file array
list($name, $type, $tmp, $err, $size) = array_values($file);
Download at WoweBook.Com
CHAPTER 8 ADDING THE ABILITY TO UPLOAD IMAGES
239
// If an error occurred, throw an exception
if($err != UPLOAD_ERR_OK) {
throw new Exception('An error occurred with the upload!');
exit;
}
// Check that the directory exists
$this->checkSaveDir();
// Rename the file if the flag is set to TRUE
if($rename===TRUE) {
// Retrieve information about the image
$img_ext = $this->getImageExtension($type);
$name = $this->renameFile($img_ext);
}
// Create the full path to the image for saving
$filepath = $this->save_dir . $name;
// Store the absolute path to move the image
$absolute = $_SERVER['DOCUMENT_ROOT'] . $filepath;
// Save the image
if(!move_uploaded_file($tmp, $absolute))
{
throw new Exception("Couldn't save the uploaded file!");
}
return $filepath;
}
Save images.inc.php and try uploading another image through the admin form. You should see
a renamed file stored in the file system, as well as on your screen (see Figure 8-6).
Download at WoweBook.Com
CHAPTER 8 ADDING THE ABILITY TO UPLOAD IMAGES
240
Figure 8-6. An image renamed by your script
Your ImageHandler class now accepts, renames, and stores images in your file system, which
means you’re ready to start working with the database.
Storing and Retrieving Images from the Database
If you need to, you can store the image itself in the database as a BLOB column. However, it’s much
more efficient to save the path to the image in the database instead. This means you need to do three
things to save an image:
• Add an image column to the entries table
• Modify update.inc.php to save the image path along with the rest of the entry
• Modify retrieveEntries() to select the new image column
Download at WoweBook.Com
CHAPTER 8 ADDING THE ABILITY TO UPLOAD IMAGES
241
Modifying the entries Table
Your next step is to add the image column to your entries table. You do this the same way that you
added all the other columns to your table.
Navigate to http://localhost/phpmyadmin, open the simple_blog database, select the entries
table, and open the SQL tab. Insert the following command to add the image column:
ALTER TABLE entries
ADD image VARCHAR(150) DEFAULT NULL
AFTER title
This creates an image column after the title column, which stores a 150-character string and
defaults to NULL if no value is supplied.
Modifying update.inc.php to Save Images
Now that your entries table can store the image path, it’s time to modify update.inc.php to save the
image path.
You’ve already done everything necessary to make the image path available. All you need to do
is remove the sections of code that output the image and exit the script.
After the code no longer outputs image data, you need to modify your queries to include the
image path. You do this for both new entries and updated entries.
You can save the image path in the database by modifying update.inc.php to reflect the
changes shown in bold:
<?php
// Include the functions so you can create a URL
include_once 'functions.inc.php';
// Include the image handling class
include_once 'images.inc.php';
if($_SERVER['REQUEST_METHOD']=='POST'
&& $_POST['submit']=='Save Entry'
&& !empty($_POST['page'])
&& !empty($_POST['title'])
&& !empty($_POST['entry']))
Download at WoweBook.Com
CHAPTER 8 ADDING THE ABILITY TO UPLOAD IMAGES
242
{
// Create a URL to save in the database
$url = makeUrl($_POST['title']);
if(isset($_FILES['image']['tmp_name']))
{
try
{
// Instantiate the class and set a save dir
$img = new ImageHandler("/simple_blog/images/");
// Process the uploaded image and save the returned path
$img_path = $img->processUploadedImage($_FILES['image']);
}
catch(Exception $e)
{
// If an error occurred, output your custom error message
die($e->getMessage());
}
}
else
{
// Avoids a notice if no image was uploaded
$img_path = NULL;
}
// Include database credentials and connect to the database
include_once 'db.inc.php';
$db = new PDO(DB_INFO, DB_USER, DB_PASS);
// Edit an existing entry
if(!empty($_POST['id']))
{
$sql = "UPDATE entries
SET title=?, image=?, entry=?, url=?
WHERE id=?
LIMIT 1";
Download at WoweBook.Com
CHAPTER 8 ADDING THE ABILITY TO UPLOAD IMAGES
243
$stmt = $db->prepare($sql);
$stmt->execute(
array(
$_POST['title'],
$img_path,
$_POST['entry'],
$url,
$_POST['id']
)
);
$stmt->closeCursor();
}
// Create a new entry
else
{
// Save the entry into the database
$sql = "INSERT INTO entries (page, title, image, entry, url)
VALUES (?, ?, ?, ?, ?)";
$stmt = $db->prepare($sql);
$stmt->execute(
array(
$_POST['page'],
$_POST['title'],
$img_path,
$_POST['entry'],
$url
)
);
$stmt->closeCursor();
}
// Sanitize the page information for use in the success URL
$page = htmlentities(strip_tags($_POST['page']));
// Send the user to the new entry
header('Location: /simple_blog/'.$page.'/'.$url);
exit;
}
Download at WoweBook.Com
CHAPTER 8 ADDING THE ABILITY TO UPLOAD IMAGES
244
else
{
header('Location: /');
exit;
}
?>
At this point, you’re ready to create a new entry with an image. Navigate to your admin form in
a browser and create an entry with the following information:
•
Title
: Entry with an image
•
Body
: This entry is created with an accompanying image
Add an image, then click Save Entry. If you look in the database, you should see that an image
path has been saved in the image column.
Now you need to retrieve the path from the database to display uploaded images with the entry.
Modifying retrieveEntries() to Retrieve Images
Your first step in displaying saved images is to add the image column to the array returned from
retrieveEntries(). This is easy to do; it requires only that you add the column name to the SQL query.
Modify retrieveEntries() in functions.inc.php to reflect the changes shown in bold:
function retrieveEntries($db, $page, $url=NULL)
{
/*
* If an entry URL was supplied, load the associated entry
*/
if(isset($url))
{
$sql = "SELECT id, page, title, image, entry
FROM entries
WHERE url=?
LIMIT 1";
$stmt = $db->prepare($sql);
$stmt->execute(array($url));
// Save the returned entry array
$e = $stmt->fetch();
// Set the fulldisp flag for a single entry
$fulldisp = 1;
}
Download at WoweBook.Com
CHAPTER 8 ADDING THE ABILITY TO UPLOAD IMAGES
245
/*
* If no entry ID was supplied, load all entry titles for the page
*/
else
{
$sql = "SELECT id, page, title, image, entry, url
FROM entries
WHERE page=?
ORDER BY created DESC";
$stmt = $db->prepare($sql);
$stmt->execute(array($page));
$e = NULL; // Declare the variable to avoid errors
// Loop through returned results and store as an array
while($row = $stmt->fetch()) {
if($page=='blog')
{
$e[] = $row;
$fulldisp = 0;
}
else
{
$e = $row;
$fulldisp = 1;
}
}
/*
* If no entries were returned, display a default
* message and set the fulldisp flag to display a
* single entry
*/
if(!is_array($e))
{
$fulldisp = 1;
$e = array(
'title' => 'No Entries Yet',
'entry' => 'This page does not have an entry yet!'
);
}
}
Download at WoweBook.Com
CHAPTER 8 ADDING THE ABILITY TO UPLOAD IMAGES
246
// Add the $fulldisp flag to the end of the array
array_push($e, $fulldisp);
return $e;
}
Now you can access the value stored in the image column, just as you access all the other
information in an entry. Next, you need to use this information to display the image for the world to see.
Modifying index.php to Display Images
Unlike text entries, images require a little bit of special treatment when you retrieve them from the
database. You can’t simply check whether the value is set, then output it; instead, you need to create
some extra HTML markup to display images properly.
For the sake of keeping your code clean, you need to write a function that checks whether an
image exists and return the appropriate HTML markup if it does.
Adding a Function to Format Images for Output
You add this function to functions.inc.php. The function accepts two arguments: the path to the image
and the title of the entry (you use this as an alt attribute).
Its functionality is simple: if an image path is supplied, return valid HTML markup; if not,
return NULL.
Open functions.inc.php and add the new function after the existing functions:
function formatImage($img=NULL, $alt=NULL)
{
if(isset($img))
{
return '<img "'.$img.'" alt="'.$alt.'" />';
}
else
{
return NULL;
}
}
With your new function in place, you can add your image to the displayed entry. For the sake of
organization, you display images only with a fully displayed entry.
Download at WoweBook.Com
CHAPTER 8 ADDING THE ABILITY TO UPLOAD IMAGES
247
Your image handling is taken care of in an external function, so you can add your image to the
display with just two lines of code. In index.php, where the block of code that handles full display is
located, modify the script to contain the lines in bold:
<?php
// If the full display flag is set, show the entry
if($fulldisp==1)
{
// Get the URL if one wasn't passed
$url = (isset($url)) ? $url : $e['url'];
// Build the admin links
$admin = adminLinks($page, $url);
// Format the image if one exists
$img = formatImage($e['image'], $e['title']);
?>
<h2> <?php echo $e['title'] ?> </h2>
<p> <?php echo $img, $e['entry'] ?> </p>
<p>
<?php echo $admin['edit'] ?>
<?php if($page=='blog') echo $admin['delete'] ?>
</p>
<?php if($page=='blog'): ?>
<p class="backlink">
<a href="./">Back to Latest Entries</a>
</p>
<?php endif; ?>
If you navigate to http://localhost/simple_blog/ and select your new entry, “Entry with an
Image”; you should see the image displayed with your text (see Figure 8-7).
Unfortunately, the layout doesn’t look very good if a large image is displayed (as shown in
Figure 8-7). You don’t want to resize every image uploaded manually, so you need to add new
functionality to your ImageHandler class that resizes large images automatically.
Download at WoweBook.Com
CHAPTER 8 ADDING THE ABILITY TO UPLOAD IMAGES
248
Figure 8-7. Your image displayed with the accompanying text
Resizing Images
Resizing images is a little tricky, but you can break the process down into small sections. Resizing an
image requires several steps:
• Determine new dimensions based on the defined maximum dimensions
• Determine which image handling functions are necessary for resampling
• Resample the image at the proper size
Download at WoweBook.Com
CHAPTER 8 ADDING THE ABILITY TO UPLOAD IMAGES
249
Determining the New Image Dimensions
Begin the process of resizing an image by determining what size the image should actually be.
Unfortunately, you can’t simply tell your script that all images should be 350 pixels by 240 pixels because
forcing an image to match dimensions that aren’t proportional to an image’s original dimensions causes
distortion, which doesn’t look good.
Instead, you need to determine the proportional size of the image that will fit
within
the
maximum dimensions you set. You can accomplish this following several math steps:
• Determine which side of the image is the longer
• Divide the maximum dimension that corresponds to the long side by the long side’s size
• Use the resulting decimal point to multiply both sides of the image
• Round the product to keep an integer value
• Use the product of this multiplication as the new width and height of the image
Adding a Property for Maximum Dimensions
Before you can start performing any resizing, you need to define maximum dimensions for uploaded
images. This might need to change at some future point, so you define a new property in the
ImageHandler class, called $max_dims. This property stores an array of the maximum width and height
allowed for uploaded images.
You set this property in the constructor, but be aware that you need to use a default value so
that it doesn’t
need
to be set for the class to work.
At the top of the ImageHandler class, modify the property declarations and constructor as shown
by the code in bold:
class ImageHandler
{
public $save_dir;
public $max_dims;
public function __construct($save_dir, $max_dims=array(350, 240))
{
$this->save_dir = $save_dir;
$this->max_dims = $max_dims;
}
The maximum dimensions of 350 pixels by 240 pixels are acceptable for the layout of your
current site. These are the default values, so don’t worry about adding maximum dimensions to the class
instantiation. However, if you needed to change the size of your images, you can change the dimensions
using the following instantiation of ImageHandler:
$obj = new ImageHandler('/images/', array(400, 300));
This snippet sets the maximum dimensions allowed to 400 pixels wide by 300 pixels high.
Download at WoweBook.Com
CHAPTER 8 ADDING THE ABILITY TO UPLOAD IMAGES
250
Creating the Method to Determine New Width and Height
You have your maximum dimensions prepared; next, you need to define a new private method in the
ImageHandler class. Place this method at the bottom of the class and accept one argument: the image for
which you need new dimensions.
In images.inc.php, add the following method declaration:
/**
* Determines new dimensions for an image
*
* @param string $img the path to the upload
* @return array the new and original image dimensions
*/
private function getNewDims($img)
{
// Get new image dimensions
}
You can determine the original dimensions of your image with a function called getimagesize().This
function returns the width and height of the image supplied as an argument (as well as other information I’ll
address in a moment).
You use the list() function to define the first two array elements as the $src_w (source width)
and $src_h (source height) variables.
Next, you use the maximum dimensions that you just added to the class. Again, use the list()
function to separate their values into $max_w (maximum width) and $max_h (maximum height), then add
the following code in bold to getNewDims():
/**
* Determines new dimensions for an image
*
* @param string $img the path to the upload
* @return array the new and original image dimensions
*/
private function getNewDims($img)
{
// Assemble the necessary variables for processing
list($src_w, $src_h) = getimagesize($img);
list($max_w, $max_h) = $this->max_dims;
// Finish processing
}
Before you start resizing your image, you need to check that it is, in fact, larger than your
maximum dimensions. Otherwise, small images will be blown up, which can make them look bad. You
accomplish this by checking whether either the original image’s width or height is greater than the
maximum corresponding dimension.
Download at WoweBook.Com
CHAPTER 8 ADDING THE ABILITY TO UPLOAD IMAGES
251
If so, you need to determine the scale to which you should resize the image. You can determine
this by dividing the maximum length of both sides by the original length and returning the smaller of the
two values using the min() function, which compares two or more expressions and returns the lowest
value.
After you know what side is longer, you use the corresponding maximum dimension to
determine the scale. You determine the scale by dividing the smaller maximum dimension by the
original dimension, which gives you a decimal value (for instance, if your maximum size is 60 pixels, and
the original size is 100 pixels, the scale is .6).
In the event that your image is smaller than the maximum allowed dimensions, you want to
keep it the same size. Do this by setting the scale to 1.
Add the code in bold to getNewDims() to determine the scale:
/**
* Determines new dimensions for an image
*
* @param string $img the path to the upload
* @return array the new and original image dimensions
*/
private function getNewDims($img)
{
// Assemble the necessary variables for processing
list($src_w, $src_h) = getimagesize($img);
list($max_w, $max_h) = $this->max_dims;
// Check that the image is bigger than the maximum dimensions
if($src_w > $max_w || $src_h > $max_h)
{
// Determine the scale to which the image will be resized
$s = min($max_w/$src_w,$max_h/$src_h);
}
else
{
/*
* If the image is smaller than the max dimensions, keep
* its dimensions by multiplying by 1
*/
$s = 1;
}
// Finish processing
}
Finally, you need to multiply the original dimensions by the scale you’ve just determined, then
return the new dimensions (as well as the old dimensions for reasons I’ll cover momentarily) as an array.
Download at WoweBook.Com