Java By Example PHẦN 8 pptx
Bạn đang xem bản rút gọn của tài liệu. Xem và tải ngay bản đầy đủ của tài liệu tại đây (1.9 MB, 59 trang )
parameter's values and supply default values for those parameters that are missing or invalid. For
example, to make sure that your applet has a text string to display, you might use lines like this:
str = getParameter("text");
if (str == null)
str = "Default Text";
NOTE
If you decide to release your applets so other people can use them in
their Web pages, be sure that you include a separate documentation
file that describes the applet's parameters and shows how to use
them.
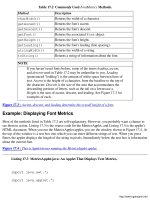
Example: Using Default Parameters in an Applet
You can now extend the ConfigApplet2 so that it provides default values for each parameter. When
you've done this, the applet can run without generating errors no matter what parameters the user chooses
to include or ignore. Listing 26.7 is the new version, called ConfigApplet3.
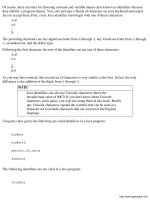
Notice that although the program now checks for missing parameters, it doesn't limit the values to any
ranges or otherwise check their validity. Because the text parameter will always be a string, there's
really nothing you need to check for (except null). However, you may want to limit the font size or
make sure that the display location is inside the applet's window. Listing 26.8 is the HTML document
used to load and run the applet as it's displayed in Figure 26.4.
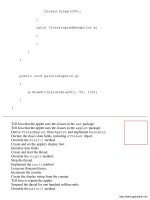
Figure 26.4 : This is ConfigApplet3 running under Appletviewer.
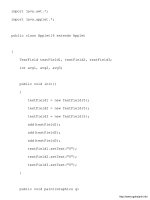
Listing 26.7 ConfigApplet3.java: This Applet Provides Default Values for All
Parameters.
import java.awt.*;
import java.applet.*;
public class ConfigApplet3 extends Applet
{
String str;
Point position;
public void init()
{
HandleTextParam();
HandleTypeSizeParam();
HandlePositionParam();
}
public void paint(Graphics g)
{
g.drawString(str, position.x, position.y);
}
protected void HandleTextParam()
{
str = getParameter("text");
if (str == null)
str = "Default Text";
}
protected void HandleTypeSizeParam()
{
String s = getParameter("typesize");
if (s == null)
s = "24";
int typeSize = Integer.parseInt(s);
Font font = new Font("TimesRoman", Font.BOLD, typeSize);
setFont(font);
}
protected void HandlePositionParam()
{
String s = getParameter("xpos");
if (s == null)
s = "20";
int xpos = Integer.parseInt(s);
s = getParameter("ypos");
if (s == null)
s = "50";
int ypos = Integer.parseInt(s);
position = new Point(xpos, ypos);
}
}
Tell Java that the applet uses the classes in the awt package.
Tell Java that the applet uses the classes in the applet package.
Derive the ConfigApplet3 class from Java's Applet class.
Declare the class's data fields.
Override the init() method.
Call the methods that retrieve and validate the parameters.
Override the paint() method.
Display the given string.
Define the HandleTextParam() method.
Retrieve the text parameter.
If the parameter is null, set str to the default text.
Define the HandleTypeSizeParam() method.
Retrieve the typesize parameter.
If the parameter is null, set the parameter string to "24."
Convert the parameter string to an integer.
Create and set the font.
Define the HandlePositionParam() method.
Retrieve the xpos parameter.
if xpos is null, set the parameter string to "20."
Convert the parameter string to an integer.
Retrieve the ypos parameter.
if ypos is null, set the parameter string to "50."
Convert the parameter string to an integer.
Create the Point object with the position values.
Listing 26.8 CONFIGAPPLET3.htmL: The HTML Document for ConfigApplet3.
<title>Applet Test Page</title>
<h1>Applet Test Page</h1>
<applet
code="ConfigApplet3.class"
width=640
height=200
name="ConfigApplet3">
<PARAM NAME=text VALUE="Hi there!">
<PARAM NAME=typesize VALUE=144>
<PARAM NAME=xpos VALUE=40>
<PARAM NAME=ypos VALUE=140>
</applet>
Summary
By supporting parameters, your applets are more flexible, which makes it easier for other people to
incorporate them into their Web-page designs. Even if you don't plan to release your applets, using
parameters can make your applets more powerful and your own Web pages easier to fine tune. Using the
<PARAM> tag is more sensible than having to reprogram and recompile an applet every time you want it
to do something slightly different. Keep in mind, though, that all parameters must have default values
built into the applet's source code. Otherwise, you could end up with an error-ridden applet, something
that won't do much for your reputation as a Java guru.
Review Questions
1. What kind of applet user is likely to appreciate parameterized applets?
2. What are the two parts of the <PARAM> tag?
3. How can your applet retrieve the value of a parameter?
4. Where do you specify the values for an applet's parameters?
5. Do you need to recompile an applet in order to take advantage of new parameters?
6. How many parameters can you have in a single applet?
7. Why do you need to convert the values of some parameters?
8. Why is it important to supply default values for all parameters?
Review Exercises
1. Write an applet that displays a rectangle on the screen. The rectangle's size should be specified
using parameters.
2. Write an applet that uses a parameter to display a red, green, or blue background.
3. Modify ConfigApplet2 so that it not only checks for null parameters, but also checks for the
parameters' validity. The type size should always be in the range of 10 to 72 points and the text
should always be positioned so that it's never printed completely out of view. (You can find the
solution to this exercise, called ConfigApplet4, in the CHAP26 folder of this book's CD-ROM.)
Chapter 27
Images and Sounds
CONTENTS
● Image Types
● Loading and Displaying an Image
❍ Example: Using the getDocumentBase() Method
❍ Example: Using the getCodeBase() Method
❍ Loading an Image
❍ Displaying an Image
❍ Example: Displaying an Image in an Applet
● Playing a Sound
❍ Example: Using the play() Method
❍ Example: Playing a Sound in an Applet
❍ Controlling Sounds
❍ Example: Using an AudioClip in an Applet
● Summary
● Review Questions
● Review Exercises
If you've seen a lot of the applets that are floating around, you've undoubtedly noticed that many of them
feature vivid graphics and even sound effects. When programming in a language such a C++, displaying
graphics and playing sounds can be infamously difficult, thanks to the fact that these languages provide
no direct support for handling these types of files. Even the Windows API, as immense as it is, provides
little help when it comes to handling these graphical and aural chores. Java, on the other hand, was
designed to make creating applets as easy as possible. For that reason, Java's classes handle almost all the
difficulties associated with displaying images (commonly called bitmaps) and playing sounds. In this
chapter, you use Java's power to add images and sounds to your applets.
Image Types
In the world of computers, there are many types of images, each of which is associated with a specific
file format. These image types are usually identified by their file extensions, which include PCX, BMP,
GIF, JPEG (or JPG), TIFF (or TIF), TGA, and more. Each of these file types was created by third-party
software companies for use with their products, but many became popular enough to grow into standards.
The PCX graphics file type, for example, began as the format for PC Paintbrush files, whereas BMP files
are usually associated with the Windows graphical interface.
If you were writing your Internet applications using a more conventional language like C++, you could
choose to support whatever image type was most convenient for your use. This is because you'd have to
write all the file-loading code from scratch, anyway. Java, on the other hand, comes complete with
classes that are capable of loading image files for you. This convenience comes with a small price,
however, since Java can load only GIF and JPEG image file formats. In this book, you'll use GIF files,
which are more common, although JPEG files are rapidly gaining a reputation, especially for high-
resolution, true-color images.
Loading and Displaying an Image
The first step in displaying an image in your applet is to load the image from disk. To do this, you must
create an object of Java's Image class. This is fairly easy to do; however, in order to do so, you need to
create an URL object that holds the location of the graphics file. You could just type the image's URL
directly into your Java source code. If you do this, however, you have to change and recompile the applet
whenever you move the graphics file to a different directory on your disk. A better way to create the
image's URL object is to call either the getDocumentBase() or getCodeBase() method. The
former returns the URL of the directory from which the current HTML file was loaded, whereas the latter
returns the URL of the directory from which the applet was run.
Example: Using the getDocumentBase() Method
As I said previously, the getDocumentBase() method returns the URL of the directory from which
the HTML document was loaded. If you're storing your images in the same directory (or a subdirectory
of that directory) as your HTML files, you'd want to use this method to obtain an URL for an image.
Suppose you have your HTML documents in a directory called PUBLIC and the image you want, called
IMAGE.gif, is stored in a subdirectory of PUBLIC called IMAGES. A call to getDocumentBase()
will get you the appropriate base URL. That call looks like this:
URL url = getDocumentBase();
As you'll soon see, once you have the URL, you can load the file by using the URL along with the
relative location of the image, which in this case would be IMAGES/IMAGE.gif. The full URL to the
file would then be FILE:/C:/PUBLIC/IMAGES/IMAGE.gif. If you decided to move your public files to a
directory called MYHOMEPAGE, the call to getDocumentBase() will give you the URL for that
new directory, without your having to change the applet's source code. This new URL, once you included
the relative location of the image file, would be FILE:/C:/MYHOMEPAGE/IMAGES/IMAGE.gif.
Example: Using the getCodeBase() Method
The getCodeBase() method works similarly to getDocumentBase(), except that it returns the
URL of the directory from which the applet was loaded. If you're storing your images in the same
directory (or a subdirectory of that directory) as your CLASS files, you'd want to call getCodeBase()
to obtain an URL for an image.
Suppose you have your CLASS files in a directory called CLASSES and the image you want (still called
IMAGE.gif) is stored in a subdirectory of CLASSES called IMAGES. A call to getCodeBase() will
get you the base URL you need to load the image. That call looks like this:
URL url = getCodeBase();
Again, once you have the URL, you can load the file by using the URL along with the relative location of
the image, which would still be IMAGES/IMAGE.gif. The full URL to the file would then be
FILE:/C:/CLASSES/IMAGES/IMAGE.gif.
Loading an Image
Once you have the image's base URL, you're ready to load the image and create the Image object. You
can complete both of these tasks at the same time, by calling your applet's getImage() method, like
this:
Image image = getImage(baseURL, relLocation);
The getImage() method's two arguments are the URL returned by your call to getCodeBase() or
getDocumentBase() and the relative location of the image. For example, assuming that you've
stored your CLASS files in the directory C:\CLASSES and your images in the directory
C:\CLASSES\IMAGES, you'd have a code that looks something like this:
URL codeBase = getCodeBase();
Image myImage = getImage(codeBase, "images/myimage.gif");
After Java has executed the above lines, your image is loaded into the computer's memory and ready to
display.
Displaying an Image
Displaying the image is a simple matter of calling the Graphics object's drawImage() method, like
this:
g.drawImage(myImage, x, y, width, height, this);
This method's arguments are the image object to display, the X and Y coordinates at which to display the
image, the width and height of the image, and the applet's this reference.
TIP
When you want to display an image with its normal width and
height, you can call a simpler version of the drawImage()
method, which leaves out the width and height arguments, like this:
drawImage(image, x, y, this). This version of the
method actually draws the image faster because it doesn't have to
worry about reducing or expanding the image to the given width
and height. It just blasts it on to the screen exactly as the image
normally appears.
You may be wondering where you can get the width and the height of the image. As it turns out (no
doubt thanks to careful consideration by Java's programmers over hundreds of cups of coffee), the
Image class has two methods, getWidth() and getHeight(), that return the width and height of
the image. The complete code for displaying the image, then, might look like this:
int width = image.getWidth(this);
int height = image.getHeight(this);
g.drawImage(image, x, y, width, height, this);
As you can see, the getWidth() and getHeight() methods require a single argument, which is the
applet's this reference.
Example: Displaying an Image in an Applet
You're now ready to write an applet that can display images. Listing 27.1 is the Java source code for an
applet called ImageApplet that displays a small image using the techniques described previously in this
chapter. When you run the applet with Appletviewer, you see the window shown in Figure 27.1. Make
sure the SNAKE.gif image is in the same directory as the ImageApplet.class file, since that's where the
program expects to find it.
Figure 27.1 : This is ImageApplet running under Appletviewer.
Listing 27.1 ImageApplet.java: An Applet That Displays an Image.
import java.awt.*;
import java.applet.*;
import java.net.*;
public class ImageApplet extends Applet
{
Image snake;
public void init()
{
URL codeBase = getCodeBase();
snake = getImage(codeBase, "snake.gif");
resize(250, 250);
}
public void paint(Graphics g)
{
int width = snake.getWidth(this);
int height = snake.getHeight(this);
g.drawRect(52, 52, width+10, height+10);
g.drawImage(snake, 57, 57, width, height, this);
}
}
Tell Java that the applet uses the classes in the awt package.
Tell Java that the applet uses the classes in the applet package.
Tell Java that the applet uses the classes in the net package.
Derive the ImageApplet class from Java's Applet class.
Declare the class's image data field.
Override the init() method.
Retrieve the base URL.
Load the image.
Size the applet.
Override the paint() method.
Get the image's width and height.
Draw a framing rectangle for the image.
Draw the image within the rectangle.
Notice how the applet imports the classes in the net package, which is where the URL class lives. If you
fail to include this line at the top of the program, Java will be unable to find the URL class and the applet
will not compile.
TIP
By using different values for the drawImage() method's width
and height arguments, you can display an image at any size you
like. For example, to display an image at twice its normal size, just
use 2*width and 2*height for the width and height arguments.
To display the image at half its normal size, use width/2 and
height/2. Figure 27.2 shows the snake image displayed at twice
its normal size. It doesn't even fit in the window any more!
Figure 27.2 : Here's the snake image at twice its size.
Playing a Sound
Just as there are many types of image files, so too are there many types of sound files. But, when it
comes to applets, the only type of sound file you need to know about are audio files, which have the file
extension AU. These types of sound files were popularized on UNIX machines and are the only type of
sound file Java can load and play.
When you want to play a sound from beginning to end, you only have to call getDocumentBase() or
getCodeBase() for the URL and then call play() to play the sound. A call to play() looks like
this:
play(baseURL, relLocation);
The play() method's two arguments are the URL returned from a call to getDocumentBase() or
getCodeBase() and the relative location of the sound file.
Example: Using the play() Method
Suppose you have your CLASS files in the directory C:/MYHOMEPAGE and your AU files in the
directory C:/MYHOMEPAGE/AUDIO. The following lines then will load and play an audio file called
SOUND.AU:
URL codeBase = getCodeBase();
play(codeBase, "audio/sound.au");
Example: Playing a Sound in an Applet
Now get ready to write an applet that plays a sound file. Listing 27.2 is the applet in question, called
SoundApplet. When you run the applet with Appletviewer, you'll see the window shown in Figure 27.3.
Just click the button to hear the sound. Of course, you need to have a sound card properly installed on
your system. You also must be sure that the SPACEMUSIC.AU sound file is in the same directory as the
applet. (This sound file is included with the Java Developer's Kit and has been copied to this chapter's
CD-ROM directory for your convenience.)
Figure 27.3 : Click the button to hear the applet's sound file.
Listing 27.2 SoundApplet.java: An Applet That Plays a Sound File.
import java.awt.*;
import java.applet.*;
import java.net.*;
public class SoundApplet extends Applet
{
Button button;
public void init()
{
BorderLayout layout = new BorderLayout();
setLayout(layout);
Font font = new Font("TimesRoman", Font.BOLD, 32);
setFont(font);
button = new Button("Play Sound");
add("Center", button);
resize(250, 250);
}
public boolean action(Event evt, Object arg)
{
if (evt.target instanceof Button)
{
URL codeBase = getCodeBase();
play(codeBase, "spacemusic.au");
}
return true;
}
}
Tell Java that the applet uses the classes in the awt package.
Tell Java that the applet uses the classes in the applet package.
Tell Java that the applet uses the classes in the net package.
Derive the SoundApplet class from Java's Applet class.
Declare the class's button object.
Override the init() method.
Create and set the applet's layout.
Create and set the applet's font.
Create and add the button.
Size the applet.
Override the action() method.
If the user clicks the button
Get the base URL.
Play the sound.
Tell Java that the event was handled.
Controlling Sounds
Although the applet's play() method is the easiest way to load and play sounds, it doesn't give you
much control. You have only one option: play the sound from beginning to end. If you want a little more
control over your sounds, you can create an AudioClip object and use the object's methods to control
the sound. Unfortunately, even the AudioClip class doesn't give you much power, although you can
play, stop, and loop the sound.
To create the AudioClip object, you call the getAudioClip() method, like this:
AudioClip audioClip = getAudioClip(baseURL, relLocation);
This method's two arguments are the sound file's base URL and relative location.
Once you have the AudioClip object created and loaded, you can call its methods to control the sound.
There are only three from which to choose: play(), stop(), and loop(). The play() method
plays the sound once from beginning to end, stop() stops the sound whether or not it has finished
playing, and loop() causes the sound to keep repeating until it's stopped.
Example: Using an AudioClip in an Applet
Although using audio clips is a little more complicated than simply loading and playing a sound using
the applet's play() method, it's still a straightforward process. Listing 27.3 is an applet that creates an
AudioClip object and enables the user to send commands to the object using the applet's command
buttons. When you run the applet with Appletviewer, you see the window shown in Figure 27.4. To play
the sound once from beginning to end, click the Play button. To stop the sound at any time, click the Stop
button. Finally, to play the sound over and over, click the Loop button.
Figure 27.4 : This is Appletviewer running SoundApplet2.
Listing 27.3 SoundApplet2.java: An Applet That Creates and Displays an AudioClip
Object.
import java.awt.*;
import java.applet.*;
import java.net.*;
public class SoundApplet2 extends Applet
{
AudioClip soundClip;
public void init()
{
GridLayout layout = new GridLayout(1, 3, 10, 10);
setLayout(layout);
Font font = new Font("TimesRoman", Font.BOLD, 24);
setFont(font);
Button button = new Button("Play");
add(button);
button = new Button("Stop");
add(button);
button = new Button("Loop");
add(button);
URL codeBase = getCodeBase();
soundClip = getAudioClip(codeBase, "spacemusic.au");
resize(250, 250);
}
public boolean action(Event evt, Object arg)
{
if (arg == "Play")
soundClip.play();
else if (arg == "Stop")
soundClip.stop();
else if (arg == "Loop")
soundClip.loop();
return true;
}
}
Tell Java that the applet uses the classes in the awt package.
Tell Java that the applet uses the classes in the applet package.
Tell Java that the applet uses the classes in the net package.
Derive the SoundApplet2 class from Java's Applet class.
Declare the class's audio clip object.
Override the init() method.
Create and set the applet's layout.
Create and set the applet's font.
Create and add the three buttons.
Get the base URL and create the audio clip.
Size the applet.
Override the 5 method.
Respond to the appropriate button.
Tell Java that the event was handled.
Summary
Nothing spices up an applet more than vivid graphics and enjoyable sound effects. That's why Java's
creators went to such lengths to ensure that you can easily add these important elements to your applets.
Loading and displaying an image is as simple as obtaining the image's base URL, creating an Image
object, and calling drawImage() to display the image on the screen. Sound effects are just as easy-if
not easier-to handle. The simplest way is to call the applet's play() method, which will play the sound
from beginning to end. However, if you want a little extra control over the sound, you can create an
AudioClip object, whose method's enable you to play, stop, and loop the sound.
Review Questions
1. What two types of image files can be loaded by a Java applet?
2. What two parameters are required by methods such as getImage() and getAudioClip()?
3. What's the only type of audio file recognized by Java?
4. How do you display an image after it's loaded?
5. Do image and sound files always have to be stored in the same directory as the HTML or CLASS
file?
6. How do you display an image larger or smaller than normal?
7. How can you determine the width and height of an image?
8. What's the difference between a document and code base URL?
9. Why does creating an AudioClip object give you more control over your sound effects?
Review Exercises
1. Write an applet that displays the SNAKE.gif image at three times its normal size.
2. Write an applet that loops the SPACEMUSIC.AU file as soon as the applet starts up. The applet
should have a Stop button that enables the user to stop the sound.
3. Write an applet that has three buttons for displaying an image at 50%, 100%, and 200% of its
normal size. Use the SNAKE.gif image that you used earlier in this chapter. When the user clicks
a button, you should display the image at the selected size, reducing or enlarging the applet's size
to accommodate the image. But make the applet's minimum horizontal size 150 so that the three
buttons always fit across the top. Figures 27.6, 27.7, and 27.8 show the ImageApplet3 applet
displaying the image in its three sizes. (You can find the solution for this exercise in the CHAP27
folder of this book's CD-ROM.)
Figure 27.5 : Here's the image at 50%.
Figure 27.6 : Here's the image at 100%.
Figure 27.7 : And here's the image at 200%.
Chapter 28
Communications
CONTENTS
● URL Objects
❍ Example: Creating an URL Object
❍ URL Exceptions
● The Applet Context
❍ Example: Using an AppletContext to Link to an URL
❍ Example: Using an AppletContext in an Applet
● Creating a "Favorite URLs" Applet
● Summary
● Review Questions
● Review Exercises
Not to state the obvious, but because applets are used on the Internet, they have the ability to perform a
few types of telecommunications tasks. One of these tasks, connecting to other Web sites, is a snap to
implement. Other tasks, such as accessing data in files, are difficult to implement because you constantly
stumble over the security restrictions built into applets. Dealing with the intricacies of Internet security is
beyond the scope of this book. If you're interested in this topic, you should pick up an advanced Java
book. In this chapter, though, you'll get a chance to use Java to communicate over the Internet by
connecting to URLs that the user supplies.
URL Objects
In the previous chapter, you got a quick introduction to URL objects when you obtained the location of
graphics and sound files by calling the getDocumentBase() and getCodeBase() methods. You
used the URL objects returned by these methods in order to display images and play sounds that were
stored on your computer. In that case, the locations of the files were on your own system. What you
didn't know then is that you can create an URL object directly by calling its constructor. Using this
technique, you can create URL objects that represent other sites on the World Wide Web.
Although the URL class's constructor has several forms, the easiest to use requires a string argument
holding the URL from which you want to create the object. Using this constructor, you create the URL
object like this:
URL url = new URL(str);
This constructor's single argument is the complete URL of the location to which you want to connect.
This URL string must be properly constructed or the URL constructor will throw an exception (generate
an error). You'll soon see what to do about such errors.
Example: Creating an URL Object
Suppose you want to create an URL object for the URL , which is where you
can find lots of information about Java. You'd create the URL object like this:
URL url = new URL("");
If the URL construction goes okay, you can then use the URL object however you need to in your applet.
URL Exceptions
As I mentioned previously, if the argument for the URL constructor is in error (meaning that it doesn't use
valid URL syntax), the URL class throws an exception. Because the URL class is designed to throw an
exception when necessary, Java gives you no choice except to handle that exception properly. This
prevents the applet from accidentally attempting to use a defective URL object. You'll learn all the details
about handling exceptions in
Chapter 30, "Exceptions." For now, though, you need to know how to
handle the URL exception because your applets will not compile properly until you add the exception-
handling code.
Basically, when you need to watch out for an exception, you enclose the code that may generate the error
in a try program block. If the code in the block generates an exception, you handle that exception in a
catch program block. (It's no coincidence that when code "throws" an exception, Java expects the
program to "catch" that exception.) When you create an URL object from a string, you must watch out for
the MalformedURLException exception, which is one of the many exceptions defined by Java. To
do this, use the try and catch program blocks, as shown in Listing 28.1.
Listing 28.1 LST28_1.TXT: Handling URL Exceptions.
try
{
URL url = new URL(str);
}
catch (MalformedURLException e)
{
DisplayErrorMessage();
}
The Applet Context
Once you have the URL object created, you need a way to pass it on to the browser in which the applet is
running. It is the browser, after all, that will make the Web connection for you. But, how do you refer to
the browser from within your applet? You call the getAppletContext() method, which returns an
AppletContext object. This AppletContext object represents the browser in which the applet is
running. You call getAppletContext() like this:
AppletContext context = getAppletContext();
Once you have the context, you can link to the URL represented by the URL object you already created.
You do this by calling the AppletContext object's showDocument() method, like this:
context.showDocument(url);
If all goes well, the above line will connect you to the requested URL.
Example: Using an AppletContext to Link to an URL
Suppose that you want to enable the user to enter an URL string in your applet and then use URL and
AppletContext objects to link to that URL. Listing 28.2 shows how you might accomplish this feat
of Internet prestidigitation:
Listing 28.2 LST28_2.TXT: Linking to an URL.
String str = GetURLStringFromUser();
try
{
URL url = new URL(str);
AppletContext context = getAppletContext();
context.showDocument(url);
}
catch (MalformedURLException e)
{
DisplayErrorMessage();
}
In Listing 28.2, the program first calls a method that retrieves a text string from the user. This text string
is the URL to which the user wants to connect. Then, the try program block starts. The first line inside
the try block attempts to create an URL object from the string the user entered. Of course, because
user's often make mistakes when typing in long strings of characters, the string the user entered may not
be a syntactically valid URL. In that case, program execution automatically jumps to the catch
program block, where your applet displays an appropriate error message. If the URL object gets created
okay, though, the program finishes the code in the try block, getting the AppletContext object and
making the link to the URL. In this case, Java completely ignores the catch block.
Example: Using an AppletContext in an Applet
Ready for a full-fledged example? Listing 28.3 is a complete applet that enables the user to link to an
URL. Listing 28.4 is the HTML document that loads the applet. Because this applet actually interacts
with a browser and the Internet, you must have made your Internet connection before running the applet.
Then, to run the applet, load its HTML document into a Java-compatible browser such as Netscape
Navigator 2.0. When you do, you'll see a window similar to that shown in Figure 28.1. In this figure, the
user has already entered the URL he wishes to visit. In Figure 28.2, the browser has made the requested
connection. Figure 28.3 shows the browser when the user enters an invalid URL string.
Figure 28.1 : Here, the user is ready to make a connection.
Figure 28.2 : If the URL is OK, the browser connects.
Figure 28.3 : If the URL is constructed improperly, the applet displays an error message.
NOTE
You can load ConnectApplet's HTML file using Appletviewer, if
you like. However, you will be unable to make a connection to the
requested URL. You can, however, see what happens when you
enter a badly constructed URL string.
Listing 28.3 ConnectApplet.java: An Applet That Connects to User-Requested
URLs.
import java.awt.*;
import java.applet.*;
import java.net.*;
public class ConnectApplet extends Applet
{