Tải bản đầy đủ (.pdf) (49 trang)

jQuery UI 1.6 The User Interface Library for jQuery phần 10 pptx

Bạn đang xem bản rút gọn của tài liệu. Xem và tải ngay bản đầy đủ của tài liệu tại đây (1.17 MB, 49 trang )

Sorting

You should find when you run the page that you can move the boxes around,
close your browser, run the page again, and see the boxes retain the order that
you gave them:

Please note that that example does not run correctly in Opera and exhibits the same
unusual placement of sorted items that occurred in some of the earlier connected-list
examples in the chapter.

[ 372 ]


Chapter 11

Summary
We've finished off our tour of the interaction components of the library by looking
at the sortables component. Like the other modules that we looked at before, it has
a wide range of properties and methods that allow us to configure and control its
behavior and appearance in both simple and more complex implementations.
We started the chapter off with a look at a simple, default implementation with no
configuration to see the most basic level of functionality added by the component.
We looked at some of the different elements that can be made sortable and added
some basic styling to the page.
Following this, we looked at the range of configurable properties that are exposed by
the sortable API. The list is extensive and provides a wide range of functionality that
can be enabled or disabled with ease.
We moved on to look at the extensive event model used by this component which
gives us the ability to react to different events as they occur in any sort operation
initiated by the visitor.
Connected lists offer the ability to be able to exchange sortable items, giving our


visitors the ability to move items between separate lists. We saw the additional
properties and events that are used specifically with connected sortable lists.
In the last part of the chapter, we looked at the methods available for use with the
sortables component and focused on the highly useful serialize method, and also
had a quick look at its compatibility with other members of the jQuery UI library in
the form of the sortable tabs example.

[ 373 ]


UI Effects
So far, we've looked at a range of incredibly useful widgets and extension helpers.
All are easy to use, but some have had their subtle nuances which have required
consideration and thought during their use. Some of the components' APIs that we
have looked at have been huge. The effects of the library on the other hand are for
the most part, extremely compact, with very few properties to learn and no methods
at all. Using the effects is as simple as calling the effect's constructor and including
maybe one or two properties if required.
Each of the previous chapters has finished on a fun with section in which the API that
the chapter focuses on has been put to use in a functional, potentially useful, and
above all fun scenario. This chapter isn't going to end with a fun with example – the
whole chapter is instead going to be written from a 'fun' perspective, so we can sit
back, relax a little, and enjoy the show that the UI effect components can put on for us.
The effects that we'll be looking at in this chapter are as follows:


blind
bounce
clip
drop
explode
fold
highlight
pulsate
puff
scale
shake
slide
transfer


UI Effects

The core effects file
Like the individual components themselves, the effects require the services of a
separate core file which provides essential services to the effects, such as creating
wrapper elements, and controlling the animations. Most, but not all, of the effects

have their own source file.
All we need to do to use an effect is include the core file (effects.core.js) in the
page before the effect's source file, and then forget about it. Unlike the ui.core.
js file however, the effects.core.js file has been designed to be used, in part,
completely standalone.
When using the core effect file on its own we can take advantage of color animations,
such as smoothly changing the background color of an element into another color
(and not just a snap change but a smooth morphing of one color into another), class
transitions, and advanced easing animations.

Color animations
Let's look at color animations first. These are very easy to implement and give an
attractive result quickly. Create the following new page:
<!DOCTYPE HTML PUBLIC "-//W3C//DTD HTML 4.01//EN" " />TR/html4/strict.dtd">
<html lang="en">
<head>


<title>jQuery UI Color Animation Example</title>
</head>
<body>
<div><label>Name: </label><input type="text"></div>
<div><label>Age: </label><input type="text"></div>
<div><label>Email: </label><input type="text"></div>
<button id="submit">Submit</button>

effects.core.js"></script>
<script type="text/javascript">
//function to execute when doc ready
$(function() {

[ 376 ]


Chapter 12
$("#submit").click(function() {
//check fields not empty
$("input").each(function() {
//color red if they are
($(this).val().length == 0) ? $(this).animate({
backgroundColor:"#ff9999",
borderTopColor:"#ff0000",
borderRightColor:"#ff0000",
borderBottomColor:"#ff0000",
borderLeftColor:"#ff0000"
}) : $(this).animate({ //color green if not
backgroundColor:"#ccffcc",
borderTopColor:"#00ff00",
borderRightColor:"#00ff00",
borderBottomColor:"#00ff00",
borderLeftColor:"#00ff00"
});
});
});
});
</script>

</body>
</html>

Save the page as colorAnim.html. As you can see, all we need are jQuery and
the effects.core.js file. When I said the effects.core.js file could be used
standalone, I actually meant on top of the normal jQuery library, although it is still
standalone as far as the UI effects are concerned.
The animate method, as I'm sure you're aware, is part of jQuery rather than jQuery
UI, but the effects.core.js file extends the animate method by allowing it to
specifically work with colors and classes.
When the Submit <button> is clicked in this example, we simply use the animate
method to apply a series of new CSS properties to the target elements. These style
properties are supplied to the method as the properties and values of a literal object.
We also use a basic stylesheet in this example. In another new page, add
the following;
div { margin-bottom:5px; }
label { display:block; width:100px; float:left; }
input { border:1px solid #000000; }

[ 377 ]


UI Effects

Save this as colorAnim.css in the styles folder. When we view this page in our
browser, we should see that any fields left blank smoothly turn red when the Submit
<button> is clicked, while fields that are not empty smoothly turn green. The most
attractive however are when a field changes from red to green.
The following screenshot shows the page once the Submit <button> has
been clicked:


The style attributes that color animations can be used on are:


backgroundColor


any borderColor


color


outlineColor

Colors may be specified using either RGB or HEX, or even standard color names.

Class transitions
In addition to animating individual color attributes, effects.core.js also gives us
the powerful ability to animate between entire classes, allowing us to switch styles
smoothly and seamlessly without sudden, jarring changes. Let's look at this aspect
of the file's use in the following example. Create the following new file in your
text editor:
<!DOCTYPE HTML PUBLIC "-//W3C//DTD HTML 4.01//EN" " />TR/html4/strict.dtd">
<html lang="en">
<head>

classAnim.css">
[ 378 ]


Chapter 12

<title>jQuery UI Class Animation Example</title>
</head>
<body>
<div><label>Name: </label><input type="text"></div>
<div><label>Age: </label><input type="text"></div>
<div><label>Email: </label><input type="text"></div>
<button id="submit">Submit</button>

//if input already has pass class
} else if ($(this).hasClass("pass")) {
//do nothing if not empty or add error class
($(this).val().length != 0) ? null : $(this).
switchClass("pass", "error", 2000);
//if has neither class
} else {
//add error class if empty, pass if not
($(this).val().length == 0) ? $(this).addClass("error",
2000) : $(this).addClass("pass", 2000);
}
});
});
});
</script>
</body>
</html>
[ 379 ]


UI Effects

Save this as classAnim.html. The effects.core.js extends the jQuery addClass
method by allowing us to specify a duration over which the new class name should
be applied instead of just switching it instantly. We also use the switchClass
method of the effects.core.js file when the fields already have one of the
class names.
Essentially, the page functions as it did before, although using this type of class
transition allows us to use non-color-based style rules as well, so we could adjust
widths, heights, or anything else controlled by CSS. As in the previous example, we

have a stylesheet attached. This is essentially the same as in the previous example
except with some styles for our two new classes. Add the following selectors and
rules to colorAnim.css:
.error { border:1px solid #ff0000; background-color:#ff9999; }
.pass { border:1px solid #00ff00; background-color:#ccffcc; }

Save the updated file as classAnim.css in the styles folder. In the next screenshot,
we see the page after it has been interacted with:

Please note that at the time of writing, this example only works in Firefox.

Advanced easing
The animate method found in standard jQuery has some basic easing capabilities
built in, but for more advanced easing, you had to include an additional easing
plug-in (ported to jQuery by GSGD).

[ 380 ]


Chapter 12

The effect.core.js file however has all of these advanced easing options built
right in so there is no need to include additional plugins. We won't be looking at
them in any real detail in this section, however, as we'll be using them in some of
the examples later on in the chapter.

Highlighting
The highlight effect temporarily applies a light yellow coloring to any element that
it's called on. Let's put a simple example together so we can see the effect in action.
In a new page in your text editor, add the following code:

<!DOCTYPE HTML PUBLIC "-//W3C//DTD HTML 4.01//EN" " />TR/html4/strict.dtd">
<html lang="en">
<head>

<title>jQuery UI Highlight Effect</title>
</head>
<body>
<button id="a">Next</button>
<button id="b">Next</button>
<button id="c">Next</button>
<button id="d">Next</button>

Only one of these buttons will take you to the next page,
choose wisely (click the hint button for help).
<button id="Hint">Hint</button>

</body>
</html>
[ 381 ]


UI Effects

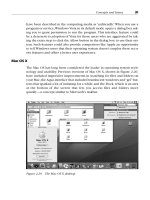
Save this as highlight.html. The code which invokes the highlight effect takes the
same familiar form as other library components. The effect constructor is called
and the actual effect is specified as a string argument in the constructor. View the
example and click the Hint button. The third button should briefly be highlighted:

The library files we needed for this example are listed below:


jquery-1.2.6.js


effects.core.js


effects.highlight.js

While our example may seem a little contrived, it is easy to see the potential for this
effect as an assistance tool on the front-end. Whenever there is a sequence of actions
that needs to be completed in a specific order, the highlight effect can instantly give
the visitor a visual cue as to the step that needs to be completed next. Similarly, it
could be used in a tutorial or electronic manual to draw attention to a particular


part of the screen.

Additional effect parameters
Each of the effect constructors, as well as the parameter which dictates which effect
is actually applied, can take up three additional parameters which control how the
effect functions. All are optional, and consist of the following (in the listed order):


An object containing additional configuration properties


An integer representing in milliseconds the duration of the effect, or a string
specifying one of slow, normal, or fast.


A callback function that is executed when the effect ends

[ 382 ]


Chapter 12

Let's add these additional parameters into our highlight example to clarify their
usage. Change the final <script> element in highlight.html so that it appears
as follows:
<script type="text/javascript">
//function to execute when doc ready
$(function() {

$("#hint").click(function() {
//highlight specified element
$("#c").effect("highlight", {}, 2000, function() {
$("

").text("That was the highlight").appendTo("body");
});
});
});
</script>

Save this as highlightParameter.html. Perhaps the most striking feature of our
new code is the empty object passed as the second argument. In this example, we
don't need any additional configurable properties, but we still need to pass in the
empty object in order to access the third and fourth arguments.
The highlight effect has only one configurable property that can be used in the
configuration object passed and that is the highlight color.
The animation should now proceed much slower as we have set the duration to
2000 milliseconds (2 seconds). Note that this third parameter may also take a string
representing the speed of the animation. Our callback function, passed as the fourth
and final argument, is perhaps the least useful callback in the history of JavaScript,
but it does serve to illustrate how easy it is to arrange additional post-animation code
execution. Here's how the page should look after the Hint button has been clicked:

[ 383 ]


UI Effects

Bouncing
Another simple effect we can use with little configuration is the bounce effect. To see
this effect in action create the following page:


<!DOCTYPE HTML PUBLIC "-//W3C//DTD HTML 4.01//EN" " />TR/html4/strict.dtd">
<html lang="en">
<head>
<link rel="stylesheet" type="text/css" href="styles/bounce.css">

<title>jQuery UI Bounce Effect</title>
</head>
<body>
<div id="menu">
<a href="#">Home</a><a href="#">About</a><a href="#">Help</a>
<a href="#">Products</a><a href="#">Services</a>
</div>


Save this as bounce.html. Using the bounce effect in this example shows how
easy it is to add this simple but attractive effect. We didn't use any of the effect's
configuration properties in this example, but the bounce effect does have three
that may be useful in other situations:
Property
direction

Default
up

Usage

distance

20 (pixels)
5

Sets the distance of the first bounce

times

Sets the direction of the bounce
Sets the number of times the element should bounce
[ 384 ]


Chapter 12

You'll notice when you run the example that the bounce effect has an ease-out easing

feature built into it, so the distance of the bounce will automatically decrease as the
animation transpires. We also need a little CSS for this example. Add the following
styles in a new page:
#menu {
position:relative; top:100px; width:275px; margin:0 auto;
}
#menu a {
float:left; height:20px; padding:2px 5px;
text-decoration:none;
}

Save this as bounce.css in the styles folder. Here's how the page should look:

Shaking
The shake effect is similar to the bounce effect but with the crucial difference of not
having any built-in easing, so the targeted element will shake the same distance for
the specified number of times instead of lessening each time (although it will come
to a smooth stop at the end of the animation).

[ 385 ]


UI Effects

Let's change the previous example so that it uses the shake effect instead of the
bounce effect. Change bounce.html so that it appears as follows:
<!DOCTYPE HTML PUBLIC "-//W3C//DTD HTML 4.01//EN" " />TR/html4/strict.dtd">
<html lang="en">
<head>
<link rel="stylesheet" type="text/css" href="styles/bounce.css">


<title>jQuery UI Shake Effect</title>
</head>
<body>
<div id="menu">
<a href="#">Home</a><a href="#">About</a><a href="#">Help</a>
<a href="#">Products</a><a href="#">Services</a>
</div>

which is left.

[ 386 ]


Chapter 12

This effect shares the same properties as the bounce effect, although the defaults are
set slightly differently. The properties are listed in the following table:
Property
direction

Default
left

Usage

distance

20 ��������
(pixels)
3

Sets the distance of the shake

times

Sets the direction of the shake
Sets the number of times the element should shake


Transference
The transfer effect is different from the others in that it doesn't directly affect the
targeted element. Instead, it transfers the outline of a specified element to another
specified element. To see this effect in action, create the following page:
<!DOCTYPE HTML PUBLIC "-//W3C//DTD HTML 4.01//EN" " />TR/html4/strict.dtd">
<html lang="en">
<head>
<link rel="stylesheet" type="text/css" href="styles/transfer.css">

<title>jQuery UI Transfer Effect</title>
</head>
<body>
<div id="container">
<div id="productContainer">
<img alt="GTX 280" src="img/gcard.jpg"></img>

BFG GTX 280 OC
1GB GDDR3 Dual DVI HDTV Out PCI-E Graphics Card

Cost:
$350

<div id="purchase"><button id="buy">Buy</button></div>
</div>
<div id="basketContainer">
<div id="basket"></div>

Basket total: <span id="total">0</span>


</div>
</div>

<script type="text/javascript">
//function to execute when doc ready
[ 387 ]


UI Effects
$(function() {
$("#buy").click(function() {
$("#productContainer img").effect("transfer", { to:"#basket"
}, 750, function() {
var currentTotal = $("#total").text();
numeric = parseInt(currentTotal);
$("#total").text(numeric + 1);
});
});
});
</script>
</body>
</html>

Save this as transfer.html. We've created a basic product listing for an imaginary
hardware retailer. When the Buy <button> is clicked, the transfer effect will give the
impression of the product being moved into the basket.
Of course, a proper shopping cart application would be exponentially more
complex than this, but we do get to see the transfer effect and get to use the built-in
callback function to do a little post-animation processing, so the exercise should still
be beneficial.
We also need some CSS for this example, so create the following new stylesheet:
#container { width:607px; margin:0 auto; }
#productContainer img {

width:92px; height:60px;
border:2px solid #000000;
float:left; position:relative;
}
#productContainer p {
width:340px; height:50px;
font-family:Verdana; font-size:11px; font-weight:bold;
float:left;
margin:0; padding:5px;
border-top:2px solid #000000;
border-right:2px solid #000000;
border-bottom:2px solid #000000;
}
p#price {
height:35px; width:70px;
padding-top:20px; float:left;
}
#purchase {
[ 388 ]


Chapter 12
height:44px; width:75px;
border-top:2px solid #000000;
border-right:2px solid #000000;
border-bottom:2px solid #000000;
padding-top:16px; float:left;
text-align:center;
}
#basketContainer {

float:right; width:90px; margin-top:100px;
}
#basket {
width:65px; height:31px;
position:relative; left:13px;
background:url(../img/basket.gif) no-repeat;
}
.ui-effects-transfer { border:2px solid #66ff66; }

Save this as transfer.css in the styles folder. The key rule in our stylesheet is
the one which targets the element that has a class of ui-effects-transfer.
This element is created by the control and together with our styling produces the
actual effect.
Run the file in your browser. I think you'll agree that it's a nice effect which would
add value to any page that it was used on. Here's how it should look while the
transfer is occurring:

[ 389 ]


UI Effects

The transfer effect has just two configurable properties, one of which is required and
that we have already seen. For reference, both are listed in the following table:
Property
className

Default
ui-effects-transfer


Usage

to

none

Sets the element the effect will be
transferred to. This property is mandatory

A new class to apply to the element the
transfer originates from

The four effects that we've looked at so far all have one thing in common—they can
only be used with the effect method. The remaining effects can be used not only
with the effect method, but also with the toggle, and the show/hide methods.
Let's take a look.

Scaling
The next effect that we'll look at is scaling, which allows us to shrink or grow any
specified element. At the end of the last chapter, we created a page that had a series
of boxes on it which could be reordered or closed. When they were closed, they
simply vanished instantly from the page.
Let's use the scale effect to make them gracefully shrink to nothing instead. Change
the anonymous click function attached to the .close button in jPage.html so that it
appears as follows:
//close the box on close icon click
$(".close").click(function() {

//shrink the box to nothing then append to closed list
$(this).parent().parent().effect("scale", { percent:0 }, "slow",

function() {
$(this).appendTo("#hidden");
});
});

[ 390 ]


Chapter 12

Save this file as scaling.html. The percent property indicates the ending size
of the element the effect is applied to. Here's how one of our boxes should look
in mid-scale:

[ 391 ]


UI Effects

There are several more properties that can be used with scale, which are as follows:
Property
direction

Default
both

Usage

from


{}

Sets the starting height and width of the
element to be scaled

origin

["middle","center"]

Sets the vanishing point, used with
show/hide animations

percent

0

Sets the end size of the scaled element

Sets the direction to scale the element in. May
be a string specifying either both, vertical,�
or horizontal

I mentioned a little while ago that the effects that we're looking at now can be used
with other methods. The file in our previous example could be reconstructed to use
the hide method instead:
//close the box on close icon click
$(".close").click(function() {

//shrink the box to nothing then append to closed list
$(this).parent().parent().hide("scale", { }, "slow", function() {

$(this).appendTo("#hidden");
});
});

Save this variation as scalingHide.html. We've gotten away with a slightly lighter
method as we don't have to supply the percent property in our configuration
object, but other than this, the effects are very similar code-wise. Visually, the only
difference in the execution of this version of the file is that the boxes now vanish to
the center instead of the top-left.

Element explosion
The explosion effect is truly awesome. The targeted element is literally exploded
into a specified number of pieces before disappearing completely. It's an easy effect
to use and has few configuration properties but the visual impact of this effect is
huge, giving you a lot of effect in return for very little code. Let's see a basic example.
Create the following new page:
<!DOCTYPE HTML PUBLIC "-//W3C//DTD HTML 4.01//EN" " />TR/html4/strict.dtd">
<html lang="en">
<head>
[ 392 ]


Chapter 12
<link rel="stylesheet" type="text/css" href="styles/explode.css">

<title>jQuery UI Explode Effect</title>
</head>
<body>
<button id="detonate">Pull the Pin!</button>

<div id="theBomb"></div>


[ 393 ]


UI Effects

As our example shows, the effect can be used with either simple CSS properties like
coloured backgrounds and borders, or more complex implementations involving
proper images:

Physicists sometimes speculate as to why the arrow of time seems to only point
forwards. They invariably ask themselves philosophical questions like 'why do we
not see grenades spontaneously forming from a large cloud of debris?' (actually, the
object is usually an egg but I don't think an egg-based example would have had the
same impact!)
jQuery UI cannot help our understanding of entropy, but it can show us what a
grenade spontaneously reassembling might look like. Change the click handler in
the previous function so that it appears as follows:
//show the image
$("#detonate").click(function() {
$("#theBomb").show("explode");
});

Save this variant as explodeShow.html. The animation is the same except that it
is shown in reverse. Like the other effects, explode can also make use of specific
timings and callback functions.
[ 394 ]


Chapter 12


The puff effect
Similar to the explode effect but slightly more subtle is the puff effect which
causes an element to grow slightly before fading away. Like explode there are
few configuration options to concern ourselves with.
Consider a page that has AJAX operations occurring on it. It's useful to provide a
loading image that shows the visitor that something is happening. Instead of just
hiding an image like this when the operation has completed, we can puff it out of
existence instead. Create the following page:
<!DOCTYPE HTML PUBLIC "-//W3C//DTD HTML 4.01//EN" " />TR/html4/strict.dtd">
<html lang="en">
<head>
<link rel="stylesheet" type="text/css" href="styles/puff.css">

<title>jQuery UI Puff Effect</title>
</head>
<body>
<img id="loading" alt="Loading" src="img/loading.gif">

$(this).hide("puff");
});
});
</script>
</body>
</html>

Save this as puff.html. The stylesheet used in this example is purely to position the
image slightly so that we can see the full effect of the, well, the effect. For reference, it
is comprised of the following styles:
#loading { position:relative; top:100px; left:100px; }
[ 395 ]


UI Effects

Save this as puff.css in the styles folder. In this example, the effect is produced on
the click event of the image. However, in reality, we would probably work it into the
success AJAX event instead.
You'll notice that we used the effect.scale.js source file for this effect. The puff
effect is the only effect that does not have its own source file and is instead part of the
very closely related scaling effect's source file.
Like the explode effect that we looked at in the last section, this effect has just one
configuration property that can be passed in an object as the second argument of the
effect constructor. This is the percent property and controls how big the image is
scaled up to. The default value is 150%.
The effect stretches the targeted element (and its children), while at the same time
reducing its opacity. It works well on proper images, background colours, and borders,
but you should note that it does not work so well with background images specified by
CSS. Nevertheless, it's a great effect. The following screenshot shows it in action:


[ 396 ]


×