microsoft visual basic 2008 step by step phần 2 pptx
Bạn đang xem bản rút gọn của tài liệu. Xem và tải ngay bản đầy đủ của tài liệu tại đây (1.15 MB, 57 trang )
Chapter 1 Exploring the Visual Studio Integrated Development Environment 29
The How Do I article is deleted from your favorites list (but not from the Help system).
13. Click the Close button on the Document Explorer title bar.
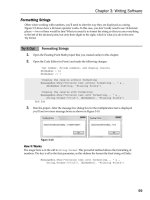
There are additional Help features to learn and experiment with, but now is a good time for
me to summarize the important Help commands and for you to turn to the writing of your
fi rst program in the next chapter.
Summary of Help Commands
Here is a short compilation of useful Help commands and their uses within the Visual
Studio IDE.
To get Help information Do this
Organized by programming task On the Visual Studio Help menu, click How Do I.
About the feature or command
you’re currently using
On the Visual Studio Help menu, click Dynamic Help.
By topic or activity On the Visual Studio Help menu, click Contents.
While working in the Code Editor Click the keyword or program statement you’re interested in,
and then press F1.
While working in a dialog box Click the Help button (question mark) in select dialog boxes
(for example, the dialog box displayed when you choose the
Options command on the Tools menu).
By searching for a specifi c
keyword
On the Help menu, click Search, and type the term you’re
looking for. Filter and organize the search results using the
Sort By list box.
From MSDN and independent
Visual Studio Web sites
On the Help menu, click MSDN Forums.
About contacting Microsoft for
product support
On the Help menu, click Technical Support.
Customizing IDE Settings to Match Step-by-Step
Exercises
Like the tool windows and the Help system, the compiler settings within the Visual Studio
development environment are highly customizable. It is important to review a few of these
settings now so that your version of Visual Studio is confi gured in a way that is compatible
with the step-by-step programming exercises that follow. You will also learn how to cus-
tomize Visual Studio generally so that as you gain programming experience, you can set
up Visual Studio in the way that is most productive for you.
To get Help in
f
ormatio
n
D
o th
i
s
30 Part I Getting Started with Microsoft Visual Basic 2008
Setting the IDE for Visual Basic Development
The fi rst setting that you need to check was established when Visual Studio was fi rst installed
on your machine. During setup, you were asked how you wanted Visual Studio to confi gure
your general development environment. Since Visual Studio is a multi-purpose programming
tool, you had many options—Visual Basic development, Visual C++ development, Visual C#
development, Web development, and even a general-purpose programming environment
that closely matches previous versions of Visual Studio. The selection you made confi gured
not only the Code Editor and the development tools available to you, but also the menu and
toolbar commands, and the contents of several tool windows. For this reason, if you plan to
use this book to learn Visual Basic programming but originally confi gured your software for
a different language, a few of the menu commands and procedures described in this book
will not exactly match your current software confi guration. (The location of the Web Browser
command, discussed above, is one example.)
Fortunately, you can fi x this inconsistency and practice changing your environment settings
by using the Import And Export Settings command on the Tools menu. The following steps
show you how to change your environment setting to Visual Basic development, the recom-
mended setting for this book.
Set the IDE for Visual Basic development
1. On the Tools menu, click Import And Export Settings.
You can use the wizard that appears to save your environment settings for use on
another computer, load settings from another computer, or reset your settings—the
option that you want to select now.
2. Click Reset All Settings, and then click Next.
Visual Studio asks you if you want to save your current settings in a fi le before you
confi gure the IDE for a different type of programming. It is always a good idea to
save your current settings as a backup, so that you can return to them if the new
ones don’t work out.
3. Verify that the Yes, Save My Current Settings button is selected, and note the fi le name
and folder location in which Visual Studio plans to save the settings.
If you want to go back to these settings, you’ll use this same wizard and the Import
Selected Environmental Settings button to restore them.
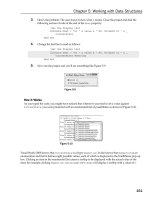
4. Click Next to view the default list of settings that you can use for Visual Studio.
Depending on what Visual Studio components are installed, you will see a list of settings
similar to those shown in the following illlustration:
Chapter 1 Exploring the Visual Studio Integrated Development Environment 31
5. Click Visual Basic Development Settings (if it is not already selected), and click Finish.
The wizard switches your IDE settings, including menu commands, toolbars, and settings
within a few dialog boxes, tool windows, and the Code Editor. If a Help window is still
open from an earlier exercise, you see a warning reminding you that the Help system
cannot be updated fully until you close and restart Help.
Feel free to repeat this customization process any time that you need to reset your
settings (for example, if you make a customization mistake that you regret), or if you
want to customize Visual Studio for another programming tool.
6. Click Close to close the wizard.
Checking Project and Compiler Settings
If you just reset your environment settings for Visual Basic development, you are now ready
to begin the programming exercises. But if you didn’t reset your settings—for example, if
you were already confi gured for Visual Basic development and have been using Visual Studio
2008 for a while, or if your computer is a shared resource used by other programmers who
might have modifi ed the default settings (perhaps in a college computer lab)—complete the
following steps to verify that your settings related to projects, solutions, and the Visual Basic
compiler match those that I use in the book.
32 Part I Getting Started with Microsoft Visual Basic 2008
Check project and compiler settings
1. Click the Options command on the Tools menu to display the Options dialog box.
The Options dialog box is your window to many of the customizable settings within
Visual Studio. To see all the settings that you can adjust, click to select the Show All
Settings check box in the lower-left corner of the dialog box.
2. Expand the Projects And Solutions category and then click the General item in the
Options dialog box.
This group of check boxes and options confi gures the Visual Studio project and solution
settings.
3. So that your software matches the settings used in this book, adjust your settings to
match those shown in the following dialog box:
Set this to the location of the book's
practice files (c:\vb08sbs)
Remove checkmarks
from boxes so that
instructions related to
opening projects
match the book
Select this checkbox to show
all available settings
In particular, I recommend that you clear the check marks from the Always Show
Solution and Save New Projects When Created check boxes. The fi rst option shows
additional solution commands in the IDE, which is not necessary for solutions that con-
tain only one project (the situation for most programs in this book). The second option
(in contrast with Visual Studio .NET 2003 and Visual Basic 6) causes Visual Studio to
postpone saving your project until you click the Save All command on the File menu
and provide a location for saving the fi le. This “delayed save” feature allows you to
create a test program, compile and debug the program, and even run it without actu-
ally saving the project on disk—a useful feature when you want to create a quick test
program that you might want to discard instead of saving. (An equivalent situation in
word-processing terms is when you open a new Word document, enter an address for
Chapter 1 Exploring the Visual Studio Integrated Development Environment 33
a mailing label, print the address, and then exit Word without saving the fi le.) With this
default setting, the exercises in this book prompt you to save your projects after you
create them, although you can also save your projects in advance by selecting the Save
New Projects When Created check box.
You’ll also notice that I have highlighted the c:\vb08sbs folder as the location for Visual
Studio projects, the default location for this book’s sample fi les. Most of the projects
that you create will be stored in this folder, and they will have a “My” prefi x to distin-
guish them from the completed project I provide for you to examine.
After you have adjusted these settings, you’re ready to check four Visual Basic compiler
settings.
4. Click the VB Defaults item in the Options dialog box.
Visual Studio displays a list of four compiler settings: Option Explicit, Option Strict,
Option Compare, and Option Infer. Your screen looks like this:
Although a detailed description of these settings is beyond the scope of this chapter,
you’ll want to verify that Option Explicit is set to On and Option Strict is set to Off—the
default settings for Visual Basic programming within Visual Studio. Option Explicit On
is a setting that requires you to declare a variable before using it in a program—a very
good programming practice that I want to encourage. Option Strict Off allows variables
and objects of different types to be combined under certain circumstances without
generating a compiler error. (For example, a number can be assigned to a text box
object without error.) Although this is a potentially worrisome programming practice,
Option Strict Off is a useful setting for certain types of demonstration programs. If you
don’t keep this setting, a few projects will display error messages when you run them.
34 Part I Getting Started with Microsoft Visual Basic 2008
Option Compare determines the comparison method when different strings are com-
pared and sorted. For more information about comparing strings and sorting text, see
Chapter 13, “Exploring Text Files and String Processing.”
Option Infer is a new setting in Visual Basic 2008. If you set Option Strict to Off and you
set Option Infer to On, you can declare variables without explicitly stating a data type.
Or rather, if you make such a declaration, the Visual Basic compiler will infer (or take
an educated guess) about the data type based on the initial assignment you made for
the variable. The designers of Visual Basic have allowed this type of declaration in the
hopes of saving you computer memory. You’ll learn more about the feature in Chapter
5, “Visual Basic Variables and Formulas, and the .NET Framework”.
As a general rule, I recommend that you set Option Infer to Off to avoid unexpected
results in how variables are used in your programs. I have set Option Infer to Off in
most of the sample projedcts included on the companion CD.
5. Feel free to examine additional settings in the Options dialog box related to your pro-
gramming environment and Visual Studio. When you’re fi nished, click OK to close the
Options dialog box.
You’re ready to exit Visual Studio and start programming.
One Step Further: Exiting Visual Studio
Each chapter in this book concludes with a section titled “One Step Further” that enables
you to practice an additional skill related to the topic at hand. After the “One Step Further”
tutorial, I’ve compiled a Quick Reference table that reprises the important concepts dis-
cussed in each chapter.
When you’re fi nished using Visual Studio for the day, save any projects that are open, and
close the development environment. Give it a try.
Exit Visual Studio
1. Save any changes you’ve made to your program by clicking the Save All button on the
Standard toolbar.
As you learned in the preceding section, the default behavior in Visual Studio 2008
is that you give your program a name when you begin a project or solution, but you
don’t specify a fi le location and save the project until you click the Save All button or
the Save All command on the File menu. You’ve made a few changes to your project, so
you should save your changes now.
2. On the File menu, click the Exit command.
The Visual Studio program closes. Time to move on to your fi rst program in Chapter 2!
Chapter 1 Exploring the Visual Studio Integrated Development Environment 35
Chapter 1 Quick Reference
To Do this
Start Visual Studio Click Start on the taskbar, click All Programs, click the Microsoft Visual Studio
2008 folder, and then click the Microsoft Visual Studio 2008 program icon.
Open an existing
project
Start Visual Studio. Click Open Project on the File menu.
or
On the Start Page, click Project at the bottom of the Recent Projects pane.
Compile and run a
program
Click the Start Debugging button on the Standard toolbar.
or
Press F5.
Set properties Click the form object whose properties you want to set. In the Properties
window, click the property name in the left column, and then change the
corresponding property setting in the right column.
Resize a tool window Display the tool as a fl oating window (if it is currently docked), and resize it
by dragging its edges.
Move a tool window Display the tool as a fl oating window (if it is in a docked state), and then
drag its title bar.
Dock a tool window With the mouse pointer, drag the window’s title bar over a docking guide to
preview how it will appear, and then release the mouse button to snap the
tool into place.
Auto hide a docked
tool window
Click the Auto Hide pushpin button on the right side of the title bar of the
tool window. The window hides behind a small tab at the edge of the devel-
opment environment until you hold the mouse over it.
Disable Auto Hide for
a docked tool window
Click the tool tab, and then click the Auto Hide pushpin button.
Switch between open
fi les
Hold down the Ctrl key and press Tab to display the IDE Navigator. While
holding down the Ctrl key, press Tab to scroll through the list of open fi les.
Use the arrow keys to scroll through both the list of open fi les and tools. You
can also click on a fi le or tool in the IDE Navigator to switch to it.
Switch between open
tools
Press Alt+F7 to scroll in a forward direction through the open tools in the
IDE. Press Alt+Shift+F7 to scroll in the reverse direction.
Get Help Start the Help system (hosted by the Microsoft Document Explorer) by click-
ing a command on the Help menu.
Customize Help In Document Explorer, click the Options command on the Tools menu.
Confi gure the Visual
Studio environment
for Visual Basic
development
Click the Import And Export Settings command on the Tools menu, click
Reset All Settings and the Next button. Click Yes, Save My Current Settings,
and the Next button. Finally click Visual Basic Development Settings and the
Finish button, and then click Close.
Customize IDE
settings
Click the Options command on the Tools menu, and then customize Visual
Studio settings by category. To view and customize project settings, click the
General item in the Projects And Solutions category. To view and customize
compiler settings, click the VB Defaults item in the same category.
Exit Visual Studio On the File menu, click Exit.
T
o Do th
is
37
Chapter 2
Writing Your First Program
After completing this chapter, you will be able to:
Create the user interface for a new program.
Set the properties for each object in your user interface.
Write program code.
Save and run the program.
Build an executable fi le.
As you learned in Chapter 1, “Exploring the Visual Studio Integrated Development Environment,”
the Microsoft Visual Studio 2008 Integrated Development Environment (IDE) contains several
powerful tools to help you run and manage your programs. Visual Studio also contains every-
thing you need to build your own applications for Windows and the Web from the ground up.
In this chapter, you’ll learn how to create a simple but attractive user interface with the con-
trols in the Visual Studio Toolbox. Next you’ll learn how to customize the operation of these
controls with property settings. Then you’ll see how to identify just what your program should
do by writing program code. Finally, you’ll learn how to save and run your new program (a Las
Vegas–style slot machine) and how to compile it as an executable fi le.
Lucky Seven: Your First Visual Basic Program
The Windows-based application you’re going to construct is Lucky Seven, a game program
that simulates a lucky number slot machine. Lucky Seven has a simple user interface and can
be created and compiled in just a few minutes using Microsoft Visual Basic. Here’s what your
program will look like when it’s fi nished:
38 Part I Getting Started with Microsoft Visual Basic 2008
Programming Steps
The Lucky Seven user interface contains two buttons, three lucky number boxes, a digital
photo depicting your winnings, and the label “Lucky Seven.” I produced these elements
by creating seven objects on the Lucky Seven form and then changing several properties
for each object. After I designed the interface, I added program code for the Spin and End
buttons to process the user’s button clicks and produce the random numbers. To re-create
Lucky Seven, you’ll follow three essential programming steps in Visual Basic: Create the user
interface, set the properties, and write the program code. The following table shows the
process for Lucky Seven.
Programming step Number of items
1. Create the user interface. 7 objects
2. Set the properties. 13 properties
3. Write the program code. 2 objects
Creating the User Interface
In this exercise, you’ll start building Lucky Seven by fi rst creating a new project and then
using controls in the Toolbox to construct the user interface.
Create a new project
1. Start Visual Studio 2008.
2. On the Visual Studio File menu, click New Project.
Tip You can also start a new programming project by clicking the blue Project link to the
right of Create at the bottom of the Recent Projects pane on the Start Page.
The New Project dialog box opens.
Programm
i
ng step
N
umber o
f
items
Chapter 2 Writing Your First Program 39
The New Project dialog box provides access to the major project types available for
writing Windows applications. If you indicated during setup that you are a Visual Basic
programmer, Visual Basic is your primary development option (as shown here), but
the other languages in Visual Studio (Visual C# and C++) are always available through
this dialog box. Although you will select a basic Windows application project in this
exercise, this dialog box is also the gateway to other types of development projects,
such as a Web application, console application, smart device (Microsoft .NET Compact
Framework) application, or Visual Studio deployment project.
In the upper-right corner of the New Project dialog box, you will notice a drop-down list
box. This is a new feature of Visual Studio 2008 that is called multi-targeting. This drop-
down list allows you specify the version of the .NET Framework that your application will
target. For example, if you select .NET Framework 3.5, any computer that your applica-
tion will run on must have the .NET Framework 3.5 installed. Visual Studio will show only
options that will work with the selected version of the .NET Framework. Applications
created with Visual Basic 2005 all targeted the .NET Framework 2.0. If you upgrade
programs created in Visual Basic 2005 to Visual Basic 2008, they will continue to target
the .NET Framework 2.0. Unless you have a specifi c need, you can just leave this drop-
down list at its default setting of .NET Framework 3.5. You’ll learn more about the .NET
Framework in Chapter 5, “Visual Basic Variables and Formulas, and the .NET Framework.”
40 Part I Getting Started with Microsoft Visual Basic 2008
3. Click the Windows Forms Application icon in the Templates area of the dialog box, if it
is not already selected.
Visual Studio prepares the development environment for Visual Basic Windows
application programming.
4. In the Name text box, type MyLucky7.
Visual Studio assigns the name MyLucky7 to your project. (You’ll specify a folder loca-
tion for the project later.) I’m recommending the “My” prefi x here so you don’t confuse
your new application with the Lucky7 project I’ve created for you on disk.
Tip
If your New Project dialog box contains Location and Solution Name text boxes, you
need to specify a folder location and solution name for your new programming project now.
The presence of these text boxes is controlled by a check box in the Tools/Options dialog
box, but it is not the default setting. Throughout this book, you will be instructed to save
your projects (or discard them) after you have completed the programming exercise. For
more information about this “delayed saving” feature and default settings, see “Customizing
IDE Settings to Match Step-by-Step Exercises” in Chapter 1.
5. Click OK to create the new project in Visual Studio.
Visual Studio cleans the slate for a new programming project and displays the blank
Windows form that you will use to build your user interface.
Now you’ll enlarge the form and create the two buttons in the interface.
Create the user interface
1. Point to the lower-right corner of the form until the mouse pointer changes to a
resizing pointer, and then drag to increase the size of the form to make room for
the objects in your program.
As you resize the form, scroll bars might appear in the Designer to give you access to
the entire form you’re creating. Depending on your screen resolution and the Visual
Studio tools you have open, you might not be able to see the entire form at once.
Don’t worry about this—your form can be small or it can fi ll the entire screen because
the scroll bars give you access to the entire form.
Chapter 2 Writing Your First Program 41
Size your form so that it is about the size of the form shown here. If you want to match
my example exactly, you can use the width and height dimensions (485 pixels × 278
pixels) shown in the lower-right corner of the screen.
To see the entire form without obstruction, you can resize or close the other program-
ming tools, as you learned in Chapter 1. (Return to Chapter 1 if you have questions
about resizing windows or tools.)
Now you’ll practice adding a button object on the form.
2. Click the Toolbox tab to display the Toolbox window in the IDE.
The Toolbox contains all of the controls that you’ll use to build Visual Basic programs in
this book. The controls suitable for creating a Windows application are visible now be-
cause you selected the Windows Application project type earlier. Controls are organized
by type, and by default the Common Controls category is visible. (If the Toolbox is not
visible now, click Toolbox on the View menu to display it.)
42 Part I Getting Started with Microsoft Visual Basic 2008
3. Double-click the Button control in the Toolbox, and then move the mouse pointer away
from the Toolbox.
Visual Studio creates a default-sized button object on the form and hides the Toolbox,
as shown here:
The button is named Button1 because it is the fi rst button in the program. (You should make a
mental note of this button name—you’ll see it again when you write your program code.) The
new button object is selected and enclosed by resize handles. When Visual Basic is in design
mode (that is, whenever the Visual Studio IDE is active), you can move objects on the form by
dragging them with the mouse, and you can resize them by using the resize handles. While a
program is running, however, the user can’t move interface elements unless you’ve changed a
property in the program to allow this. You’ll practice moving and resizing the button now.
Move and resize a button
1. Point to the button so that the pointer changes to a four-headed arrow, and then drag
the button down and to the right.
The button moves across the surface of the form. If you move the object near the edge of
the form or another object (if other objects are present), it automatically aligns itself to a
hidden grid when it is an inch or so away. A little blue “snapline” also appears to help you
gauge the distance of this object from the edge of the form or the other object. The grid
is not displayed on the form by default, but you can use the snapline to judge distances
with almost the same effect.
Tip
If you want to display the design mode grid as in Microsoft Visual Studio .NET 2003
and Visual Basic 6, click the Options command on the Tools menu, expand Windows
Form Designer, and then click General. Set ShowGrid to True, and set LayOutMode to
SnapToGrid. You will need to close and reopen the form for the change to take effect.
Chapter 2 Writing Your First Program 43
2. Position the mouse pointer on the lower-right corner of the button.
When the mouse pointer rests on a resize handle of a selected object, it becomes a
resizing pointer. You can use the resizing pointer to change the size of an object.
3. Enlarge the button by dragging the pointer down and to the right.
When you release the mouse button, the button changes size and snaps to the grid.
4. Use the resizing pointer to return the button to its original size.
Now you’ll add a second button to the form, below the fi rst button.
Add a second button
1. Click the Toolbox tab to display the Toolbox.
2. Click the Button control in the Toolbox (single-click this time), and then move the
mouse pointer over the form.
The mouse pointer changes to crosshairs and a button icon. The crosshairs are designed
to help you draw the rectangular shape of the button on the form, and you can use this
method as an alternative to double-clicking to create a control of the default size.
3. Drag the pointer down and to the right. Release the mouse button to complete the
button, and watch it snap to the form.
4. Resize the button object so that it is the same size as the fi rst button, and then move it
below the fi rst button on the form. (Use the snapline feature to help you.)
Tip
At any time, you can delete an object and start over again by selecting the object
on the form and then pressing Delete. Feel free to create and delete objects to practice
creating your user interface.
Now you’ll add the labels used to display the numbers in the program. A label is a special
user interface element designed to display text, numbers, or symbols when a program runs.
When the user clicks the Lucky Seven program’s Spin button, three random numbers appear
in the label boxes. If one of the numbers is a 7, the user wins.
Add the number labels
1. Double-click the Label control in the Toolbox.
Visual Studio creates a label object on the form. If you’re familiar with earlier versions
of Visual Studio or Visual Basic, you’ll notice that the label object is smaller than in
previous versions by default. It is just large enough to hold the text contained in the
object, but it can also be resized.
44 Part I Getting Started with Microsoft Visual Basic 2008
2. Drag the Label1 object to the right of the two button objects.
Your form looks something like this:
3. Double-click the Label control in the Toolbox to create a second label object.
This label object will be named Label2 in the program.
4. Double-click the Label control again to create a third label object.
5. Move the second and third label objects to the right of the fi rst one on the form.
Allow plenty of space between the three labels because you will use them to display
large numbers when the program runs.
Now you’ll use the Label control to add a descriptive label to your form. This will be the
fourth and fi nal label in the program.
6. Double-click the Label control in the Toolbox.
7. Drag the Label4 object below the two command buttons.
When you’ve fi nished, your four labels should look like those in the following illustration.
(You can move your label objects if they don’t look quite right.)
Chapter 2 Writing Your First Program 45
Now you’ll add a picture box to the form to graphically display the payout you’ll receive
when you draw a 7 and hit the jackpot. A picture box is designed to display bitmaps, icons,
digital photos, and other artwork in a program. One of the best uses for a picture box is to
display a JPEG image fi le.
Add a picture
1. Click the PictureBox control in the Toolbox.
2. Using the control’s drawing pointer, create a large rectangular box below the second
and third labels on the form.
Leave a little space below the labels for their size to grow as I mentioned earlier. When
you’ve fi nished, your picture box object looks similar to this:
This object will be named PictureBox1 in your program; you’ll use this name later in the
program code.
Now you’re ready to customize your interface by setting a few properties.
Setting the Properties
As you discovered in Chapter 1, you can change properties by selecting objects on the form
and changing their settings in the Properties window. You’ll start by changing the property
settings for the two buttons.
Set the button properties
1. Click the fi rst button (Button1) on the form.
The button is selected and is surrounded by resize handles.
46 Part I Getting Started with Microsoft Visual Basic 2008
2. Click the Properties window title bar.
Tip
If the Properties window isn’t visible, click the Properties Window command on the
View menu, or press F4.
3. A the top of the Properties window, click the Categorized button.
For information about categorized properties, see “The Properties Window” in Chapter 1.
4. Resize the Properties window (if necessary) so that there is plenty of room to see the
property names and their current settings.
Once you get used to setting properties, you will probably use the Properties win-
dow without enlarging it, but making it bigger helps when you fi rst try to use it. The
Properties window in the following illustration is a good size for setting properties:
The Properties window lists the settings for the fi rst button. These include settings for
the background color, text, font height, and width of the button. Because there are so
many properties, Visual Studio organizes them into categories and displays them in
outline view. If you want to see the properties in a category, click the plus sign (+) next
to the category title.
5. Scroll in the Properties window until you see the Text property located in the
Appearance category.
6. Double-click the Text property in the left column of the Properties window.
Chapter 2 Writing Your First Program 47
The current Text setting (“Button1”) is highlighted in the Properties window.
7. Type Spin, and press Enter.
The Text property changes to “Spin” in the Properties window and on the button on
the form. Now you’ll change the Text property of the second button to “End”. (You’ll
select the second button in a new way this time.)
8. Open the Object list at the top of the Properties window.
A list of the interface objects in your program appears as follows:
9. Click Button2 System.Windows.Forms.Button (the second button) in the list box.
The property settings for the second button appear in the Properties window, and
Visual Studio highlights Button2 on the form.
10. Double-click the current Text property (“Button2”), type End, and then press Enter.
The text of the second button changes to “End”.
Tip
Using the Object list is a handy way to switch between objects in your program. You
can also switch between objects on the form by clicking each object.
Now you’ll set the properties for the labels in the program. The fi rst three labels will hold the
random numbers generated by the program and will have identical property settings. (You’ll
set most of them as a group.) The descriptive label settings will be slightly different.
48 Part I Getting Started with Microsoft Visual Basic 2008
Set the number label properties
1. Click the fi rst number label (Label1), hold down the Shift key, click the second and third
number labels, and then release the Shift key. (If the Properties window is in the way,
move it to a new place.)
A selection rectangle and resize handles appear around each label you click. You’ll
change the TextAlign, BorderStyle, and Font properties now so that the numbers that
will appear in the labels will be centered, boxed, and identical in font and font size. (All
of these properties are located in the Appearance category of the Properties window.)
You’ll also set the AutoSize property to False so that you can change the size of the labels
according to your precise specifi cations. (The AutoSize property is located in the Layout
category.)
Tip
When more than one object is selected, only those properties that can be changed
for the group are displayed in the Properties window.
2. Click the AutoSize property in the Properties window, and then click the arrow that
appears to the right.
3. Set the AutoSize property to False so that you can size the labels manually.
4. Click the TextAlign property, and then click the arrow that appears to the right.
A graphical assortment of alignment options appears in the list box; you can use these
settings to align text anywhere within the borders of the label object.
5. Click the center option (MiddleCenter).
The TextAlign property for each of the selected labels changes to MiddleCenter.
6. Click the BorderStyle property, and then click the arrow that appears to the right.
The valid property settings (None, FixedSingle, and Fixed3D) appear in the list box.
7. Click FixedSingle in the list box to add a thin border around each label.
8. Click the Font property, and then click the ellipsis button (the button with three dots
that’s located next to the current font setting).
The Font dialog box opens.
9. Change the font to Times New Roman, the font style to Bold, and the font size to 24,
and then click OK.
The label text appears in the font, style, and size you specifi ed.
Chapter 2 Writing Your First Program 49
Now you’ll set the text for the three labels to the number 0—a good “placeholder” for
the numbers that will eventually fi ll these boxes in your game. (Because the program
produces the actual numbers, you could also delete the text, but putting a placeholder
here gives you something to base the size of the labels on.)
10. Click a blank area on the form to remove the selection from the three labels, and
then click the fi rst label.
11. Double-click the Text property, type 0, and then press Enter.
The text of the Label1 object is set to 0. You’ll use program code to set this property to
a random “slot machine” number later in this chapter.
12. Change the text in the second and third labels on the form to 0 also.
13. Move and resize the labels now so that they are appropriately spaced.
Your form looks something like this:
Now you’ll change the Text, Font, and ForeColor properties of the fourth label.
Set the descriptive label properties
1. Click the fourth label object (Label4) on the form.
2. Change the Text property in the Properties window to Lucky Seven.
3. Click the Font property, and then click the ellipsis button.
4. Use the Font dialog box to change the font to Arial, the font style to Bold, and the font
size to 18. Then click OK.
The font in the Label4 object is updated, and the label is resized automatically to hold
the larger font size because the object’s AutoSize property is set to True.
50 Part I Getting Started with Microsoft Visual Basic 2008
5. Click the ForeColor property in the Properties window, and then click the arrow in the
second column.
Visual Studio displays a list box with Custom, Web, and System tabs for setting the
foreground colors (the color of text) of the label object. The Custom tab offers many of
the colors available in your system. The Web tab sets colors for Web pages and lets you
pick colors using their common names. The System tab displays the current colors used
for user interface elements in your system.
6. Click the purple color on the Custom tab.
The text in the label box changes to purple.
Now you’re ready to set the properties for the last object.
Reading Properties in Tables
In this chapter, you’ve set the properties for the Lucky Seven program step by
step. In future chapters, the instructions to set properties will be presented in table
format unless a setting is especially tricky. Here are the properties you’ve set so far in
the Lucky Seven program in table format, as they’d look later in the book. Settings you
need to type in are shown in quotation marks. You shouldn’t type the quotation marks.
Object Property Setting
Button1 Text “Spin”
Button2 Text “End”
Label1, Label2, Label3 AutoSize
BorderStyle
Font
Text
TextAlign
False
FixedSingle
Times New Roman, Bold, 24-point
“0”
MiddleCenter
Label4 Text
Font
ForeColor
“Lucky Seven”
Arial, Bold, 18-point
Purple
PictureBox1 Image
SizeMode
Visible
“c:\vb08sbs\chap02\paycoins.jpg”
StretchImage
False
O
b
j
ec
t
P
ropert
y
Settin
g
Chapter 2 Writing Your First Program 51
The Picture Box Properties
When the person playing your game hits the jackpot (that is, when at least one 7 appears
in the number labels on the form), the picture box object will contain a picture of a person
dispensing money. This picture is a digitized image from an unpublished fourteenth-century
German manuscript stored in JPEG format. (As a history professor, I run across these things.)
You need to set the SizeMode property to accurately size the picture and set the Image
property to specify the name of the JPEG fi le that you will load into the picture box. You
also need to set the Visible property, which specifi es the picture state at the beginning of
the program.
Set the picture box properties
1. Click the picture box object on the form.
2. Click the SizeMode property in the Properties window (listed in the Behavior
category), click the arrow to the right, and then click StretchImage.
Setting SizeMode to StretchImage before you open a graphic causes Visual Studio to
resize the graphic to the exact dimensions of the picture box. (Typically, you set this
property before you set the Image property.)
3. Click the Image property in the Properties window, and then click the ellipsis button in
the second column.
The Select Resource dialog box opens.
4. Click the Local Resource option, and then click the Import button.
5. In the Open dialog box, navigate to the c:\vb08sbs\chap02 folder.
This folder contains the digital photo PayCoins.jpg.
6. Select PayCoins.jpg, and then click Open.
52 Part I Getting Started with Microsoft Visual Basic 2008
A medieval illustration of one person paying another appears in the Select Resource
dialog box. (The letter “W” represents winning.)
7. Click OK.
The PayCoins photo is loaded into the picture box. Because the photo is relatively small
(24 KB), it opens quickly on the form.
8. Resize the picture box object now to fi x any distortion problems that you see in the
image.
I sized my picture box object to be 148 pixels wide by 143 pixels high. You can match
this size by using the width and height dimensions located on the lower-right side of
the Visual Studio IDE. (The dimensions of the selected object are given on the lower-
right side, and the location on the form of the object’s upper-left corner is given to
the left of the dimensions.)
This particular image displays best when the picture box object retains a square shape.
Note
As you look at the picture box object, you might notice a tiny shortcut arrow near
its upper-right corner. This arrow is a button that you can click to quickly change a few
common picture box settings and open the Select Resource dialog box. (You’ll see the
shortcut arrow again in Chapter 4, “Working with Menus, Toolbars, and Dialog Boxes,”
when you use the ToolStrip control.)
Now you’ll change the Visible property to False so that the image will be invisible when
the program starts.
9. Click the Visible property in the Behavior category of the Properties window, and
then click the arrow to the right.
Chapter 2 Writing Your First Program 53
The valid settings for the Visible property appear in a list box.
10. Click False to make the picture invisible when the program starts.
Setting the Visible property to False affects the picture box when the program runs, but
not now while you’re designing it. Your completed form looks similar to this:
Tip You can also double-click property names that have True and False settings (so-called
Boolean properties), to toggle back and forth between True and False. Default Boolean
properties are shown in regular type, and changed settings appear in bold.
11. You are done setting properties for now, so if your Properties window is fl oating,
double-click its title bar to return it to the docked position.
Writing the Code
Now you’re ready to write the code for the Lucky Seven program. Because most of the
objects you’ve created already “know” how to work when the program runs, they’re ready
to receive input from the user and process it. The inherent functionality of objects is one
of the great strengths of Visual Studio and Visual Basic—after objects are placed on a form
and their properties are set, they’re ready to run without any additional programming.
However, the “meat” of the Lucky Seven game—the code that actually calculates random
numbers, displays them in boxes, and detects a jackpot—is still missing from the program.
This computing logic can be built into the application only by using program statements—
code that clearly spells out what the program should do at each step of the way. Because
the Spin and End buttons drive the program, you’ll associate the code for the game with
those buttons. You enter and edit Visual Basic program statements in the Code Editor.
In the following steps, you’ll enter the program code for Lucky Seven in the Code Editor.