Learn Objective C on the Mac phần 6 potx
Bạn đang xem bản rút gọn của tài liệu. Xem và tải ngay bản đầy đủ của tài liệu tại đây (241.66 KB, 37 trang )
CHAPTER 9: Memory Management162
NOTE
Memory management is a hard problem. Cocoa’s solution is rather elegant but does take some time to
wrap your mind around. Even programmers with decades of experience have problems when first encoun-
tering this material, so don’t worry if it leaves your head spinning for awhile.
If you know that your programs will only be run on Leopard or later, you can take advantage of Objective- C
2.0’s garbage collection, which we’ll discuss at the end of this chapter. We won’t feel sad if you skip to the
end, really. If you want to run on older versions of Mac OS X or you’re doing iPhone development, you will
want to read the whole chapter.
Object Life Cycle
Just like the birds and the bees out here in the real world, objects inside a program have
a life cycle. They’re born (via an alloc or a new); they live (receive messages and do stuff),
make friends (via composition and arguments to methods), and eventually die (get freed)
when their lives are over. When that happens, their raw materials (memory) are recycled and
used for the next generation.
Reference Counting
Now, it’s pretty obvious when an object is born, and we’ve talked a lot about how to use an
object, but how do we know when an object’s useful life is over? Cocoa uses a technique
known as reference counting, also sometimes called retain counting. Every object has an
integer associated with it, known as its reference count or retain count. When some chunk
of code is interested in an object, the code increases the object’s retain count, saying, “I am
interested in this object.” When that code is done with the object, it decreases the retain
count, indicating that it has lost interest in that object. When the retain count goes to 0,
nobody cares about the object anymore (poor object!), so it is destroyed and its memory is
returned to the system for reuse.
When an object is created via alloc or new, or via a copy message (which makes a copy of
the receiving object), the object’s retain count is set to 1. To increase its retain count, send the
object a retain message. To decrease its retain count, send the object a release message.
When an object is about to be destroyed because its retain count has reached 0, Objective- C
will automatically send the object a dealloc message. You can override dealloc in your
objects. Do this to release any related resources you might have allocated. Don’t ever call
dealloc directly. You can rely on Objective- C to invoke your dealloc method when it’s time
to kill your object. To find out the current retain count, send the retainCount message. Here
are the signatures for retain, release and retainCount:
CHAPTER 9: Memory Management 163
- (id) retain;
- (void) release;
- (unsigned) retainCount;
Retain
returns an id. That way, you can chain a retain call with other message sends, incre-
menting its retain count and then asking it to do some work. For instance, [[car retain]
setTire: tire atIndex: 2];
asks car to bump up its retain count and perform the
setTire action.
The first project in this chapter is RetainCount1, located in the 09.01 RetainCount- 1 project
folder. This program creates an object (RetainTracker) that calls NSLog() when it’s initial-
ized and when it gets deallocated:
@interface RetainTracker : NSObject
@end // RetainTracker
@implementation RetainTracker
- (id) init
{
if (self = [super init]) {
NSLog (@"init: Retain count of %d.",
[self retainCount]);
}
return (self);
} // init
- (void) dealloc
{
NSLog (@"dealloc called. Bye Bye.");
[super dealloc];
} // dealloc
@end // RetainTracker
The init method follows the standard Cocoa idiom for object initialization, which we’ll explore
in the next chapter. As we mentioned earlier, the dealloc message is sent (and, as a result, the
dealloc method called) automatically when an object’s retain count reaches 0. Our versions of
init and dealloc use NSLog() to write out a message saying that they were called.
main() is where a new RetainTracker object is created, and the two methods defined by
that class get called indirectly. When a new RetainTracker is created, retain and release
CHAPTER 9: Memory Management164
messages are sent to increase and decrease the retain count, while we watch the fun, cour-
tesy of NSLog():
int main (int argc, const char *argv[])
{
RetainTracker *tracker = [RetainTracker new];
// count: 1
[tracker retain]; // count: 2
NSLog (@"%d", [tracker retainCount]);
[tracker retain]; // count: 3
NSLog (@"%d", [tracker retainCount]);
[tracker release]; // count: 2
NSLog (@"%d", [tracker retainCount]);
[tracker release]; // count: 1
NSLog (@"%d", [tracker retainCount]);
[tracker retain]; // count 2
NSLog (@"%d", [tracker retainCount]);
[tracker release]; // count 1
NSLog (@"%d", [tracker retainCount]);
[tracker release]; // count: 0, dealloc it
return (0);
} // main
In real life, of course, you wouldn’t be doing multiple retains and releases in a single function
like this. Over its lifetime, an object might see patterns of retains and releases like this from
a bunch of different places in your program over time. Running the program lets us see the
retain counts:
init: Retain count of 1.
2
3
2
1
2
1
dealloc called. Bye Bye.
CHAPTER 9: Memory Management 165
So, if you alloc, new, or copy an object, you just need to release it to make it go away and let
the memory get reclaimed.
Object Ownership
“So,” you’re thinking, “didn’t you say this was hard? What’s the big deal? You create an object,
use it, release it, and memory management is happy. That doesn’t sound terribly compli-
cated.” It gets more complex when you factor in the concept of object ownership. When
something is said to “own an object,” that something is responsible for making sure the
object gets cleaned up.
An object with instance variables that point to other objects is said to own those other
objects. For example, in CarParts, a car owns the engine and tires that it points to. Similarly,
a function that creates an object is said to own that object. In CarParts, main() creates
a new car object, so main() is said to own the car.
A complication arises when more than one entity owns a particular object, which is why the
retain count can be larger than 1. In the case of the RetainCount1 program, main() owned
the RetainTracker object, so main() is responsible for cleaning up the object.
Recall the engine setter method for Car:
- (void) setEngine: (Engine *) newEngine;
and how it was called from main():
Engine *engine = [Engine new];
[car setEngine: engine];
Who owns the engine now? Does main() own it or does Car? Who is responsible for mak-
ing sure the Engine gets a release message when it is no longer useful? It can’t be main(),
because Car is using the engine. It can’t be Car, because main() might be use the engine
later.
The trick is to have Car retain the engine, increasing its retain count to 2. That makes sense,
since two entities, Car and main(), are now using the engine. Car should retain the engine
inside setEngine:, and main() should release the engine. Then Car releases the engine
when it’s done (in its dealloc method), and the engine’s resources will be reclaimed.
Retaining and Releasing in Accessors
A first crack at writing a memory management–savvy version of setEngine might look like
this:
- (void) setEngine: (Engine *) newEngine
{
CHAPTER 9: Memory Management166
engine = [newEngine retain];
// BAD CODE: do not steal. See fixed version below.
} // setEngine
Unfortunately, that’s not quite enough. Imagine this sequence of calls in main():
Engine *engine1 = [Engine new]; // count: 1
[car setEngine: engine1]; // count: 2
[engine1 release]; // count: 1
Engine *engine2 = [Engine new]; // count: 1
[car setEngine: engine2]; // count: 2
Oops! We have a problem with engine1 now: its retain count is still 1. main() has already
released its reference to engine1, but Car never did. We have now leaked engine1, and
leaky engines are never a good thing. That first engine object will sit around idling (sorry,
we’ll stop with the puns for awhile) and consuming a chunk of memory.
Here’s another attempt at writing
setEngine:.
- (void) setEngine: (Engine *) newEngine
{
[engine release];
engine = [newEngine retain];
// More BAD CODE: do not steal. Fixed version below.
} // setEngine
That fixes the case of the leaked engine1 that you saw previously. But it breaks when
newEngine and the old engine are the same object. Ponder this case:
Engine *engine = [Engine new]; // count: 1
Car *car1 = [Car new];
Car *car2 = [Car new];
[car1 setEngine: engine]; // count: 2
[engine release]; // count 1
[car2 setEngine: [car1 engine]]; // oops!
Why is this a problem? Here’s what’s happening. [car1 engine] returns a pointer to
engine, which has a retain count of 1. The first line of setEngine is [engine release],
which makes the retain count 0, and the object gets deallocated. Now, both newEngine and
the engine instance variable are pointing to freed memory, which is bad. Here’s a better way
to write setEngine:
CHAPTER 9: Memory Management 167
- (void) setEngine: (Engine *) newEngine
{
[newEngine retain];
[engine release];
engine = newEngine;
} // setEngine
If you retain the new engine first, and newEngine is the same object as engine, the retain
count will be increased and immediately decreased. But the count won’t go to 0, and the
engine won’t be destroyed unexpectedly, which would be bad. In your accessors, if you
retain the new object before you release the old object, you’ll be safe.
NOTE
There are different schools of thought on how proper accessors should be written, and arguments and
flame wars erupt on various mailing lists on a semiregular basis. The technique shown in the “Retaining
and Releasing in Accessors” section works well and is (somewhat) easy to understand, but don’t be sur-
prised if you see different accessor management techniques when you look at other people’s code.
Autorelease
Memory management can be a tough problem, as you’ve seen so far when we encountered
some of the subtleties of writing setter methods. And now it’s time to examine yet another
wrinkle. You know that objects need to be released when you’re finished with them. In
some cases, knowing when you’re done with an object is not so easy. Consider the case of
a description method, which returns an NSString that describes an object:
- (NSString *) description
{
NSString *description;
description = [[NSString alloc]
initWithFormat: @"I am %d years old", 4];
return (description);
} // description
Here, we’re making a new string instance with alloc, which gives it a retain count of 1, and
then we return it. Who is responsible for cleaning up this string object?
It can’t be the description method. If you release the description string before returning it,
the retain count goes to 0, and the object will be obliterated immediately.
CHAPTER 9: Memory Management168
The code that uses the description could hang onto the string in a variable and then release
it when finished, but that makes using the descriptions extremely inconvenient. What
should be just one line of code turns into three:
NSString *desc = [someObject description];
NSLog (@"%@", desc);
[desc release];
There has got to be a better way. And luckily, there is!
Everyone into the Pool!
Cocoa has the concept of the autorelease pool. You’ve probably seen NSAutoreleasePool
in the boilerplate code generated by Xcode. Now it’s time to see what it’s all about.
The name provides a good clue. It’s a pool (collection) of stuff, presumably objects, that
automatically get released.
NSObject provides a method called autorelease:
- (id) autorelease;
This method schedules a release message to be sent at some time in the future. The return
value is the object that receives the message; retain uses this same technique, which
makes chaining calls together easy. What actually happens when you send autorelease to
an object is that the object is added to an NSAutoreleasePool. When that pool is destroyed,
all the objects in the pool are sent a release message.
NOTE
There’s no magic in the autorelease concept. You could write your own autorelease pool by using an
NSMutableArray to hold the objects and send all those objects a release message in the
dealloc method. But there’s no need for reinvention—Apple has done the hard work for you.
So we can now write a description method that does a good job with memory management:
- (NSString *) description
{
NSString *description;
description = [[NSString alloc]
initWithFormat: @"I am %d years old", 4];
return ([description autorelease]);
} // description
CHAPTER 9: Memory Management 169
So you can write code like this:
NSLog (@"%@", [someObject description]);
Now, memory management works just right, because the description method creates
a new string, autoreleases it, and returns it for the NSLog() to use. Because that description
string was autoreleased, it’s been put into the currently active autorelease pool, and, some-
time later, after the code doing the NSLog() has finished running, the pool will be destroyed.
The Eve of Our Destruction
When does the autorelease pool get destroyed so that it can send a release message to all
of the objects it contains? For that matter, when does a pool get created in the first place?
In the Foundation tools we’ve been using, the creation and destruction of the pool has
been explicit:
NSAutoreleasePool *pool;
pool = [[NSAutoreleasePool alloc] init];
[pool release];
When you create an autorelease pool, it automatically becomes the active pool. When you
release that pool, its retain count goes to 0, so it then gets deallocated. During the dealloca-
tion, it releases all the objects it has.
When you’re using the AppKit, Cocoa automatically creates and destroys an autorelease pool
for you on a regular basis. It does so after the program handles the current event (such as
a mouse click or key press). You’re free to use as many autoreleased objects as you like, and
the pool will clean them up for you automatically whenever the user does something.
NOTE
You may have seen in Xcode’s autogenerated code an alternate way of destroying an autorelease pool’s
objects: the -drain method. This method empties out the pool without destroying it. -drain is only
available in Mac OS X 10.4 (Tiger) and later. In our own code (not generated by Xcode), we’ll be using
-release, since that will work on versions of the OS back to the beginning of time.
Pools in Action
RetainTracker2 shows the autorelease pool doing its thing. It’s found in the 09- 02 RetainTracker- 2
project folder. This program uses the same RetainTracker class we built in RetainTracker1,
which NSLog()s when a RetainTracker object is initialized and when it’s released.
CHAPTER 9: Memory Management170
RetainTracker2’s main() looks like this:
int main (int argc, const char *argv[])
{
NSAutoreleasePool *pool;
pool = [[NSAutoreleasePool alloc] init];
RetainTracker *tracker;
tracker = [RetainTracker new]; // count: 1
[tracker retain]; // count: 2
[tracker autorelease]; // count: still 2
[tracker release]; // count: 1
NSLog (@"releasing pool");
[pool release];
// gets nuked, sends release to tracker
return (0);
} // main
To start, we create the autorelease pool:
NSAutoreleasePool *pool;
pool = [[NSAutoreleasePool alloc] init];
Now, any time we send the autorelease message to an object, it jumps into this pool:
RetainTracker *tracker;
tracker = [RetainTracker new]; // count: 1
Here, a new tracker is created. Because it’s being made with a new message, it has a retain
count of 1:
[tracker retain]; // count: 2
Next, it gets retained, just for fun and demonstration purposes. The object’s retain count
goes to 2:
[tracker autorelease]; // count: still 2
Then the object gets autoreleased. Its retain count is unchanged: it’s still 2. The important
thing to note is that the pool that was created earlier now has a reference to this object.
When pool goes away, the tracker object will be sent a release message.
[tracker release]; // count: 1
CHAPTER 9: Memory Management 171
Next, we release it to counteract the retain that we did earlier. The object’s retain count is
still greater than 0, so it’s still alive:
NSLog (@"releasing pool");
[pool release];
// gets nuked, sends release to tracker
Now, we release the pool. An NSAutoreleasePool is an ordinary object, subject to the same
rules of memory management as any other. Because we made the pool with an alloc, it has
a retain count of 1. The release decreases its retain count to 0, so the pool will be destroyed
and its dealloc method called.
Finally, main returns 0 to indicate that everything was successful:
return (0);
} // main
Can you guess what the output is going to look like? Which will come first, the NSLog()
before we release the pool or the NSLog from RetainTracker’s dealloc method?
Here’s the output from a run of RetainTracker2:
init: Retain count of 1.
releasing pool
dealloc called. Bye Bye.
As you probably guessed, the NSLog() before releasing the pool happens prior to the
NSLog() from RetainTracker.
The Rules of Cocoa Memory Management
Now you’ve seen it all: retain, release, and autorelease. Cocoa has a number of memory
management conventions. They’re pretty simple rules, and they’re applied consistently
throughout the toolkit.
NOTE
Forgetting these rules is a common mistake, as is trying to make them too complicated. If you find yourself
scattering retains and releases around aimlessly, hoping to fix some bug, you don’t understand the
rules. That means it’s time to slow down, take a deep breath, maybe go get a snack, and read them again.
CHAPTER 9: Memory Management172
Here are the rules:
■
When you create an object using new, alloc, or copy, the object has a retain count
of 1. You are responsible for sending the object a release or autorelease message
when you’re done with it. That way, it gets cleaned up when its useful life is over.
■
When you get hold of an object via any other mechanism, assume it has a retain
count of 1 and that it has already been autoreleased. You don’t need to do any fur-
ther work to make sure it gets cleaned up. If you’re going to hang on to the object for
any length of time, retain it and make sure to release it when you’re done.
■
If you retain an object, you need to (eventually) release or autorelease it. Balance
these retains and releases.
That’s it—just three rules.
You’ll be safe if you remember the mantra, “If I get it from
new, alloc, or copy, I have to
release or autorelease it.”
Whenever you get hold of an object, you must be aware of two things: how you got it, and
how long you plan on hanging on to it (see Table 9-1).
Table 9-1. Memory Management Rules
Obtained Via . . . Transient Hang On
alloc/init/copy Release when done Release in dealloc
Any other way Don’t need to do anything Retain when acquired, release in dealloc
Transient Objects
Let’s take a look at some common memory- management life cycle scenarios. In the first,
you’re using an object, temporarily, in the course of some code, but you’re not going to be
keeping it around for very long. If you get the object from new, alloc, or copy, you need to
arrange its demise, usually with a release:
NSMutableArray *array;
array = [[NSMutableArray alloc] init]; // count: 1
// use the array
[array release]; // count: 0
If you get the object from any other mechanism, such as arrayWithCapacity:, you don’t
have to worry about destroying it:
CHAPTER 9: Memory Management 173
NSMutableArray *array;
array = [NSMutabelArray arrayWithCapacity: 17];
// count: 1, autoreleased
// use the array
arrayWithCapacity:
is not alloc, new, or copy, so you can assume that the object being
returned has a retain count of 1 and has already been autoreleased. When the autorelease pool
goes away, array is sent the release message, its retain count goes to 0, and its memory is
recycled.
Here’s some code that uses an
NSColor:
NSColor *color;
color = [NSColor blueColor];
// use the color
blueColor
is not alloc, new, or copy, so you can assume it has a retain count of 1 and is
autoreleased. blueColor returns a global singleton object—a single object that’s shared by
every program that needs it—and won’t actually ever get destroyed, but you don’t need to
worry about those implementation details. All you need to know is that you do not need
to explicitly release the color.
Hanging on to Objects
Frequently, you’ll want to keep an object around for more than a couple of lines of code.
Typically, you’ll put these objects into instance variables of other objects, add them to a
collection like NSArray or NSDictionary, or more rarely, keep them as global variables.
If you’re getting an object from init, new, or copy, you don’t need to do anything special.
The object’s retain count will be 1, so it will stick around. Just be sure to release the object
in the dealloc method of the owner- object that’s hanging on to it:
- (void) doStuff
{
// flonkArray is an instance variable
flonkArray = [NSMutableArray new]; // count: 1
} // doStuff
- (void) dealloc
{
[flonkArray release]; // count: 0
[super dealloc];
} // dealloc
CHAPTER 9: Memory Management174
If you get an object from something other than init, new, or copy, you need to remember
to retain it. When you’re writing a GUI application, think in event loops. You want to retain
autoreleased objects that will survive for longer than the current event loop.
So what’s an event loop? A typical graphical application spends a lot of time waiting on the
user to do something. The program sits twiddling its thumbs until the very slow human at
the controls decides to click the mouse or press a key. When one of these events does hap-
pen, the program wakes up and gets to work doing whatever is necessary to respond to the
event. After the event is handled, the application goes back to sleep waiting for the next
event. To keep your program’s memory footprint low, Cocoa creates an autorelease pool
before it starts handling the event and destroys the pool after the event is handled. This
keeps the amount of accumulated temporary objects to a minimum.
The previous methods would be written as follows when using autoreleased objects:
- (void) doStuff
{
// flonkArray is an instance variable
flonkArray
= [NSMutableArray arrayWithCapacity: 17];
// count: 1, autoreleased
[flonkArray retain]; // count: 2, 1 autorelease
} // doStuff
- (void) dealloc
{
[flonkArray release]; // count: 0
[super dealloc];
} // dealloc
At the end of the current event loop (if it’s a GUI program) or when the autorelease pool gets
destroyed, flonkArray will be sent a release message, which will lower its retain count
from 2 to 1. Because the count is greater than 0, the object lives on. We still need to release
the object in our dealloc so that it gets cleaned up. If we didn’t have the retain in doStuff,
flonkArray would get destroyed unexpectedly.
Remember that the autorelease pool is purged at well- defined times: when it’s explicitly
destroyed in your own code or at the end of the event loop when using the AppKit. You don’t
have to worry about a demon that goes around destroying autorelease pools at random. You
also don’t have to retain each and every object you use, because the pool won’t go away in the
middle of a function.
CHAPTER 9: Memory Management 175
KEEPING THE POOL CLEAN
Sometimes autorelease pools don’t get cleaned out as often as you would like. Here’s a common question
that comes up on Cocoa mailing lists: “I’m autoreleasing all the objects I use, but my program’s memory is
growing to absolutely huge levels.” That problem is usually caused by something like this:
int i;
for (i = 0; i < 1000000; i++) {
id object = [someArray objectAtIndex: i];
NSString *desc = [object description];
// and do something with the description
}
This program is running a loop that generates an autoreleased object (or two or ten) every time through
a whole bunch of iterations. Remember that the autorelease pool is only purged at well- defined times, and
the middle of this loop is not one of those times. Inside this loop, a million description strings are being cre-
ated, and all of them are put into the current autorelease pool, so we have a million strings sitting around.
Once the pool gets destroyed, the million strings will finally go away, but it won’t happen before then.
The way to work around this is to create your own autorelease pool inside the loop. This way, every thousand
times through the loop, you can nuke the pool and make a new one (as follows, with new code in bold):
NSAutoreleasePool *pool;
pool = [[NSAutoreleasePool alloc] init];
int i;
for (i = 0; i < 1000000; i++) {
id object = [someArray objectAtIndex: i];
NSString *desc = [object descrption];
// and do something with the description
if (i % 1000 == 0) {
[pool release];
pool = [[NSAutoreleasePool alloc] init];
}
}
[pool release]
Every thousand times through the loop, the new pool is destroyed and a newer one is created. Now, no more
than a thousand description strings will be in existence at one time, and the program can breathe easier.
Autorelease pool allocation and destruction are pretty cheap operations, so you could even make a new pool
in every iteration of the loop.
Autorelease pools are kept as a stack: if you make a new autorelease pool, it gets added to the top of the
stack. An autorelease message puts the receiver into the topmost pool. If you put an object into a pool,
and then make a new pool and destroy it, the autoreleased object will still be around, because the pool hold-
ing that object is still in existence.
CHAPTER 9: Memory Management176
Take Out Those Papers and the Trash
Objective-C 2.0 introduces automatic memory management, also called garbage collection.
Programmers used to languages like Java or Python are well acquainted with the concept of
garbage collection. You just create and use objects and then, shockingly, forget about them.
The system automatically figures out what’s still being used and what can be recycled. Turning
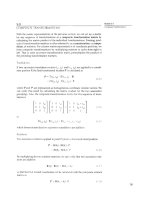
on garbage collection is very easy, but it’s an opt- in feature. Just go to the Build tab of the proj-
ect information window, and choose Required [-fobjc-gc- only], as shown in Figure 9-1.
Figure 9-1. Enabling garbage collection
NOTE
-fobjc-gc is for code that supports both garbage collection and retain/release, such as library code
that can be used in both environments.
When you enable garbage collection, the usual memory management calls all turn into
no- op instructions; that’s a fancy way of saying they don’t do anything.
The Objective- C garbage collector is a generational garbage collector. Newly created objects
are much more likely to turn into garbage than objects that have been hanging around for
awhile. At regular times, the garbage collector starts looking at your variables and objects
and follows the pointers between them. Any object it discovers without anything pointing
to it is garbage, which is fit to be thrown away. The worst thing you can do is keep a pointer
to an object that you’re done with. So if you point to an object in an instance variable (recall
composition), be sure to assign nil to your instance variable, which removes your reference
to this object and lets the garbage collector know it can be purged.
Like the autorelease pool, garbage collection is triggered at the end of an event loop. You
can also trigger garbage collection yourself if you’re not in a GUI program, but that’s beyond
the scope of what we want to talk about here.
CHAPTER 9: Memory Management 177
With garbage collection, you don’t need to worry too much about memory management.
There are some subtle nuances when using memory received from the malloc function or
with Core Foundation objects, but they’re obscure enough that we won’t be covering them.
For now, you can just create objects and not worry about releasing them. We’ll be discussing
garbage collection as we go along.
Note that you can’t use garbage collection if you’re writing iPhone software. In fact, in
iPhone programming, Apple recommends you avoid using autorelease in your own code
and that you also avoid convenience functions that give you autoreleased objects.
Summary
In this chapter, you learned about Cocoa’s memory management methods: retain,
release, and autorelease.
Each object maintains a retain count. Objects start their lives with a retain count of 1. When
the object is retained, the retain count increases by 1, and when the object is released, the
retain count is decreased by 1. When the retain count reaches 0, the object is destroyed. The
object’s dealloc message is called first, and then its memory is recycled, ready for use by
other objects.
When an object receives the
autorelease message, its retain count doesn’t change
immediately; instead, the object is placed into an NSAutoreleasePool. When this pool is
destroyed, all the objects in the pool are sent a release message. Any objects that have
been autoreleased will then have their retain counts decremented by 1. If the count goes
to 0, the object is destroyed. When you use the AppKit, an autorelease pool will be created
and destroyed for you at well- defined times, such as when the current user event has been
handled. Otherwise, you are responsible for creating your own autorelease pool. The tem-
plate for Foundation tools includes code for this.
Cocoa has three rules about objects and their retain counts:
■
If you get the object from a new, alloc, or copy operation, the object has a retain
count of 1.
■
If you get the object any other way, assume it has a retain count of 1 and that it has
been autoreleased.
■
If you retain an object, you must balance every retain with a release.
Coming up next, we’ll talk about init methods: how to make your objects hit the ground
running.
s
Chapter 10
Object
Initialization
o far, we’ve created new objects in two different ways. The first way is
[SomeClass new], and the second is [[SomeClass alloc] init]. These
two techniques are equivalent, but the common Cocoa convention is to use
alloc and init rather than new. Typically, Cocoa programmers use new as
training wheels until they have enough background to be comfortable with
alloc and init. It’s time for your training wheels to come off.
Allocating Objects
Allocation is the process by which a new object is born. It’s the happy time
when a chunk of memory is obtained from the operating system and desig-
nated as the location that will hold the object’s instance variables. Sending
the alloc message to a class causes that class to allocate a chunk of memory
large enough to hold all its instance variables. alloc also conveniently initial-
izes all the memory to 0. That way, you don’t have the problem of uninitialized
memory causing all sorts of random bugs that afflicts many languages. All
your BOOLs start out as NO; all your ints are 0; all your floats become 0.0; all
your pointers are nil; and all your base are belong to us (sorry, couldn’t resist).
A newly allocated object isn’t ready to be used right away: you need to ini-
tialize it before you can work with it. Some languages, including C++ and
Java, perform object allocation and initialization in a single operation using
a constructor. Objective- C splits the two operations into explicit allocation
and initialization stages. A common beginner’s error is to use only the alloc
operation, like this:
Car *car = [Car alloc];
CHAPTER 10: Object Initialization180
This might work, but without the initialization, you can get some strange behavior (also known
as “bugs”) later on. The rest of this chapter is all about the vital concept of initialization.
Initializing Objects
The counterpart to allocation is initialization. Initialization takes a chunk of memory and
gets it ready to become a productive member of society. init methods—that is, methods
that do initialization—almost always return the object they’re initializing. You can (and
should) chain your allocs and initializations like this:
Car *car = [[Car alloc] init];
and not like this:
Car *car = [Car alloc];
[car init];
This chaining technique is important because an initialization method might return an
object that’s not the same as the one that was allocated. If you think that’s pretty odd, you’re
right. But it can happen.
Why might a programmer want an init method to return a different object? If you recall
the discussion on class clusters at the end of Chapter 8, you saw that classes like NSString
and NSArray are really just false fronts for a whole lot of specialized classes. An init method
can take arguments, so the method code gets a chance to look at the arguments and decide
that another class of object would be more appropriate. For example, let’s say a new string
is being made from a very long string, or maybe from a string of Arabic characters. Based on
this knowledge, the string initializer might decide to create an object of a different class, one
better suited to the needs of the desired string, and return that instead of the original object.
Writing Initialization Methods
Earlier, we asked you to endure some nod-and- smile moments when we presented initializa-
tion methods, mainly because they looked a little weird. Here’s the init method from an
earlier version of CarParts:
- (id) init
{
if (self = [super init]) {
engine = [Engine new];
tires[0] = [Tire new];
tires[1] = [Tire new];
tires[2] = [Tire new];
tires[3] = [Tire new];
CHAPTER 10: Object Initialization 181
}
return (self);
} // init
The main weirdness hits you on the very first line:
if (self = [super init]) {
This code implies that self might change. Change self in the middle of a method? Are
we crazy? Well, maybe, but not this time. The first bit of code that runs in that statement is
[super init]. That code lets the superclass do its initialization work. For classes that inherit
from NSObject, calling on the superclass lets NSObject do any processing it needs to do so
that objects can respond to messages and deal with retain counts. For classes that inherit
from another class, this is their chance to do their own version of clean- slate initialization.
We just said that
init methods like this one can return totally different objects. Remember
that instance variables are found at a memory location that’s a fixed distance from the hid-
den self parameter. If a new object is returned from an init method, we need to update
self so that any subsequent instance variable references affect the right places in memory.
That’s why we need the self = [super init] assignment. Keep in mind that this assign-
ment affects the value of self only for this method. It doesn’t change anything outside the
method’s scope.
An
init method can return nil if there’s a problem initializing an object. For example, you
might be using an init method that takes a URL and initializes an image object using an
image file from a web site. If the network is down, or a redesign of the web site has moved
the picture, you won’t get a useful image object. The
init method would then return nil,
indicating the object couldn’t be initialized. The test if (self = [super init]) won’t
run the body code if nil is returned from [super init]. Combining the assignment with
a check for a nonzero value like this is a classic C idiom that lives on in Objective- C.
The code to get the object up and running is in the braces of the if statement’s body. In the
original Car init method, the body of the if statement creates an engine and four tires.
From the memory management perspective, this code does the right thing, because objects
returned via new start out with their reference counts set to 1.
Finally, the last line of the method is
return (self);
An init method returns the object that was just initialized. Since we assigned the return
value of [super init] to self, that’s what we should return.
CHAPTER 10: Object Initialization182
INIT TO WIN IT
Some programmers don’t like the combined assignment and test for a nonzero value. Instead, they write
their init methods like this:
self = [super init];
if (self) {
}
return (self);
And that’s fine. The key is that you assign back to self, especially if you’re accessing any instance variables.
No matter which way you do it, be aware that combining the assignment and test is a common technique,
and you’ll see it a lot in other people’s code.
The self = [super init] style is the source of some controversy. One faction says you should always
do this, just in case the superclass changes something in the initialization. The other camp says that this
object changing is so rare and obscure that you need not bother—just use a plain [super init]. Those
in this camp point out that if even if the init changes the object, that new object probably doesn’t take any
new instance variables you have added.
This is a truly thorny problem in the abstract, but in the real world, it doesn’t happen very often. We recom-
mend always using the if (self = [super init]) technique just to be safe and to catch the
“init returning nil” behavior of some init methods. But if you choose to use a plain [super init],
that’s fine too. Just be prepared to do a little debugging if you happen to catch one of the obscure corner cases.
What to Do When You’re Initializing
What should you put in your init methods? This is the place to do your clean- slate initial-
ization work. You assign values to instance variables and create the other objects that your
object needs to do its work. When you write your init methods, you must decide how
much work you want to do there. The CarParts programs showed two different approaches
over the course of its evolution.
The first way used the init method to create the engine and all four tires. This made the Car
immediately useful out of the box: call alloc and init, and take the car out for a test drive.
We changed the next version to create nothing at all in the init method. We just left empty
spaces for the engine and tires. The code that created the object would then have to create
an engine and tires and set them using accessor methods.
Which way is right for you? The decision comes down to flexibility over performance, as do
many tradeoffs in programming. The original Car init method is very convenient. If the
intended use of the Car class is to create a basic car and then use it, that’s the right design.
CHAPTER 10: Object Initialization 183
On the other hand, if the car will often be customized with different kinds of tires and
engines, as in a racing game, we’ll be creating the engine and tires just to have them thrown
away. Such a waste! Objects would be created and then destroyed without ever being used.
NOTE
Even if you don’t provide calls to customize your object’s attributes, you can still wait to create them until
a caller asks for them. This is a technique known as lazy evaluation, and it can give you a performance
boost if you’re creating complex objects in your -init that might not actually be used.
Isn’t That Convenient?
Some objects have more than one method that starts with the word init. In fact, it’s impor-
tant to remember that init methods are nothing special. They’re just ordinary methods that
follow a naming convention.
Many classes have convenience initializers. These are init methods that do some extra
work, saving you the trouble of doing it yourself. To give you an idea of what we’re talking
about, here’s a sampling of some of NSString’s init methods:
- (id) init;
This basic method initializes a new, empty string. For immutable NSStrings, this method
isn’t terribly useful. But you can allocate and initialize a new NSMutableString and start
throwing characters into it. You’d use it like this:
NSString *emptyString = [[NSString alloc] init];
That code gives you an empty string.
- (id) initWithFormat: (NSString *) format, ;
This version initializes a new string to the result of a formatting operation, just like we did
with NSLog() and with the stringWithFormat: class method you saw in Chapter 7. Here’s
an example that gives the flavor of using this init method:
string = [[NSString alloc]
initWithFormat: @"%d or %d", 25, 624];
This gives you a string with the value of "25 or 624".
- (id) initWithContentsOfFile: (NSString *) path;
CHAPTER 10: Object Initialization184
The initWithContentsOfFile: method opens the text file at the given path, reads every-
thing there, and initializes a string with the contents. The following line of code reads the file
/tmp/words.txt:
string = [[NSString alloc]
initWithContentsOfFile: @"/tmp/words.txt"];
That’s some pretty powerful stuff. This would take a whole bunch of code in C (you would
have to open the file, read blocks of data, append to a string, make sure the trailing zero- byte
is in the right place, and close the file). For us Objective- C devotees, it becomes a single line of
code. Nice.
More Parts Is Parts
Let’s revisit CarParts, last seen in Chapter 6 when we broke out each class into its own source
file. This time, we’ll add some initialization goodness to the Tire class and clean up Car’s
memory management along the way. For those of you following along at home, the proj-
ect directory that has the finished program for this chapter is 10.01 CarPartsInit, or 10.01
CarPartsInit- GC for a garbage- collected version.
init for Tires
Tires in the real world are more interesting creatures than the ones we’ve simulated in
CarParts so far. In your real tires, you have to keep track of the tire pressure (don’t want it to
get too low) and the tread depth (once it goes below a couple of millimeters, the tires aren’t
safe anymore). Let’s extend Tire to keep track of the pressure and tread depth. Here’s the
class declaration that adds two instance variables and the corresponding accessor methods:
#import <Cocoa/Cocoa.h>
@interface Tire : NSObject
{
float pressure;
float treadDepth;
}
- (void) setPressure: (float) pressure;
- (float) pressure;
- (void) setTreadDepth: (float) treadDepth;
- (float) treadDepth;
@end // Tire
CHAPTER 10: Object Initialization 185
And here’s the implementation of Tire, which is pretty straightforward:
#import "Tire.h"
@implementation Tire
- (id) init
{
if (self = [super init]) {
pressure = 34.0;
treadDepth = 20.0;
}
return (self);
} // init
- (void) setPressure: (float) p
{
pressure = p;
} // setPressure
- (float) pressure
{
return (pressure);
} // pressure
- (void) setTreadDepth: (float) td
{
treadDepth = td;
} // setTreadDepth
- (float) treadDepth
{
return (treadDepth);
} // treadDepth
- (NSString *) description
{
NSString *desc;
desc = [NSString stringWithFormat:
@"Tire: Pressure: %.1f TreadDepth: %.1f",
pressure, treadDepth];
CHAPTER 10: Object Initialization186
return (desc);
} // description
@end // Tire
The accessor methods provide a way for users of the tire to change the pressure and the
tread depth. Let’s take a quick look at the init method:
- (id) init
{
if (self = [super init]) {
pressure = 34.0;
treadDepth = 20.0;
}
return (self);
} // init
There should be no surprises here. The superclass (NSObject, in this case) is told to initialize
itself, and the return value from that call is assigned to self. Then, the instance variables are
assigned to useful default values. Let’s make a brand new tire like this:
Tire *tire = [[Tire alloc] init];
The tire’s pressure will be 34 psi, and its tread depth will be 20 mm.
We should change the description method, too:
- (NSString *) description
{
NSString *desc;
desc = [NSString stringWithFormat:
@"Tire: Pressure: %.1f TreadDepth: %.1f",
pressure, treadDepth];
return (desc);
} // description
The description method now uses NSString’s stringWithFormat: class method to make
a string that includes the tire pressure and tread depth. Does this method follow our rules of
good memory management behavior? Yes, it does. Because the object was not created by
an
alloc, copy, or new, it has a retain count of 1 and we can consider it to be autoreleased.
So, this string will get cleaned up when the autorelease pool is destroyed.