Programming C# 2nd Edition phần 8 pdf
Bạn đang xem bản rút gọn của tài liệu. Xem và tải ngay bản đầy đủ của tài liệu tại đây (720.72 KB, 59 trang )
Programming C#, 2nd Edition
408
When two assemblies have different major or minor numbers, they are considered to be
incompatible. When they have different build numbers, they might or might not be
compatible, and when they have different revision numbers, they are considered definitely
compatible with each other.
Revision numbers are intended for bug fixes. If you fix a bug and are prepared to certify that
your DLL is fully backward-compatible with the existing version, you should increment the
revision. When an application loads an assembly, it specifies the major and minor version that
it wants, and the AssemblyResolverfinds the highest build and revision numbers.
17.8.3 Strong Names
In order to use a shared assembly, you must meet three requirements:
• You need to be able to specify the exact assembly you want to load. Therefore, you
need a globally unique name for the shared assembly.
• You need to ensure that the assembly has not been tampered with. That is, you need a
digital signature for the assembly when it is built.
• You need to ensure that the assembly you are loading is the one authored by the actual
creator of the assembly. You therefore need to record the identity of the originator.
All these requirements are met by strong names. Strong names must be globally unique and
use public key encryption to ensure that the assembly hasn't been tampered with and was
written by the creator. A strong name is a string of hexadecimal digits and is not meant to be
human-readable.
To create a strong name, a public-private key pair is generated for the assembly. A hash is
taken of the names and contents of the files in the assembly. The hash is then encrypted with
the private key for the assembly and placed in the manifest. This is known as signing the
assembly. The public key is incorporated into the strong name of the assembly.
Public Key Encryption
Strong names are based on public key encryption technology. The essence of public
key encryption is that your data is encoded with a complex mathematical formula
that returns two keys. Data encrypted with the first key can only be decrypted with
the second. Data encrypted with the second key can only be decrypted with the first.
Distribute your first key as a public key that anyone can have. Keep your second key
as a private key that no one but you can have access to.
The reciprocal relationship between the keys allows anyone to encrypt data with
your public key, and then you can decrypt it with your private key. No one else has
access to the data once it is encrypted, including the person who encrypted it.
Similarly, you can encrypt data with your private key, and then anyone can decrypt
that data with your public key. Although this makes the data freely available, it
ensures that only you could have created it. This is called a digital signature .
Programming C#, 2nd Edition
409
When an application loads the assembly, the CLR uses the public key to decode the hash of
the files in the assembly to ensure that they have not been tampered with. This also protects
against name clashes.
You can create a strong name with the sn utility:
sn -k c:\myStrongName.snk
The -k flag indicates that you want a new key pair written to the specified file. You can call
the file anything you like. Remember, a strong name is a string of hexadecimal digits and is
not meant to be human-readable.
You can associate this strong name with your assembly by using an attribute:
using System.Runtime.CompilerServices;
[assembly: AssemblyKeyFile("c:\myStrongName.key")]
Attributes are covered in detail in Chapter 8. For now, you can just put this code at the top of
your file to associate the strong name you generated with your assembly.
17.8.4 The Global Assembly Cache
Once you've created your strong name and associated it with your assembly, all that remains
is to place the assembly in the GAC, which is a reserved system directory. You can do that
with the gacutil utility:
gacutil /i MySharedAssembly.dll
Or you can open your File Explorer and drag your assembly into the GAC. To see the GAC,
open the File Explorer and navigate to %SystemRoot%\assembly; Explorer turns into a GAC
utility.
17.8.5 Building a Shared Assembly
The best way to understand shared assemblies is to build one. Let's return to the earlier multi-
module project (see Examples 17-1 through 17-4) and navigate to the directory that contains
the files calc.cs and fraction.cs.
Try this experiment: locate the bin directory for the driver program and make sure that you
do not have a local copy of the MySharedAssembly DLL files.
The referenced assembly (MySharedAssembly) should have its
CopyLocal property set to false.
Run the program. It should fail with an exception saying it cannot load the assembly:
Programming C#, 2nd Edition
410
Unhandled Exception: System.IO.FileNotFoundException: File or assembly name
MySharedAssembly, or one of its dependencies, was not found.
File name: "MySharedAssembly"
at Programming_CSharp.Test.UseCS( )
at Programming_CSharp.Test.Main( )
Now copy the DLLs into the driver program's directory tree, run it again, and this time you
should find that it works fine.
Let's make the MySharedAssembly into a shared assembly. This is done in two steps. First,
create a strong name for the assembly, and then you put the assembly into the GAC.
17.8.5.1 Step 1: Create a strong name
Create a key pair by opening a command window and entering:
sn -k keyFile.snk
Now open the AssemblyInfo.cs file in the project for the MySharedAssembly.dll and modify
this line:
[assembly: AssemblyKeyFile("")]
as follows:
[assembly: AssemblyKeyFile(".\\keyFile.snk")]
This sets the key file for the assembly. Rebuild with the same make file as earlier, and then
open the resulting DLL in ILDasm and open the manifest. You should see a public key, as
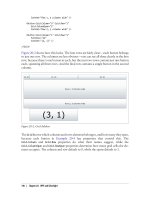
shown in Figure 17-8.
Figure 17-8. The originator in the manifest of MySharedAssembly.dll
By adding the strong name, you have signed this assembly (your exact values will be
different). You now need to get the strong name from the DLL. To do this, navigate to the
directory with the DLL and enter the following at a command prompt:
sn -T MySharedAssembly.dll
Note that sn is case-sensitive. Do not write sn -t.
The response should be something like this:
Programming C#, 2nd Edition
411
Public key token is 01fad8e0f0941a4d
This value is an abbreviated version of the assembly's public key, called the public key token .
Remove the DLLs from the test program's directory structure and run it again. It should fail
again. Although you've given this assembly a strong name, you've not yet registered it in the
GAC.
17.8.5.2 Step 2: Put the shared assembly in the GAC
The next step is to drag the library into the GAC. To do so, open an Explorer window and
navigate to the %SystemRoot% directory. When you double-click the Assembly subdirectory,
Explorer will turn into a GAC viewer.
You can drag and drop into the GAC viewer, or you can invoke this command-line utility:
Gacutil /i mySharedAssembly.dll
In either case, be sure to check that your assembly was loaded into the GAC, and that the
originator value shown in the GAC viewer matches the value you got back from sn:
Public key token is 01fad8e0f0941a4d
This is illustrated in Figure 17-9.
Figure 17-9. The GAC
Once this is done, you have a shared assembly that can be accessed by any client. Refresh the
client by building it again and look at its manifest, as shown in Figure 17-10.
Figure 17-10. The manifest
There's MySharedAssembly, listed as an external assembly, and the public key now matches
the value shown in the GAC. Very nice, time to try it.
Close ILDasm and compile and run your code. It should work fine, even though there are no
DLLs for this library in its immediate path. You have just created and used a shared assembly.
Programming C#, 2nd Edition
412
Chapter 18. Attributes and Reflection
Throughout this book, I have emphasized that a .NET application contains code, data, and
metadata. Metadata is information about the data that is, information about the types, code,
assembly, and so forth stored along with your program. This chapter explores how some of
that metadata is created and used.
Attributes are a mechanism for adding metadata, such as compiler instructions and other data
about your data, methods, and classes, to the program itself. Attributes are inserted into
the metadata and are visible through ILDasm and other metadata-reading tools.
Reflection is the process by which a program can read its own metadata. A program is said to
reflect on itself, extracting metadata from its assembly and using that metadata either to
inform the user or to modify its own behavior.
18.1 Attributes
An attribute is an object that represents data you want to associate with an element in your
program. The element to which you attach an attribute is referred to as the target of that
attribute. For example, the attribute:
[NoIDispatch]
is associated with a class or an interface to indicate that the target class should derive from
IUnknown rather than IDispatch when exporting to COM. COM interface programming is
discussed in detail in Chapter 22.
In Chapter 17, you saw this attribute:
[assembly: AssemblyKeyFile("c:\\myStrongName.key")]
This inserts metadata into the assembly to designate the program's StrongName.
18.2 Intrinsic Attributes
Attributes come in two flavors: intrinsic and custom . Intrinsic attributes are supplied as part
of the Common Language Runtime (CLR), and they are integrated into .NET. Custom
attributes are attributes you create for your own purposes.
Most programmers will use only intrinsic attributes, though custom attributes can be a
powerful tool when combined with reflection, described later in this chapter.
18.2.1 Attribute Targets
If you search through the CLR, you'll find a great many attributes. Some attributes are applied
to an assembly, others to a class or interface, and some, such as [WebMethod], are applied to
class members. These are called the attribute targets. Possible attribute targets are detailed in
Table 18-1.
Programming C#, 2nd Edition
413
Table 18-1. Possible attribute targets
Member name Usage
All
Applied to any of the following elements: assembly, class, constructor, delegate, enum, event,
field, interface, method, module, parameter, property, return value, or struct
Assembly
Applied to the assembly itself
Class
Applied to instances of the class
Constructor
Applied to a given constructor
Delegate
Applied to the delegated method
Enum
Applied to an enumeration
Event
Applied to an event
Field
Applied to a field
Interface
Applied to an interface
Method
Applied to a method
Module
Applied to a single module
Parameter
Applied to a parameter of a method
Property
Applied to a property (both get and set, if implemented)
ReturnValue
Applied to a return value
Struct
Applied to a struct
18.2.2 Applying Attributes
Apply attributes to their targets by placing them in square brackets immediately before the
target item. You can combine attributes by stacking one on top of another:
[assembly: AssemblyDelaySign(false)]
[assembly: AssemblyKeyFile(".\\keyFile.snk")]
This can also be done by separating the attributes with commas:
[assembly: AssemblyDelaySign(false),
assembly: AssemblyKeyFile(".\\keyFile.snk")]
You must place assembly attributes after all using statements and
before any code.
Many intrinsic attributes are used for interoperating with COM, as discussed in detail in
Chapter 22. You've already seen use of one attribute ([WebMethod]) in Chapter 16. You'll see
other attributes, such as the [Serializable] attribute, used in the discussion of serialization
in Chapter 19.
The System.Runtime namespace offers a number of intrinsic attributes, including attributes
for assemblies (such as the keyname attribute), for configuration (such as debug to indicate
the debug build), and for version attributes.
You can organize the intrinsic attributes by how they are used. The principal intrinsic
attributes are those used for COM, those used to modify the Interface Definition Language
(IDL) file from within a source-code file, those used by the ATL Server classes, and those
used by the Visual C++ compiler.
Programming C#, 2nd Edition
414
Perhaps the attribute you are most likely to use in your everyday C# programming (if you are
not interacting with COM) is [Serializable]. As you'll see in Chapter 19, all you need to
do to ensure that your class can be serialized to disk or to the Internet is add the
[Serializable] attribute to the class:
[Serializable]
class MySerializableClass
The attribute tag is put in square brackets immediately before its target in this case, the
class declaration.
The key fact about intrinsic attributes is that you know when you need them; the task will
dictate their use.
18.3 Custom Attributes
You are free to create your own custom attributes and use them at runtime as you see fit.
Suppose, for example, that your development organization wants to keep track of bug fixes.
You already keep a database of all your bugs, but you'd like to tie your bug reports to specific
fixes in the code.
You might add comments to your code along the lines of:
// Bug 323 fixed by Jesse Liberty 1/1/2005.
This would make it easy to see in your source code, but there is no enforced connection to
Bug 323 in the database. A custom attribute might be just what you need. You would replace
your comment with something like this:
[BugFixAttribute(323,"Jesse Liberty","1/1/2005",
Comment="Off by one error")]
You could then write a program to read through the metadata to find these bug-fix notations
and update the database. The attribute would serve the purposes of a comment, but would also
allow you to retrieve the information programmatically through tools you'd create.
18.3.1 Declaring an Attribute
Attributes, like most things in C#, are embodied in classes. To create a custom attribute,
derive your new custom attribute class from
System.Attribute:
public class BugFixAttribute : System.Attribute
You need to tell the compiler which kinds of elements this attribute can be used with (the
attribute target). Specify this with (what else?) an attribute:
[AttributeUsage(AttributeTargets.Class |
AttributeTargets.Constructor |
AttributeTargets.Field |
AttributeTargets.Method |
AttributeTargets.Property,
AllowMultiple = true)]
Programming C#, 2nd Edition
415
AttributeUsage
is an attribute applied to attributes: a meta-attribute. It provides, if you will,
meta-metadata that is, data about the metadata. For the AttributeUsage attribute
constructor, you pass two arguments. The first argument is a set of flags that indicate the
target in this case, the class and its constructor, fields, methods, and properties. The second
argument is a flag that indicates whether a given element might receive more than one such
attribute. In this example, AllowMultiple is set to true, indicating that class members can
have more than one BugFixAttribute assigned.
18.3.2 Naming an Attribute
The new custom attribute in this example is named BugFixAttribute. The convention is to
append the word Attribute to your attribute name. The compiler supports this by allowing
you to call the attribute with the shorter version of the name. Thus, you can write:
[BugFix(123, "Jesse Liberty", "01/01/05", Comment="Off by one")]
The compiler will first look for an attribute named BugFix and, if it does not find that, will
then look for BugFixAttribute.
18.3.3 Constructing an Attribute
Every attribute must have at least one constructor. Attributes take two types of parameters:
positional and named. In the BugFix example, the programmer's name and the date are
positional parameters, and comment is a named parameter. Positional parameters are passed in
through the constructor and must be passed in the order declared in the constructor:
public BugFixAttribute(int bugID, string programmer,
string date)
{
this.bugID = bugID;
this.programmer = programmer;
this.date = date;
}
Named parameters are implemented as properties:
public string Comment
{
get
{
return comment;
}
set
{
comment = value;
}
}
It is common to create read-only properties for the positional parameters:
Programming C#, 2nd Edition
416
public int BugID
{
get
{
return bugID;
}
}
18.3.4 Using an Attribute
Once you have defined an attribute, you can put it to work by placing it immediately before
its target. To test the
BugFixAttribute of the preceding example, the following program
creates a simple class named
MyMath and gives it two functions. Assign BugFixAttributes
to the class to record its code-maintenance history:
[BugFixAttribute(121,"Jesse Liberty","01/03/05")]
[BugFixAttribute(107,"Jesse Liberty","01/04/05",
Comment="Fixed off by one errors")]
public class MyMath
These attributes will be stored with the metadata. Example 18-1 shows the complete program.
Example 18-1. Working with custom attributes
namespace Programming_CSharp
{
using System;
using System.Reflection;
// create custom attribute to be assigned to class members
[AttributeUsage(AttributeTargets.Class |
AttributeTargets.Constructor |
AttributeTargets.Field |
AttributeTargets.Method |
AttributeTargets.Property,
AllowMultiple = true)]
public class BugFixAttribute : System.Attribute
{
// attribute constructor for
// positional parameters
public BugFixAttribute
(int bugID,
string programmer,
string date)
{
this.bugID = bugID;
this.programmer = programmer;
this.date = date;
}
// accessor
public int BugID
{
get
{
return bugID;
}
}
Programming C#, 2nd Edition
417
// property for named parameter
public string Comment
{
get
{
return comment;
}
set
{
comment = value;
}
}
// accessor
public string Date
{
get
{
return date;
}
}
// accessor
public string Programmer
{
get
{
return programmer;
}
}
// private member data
private int bugID;
private string comment;
private string date;
private string programmer;
}
// ********* assign the attributes to the class ********
[BugFixAttribute(121,"Jesse Liberty","01/03/05")]
[BugFixAttribute(107,"Jesse Liberty","01/04/05",
Comment="Fixed off by one errors")]
public class MyMath
{
public double DoFunc1(double param1)
{
return param1 + DoFunc2(param1);
}
public double DoFunc2(double param1)
{
return param1 / 3;
}
}
Programming C#, 2nd Edition
418
public class Tester
{
public static void Main( )
{
MyMath mm = new MyMath( );
Console.WriteLine("Calling DoFunc(7). Result: {0}",
mm.DoFunc1(7));
}
}
}
Output:
Calling DoFunc(7). Result: 9.3333333333333333
As you can see, the attributes had absolutely no impact on the output. In fact, for the moment,
you have only my word that the attributes exist at all. A quick look at the metadata using
ILDasm does reveal that the attributes are in place, however, as shown in Figure 18-1. You'll
see how to get at this metadata and use it in your program in the next section.
Figure 18-1. The metadata in the assembly
18.4 Reflection
For the attributes in the metadata to be useful, you need a way to access them ideally during
runtime. The classes in the Reflection namespace, along with the System.Type and
System.TypedReference classes, provide support for examining and interacting with the
metadata.
Reflection is generally used for any of four tasks:
Viewing metadata
This might be used by tools and utilities that wish to display metadata.
Programming C#, 2nd Edition
419
Performing type discovery
This allows you to examine the types in an assembly and interact with or instantiate
those types. This can be useful in creating custom scripts. For example, you might
want to allow your users to interact with your program using a script language, such as
JavaScript, or a scripting language you create yourself.
Late binding to methods and properties
This allows the programmer to invoke properties and methods on objects dynamically
instantiated based on type discovery. This is also known as dynamic invocation.
Creating types at runtime (Reflection Emit)
The ultimate use of reflection is to create new types at runtime and then to use those
types to perform tasks. You might do this when a custom class, created at runtime,
will run significantly faster than more generic code created at compile time. An
example is offered later in this chapter.
18.4.1 Viewing MetaData
In this section, you will use the C# Reflection support to read the metadata in the MyMath
class.
Start by initializing an object of the type MemberInfo. This object, in the
System.Reflection namespace, is provided to discover the attributes of a member and to
provide access to the metadata:
System.Reflection.MemberInfo inf = typeof(MyMath);
Call the typeof operator on the MyMath type, which returns an object of type Type, which
derives from MemberInfo.
The Type class is the root of the reflection classes. Type encapsulates a
representation of the type of an object. The Type class is the primary
way to access metadata. Type derives from MemberInfo and
encapsulates information about the members of a class (e.g., methods,
properties, fields, events, etc.).
The next step is to call GetCustomAttributes on this MemberInfo object, passing in the type
of the attribute you want to find. You get back an array of objects, each of type
BugFixAttribute:
object[] attributes;
attributes =
inf.GetCustomAttributes(typeof(BugFixAttribute),false);
You can now iterate through this array, printing out the properties of the BugFixAttribute
object. Example 18-2 replaces the
Tester class from Example 18-1.
Programming C#, 2nd Edition
420
Example 18-2. Using reflection
public static void Main( )
{
MyMath mm = new MyMath( );
Console.WriteLine("Calling DoFunc(7). Result: {0}",
mm.DoFunc1(7));
// get the member information and use it to
// retrieve the custom attributes
System.Reflection.MemberInfo inf = typeof(MyMath);
object[] attributes;
attributes =
inf.GetCustomAttributes(
typeof(BugFixAttribute), false);
// iterate through the attributes, retrieving the
// properties
foreach(Object attribute in attributes)
{
BugFixAttribute bfa = (BugFixAttribute) attribute;
Console.WriteLine("\nBugID: {0}", bfa.BugID);
Console.WriteLine("Programmer: {0}", bfa.Programmer);
Console.WriteLine("Date: {0}", bfa.Date);
Console.WriteLine("Comment: {0}", bfa.Comment);
}
}
Output:
Calling DoFunc(7). Result: 9.3333333333333333
BugID: 121
Programmer: Jesse Liberty
Date: 01/03/05
Comment:
BugID: 107
Programmer: Jesse Liberty
Date: 01/04/05
Comment: Fixed off by one errors
When you put this replacement code into Example 18-1 and run it, you can see the metadata
printed as you'd expect.
18.4.2 Type Discovery
You can use reflection to explore and examine the contents of an assembly. You can find the
types associated with a module; the methods, fields, properties, and events associated with a
type, as well as the signatures of each of the type's methods; the interfaces supported by the
type; and the type's base class.
To start, load an assembly dynamically with the Assembly.Load static method. The
Assembly class encapsulates the actual assembly itself, for purposes of reflection. The
signature for the Load method is:
public static Assembly.Load(AssemblyName)
Programming C#, 2nd Edition
421
For the next example, pass in the Core Library to the Load method. MsCorLib.dll has the
core classes of the .NET Framework:
Assembly a = Assembly.Load("Mscorlib.dll");
Once the assembly is loaded, you can call GetTypes( ) to return an array of Type objects.
The Type object is the heart of reflection. Type represents type declarations (classes,
interfaces, arrays, values, and enumerations):
Type[] types = a.GetTypes( );
The assembly returns an array of types that you can display in a foreach loop, as shown in
Example 18-3. Because this listing uses the Type class, you will want to add a using
statement for the System.Reflection namespace.
Example 18-3. Reflecting on an assembly
namespace Programming_CSharp
{
using System;
using System.Reflection;
public class Tester
{
public static void Main( )
{
// what is in the assembly
Assembly a = Assembly.Load("Mscorlib.dll");
Type[] types = a.GetTypes( );
foreach(Type t in types)
{
Console.WriteLine("Type is {0}", t);
}
Console.WriteLine(
"{0} types found", types.Length);
}
}
}
The output from this would fill many pages. Here is a short excerpt:
Type is System.TypeCode
Type is System.Security.Util.StringExpressionSet
Type is System.Runtime.InteropServices.COMException
Type is System.Runtime.InteropServices.SEHException
Type is System.Reflection.TargetParameterCountException
Type is System.Text.UTF7Encoding
Type is System.Text.UTF7Encoding+Decoder
Type is System.Text.UTF7Encoding+Encoder
Type is System.ArgIterator
1426 types found
This example obtained an array filled with the types from the Core Library and printed them
one by one. The array contained 1,426 entries on my machine.
Programming C#, 2nd Edition
422
18.4.3 Reflecting on a Type
You can reflect on a single type in the mscorlib assembly as well. To do so, extract a type
from the assembly with the GetType( ) method, as shown in Example 18-4.
Example 18-4. Reflecting on a type
namespace Programming_CSharp
{
using System;
using System.Reflection;
public class Tester
{
public static void Main( )
{
// examine a single object
Type theType =
Type.GetType(
"System.Reflection.Assembly");
Console.WriteLine(
"\nSingle Type is {0}\n", theType);
}
}
}
Output:
Single Type is System.Reflection.Assembly
18.4.3.1 Finding all type members
You can ask the Assembly type for all its members using the GetMembers( ) method of the
Type class, which lists all the methods, properties, and fields, as shown in Example 18-5.
Example 18-5. Reflecting on the members of a type
namespace Programming_CSharp
{
using System;
using System.Reflection;
public class Tester
{
public static void Main( )
{
// examine a single object
Type theType =
Type.GetType(
"System.Reflection.Assembly");
Console.WriteLine(
"\nSingle Type is {0}\n", theType);
Programming C#, 2nd Edition
423
// get all the members
MemberInfo[] mbrInfoArray =
theType.GetMembers( );
foreach (MemberInfo mbrInfo in mbrInfoArray )
{
Console.WriteLine("{0} is a {1}",
mbrInfo, mbrInfo.MemberType);
}
}
}
}
Once again the output is quite lengthy, but within the output you see fields, methods,
constructors, and properties, as shown in this excerpt:
Boolean IsDefined(System.Type, Boolean) is a Method
System.Object[] GetCustomAttributes(Boolean) is a Method
System.Object[] GetCustomAttributes(System.Type, Boolean) is a Method
System.Security.Policy.Evidence get_Evidence( ) is a Method
System.String get_Location( ) is a Method
18.4.3.2 Finding type methods
You might want to focus on methods only, excluding the fields, properties, and so forth. To
do so, remove the call to GetMembers( ):
MemberInfo[] mbrInfoArray =
theType.GetMembers(BindingFlags.LookupAll);
and add a call to GetMethods( ):
mbrInfoArray = theType.GetMethods( );
The output now is nothing but the methods:
Output (excerpt):
Boolean Equals(System.Object) is a Method
System.String ToString( ) is a Method
System.String CreateQualifiedName(
System.String, System.String) is a Method
Boolean get_GlobalAssemblyCache( ) is a Method
18.4.3.3 Finding particular type members
Finally, to narrow it down even further, you can use the FindMembers method to find
particular members of the type. For example, you can narrow your search to methods whose
names begin with the letters Get.
To narrow the search, use the FindMembers method, which takes four parameters:
MemberTypes, BindingFlags, MemberFilter, and object.
Programming C#, 2nd Edition
424
MemberTypes
A MemberTypes object that indicates the type of the member to search for. These
include All, Constructor, Custom, Event, Field, Method, Nestedtype, Property,
and TypeInfo. You will also use the MemberTypes.Method to find a method.
BindingFlags
An enumeration that controls the way searches are conducted by reflection. There are
a great many BindingFlag values, including IgnoreCase, Instance, Public,
Static, and so forth.
MemberFilter
A delegate (see Chapter 12) that is used to filter the list of members in the
MemberInfo array of objects. The filter you'll use is Type.FilterName, a field of the
Type class used for filtering on a name.
Object
A string value that will be used by the filter. In this case you'll pass in "Get*" to match
only those methods that begin with the letters Get.
The complete listing for filtering on these methods is shown in Example 18-6.
Example 18-6. Finding particular members
namespace Programming_CSharp
{
using System;
using System.Reflection;
public class Tester
{
public static void Main( )
{
// examine a single object
Type theType = Type.GetType(
"System.Reflection.Assembly");
// just members which are methods beginning with Get
MemberInfo[] mbrInfoArray =
theType.FindMembers(MemberTypes.Method,
BindingFlags.Public |
BindingFlags.Static |
BindingFlags.NonPublic |
BindingFlags.Instance |
BindingFlags.DeclaredOnly,
Type.FilterName, "Get*");
Programming C#, 2nd Edition
425
foreach (MemberInfo mbrInfo in mbrInfoArray )
{
Console.WriteLine("{0} is a {1}",
mbrInfo, mbrInfo.MemberType);
}
}
}
}
Output (excerpt):
System.Type[] GetTypes( ) is a Method
System.Type[] GetExportedTypes( ) is a Method
System.Type GetType(System.String, Boolean) is a Method
System.Type GetType(System.String) is a Method
System.Reflection.AssemblyName GetName(Boolean) is a Method
System.Reflection.AssemblyName GetName( ) is a Method
18.4.4 Late Binding
Once you have discovered a method, it's possible to invoke it using reflection. For example,
you might like to invoke the Cos( ) method of System.Math, which returns the cosine of an
angle.
You could, of course, call Cos( ) in the normal course of your code,
but reflection allows you to bind to that method at runtime. This is
called late-binding and offers the flexibility of choosing at runtime
which object you will bind to and invoking it programmatically. This
can be useful when creating a custom script to be run by the user or
when working with objects that might not be available at compile time.
For example, by using late-binding, your program can interact with the
spellchecker or other components of a running commercial word
processing program such as Microsoft Word.
To invoke Cos( ), you will first get the Type information for the System.Math class:
Type theMathType = Type.GetType("System.Math");
With that type information, you could dynamically load an instance of a class by using a static
method of the Activator class. Since Cos( ) is static, you don't need to construct an instance
of System.Math (and you can't, since System.Math has no public constructor).
The Activator class contains four methods, all static, which you can use to create objects
locally or remotely, or to obtain references to existing objects. The four methods are
CreateComInstanceFrom, CreateInstanceFrom, GetObject, and CreateInstance:
CreateComInstanceFrom
Used to create instances of COM objects.
Programming C#, 2nd Edition
426
CreateInstanceFrom
Used to create a reference to an object from a particular assembly and type name.
GetObject
Used when marshaling objects. Marshaling is discussed in detail in Chapter 19.
CreateInstance
Used to create local or remote instances of an object.
For example:
Object theObj = Activator.CreateInstance(someType);
Back to the Cos( ) example, you now have one object in hand: a Type object named
theMathType, which you created by calling GetType.
Before you can invoke a method on the object, you must get the method you need from the
Type object, theMathType. To do so, you'll call GetMethod( ), and you'll pass in the
signature of the Cos method.
The signature, you will remember, is the name of the method (Cos) and its parameter types. In
the case of Cos( ), there is only one parameter: a double. However, Type.GetMethod takes
two parameters. The first represents the name of the method you want, and the second
represents the parameters. The name is passed as a string; the parameters are passed as an
array of types:
MethodInfo CosineInfo =
theMathType.GetMethod("Cos",paramTypes);
Before calling GetMethod, you must prepare the array of types:
Type[] paramTypes = new Type[1];
paramTypes[0]= Type.GetType("System.Double");
This code declares the array of Type objects and then fills the first element (paramTypes[0])
with a Type representing a double. Obtain the type representing a double by calling the static
method Type.GetType( ), and passing in the string "System.Double".
You now have an object of type MethodInfo on which you can invoke the method. To do so,
you must pass in the object to invoke the method on and the actual value of the parameters,
again in an array. Since this is a static method, pass in theMathType. (If Cos( ) was an
instance method, you could use
theObj instead of theMathType.)
Object[] parameters = new Object[1];
parameters[0] = 45 * (Math.PI/180); // 45 degrees in radians
Object returnVal = CosineInfo.Invoke(theMathType,parameters);
Programming C#, 2nd Edition
427
Note that you've created two arrays. The first, paramTypes, holds the
type of the parameters. The second, parameters, holds the actual value.
If the method had taken two arguments, you'd have declared these
arrays to hold two values. If the method did not take any values, you
still would create the array, but you would give it a size of zero!
Type[] paramTypes = new Type[0];
Odd as this looks, it is correct.
Example 18-7 illustrates dynamically calling the Cos( ) method.
Example 18-7. Dynamically invoking a method
namespace Programming_CSharp
{
using System;
using System.Reflection;
public class Tester
{
public static void Main( )
{
Type theMathType = Type.GetType("System.Math");
// Since System.Math has no public constructor, this
// would throw an exception.
//Object theObj =
// Activator.CreateInstance(theMathType);
// array with one member
Type[] paramTypes = new Type[1];
paramTypes[0]= Type.GetType("System.Double");
// Get method info for Cos( )
MethodInfo CosineInfo =
theMathType.GetMethod("Cos",paramTypes);
// fill an array with the actual parameters
Object[] parameters = new Object[1];
parameters[0] = 45 * (Math.PI/180); // 45 degrees in radians
Object returnVal =
CosineInfo.Invoke(theMathType,parameters);
Console.WriteLine(
"The cosine of a 45 degree angle {0}",
returnVal);
}
}
}
That was a lot of work just to invoke a single method. The power, however, is that you can
use reflection to discover an assembly on the user's machine, to query what methods are
available, and to invoke one of those members dynamically!
Programming C#, 2nd Edition
428
18.5 Reflection Emit
So far we've seen reflection used for three purposes: viewing metadata, type discovery, and
dynamic invocation. You might use these techniques when building tools (such as a
development environment) or when processing scripts. The most powerful use of reflection,
however, is with reflection emit.
Reflection emit supports the dynamic creation of new types at runtime. You can define an
assembly to run dynamically or to save itself to disk, and you can define modules and new
types with methods that you can then invoke.
The use of dynamic invocation and reflection emit should be considered
an advanced topic. Most developers will never have need to use
reflection emit. This demonstration is based on an example provided at
the Microsoft Author's Summit, Fall 2000.
To understand the power of reflection emit, you must first consider a slightly more
complicated example of dynamic invocation.
Problems can have general solutions that are relatively slow and specific solutions that are
fast. To keep things manageably simple, consider a DoSum( ) method, which provides the
sum of a string of integers from 1 n, where n will be supplied by the user.
Thus, DoSum(3) is equal to 1+2+3, or 6. DoSum(10) is 55. Writing this in C# is very simple:
public int DoSum1(int n)
{
int result = 0;
for(int i = 1;i <= n; i++)
{
result += i;
}
return result;
}
The method simply loops, adding the requisite number. If you pass in 3, the method adds 1 +
2 + 3 and returns an answer of 6.
With large numbers, and when run many times, this might be a bit slow. Given the value 20,
this method would be considerably faster if you removed the loop:
public int DoSum2( )
{
return 1+2+3+4+5+6+7+8+9+10+11+12+13+14+15+16+17+18+19+20;
}
DoSum2
runs more quickly than DoSum1 does. How much more quickly? To find out, you'll
need to put a timer on both methods. To do so, use a DateTime object to mark the start time
and a TimeSpan object to compute the elapsed time.
Programming C#, 2nd Edition
429
For this experiment, you need to create two DoSum( ) methods; the first will use the loop and
the second will not. Call each 1,000,000 times. (Computers are very fast, so to see a
difference you have to work hard!) Then compare the times. Example 18-8 illustrates the
entire test program.
Example 18-8. Comparing loop to brute force
namespace Programming_CSharp
{
using System;
using System.Diagnostics;
using System.Threading;
public class MyMath
{
// sum numbers with a loop
public int DoSum(int n)
{
int result = 0;
for(int i = 1; i <= n; i++)
{
result += i;
}
return result;
}
// brute force by hand
public int DoSum2( )
{
return 1+2+3+4+5+6+7+8+9+10+11
+12+13+14+15+16+17+18+19+20;
}
}
public class TestDriver
{
public static void Main( )
{
const int val = 20; // val to sum
// 1,000,000 iterations
const int iterations = 1000000;
// hold the answer
int result = 0;
MyMath m = new MyMath( );
// mark the start time
DateTime startTime = DateTime.Now;
// run the experiment
for (int i = 0;i < iterations;i++)
{
result = m.DoSum(val);
}
Programming C#, 2nd Edition
430
// mark the elapsed time
TimeSpan elapsed =
DateTime.Now - startTime;
// display the results
Console.WriteLine(
"Loop: Sum of ({0}) = {1}",
val, result);
Console.WriteLine(
"The elapsed time in milliseconds is: " +
elapsed.TotalMilliseconds.ToString( ));
// mark a new start time
startTime = DateTime.Now;
// run the experiment
for (int i = 0;i < iterations;i++)
{
result = m.DoSum2( );
}
// mark the new elapsed time
elapsed = DateTime.Now - startTime;
// display the results
Console.WriteLine(
"Brute Force: Sum of ({0}) = {1}",
val, result);
Console.WriteLine(
"The elapsed time in milliseconds is: " +
elapsed.TotalMilliseconds);
}
}
}
Output:
Loop: Sum of (20) = 210
The elapsed time in milliseconds is: 187.5
Brute Force: Sum of (20) = 210
The elapsed time in milliseconds is: 31.25
As you can see, both methods returned the same answer (one million times!), but the brute-
force method was six times faster.
Is there a way to avoid the loop and still provide a general solution? In traditional
programming, the answer would be no, but with reflection you do have one other option. You
can, at runtime, take the value the user wants (20, in this case) and write out to disk a class
that implements the brute-force solution. You can then use dynamic invocation to invoke that
method.
There are at least three ways to achieve this result, each increasingly elegant. The third,
reflection emit, is the best, but a close look at two other techniques is instructive. If you are
pressed for time, you might wish to jump ahead to Section 18.5.3, later in this chapter.
Programming C#, 2nd Edition
431
18.5.1 Dynamic Invocation with InvokeMember( )
The first approach will be to dynamically create a class named BruteForceSums at runtime.
The BruteForceSums class will contain a method, ComputeSum( ), that implements the
brute-force approach. You'll write that class to disk, compile it, and then use dynamic
invocation to invoke its brute-force method by means of the InvokeMember( ) method of the
Type class. The key point is that BruteForceSums.cs won't exist until you run the program.
You'll create it when you need it and supply its arguments then.
To accomplish this, you'll create a new class named ReflectionTest. The job of the
ReflectionTest class is to create the BruteForceSums class, write it to disk, and compile it.
ReflectionTest has only two methods: DoSum and GenerateCode.
ReflectionTest.DoSum is a public method that returns the sum, given a value. That is, if you
pass in 10, it returns the sum of 1+2+3+4+5+6+7+8+9+10. It does this by creating the
BruteForceSums class and delegating the job to its ComputeSum method.
ReflectionTest has two private fields:
Type theType = null;
object theClass = null;
The first is an object of type Type, which you use to load your class from disk; the second is
an object of type object, which you use to dynamically invoke the ComputeSums( ) method
of the BruteForceSums class you'll create.
The driver program instantiates an instance of ReflectionTest and calls its DoSum method,
passing in the value. For this version of the program, the value is increased to 200.
The DoSum method checks whether theType is null; if it is, the class has not been created yet.
DoSum calls the helper method GenerateCode to generate the code for the BruteForceSums
class and the class's ComputeSums method. GenerateCode then writes this newly created code
to a .cs file on disk and runs the compiler to turn it into an assembly on disk. Once this is
completed,
DoSum can call the method using reflection.
Once the class and method are created, load the assembly from disk and assign the class type
information to theType DoSum can use that to invoke the method dynamically to get the
correct answer.
You begin by creating a constant for the value to which you'll sum:
const int val = 200;
Each time you compute a sum, it will be the sum of the values 1 to 200.
Before you create the dynamic class, you need to go back and re-create
MyMath:
MyMath m = new MyMath( );
Give MyMath a method DoSumLooping, much as you did in the previous example:
Programming C#, 2nd Edition
432
public int DoSumLooping (int initialVal)
{
int result = 0;
for(int i = 1;i <=initialVal;i++)
{
result += i;
}
return result;
}
This serves as a benchmark against which you can compare the performance of the brute-
force method.
Now you're ready to create the dynamic class and compare its performance with the looping
version. First, instantiate an object of type ReflectionTest and invoke the DoSum( ) method
on that object:
ReflectionTest t = new ReflectionTest( );
result = t.DoSum(val);
ReflectionTest.DoSum
checks to see if its Type field, theType, is null. If it is, you haven't
yet created and compiled the BruteForceSums class and must do so now:
if (theType == null)
{
GenerateCode(theValue);
}
The GenerateCode method takes the value (in this case, 200) as a parameter to know how
many values to add.
GenerateCode begins by creating a file on disk. The details of file I/O will be covered in
Chapter 21. For now, I'll walk you through this quickly. First, call the static method
File.Open, and pass in the filename and a flag indicating that you want to create the file.
File.Open returns a Stream object:
string fileName = "BruteForceSums";
Stream s = File.Open(fileName + ".cs", FileMode.Create);
Once you have the Stream, you can create a StreamWriter so that you can write into that
file:
StreamWriter wrtr = new StreamWriter(s);
You can now use the WriteLine methods of StreamWriter to write lines of text into the file.
Begin the new file with a comment:
wrtr.WriteLine("// Dynamically created BruteForceSums class");
This writes the text:
// Dynamically created BruteForceSums class