Programming with Java, Swing and Squint phần 2 pdf
Bạn đang xem bản rút gọn của tài liệu. Xem và tải ngay bản đầy đủ của tài liệu tại đây (481.37 KB, 35 trang )
tal “C” to a lower case “c” would therefore confuse Java enough that the code in the method would
not be executed when a button was clicked.
There are many other examples of logical errors a programmer can make. In larger programs
the possibilities for making such errors just increase. You will find that careful, patient, thoughtful
examination of your code as you write it and after errors are detected is essential.
1.7 Summary
Programming a computer to say “I’m Touched.” is obviously a rather modest achievement. In the
process of discussing this simple program, however, we have explored many of the principles and
practices that will be developed throughout this book. We have learned that computer programs are
just collections of instructions. These instructions, however, are special in that they can be followed
mechanically, without understanding their actual purpose. This is the notion of an algorithm, a
set of instructions that can be followed to accomplish a task without understanding the task itself.
We have seen that programs are produced by devising algorithms and then expressing them in a
language which a computer can interpret. We have learned the rudiments of the language we will
explore further throughout this text, Java. We have also explored some of the tools used to enter
computer programs, translate them into a form the machine can follow, and run them.
Despite our best efforts to explain how these tools interact, there is nothing that can take the
place of actually writing, entering and running a program. We strongly urge you to do so before
proceeding to read the next chapter. Throughout the process of learning to program you will
discover that it is a skill that is b es t learned by practice. Now is a good time to start.
30
Chapter 2
What’s in a name?
An important feature of programming languages is that the vocabulary used can be expanded
by the programmer. Suppose you were given the task of writing a web browser and one of the
desired features was a menu which would list the user’s favorite web pages. How would you write
the commands to create such a menu? You could not actually type in the desired menu items
because they would not be known until later when the program was actually being used. In fact,
the contents of the menu might change based on user input while the program was running. What
you must do instead is introduce a name that will function as a place holder for the information
that belongs in the menu. You can use such a name to describe the contents of the menu as long as
elsewhere in the program you include instructions that tell the computer what information should
be associated with the name. Such names are somewhat like proper names used to refer to the
characters in a story. You cannot determine their meanings by simply looking them up in a standard
dictionary. Instead, the information that enables you to interpret them is part of the story itself.
In this chapter, we will continue your introduction to programming in Java by discussing how to
introduce and use such names in Java programs. In addition, we will introduce several details of
the primitives used to manipulate GUI components.
2.1 Modifying Objects
Instructions like:
contentPane.add( new JButton( "Continue" ) );
provide the means to place a variety of GUI components on a computer screen. Many programs
that use GUI components, however, do more than just place them on the screen and respond when
users interact with the GUI components. They also modify the GUI components in various ways
to reflect changes in the state of the program. For example, when you try to save a new file in an
application, the program is likely to display a dialog box containing a text field in which you can
type a name for the file, and a “Save” button to click once you finish typing the name. Typically,
the “Save” button is initially disabled, but as soon as you type in a potential name for the file, the
program somehow changes the state of the button by enabling it. Similarly, many word processing
programs contain menus of styles you can apply to text. These programs usually also allow you
to add new styles. When you add a new style, the program has to somehow modify the menu it
created earlier by adding new items.
31
At some level, adding a new item to a menu is actually quite similar to adding a new GUI
component to the display. Therefore, it should not come as a surprise that just as we use a method
invocation to add components to the window, we can also use method invocations to add items to
menus and to modify GUI components in many other ways.
Recall that, in general, a method invocation has the form:
name.action( . . . arguments . . . )
where
action is the name of a method that describes the action we want performed,
name is a name associated with the object that we want to perform this action, and
arguments are 0 or more pieces of extra information that more precisely describ e the action to
be performed.
In order to write a method invocation that will modify a GUI component in a particular way,
we need to know exactly what to use in place of the name, action, and arguments components that
comprise a complete invocation. The action, and arguments are actually fairly simple. Associated
with each type of GUI com ponent there is a collection of methods that c an be used to perform
actions that affect GUI components of that type. We can look up the names of these methods in
the documentation that comes with the Java language. In this documentation, we will also find
descriptions of each method’s behavior and of the arguments that each method expects.
For example, with a JLabel, a method named setText can be used to change the text displayed
on the screen by the label. When this method is used, a single argument giving the new text to be
displayed must be included. Thus, if statusMessage is a name that refers to a JLabel, then the
method invocation
statusMessage.setText( "Host www.yhoo.com not responding" );
could be used to replace whatever message had been previously displayed by the label with the
warning message “Host www.yhoo.com not responding”.
Similarly, a method named setEnabled can be used to tell a JButton to become enabled (or
disabled). This method also expects a single argument. If the argument provided is true, the
button will become enabled. If the argument is false, the button will become disabled. Thus, if
saveButton is a name that refers to a button, the instruction
saveButton.setEnabled( false );
can be used to disable that button.
In fact, the setEnabled action c an be performed by any GUI component. So, if you wanted to
disable a menu you could type something like
historyMenu.setEnabled( false );
This example illustrates why we have to provide the name of the objec t that should perform the
desired action in a method invocation. If we just typed
setEnabled( false );
32
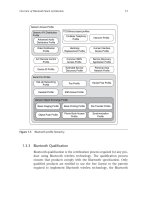
Figure 2.1: Behavior of proposed NotSoTouchy program
in a program that included both a button and a menu in its interface, Java would have no way to
decide which one we wanted to disable. In general, to apply a method to a particular object, Java
expects us to provide a name or some other means of identifying the object followed by a period
and the name of the method to b e used. So, in order to learn to use method invocations effectively,
we need to learn how to as sociate names with GUI components and other entities in our programs.
2.2 Instance Variable Declarations
To introduce the process of associating a name with an object in Java we will construct another
version of the TouchyButton program that we used as an example in the preceding chapter. In the
original version, each time someone clicked the button, a new copy of the message “I’m touched”
appeared on the screen. Our new version will be less repetitive. Rather than filling the screen with
multiple copies of its message, the new version will only display its message once no matter how
many times the button is pressed. We will name the new program NotSoTouchy
To accomplish this, we will make the program take a different approach to displaying its message.
Instead of constructing a new JLabel each time the button is pressed, we will change the program
so that the JLabel is created and displayed in the constructor before the button is pressed. Initially,
instead of displaying “I’m touched” we will make the label display instructions telling the user to
click the button. Then, when the button is pressed, we will use setText to make the label display
the message “I’m touched”. Figure 2.1 illustrates the behavior we have in mind. If the button is
pressed again, the program will use setText to make the label display the message “I’m touched”
again, but since it already is displaying this message nothing will change on the screen.
Before we can use setText to change the appearance of a JLabel, we have to choose a name
to associate with the label. Java puts a few restrictions on the names we can pick. Names that
satisfy these restrictions are called identifiers. An identifier must start with a letter. After the
first letter, you can use either letters, digits or underscores. So we could name our labe l something
like message, status or message2user. Case is significant. Java would treat userStatus and
userstatus as two completely distinct names . An identifier can be as long (or short) as you like,
but it must be just one word (i.e., no blanks or punctuation marks are allowed in the middle of an
identifier). A common conve ntion used to make up for the inability to separate parts of a name
using spaces is to start each part of a name with a capital letter. For example, we might use a name
like importantMessage. It is also a convention to use identifiers starting with lower case letters to
name objects to help distinguish them from the names of classes like TouchyButton and constants
like WINDOW
WIDTH. Finally, words like class and public that are used as part of the Java language
itself cannot be used as identifiers. These are called reserved words or keywords.
33
We can use a sequence of letters, numbers and underscores as an identifier in a Java program
even if it has no meaning in English. Java would be perfectly happy if we named our label e2d iw0.
It is much better, however, to choose a name that suggests the role of an object. Such names make
it much easier for you and others reading your code to understand its meaning. With this in mind,
we will use the name message for the label as we complete this example.
There are two steps involved in associating a name with an object. Java requires that we
first introduce each name we plan to use by including what is called a declaration of the name.
Then, we associate a particular meaning with the name using an assignment statement. We discuss
declarations in this section and introduce assignments in the following section.
The syntax of a declaration is very simple. For each name you plan to use, you enter the
word private followed by the name of the type of object to which the name will refer and finally
the name you wish to introduce. In addition, like commands, each declaration is terminated by a
semi-colon. So, to declare the name message, which we intend to use to refer to a JLabel, we type
the declaration:
private JLabel message;
The form and placement of a declaration within a program determines where in the program
the name can be used. This region is called the scope of the name. In particular, we will eventually
want to refer to the name message in both the constructor for the NotSoTouchy class and in the
buttonClicked method. The declaration of a name that will be shared between a constructor and
a method or between several methods should be placed within the braces that surround the body
of our class, but outside of the constructor and method bodies. Names declared in this way are
called instance variables. We recommend that instance variable declarations be placed before the
constructor and method definitions. The inclusion of the word private in an instance variable
declaration indicates that only code within the c lass we are defining should be allowed to refer
to this name. The public qualifier that we include in method declarations, by way of contrast,
indicates that the method is accessible outside of the class.
The declaration of an instance variable does not determine to which object the name will refer.
Instead, it merely informs Java that the name will be used at some point in the program and
tells Java the type of object that will eventually be associated with the name. The purpose of
such a declaration is to enable Java to give you helpful feedback if you make a mistake. Suppose
that after deciding to use the name “message” in a program we made a typing mistake and typed
“massage” in one line where we meant to type “mess age”. It would be nice if when Java tried
to run this program it could notice such a mistake and provide advice on how to fix the error
similar to that provided by a spelling checker. To do this, however, Java needs the equivalent of a
dictionary against which it can check the names used in the program. The declarations included
in a program provide this dictionary. If Java encounters a name that was not declared it reports it
as the equivalent of a spelling mistake.
Based on this discussion, the contents of the program we want to write might begin with the
code shown in Figure 2.2.
2.3 Assigning Meanings to Variable Names
Before a name can be used in a command like:
message.setText( "I’m touched" );
34
import squint.*;
import javax.swing.*;
public class NotSoTouchy extends GUIManager {
private final int WINDOW_WIDTH = 170;
private final int WINDOW_HEIGHT = 100;
private JLabel message;
public NotSoTouchy() {
this.createWindow( WINDOW_WIDTH, WINDOW_HEIGHT );
contentPane.add( new JButton( "Click Here" ) );
. . .
}
. . .
}
Figure 2.2: Declaring message in the NotSoTouchy program
we must associate the name with a particular object using a command Java calls an assignment
statement. An assignment statement consists of a name followed by an equal sign and a phrase
that describes the object we would like to assoc iate with that name. As an example, an assignment
statement to as sociate the name message with a JLabel that initially displayed instructions for
the user of our program might look like:
message = new JLabel( "Click the button above" );
In this assignment stateme nt, we use the construction that creates the JLabel as a sub-phrase to
describe the object we want associated with the name message.
Ordering is critical in an assignment. The name being defined must be placed on the left side
of the equal sign while the phrase that describes the object to which the name should refer belongs
on the right side. Java will reject the command as nonsense if we interchange the order of the
name and the construction. It may be easier to remember this rule if you recognize that the correct
ordering of the parts of an assignment statement is similar to the way definitions are presented in
a dictionary. The name being defined comes before its definition.
Java will also reject an assignment statement that attempts to associate a name with an object
that is not of the type included in the name’s declaration. The declaration included in Figure 2.2
states that message will be used to refer to a JLabel. If we included the assignment
message = new JButton( "Click Here" );
in our program, it would be identified as an error because it attempts to associate the name with
an object that is a JButton rather than with a JLabel.
When we use a construction of a GUI component as an argument in a method invocation of
the form
35
import squint.*;
import javax.swing.*;
public class NotSoTouchy extends GUIManager {
private final int WINDOW_WIDTH = 170;
private final int WINDOW_HEIGHT = 100;
private JLabel message;
public NotSoTouchy() {
this.createWindow( WINDOW_WIDTH, WINDOW_HEIGHT );
contentPane.add( new JButton( "Click Here" ) );
message = new JLabel( "Click the button above" );
contentPane.add( message );
}
public void buttonClicked() {
message.setText( "I’m touched" );
}
}
Figure 2.3: Complete program illustrating use of an instance variable
contentPane.add( new JLabel( "I’m Touched" ) );
as we have in all our earlier examples, the command both creates the specified GUI component and
adds it to the program’s display. When a GUI component construction is instead used as a sub-
phrase of an assignment, execution of the assignment instruction creates the object and associates a
name with it but does not add it to the display. So, if all we do is execute the assignment statement
message = new JLabel( "Click the button above" );
nothing new will appear in the program’s window.
This gives us a chance to immediately show how we can make use of the name message. We
want the label to appear on the screen. To make something appear on the screen we have to provide
it as an argument to the contentPane’s add method. The name message now refers to the label
we want to add. So, using this name as an argument to the add method as in
contentPane.add( message );
will now make the label appear in the display. Basically, once we have used an assignment to
associate a name with an object, we can use that name whenever we want to tell the computer to
do something with that object.
Given this introduction to associating names with objects, we can now show the complete code
for our NotSoTouchy program. The code is shown in Figure 2.3. Even though it is very short and
simple, this program includes examples of all three of the basic steps involved in using variable
names: declarations, assignments, and references.
36
• The declaration:
private JLabel message;
appears at the beginning of the class body.
• An assignment of a meaning to the name appe ars on the third line of the constructor:
message = new JLabel( "Click the button above" );
• References to the label through its name appear in both the last line of the constructor :
contentPane.add( message );
and the only instruction in the buttonClicked method:
message.setText( "I’m touched" );
We emphasize these three aspects of using variable names because they apply not just to this
example but to almost any use of a variable name in Java. To illustrate this, suppos e someone
pointed out that it seemed silly to be able to click the button in our program over and over when
it really only did something on the first click. We could address this complaint by disabling the
button after it was clicked using the setEnabled method. To do this, we would follow the same
three steps identified above. Assuming that we decided to call the button theButton, we would
first add a declaration of the form:
private JButton theButton;
just before or after the declaration of message. Then, we would associate the name with an actual
JButton by replacing the line
contentPane.add( new JButton( "Click Here" ) );
with the pair of lines
theButton = new JButton( "Click Here" );
contentPane.add( theButton );
Finally, we would add the instruction
theButton.setEnabled( false );
to the buttonClicked method.
2.4 Local Variables
In the examples considered in the last section, the variables we used were essential to the instruc-
tions we wanted to write in two distinct sections of the program’s code, the constructor and the
buttonClicked metho d. The GUI components associated with these names were constructed and
added to the content pane in the constructor, but modified later in buttonClicked. Whenever a
37
variable is asso c iated with an object that is shared between a constructor and a method or between
several methods in this way, the variable should be declared as what we call an instance variable.
This is done by placing its declaration outside of the bodies of the constructor and the methods
(and typically b efore the constructor and method definitions).
There are other situations, however, where all the operations we wish to perform with some
object occur within the constructor or within a single method. In such situations, Java allows
us to define names in such a way that their meanings only apply within the section of code in
which they are needed. Such names are called local variables. Using local variables rather than
instance variables when possible is considered good programming style. As your knowledge of
programming increases and you write larger and larger programs, you will quickly discover that
the overall structure of a program can become very complex. One way to minimize this overall
complexity is to specify any details of the program that don’t need to be known globally in such a
way that they are local to the part of the program for which they are relevant. Using lo cal variables
is a good example of this practice.
To illustrate the use of a local variable, let’s make a simple, cosmetic change to the NotSoTouchy
program shown in Figure 2.3. In particular, let’s make the text “Click Here” app ear in red instead
of the default black.
When GUI components are drawn on the screen, the computer uses one color, the foreground
color, for the text shown, and another color, the background color, to fill the remainder of the
component. By default, the foreground color is black and the background color is white. The
methods setForeground and setBackground can be invoked to change the colors used. Both
methods expect a single argument specifying the color to use. The names Color.RED, Color.BLUE,
Color.GREEN, and a few other similar names can be used to describe common colors.
1
So, if the
name theButton were associated with our program’s button, the invocation
theButton.setForeground( Color.RED );
could be used to make the words “Click Here” appear in red.
If this is all we want to do with the button (in particular, if we don’t want to try to disable it
in the buttonClicked method), then all the operations that involve the button will occur in the
constructor. We will construct the button in the constructor, we will set its foreground color, and
we will add it to the content pane. In such a situation, it is best to declare theButton as a local
variable within the constructor rather than as an instance variable.
Declaring a local variable is quite simple. The main difference between local variable declarations
and instance variable declarations is that the line that declares a local variable is placed inside the
body of the constructor or method where the name will be used rather than outside of the definitions
of the constructors and methods. Doing this tells Java that the name will be private, not just to
its class, but to the constructor or method in which it is declared. Therefore, the word private is
not included in a local variable declaration. The revised definition of the NotSoTouchy constructor
would contain the code s hown in Figure 2.4.
1
These names are actually defined in a library known as the Abstract Windowing Toolkit (or AWT) rather than
in Squint or Swing. Therefore, to use these names we have to add an import for the l ibrary “java.awt.*” to our
program. Java also provides a complete mechanism to describ e custom colors which we will discuss later.
38
public NotSoTouchy() {
this.createWindow( WINDOW_WIDTH, WINDOW_HEIGHT );
JButton theButton;
theButton = new JButton( "Click Here" );
theButton.setForeground( Color.RED );
contentPane.add( theButton );
message = new JLabel( "Click the button above" );
contentPane.add( message );
}
Figure 2.4: A method definition including a local variable
2.5 GUI Layout with Panels
In Section 1.5.3 we explained that the simple approach we are taking to the layout of GUI compo-
nents sometimes produces undesirable results. The program discussed in that section created four
JTextFields intended to be used to enter an individual’s address. Each JTextField was paired
with an identifying JLabel. In Figure 1.16, we showed how the layout manager might under some
circumstances unnecessarily separate a JLabel from the component it was intended to label. At
that time, we promised that we would introduce a mechanism to address this issue. This is a good
time to keep that promise since the mechanism used will give us a chance to show you a few more
examples of the use of local variables.
You should be familiar with the fact that when we want to add a component to the display, we
write an invocation of the form
contentPane.add( . . . );
When we first introduced this mechanism, we explained that contentPane was a name for the
interior of the program’s window. By now, we know that when we want to associate an object
with a name, we first have to tell Java the type of the object to which the name will refer. Will
it identify a JButton, a JLabel, or something else? So it seems fair to ask for the same sort of
information about the name contentPane. What type of object does the name contentPane refer
to?
contentPane refers to an object that belongs to the class JPanel. A JPanel is essentially a box
into which one can insert GUI components that you want displayed as a group. In a program, we
can construct a JPanel and then add a collection of related components to the panel’s contents in
much the same manner that we would add them to the contentPane. More importantly, a JPanel
is also a GUI comp onent itself. That means that after we have constructed a JPanel and placed
some other components inside of it, we can add the JPanel to the contentPane and thereby add
all of the components it contains to our program’s display as a group.
For example, suppose that we place a JLabel that displays the label “Street Addr:” and a
JTextField together in a new JPanel. We can then add these two components to our display by
adding the JPanel to the contentPane instead of adding the two components to the contentPane
separately. This will ensure that these two components will be displayed together if at all possible.
39
JPanel streetPanel;
streetPanel = new JPanel();
streetPanel.add( new JLabel( "Street Addr:" ) );
streetPanel.add( new JTextField( 29 ) );
contentPane.add( streetPanel );
Figure 2.5: Instructions to add a JPanel holding two components to the display
Figure 2.6: JPanels can be used to group components in the display
The actual code to accomplish this is fairly simple. The JPanel does not expect any arguments
in its construction. Therefore, the code shown in Figure 2.5 can be used to create the two desired
components and add them to the display as part of a single sub-panel.
The first line of this code dec lares the name streetPanel that we will use to refer to our
JPanel. We will only need to perform op e rations on the panel within the constructor, so we declare
streetPanel as a local variable. The following line constructs an empty panel and associates it
with the name streetPanel. The next two lines are identical to lines from the original program
(as shown in Figure 1.11) except the name of the program’s main JPanel, the contentPane, has
been replaced by the name streetPanel. The last line adds the sub-panel we have formed to the
content pane.
Following this pattern, we can create three additional JPanels to hold the labels and text fields
for the remaining components of the address: the city, state and zip code. For now, let us assume
these JPanels are named cityPanel, statePanel, and zipPanel. Figure 2.6 shows how the display
of this program might look if its window was narrowed just a bit, just as we did to the earlier version
of the program to produce the display shown in Figure 1.16. When we narrowed the window of the
earlier version of the program, the label “Zip:” became separated from its text field because while
there was enough room for the label on the second line of the display, there wasn’t enough room
for the text field. If you look at Figure 2.6 carefully, you can see that there is still enough room for
the label “Zip:” on the second line of the display. The layout manager for the w indow, however,
doesn’t see the label and the text field as separate components. Instead, it sees a single JPanel
that contains both of them. Since the entire panel cannot fit on the second line, it puts the label
40
Figure 2.7: Coloring makes JPanels visible in the display
and the text field together on the third line as desired.
We can make the effect of the JPanels visible by using the setBackground method to change
the colors of the JPanels. In particular, if we add the instructions
zipPanel.setBackground( Color.YELLOW );
statePanel.setBackground( Color.GRAY );
cityPanel.setBackground( Color.YELLOW );
streetPanel.setBackground( Color.GRAY );
to our program and run it again in a narrow window, it produces the display shown in Figure 2.7.
Now it should be clear how the JPanels are grouping the components in the display.
There is one last interesting change we can make to this program. Consider how the name
streetPanel is used in the program. It is clearly very important during the five lines shown in
figure 2.5, but it isn’t used at all after that. The names cityPanel, statePanel, and zipPanel
have similarly short spans during which they are actually of use in the program. As a result, we
can instead use just one name to refer to all four of these JPanels. Obviously, this name can only
refer to one panel at a time. It will refer to the panel that we named streetPanel for the five
instructions that work with that panel, then we will change its meaning to make it refer to the
panel that was originally named cityPanel and so on.
The key to doing this is that Java allows us to use an assignment statement to change the
meaning of a name at any point in a program where that is useful. This should not strike you as
too surprising. We frequently use names in this way outside the world of programming. The name
“president of the class” often changes its meaning once a year. Of course, it would be bad to use
streetPanel or any of the other three names we suggested earlier for this new name. Instead, we
will use the identifier currentPanel. The complete code to construct the address entry display
using this approach is shown in Figure 2.8. Note that the name is only declared once in the first line
of this code, but then is associated with four different JPanels at different points in the program.
2.6 More on Declarations
There are three additional features of variable declarations that we want to introduce at this point.
They are not essential features, but they can help you write programs that are more concise and
clear.
41
JPanel currentPanel;
currentPanel = new JPanel();
currentPanel.add( new JLabel( "Street Addr:" ) );
currentPanel.add( new JTextField( 29 ) );
contentPane.add( currentPanel );
currentPanel = new JPanel();
currentPanel.add( new JLabel( "City:" ) );
currentPanel.add( new JTextField( 18 ) );
contentPane.add( currentPanel );
currentPanel = new JPanel();
currentPanel.add( new JLabel( "State:" ) );
currentPane.add( new JTextField( 2 ) );
contentPane.add( currentPanel );
currentPanel = new JPanel();
currentPanel.add( new JLabel( "Zip:" ) );
currentPanel.add( new JTextField( 5 ) );
contentPane.add( currentPanel );
Figure 2.8: Changing the meaning associated with a variable
42
2.6.1 Initializers
We have emphasized that in Java, the act of introducing a name is logically distinct from the
act of associating a meaning with a name. One is accomplished using a declaration. The other is
accomplished using an assignment statement. It is frequently the case, however, that a programmer
knows that a certain value should be associated with a name when it is first introduced. In this
situation, Java allows the programmer to write a declaration that looks somewhat like a hybrid
between a declaration and an assignment statement.
As an example, consider the first two statements of the code we wrote to illustrate the use of
JPanels shown in Figure 2.8:
JPanel currentPanel;
currentPanel = new JPanel();
Java allows you to combine these two lines into a single declaration of the form
JPanel currentPanel = new JPanel();
Note that while this looks like an assignment statement with a type name added to the beginning
it is considered a declaration with an initializer rather than an assignment statement.
Initializers can be used in the declarations of instance variables as well as in local variables.
Figure 2.9 shows yet another version of the “touchy button” program that incorporates the use of
such initializers. Note that the constructions to create the JButton and the JLabel have been moved
out of the constructor and into the instance variable declarations for message and theButton.
The use of initializers in dec larations often provides the clearest way to specify the initial value
associated with a name. In the next few chapters, however, we will deliberately make sparing use
of this feature. We do this primarily to emphasize the distinction between declaring a name and
assigning a value to a name. Novice Java programmer frequently confuse these two steps in the use
of variable names. In a few chapters, after you become comfortable with this distinction we will
use initializers more frequently.
2.6.2 Making it final
By now, you might have noticed that the two lines we put at the beginning of the body of all our
class definitions:
private final int WINDOW_WIDTH = 170;
private final int WINDOW_HEIGHT = 100;
look a lot like declarations with initializers. If you ignore the second word on each line, you are left
with the words private, followed by the word int (which refers to the collection of values usually
called the integer numbers), an identifier, then an equal sign, and a value to associate with the
identifier as its initial value. The only thing that is odd about these lines is that they include the
word final after the word private.
The word final tells Java that the values associated with these names by their initializers will
be the only values ever associated with these names. In fact, if you include the word final in such
a declaration and later try to use an assignment statement to change the meaning of the name,
Java will identify this as an error in your program.
43
import squint.*;
import java.awt.*;
import javax.swing.*;
public class NotSoTouchy extends GUIManager {
private final int WINDOW_WIDTH = 170;
private final int WINDOW_HEIGHT = 100;
private JLabel message = new JLabel( "Click the button above" );
private JButton theButton = new JButton( "Click Here" );
public NotSoTouchy() {
this.createWindow( WINDOW_WIDTH, WINDOW_HEIGHT );
theButton.setForeground( Color.RED );
contentPane.add( theButton );
contentPane.add( message );
}
public void buttonClicked() {
message.setText( "I’m touched" );
}
}
Figure 2.9: A program illustrating initializers in instance variable declarations
44
Variables declared to be final are called constant names. As the names we have used for these
two variables suggest, it is a convention that identifiers used as constant names are composed of
all upper case letters.
The primary purpose for using constant names is to make your program more readable. As we
mentioned earlier, the role of the arguments to createWindow would be fairly clear in the line
this.createWindow( WINDOW_WIDTH, WINDOW_HEIGHT );
even to someone who didn’t fully understand what the createWindow method did. On the other
hand, the purpose of the numbers 170 and 100 in
this.createWindow( 170, 100 );
is not so obvious.
2.6.3 Declaring Collections of Similar Names
One final feature of Java name declarations is the fact that you can declare several names that
will refer to values of the same type in a single declaration. For example, we could either declare
the names streetPanel, cityPanel, statePanel, and zipPanel used in our discussion of JPanels
using four separate declarations of the form:
JPanel streetPanel;
JPanel cityPanel;
JPanel statePanel;
JPanel zipPanel;
or within a single declaration of the form
JPanel streetPanel, cityPanel, statePanel, zipPanel;
When multiple variables are declared together in this way, it is possible to include initializers for
each of the names as in:
private final int WINDOW_WIDTH = 600, WINDOW_HEIGHT = 200;
While including multiple names in a single declaration is sometimes helpful, this feature should
be used with caution. For the sake of readability, you should only declare names together if they
are used in nearly identical ways.
2.7 ints and Strings
One other interesting aspect of the declarations of WINDOW WIDTH and WINDOW HEIGHT is that they
show that it is possible to associate names with things other than GUI components. There are two
interesting collections of values that will be used often in our programs and with which we will want
to associate names. As mentioned above, the name int refers to the collection of integer values.
If we want to do any kind of calculation or counting in a program, we will clearly want to refer
to ints using variable names. The other important class of values is the collection of sequences
of letters strung together to form words and sentences. We have used such values when creating
JButtons and JLabels. The information "Click Here" used in the construction
45
new JButton( "Click Here" )
is an example of such a sequence of letters. In Java, the name String is used to refer to the
collection of such sequences.
2
Just as we have seen that we c an declare variable names to refer to GUI components, we can
declare variables that refer to ints and Strings. The variables WINDOW WIDTH and WINDOW HEIGHT
are examples of int variables. We could easily use a String variable in a similar way. If we included
the declaration
private final String BUTTON_LABEL = "Click Here";
right after the declaration of WINDOW
HEIGHT in Figure 2.9, we could then rewrite the declaration
of theButton as
private JButton theButton = new JButton( BUTTON_LABEL );
As a much more interesting use of a variable that refers to something that is not a GUI com-
ponent, let’s see how to make a program count. In particular, we will change TouchyButton once
more to produce a version that displays a message of the form “I’ve been touched 4 time(s)”
each time its button is clicked, where the value 4 will be replaced by the actual number of times
the button has been clicked.
First, we need to associate a name with the number that describes how many times the button
has been clicked. Initially the value associated with this name should b e 0, so we can declare the
name using the declaration
private int numberOfClicks;
Then, in the constructor for our class we will include the assignment
numberOfClicks = 0;
to associate the correct initial value with this variable.
Obviously, the meaning associated with this variable will have to change as the program runs.
We have seen that we can associate a new value with a name by executing an assignment statement.
To change the value of numberOfClicks, we will say
numberOfClicks = numberOfClicks + 1;
In all our previous examples of assignments, the right hand side has been a construction. When we
introduced the assignment statement, we did not say this was required. Instead, we simply said that
the right hand side should describe the value with which the name on the left should be associated.
When working with numbers, Java interprets the plus sign in the usual way. Accordingly, if
numberOfClicks is associated with 0, then numberOfClicks + 1 describes the value 1. Therefore,
after the assignment is executed once, numberOfClicks will be associated with 1. The right hand
2
It is actually not quite precise to limit ourselves to sequences of letters. We might want to create a button by
saying
new JButton( "Choice 1." )
In this example, "Choice 1." is definitely a String even though it contains the symbols “1” and “.” which are
considered digits and punctuation marks rather than letters. To be accurate we should describe Strings as sequences
of symbols.
46
side of the assignment now desc ribes the value 2. Therefore, if the assignment is executed a sec ond
time, the value associated with numberOfClicks will become 2. In fact, the value associated with
numberOfClicks will always be equal to the number of times the assignment has been executed.
The last detail required to complete the program we have in mind is that Java interprets the plus
sign a bit differently when it is used to combine a String value with a number or another String.
Instead of trying to perform the arithmetic addition operation, it sticks the sequence of symbols
that make up the String and the sequence of digits that describe the number together to form a
longer sequence. This operation is called concatenation. For example, when numberOfClicks is
associated with the number 4, the phrase
"I’ve been touched " + numberOfClicks + " time(s)"
describes the String
"I’ve been touched 4 time(s)"
The spaces within the quoted strings "I’ve been touched " and " time(s)" are required or no
spaces will be left around the digits placed between them.
The complete code for the simple counting program is shown in Figure 2.10. We have included
lines of text in this program that are intended to help explain the program to a human reader
rather than the computer. The details of the mechanisms Java provides for such explanatory notes,
which are known as comments are discussed in the next sec tion.
2.8 Comments
In the program shown in Figure 2.10, we introduce one additional and very important feature of
Java, the comment. As programs become complex, it can be difficult to understand their operation
by just reading the Java code. It is often use ful to annotate this code with English text that explains
more about its purpose and organization. In Java, you can include such comments in the program
text itself as long as you follow conventions designed to enable the c omputer to distinguish the actual
instructions it is to follow from the comments. For short comments, this is done by preceding such
comments with a pair of slashes (“//”). Any text that appears on a line after a pair of slashes is
treated as a comment by Java.
The class declaration in Figure 2.10 is preceded by three lines of comments. If we have multiple
lines of comments, we can write them a bit more simply by starting the comments with a “/*” and
ending them with “*/” as follows:
/*
A program that responds when its user clicks on a button
by displaying a count of the total number of times the
button has been clicked.
*/
Many programmers prefer to format multi-line comments as shown in the figure:
/*
* A program that responds when its user clicks on a button
* by displaying a count of the total number of times the
* button has been clicked.
*/
47
import squint.*;
import javax.swing.*;
/*
* A program that responds when its user clicks on a button
* by displaying a count of the total number of times the
* button has been clicked.
*/
public class TouchCounter extends GUIManager {
// The desired dimensions of the program window
private final int WINDOW_WIDTH = 170, WINDOW_HEIGHT = 100;
// Used to display instructions and counter messages
private JLabel message;
// Keeps track of the number of times the button has been clicked
private int numberOfClicks;
/*
* Place a button and the instructions in a window
*/
public TouchCounter() {
this.createWindow( WINDOW_WIDTH, WINDOW_HEIGHT );
numberOfClicks = 0;
contentPane.add( new JButton( "Click Here" ) );
message = new JLabel( "Click the button above" );
contentPane.add( message );
}
/*
* Display a counter of the number of clicks
*/
public void buttonClicked() {
numberOfClicks = numberOfClicks + 1;
message.setText( "I’ve been touched " + numberOfClicks + " time(s)" );
}
}
Figure 2.10: Using an int variable to count
48
While Java only considers the initial “/*” and final “*/”, the “*”s at the beginning of new lines
make it easier for the reader to see that they are part of a comment.
2.9 Summary
In this chapter we explored the importance of using names to refer to the objects our programs
manipulate. Instance variable names are used to share information between constructors and
methods and local variables provide the means to associate a name with an object for use within a
single constructor or method. We saw that both types of variables have to be declared before they
can be used in a program, and that the actual meaning associated with a name can be specified
either in an assignment statement that is separate from the declaration or by an initializer included
in its declaration.
We also presented several additional aspects of working with GUI components. We learned
about methods like setText, setForeground, and setEnabled that can be used to change the
properties of GUI components. We also discussed how to use JPanels to gain a little more control
over the pos itioning of GUI components in a program’s window.
49
50
Chapter 3
Probing Questions
In the preceding chapter, we learned how to give commands in Java. Using method invocations,
you can now write programs that create GUI components and then command them to change in
various ways. In this chapter, we show that method invocations can also be used to ask questions.
For example, at some point in a program you might need to determine what a user has typed into
a text field. We will learn that you can ask a text field to tell you what it currently contains by
invoking a method named getText. A similar method can be used to ask a menu which of its
items is currently selected. Such methods are called accessor methods. They are used to access
information about the state of an object. In contrast, all the methods we introduced in the last
chapter are used to change object states. Such methods are called mutator methods.
There is one important kind of question that cannot be asked using an accessor method. Imagine
a program that displays two buttons in its interface. One button might be labeled “Print” while
the other is labeled “Quit”. If a user clicks one of these buttons, the code in the program’s
buttonClicked method will be executed. Somehow, this method will have to ask which button
was clicked. We will see that rather than depending on method invocations to determine this
information, Java instead provides a way to directly associate a name with the GUI component
that causes an event-handling method to be invoked.
Finally, after discussing the basics of using both mutator and accessor methods, we will explore
the collection of methods that can be used to manipulate GUI components. In addition, we will
introduce one additional type of GUI component, the JTextArea which is used to display multiple
lines of text.
3.1 Accessor Methods
To introduce the use of accessor methods, we will construct a program that implements aspects of
a feature found in many web browsers, the bookmarks or favorites menu. Obviously, we are not
going to try to present the code for a complete web browser in this chapter. Instead, we will focus
on exploring the type of code that might be included in a web browser to allow a user to add the
addresses of interesting web sites to a menu.
The interface for the program we want to examine will be quite simple. There will be a
JTextField in which a user can type items that should be added to the favorites menus. We will
assume that the user types addresses of web sites into this text field, but our program will actually
work the same way no matter what form of text the user chooses to enter. There will also be a
51
Figure 3.1: Interface for program implementing a “favorites” menu
JComboBox that will display the list of items the user has identified as “favorite” web site addresses.
Finally, there will be a button labeled “Add”. When this button is pressed, the address currently
in the text field will be added to the menu as a new item. An image of what the program’s interface
might look like while the user is actually selecting an item from the favorites menu is shown in
Figure 3.1. Of course, selecting an item from the menu will have no real effect. The only reason
we show the program in this state is so that you can see that items have been added to the menu,
including the latest item, www.williams.edu, which still app e ars in the JTextField.
The only detail of implementing this program that will be new is the use of the accessor method
named getText to determine what the user has typed into the text field. In some respects even
this will seem fairly familiar, because using an accessor metho d is very much like using a mutator
method. To invoke either a mutator method or an accessor method we must write a phrase of the
form
name.action( . . . arguments . . . )
Accordingly, before we can use getText to find out what is in a JTextField we will have to
associate a name with the JTextField, much as we had to associate names with buttons and labels
in the last chapter in order to use mutator metho ds.
Assume that we include the following declarations in our program:
// A place where the user can type in a web site address
private JTextField address;
// Size of field used to enter addresses
private final int ADDR_LENGTH = 20;
// Menu that will hold all the addresses identified as favorite sites
private JComboBox favorites;
and that we include code in our constructor to create a text field and a menu and to associate them
with these names:
address = new JTextField( ADDR_LENGTH );
favorites = new JComboBox();
Finally, assume that we include code in the constructor to add these two components and a JButton
to the contentPane Note that in the assignment statement for favorites we use a JComboBox
52
construction that includes no arguments. This type of construction produces a menu that initially
contains no items. The only detail we have left to consider is what code to put in the buttonClicked
method to actually add the contents of the text field as a new item in the menu.
There is a mutator method named addItem that is used to add entries to a menu. If the
invocation
favorites.addItem( "" );
is executed, the computer will add the address as a new item in the
menu. Of course, while we will want to use this method, we cannot use it in this way. We cannot
just type in the item we want to add in quotes as an argument because we won’t know what needs
to be added until the program is running. We have to provide something in the invocation of the
addItem method that will tell the computer to ask the text field what it currently contains and use
that as the argument to addItem.
Java lets us do this by using an invocation of the getText accessor method as an argument to
the addItem method. The complete command we need to place in the buttonClicked method will
therefore look like
favorites.addItem( address.getText() );
The complete program is shown in Figure 3.2.
3.2 Statements and Expressions
It is important to remember that accessor methods like getText serve a very different function
than mutator metho ds. A mutator method instructs an object to change in some way. An accessor
method requests some information about the object’s current state. As a result, we will use accessor
methods in very different contexts than mutator methods. With this in mind, it is a good time for
us to take a close look at some aspe cts of the grammatical structure of Java programs and clearly
distinguish between two types of phrases that are critical to understanding this structure.
The body of a method definition consists of a sequence of commands. These commands are
called statements or instructions. We have seen two types of phrases that are classified as statements
so far: assignment statements such as
message = new JLabel( "Click the button above" );
and method invocations such as
contentPane.add( new JButton( "Click Here") );
Simply asking an object for information is rarely a meaningful command by itself. We would
never write a statement of the form:
address.getText();
One might mistakenly think of such a method invocation as a command because it does tell the
computer to do something — to ask the JTextField for its contents. It would be a useless command,
however, because it does not tell the computer what to do with the information requested. For
this reason, invocations that involve mutator methods are used as statements, but invocations that
involve accessor methods are not.
53
import squint.*;
import javax.swing.*;
/*
* A program to demonstrate the techniques that would be used
* to enable a user to add addresses to a favorites menu in a
* web browser.
*/
public class FavoritesMenu extends GUIManager {
// Change these to adjust the size of the program’s window
private final int WINDOW_WIDTH = 600, WINDOW_HEIGHT = 100;
// A place where the user can type in a web site address
private JTextField address;
// Size of field used to enter addresses
private final int ADDR_LENGTH = 20;
// Menu that will hold all the addresses identified as favorite sites
private JComboBox favorites;
/*
* Create the program window and place a button, text field and
* a menu inside.
*/
public FavoritesMenu() {
this.createWindow( WINDOW_WIDTH, WINDOW_HEIGHT );
address = new JTextField( ADDR_LENGTH );
favorites = new JComboBox();
contentPane.add( new JButton( "Add to favorites" ) );
contentPane.add( address );
contentPane.add( favorites );
}
/*
* Add contents of JTextField to JComboBox
*/
public void buttonClicked( ) {
favorites.addItem( address.getText() );
}
}
Figure 3.2: Code for program to simulate a favorites menu
54