Intro to Java Programming phần 5 docx
Bạn đang xem bản rút gọn của tài liệu. Xem và tải ngay bản đầy đủ của tài liệu tại đây (1.69 MB, 15 trang )
Technical: Java
Building the Backward Button
File: BackwardButton.java
Contents
Overview
1) Implementing initImages( )
Summary
Overview
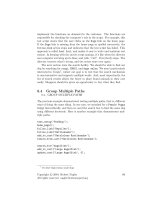
Up Rollover Down
Like its sibling, the ForwardButton class,
BackwardButton is a subclass of RolloverButton. It
specifies a series of images that represent the appearance of a
“backward” or “previous” control.
The image on the right shows the various images used by this button. This class
implements a single method, initImages( ) which is declared as abstract in
RolloverButton.
Steps to Follow
Step 1 - Implementing initImages( )
This class does not import any packages. It uses only the default package java.lang.*
and classes in its default package. This class is derived from RolloverButton which we
examined earlier.
public class BackwardButton extends RolloverButton
{
protected void initImages( )
{
//Initialize images for the BackwardButton
//Insert "BackwardButton initImages"
Building the Backward Button
(1 of 2) [1/28/2000 1:26:22 PM]
We have only a single method that was defined as an abstract method in
RolloverButton. This method specifies the images to be used for this button. Locate the
BackwardButton initImages clipping in the BackwardButton folder and drag it
directly below the last line of code shown above. Your code should now look like this:
public class BackwardButton extends RolloverButton
{
protected void initImages( )
{
//Initialize images for the BackwardButton
//Insert "BackwardButton initImages"
addImage("images/RWW.jpg", upImage);
addImage("images/RWWa.jpg", downImage);
addImage("images/RWWb.jpg", rolloverImage);
}
}
This method looks nearly identical to the implementation of the ForwardButton.
That’s because we are doing basically the same thing. The only difference is that we are
specifying a different set of images.
Back to top
Summary
This class is very similar to ForwardButton.java. Due to our architecture, this class is
fairly trivial. The next (and final) step in our series of button classes is to implement the
PlayPauseButton. To return to main tutorial file, click here.
Building the Backward Button
(2 of 2) [1/28/2000 1:26:22 PM]
Technical: Java
Building the Play/Pause Button
File: PlayPauseButton.java
Contents
Overview
1) Declaring and Defining Constants
2) Implementing initImages( )
3) Implementing setState( )
4) Implementing getState( )
5) Declaring the State Variable
Summary
Overview
Play Mode
Up Rollover Down
Pause Mode
Up Rollover Down
Like its siblings ForwardButton and BackwardButton, the
PlayPauseButton class is a subclass of RolloverButton. It is a
little special, however, because it is a toggle button that switches between a
“play” series of images and a “pause” series of images.
The image on the right shows the various images used by this button. This
class implements the method, initImages( ), which is declared as
abstract in RolloverButton. Additionally, it keeps track of its own
state information and provides two accessor routines, getState( ) and
setState( ).
Building the Play/Pause Button
(1 of 6) [1/28/2000 1:26:25 PM]
Steps to Follow
Back to top
Step 1 - Declaring and Defining Constants
This class does not import any packages. It uses only the default package java.lang.* and classes
in its default package. This class is derived from RolloverButton which we examined earlier.
public class PlayPauseButton extends RolloverButton
{
//Declare and define constants
//Insert "PlayPauseButton Constants"
Locate the PlayPauseButton Constants clipping in the ForwardButton folder and drag it
directly below the last line of code shown above. Your code should now look like this:
public class PlayPauseButton extends RolloverButton
{
//Declare and define constants
//Insert "PlayPauseButton Constants"
public static final String PLAY_UP_IMAGE = "play up";
public static final String PLAY_DOWN_IMAGE ="play down";
public static final String PLAY_ROLLOVER_IMAGE =
"play rollover";
public static final String PAUSE_UP_IMAGE = "pause up";
public static final String PAUSE_DOWN_IMAGE="pause down";
public static final String PAUSE_ROLLOVER_IMAGE =
"pause rollover";
public static final int PLAY_STATE = 0;
public static final int PAUSE_STATE = 1;
We are declaring many string constants. A majority of these are to be used for identifiers for the
button images as they are placed in the hashtable of button images. The last two integers are
constants that define the two possible button states for our toggle button, PLAY_STATE, and
PAUSE_STATE.
Now that we have these constants, let’s see how they are used in initImages( ).
Back to top
Step 2 - Implementing initImages( )
Like the other RolloverButton derivatives, the initImages( ) method of the
PlayPauseButton class is used to specify the images to be used for the various button states.
This method is slightly different because we have six states instead of three since we are a toggle
button.
Building the Play/Pause Button
(2 of 6) [1/28/2000 1:26:25 PM]
Public void initImages( )
{
//Initialize images and set the state for the PlayPauseButton
//Insert "PlayPauseButton initImages"
Locate the PlayPauseButton initImages clipping in the ForwardButton folder and drag it
directly below the last line of code shown above. Your code should now look like this:
public void initImages( )
{
//Initialize images and set the state for the PlayPauseButton
//Insert "PlayPauseButton initImages"
addImage("images/play.jpg", PLAY_UP_IMAGE);
addImage("images/playa.jpg", PLAY_DOWN_IMAGE);
addImage("images/playb.jpg", PLAY_ROLLOVER_IMAGE);
addImage("images/pause.jpg", PAUSE_UP_IMAGE);
addImage("images/pausea.jpg", PAUSE_DOWN_IMAGE);
addImage("images/pauseb.jpg", PAUSE_ROLLOVER_IMAGE);
setState(PLAY_STATE);
}
The implementation for this method is pretty straightforward. We add the six images to our
hashtable using addImage( ) and passing our constant identifiers for the hash key string. We
then call setState( ) to set the initial state to the play mode. Let’s look at what setState(
) does.
Back to top
Step 3 - Implementing setState( )
The set state method toggles the state of the button to either PLAY_STATE or PAUSE_STATE.
/**
* Sets the state of the PlayPauseButton.
* @param the state to use.
* @see #PLAY_STATE
* @see #PAUSE_STATE
*/
public void setState(int state)
{
//Handle switching states
//Insert "PlayPauseButton setState"
SetState( ) takes and integer state parameter. Locate the PlayPauseButton setState
clipping in the ForwardButton folder and drag it directly below the last line of code shown above.
Your code should now look like this:
Building the Play/Pause Button
(3 of 6) [1/28/2000 1:26:25 PM]
/**
* Sets the state of the PlayPauseButton.
* @param the state to use.
* @See #PLAY_STATE
* @see #PAUSE_STATE
*/
public void setState(int state)
{
//Handle switching states
//Insert "PlayPauseButton setState"
switch (state)
{
case PLAY_STATE:
upImage = PLAY_UP_IMAGE;
downImage = PLAY_DOWN_IMAGE;
rolloverImage = PLAY_ROLLOVER_IMAGE;
setActionCommand("" + PLAY_STATE);
this.state = state;
refreshImage( );
break;
case PAUSE_STATE:
upImage = PAUSE_UP_IMAGE;
downImage = PAUSE_DOWN_IMAGE;
rolloverImage = PAUSE_ROLLOVER_IMAGE;
setActionCommand("" + PAUSE_STATE);
this.state = state;
refreshImage( );
break;
}
}
Our setState( ) method does a switch on the state that is passed in. If the state is play, we
set the upImage, downImage, and rolloverImage to the appropriate image strings. Then
we set the action command to the play state. This allows listeners to recognize whether the event
is a play command or a pause command. We change our internal state variable (state is a
private data member that we will declare in Step 5), and call refreshImage( ) from
RolloverButton to update the visual appearance of our button.
The PAUSE_STATE case is very similar. We set cache the appropriate image strings in our data
members for the images, set our action command member, store the current state, and refresh our
button.
Now that we have a setState( ), let’s look at getState( ).
Back to top
Step 4 - Implementing getState( )
Building the Play/Pause Button
(4 of 6) [1/28/2000 1:26:25 PM]
Our state accessor routine, getState( ) is fairly trivial. All it has to do is return the current
state as either PLAY_STATE or PAUSE_STATE.
/**
* Gets the state of the PlayPauseButton.
* @return the state currently in use.
* @See #PLAY_STATE
* @see #PAUSE_STATE
*/
public int getState( )
{
//Return the current state
//Insert "PlayPauseButton getState"
Locate the PlayPauseButton getState clipping in the ForwardButton folder and drag it directly
below the last line of code shown above. Your code should now look like this:
/**
* Gets the state of the PlayPauseButton.
* @Return the state currently in use.
* @See #PLAY_STATE
* @see #PAUSE_STATE
*/
public int getState( )
{ //Return the current state
//Insert "PlayPauseButton getState"
return state;
}
All we do is return our stored state variable. Lastly, it is time to declare a single private variable.
Back to top
Step 5 - Declaring the State Variable
We have a single private variable that we need to declare.
Public int getState( )
{
//Return the current state
//Insert "PlayPauseButton getState"
return state;
}
//Declare data members
//Insert "PlayPauseButton data members"
Locate the PlayPauseButton data members clipping in the ForwardButton folder and drag it
directly below the last line of code shown above. Your code should now look like this:
Building the Play/Pause Button
(5 of 6) [1/28/2000 1:26:25 PM]
public int getState( )
{
//Return the current state
//Insert "PlayPauseButton getState"
return state;
}
//Declare data members
//Insert "PlayPauseButton data members"
protected int state;
This finishes off the PlayPauseButton class.
Back to top
Summary
In this section of the tutorial, we started by defining a base button class called ImageButton.
We built a class on top of that called RolloverButton that defined specific behavior for
changing the button images based on user interaction. We built two more buttons,
ForwardButton and BackwardButton that defined a set of images to use for their display.
Lastly, we built a PlayPauseButton class that toggled between two separate states while
inheriting our image and rollover behavior.
In our next class, we will be working with is the CloseBoxButton. Click here to return to the
main tutorial file.
Building the Play/Pause Button
(6 of 6) [1/28/2000 1:26:25 PM]
Technical: Java
Previous Section Table of Contents Next Section
Step 7 - Building the Close Box Button
The CloseBoxButton class extends the RolloverButton class. It implements a
button that behaves like a simple rectangular close box in the upper left-hand corner of
the controller floating palette.
As we have done before, close the PlayPauseButton folder and open the
CloseBoxButton Source Clipping folder. Open the CloseBoxButton.java from the
Project window before proceeding to the next set of steps in the section Building the
Close Box Button.
Back to top
Step 8 - Building the Controller
The controller class is a floating palette that contains the controller buttons
(forward, backward, and play/pause buttons), as well as the close box button.
Once again, close any open source files and open the Controller.java skeleton file.
Open the Controller Source Clipping folder in the Finder.
After completing this step, proceed to the steps in the section Building the Controller.
Back to top
Step 9 - Building the Slide Show
Intro to Java Programming - Steps 7-10
(1 of 2) [1/28/2000 1:26:13 PM]
The SlideShow class is the main application implementation file. It provides all of the
user interface features, such as menus and windows typical of an application, and ties
together all of our other classes into a cohesive unit.
Before proceeding to the steps for the SlideShow, close any open source files, and
open the SlideShow.java source file and the SlideShow Source Clipping folder in the
Finder. Once again, you may need to resize or reposition your windows to make optimal
use of your screen real estate. Once this preparation is completed, proceed to the steps in
the section Building the SlideShow Application.
Back to top
Step 10 - Building the Image Name Filter
The ImageNameFilter class is used by the SlideShow class to filter files
displayed in the open file dialog box.
As we have done before, close the SlideShow folder and open the ImageNameFilter
Source Clipping folder. Open the ImageNameFilter.java from the Project window
before proceeding to the next steps in the section Building the Image Name Filter.
Back to top
Previous Section Table of Contents Next Section
Search Tips | Site Map Extended Index
The Apple Store | Hot News | About Apple | Products | Support
Design & Publishing | Education | Developer | Where to Buy | Home
Contact Us - Developer Site Map
Copyright © 2000 Apple Computer, Inc. All rights reserved.
Intro to Java Programming - Steps 7-10
(2 of 2) [1/28/2000 1:26:13 PM]
Search
Shortcut
Technical: Java
Building the Close Box Button
File: CloseBoxButton.java
Contents
Overview
1) Implementing initImages( )
Summary
Overview
Up Down
The CloseBoxButton is a special class that is derived from
RolloverButton. Its function mimics a standard close box such as the
one that you would find in the upper left-hand corner of a window. The CloseBox is
used by the Controller class.
The image on the right shows the two images used by this button. Note that there is only
an up state and a down state. There is no rollover state. This class implements a single
method, initImages( ), which is declared as abstract in RolloverButton.
Steps to Follow
Step 1 - Implementing initImages( )
This class does not import any packages. It uses only the default package java.lang.*
and classes in its default package. This class is derived from RolloverButton,
which we examined earlier.
public class CloseBoxButton extends RolloverButton
{
protected void initImages( )
{
//Initialize images for the CloseBoxButton
//Insert "CloseBoxButton initImages"
We have only a single method that was defined as an abstract method in
Building the Close Box Button
(1 of 2) [1/28/2000 1:26:30 PM]
RolloverButton. This method specifies the images to be used for this button.
Locate the CloseBoxButton initImages clipping in the CloseBoxButton folder
and drag it directly below the last line of code shown above. Your code should now
look like this:
public class CloseBoxButton extends RolloverButton
{
protected void initImages( )
{
//Initialize images for the CloseBoxButton
//Insert "CloseBoxButton initImages"
addImage("images/closebox.jpg", upImage);
addImage("images/closeboxa.jpg", downImage);
}
}
Note that we only specify an up image and a down image. We do not specify a rollover
image. Is this going to cause a problem? No, because the RolloverButton code we
inherit is smart. When handleRollover( ) is called, it will try to call
setImage(rolloverImage). There will be no entry in the hashTable for the
rolloverImage, so it will return null. Our code in ImageButton.setImage(
) knows not to change the current image if it is null. Thus, the button will not change its
visual appearance if a rollover state occurs because there is no rollover image.
Back to top
Summary
The close box button is a very simple class. Like its fellow
RolloverButton-derived classes, it overrides initImages( ) but it specifies
only two images. This is because we only use an up state and a down state and no
intermediary states.
Now let’s look at the next class, Controller, by returning to the main tutorial file
here.
Building the Close Box Button
(2 of 2) [1/28/2000 1:26:30 PM]
Technical: Java
Building the Controller
File: Controller.java
Contents
Overview
1) Declaring the Controller Constants
2) Declaring the Controller Data Members
3) Specifying the Controller’s Parent Frame
4) Initializing Controls
5) Handling Controller Actions
6) Handling Button Actions
7) Registering our Event Listeners
8) Completing our Controller Constructor
9) Implementing setPlayState( )
10) Implementing isPlayState( )
Implementing the Controller
(1 of 19) [1/28/2000 1:26:37 PM]
11) Implementing Action Event Management
Routines
12) Implementing paint( )
13) Implementing update( )
14) - Implementing getPreferredSize( )
Summary
Overview
The Controller class is a palette that provides a user interface for the slideshow. It is a
floating palette that contains three buttons: a backward button, a play/pause button, and a
forward button. It also has a close box that dismisses the window.
The Controller is designed to be a standalone component. It has a container that encloses the buttons and
arranges them in a nice simple horizontal strip, and it listens for events from the buttons and rebroadcasts them.
This allows clients to listen to the controller and receive messages, instead of dealing with each individual
button separately.
The controller can be dismissed by clicking on the close box.
Steps to Follow
Back to top
Step 1 - Declaring the Controller Constants
The controller class imports several packages including the abstract window toolkit (or awt), as well as two
packages from java.awt.event that are needed to handle events.
The class is derived from window since it is a floating window.
import java.awt.*;
Import java.awt.event.ActionEvent;
import java.awt.event.ActionListener;
public class Controller extends Window
{
//Declare constants
//Insert "Controller Constants"
Locate the Controller Constants clipping in the Controller folder and drag it directly below the last line of
code shown above. Your code should now look like this:
Implementing the Controller
(2 of 19) [1/28/2000 1:26:37 PM]
import java.awt.*;
Import java.awt.event.ActionEvent;
import java.awt.event.ActionListener;
public class Controller extends Window
{
//Declare constants
//Insert "Controller Constants"
public static final String BACKWARD_COMMAND = "backward";
public static final String FORWARD_COMMAND = "forward";
public static final String PLAY_COMMAND = "play";
public static final String PAUSE_COMMAND = "pause";
protected static final String imagePath =
"images/controlborder.jpg";
protected static final int collapsedWidth = 9;
Most of this code is self explanatory. We create four strings that will be used as command names. When the
user clicks on one of the buttons in the controller, we will broadcast a message with a command string that is
appropriate for the action. For example, if the user clicks on the backwards button, we will broadcast a
BACKWARD_COMMAND so that our listeners know how to respond.
We then declare a String that specifies a relative image path to the image that we will be using as the
background of our controller. That image looks like this:
We will be placing the buttons on top of this image and also placing the close box button in the upper left-hand
corner.
Our last constant is an integer that specifies how wide we want the window to be when it is collapsed. This
number corresponds to the “thumb area” or gray region in the image.
Now that we have created the constants that we will be using in this class, let’s take a look at the data members.
Back to top
Step 2 - Declaring the Controller Data Members
We need to add several data members to our class to keep track of objects such as our buttons and background
image.
protected static final int collapsedWidth = 9;
//Declare data members
//Insert "Controller data members"
Locate the Controller data members clipping in the Controller folder and drag it directly below the last line of
code shown above. Your code should now look like this:
Implementing the Controller
(3 of 19) [1/28/2000 1:26:37 PM]