Sun Fundamentals of Solaris 7 Student Guide With Instructor Notes phần 7 pdf
Bạn đang xem bản rút gọn của tài liệu. Xem và tải ngay bản đầy đủ của tài liệu tại đây (391.67 KB, 68 trang )
12
12-14 Fundamentals of Solaris 7
Copyright 1999 Sun Microsystems, Inc. All Rights Reserved. Enterprise Services August 1999, Revision D
History in the Korn Shell
Re-Executing Commands
The r is a custom command (alias) in the Korn shell. This enables the
user to re-execute commands from the history list.
Command Format
r[
argument(s)
]
The argument passed to the r command is the history line number of
a particular command, or a letter indicating the most recent command
in the history list that started with that letter.
12
Basic Features of the Korn Shell 12-15
Copyright 1999 Sun Microsystems, Inc. All Rights Reserved. Enterprise Services August 1999, Revision D
History in the Korn Shell
Re-Executing Commands
$ pwd
/home/user2
$ r
pwd
/home/user2
$ history 27
27 cd /usr/dict
28 history 23
29 history 22 24
30 pwd
31 pwd
32 cd ~
$ r 27
cd /usr/dict
$ pwd
/usr/dict
$ pwd
/usr/dict
$ r p
pwd
/usr/dict
12
12-16 Fundamentals of Solaris 7
Copyright 1999 Sun Microsystems, Inc. All Rights Reserved. Enterprise Services August 1999, Revision D
History in the Korn Shell
Editing the Command Line
The in-line edit mode enables you to edit a previous command on the
current command line. Use vi commands to move and edit the
previous command line.
Command Format
set [-+]o vi
Using set -o vi turns command-line editing on, while set +o vi
turns it off. Once the editing has been turned on, pressing the Esc key
activates the in-line editor. You then have access to vi commands.
12
Basic Features of the Korn Shell 12-17
Copyright 1999 Sun Microsystems, Inc. All Rights Reserved. Enterprise Services August 1999, Revision D
History in the Korn Shell
Editing the Command Line
The following vi commands can be used to edit a command line. In
the above example, the user used the editing feature to change worfs
to words. The Return key is pressed after all changes are made.
Note – The arrow keys cannot be used to reposition the cursor during
in-line editing.
$ more /usr/dict/worfs
/usr/dict/worfs: No such file or directory
$ set -o vi
(Press the Esc key and then the k key until the
desired command displays then edit
appropriately.)
$ more /usr/dict/words
Table 12-1 Command Line Edit Commands
vi Command Meaning
k Move backward through history list
j Move forward through history list
l Move to the right one character
h Move to the left one character
r Replace one character
cw Change word
x Delete one character
12
12-18 Fundamentals of Solaris 7
Copyright 1999 Sun Microsystems, Inc. All Rights Reserved. Enterprise Services August 1999, Revision D
Additional Features of the Korn Shell
Table 12-2 identifies some of the features of each shell available in the
Solaris 7 environment.
a
The C shell has a form of command-line editing called command substitution. It is not
capable of editing a full line, but rather substitutes one character for another.
b
Covered in detail in Module 16, “System Processes & Memory Management.”
The set command can be used with the ignoreeof and noclobber
arguments as shown previously with command-line editing. Use
set -o to turn a feature on and set +o to turn it off.
Table 12-2 Solaris Shell Features
Feature Bourne C Korn
Use aliases No Yes Yes
Support command-line editing No No
a
Yes
Support history list No Yes Yes
Ignore Control-d (ignoreeof) No Yes Yes
Separate initialization file from
.profile
No Yes Yes
Have job control (ability to move job to
and from the background and
foreground for processing; ability to
suspend a job)
b
No Yes Yes
Logout file No Yes No
Protect files from overwriting
(noclobber)
No Yes Yes
12
Basic Features of the Korn Shell 12-19
Copyright 1999 Sun Microsystems, Inc. All Rights Reserved. Enterprise Services August 1999, Revision D
Exercise: Using the Basic Features of the Korn Shell
Exercise objective – In this exercise, you will use the Korn shell
features discussed in this module to create aliases; display, re-execute,
and edit previously entered commands; and customize your .kshrc
file.
Tasks
Be sure you do the following exercises in the Korn shell:
1. Create an alias that changes to your home directory and then
prints the absolute pathname of the directory.
2. Test the alias created in step 1.
3. Create an alias called del that will prompt for confirmation
whenever you delete a file.
4. Test the alias created in step 3 by deleting the memo file in the
~/practice directory.
5. Create an alias that will display a long listing of directory contents.
6. Type the command that displays your list of aliases.
7. Delete the alias called del.
8. Change to your home directory. Be sure you are in the Korn shell.
9. Type an ls command and the appropriate option that will display
the file and directory names of any length that end with the
letter “s”.
10. Display the history list and then re-execute the previous ls
command.
11. Use the ls command and output redirection to create a file called
dir.list.
12. Use the cat command to display the file created in step 11.
12
12-20 Fundamentals of Solaris 7
Copyright 1999 Sun Microsystems, Inc. All Rights Reserved. Enterprise Services August 1999, Revision D
Exercise: Using the Basic Features of the Korn Shell
Tasks
13. Use in-line editing (set -o vi) to change the cat command in
the previous command to ls.
14. Create an alias called star that will change the current directory
to ~/dir3/planets and list its contents.
15. Alter your PATH statement in the appropriate initialization file to
include your personal binary directory.
Workshop Labs
Use what you have learned so far in this course to work through the
following:
1. Create a .kshrc file, if one does not already exist. Put the
following into it:
a. A feature that keeps the system from overwriting a file during
redirection.
b. Two aliases to shortcut commands that you use frequently.
c. A feature that sets command-line editing for future login
sessions.
2. Make sure the appropriate variable is in the .profile file so that
the .kshrc is read when you log in to the system.
3. Have the system reread the two initialization files and test your
new aliases and PATH statement.
12
Basic Features of the Korn Shell 12-21
Copyright 1999 Sun Microsystems, Inc. All Rights Reserved. Enterprise Services August 1999, Revision D
Exercise: Using the Basic Features of the Korn Shell
Exercise Summary
Discussion – Take a few minutes to discuss what experiences, issues,
or discoveries you had during the lab exercises.
✓
Manage the discussion here based on the time allowed for this module, which was given
in the “About This Course” module. If you find you do not have time to spend on
discussion, then just highlight the key concepts students should have learned from the
lab exercise.
● Experiences
✓
Ask students what their overall experiences with this exercise have been. You might want
to go over any trouble spots or especially confusing areas at this time.
● Interpretations
✓
Ask students to interpret what they observed during any aspects of this exercise.
● Conclusions
✓
Have students articulate any conclusions they reached as a result of this exercise
experience.
● Applications
✓
Explore with students how they might apply what they learned in this exercise to
situations at their workplace.
12
12-22 Fundamentals of Solaris 7
Copyright 1999 Sun Microsystems, Inc. All Rights Reserved. Enterprise Services August 1999, Revision D
Exercise: Using the Basic Features of the Korn Shell
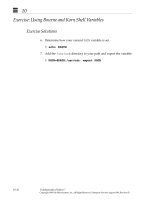
Exercise Solutions
Be sure you do the following exercises in the Korn shell.
1. Create an alias that changes to your home directory and then
prints the absolute pathname of the directory.
$ alias home=’cd;pwd’
2. Test the alias created in step 1.
$ home
3. Create an alias called del that will prompt for confirmation
whenever you delete a file.
$ alias del=’rm -i’
4. Test the alias created in step 3 by deleting the memo file in the
~/practice directory.
$ del ~/practice/memo
5. Create an alias that will display a long listing of directory contents.
$ alias long=’ls -l’
6. Type the command that displays your list of aliases.
$ alias
7. Delete the alias called del.
$ unalias del
8. Change to your home directory.
$ cd
12
Basic Features of the Korn Shell 12-23
Copyright 1999 Sun Microsystems, Inc. All Rights Reserved. Enterprise Services August 1999, Revision D
Exercise: Using the Basic Features of the Korn Shell
Exercise Solutions
9. Type an ls command and the appropriate option that will display
the file and directory names of any length that end with the
letter “s”.
$ ls -d *s
10. Display the history list and then re-execute the previous ls
command.
$ history
$ r
command_number
or $ rl
11. Use the ls command and output redirection to create a file called
dir.list.
$ ls > dir.list
12. Use the cat command to display the file created in step 11.
$ cat dir.list
13. Use in-line editing (set -o vi) to change the cat command in
the previous command to ls.
$ set -o vi
Press the Esc key and then press k twice. Change cat to ls.
14. Create an alias called star that will change the current directory
to ~/dir3/planets and list its contents.
$ alias star=’cd ~/dir3/planets;ls’
15. Alter your PATH statement in the appropriate initialization file to
include your personal binary directory.
$ vi .profile
add a line that reads
PATH=$PATH:$HOME/bin
12
12-24 Fundamentals of Solaris 7
Copyright 1999 Sun Microsystems, Inc. All Rights Reserved. Enterprise Services August 1999, Revision D
Check Your Progress
Before continuing on to the next module, check that you are able to
accomplish or answer the following:
❑ Use basic shell quoting
❑ Customize the Korn shell
❑ Customize commands in the Korn shell using the alias command
❑ Review previously executed commands in the Korn shell using the
history command
❑ Set the command-line editor and edit previously issued
commands
12
Basic Features of the Korn Shell 12-25
Copyright 1999 Sun Microsystems, Inc. All Rights Reserved. Enterprise Services August 1999, Revision D
Think Beyond
What advantages/disadvantages can you think of for changing your
prompt and adding aliases? In your work environment, are any aliases
already preset by your system administrator?
Copyright 1999 Sun Microsystems, Inc. All Rights Reserved. Enterprise Services August 1999, Revision D
Printing
13
Objectives
Upon completion of this module, you should be able to:
● Use command-line commands to print a file, check print queue
status, and cancel a print request
● Print using the Print Manager in CDE
● Determine and change the default printer
● Set print options
● Demonstrate the major functions of the Print Manager
13
13-2 Fundamentals of Solaris 7
Copyright 1999 Sun Microsystems, Inc. All Rights Reserved. Enterprise Services August 1999, Revision D
Relevance
✓
Present the following question to stimulate the students and get them thinking about the
issues and topics presented in this module. While they are not expected to know the
answer to the question, the answer should be of interest to them and inspire them to learn
the content presented in this module.
Discussion – What printing-related tasks do you need to do besides
sending a single file to a printer?
13
Printing 13-3
Copyright 1999 Sun Microsystems, Inc. All Rights Reserved. Enterprise Services August 1999, Revision D
Command Line Printing
Printing of ASCII text or PostScript™ files can be done from the
command line. Do not use this method to print data files (files created
in applications like FrameMaker) or binary files.
The function of the lp command is to queue data for printing.
✓
The Solaris computing environment supports the
lp
print spooler.
Command Format
lp [ -
options
][
filename
(
s
)]
Options
-d Specifies the desired printer. (If you are printing
to your default printer, the -d option is not
necessary.)
-o nobanner Specifies that banner page is not to be printed.
-n Prints a specified number of copies.
-m Sends mail message to user after job is complete.
13
13-4 Fundamentals of Solaris 7
Copyright 1999 Sun Microsystems, Inc. All Rights Reserved. Enterprise Services August 1999, Revision D
Printing a File
Sending Files to a Printer
Print the file feathers in your home directory on the default printer.
$ lp ~/feathers
request id is printer1-7 (1 file(s))
$
Use the -d option to specify another printer (if one is available).
$ lp -d staffp ~/feathers
request id is staffp-8 (1 file(s))
$
13
Printing 13-5
Copyright 1999 Sun Microsystems, Inc. All Rights Reserved. Enterprise Services August 1999, Revision D
Displaying Printer Status and Queues
Use the lpstat command to display the status of the printer queue.
Command Format
lpstat [-
options
]
Options
-p Prints status of all printers
-o Prints the status of all output requests
-d Prints which printer is the system default
-t Prints complete status information for all
printers
-s Prints a status summary for all printers
-a Prints which printers are accepting requests
13
13-6 Fundamentals of Solaris 7
Copyright 1999 Sun Microsystems, Inc. All Rights Reserved. Enterprise Services August 1999, Revision D
Displaying Printer Status and Queues
Note – When a print request has been sent to the printer, the output of
lpstat may show the print request as filtered. (This is not the case in
the lab environment for this course.) Filtering indicates a print request
is in the process of printing. The name of the print request does not
appear when the lpstat command is used.
Displaying the Status of All of Your Output Requests
$ lpstat -o
printer1-7 user2 391 Dec 10 16:30 on printer1
staffp-2 user2 551 Dec 10 16:45 filtered
$
Displaying Requests on a Specific Printer’s Queue
$ lpstat staffp
staffp-2 user2 551 Dec 10 16:45
staffp-3 user3 632 Dec 10 16:47
$
Determining the Status of All Configured Printers
$ lpstat -t
scheduler is running
system default destination: printer1
system for printer1: venus
system for staffp: mars
printer1 accepting requests since Wed May 6 08:20:00 EST 1998
staffp accepting requests since Mon May 25 09:43 EST 1998
$
13
Printing 13-7
Copyright 1999 Sun Microsystems, Inc. All Rights Reserved. Enterprise Services August 1999, Revision D
Displaying Printer Status and Queues
Determining Which Printers Are Configured on Your System
$ lpstat -s
scheduler is running
system default destination: printer1
system for printer1: venus
system for staffp: mars
$
Displaying Which Printers Are Accepting Requests
$ lpstat -a
printer1 accepting requests since Wed May 6 08:20:00 EST 1998
staffp accepting requests since Mon May 25 09:43:19 PST 1998
$
13
13-8 Fundamentals of Solaris 7
Copyright 1999 Sun Microsystems, Inc. All Rights Reserved. Enterprise Services August 1999, Revision D
Removing a Print Request
The cancel command enables you to cancel print requests previously
sent with the lp command. To do this, you must first use the lpstat
command to identify the
request-ID
.
Command Format
cancel
request-ID
Canceling a Print Request
$ lpstat staffp
staffp-2 user2 551 Dec 10 16:45 on staffp
staffp-3 user3 632 Dec 10 16:47
$ cancel staffp-3
request "staffp-3" cancelled
$
13
Printing 13-9
Copyright 1999 Sun Microsystems, Inc. All Rights Reserved. Enterprise Services August 1999, Revision D
Removing a Print Request
Canceling a Print Request
Use the cancel -u
username
(login ID) to remove all requests
owned by you.
$ cancel -u user2
request "staffp-2" cancelled
$
Note – You cannot remove another user’s print request. Only the
superuser can remove a print request sent by another user. When
using the CDE Printer Manager, it appears you can cancel another’s
print job, but the job is immediately reinstated.
13
13-10 Fundamentals of Solaris 7
Copyright 1999 Sun Microsystems, Inc. All Rights Reserved. Enterprise Services August 1999, Revision D
Printer Jobs
The Printer Jobs window displays a list of the current printer and any
outstanding print requests in the print queue.
Only one printer icon will be displayed in the Printer Jobs window.
This represents the printer chosen by the user (which may or may not
be the same as the system default printer).
13
Printing 13-11
Copyright 1999 Sun Microsystems, Inc. All Rights Reserved. Enterprise Services August 1999, Revision D
Printer Jobs
Printer Jobs
13
13-12 Fundamentals of Solaris 7
Copyright 1999 Sun Microsystems, Inc. All Rights Reserved. Enterprise Services August 1999, Revision D
Viewing Printer Properties
When the printer icon is selected, you can display the properties of
your default printer by choosing the Selected ➤ Properties menu
option. A window will be displayed which provides details regarding
that printer.