Windows 7 all in one for dummies PHẦN 5 potx
Bạn đang xem bản rút gọn của tài liệu. Xem và tải ngay bản đầy đủ của tài liệu tại đây (2.95 MB, 90 trang )
Book IV
Chapter 1
Jammin’ with
Windows Media
Player
337
Syncing with a Portable Player or Mobile Phone
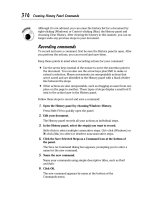
Figure 1-25:
To burn
a data
disc (full
of MP3s),
be sure to
choose Data
CD or DVD
before you
start the
burn.
Syncing with a Portable Player or Mobile Phone
Call it an MP3 player, if you will. Call it a Zune. (The folks at Microsoft do,
but they kinda have a vested interest.) Or, call it a portable digital audio
player or a personal digital device. Moving your songs from your computer
to an MP3 player has never been simpler. Most mobile phones are just as
easy.
Audio is only part of the story, though. The new generation of portable video
machines — whether you call the device a Portable Media Center (a term
trademarked by Microsoft, of course), MP4 player, fancy phone, video juke-
box, digital video player, or that dern MTV thingy — seems poised to take
over the toy market.
Windows Media Player handles both audio and video (including recorded
TV) with aplomb. In fact, when WMP works right, transferring files to your
portable player is every bit as easy as burning a CD. It’s easier, actually,
because you don’t have to put a blank CD in the drive.
If you can’t get WMP to work with your particular MP3 player or phone, you
may have to resort to using the software that came with the machine. That’s
a pity, really, and the number of nonconformist players and phones has
fallen off in recent years. But realize that the WMP way isn’t the only way,
and you may have to fall back on the Sony or LG or Nokia or Samsung soft-
ware that came with your machine. If you have an iPod, you can’t use
Windows Media Player, either. The iPod has a weird internal format, and
syncing with WMP doesn’t add songs to iPod playlists. You have to use
iTunes, Winamp, or another iPod-speaking media program. See Book IV,
Chapter 2 for details.
338
Syncing with a Portable Player or Mobile Phone
The very best, very latest players and phones (except the iPod family) work
with the phenomenal Windows 7 Device Stage. If you have a new player or
phone and the advertising says that it works with Device Stage, don’t hang
around here. Hop over to Book VIII, Chapter 2 and revel in your wondrous
purchase.
Moving tracks to the player
Here’s how to get your tunes and flicks onto your MP3 or video player:
1. Attach your player/phone/whatever to one of your computer’s USB
ports and turn it on.
Windows 7 should identify the player with the Found New Hardware
Wizard. If all else fails, read the player’s instruction manual and run the
program on the CD that came with the player to get the drivers work-
ing. You may need to visit the manufacturer’s Web site to download
the latest drivers. This technology is changing fast, and drivers become
obsolete overnight.
If your MP3 player holds more than 4GB of data and your music collec-
tion is less than 4GB, Windows Media Player asks your permission as
soon as you plug in your player and then automatically syncs your
player, copying all your music from your computer to your player.
Personally, I don’t worry about it too much. My music collection hasn’t
measured less than 4GB since about 1993. Bet you’re in the same boat.
2. Start Windows Media Player if Windows 7 doesn’t start it for you.
Click the Sync tab if it isn’t already showing.
Windows 7 shows you the MP3 device in the upper-right corner (see
“Sansa e270” in Figure 1-26) and sets up a sync list for you.
Figure 1-26:
Syncing
with an MP3
player is
easy.
Book IV
Chapter 1
Jammin’ with
Windows Media
Player
339
Syncing with a Portable Player or Mobile Phone
3. Use whatever tricks are at your disposal (clicking entries on the left,
sorting, searching) to find tracks that you want to transfer to the MP3
player. Click each track and drag it to the Sync List on the right.
See the section “Finding the tracks you want,” earlier in this chapter, for
details.
Watch the “remaining” counter to fill your MP3 player as far as possible.
If you drag too many songs to the sync list, right-click any you want to
remove and choose Remove from List.
4. To save your new playlist (and you should), click Sync List at the top
of the sync list and type a new name.
5. Click the Start Sync button.
WMP copies the files in your playlist to your portable player.
If your MP3 player didn’t have enough room, Windows Media Player
simply states that the track or tracks weren’t copied.
Note that nothing on your MP3 player gets deleted. Syncing with WMP is
quite different from syncing with iTunes (see Book IV, Chapter 2).
6. When the copying is done, unplug your portable player and have at it.
Transferring songs, video, and TV shows is truly that simple, as long as
your media files are the kind your player understands.
If you need to convert files on your computer into formats that your player
can understand, remember that Google is your friend. For example, to
search for converters that can change QuickTime MOV files into AVI files
(which essentially all portable video players can understand), search Google
for convert MOV AVI free.
Moving tracks from the player to your PC
If you have tracks on your player that you want to copy to your PC, this sec-
tion is the one for you — unless you have an iPod.
If you have an iPod, copying music from your iPod to your computer
involves a trip through Windows Explorer, with hidden files displayed. It
isn’t difficult, but it’s a pain in the neck. See Book IV, Chapter 2 for details.
The method I explain in that chapter works for copying files from any other
kind of MP3 player to your computer too, but why bother? Windows Media
Player makes it easy to “reverse sync” your music.
To reverse-sync your music from your player to your PC using Windows
Media Player, follow these steps:
340
Syncing with a Portable Player or Mobile Phone
1. Plug your MP3 player into your computer.
Windows Media Player may appear, showing the Sync tab.
If this doesn’t happen, start Windows Media Player and click the Sync
tab. You should see an invitation to drag songs off your MP3 player and
stick them on your computer, as shown in Figure 1-27.
Figure 1-27:
WMP offers
to sync
tracks on
your MP3
player,
sticking
them
on your
computer.
2. On the left, click the name of your MP3 player and then click the
Music folder underneath.
3. Navigate to the songs you want to copy to your PC.
You can use any of the typical tricks, including a search.
4. Click and drag the songs you want to retrieve to the sync list on the
right.
The Start Sync link magically turns into a Copy from Device link.
5. After you gather all the songs you want to copy to your PC, click the
Copy from Device button.
WMP lists each song and lets you know when they’ve been copied.
The songs end up in your computer’s Public Music folder or whichever
folder you designated as your default folder for ripped music. See the sec-
tion “Copying from a CD (Also Known As Ripping),” earlier in this chapter.
Deleting tracks from your player
What? You’re tired of listening to the same Weird Al Yankovic song a hun-
dred million times? Does it make you break out in hives? Zap it!
Book IV
Chapter 1
Jammin’ with
Windows Media
Player
341
Sharing Your Windows Media Player Media
WMP makes it surprisingly easy to manually delete any song you like. But
before you make any rash decisions — sorry, Al — why not create a backup
copy of the song, before you send it to that big bit bucket in the sky?
Here’s how:
1. Follow the steps in the preceding section to copy to your PC the songs
you want to delete from your player.
If a particular song is already on your PC and you try to reverse-sync it,
WMP simply tells you that the song is already in the library. No biggie.
2. When WMP finishes copying all the songs to your PC, right-click the
song in the Copy from Device list on the left and choose Delete (see
Figure 1-28).
Figure 1-28:
Deleting
songs from
your MP3
player is
easy, too —
if you know
the trick.
3. When WMP asks for confirmation that you want to delete the song
from the MP3 player, click the OK button, and it’s gone.
Sharing Your Windows Media Player Media
Windows Media Player can make media in its libraries available to other
computers on your network by using the streaming technique. To a first
approximation, streaming involves using your Windows 7 PC to send signals
to a digital media player, which can then play the music or show a movie on
a television. That can be mighty handy if you want to hook up an Xbox 360,
or some other network digital media player, to play songs or movies.
The mechanics for setting up a network in your house or small office are
straightforward. The mechanics for sharing things over the network aren’t
quite so easy.
342
Sharing Your Windows Media Player Media
I talk about networking and sharing all sorts of things in Book VII, Chapter 2.
If your Windows 7 computer is part of a HomeGroup (see Book VII, Chapter 1)
and you haven’t changed any settings, your computer automatically shares
everything in its media libraries (Music Library, Video Library, Recorded TV
Library, Picture Library) with all other computers in the HomeGroup and with
every user on every computer in the HomeGroup.
If you have an Xbox 360 or some other kind of networked digital media
player that doesn’t understand HomeGroups, you should hop into Windows
Media Player and give Windows permission to share your media — assuming
that you want to share your media.
Here’s how to share all your media:
1. Start Windows Media Player and click the Play tab.
2. In the upper-left corner, click Stream➪More Streaming Options.
You see the Media Streaming Options dialog box. Depending on how
many computers you have connected to your network, it looks more or
less like Figure 1-29.
Figure 1-29:
Media
sharing
options.
3. In the Show Devices On drop-down box, choose All Networks.
4. Click the button marked Allow All.
This step sets up streaming for any device now connected to your net-
work. It also opens your media libraries to other computers on your
network. Windows Media Player on those other computers shows your
media libraries under the Other Libraries entry on the left side of the
main Windows Media Player window.
Book IV
Chapter 1
Jammin’ with
Windows Media
Player
343
Customizing WMP
If you get stuck with C.R.A.P. media that plays only on your computer,
streaming in this way may be a viable option — if your network is fast
enough to handle the load.
Customizing WMP
You can customize WMP in a large number of ways. You get to most of the
settings by choosing Organize➪Options. This command displays a dialog
box with a bunch of tabs for customizing many aspects of WMP behavior:
✦ Player: Controls general aspects of WMP behavior, such as checking for
automatic updates.
✦ Rip Music: Controls aspects of the copying process, including, most
importantly, the format of ripped CDs (which you set to MP3 already,
right?). You can also control the amount of data compression to apply
when copying a CD. (More compression makes the copied tracks occupy
less space, but reduces sound quality.) It also controls the folder to
which music is copied. (You changed it to your computer’s Public
Music folder, right?)
✦ Devices: Lists available devices that WMP can use (such as CD drives
and portable players) and enables you to control certain aspects of their
behavior. If you tend to rip CDs with lots of scratches, click the Devices
tab, click your DVD drive, and then click Properties. In the Rip section at
the bottom (see Figure 1-30), select the Use Error Correction check box
and click OK. That makes ripping go slower, in some circumstances, but
increases the chances that you perform a clean rip, even from an iffy CD.
Figure 1-30:
Tell
Windows
to keep
trying, over
and over, to
produce
a high-
quality rip.
344
Customizing WMP
✦ Burn: A subject I talk about extensively in the section “Burning CDs and
DVDs,” earlier in this chapter.
✦ Performance: Lets you control how WMP handles streaming media.
✦ Library: Controls whether WMP looks for video files in the Pictures
Library, whether volume-leveling information should be calculated for
new files, and how WMP retrieves information from the Internet.
✦ Privacy and Security: Primarily controls how much information you
send to Microsoft every time you use WMP. See the section “Adjusting
WMP Privacy Settings,” earlier in this chapter.
My privacy settings are shown at the beginning of this chapter (refer to
Figure 1-4). If you decide to give Microsoft more information than the
amount shown in that figure, I strongly recommend that you click the
Read the Privacy Statement Online link and read the information with a
thoroughly jaundiced eye.
✦ DVD: Sets the default language that’s used when playing DVDs.
✦ Network: Lets you select the network protocols that WMP may use to
receive streaming media. It also lets you control proxy settings, which
you may have to change if your computer is on a local-area network pro-
tected by a separate firewall.
It would take an advanced degree in computer science to even begin to
understand many of these settings. Come to think of it, I have an advanced
degree in computer science and I don’t understand some of those settings.
It’s a good policy to change one of the options only if you understand it well
and keep careful notes so that you can restore the original setting if anything
goes wrong.
There’s no harm in looking at the options, though. You can discover a lot by
rummaging through each tab of the Options dialog box.
Chapter 2: iPod and iTunes
in Windows 7
In This Chapter
✓Getting your iPod to work
✓Getting your iPod to work right
✓Copying songs from your iPod to your computer
✓Solving the problems everyone has with iPods and Windows
S
o you went out and splurged on a brand-new iPod, eh? Yeah. Me, too —
six times, at last count. That teensy, tiny Shuffle is positively o-o-o-zes
cool.
No doubt you’ve discovered that the iPod works fine with Windows — as
long as you use Apple software and buy from the Apple music store, and
you don’t want to do anything Apple doesn’t want you to do. B-o-r-i-n-g.
Look. You bought your iPod. You paid for your music (or you got it for free,
legitimately). You bought your PC. You paid for Windows 7. So why in the
heck are you treated like a criminal every time you want to do something
reasonable?
As Windows 7 hit the stands, Apple and the iTunes Store were experiencing
a traumatic transition: Before 2009, Apple controlled the music you bought
in the iTunes Store, and you had few options and no rights. Because most
iPod owners bought their music from the Apple iTunes Store, Apple called
the tune and set the rules for what you can and can’t do with your purchase.
It’s all about C.R.A.P. music; see Book IV, Chapter 1 for details.
By the time Windows 7 arrived in the fall of 2009, Apple had seen the error
of its ways (and the plummeting of its income) and converted almost all its
iTunes tunes to the MP3 format, which can’t be controlled.
You, too, can convert your digital-rights-encumbered iTunes tracks to so-
called iTunes Plus music (the Plus means “C.R.A.P free”) for 30 cents per
song. (See www.apple.com/itunes/whatsnew.) So, if you made a mistake
and paid Apple for digital-rights-locked music, you can pay them again and
get the music unlocked. Golly.
Contents
Chapter 2: iPod and iTunes in
Windows 7 345
What You Can’t Do 346
iPod the Apple Way 348
Copying Songs to Your PC 360
Taking a Look at the iPod Ecosystem 362
346
What You Can’t Do
Because upward of 5 billion Apple-locked songs are running around, this
chapter has to cover the unsavory, and increasingly obsolete, restrictions
that Apple still imposes on its old songs. The restrictions are going away
gradually, but if you can’t figure out why iTunes prevents you from perform-
ing perfectly reasonable actions with your own songs, the tricks in this chap-
ter should help.
What You Can’t Do
I bet you’ve shed more than a few tears (and sworn more than a few syl-
lables) trying to figure out why these things happen:
✦ You can’t use Windows Media Player to put music on your iPod.
Why? No way will Microsoft do anything to support iPod. Well, okay,
maybe if UFOs invade Lake Washington and a hundred little green aliens
march into Bill G’s living room, chanting “I pod, you pod, we all pod for
iPod. . . .”
✦ You can’t upload music from your iPod to your PC, using either
iTunes or Windows Media Player.
Why? Apple wants you to buy more music from the iTunes Store.
Microsoft wants you to buy more from the MSN Music store (or whatever
front it’s using this week). Neither Microsoft nor Apple nor the music com-
panies want you to use your iPod to move music from one PC to another,
even if you bought and paid for the music. Ka-ching. But a solution exists.
See the section “Copying Songs to Your PC,” later in this chapter.
✦ You can play MP3s on your iPod and play music you bought from
iTunes on your iPod, but you can’t play music that you bought from
other services on your iPod — unless, of course, you were smart
enough to buy MP3 music.
Why? Because every place that sells music other than MP3s is banking on
customer ignorance to keep the suckers — er, customers — tethered. My
favorite example: Microsoft’s old PlaysForSure campaign. If you bought
music from Microsoft that “plays for sure,” you got hoodwinked — the
music doesn’t play, for sure, on most MP3 players.
If you have unprotected WMA files (that’s the Microsoft proprietary
music format), iTunes gleefully translates them into AACs (to a first
approximation that’s Apple’s proprietary format), and the translated
files play on your iPod.
✦ You can’t add music from two computers to the same iPod.
Why? When you connect an iPod to a computer it becomes “tethered”
to that computer. As long as you only plug it into the same computer,
everything (usually) works as advertised. But when you move the iPod
to a second computer, iTunes wants to erase all the old music and sync
with the music on the second computer. Of course, Apple stands to
Book IV
Chapter 2
iPod and iTunes
in Windows 7
347
What You Can’t Do
make more money that way, but you have a rather easy (and not well
known) way to get around the restriction.
✦ You plug your iPod into your computer, and all of a sudden, some
songs that you had on your iPod disappear.
Why? Apple built it that way, to enforce its digital rights management
scheme. It’s called auto-sync. I talk about how to disable it — or at least
make it work for you, instead of against you — in the sidebar “The down-
side of automatically syncing,” later in this chapter.
✦ You can’t play any music you bought from the iTunes Store before
2009 on another computer. (If you’re really unlucky, or just weren’t
paying attention, this problem can happen with music you bought
after 2009, too.)
Why? Apple built it that way, to enforce its digital rights management
scheme. (Do you hear an echo in here?) Actually, you can copy and play
the music you bought on as many as five different computers (if you
know the trick), but you can’t mix ’n’ match — all five computers have
to be “locked in” to the same iTunes Store account. See the sidebar “The
five-PC limit for older iTunes songs,” later in this chapter.
But you can play regular old MP3 music files on your iPod, even if you
borrowed those files from your maiden aunt’s long-suffering hairdress-
er’s underworked and overpaid boyfriend.
Why? Because Apple would lose most of its market share overnight if it
blocked the most popular open music file format.
Touting its Zune Pass service, Microsoft claims
that it costs $30,000 to fill a 120GB iPod with
music and costs only $15 a month for unlimited
music on a Zune Pass (see zunepass.net).
It’s a sobering thought — but the devil lies in
the details.
Though it’s true that a 120GB iPod can hold
30,000 songs, give or take ten thousand or so,
few people go out and buy 30,000 songs in one
fell swoop. Of course, after you buy MP3 songs,
you can play them anywhere, on any computer,
or burned, sliced, and diced to the owner’s
content.
You pay $15 per month for Zune Pass, but if
you stop paying, your songs die. Bye-bye,
Miss American Pie. You have to download
your entire collection once a month. Microsoft
lets you keep ten songs a month, but at that
rate it would take 250 years to fill your 120GB
Zune with tunes. You can play the downloaded
music on as many as three PCs or Macs and as
many as three Zune players. But you can’t burn
any of the songs on CD or DVD, and Microsoft
retains full control over the music: You play by
Microsoft’s rules, or you don’t play at all.
The subscription model has too many restric-
tions for my tastes, but you may well disagree.
Choose whatever feels right and vote with your
pocketbook.
Does it cost $30,000 to fill an iPod?
348
iPod the Apple Way
It’s surprisingly difficult to get surprisingly simple things done, eh?
Fortunately, decent workarounds exist for all those problems, and many
more.
The rest of this chapter not only explains the “official” way to work with
your iPod but also takes you behind the scenes to see how the pros make
iPods dance the hurdy-gurdy, whether the folks in Redmond or Cupertino
like it or not.
iPod the Apple Way
So you pulled your iPod out of its cavernous box and you’re ready to boogie.
Fine. Just don’t bother slipping the iPod driver CD into your computer. The
stuff on the CD is obsolete by now, and you want the latest.
Even if you already installed anything and everything that Apple has to offer,
your first stop should be the Apple Web site.
In the following sections, you find out the best way to break in your new
iPod by getting the software you need, setting up iTunes, and filling the iPod
with songs.
Installing the iTunes program
The iTunes program runs on your PC. It uses another Apple program,
QuickTime — a video-playing program that I’ve sworn at for many years.
When you install iTunes, you install QuickTime, whether you want to or not.
iTunes ain’t the only game in town. If you own
an iPod, you can’t use Windows Media Player
to fill it with music — but you can use Winamp
(winamp.com). The free version includes
full iPod support, without many of the “weirdi-
ties” that Apple retains to try to sell you more
music.
Copying songs from Winamp to your iPod
takes three steps: Add the music you want to a
playlist; select the playlist; and right-click and
choose Send To➪your iPod. It’s that simple.
Best of all, your iPod isn’t married to a single
computer. Though you have to perform your
updates manually in Winamp, all the legacy
junk that Apple has to keep around for its nefar-
ious digital rights management (DRM) scheme
doesn’t even appear in Winamp.
Using Winamp to feed your iPod
Book IV
Chapter 2
iPod and iTunes
in Windows 7
349
iPod the Apple Way
From time to time, Apple also tries to get you to install other pieces of ju —
er, software, such as Safari, Bonjour Services, the Apple Updater, MobileMe,
and they’ve been known to use sneaky techniques to convince you to install
the other ju — er, software. So keep your guard up, and keep your clicking
finger at bay. The idea is to install iTunes because you have to — and noth-
ing extra. If that friendly Apple update reminder appears miraculously on
your screen three months from now and says you need to install another
wonderful Apple product, you have my permission to guffaw and obliterate
the reminder.
Over the years, Apple PC software has repeatedly driven me nuts. Bonjour,
in particular, has been known to cause major headaches with corporate vir-
tual private network (VPN) connections. Look before you leap.
You need to make sure that you have the latest version of the internal iPod
software (firmware) and the latest version of iTunes. You don’t need to
do this every week, but you probably should check things out every few
months. Here’s how to keep on top of the latest:
1. Crank up your favorite browser and head to www.apple.com/
itunes/download.
You might shield your eyes before you hit Enter. The site’s a bit, uh,
overwhelming.
2. On the left, choose between Windows 64-bit and Windows 32-bit
(probably marked Windows XP or Vista). Click Download Now.
If you aren’t sure whether your copy of Windows 7 is 32-bit or 64-bit,
click Start, right-click Computer, and pick Properties. The, uh, bitted-
ness of your computer appears at the bottom of the list marked System.
You can elect to put your e-mail address on the special Apple mailing
list, thereby ensuring a constant run of ju — er, informative e-mails —
that keep you up to date with Apple news and the latest information.
Submit your e-mail address, if you like, but realize that you don’t need to
give Apple anything more. You’ve already given it your money.
Windows warns you that Apple is trying to invade your system. Actually,
it says that you have chosen to open iTunesSetup.exe. Depending on
your browser, save the file or open it. After you save it, double-click the
file and press whichever placating buttons are necessary to run it.
The iTunes installer appears, as shown in Figure 2-1. Remember that
installing iTunes also brings along QuickTime, a movie-playing program
from Apple that I’ve been swearing at for a decade.
3. Click Next to start the installation and then click through the End User
License Agreement (EULA).
You see the Installation Options dialog box, shown in Figure 2-2. iTunes
asks permission to bug you, for not only iTunes but also any other pro-
gram that Apple wants to throw your way.
350
iPod the Apple Way
4. Deselect the check box marked Automatically Update iTunes and
Other Apple Software. Also, deselect the check box marked Use
iTunes As the Default Player for Audio Files.
In the past, Apple has used the update “permission” to bother iTunes
users into installing Safari and putting ten new icons on the desktop.
If you let iTunes take over all your audio files, it appears in all sorts of
weird places and does things that aren’t at all intuitive — to me, anyway.
5. Click Install.
The installer splashes an ad on your screen, does its thing, and ends
several minutes later with a Congratulations! message.
6. Click Finish.
You can quit at this point, or you can continue on to start iTunes for the
first time. See the next section.
Figure 2-1:
Installing
iTunes
gives you a
QuickTime
bonus.
Figure 2-2:
iTunes asks
permission
to bug you.
Book IV
Chapter 2
iPod and iTunes
in Windows 7
351
iPod the Apple Way
Setting up iTunes
Before you use iTunes for the first time, you get to run through the iTunes
Setup Assistant program. Here’s how to minimize your ongoing headaches:
1. If you quit immediately after iTunes is installed (see the preceding
section) or if iTunes was preinstalled on your PC, double-click the
iTunes icon to run iTunes for the first time. (Otherwise, you automati-
cally come to this step after iTunes has been successfully installed.)
After you click through another license agreement, which is only slightly
shorter than the U.S. Constitution, the iTunes Setup Assistant appears,
as shown in Figure 2-3.
Figure 2-3:
Yes, iTunes
has an
installer
and a Setup
Assistant.
2. Click Next.
The assistant presents you with the dialog box shown in Figure 2-4. Don’t
let iTunes scan just yet.
The Setup Assistant offers to scan your music library (or at least part of
it), looking for MP3 and AAC files, to add them to the iTunes catalog. The
Setup Assistant also offers to scan for WMA (Microsoft format) files and
convert them to AAC (Apple format) files: The WMA files aren’t touched,
but AAC copies appear on your hard drive in the iTunes library.
3. Deselect both check boxes — don’t let iTunes scan for existing music
just yet. Then click the Next button.
Later, in Steps 6 and 7, you can change the automatic scanner so that it
generates MP3 files (which can be used anywhere) rather than
Advanced Audio Coding (AAC) files (which are good only in the Apple
world, really) when it automatically converts Microsoft-formatted
(WMA) music files. You don’t need to run the scan now and create a
bunch of files you’ll never use.
352
iPod the Apple Way
Figure 2-4:
Don’t let
iTunes scan
for existing
music yet.
Whenever you convert file formats, the quality of the recording suffers.
If you have a bunch of WMA files that were ripped from CDs by Windows
Media Player, it would behoove you to take the time to rip the same
CDs again, but into MP3 format. You won’t notice the quality difference
on your portable boom box, but if you listen carefully on good-quality
equipment — even on an iPod — you can tell the difference between
converted WMA files and those ripped directly to MP3. See Book IV,
Chapter 1 for details.
The assistant asks whether you want iTunes to maintain its own music
folder.
4. Select the Yes, Keep My iTunes Music Folder Organized check box and
click the Next button.
Allowing iTunes to maintain its own music folder (which is kept in your
\Music\iTunes folder) can help keep things straight on your iPod.
iTunes is quite good about not creating extraneous copies of music
files — the folder is used only when you convert music file formats or
change the names of songs.
The Setup Assistant explains that iTunes can automatically download
album covers for you, but you have to create an iTunes Store account in
order to enable the feature. If you plan to buy MP3 files from iTunes that
are free of digital rights management, that isn’t a bad idea. You don’t
need to do anything right now.
5. Click Finish.
iTunes appears in all its naked glory — without a song to be seen but
offering to sell, sell, sell, as shown in Figure 2-5.
6. Immediately choose Edit➪Preferences. In the dialog box that appears,
on the General tab, click the Import Settings button.
Book IV
Chapter 2
iPod and iTunes
in Windows 7
353
iPod the Apple Way
You see the Import Settings dialog box, shown in Figure 2-6. Switch
around the iTunes importer so that it rips and converts imported WMA
files to the MP3 — not AAC — format.
7. In the Import Using drop-down list, select MP3 Encoder. For Setting,
use Higher Quality (192 kbps). Select the check box marked Use Error
Correction When Reading Audio CDs. Then click the OK button.
By doing so, you ensure that iTunes always rips songs into MP3 format.
(See Book IV, Chapter 1 for a description of why that’s beneficial.) You
also ensure that when iTunes encounters a WMA file that hasn’t been
locked up with digital rights management, it converts the WMA file into
an MP3 file. (WMA is the Microsoft proprietary music format.)
Figure 2-5:
iTunes
finally
appears and
invites you
to spend
money the
Apple way.
Figure 2-6:
Ripping and
converting
imported
WMA files
to the MP3
format.
354
iPod the Apple Way
I strongly recommend that you use error correction when ripping audio
CDs, even if it takes more time, because it minimizes your chances of
coming up with ripped tracks that are screechy and skippy. Ya know —
like peanut butter?
Now it’s time to import your music into iTunes. (Note that your music
hasn’t moved — iTunes just collects pointers to the song files.)
8. Choose Start➪Music, click any albums or songs that you want to add
(or press Ctrl+A to select everything in your Music folder), and drag
the albums into the left pane in iTunes.
If iTunes bumps into songs in WMA format, it warns you (see Figure 2-7).
Click the Convert button, and iTunes automatically creates an MP3 ver-
sion of the song, placing it in the iTunes folder <your username>\
Music\iTunes\iTunes Music.
Your WMA file remains intact — iTunes doesn’t touch it.
9. Gather all the music you like — and avoid the music that you don’t
particularly want on your iPod. (You can use Windows Media Player
to mess around with that stuff.)
In the end, you should have a sizable collection of music. If you gather
more than can fit on your iPod (as you can confirm by the status bar at
the bottom of the iTunes window; see Figure 2-8), not to worry: iTunes
can help.
Figure 2-7:
Converting
WMA songs
to MP3
format.
Figure 2-8:
iTunes now
has 2.32GB
of songs,
according
to the status
bar.
Book IV
Chapter 2
iPod and iTunes
in Windows 7
355
iPod the Apple Way
If you ever discover that iTunes failed to pick up a new song — one that you
ripped from a CD, downloaded from the Internet, or bought from an online
service — simply locate the song file or album folder and drag it into iTunes,
precisely as you did in Step 8.
Now would be a good time to run through the Apple iPod tutorial. Even if
you’ve been using an iPod for years, you might pick up on some nuances
that could prove to be fun — or even useful. Start at www.apple.com/
support/ipod/tutorial and click the Click to Play link.
With the latest versions ready, and a bit of Apple party line orientation
under your belt, it’s time to fill your iPod.
Back before Apple got the MP3 religion, music
sold in the iTunes Store was restricted to play-
ing on five computers. If you have old iTunes
music and don’t want to pay Apple to release
its chains, you may still have music that lives
under the bad, old rules. Here’s how it works.
Each computer (PC or Mac) gets branded with
an Audible Account ID (which does double duty
as an iTunes Store account number). As many
as five computers can be branded with the
same Audible Account ID. Songs can be played
only on computers branded with the original,
downloading computer’s Audible Account ID.
Confused? Yeah, me too.
Say you buy a song at the iTunes Store with
an Audible Account ID of myaccount@some
place.com and the password 123456789.
Here’s a hypothetical scenario to show you how
the limit might affect your use of that song:
✓ Sharing a song with another computer
requires authorization (or branding).
Keeping with the example, you give a
copy of the song to your son to play on his
computer. When he tries to play it, iTunes
asks for authorization. Your son has to
type
and the password 123456789, and his
computer is then “branded” with that
account number. (Not so coincidentally,
he now has your iTunes Store ID and pass-
word.) Now, you and your son can share
songs bought using that iTunes Store
account number ’til the cows come home.
You can copy the file without restric-
tion. But the song doesn’t play on any PC
unless the person who tries to play the file
can provide the correct authorization —
and
password 123456789.
✓ Because a computer can be branded with
only one Audible Account ID, you can’t
mix and match songs. If your computer
is branded with myaccount@some-
place.com, you can’t play songs that
were bought with, oh, anotherac-
It’s an
either-or situation.
✓ Only five PCs, at any one time, can be
branded with that Audible Account ID.
To deauthorize a computer, go to iTunes,
choose Advanced➪Deauthorize Audible
Account, type your Audible Account ID
and password, and click the OK button.
That frees one of the five available copies.
The five-PC limit for older iTunes songs
356
iPod the Apple Way
Moving music to your iPod
Have all the songs you want in your iTunes library? Good. It’s time to trans-
fer them to your iPod. Here’s how:
1. Wait until you have enough time to fill up your iPod.
If you have a lot of music, it can take an hour. You don’t have to sit next
to the iPod while it’s transferring music, but you should stick around
and check on it occasionally, like it’s a five-year-old.
2. Get iTunes going and plug your iPod into your USB port.
If you see an AutoPlay notice, click the red X to get rid of it.
The iPod setup page appears, as shown in Figure 2-9.
Figure 2-9:
Set up your
iPod for the
first time.
3. Give your ’Pod a good name.
4. Consider whether you want your iPod to be updated automatically,
and select or deselect the check boxes accordingly.
I have iTunes update my iPod automatically. Why? Because I use
Windows Media Player to work with most of my music. I put only the
songs I want on my iPod in one specific playlist in iTunes. (The next
section shows you how.) I add or remove songs from the playlist as the
mood strikes. And, I tell iTunes to sync only this specific playlist. That
way, when I plug my iPod into my computer, I know exactly which songs
will get synced.
There’s a downside to automatically updating your songs, as I explain in
the nearby sidebar, “The downside of automatically syncing.”
Book IV
Chapter 2
iPod and iTunes
in Windows 7
357
iPod the Apple Way
If you choose to update your iPod manually, you just need to click the
Sync button in iTunes before your songs are synced.
You probably don’t want to sync your photos, unless you have only a
few photos inside iTunes — otherwise, your photo collection takes over
your Pod.
5. Click Done.
If you selected the check box marked Automatically Sync Songs to my
iPod, iTunes takes off and immediately begins copying songs to the iPod.
You see the iPod Summary tab, shown in Figure 2-10.
Figure 2-10:
iTunes
immediately
starts
copying
music to
your iPod.
6. If you want to take control of your iPod — including being able
to copy music from the iPod to your PC, as I explain later in this
chapter — select the Enable Disk Use check box.
iTunes warns you that enabling the iPod for disk use means that you
have to eject the Pod — if you simply yank the cord, some data may get
scrambled.
7. Click OK to dismiss the warning.
358
iPod the Apple Way
8. If you have too much music to fit into the iPod, iTunes detects a blivet
condition (that’s a technical term — never mind) and asks whether
it can choose a selection of songs to copy to the iPod. If you see that
dialog box, click the Yes button.
If you tried to put more music on your iPod than the iPod can handle,
iTunes automatically creates a new playlist named <your iPod’s
name> Selection. (In my case, it’s Woody’s iPod Selection.) The
program trims the list of songs you tried to put on the ’Pod, removing
songs from the bottom of the list, and that truncated list of songs
becomes the new playlist, <your iPod’s name> Selection. iTunes
then automatically sets itself up so that it synchronizes the <your
iPod’s name> Selection playlist with your iPod.
The process sounds complicated, but it’s about the only thing iTunes
can do. If you ever wondered why your iPod synchronizes with a weird
playlist that you didn’t personally create, now you know why.
When iTunes finishes syncing — copying the songs from iTunes to the
iPod — it tells you, in the box at the top of the iTunes window, that the
sync is complete, as shown in Figure 2-11.
Figure 2-11:
Start
grooving!
During a sync, iTunes reigns: What’s on iTunes
is synced to your iPod, according to the set-
tings you selected in iTunes. If you choose to
automatically sync, you can’t count on your
iPod to be your backup if something goes awry
in iTunes. For example, if you remove a song
from iTunes (even accidentally), or if something
catastrophic happens to your iTunes database,
the next time you plug your iPod into your com-
puter, it’s synchronized quite precisely: Any
songs that are in your iPod, but aren’t in iTunes,
disappear.
If you backed up your PC (as you should; see
Book II, Chapter 3), you should have copies of
your music. Or, if you chose to sync manually,
you have a chance to grab the songs off your
iPod before you sync (see “Copying Songs to
Your PC,” later in this chapter).
The downside of automatically syncing
Book IV
Chapter 2
iPod and iTunes
in Windows 7
359
iPod the Apple Way
Controlling syncing with playlists
I’ve played with iPods for years now and have finally settled on a way of
syncing that works for me. I bet it’ll work for you, too. I have a whole lot of
music — much more than will fit on the iPod. And, I don’t trust any auto-
mated gizmos — not even the Genius feature — to choose the right music
for me. Here’s how I set up iTunes to sync <ahem> “My-y-y-y Wa-a-a-y.”
Gad. I didn’t really say that, did I?
The trick is to set up playlists and then tell iTunes to sync only those play-
lists. Here’s how it works:
1. Start iTunes. Click the Music Library, in the upper-left corner. Choose
File➪New Playlist.
iTunes opens a new, blank playlist.
2. Click and drag into this new playlist the songs you want to put on
your iPod.
Fill ’er up! A status bar at the bottom tells you how much space remains.
3. On the left side, scroll down to the bottom of the Playlists list, click
the text untitled playlist, and type a good name for your sync playlist.
In Figure 2-12, I name my new playlist Stuff to Sync.
If you want, you can create multiple playlists to break your songs into
categories. (You might have a playlist of fast-paced songs for the gym
and another for relaxing in the dentist’s waiting room before your root
canal surgery.) Just repeat Steps 1 through 3.
Figure 2-12:
Give your
iPod sync
list a name.
360
Copying Songs to Your PC
4. When you’re done dragging songs into the playlist, on the left, under
Devices, click your iPod and then click the Music tab.
You see a list of all your playlists, as shown in Figure 2-13.
Figure 2-13:
Choose
playlists that
sync auto-
matically.
5. Select the button marked Selected Playlists, and then select the check
box next to the name of the sync playlist you just put together.
This step tells iTunes that you want it to sync only this specific playlist
(or playlists).
6. Click Apply. Then click the Summary tab and click Apply again.
iTunes syncs to your new playlist. The next time you plug your iPod into
the computer, it syncs to the same playlist.
Sometimes your iPod flashes a “Do not disconnect” message while iTunes
says “iPod update is complete / OK to disconnect.” (It’s a bit of iPodding cog-
nitive dissonance, eh?) If that ever happens to you, click the Eject iPod icon
to the right of the name of your iPod. Give it a few seconds, and as long as
the battery’s charged, the iPod should say “OK to Disconnect.”
Copying Songs to Your PC
Here’s one question I hear over and over: How do I take songs off the iPod
and copy them back to my PC?
Book IV
Chapter 2
iPod and iTunes
in Windows 7
361
Copying Songs to Your PC
It’s very easy. In fact, if you follow my instructions in Book II, Chapter 1 and
tell Windows 7 that you want to see hidden files, you’re basically done.
Here’s how to copy songs back to your PC:
1. Make sure your iPod is set to Enable Disk Use.
See Step 6 in the section “Moving music to your iPod,” earlier in this
chapter. You may have to plug your iPod into your computer, start
iTunes, and double-click the name of your iPod under Devices on the
left, in order to see the Enable Disk Use option.
2. If your iPod isn’t connected to your computer, plug it in. If you receive
an AutoPlay notification, click the Open Folder to View Files Using
Windows Explorer link.
If your iPod is already connected, or you don’t see an AutoPlay notifica-
tion, choose Start➪Computer and double-click your iPod “drive.”
If you don’t see a drive letter for your iPod, go back to Step 1. You have
to select the Enable Disk Use setting for your iPod or else it doesn’t
show up in Windows Explorer.
Windows Explorer should look like Figure 2-14, with your music in the
hidden folder iPod_Control.
Figure 2-14:
Your music
is in the
hidden
folder
iPod_
Control
.
3. If you can’t see the iPod_Control folder, press Alt and then choose
Tools➪Folder Options➪View. Select the Show Hidden Files and
Folders check box, and then click OK.
While you’re here anyway, deselect the Hide Extensions for Known File
Types check box. Click the OK button.
The details are in Book II, Chapter 1, but every Windows 7 user needs to
be able to see her hidden files and folders and her full filename exten-
sions. I hate to say it, and I don’t mean to nag, but I toldja so.