Beginning Visual Basic .NET Database Programming phần 4 ppt
Bạn đang xem bản rút gọn của tài liệu. Xem và tải ngay bản đầy đủ của tài liệu tại đây (626.68 KB, 69 trang )
Data Access with ADO.NET
27
We can also add a UniqueConstraint to the ConstraintCollection to ensure that the primary
key of a column is unique. This is a very similar process to setting the primary key shown earlier.
' Declare a ConstraintCollection.
Dim myCKey As ConstraintCollection
Dim myColumn As DataColumn
' Get the column we want to place a unique constraint on.
myColumn = myDataSet.Tables("Customers").Columns("CustomerID")
' Add the constraint to the constraint collection.
myCKey.Add("MyConstraint", myColumn, True)
' Add the constraint collection to the table's constraint collection.
myDataSet.Tables("Customers").Constraints.Add(mCKey)
This code starts with declarations for a ConstraintCollection and a DataColumn object to hold
the column we want to set the constraint for (in this case the CustomerID column). We use the Add
method of the ConstraintCollection, passing in the name of a constraint, the DataColumn
object, and a Boolean parameter indicating if this is a primary key. We then call the Add method of the
Tables.Constraints property and pass in the ConstraintCollection object.
There are many objects that work together to make up the DataSet object. They all work hand and
hand to build the tables' schema as well as manage the data.
Next we will see how to save changes that are made to a DataSet on the server.
Updating the Database
Once changes are made to a DataSet how do we update those changes back to the database? Earlier we
showed how calling the AcceptChanges method updates only local records and not the database proper.
These methods we use next assume you haven't called AcceptChanges on any of your modified records
before you post changes to the server. We have a couple of methods for updating our database. To update
a DataSet call the Update method of the DataAdapter. This can take a DataSet, DataTables, or
an array of DataRow objects, and examines the RowState property to determine which rows have
changed. Then Insert, Update, or Delete is executed depending on the state of the changed row.
When you call a DataAdapter's Update method, you update your changes on the server. As you can
see from the illustration below, we follow a similar process as with the AcceptChanges method:
Data Access with ADO.NET
29
We can control which updates are completed first if we need to. By default, the DataAdapter will update
each row depending on its order, one row could be deleted and the row after it added. We can use the
GetChanges method of a DataSet or DataTable to control which updates we want to occur first.
GetChanges returns a DataSet containing changes that match the RowState parameter you specify, thus
allowing us to retrieve only records marked as modified, deleted, or inserted, as the code below shows:
Dim myDataSetChanges As New DataSet()
' Gets all changes.
myDataSetChanges = myCustomerDataSet.GetChanges()
' Get records that have been modified only.
myDataSetChanges = myCustomerDataSet.GetChanges(DataRowState.Modified)
' Get records that have been deleted only.
myDataSetChanges = myCustomerDataSet.GetChanges(DataRowState.Deleted)
' Get records that have been added only.
myDataSetChanges = myCustomerDataSet.GetChanges(DataRowState.Inserted)
' Update changes back to actual database.
myDataAdapter.Update(myDataSetChanges)
Once we have a DataSet with only records that have changed, we call the DataAdapter's Update
method passing in this DataSet as shown above.
This allows you to perform updates where you have referential integrity. Let's say you have a Customer
table and an Address table and the Address table contains the primary key of the customer. You would
want to delete the addresses before the customer otherwise you could experience an error. If we were to
delete the customer first, we would have a record that points to another record that doesn't exist. This
would leave "orphaned" records in the database that referential integrity prohibits.
A related method is the Merge method, which merges one DataSet into another keeping all the
original DataSet's row state information:
' Create a new dataset with only the modified records.
Dim myDataSetChanges As New DataSet()
myDataSetChanges = myCustomerDataSet.GetChanges(DataRowState.Modified)
' Merge the changes back into our local dataset.
myNewDataSet.Merge(myDataSet)
' Commit the changes.
myNewDataSet.AcceptChanges()
When we call the Merge method passing in myDataSet, any records in the DataSet are added to
myNewDataSet that now has the records that were in myDataSet along with the row state information
of each record. This is useful when we get data from an outside source or a source not part of our system
that we want to merge into our current set of data. Once we call the AcceptChanges method of
myNewDataSet, we no longer have a modified RowState and we lose any changes we may have had.
Chapter 6
30
As a final note, you must ensure you have updated your changes back to the database by calling the
Update method of your DataAdapter, otherwise the changes will be lost. This must be done before
the AcceptChanges method is called since AcceptChanges clears any and all row states. The
Update needs the row state information to determine which records need updating.
DataSet Sample
Next, we will expand the customer application created in the last chapter to add the capability to insert,
update, and delete data. As it currently stands, our application provides a read-only view of the
database. This is only a quick sample: we will develop a more complex application in later chapters.
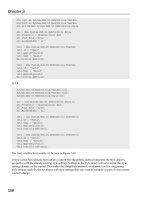
Here is what our final result will look like:
Try It Out – Reconfiguring the DataAdapters
1. Open the project from the previous chapter called CustomerApp.
We need to re-configure the data adapter for our customer table so we can perform Insert,
Update, and Delete commands on the table. Right-click on SqlDataAdpter1 and select
Configure Data Adapter.
Data Access with ADO.NET
31
2.
The Data Adapter Configuration Wizard dialog will appear prompting for a connection to a database.
The name of our previous connection should appear which will be listed as Servername.Northwind
SQL.dbo where Servername is the name of your particular computer. If the connection doesn't
appear, create a new connection by clicking on the New Connection button.
Click Next when you're finished.
3. The Use SQL statements option should already be selected. Ensure that it is and click Next.
Chapter 6
32
4.
The existing SQL SELECT statement should appear on the next pop up window. As we are now
going to insert, update, and delete records, we want to enable the wizard's automatic generation
of INSERT, UPDATE, and DELETE commands. Click the Advanced Options button.
5. The advanced dialog gives us three options. Select the first check box, which will enable the
rest of the check boxes. We want all of the options selected. Click OK when you're finished.
Data Access with ADO.NET
33
Review the SELECT statement on the next screen and click Next.
6. The last screen to be shown is a review of what will be built, and it should indicate that we are
going to generate INSERT, UPDATE, and DELETE statements. Click the Finish button.
7. Repeat the above steps for the second data adapter, SqlDataAdapter2, so that we will be
able to make changes to the Suppliers table.
Try It Out – Update
8. Add a new button to the form and call it btnUpdateData. Set the Text property to Update. Add
one more button to the form and call it btnShowChanges. Set its Text property to Show Changes.
Chapter 6
34
9.
The Update button we added will be used to update any changes we have made to the records in
our DataGrid. The Show Changes button will show us any changes we have made to the data.
Add some code to the click event of the Update button by double-clicking on the button:
Private Sub btnUpdateData_Click(ByVal sender As System.Object, _
ByVal e As System.EventArgs) _
Handles btnUpdateData.Click
Dim RecordsUpdated As Integer
If CustomerDataSet1.HasChanges Then
' Update any customer table changes.
RecordsUpdated = SqlDataAdapter1.Update(CustomerDataSet1)
MessageBox.Show(RecordsUpdated.ToString & " customer record(s)
updated.")
' Update any supplier table changes.
RecordsUpdated = SqlDataAdapter2.Update(CustomerDataSet1)
MessageBox.Show(RecordsUpdated.ToString & " supplier record(s)
updated.")
' Refresh the grid.
btnGetData_Click(sender, e)
Else
MessageBox.Show("There are no changed records to update.")
End If
End Sub
10. Add some code to the click event of the Show Changes button by double-clicking on the button.
Private Sub btnShowChanges_Click(ByVal sender As System.Object, _
ByVal e As System.EventArgs) _
Handles btnShowChanges.Click
' Make sure we have changes to show.
If CustomerDataSet1.HasChanges = False Then
MessageBox.Show("There are no changed records to show.")
Exit Sub
End If
' Create a dataset with all changes.
Dim myDataSet As New DataSet()
myDataSet = CustomerDataSet1.GetChanges()
' Make sure we have no errors.
If myDataSet.HasErrors = 0 Then
' Show only the changed records.
DataGrid1.DataSource = Nothing
DataGrid1.DataSource = myDataSet
End If
End Sub
Data Access with ADO.NET
35
11.
Add some code to re-bind the DataSource to our original DataSet and to expand the rows:
Private Sub btnGetData_Click(ByVal sender As System.Object, _
ByVal e As System.EventArgs) _
Handles btnGetData.Click
' If connection isn't open then open it.
If SqlConnection1.State <> ConnectionState.Open Then SqlConnection1.Open()
' Fill our customer table.
SqlDataAdapter1.Fill(CustomerDataSet1)
' Fill our suppliers table.
SqlDataAdapter2.Fill(CustomerDataSet1)
' If connection isn't closed then close it.
If SqlConnection1.State <> ConnectionState.Closed Then
SqlConnection1.Close()
End If
' Rebind data source in case its not bound to original dataset.
DataGrid1.DataSource = Nothing
DataGrid1.DataSource = CustomerDataSet1
' Expand all the child rows.
DataGrid1.Expand(-1)
End Sub
How It Works
First let's look at the code we added under the Update button. We start by checking to see if the
CustomerDataSet1 DataSet has any changes in any of the tables that it contains and, if there are
any changes, we update the database server by calling the Update method of both DataAdapters. If
there are no changes, then these methods won't be called.
If CustomerDataSet1.HasChanges Then
' Update any customer table changes.
RecordsUpdated = SqlDataAdapter1.Update(CustomerDataSet1)
We show the number of records updated by passing back the result from the Update method.
MessageBox.Show(RecordsUpdated.ToString & " customer record(s)
updated.")
The same goes for the supplier table; we call the Update method of SqlDataAdapter2 and display
the number of records as well.
' Update any supplier table changes.
RecordsUpdated = SqlDataAdapter2.Update(CustomerDataSet1)
MessageBox.Show(RecordsUpdated.ToString & " supplier record(s)
updated.")
Chapter 6
36
Once we update any changes, we refresh the DataGrid by calling the Get Data button's click method:
' Refresh the grid.
btnGetData_Click(sender, e)
Now let's see the code behind the Show Changes button in the btnShowChanges_click event that
shows only changed records:
' Make sure we have changes to show.
If CustomerDataSet1.HasChanges = False Then
MessageBox.Show("There are no changed records to show.")
Exit Sub
End If
' Create a dataset with all changes.
Dim myDataSet As New DataSet()
myDataSet = CustomerDataSet1.GetChanges()
' Make sure we have no errors.
If myDataSet.HasErrors = 0 Then
' Show only the changed records.
DataGrid1.DataSource = Nothing
DataGrid1.DataSource = myDataSet
End If
First we check to see if there are any changes in our DataSet, CustomerDataSet1, and display a message
box to the user indicating that no changes have been made if that is the case. When we show our changed
records in the DataGrid, we are binding it to a DataSet that contains just the changed records. We do this by
calling the GetChanges method of our customer DataSet. This method returns a new DataSet with only
changed records; we then verify that it doesn't contain any errors by checking the HasErrors property. The
HasErrors property can be used for DataRow, DataTable, and DataSet objects, so you are not limited to
just checking errors for whole DataSets. As long as there are no errors, we display the contents of the changed
DataSet, myDataSet, in the DataGrid. We then call the Expand method of DataGrid1 to display any
child rows. Once you view the changed records, you can click the Update button to save the changes to the
database. If you don't click the Update button but instead click the Get Data button, the DataGrid is refreshed
with a new DataSet and, as a result, any changes that you may have made will be lost.
Lastly, we added code in the Get Data button. To view our original DataSet we have to re-assign the
original DataSet, CustomerDataSet1, back to the DataGrid. We first set the DataSource to
Nothing to clear any existing DataSource.
' Rebind data source in case its not bound to original dataset
DataGrid1.DataSource = Nothing
DataGrid1.DataSource = CustomerDataSet1
We then call the DataGrid's Expand method, using a value of -1 to expand all the child rows. We
can also expand an individual row by passing in a number representing that row.
' Expand all the child rows.
DataGrid1.Expand(-1)
Now that we have added code to actually update our DataGrid information, let's go ahead and try it out.
Data Access with ADO.NET
37
Try It Out – Updating DataGrid Information
1. Compile and run the application using the F5 key.
2. Click the Get Data button.
3. Expand the node if not already expanded so that the Customer and Supplier links show.
4. Select the Customers link and modify the second PostalCode record from 05021 to 05023.
5. Click the navigate back button at the top right of the grid to navigate back to the parent. Click the
Suppliers table and modify the first address record from 49 Gilbert Street to 100 Elm Street.
Chapter 6
38
6. Click the Show Changes button. This will bring you back to the parent node.
7. Expand the parent node and click on the Customers link to show the changes made in the
table. Do the same for the Suppliers link also.
Data Access with ADO.NET
39
8. Once you're finished reviewing the changes, click the Update button. You will get messages
indicating how many records were updated in each table. In this case there was one in each.
How It Works
We clicked the Get Data button to fill our DataSet, CustomerDataSet1, with our table information.
This opens the database connection, retrieves the data, then closes the connection. Once our DataSet
is filled, we are disconnected from the data source.
We then modified a customer record and a supplier record and clicked the Show Changes button to
view all changes for each table. When we clicked the Update button, the Update method was called for
the entire DataSet. The Update method examines the RowState property of the data tables to
determine which records were modified. According to the value of RowState, the DataAdapter calls
an INSERT, UPDATE, or DELETE statement to perform the required action.
The GetChanges method determines all the changes made, which were just the two, and which we can
then store in a local DataSet that we bind to the DataGrid to view the changes. By selecting each
link, Customers or Suppliers, we were able to view the changes in the corresponding table.
As you can see, we can update our records with very little code.
Chapter 6
40
ADO.NET Namespaces
In this next section, we will look at the different namespaces that make up ADO.NET and how they are used.
Namespaces help identify a class or hierarchy. The namespace uses the assembly name as part of its naming
convention. It's a way of referencing many assembly files together by tying the assemblies together.
Anytime you create a new project, System.Data and System.XML are automatically referenced by
the project, automatically giving you access to their underlying classes.
If we examine the properties of the System.Data reference, we can see the assembly's name,
description, location, and version information:
Data Access with ADO.NET
41
Let's take a look at the five commonly used ADO.NET namespaces:
System
Data
OleDb
SqlClient
XML
❑ System – the core namespace that contains the fundamental classes and base classes that
define commonly used value and reference data types, events and event handlers, interfaces,
attributes, and processing exceptions.
❑ System.Data – this consists of classes that make up the ADO.NET architecture. Contains
components to help manage data efficiently along with tools to view and update data.
❑ System.Data.OleDb – consists of classes to allow you to connect to OLE DB providers,
execute commands, and view results.
❑ System.Data.SqlClient – contains classes to be used with a SQL data provider and is
optimized to access SQL Server 7.0 or greater. The SQL Server version of the
System.Data.OleDb namespace.
❑ System.XML – provides classes to support XML based operations. The DataSet uses this
for reading and writing XML data including schema files.
The System.Data Namespace
Underneath the System.Data namespace are five classes that support data management:
System
Data
DataSet
DataTable
DataColoumn
DataRow
DataRelation
The System.Data namespace essentially provides all the tools required for management of our data:
table creation, relation management, data management, and schema information.
When we need to declare a class within the namespace, we simply use the New keyword to create a new
instance of the object:
Chapter 6
42
Dim myDataSet As New DataSet()
Dim myTable As New DataTable()
Dim myColumn As New DataColumn()
Dim myRow As DataRow
We can also declare them with their fully qualified names:
Dim myDataSet As New System.Data.DataSet()
Dim myTable As New System.Data.DataTable()
Dim myColumn As New System.Data.DataColumn()
Dim myRow As System.Data.DataSet
We can set up an alias – an alternative way of referring to an object – for a namespace. This is a handy way to
set up shorthand identifiers for some of the longer names. In a new Windows project, we would use an Import
statement for the System.Data at the top of the module in order to set up the alias MyADO as shown:
Imports MyADO = System.Data
Public Class Form1
Inherits System.Windows.Forms.Form
Windows Form Designer generated code
Private Sub Form1_Load(ByVal sender As System.Object, _
ByVal e As System.EventArgs) Handles MyBase.Load
Dim myDataSet As New MyADO.DataSet()
Dim myTable As New MyADO.DataTable()
Dim myColumn As New MyADO.DataColumn()
Dim myRow As MyADO.DataRow
End Sub
End Class
The System.Data.OleDb and System.Data.SqlClient Namespaces
System
Data
OleDb
OleDbCommand
OleDbConnection
SqlConnection
OleDbDataAdapter
SqlDataAdapter
OleDbDataReader
SqlDataReader
SqlClient
SqlCommand
Data Access with ADO.NET
43
Chapter 5 introduced us to the Command, Connection, and DataAdapter classes, and we look at
these in more detail shortly. We will also take a look at the DataReader class. Note that there are OLE
DB and SQL versions of each class. Since we are using the SQL Server Desktop Engine in this book, we
can use the SqlClient namespace instead of OleDb since it is much quicker and cuts out much the
overhead of the OLE DB layer.
The System.Xml Namespace
System
XML
XMLDataDocument
ReadXmlSchema
WriteXmlSchema
XmlReader
XmlWriter
Since ADO.NET has built-in XML support, the System.XML namespace is an important namespace to
become familiar with. Amongst other things, this namespace helps to define our table schemas, which – as
you may remember – specify the structure of our tables. There is no need to worry about this namespace
right now; this diagram has been included for completeness here. In Chapter 12, we look at ADO.NET and
XML in further detail, and the classes listed above will be used throughout the final chapters of this book.
Dataflow in ADO.NET
Now that we have discussed the components of ADO.NET, let's see how they complement each other
and how they would flow in a real world application.
The data tier contains the data source, to which the managed provider must connect to retrieve
information and fill our tables with information as requested by the client. The following figure
summarizes the basic components of ADO.NET:
DataSet
Windows/Web App
Table
Table
Middle Tier Data Tier
SQL Server
Provider
OLE DB
Provider
Client Tier
DataSet
Table
Table
XML
XML
Data Provider
Data
Adapter
Data
Adapter
Data
Connection
Data
Connection
Chapter 6
44
This diagram shows how ADO.NET is designed to work with a 3-tier or n-tier architecture. In our client
tier, we use a DataSet that is entirely separate and independent from the middle tier. The client tier
DataSet is a mirror image of the DataSet contained within the middle tier, and they communicate
with each other through XML. The middle tier DataSet communicates with the Data Providers to
select, add, update, or delete information. The Data Providers establish a connection to the data tier
whenever information needs to be managed. Each tier can work quite independently all others.
❑ The data tier is where the data store is located, as a SQL Server or an OLE DB data provider.
❑ Next, we have the middle tier, where the brains of the system are – the business logic. In this tier
resides our DataSet, which gets populated by the Data Providers selecting records as appropriate.
The Data Providers located in the middle tier constitute a business data tier component because they
contain business logic that defines how we communicate with the database, and which is specific to
this solution. The System.Data assembly is used to retrieve the data directly from the database.
❑ Lastly we have the client tier, where the users interface with our system; this is sometimes
referred to as the presentation tier. The client tier could comprise a Windows or web
application that interacts with the system.
.NET Data Providers
The .NET Data Providers consist of a number of classes used to connect to a data source, execute
commands, and return records. They form the data tier. The .NET Data Providers are sometimes called
Managed Providers.
There are two types of .NET Data Providers:
❑ The OLE DB Data Provider – to access any OLE DB provider including ODBC drivers for
Oracle, Microsoft Access, Excel, FoxPro, Paradox, dBase, and any other native ODBC or
OLE DB driver. It uses the System.Data.OleDb namespace.
❑ The SQL Server Data Provider– specific to SQL Server 7.0 and greater. It is faster than the
OLE DB provider because it doesn't have to go through the OLE DB layer – it communicates
directly with SQL Server. It uses the System.Data.SqlClient namespace.
Your application's performance and functional requirements will determine the best provider for your
purposes. The chart below sums up when to choose one over the other:
Use the OLE DB Data Provider when: Use the SQL Server Data Provider when:
Using Microsoft SQL Server 6.5 or earlier Using SQL Server 7.0 or greater
You need to use Oracle Using the Microsoft Data Engine
You need to use Microsoft Access You require the best performance possible and
are only using SQL Server
You need support for OLE DB Provider (use the
SQL Data Provider instead of OLE DB Provider
for SQL Server)
There is no future need for other database types
besides Microsoft SQL Server (SQL Server 7.0
and above)
You need support for any native ODBC drivers
Data Access with ADO.NET
45
To use the OLE DB data provider in your project, you must include the OleDb namespace in your code modules:
Imports System.Data.OleDb
To use the SQL Server data provider in your project, you include the SqlClient namespace in your
code modules:
Imports System.Data.SqlClient
Within each managed provider are four components: the Connection, DataAdapter, Command, and
DataReader objects.
DataAdapter
Command Properties
SelectCommand
InsertCommand
UpdateCommand
DeleteCommand
DataReader
Stores commands such
as SELECT, UPDATE,
INSERT, and DELETE
Establishes actual
connection
Requests a
connection, sends out
commands from
DataAdapter. Builds
commands
Command
Connection
.NET Data Provider
SQL or OLE DB
Data Source
If you're using the SQL Server Data Provider, you use the SQLDataAdapter, SqlCommand,
SQLDataReader, and SqlConnection form of these objects. For OLE DB Data providers, use the
OleDbDataAdapter, OleDbCommand, OleDbDataReader, and OleDbConnection objects.
Now, let's next look at each of these objects individually.
The Connection Object
This opens a connection to the data source. You can use either the OleDbConnection or the
SqlConnection object. For the OLE DB provider, you use a Provider, Data Source, User ID,
and Password in the connection string. For the SQL provider, you need the same arguments as for the
OLE DB provider, but omit the Provider type (which is always SQLOLEDB). If the connection string
for a SQL provider does specify a Provider parameter, an exception is generated.
The connection string has several commonly used properties:
Chapter 6
46
Property Default Value Description
Provider
(Required) Used with OLE DB provider only.
Specifies the provider to use.
Data Source or Server (Required) The name of the server to connect to, for
example: localhost, MYSERVER.
Initial Catalog or
Database
(Required) The database to connect to, for example:
Northwind, Pubs.
User ID
(Required if set) The login account user name.
Password or PWD
(Required if set)
The password for server logon.
Connect Timeout or
Connection Timeout
15
The length of time (in seconds) to wait for
a connection to the server before
generating an error. Make sure this is
adequate when using particularly slow
networks.
Persist Security Info False
Whether or not to return security sensitive
information back as part of the
connection string.
Integrated Security or
Trusted_Connection
False
Whether to use a secure connection or
not. Either True, False, or sspi (same
as True). Security Service Provider
Interface (SSPI) is a means of secure
authentication when communicating to a
data source.
The connection must be closed when modifying the ConnectionString property. When you set the
property, the connection string is parsed for errors and an exception is generated if it contains incorrect
syntax or property values. A semicolon must be included between each property to allow the parser to
distinguish between them. You can use single quotes or none around a value to set. Any value left blank
will be ignored. Lastly, for true or false values, you can use 'yes' and 'no' as well as 'true' and 'false'.
The minimum arguments to connect to a data source are Provider (in the case of an OLE DB provider),
Data Source, and Initial Catalog. If a username and password is set on the database, then you will
also need those two pieces of information. Now let's take a look at some sample connection strings.
This one connects to a Microsoft Access database:
"Provider=Microsoft.Jet.OLEDB.4.0;Data Source=C:\Samples\Northwind.mdb;User
ID=;Password=;"
This one connects to an Oracle database:
"Provider=MSDAORA;Data Source=MyOracleDB;User ID=myID;Password=myPWD;"
Data Access with ADO.NET
47
The next one connects an OleDbConnection object to a SQL Server database. Wherever possible, use
the SQL Data Provider if you know you are using a SQL database which doesn't require the Provider
parameter, although you will come across applications that select a data provider at run time.
"Provider=SQLOLEDB;Data Source=localhost;Initial Catalog=Pubs;Password=;User ID=;"
You can set the time before a connection fails to open by modifying your connection string to include a
timeout value:
Dim myConnString As String = "Data Source=localhost;" & _
"Initial Catalog=NorthwindSQL;User ID=sa;" & _
"Connect Timeout=30;"
The ConnectionTimeout property of the Connection object is used to read the timeout value. This
property is read-only and has a default of 15 seconds:
Timeout = myConnection.ConnectionTimeout
Connection Pooling
Connection pooling is enabled by default, and can provide improved performance of your applications
and servers. When you create a new connection, a pool is created based on the connection string. The
next time you create a connection, if the connection string hasn't changed then the same pool will be
used. If the connection string has changed in anyway, then a new pool will be required.
Consider a short example. The following code creates a new connection pool:
' Connection creates a new pool.
myConnString = "Data Source=localhost;Initial Catalog=NorthwindSQL;User Id=sa;"
myConnection = New SqlConnection(myConnString)
myConnection.Open()
If we then create another connection with the exact same connection string, it will simply be added to
our first pool, thus avoiding the overhead imposed when a connection is set up:
' Connection added to existing pool.
myConnString2 = "Data Source=localhost;Initial Catalog=NorthwindSQL;User Id=sa;"
myConnection2 = New SqlConnection(myConnString2)
myConnection2.Open()
Now let's say we create another connection, but this time we have an Initial Catalog argument of
Pubs instead of NorthwindSQL. This will cause a new pool to be created:
' Connection added to a new pool.
myConnString3 = "Data Source=localhost;Initial Catalog=Pubs;User Id=sa;"
myConnection3 = New SqlConnection(myConnString2)
myConnection3.Open()
Chapter 6
48
The DataAdapter Object
The DataAdapter is the physical means of communication between the data source and the DataSet,
and is either a SqlDataAdapter or an OleDbDataAdapter. If the application wants to retrieve or
update records, it uses properties of the DataAdapter that reference Command objects that contain
SELECT, INSERT, UPDATE, and DELETE commands. It is these referenced Command objects that
communicate directly with the data source to manipulate data according to the user's request.
DataAdapter
Command Properties
SelectCommand
InsertCommand
UpdateCommand
DeleteCommand
Rows
Columns
Constraints
Relations
DataSet
DataTable
To Data Source
Command Object
The most useful methods of the DataAdapter are the Fill and Update methods. The Fill method
populates a DataSet or table with the specified information. To fill a DataSet, use the Fill method
of a DataAdapter as in the following lines:
Dim myDataSet As New DataSet()
myAdapter.Fill(myDataSet)
We can also use the DataAdapter's Fill method with a DataTable:
Dim myCustomerTable As New DataTable()
myAdapter.Fill(myCustomerTable)
The Update method, as you may've guessed, serves to update records. Edit any rows in your DataSet,
and call the Update method to persist those changes in the data source:
myAdapter.Update(myDataSet)
Use this method in the following fashion when dealing with a DataTable object:
myAdapter.Update(myTable)
Command Object
The Command object is used to set up SELECT, INSERT, UPDATE, and DELETE commands or stored
procedures for a DataAdapter object. There are two types, OleDbCommand and SqlCommand, and
four subtypes: SelectCommand, InsertCommand, UpdateCommand, and DeleteCommand.
Data Access with ADO.NET
49
This object is used to send commands to a database by way of a connection object.
Dim myConnection As New SqlConnection(myConnString)
Dim myAdapter As New SqlDataAdapter()
Dim mySelectQuery As String = "SELECT Address, City, PostalCode FROM Customers"
myAdapter.SelectCommand = New SqlCommand(mySelectQuery, myConnection)
This sets the SelectCommand property of the adapter to a new SqlCommand object, based on the
SELECT query assembled in mySelectQuery, and using the connection called myConnection.
Setting up an InsertCommand is similar: create a new SqlCommand object with the required INSERT
statement and connection object as parameters, and assign it to the InsertCommand property of a
DataAdapter:
Dim myInsertQuery As String = "INSERT INTO Customers(Address, City, PostalCode) "
& _
"VALUES (@Address, @City, @PostalCode)"
myAdapter.InsertCommand = New SqlCommand(myInsertQuery, myConnection)
Assigning other commands follows the same pattern. For an UPDATE query, use code like this:
Dim myUpdateQuery As String = "UPDATE Customers SET Address='200 ABC Street', " &
_
"City='Beverly Hills' WHERE CustomerID='DUMON'"
myAdapter.UpdateCommand = New SqlCommand(myUpdateQuery, myConnection)
Likewise, for a DELETE query, create a new SqlCommand object and assign it to the DeleteCommand
property of an DataAdapter:
Dim myDeleteQuery As String = "DELETE FROM Customers WHERE CustomerID='DUMON'"
myAdapter.DeleteCommand = New SqlCommand(myDeleteQuery, myConnection)
If you create your Command objects manually instead of using the data wizards, the SqlCommandBuilder
class provides an easy way to generate the SQL INSERT, UPDATE, and DELETE commands that the data
wizards automatically produce. This class generates SQL statements to INSERT, UPDATE, and DELETE single
tables based on the SELECT statement provided. Be aware though that, with this approach, you won't have as
much control as if you were to create such commands yourself and the performance isn't the best it could be,
because the class must query the database schema for information such as table column names, size, type,
and key information. The generated statements provide for optimistic concurrency (see Chapter 10) and for
refreshing the DataSet, as provided by the Data Adapter Wizard. This can be really useful if our application
allows the users to design their own SELECT statements, because it gives us the ability to change any related
INSERT, UPDATE, and DELETE commands programmatically. You can only use single tables with your
DataAdapters so, if you're linked to multiple tables, you will get an exception.
Using the SqlCommandBuilder is quite straightforward: just declare a new object and pass in a
DataAdapter:
Dim myBuilder As New SqlCommandBuilder(myAdapter)
' Show the INSERT statement that was generated.
MessageBox.Show(myBuilder.GetInsertCommand.CommandText)
Chapter 6
50
After the above code, you will be able to execute the Update method of your DataAdapter to run the
appropriate INSERT, UPDATE, and DELETE commands as required. These commands are built on the
fly when the Update method is called, so you won't be able to see any of the Command object
properties by inspecting your DataAdapter's contents. To retrieve the commands that will be used
during an update, use the GetInsertCommand, GetUpdateCommand, and GetDeleteCommand
properties of the SqlCommandBuilder object.
We're not limited to just SQL statements when we create our Command object, as we can also call
stored procedures:
Dim mySelectCommand As SqlCommand
mySelectCommand = New SqlCommand("DeleteCustomer", myConnection)
mySelectCommand.CommandType = CommandType.StoredProcedure
Dim myParm As SqlParameter
myParm = mySelectCommand.Parameters.Add("@CustID", SqlDbType.NVarChar, 10)
myParm.Value = "DUMON"
myConnection.Open()
Dim RecordsAffected As Integer = mySelectCommand.ExecuteNoQuery()
myConnection.Close()
We create a new Command object and pass in the name of our stored procedure, which is
DeleteCustomer. Within the DeleteCustomer stored procedure, there would be a SQL statement as
shown below. We have to specify the type of command we want to execute, namely a stored procedure,
using the CommandType.StoredProcedure property value. We then create a new SqlParameter to
contain our parameter name, type, size, and value. We must then open our connection and execute the
stored procedure using the ExecuteNoQuery method of the Command object. ExecuteNoQuery
executes the SQL statement or procedure associated with the Command object and returns the number of
records affected by the operation. When finished, we close the connection.
CREATE PROCEDURE dbo.DeleteCustomer
(
@ReturnValue INT = Null OUTPUT,
@CustID INT
)
AS
DELETE FROM Customers WHERE CustomerID = @CustID
SELECT @ReturnValue = @@ROWCOUNT
The DataReader Object
If you don't need to manipulate or modify records, you can greatly increase performance by using a
DataReader. This is a forward only reader that can only read, not write, data. You're working directly with
a data steam and not in-memory objects as with the DataSet. If you just want a quick display of your data
then the DataReader is the object to use. Since we don't have all the bells and whistles of the DataSet,
that allow it to manipulate records, go backwards, and jump to specific records, we cut out all the associated
overhead, resulting in much improved performance. Internally, the DataAdapter itself uses a
DataReader to populate a DataSet and, as you may expect, there are two types of data reader: the
OleDbDataReader and the SqlDataReader. Unfortunately the DataReader can't bind to a DataGrid
like the DataSet can, so you must manually display any information read from a DataReader.
Data Access with ADO.NET
51
To populate a DataReader, you follow all the same steps of populating a DataSet as far as setting up
your Command objects and connections. Since we don't have the capability to UPDATE, DELETE, or
INSERT data with a DataReader, we don't need a DataAdapter.
To initialize a DataReader object, call the ExecuteReader method of the Command class:
Dim myReader As SqlClient.SqlDataReader = mySelectCommand.ExecuteReader()
The following constructs a DataReader object. The type of reader you create, whether SQL or OLE
DB, will depend on the Command and Connection object you are using:
Dim myConnection As New SqlClient.SqlConnection()
myConnection.ConnectionString = "Data Source=localhost;" & _
"Initial Catalog=NorthwindSQL;User Id=sa;"
Dim mySelectQuery As String = "SELECT Address, City FROM Customers"
Dim mySelectCommand As New SqlClient.SqlCommand(mySelectQuery, myConnection)
myConnection.Open()
Dim myReader As SqlDataReader
myReader = mySelectCommand.ExecuteReader()
Use the Item property to get a value for a particular field. Pass the name of the field you want to
retrieve or the index value representing the ordinal position of that field:
Console.WriteLine(myReader.Item("Address"))
To read records, use the Read method of the DataReader to load the next row into the Reader
object. Read returns True as long as there are more records to read. Since a DataReader is a forward
only reader, there are no methods to move backwards through the result set. Initially, the reader is
located just prior to the first record, so you must call Read before you may access any records:
While myReader.Read()
Console.WriteLine(myReader.Item("Address"))
End While
You can also call the methods GetString, GetInt16, GetDouble, or GetDateTime according to
the specific type of the column in question. We can call GetName to get the name of the field, and
GetType to determine the type of the field. These methods all take a zero-based index as the single
argument so, to access the first field in your result set, you would use index 0. In this example, we
retrieve the first column value, which is taken to be of type String:
CONST CUSTOMERID_COLUMN As Integer = 0
While myReader.Read()
Console.WriteLine(myReader.GetString(CONST CUSTOMERID_COLUMN))
End While
If you try to display a record that is Null you will get an exception. This isn't difficult to avoid, as in the
next code extract which uses the IsDBNull property to check whether a field is Null. This property
takes a zero-based index representing the ordinal position of the field you want to check.