mcsa mcse windows xp professional study guide 2nd phần 5 potx
Bạn đang xem bản rút gọn của tài liệu. Xem và tải ngay bản đầy đủ của tài liệu tại đây (4.2 MB, 74 trang )
266
Chapter 7
Managing Security
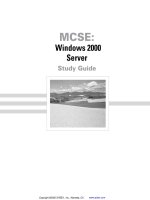
FIGURE 7.9 Security Analysis Results dialog box
The policies that have been analyzed will have an × or a √ next to each policy. An × indicates
that the template specification and the actual policy do not match. A √ indicates that the tem-
plate specification and the policy do match. If any security discrepancies are indicated, you
should use the Group Policy snap-in to resolve the security violation.
In Exercise 7.7, you will use the Security Configuration and Analysis tool to analyze your
security configuration. This exercise assumes that you have completed all of the previous
exercises in this chapter.
EXERCISE 7.7
Using the Security Configuration and Analysis Tool
In this exercise, you will specify a security database, create a security template, import the
template, perform an analysis, and review the results.
Specifying the Security Database
1. In the MMC, right-click Security Configuration and Analysis and select Open Database.
2. In the Open Database dialog box, type sampledb in the File Name text box. Then click the
Open button.
3. In the Import Template dialog box, select the template securews and click the Open button.
Simpo PDF Merge and Split Unregistered Version -
Copyright ©2003 SYBEX Inc., 1151 Marina Village Parkway, Alameda, CA 94501.
COPYING PROHIBITED
www.sybex.com
Analyzing System Security
267
Creating the Security Template
4. In the MMC, select File Add/Remove Snap-in.
5. In the Add/Remove Snap-In dialog box, click the Add button. Highlight the Security
Templates snap-in and click the Add button. Then click the Close button.
6. In the Add/Remove Snap-In dialog box, click the OK button.
7. Expand the Security Templates snap-in, then expand the WINDOWS\Security\Templates
folder.
8. Double-click the securews file.
9. Select Account Policies, then Password Policy.
10. Edit the password policies as follows:
Set the Enforce Password History option to 10 passwords remembered.
Enable the Passwords Must Meet Complexity Requirements option.
Set the Maximum Password Age option to 30 days.
11. Highlight the securews file, right-click, and select the Save As option.
12. In the Save As dialog box, place the file in the default folder and name the file xptest. Click
the Save button.
Importing the Security Template
13. Highlight the Security Configuration and Analysis snap-in, right-click, and select the
Import Template option.
14. In the Import Template dialog box, highlight the xptest file and click the Open button.
Performing and Reviewing the Security Analysis
15. Highlight the Security Configuration and Analysis snap-in, right-click, and select the
Analyze Computer Now option.
16. In the Perform Analysis dialog box, accept the default error log file path and click the OK
button.
17. When you return to the main MMC window, double-click the Security Configuration and
Analysis snap-in.
18. Double-click Account Policies, and then double-click Password Policy. You will see the
results of the analysis for each policy, indicated by an
× or a √ next to the policy.
EXERCISE 7.7 (continued)
Simpo PDF Merge and Split Unregistered Version -
Copyright ©2003 SYBEX Inc., 1151 Marina Village Parkway, Alameda, CA 94501.
COPYING PROHIBITED
www.sybex.com
268
Chapter 7
Managing Security
Summary
In this chapter, you learned how to define security for Windows XP Professional. We covered
the following topics:
The difference between LGPOs, which are applied at the local level, and GPOs, which are
applied through a Windows 2000 or Windows 2003 domain, and how they are applied.
Account policies, which control the logon process. The two types of account policies are
password and account lockout policies.
Local policies, which control what a user can do at the computer. The three types of local
policies are audit, user rights, and security options policies.
How to manage security through the Security Configuration and Analysis tool.
How to use the Group Policy Result Tool to analyze current configuration settings.
Exam Essentials
Understand how group policies are applied locally and through the Active Directory. Know
how group policies can be applied either locally through LGPOs or through the Active Direc-
tory with GPOs. Understand how group policy is applied through the order of inheritance. Be
able to use the Group Policy Result Tool to view how group policy is currently configured for
a specific computer.
Set up a security configuration based on network requirements. Define the options that can
be configured for secure network environments. Know where to configure each option.
Know how to set local group policies. Understand the purpose of account policies and local
policies. Understand the purpose and implementation of account policies for managing pass-
word policies and account lockout policies. Understand the purpose and implementation of
local policies and how they can be applied to users and groups for audit policies, user rights
assignments, and security options.
Know how to analyze security. Be able to analyze security through the Security Configura-
tion and Analysis tool. Understand the use of templates and the function of the default tem-
plates that are provided with Windows XP Professional.
Simpo PDF Merge and Split Unregistered Version -
Copyright ©2003 SYBEX Inc., 1151 Marina Village Parkway, Alameda, CA 94501.
COPYING PROHIBITED
www.sybex.com
Key Terms
269
Key Terms
Before you take the exam, be certain you are familiar with the following terms:
account lockout policies Local Group Policy snap-in
account policies local policies
Active Directory organizational units (OUs)
audit policies password policies
Group Policy Objects (GPOs) Security Configuration and Analysis tool
Group Policy Result Tool security option policies
Local Computer Policy snap-in user right policies
Local Group Policy Objects (LGPOs)
Simpo PDF Merge and Split Unregistered Version -
Copyright ©2003 SYBEX Inc., 1151 Marina Village Parkway, Alameda, CA 94501.
COPYING PROHIBITED
www.sybex.com
270
Chapter 7
Managing Security
Review Questions
1. Your network’s security has been breached. You are trying to redefine security so that a user
cannot repeatedly attempt user logon with different passwords. To accomplish this, which of the
following items (in the Local Security Settings dialog box shown here) should you define?
A.
Password policy
B. Account lockout policy
C. Audit policy
D. Security options
2. You are the network administrator for a Fortune 500 company. The Accounting department has
recently purchased a custom application for running financial models. To run properly, the
application requires that you make some changes to the computer policy. You decide to deploy
the changes through the Group Policy setting. You create an OU called Sales and apply the policy
settings. When you log on as a member of the Sales OU and run the application, it is still not run-
ning properly. You suspect that the policy is not being applied properly because of a conflict
somewhere with another Group Policy setting. What command should you run to see a listing
of how the group policies have been applied to the computer and the user?
A.
GPResult.exe
B. GPOResult.exe
C. GPAudit.exe
D. GPInfo.exe
Simpo PDF Merge and Split Unregistered Version -
Copyright ©2003 SYBEX Inc., 1151 Marina Village Parkway, Alameda, CA 94501.
COPYING PROHIBITED
www.sybex.com
Review Questions
271
3. You have a Windows XP Professional computer that is located in an unsecured area. You want
to track usage of the computer by recording user logon and logoff events. To do this, which of
the following auditing policies must be enabled?
A.
Audit Account Logon Events
B. Audit Process Tracking
C. Audit Logon Events
D. Audit System Events
4. Bill is very good at troubleshooting hardware, installing new devices, and updating drivers. You
want Bill to be able to add and remove hardware and install and update drivers on the Windows XP
Professional computers in your network. What is the minimum assignment that will allow Bill
to complete this task?
A.
Add Bill to the Administrators group.
B. Add Bill to the Server Operators group.
C. Add Bill to the Manage Devices group.
D. Grant Bill the user right Load and Unload Device Drivers on each computer he will
manage.
5. You are the network administrator of a small company. You have just decided to install the XYZ
Virus Scanner application. The scanner runs as a service. You create a user account called
VirScan that will be used to run the service. What user right must be granted for this account?
A.
Log On as a Batch Job
B. Log On as a Service
C. Process Service Requests
D. Manage Services and Security
6. You are the system administrator for the ACME Corp. You have a computer that is shared by
many users. You want to ensure that when users press Ctrl+Alt+Delete to log on, they do not
see the name of the last user. What do you configure?
A.
Set the security option Clear User Settings When Users Log Off.
B. Set the security option Do Not Display Last User Name in Logon Screen.
C. Set the security option Prevent Users from Seeing Last User Name.
D. Configure nothing; this is the default setting.
7. You are the network administrator of a medium-sized company. Due to recent security breaches, you
have configured auditing so that you can track events such as account management tasks and
system events. Where can you view the results of the audit?
A.
Audit Manager
B. \Windir\audit.log
C. Event Viewer System log
D. Event Viewer Security log
Simpo PDF Merge and Split Unregistered Version -
Copyright ©2003 SYBEX Inc., 1151 Marina Village Parkway, Alameda, CA 94501.
COPYING PROHIBITED
www.sybex.com
272
Chapter 7
Managing Security
8. You have recently hired Al as an assistant for network administration. You have not decided
how much responsibility you want Al to have. In the meantime, you want Al to be able to restore
files on Windows XP Professional computers in your network, but you do not want Al to be able
to run the backups. What is the minimum assignment that will allow Al to complete this task?
A. Add Al to the Administrators group.
B. Grant Al the Read right to the root of each volume he will back up.
C. Add Al to the Backup Operators group.
D. Grant Al the user right Restore Files and Directories.
9. You are the network administrator of a medium-sized company. Your company requires a fair
degree of security and you have been tasked with defining and implementing a security policy.
You have configured password policies so that users must change their passwords every 30 days.
Which password policy would you implement if you want to prevent users from reusing pass-
words they have used recently?
A.
Passwords Must Be Advanced
B. Enforce Password History
C. Passwords Must Be Unique
D. Passwords Must Meet the Complexity Requirements of the Installed Password Filters
10. Prioritize-a-list: As network administrator, you have configured GPOs for your local computers,
domains, sites, and OUs. Your GPOs are not being applied as you had expected. You have not
set any filter or inheritance settings. What is the default order of inheritance that will be applied
to the GPOs?
Local Computer
Domain
Site
OU
11. A user in your San Jose domain is attempting to install an updated modem driver. They report
that they can’t get the driver to update properly. You log on to the user’s computer with admin-
istrative rights to the San Jose domain and attempt to update the driver. When you check the
driver through Device Manager, you notice that the old driver is still installed. In Control Panel,
you open the System icon and see that driver signing is configured with Ignore for the driver sign-
ing verification. You suspect that the problem may be with the GPO’s configuration. Which of
the following actions should you take that will make the least impact on the GPO for Active
Directory?
A.
Configure the domain GPO for the Warn file signature verification, and then attempt
to update the driver.
B. For the Sales domain, set the No Override option.
C. For the Sales domain, set the Block Inheritance option.
D. Configure the local computer for the Warn file signature verification, and then attempt
to update the driver.
Simpo PDF Merge and Split Unregistered Version -
Copyright ©2003 SYBEX Inc., 1151 Marina Village Parkway, Alameda, CA 94501.
COPYING PROHIBITED
www.sybex.com
Review Questions
273
12. Your Active Directory structure consists of a domain called CCCUSA, which is a part of a site
called CCCCORP. There is an OU called Sales, and each computer within Sales has a local policy
set. You have configured all of the GPOs with the No Override option. Which of the following
policies will be applied in the event of conflict?
A.
Domain
B. Site
C. OU
D. Local computer
13. You are the network administrator for the Wacky Widgets Corporation. Your network requires
a high level of security. You evaluate the hisecws.inf security template and determine that the
settings this template uses will meet the needs of your network. Which of the following two
options can be used to deploy the hisecws.inf security template?
A.
Security Configuration and Analysis tool
B. Secedit.exe
C. RSOP.exe
D. Security Templates MMC snap-in
14. You are the administrator of a medium-sized network. Your company requires that custom
security settings be applied to all Windows XP Professional computers within the network. You
define all of the security settings that should be applied. Which of the following utilities can be
used to create a template with your custom security settings that can then be used for security
analysis?
A.
Security Configuration and Analysis tool
B. Secedit.exe
C. RSOP.exe
D. Security Templates MMC snap-in
15. You are the network administrator for a medium-sized company. You recently upgraded 10
Windows NT 4 Workstation computers to Windows XP Professional. Some of the applica-
tions that worked properly under Windows NT 4 Workstation no longer work properly with
Windows XP Professional. Which of the following security templates might correct the application
compatibility issues?
A.
security.inf
B. application.inf
C. rootsec.inf
D. compatws.inf
Simpo PDF Merge and Split Unregistered Version -
Copyright ©2003 SYBEX Inc., 1151 Marina Village Parkway, Alameda, CA 94501.
COPYING PROHIBITED
www.sybex.com
274
Chapter 7
Managing Security
Answers to Review Questions
1. B. Account lockout policies, a subset of account policies, are used to specify options that
prevent a user from attempting multiple failed logon attempts. If the Account Lockout Threshold
value is exceeded, the account will be locked. The account can be reset based on a specified
amount of time, or through Administrator intervention.
2. A. The System Group Policy Result Tool is accessed through the GPResult.exe command-line
utility. The GPResult.exe command displays the resulting set of policies that were enforced
on the computer and the specified user during the logon process.
3. A. Audit Account Logon Events is used to track when a user logs on, logs off, or makes a
network connection. You can configure auditing for success or failure and audited events can be
tracked through Event Viewer.
4. D. The Load and Unload Device Drivers user right allows a user to dynamically unload and
load Plug and Play device drivers. You could allow a user to complete this task through
Administrator or Power User group membership, but by assigning user rights, you can better
control security access.
5. B. The Log On as a Service user right allows a service to log on in order to run the specific
service. This user right can be assigned to users or groups.
6. B. The security option Do Not Display Last User Name is used to prevent the last username in
the logon screen from being displayed in the logon dialog box. This option is commonly used
in environments where computers are used publicly.
7. D. Once auditing has been configured, you can see the results of the audit through the Security
log in the Event Viewer utility. In order to view the security logs, you must be a member of the
Administrators group or have appropriate user rights to view or manage the audit logs.
8. D. The Restore Files and Directories user right allows a user to restore files and directories,
regardless of file and directory permissions. Assigning this user right is an alternative to making
a user a member of the Backup Operators group.
9. B. The Enforce Password History policy allows the system to keep track of a user’s password
history for up to 24 passwords. This prevents a user from using the same password over and
over again.
10. Local Computer
Site
Domain
OU
By default, GPOs are applied in the order of local computer, site, domain, and OU. The policies
will be combined unless conflicting settings are applied, in which case the last policy that is
applied contains the effective setting.
Simpo PDF Merge and Split Unregistered Version -
Copyright ©2003 SYBEX Inc., 1151 Marina Village Parkway, Alameda, CA 94501.
COPYING PROHIBITED
www.sybex.com
Answers to Review Questions
275
11. A. You should just configure a specific GPO so that the file signature verification is set to Warn
as opposed to Block, which will refuse upgrading of the driver if it is unsigned without any user
notification. The last GPO applied is the domain’s, so you should edit the Sales domain’s GPO
for this arrangement.
12. B. The No Override option is used to specify that child containers can’t override the policy
settings of higher-level GPOs. In this case, the order of precedence would be as follows: Site
would override Domain, and Domain would override OU. The No Override option can be used
if you want to set corporate-wide policies and do not want to give administrators of lower-level
containers the capability to override your settings. This option can be set on a per-container
basis as needed.
13. A, B. The Security Configuration and Analysis tool and the Secedit command-line utility can
be used to apply security templates. The Security Templates MMC snap-in is used to create and
modify templates.
14. D. By default, Windows XP Professional ships with a variety of predefined security templates.
You create security templates through the Security Templates snap-in in the MMC.
15. D. The compatws.inf template is used for backward compatibility. This template relaxes the
security used by Windows XP so that applications that are not certified to work with Windows XP
can still run. This template is typically associated with computers that have been upgraded and
are having problems running applications that have run in the past.
Simpo PDF Merge and Split Unregistered Version -
Copyright ©2003 SYBEX Inc., 1151 Marina Village Parkway, Alameda, CA 94501.
COPYING PROHIBITED
www.sybex.com
Chapter
8
Managing Disks
MICROSOFT EXAM OBJECTIVES COVERED
IN THIS CHAPTER:
Monitor, manage, and troubleshoot access to files and folders.
Configure, manage, and troubleshoot file compression.
Optimize access to files and folders.
Configure and manage file systems.
Convert from one file system to another file system.
Configure NTFS, FAT32, or FAT file systems.
Implement, manage, and troubleshoot disk devices.
Monitor and configure disks.
Monitor, configure, and troubleshoot volumes.
Configure, manage, and troubleshoot Encrypting File
System (EFS).
Simpo PDF Merge and Split Unregistered Version -
Copyright ©2003 SYBEX Inc., 1151 Marina Village Parkway, Alameda, CA 94501.
COPYING PROHIBITED
www.sybex.com
When you install Windows XP Professional, you designate the
initial configuration for your disks. Through Windows XP Pro-
fessional’s utilities and features, you can change that configuration
and perform disk-management tasks.
For file system configuration, you can choose FAT, FAT32, or NTFS. You can also update
a FAT or FAT32 partition to NTFS. This chapter covers the features of each file system and how
to use the
Convert
utility to upgrade to NTFS.
Another factor in disk management is choosing the configuration for your physical drives.
Windows XP supports basic storage and dynamic storage. When you install Windows XP
Professional or upgrade from Windows NT Workstation 4, the drives are configured as basic
storage. Dynamic storage is supported by Windows 2000 (all versions), Windows XP Professional,
and Windows Server 2003 and allows you to create simple volumes, spanned volumes, and
striped volumes.
Once you decide how your disks should be configured, you implement the disk configurations
through the Disk Management utility. This utility helps you view and manage your physical
disks and volumes. In this chapter, you will learn how to manage both types of storage and to
upgrade from basic storage to dynamic storage.
The other disk-management features covered in this chapter are data compression, disk quotas,
data encryption, disk defragmentation, disk cleanup, and disk error checking.
The procedures for many disk-management tasks are the same for both Win-
dows XP Professional, Windows 2000 (all versions) and Windows Server 2003.
The main difference is that Windows 2000 Server and Windows Server 2003 also
support mirrored and RAID-5 volumes.
Configuring File Systems
Each partition (each
logical drive
that is created on your hard drive) you create under Windows XP
Professional must have a file system associated with it.
When selecting a file system, you can select FAT (also referred to as FAT16), FAT32, or NTFS.
You typically select file systems based on the feature you want to use and based on whether you
will need to access the file system using other operating systems. If you have a FAT or FAT32
partition and want to update it to NTFS, you can use the
Convert
utility. The features of each
file system and the procedure for converting file systems are covered in the following sections.
Simpo PDF Merge and Split Unregistered Version -
Copyright ©2003 SYBEX Inc., 1151 Marina Village Parkway, Alameda, CA 94501.
COPYING PROHIBITED
www.sybex.com
Configuring File Systems
279
In this book, the terms FAT and FAT16 are used synonymously.
File System Selection
Your file system is used to store and retrieve the files stored on your hard drive. One of the most
fundamental choices associated with file management is the choice of your file system’s configu-
ration. As explained in Chapter 1, “Getting Started with Windows XP Professional,” Windows XP
Professional supports the FAT16, FAT32, and NTFS file systems. You should choose FAT16
or FAT32 if you want to dual-boot your computer, because these file systems are backward
compatible with other operating systems. Choose NTFS, however, if you want to take advantage
of features such as local security, file compression, and file encryption.
Table 8.1 summarizes the capabilities of each file system, and they are described in more
detail in the following sections.
TABLE 8.1
File System Capabilities
Feature FAT16 FAT32 NTFS
Supporting
operating systems
Most Windows 95 OSR2,
Windows 98, Windows
Me, Windows 2000,
Windows XP, and
Windows Server 2003
Windows NT,
Windows 2000,
Windows XP, and
Windows Server 2003
Long filename support Yes Yes Yes
Efficient use of disk
space
No Yes Yes
Compression support No No Yes
Quota support No No Yes
Encryption support No No Yes
Support for local
security
No No Yes
Support for network
security
Yes Yes Yes
Maximum volume size 2GB 32GB 2TB
Simpo PDF Merge and Split Unregistered Version -
Copyright ©2003 SYBEX Inc., 1151 Marina Village Parkway, Alameda, CA 94501.
COPYING PROHIBITED
www.sybex.com
280
Chapter 8
Managing Disks
Windows XP Professional also supports
Compact Disk File System (CDFS)
.
However, CDFS cannot be managed. It is used only to mount and read CDs.
FAT16
FAT16
was first used with DOS (Disk Operating System) 3.0 in 1981. With FAT16, the
directory-entry table keeps track of the location of the file’s first block, the filename and extension,
the date- and timestamps on the file, and any attributes associated with the file. FAT16 is similar
in nature to a card catalog at a library—when the operating system needs a file, the FAT listing
is consulted.
The main advantage of FAT16 is that almost all operating systems support this file system. This
makes FAT16 a good choice if the computer will dual-boot with other operating systems (see
Chapter 1 for more information about dual-booting). FAT16 is also a good choice for small
partitions (FAT16 partitions can only be up to 2GB in size). Because FAT16 is a very simple
file system, the overhead associated with storing files is much smaller than with NTFS. In addition,
FAT16 partitions only support disk compression through utilities such as
DRVSPACE
, although
this utility is not supported by Windows XP.
The problem with using FAT16 is that it was designed to be used as a single-user file system,
and thus it does not support any kind of security. Prior to Windows 95, FAT16 did not support
long filenames. Other file systems, such as NTFS, offer many more features, including local
security, file compression, and encrypting capabilities.
FAT32
FAT32
is an updated version of FAT. FAT32 was first shipped with Windows 95 OSR2
(Operating System Release 2), and it currently ships with Windows 98. It is supported by
Windows XP.
One of the main advantages of FAT32 is its support for smaller cluster sizes, which results
in more efficient space allocation than was possible with FAT16. Files stored on a FAT32 parti-
tion can use 20 to 30 percent less disk space than files stored on a FAT16 partition. FAT32
supports drive sizes of up to 2TB, although if you create and format a FAT32 partition through
Windows XP Professional, the FAT32 partition can only be up to 32GB. Because of the smaller
cluster sizes, FAT32 can also load programs up to 50 percent faster than programs loaded from
FAT16 partitions.
The main disadvantage of FAT32 is that it is not compatible with previous versions of
Windows NT, including NT 4. It also offers no native support for disk compression.
NTFS
NTFS
, which was first used with the NT operating system, now offers the highest level of service
and features for Windows XP computers. NTFS partitions can be up to 2TB.
NTFS offers comprehensive folder- and file-level security. This allows you to set an additional
level of security for users who access the files and folders locally or through the network. For
example, two users who share the same Windows XP Professional computer can be assigned
Simpo PDF Merge and Split Unregistered Version -
Copyright ©2003 SYBEX Inc., 1151 Marina Village Parkway, Alameda, CA 94501.
COPYING PROHIBITED
www.sybex.com
Configuring File Systems
281
different NTFS permissions, so that one user has access to a folder but the other user is denied
access to that folder.
NTFS also offers disk management features—such as compression, disk quotas, and encryption
services—and data recovery features. The disk management features are covered later in this
chapter. The data recovery features are covered in Chapter 14, “Performing System Recovery
Functions.”
The main drawback of using NTFS is that only the Windows NT, Windows 2000, Win-
dows XP, and Windows Server 2003 operating systems recognize the NTFS file system. If your
computer dual-boots with other operating systems, such as Windows 98, the NTFS partition
will not be recognized.
You should also be aware that there are several different versions of NTFS. Windows 2000 (all
versions) uses NTFS 3.0. Windows XP and Windows Server 2003 use NTFS 3.1. NTFS versions 3.0
and 3.1 use similar disk formats, so Windows 2000 computers can access NTFS 3.1 volumes and
Windows XP computers can access NTFS 3.0 volumes. The features of NTFS 3.1 include:
The ability to specify disk quotas on a per-volume basis. Quota levels are stored on NTFS
volumes with three quota attributes: off, tracking, and enforced.
When files are read or written to a disk, they can be automatically encrypted and decrypted.
Reparse points that are used with mount points to redirect data as it is written or read from
a folder to another volume or physical disk.
Support for sparse files, which is used by programs that create large files, but only allocate
disk space as needed.
If you are upgrading Windows NT Workstation 4 to Windows XP Professional
or will dual-boot Windows XP Professional with any version of Windows NT 4,
you will need to apply Service Pack 4 or higher to the Windows NT 4 operating
system. Windows NT 4 used a version of NTFS that is incompatible with
Windows XP Professional. The Service Pack updates the
Ntfs.sys
file, which
makes Windows NT 4 compatible with NTFS 3.1.
File System Conversion
In Windows XP, you can convert both FAT16 and FAT32 partitions to NTFS. File system
conversion is the process of converting one file system to another without the loss of data. If you
format a drive as another file system, as opposed to converting that drive, all the data on that
drive will be lost.
To convert a partition, you use the
Convert
command-line utility. The syntax for the
Convert
command is as follows:
Convert [drive:] /fs:ntfs
For example, if you wanted to convert your D: drive to NTFS, you would type the following
from a command prompt:
Convert D: /fs:ntfs
Simpo PDF Merge and Split Unregistered Version -
Copyright ©2003 SYBEX Inc., 1151 Marina Village Parkway, Alameda, CA 94501.
COPYING PROHIBITED
www.sybex.com
282
Chapter 8
Managing Disks
When the conversion process begins, it will attempt to lock the partition. If the partition
cannot be locked—perhaps because the partition contains the Windows XP operating system
files or the system’s page file—the conversion will not take place until the computer is
restarted.
You can use the
/v
switch with the
Convert
command. This switch specifies
that you want to use verbose mode, and all messages will be displayed during
the conversion process. You can also use the
/NoSecurity
switch, which
specifies that all converted files and folders will have no security applied by
default so they can be accessed by anyone.
In Exercise 8.1, you will convert your D: drive from FAT16 to NTFS.
If you choose to convert a partition from FAT or FAT32 to NTFS, and the
conversion has not yet taken place, you can cancel the conversion by editing
the Registry with the
REGEDIT
command. The key that needs to be edited is
HKEY_LOCAL_MACHINE\System\CurrentControlSet\Control\SessionManager
.
The value needs to be changed from
autoconv
\DosDevices\x:
/FS:NTFS
to
autocheck
autochk*
.
Configuring Disk Storage
Windows XP Professional supports two types of disk storage: basic storage and dynamic
storage. Basic storage is backward compatible with other operating systems and can be
configured to support up to four partitions. Dynamic storage is supported by Windows 2000,
Windows XP, and Windows Server 2003 and allows storage to be configured as volumes. The
following sections describe the basic storage and dynamic storage configurations.
EXERCISE 8.1
Converting a FAT16 Partition to NTFS
1.
Copy some folders to the D: drive.
2.
Select Start
All Programs
Accessories
Command Prompt.
3.
In the Command Prompt dialog box, type
Convert
D:
/fs:ntfs
and press Enter.
4.
After the conversion process is complete, close the Command Prompt dialog box.
5.
Verify that the folders you copied in step 1 still exist on the partition.
Simpo PDF Merge and Split Unregistered Version -
Copyright ©2003 SYBEX Inc., 1151 Marina Village Parkway, Alameda, CA 94501.
COPYING PROHIBITED
www.sybex.com
Configuring Disk Storage
283
Basic Storage
Basic storage
consists of primary and extended partitions. The first partition that is created on a
hard drive is called a
primary partition
, and is usually represented as drive C:. Primary parti-
tions use all of the space that is allocated to the partition and use a single drive letter to represent
the partition. Each physical drive can have up to four partitions. You can set up four primary
partitions, or you can have three primary partitions and one extended partition. With an
extended partition
, you can allocate the space however you like, and each sub-allocation of
space is represented by a different drive letter. For example, a 500MB extended partition could
have a 250MB D: partition and a 250MB E: partition.
At the highest level of disk organization, you have a physical hard drive. You
cannot use space on the physical drive until you have logically partitioned
the physical drive. A
partition
is a logical definition of hard drive space.
One of the advantages of using multiple partitions on a single physical hard drive is that
each partition can have a different file system. For example, the C: drive might be FAT32 and
the D: drive might be NTFS. Multiple partitions also make it easier to manage security
requirements.
Laptop computers support only basic storage.
Dynamic Storage
Dynamic storage
is a Windows XP feature that consists of a
dynamic disk
divided into dynamic
volumes
. Dynamic volumes cannot contain partitions or logical drives, and they are not
accessible through DOS.
Dynamic storage supports three dynamic volume types: simple volumes, spanned volumes, and
striped volumes. These are similar to disk configurations that were used with Windows NT Work-
station 4. However, if you’ve upgraded from NT Workstation 4, you are using basic storage, and
you can’t add volume sets. Fortunately, you can upgrade from basic storage to dynamic storage,
as explained in the “Upgrading a Basic Disk to a Dynamic Disk” section later in this chapter.
To set up dynamic storage, you create or upgrade a basic disk to a dynamic disk. Then you create
dynamic volumes within the dynamic disk. You create dynamic storage with the Windows XP Disk
Management utility, which is discussed after the descriptions of the dynamic volume types.
Simple Volumes
A
simple volume
contains space from a single dynamic drive. The space from the single drive
can be contiguous or noncontiguous. Simple volumes are used when you have enough disk
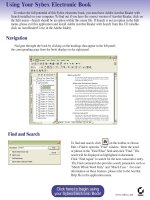
space on a single drive to hold your entire volume. Figure 8.1 illustrates two simple volumes
on a physical disk.
Simpo PDF Merge and Split Unregistered Version -
Copyright ©2003 SYBEX Inc., 1151 Marina Village Parkway, Alameda, CA 94501.
COPYING PROHIBITED
www.sybex.com
284
Chapter 8
Managing Disks
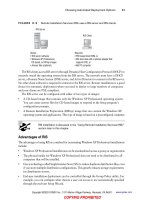
FIGURE 8.1 Two simple volumes
Spanned Volumes
A spanned volume consists of disk space on two or more dynamic drives; up to 32 dynamic drives
can be used in a spanned volume configuration. Spanned volume sets are used to dynamically
increase the size of a dynamic volume. When you create spanned volumes, the data is written
sequentially, filling space on one physical drive before writing to space on the next physical
drive in the spanned volume set. Typically, administrators use spanned volumes when they are
running out of disk space on a volume and want to dynamically extend the volume with space
from another hard drive.
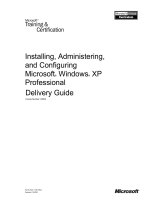
You do not need to allocate the same amount of space to the volume set on each physical
drive. This means you could combine a 500MB partition on one physical drive with two 750MB
partitions on other dynamic drives, as shown in Figure 8.2.
FIGURE 8.2 A spanned volume set
Because data is written sequentially, you do not see any performance enhancements with
spanned volumes as you do with striped volumes (discussed next). The main disadvantage of
Physical Disk 0
20GB
Simple Volume C:\
10GB
Simple Volume D:\
10GB
Physical Disk 0
1GB
Physical Disk 1
500MB
Physical Disk 2
750MB
Physical Disk 3
750MB
Data written
sequentially
Spanned Volume Set D:\
Simpo PDF Merge and Split Unregistered Version -
Copyright ©2003 SYBEX Inc., 1151 Marina Village Parkway, Alameda, CA 94501.
COPYING PROHIBITED
www.sybex.com
Using the Disk Management Utility
285
spanned volumes is that if any drive in the spanned volume set fails, you lose access to all of the
data in the spanned set.
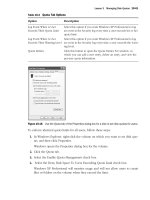
Striped Volumes
A striped volume stores data in equal stripes between two or more (up to 32) dynamic drives,
as illustrated in Figure 8.3. Since the data is written sequentially in the stripes, you can take
advantage of multiple I/O performance and increase the speed at which data reads and writes
take place. Typically, administrators use striped volumes when they want to combine the space
of several physical drives into a single logical volume and increase disk performance.
FIGURE 8.3 A striped volume set
The main disadvantage of striped volumes is that if any drive in the striped volume set fails,
you lose access to all of the data in the striped set.
Mirrored volumes and RAID-5 volumes are fault-tolerant dynamic disk con-
figurations. These options are available only with Windows 2000 Server and
Windows Server 2003.
If you created a multidisk volume—such as a spanned, mirrored, or striped
set, or a striped set with parity—with Windows NT 4 or earlier, they are not
supported by Windows XP Professional or Windows Server 2003.
Using the Disk Management Utility
The Disk Management utility is a graphical tool for managing disks and volumes within the
Windows XP environment. In this section, you will learn how to access the Disk Management
utility and use it to manage basic tasks, basic storage, and dynamic storage. You will also learn
about troubleshooting disks through disk status codes.
To have full permissions to use the Disk Management utility, you must be logged on with
Administrative privileges. To access the utility, right-click My Computer from the Start menu
Striped Volume Set D:\
Physical Disk 1
Data
Physical Disk 2
Data
Physical Disk 3
Data
Simpo PDF Merge and Split Unregistered Version -
Copyright ©2003 SYBEX Inc., 1151 Marina Village Parkway, Alameda, CA 94501.
COPYING PROHIBITED
www.sybex.com
286
Chapter 8
Managing Disks
and select Manage, then in Computer Management, select Disk Management. You could also
use Control Panel Performance and Maintenance Administrative Tools Computer Man-
agement. Expand the Storage folder to see the Disk Management utility. The Disk Management
utility’s opening window, shown in Figure 8.4, shows the following information:
The volumes that are recognized by the computer
The type of disk, either basic or dynamic
The type of file system used by each partition
The status of the partition and whether the partition contains the system or boot partition
The capacity (amount of space) allocated to the partition
The amount of free space remaining on the partition
The amount of overhead associated with the partition
FIGURE 8.4 The Disk Management window
You can also add Disk Management as a Microsoft Management Console
(MMC) snap-in, as described in Chapter 4.
Windows XP Professional includes a new command-line utility called Diskpart,
which can be used as a command-line alternative to the Disk Management
utility. You can view all of the options associated with the Diskpart utility by
typing Diskpart /? from a command prompt.
Simpo PDF Merge and Split Unregistered Version -
Copyright ©2003 SYBEX Inc., 1151 Marina Village Parkway, Alameda, CA 94501.
COPYING PROHIBITED
www.sybex.com
Using the Disk Management Utility
287
Managing Basic Tasks
With the Disk Management utility, you can perform a variety of basic tasks. These tasks are
discussed in the sections that follow:
View disk properties.
View volume and local disk properties.
Add a new disk.
Create partitions and volumes.
Upgrade a basic disk to a dynamic disk.
Change a drive letter and path.
Delete partitions and volumes.
Viewing Disk Properties
To view the properties of a disk, right-click the disk number in the lower panel of the Disk
Management main window (see Figure 8.4) and choose Properties from the pop-up menu. This
brings up the Disk Properties dialog box. Click the Volumes tab to see the volumes associated
with the disk, as shown in Figure 8.5, which contains the following disk properties:
The disk number
The type of disk (basic, dynamic, CD-ROM, removable, DVD, or unknown)
The status of the disk (online or offline)
The capacity of the disk
The amount of unallocated space on the disk
The logical volumes that have been defined on the physical drive
FIGURE 8.5 The Volumes tab of the Disk Properties dialog box
Simpo PDF Merge and Split Unregistered Version -
Copyright ©2003 SYBEX Inc., 1151 Marina Village Parkway, Alameda, CA 94501.
COPYING PROHIBITED
www.sybex.com
288
Chapter 8
Managing Disks
If you click on the General tab of Disk Properties, the hardware device type, the
hardware vendor who produced the drive, the physical location of the drive,
and the device status are displayed.
Viewing Volume and Local Disk Properties
On a dynamic disk, you manage volume properties. On a basic disk, you manage local disk
properties. Volumes and local disks perform the same function, and the options discussed in the
following sections apply to both. (The examples here are based on a dynamic disk using a simple
volume. If you are using basic storage, you will view the local disk properties rather than
the volume properties.)
To see the properties of a volume, right-click the volume in the upper panel of the Disk
Management main window and choose Properties. This brings up the volume Properties dialog
box. Volume properties are organized on six tabs: General, Tools, Hardware, Sharing, Security,
and Quota. The Security and Quota tabs appear only for NTFS volumes. All these tabs are
covered in detail in the following sections.
If the Security and Sharing tabs do not appear for your NTFS partition, and you
are not a part of a domain, then Simple File Sharing is probably enabled, which
will keep this option from appearing. To disable Simple File Sharing, from My
Computer, select Tools, then Folder Options. In Advanced Settings on the View
Tab, clear the box for Use Simple File Sharing (Recommended).
General
The information on the General tab of the volume Properties dialog box, as seen in Figure 8.6,
gives you a general idea of how the volume is configured. This dialog box shows the label, type,
file system, used and free space, and capacity of the volume. The label is shown in an editable
text box, and you can change it if desired. The space allocated to the volume is shown in a
graphical representation as well as in text form.
The label on a volume or local disk is for informational purposes only. For example,
depending on its use, you might give a volume a label such as APPS or ACCTDB.
The Disk Cleanup button starts the Disk Cleanup utility, with which you can delete unnecessary
files and free disk space. This utility is discussed later in this chapter in the “Using the Disk
Cleanup Utility” section.
Tools
The Tools tab of the volume Properties dialog box, shown in Figure 8.7, provides access to three tools:
Click the Check Now button to run the Check Disk utility to check the volume for errors.
You would do this if you were experiencing problems accessing the volume, or if the
volume had been open during a system restart that did not go through a proper shutdown
sequence. This utility is covered in more detail in “Troubleshooting Disk Devices and
Volumes” later in this chapter.
Simpo PDF Merge and Split Unregistered Version -
Copyright ©2003 SYBEX Inc., 1151 Marina Village Parkway, Alameda, CA 94501.
COPYING PROHIBITED
www.sybex.com
Using the Disk Management Utility
289
Click the Defragment Now button to run the Disk Defragmenter utility. This utility defrag-
ments files on the volume by storing the files contiguously on the hard drive. Defragmentation
is discussed later in this chapter, in the “Defragmenting Disks” section.
Click the Backup Now button to run the Backup or Restore Wizard, which steps you
through backing up the files on the volume. Backup procedures are covered in Chapter 14.
FIGURE 8.6 General properties for a volume
FIGURE 8.7 The Tools tab of the volume’s Properties dialog box
Simpo PDF Merge and Split Unregistered Version -
Copyright ©2003 SYBEX Inc., 1151 Marina Village Parkway, Alameda, CA 94501.
COPYING PROHIBITED
www.sybex.com
290
Chapter 8
Managing Disks
Hardware
The Hardware tab of the volume Properties dialog box, shown in Figure 8.8, lists the hardware
associated with the disk drives that are recognized by the Windows XP Professional operating
system. The bottom half of the dialog box shows the properties of the device that is highlighted
in the top half of the dialog box.
FIGURE 8.8 The Hardware tab of the volume Properties dialog box
For more details about a hardware item, highlight it and click the Properties button in the
lower-right corner of the dialog box. This brings up a Properties dialog box for the item (for
example, Figure 8.9). With luck, your Device Status field will report that “This device is working
properly.” If that’s not the case, you can click the Troubleshoot button to get a troubleshooting
wizard that will help you discover what the problem is.
Sharing
In the Sharing tab of the volume Properties dialog box, shown in Figure 8.10, you can specify
whether or not the volume is shared. All volumes are shared by default. The share name is the
drive letter followed by a $ (dollar sign). The $ indicates that the share is hidden. From this
dialog box, you can set the user limit, permissions, and cacheing for the share. Sharing is covered
in Chapter 9, “Accessing Files and Folders.”
Security
The Security tab of the volume Properties dialog box, shown in Figure 8.11, appears only for
NTFS volumes. The Security tab is used to set the NTFS permissions for the volume.
Simpo PDF Merge and Split Unregistered Version -
Copyright ©2003 SYBEX Inc., 1151 Marina Village Parkway, Alameda, CA 94501.
COPYING PROHIBITED
www.sybex.com
Using the Disk Management Utility
291
FIGURE 8.9 A disk drive’s Properties dialog box accessed through the Hardware tab of
the volume Properties dialog box
FIGURE 8.10 The Sharing tab of the volume Properties dialog box
Simpo PDF Merge and Split Unregistered Version -
Copyright ©2003 SYBEX Inc., 1151 Marina Village Parkway, Alameda, CA 94501.
COPYING PROHIBITED
www.sybex.com