Setting Up LAMP Getting Linux, Apache, MySQL, and PHP Working Together phần 8 doc
Bạn đang xem bản rút gọn của tài liệu. Xem và tải ngay bản đầy đủ của tài liệu tại đây (1.1 MB, 42 trang )
272
Chapter 9 • MySQL: Installation and Administration
Here you can see your first table had been correctly inserted into the database.
Now take a look at the details of the table by using a new command, DESCRIBE:
DESCRIBE food;
You should then be given a result as follows:
+ + + + + + +
| Field | Type | Null | Key | Default | Extra |
+ + + + + + +
| food_id | int(11) | YES | | NULL | |
| food_name | varchar(30) | YES | | NULL | |
| expiration_date | date | YES | | NULL | |
+ + + + + + +
3 rows in set (0.01 sec)
Here, formatted nicely with ASCII characters, you can see each column name listed along
with its type, null, key, default, and extra values. These values call all be changed through other
commands and during the table creation. Because of the complex nature of the many possibil-
ities of MySQL, we will not be covering this in depth.
Now that you have your table, drop the table:
DROP TABLE food;
You can follow it up with this command:
DROP DATABASE test;
You will once again have a clean installation with only your mysql database installed. With
these exercises completed, you will be ready to move on to administering users within MySQL.
Creating and Administering Users
If you are logged in to the MySQL Client, go ahead and quit so you can reenter by using a
database from the command line. Because all privileges and user accounts are modified
through the mysql database, use the following command to launch the client:
/usr/local/mysql/bin/mysql -u root mysql -p
After you have entered your password, you will once again be brought into the database, but
this time you will receive a slightly different message letting you know that MySQL has read
the table information into memory for quicker queries.
In this section, we will show you several GRANT statements that allow for varying levels of
access to be assigned to a user. The first one we will show you is the way to create a super user,
someone who has access to all commands for all databases and tables as well as the ability to cre-
ate new users.
4337Book.fm Page 272 Saturday, June 19, 2004 5:24 PM
Simpo PDF Merge and Split Unregistered Version -
273
Performing MySQL Administration
The following is the correct syntax for a user named eric with a password of inst1234 who
is allowed to access the system from localhost only:
GRANT ALL PRIVILEGES ON *.* TO 'eric'@'localhost'
IDENTIFIED BY 'inst1234' WITH GRANT OPTION;
Using the GRANT command does not require that you use that PASSWORD() function because
it is already taken care of for you. You will not need to use the
FLUSH PRIVILEGES command
either, as you would normally need to if you were to use a direct INSERT statement.
The syntax of the preceding GRANT statement is to use GRANT and then pass in the privileges.
Next you specify ON, followed by which databases and tables you are granting privileges to.
Then you use TO, followed by the username @ hostname. You can choose to leave off this option
because most users will not need to grant privileges to other users.
Here is another example of creating a new user. This is much like the previous example but
instead provides access only to all tables on one specific database and does not enable the user
to grant privileges:
GRANT ALL PRIVILEGES ON test.* TO 'eric'@'localhost' IDENTIFIED BY 'inst1234';
This example is easy enough to follow; we simply changed the wildcard where the database
name was to an actual database and left off the WITH statement. You could further narrow their
restrictions by replacing the wildcard located after the database name with a table name. This
would only allow the given user access to that single table.
Now let’s take a look at another way to create an account. This example creates an account with
no access but to use the MySQL Server, and this user doesn’t require a password to connect:
GRANT USAGE ON *.* TO 'eric'@'localhost';
That’s all there is to it—very simple.
Next you’ll be looking into a more practical application. You do not want all users to have all
privileges or no privileges for your database server. More than likely you will want them to be
able to administer the databases they have access to, but no more. To do so, you can replace the
ALL PRIVILEGES or USAGE portion with a comma-separated list of the privileges you wish grant.
The following is a typical setup for the eric user identified by a password of inst1234 who
can use the server from any subdomain of mydomain.com. Notice you will need to use a wildcard
here, and in MySQL the wildcard symbol for this instance is a percent symbol (%). The eric
user will have access only to the freak database:
GRANT SELECT,INSERT,UPDATE,DELETE,CREATE,DROP ON freak.* TO 'eric'@'localhost'
IDENTIFIED BY 'inst1234';
Easy enough.
4337Book.fm Page 273 Saturday, June 19, 2004 5:24 PM
Simpo PDF Merge and Split Unregistered Version -
274
Chapter 9 • MySQL: Installation and Administration
You are now ready to create new users at will for your MySQL Server. After creating a few
test users, though, you might wish to delete them. To do so, you use the REVOKE command in
addition to the DROP USER statement. These need to be performed in order to ensure that the
user is completely eradicated. First you will need to REVOKE all privileges associated with a user:
REVOKE ALL PRIVILEGES ON *.* FROM 'eric'@'localhost';
REVOKE GRANT OPTION ON *.* FROM 'eric'@'localhost';
This user will no longer have any privileges on the system including the GRANT ability. After
this is complete, you will need to use the following:
DELETE FROM mysql.user WHERE User='eric';
FLUSH PRIVILEGES;
This removes all users named eric from any host. After you have completed the deletion,
flush the privileges to force MySQL to reload all privileges. With that done, you are now ready
to begin administering the users of your MySQL Server.
Backing Up and Restoring Databases
The easiest and most efficient way to perform a backup of a database or all databases is by using
the mysqldump command we covered earlier in this chapter. We talked about how you can spec-
ify all-databases or any number of databases and tables. For the purpose of this chapter, we
will be running a backup of all databases. You might wish to perform a backup of some databases
more often then others. It is now up to you, the system administrator, to judge how important
your data is and determine how often you should back up that data. You can choose to have a
script run by the cron daemon if you wish or you can choose to back up the server manually. We
of course recommend using an automated script because the human memory is anything but
infallible.
The command you should be using within your script to back up all databases should read
like the following:
mysqldump -uuser -ppassword all-databases > /path/to/backup/dir/filename.sql
This will ensure that all of your databases are then backed up to the location you specify.
Additionally, the backup script you have already created, if following along with the book, will
backup these backup files to your remote server for safe keeping. You might wish, however, to
dump each database individually rather than all together. This makes it easier to rebuild your
database(s) should anything go wrong. You can use a command similar to the following:
mysqldump flush-logs quick add-drop-table extended-insert add-locks
-uusername -ppassword database > /path/to/backup/dir/filename.sql
NOTE
You might also wish to create a separate user who has only the SELECT and LOCK TABLES
privileges just for the purposes of backing up your databases.
4337Book.fm Page 274 Saturday, June 19, 2004 5:24 PM
Simpo PDF Merge and Split Unregistered Version -
275
Performance and Replication
Restoring your database is nearly as simple, and you will be happy to know that you can recover
to an even more recent state then your last backup. However you must have the log-bin
option enabled when running the server. To do so, simply place the directive in your /etc/
my.cnf
file. All changes made to the database will then be saved in hostname-bin.xxx files.
To perform a full recovery, if you have dumped each database individually, first locate your
most recent mysqldump files and perform the following command for each database that needs
to be recovered:
mysql -uuser -p database < filename.sql
This will then return your database to the state it was during the last backup. To bring your
database, further up-to-date you can then use the following command to execute all binary
(bin), logs on your database:
mysqlbinlog hostname-bin.[0-9]* | mysql -uuser -p
Enter your password when prompted, and all queries will then be run on your database.
NOTE
The preceding statement will execute all bin logs on your database. For practical applica-
tion, you will want to locate the file that has the closest date to your backup and use the
bin logs starting from that point.
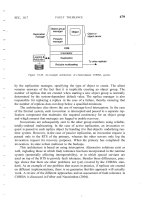
Performance and Replication
Performance and replication can be a complicated issue. With thousands, if not millions, of pos-
sible setups, each installation is unique. Truly tuning a server to reach maximum performance
requires an understanding of the entire system. This type of understanding reaches a level that
is beyond the scope of this book. (See Appendix C, “Getting Support,” for a list of books and
other resources.) For now, we are going to cover some of the more simple procedures and meth-
ods of using multiple database servers through replication via a master/slave approach.
Replication enables you to run multiple database servers that share the same information. For
large-scale projects, this becomes necessary in order to keep queries down to acceptable speeds.
If your single database server is being backlogged with requests, and you have made every effort
to optimize your queries by adding additional indexes and perhaps additional reference tables
for quicker lookups, it is time to consider using replication to enhance your application.
Replication is accomplished by MySQL by having the master server keep track of all changes.
Therefore, it is necessary to have binary logging enabled for your master server. Each slave
server then receives these logging statements from the master server so that it can process the
same commands on itself. Remember that the binary log stores only queries and statements
that have actually modified data. This prevents a slave server from running needless queries
taking up valuable resources.
4337Book.fm Page 275 Saturday, June 19, 2004 5:24 PM
Simpo PDF Merge and Split Unregistered Version -
276
Chapter 9 • MySQL: Installation and Administration
When setting up your slave servers, you must have an exact copy of each database to be rep-
licated in place on each slave server. This way, when the binary log makes a change, each data-
base on each slave server will be an exact duplicate. To do this, you can use the LOAD DATA FROM
MASTER
command. This command uses a global lock on the master server to ensure that all data
is replicated at that point in time. This works only for MyISAM tables, however, and you will
need to specify additional privileges your slave account on the master. After you use this com-
mand, the slave transfers all data from the master. Then, after the slave is started, it establishes
a connection and waits for any additional data that is written to the binary log file. If the server
for some reason loses its connection, it will attempt to reestablish that connection every 60 sec-
onds. You can change this by using the master-connect-retry directive.
NOTE
The master is never aware of how many slave servers are present.
Understanding How Replication Threads Work
Before you begin issuing commands to set up your master and slave servers, let’s take a closer
look at how replication works in regard to threads. On the master server, there will be one
thread for each slave. Each of these threads is referred to as the BinLog Dump thread and it is
in charge of sending each new statement that updates data to a slave. Each slave server will run
two additional threads: I/O and SQL. The I/O thread is the thread that connects to the master
server and receives the commands from the BinLog Dump thread. These commands are then
copied to local files for processing by the SQL thread. These files are called relay logs.
Using these two separate slave threads enables the slave server to separate the reading and
execution of the statements. Therefore, the reading of the statements from the master is not
slowed down by SQL’s ability to process these statements. This allows for a type of queue. To
view these threads later, after your installation is complete, you can use the SHOW PROCESSLIST
command. To make this a bit easier to read, try substituting the semicolon normally used to
end a command with \G. This will give you a vertical print for better human readability. Per-
forming this command on a slave server will give you an output similar to the following:
************************* 1. row *************************
Id: 10
User: system user
Host:
db: NULL
Command: Connect
Time: 11
State: Waiting for master to send event
Info: NULL
************************* 2. row *************************
Id: 11
User: system user
4337Book.fm Page 276 Saturday, June 19, 2004 5:24 PM
Simpo PDF Merge and Split Unregistered Version -
277
Performance and Replication
Host:
db: NULL
Command: Connect
Time: 11
State: Has read all relay log; waiting for the slave I/O
thread to update it
Info: NULL
In this example, thread 10 is your I/O thread, and thread 11 is your SQL thread. These
states, however, can change depending on what action they are performing. Your master
server’s BinLog Dump thread can have the following states:
Sending binlog event to slave This means that the master has received a statement that
has updated its binlog and it is currently sending this information to the slave.
Finished reading one binlog; switching to the next binlog This means that the master
server has finished reading a binlog and is opening the next to send to the slave.
Has sent all binlog to slave; waiting for binlog to be updated Quite verbose, this
means that the slave I/O thread has read all the statements sent by the master.
Waiting to finalize termination You will most likely not see this state appear because it
occurs for only the brief moment the thread is stopping.
Each thread has its own thread states that will be given. The slave I/O thread can have the
following states:
Connecting to master The thread is attempting to connect to the master.
Checking master version This status is displayed for a brief moment after a connection
with the master has been established.
Registering slave on master This status is displayed for a brief moment after a connec-
tion with the master has been established.
Requesting binlog dump This status is displayed for a brief moment after a connection with
the master has been established. This is the request to the master for the contents of its bin log.
Waiting to reconnect after a failed binlog dump request This state is displayed dur-
ing the time the thread is “asleep,” while it is waiting for the timeout to connect again.
Reconnecting after a failed binlog dump request The slave I/O thread is attempting to
reconnect to the master.
Waiting for master to send event This is the idle status of the thread. When the I/O
thread has read all the changes to the database and the master is not currently updating and
sending new events, the I/O thread will read this state.
4337Book.fm Page 277 Saturday, June 19, 2004 5:24 PM
Simpo PDF Merge and Split Unregistered Version -
278
Chapter 9 • MySQL: Installation and Administration
Queuing master event to the relay log The I/O thread has received a new event and is
currently writing it to the relay log.
Waiting to reconnect after a failed master event read An error has occurred in the
connection, and the thread is waiting for the appropriate timeout to occur so that it can
attempt to reconnect to the master.
Reconnecting after a failed master event read The thread is currently attempting to
reconnect.
Waiting for the slave SQL thread to free enough relay log space This means that the
SQL thread is currently backed up with work and that the relay log size has reached its max-
imum. This shows only if you have specifically set the relay log space limit.
Waiting for slave mutex on exit This is a brief state denoting the thread is stopping.
The last thread, the SQL thread, has the least amount of states because of its single purpose
of processing events from the relay log. Listed here are its states:
Reading an event from the relay log The thread is reading an event from the relay log
for processing.
Has read all relay log; waiting for the slave I/O thread to update it All events from
the relay log have been processed. This is the SQL thread’s idle state.
Waiting for slave mutex on exit This is a brief state denoting the thread is stopping.
Introduction to Replication Application
With an understanding of how MySQL database replication works and an insight into the
responsibilities of each applicable thread, you can now take a look at the process for creating
a replication setup. This is not the only way to set up replication; there are many techniques.
It will, however, give you a straightforward method that works.
1. First, you must have valid installations of MySQL on each server for your replication pro-
cess. We will be using two servers, but you can use as many as you wish, performing the
actions on each slave server when we perform them on our single slave server.
2. Next you will need to make a few changes to your my.cnf files if they do not already exist.
On your master server you should have /etc/my.cnf, including the following two lines:
[mysqld]
log-bin
server_id=1
This will enable the bin logs as we discussed earlier as well as provide this server with a unique
ID. Remember that each server must have a unique ID and be an integer from 1 to 2
32
. On
4337Book.fm Page 278 Saturday, June 19, 2004 5:24 PM
Simpo PDF Merge and Split Unregistered Version -
279
Performance and Replication
each slave server you will need to add a server_id value to the /etc/my.cnf files as well. After
you have made these changes, restart each of the servers so that the changes will take effect.
3. Next, you will need to set up an account on the master server that the slave will be using to
connect. A special privilege is required for this user, called REPLICATION SLAVE. Because you
will be using this account for replication only, you do not need to assign any additional priv-
ileges. If you are using more than one slave server, you do not need to create multiple users.
In this example, you will be creating a user named slave_account with a password of yes_
master.
You should make sure that this slave server can access the master only from the
domain it resides in, which will be mydomain.com. To create the account, you will be using
the MySQL Client. Log in as the root user and issue the following GRANT command:
GRANT REPLICATION SLAVE ON *.*
TO 'slave_account'@'mydomain.com'
IDENTIFIED BY 'yes_master';
NOTE
Remember that if you are planning on using the LOAD DATA FROM MASTER command on your
slave, you will need to add additional privileges to the account. You should grant the SUPER
and RELOAD privileges to this account in addition to SELECT privileges for each table that
will be replicated. For the purposes of this book, we will be using the tar command to copy
our database so we will not be assigning these privileges.
4. Now, with your user created, you will need to lock the current state of your database. Per-
form the following:
FLUSH TABLES WITH READ LOCK;
This prevents any changes from taking effect while you tar the database and transfer it to
your slave server(s).
WARNING
If you exit the MySQL Client in this terminal (or terminal window) it may cause MySQL to
remove the read lock. It is recommended that you open a new terminal and stay connected
the MySQL Client.
5. With the database locked, open a new terminal window or switch to a different terminal
and move into the /usr/local/mysql/var directory.
6. Perform the following:
tar -cvf /tmp/mysql.snapshot.1.tar .
This backs up your database to the tmp directory. If you wish to use only a specific database,
then use the tar command to tar only that database. You might also wish to exclude the mysql
database from your tar so that the user accounts and privileges will not be transferred over.
4337Book.fm Page 279 Saturday, June 19, 2004 5:24 PM
Simpo PDF Merge and Split Unregistered Version -
280
Chapter 9 • MySQL: Installation and Administration
7. Return to MySQL Client and use this command:
SHOW MASTER STATUS;
This presents you with the bin log file and offset where the newest record is currently
located for your snapshot.
8. Write this information down! You will need it later. The printed results should look similar
to the following:
+ + + + +
| File | Position | Binlog_Do_DB | Binlog_Ignore_DB |
+ + + + +
| mysql-bin.003 | 73 | test,bar | foo,manual,mysql |
+ + + + +
Here you see the current file is mysql-bin.003, and the offset is 73.
1. Now you can unlock the tables by using this command:
UNLOCK TABLES;
2. Transfer the /tmp/mysql.snapshot.1.tar file to each of your slave servers’ /tmp directories.
You can choose any manner you wish to do this.
3. Move into your slave servers’ data directories and untar the file and restart the servers.
4. Log in to the MySQL Client for each slave and perform the following command:
CHANGE MASTER TO
MASTER_HOST='masterHostName',
MASTER_USER='slave_account',
MASTER_PASSWORD='yes_master',
MASTER_LOG_FILE='recorded binlog name',
MASTER_LOG_POS=recordedOffset;
The recorded binlog name is the name of the bin log file from the master server you
received from performing the SHOW MASTER STATUS command. The recorded offset is the
offset you received from the same print statement.
5. Run the following to place your slave server in action:
START SLAVE;
After you have completed this for each slave server, you will have a robust solution scalable
to almost any size. If you would like to further customize your replication setup, you should
look into the startup directives in Appendix B.
4337Book.fm Page 280 Saturday, June 19, 2004 5:24 PM
Simpo PDF Merge and Split Unregistered Version -
281
MySQL Installation and Administration Checklist
6. You should add the following lines to your my.cnf file to ensure that if your server has to
be rebooted or MySQL restarted, everything will come back online properly:
[mysqld]
server-id=serverID
master-host=masterHost
master-port=3306
master-user=slaveUser
master-password=slavePassword
master-connect-retry=60
MySQL Installation and Administration Checklist
Congratulations on completing this chapter. We have covered a myriad of administrative tasks
for your new MySQL Server as well as the entire installation process. As always, you should
review the bullet points below and make sure you have a firm understanding of each of them.
If you feel weak in any areas, don’t be afraid to go back and experiment with creating and
removing users, databases, and so on. A little practice goes a long way, and it is better to change
things now before pushing your server into live usage.
You should now be familiar with the following:
● Know the differences between a database and flat files.
● Understand the limitations and advantages of MySQL.
● Know how to read the MySQL documentation.
● Download, install, and configure MySQL from source.
● Use the various command-line operations provided by the MySQL installation.
● Administer databases and users.
● Back up and restore databases.
● Set up database replication.
In the next chapter, we will cover the final piece of required software to bring your LAMP
server together: PHP. You’ve almost made it through your entire LAMP installation so
there’s no need to slow down now. Take a deep breath, relax, and you’ll be ready to head into
Chapter 10, “PHP: Installation and Configuration.”
4337Book.fm Page 281 Saturday, June 19, 2004 5:24 PM
Simpo PDF Merge and Split Unregistered Version -
4337Book.fm Page 282 Saturday, June 19, 2004 5:24 PM
Simpo PDF Merge and Split Unregistered Version -
Chapter 10
PHP: Installation and
Configuration
•
Why Use PHP?
•
PHP Versions
•
Installing PHP
•
The PHP INI File
4337Book.fm Page 283 Saturday, June 19, 2004 5:24 PM
Simpo PDF Merge and Split Unregistered Version -
284
Chapter 10 • PHP: Installation and Configuration
A
t this point, your LAMP setup is almost complete if you have been following along in the
book. You have nearly all of the elements in place to complete your LAMP acronym. Now
all you have to do is install and configure PHP and you will be on your way to running a full-
blown LAMP server.
PHP has been around for many years and has become a fully featured and mature program-
ming language. If you are curious about PHP’s development, please refer to Chapter 1, “Intro-
ducing LAMP”; otherwise, let’s get moving along so you can learn why you should use PHP
and the important features it has to offer.
Why Use PHP?
Simply stated, PHP is the fastest parsing server-side scripting language available. ASP and Java
both require separate objects to be instantiated to accomplish almost any task. For instance, in
ASP when a programmer uses VBScript, he is running a COM (Component Object Model)
object. When he writes to the client, he’s calling the
Response
COM object’s
Write
method.
When he accesses a database, he uses another COM object. Then when he accesses the filesys-
tem, yet another COM object is called. Because of this, more and more resources are required
to perform tasks. When hundreds or even thousands of users are accessing these pages and func-
tionality, all this overhead adds up fast and significantly reduces system performance and speed.
PHP, however, accomplishes all the preceding tasks entirely in PHP’s own memory space. This
of course uses drastically less resources.
Features, features, features: PHP comes installed with
tons
of support for features such as
FTP, data compression, file uploads, XML (eXtensible Markup Language), MD5, e-mail, and
so on. To enable these features in ASP, you would need to purchase expensive third-party
packages. These hidden costs, in our opinion, are simply unacceptable—and those are just the
basic options. PHP also offers complex functionality such as dynamic images, IMAP, SNMP,
dynamic Flash, PDF (Portable Document Format), native access to Oracle and other DBs,
LDAP (Lightweight Directory Access Protocol), and sockets. Not only that, PHP is actually
more mature than ASP. ASP has been around only since 1996, whereas PHP has been in devel-
opment since 1994.
Last is the cost factor. If you want to run ASP efficiently, you’ll want to run Windows, prob-
ably access Microsoft SQL, most likely want Visual Studio, and probably run IIS—money,
money, money, and poor performance when compared to Linux, Apache, MySQL, and PHP.
PHP, in a general sense and at its base level, is capable of creating dynamic web pages that
incorporate data from databases or other sources not found directly on those web pages. PHP
can also be run from the command line and can be used from
cron
jobs or even for client-side
GUI applications, although these last two abilities are rarely seen.
4337Book.fm Page 284 Saturday, June 19, 2004 5:24 PM
Simpo PDF Merge and Split Unregistered Version -
285
Installing PHP
The most likely reason for your PHP installation, however, is the ability to create client-side
scripts for websites. PHP makes it easy to integrate with virtually every database available, in
our case MySQL. PHP also makes efficient use of
POST
and
GET
variables sent through Apache
for easy integration and manipulation. This is handy for processing HTML forms for storage
into a database or sending an e-mail, and so on.
PHP Versions
PHP currently has two versions available: PHP 4.3.
x
and PHP 5.0. For this book we will be
using 5.0 because it introduces an abundance of optimizations and additional functionality not
seen in 4.3.
x
. PHP 5.0 also introduces Zend Engine 2. The new Zend engine has been com-
pletely rewritten to include an entirely new object model. The use of objects now includes a
wide variety of new functionality not previously seen, such as private and protected methods,
abstract classes and methods, interfaces, class type hints, object cloning, unified constructors,
destructors, exceptions, and more. This alone, for the object-oriented coder, is more than
enough reason to switch to PHP 5.0 from earlier versions.
For the procedural developers out there or for those who have less experience with PHP,
there are also a myriad of new functions and additions that apply to any coding methods and
standards. The XML system has been completely overhauled and will now support SimpleXML
and the DOM and Extensible Stylesheet Language (XSL) extensions. New
php.ini
options
have also been added, stream support has been improved, the GD Graphics Library extension
has been improved—too many functions to list have been added, and countless bugs have been
fixed.
Overall it’s a good idea to install PHP 5.0 over 4.3.
x
. If you would like a full list of all the
changes that have been made, you can visit the PHP site for more information and look for the
change log. We just wanted to give you some insight into why we chose 5.0 for this book.
Installing PHP
PHP is your final installation before your server is complete with its core functionality. Quite
a few directives can be specified both during compilation and in its configuration files. This
chapter will cover all of the more common options enabling PHP to run as needed. You will
probably need to go back and recompile PHP later, when you discover that you, or someone else
using your server, needs to add a new library for usage within a script. Do not worry, however—
after a couple of installations you’ll have it down to a science.
4337Book.fm Page 285 Saturday, June 19, 2004 5:24 PM
Simpo PDF Merge and Split Unregistered Version -
286
Chapter 10 • PHP: Installation and Configuration
Determining Configuration Options and Extensions
PHP itself comes with a large list of features for you to utilize. However, there are additional
features you can enable by using PHP extensions. An
extension
is a group of functions and rou-
tines that are considered
extra
in that you have to manually enable them during installation.
Usually, extensions require additional software installed before you can enable them.
Compiling extensions for PHP can be tricky. We recommend that if you do not need it, do
not install it. A common problem with most pre-built packages for PHP is that they come with
every extension installed; this reduces performance and, more important, could lead to a vul-
nerable system. If you can relate enabling extensions in PHP to opening ports on your system
firewall that are not needed, you will have a better picture of what we mean.
Now that we have those concerns out of the way, let’s take a look at
some
of the common
configuration directives and extensions available for PHP. Keep in mind that because of the
extremely long list of directives, we are covering only the most commonly used ones.
Common Configuration Directives
prefix=
PREFIX
This tells PHP to install all architecture-independent files into the supplied
directory location. By default this directory is
/usr/local
.
help
This prints a list of configuration directives.
no-create
This does not create output files.
quiet, silent
This tells the compiler not to print checking… messages.
version
This prints the version of
autoconf
that created the
configure
file.
Features and Packages
The following list details the flags used to enable, disable, and include or not include features
and packages in your PHP compilation.
disable-
FEATURE
Do not include
FEATURE
(same as
enable-
FEATURE
=no
).
enable-
FEATURE
[=
ARG
]
Include
FEATURE
[ARG=yes]
.
with-
PACKAGE
[=
ARG
]
Use
PACKAGE
[ARG=yes].
without-
PACKAGE
Do not use
PACKAGE
(same as
with-
PACKAGE
=no
).
Server Application Programming Interface (SAPI)
SAPI extensions handle interaction with the web server. Because this book is written for the
Apache web server, we will cover only the applicable extensions.
4337Book.fm Page 286 Saturday, June 19, 2004 5:24 PM
Simpo PDF Merge and Split Unregistered Version -
287
Installing PHP
with-apxs[=FILE] | with-axps2[=FILE]
The first of these tells PHP to compile as
a shared object for Apache 1.3; the second is used for Apache 2.0+.
with-apache[=DIR]
This tells PHP to compile as a built-in Apache module.
disable-cli
CLI
is the Command Line Interface. If you disable this, you will also disable
the PHP Extension Application Repository (PEAR).
disable-cgi
This disables building the CGI version of PHP.
enable-force-cgi-redirect
If you will be running the CGI version of PHP, you will
want to enable this feature. This tells Apache to perform a security check when using an
internal redirect.
General Settings
The below list provides you with settings and options that do not directly fit into any of the
other groupings we have provided:
enable-safe-mode
We will discuss this in more detail later in this chapter. In a nutshell,
PHP safe mode attempts to solve shared-server security problems.
enable-sigchild
This directive is needed only when you are connecting to Oracle 8.1.0+
via the Bequeeze interface. It enables PHP’s own
SIGCHLD
handler.
enable-magic-quotes
This enables magic quotes by default. The magic quotes feature
automatically adds backslashes to
POST
and
GET
variables on your site.
disable-ipv6
IPv6 is the new version of IP. It contains new functionality for future
expansions to IP architecture and is optimized for high-performance networks such as gigabit
and ATM (Asynchronous Transfer Mode) technology.
with-mysql-sock[=DIR]
This tells PHP to use the
mysql.sock
file located at the supplied
directory.
disable-session
This disables sessions in PHP.
Extensions
As we said earlier, extensions are the add-ons for PHP. Keep in mind that most of these will
require additional software installed, depending on your system configuration.
disable-all
As it says, this disables all PHP extensions.
with-inifile
This is new to 5.0 and enables you to specify Microsoft-style INI files.
4337Book.fm Page 287 Saturday, June 19, 2004 5:24 PM
Simpo PDF Merge and Split Unregistered Version -
288
Chapter 10 • PHP: Installation and Configuration
Database-Specific Directives
Each directive listed here compiles PHP with support for a different database server, or for a
set of functions or a library applicable to a certain database server. Each list item below will list
the long name for the database type.
enable-dba
Build PHP with built-in modules.
with-qdbm[=DIR]
Quick Database Manager.
with-gdbm[=DIR]
GNU’s interpretation of Database Manager.
with-ndbm[=DIR]
Neuros Database Manipulator.
with-db4[=DIR]
Berkeley DB4.
with-db3[=DIR]
Berkeley DB3.
with-db2[=DIR]
Berkeley DB2.
with-dbm[=DIR] Berkeley Database Manager.
with-cdb[=DIR] Common database.
enable-dbase dBASE.
enable-dbx A database abstraction layer implemented in C.
with-flatfile Flat-file database.
with-msql[=DIR] mSQL.
with-mysql[=DIR] MySQL.
with-mysqli[=FILE] Available as of PHP 5.0, this directive and adds support for func-
tions found in MySQL 4.1 and later that are not covered by the standard with-mysql.
enable-embedded-mysql This should be enabled if you are using the embedded MySQL
Server.
with-unixODBC[=DIR] This adds support for the standard ODBC library on a non-
Microsoft system.
with-dbmaker[=DIR] This provides support for DBMaker.
with-oracle[=DIR] This provides support for Oracle.
with-ovrimos[=DIR] This adds support for Oracle Ovrimos SQL functions.
without-sqlite This tells PHP to compile without SQLite, which comes prepackaged
as of PHP 5.0.
4337Book.fm Page 288 Saturday, June 19, 2004 5:24 PM
Simpo PDF Merge and Split Unregistered Version -
289
Installing PHP
with-pgsql[=DIR] This provides support for PostgreSQL.
enable-sqlite-utf8 This enables SQLite with the UTF-8 character set.
with-sybase[=DIR] Sybase database server.
with-sybase-ct[=DIR] This indicates the location of the Sybase CT (ClienT) library.
with-custom-odbc[=DIR] This tells PHP to look in the specified directory for a custom
ODBC library.
with-iodbc[=DIR] iODBC (Independent Open DataBase Connectivity) is another data-
base server available.
with-fbsql[=DIR] This provides FrontBase support.
enable-filepro This provides FilePro database support.
with-hwapi[=DIR] This provides support for Hyperwave, which is not free software.
Hyperwave is an information system similar to a database.
with-informix[=DIR] This provides support for the IBM Informix database.
with-ingres[=DIR] This adds Ingres II database support.
with-interbase[=DIR] This adds Borland InterBase database support.
with-oci8[=DIR] Oracle 8 Call Interface support.
with-adabas[=DIR] AG’s Adabas is a high-performance database that processes online
transactions.
with-sapdb[=DIR] SAP DB is a free, enterprise-class, open source database.
with-solid[=DIR] This includes Solid DB support.
with-ibm-db2[=DIR] Support for IBM’s DB2 database.
with-empress[=DIR] Support for Empress Software’s Empress Embedded Database.
with-birdstep[=DIR] Support for Birdstep Technology’s databases.
with-esoob[=DIR] This adds support for Easysoft OOB (ODBC-ODBC Bridge) soft-
ware, which is an ODBC gateway.
File-Handling and General Directives
This list will detail flags used to enable support for different types of file handling as well as
some of the more general directives:
with-bz2[=DIR] This provides support for the bzip2 compression library.
4337Book.fm Page 289 Saturday, June 19, 2004 5:24 PM
Simpo PDF Merge and Split Unregistered Version -
290
Chapter 10 • PHP: Installation and Configuration
with-zlib[=DIR] and with-zlib-dir[=DIR] zlib is a compression library which uses
the same compression algorithm as gzip.
with-openssl[=DIR] This compiles PHP with OpenSSL support.
enable-calendar This enables calendar support for PHP through the implementation
of date math.
disable-ctype This disables the standard C-library for PHP.
enable-bcmath This supplies number theory math functions to PHP.
XML
The flags in the below list allow for varying levels and functionality packages for XML to be
disabled or enabled:
disable-libxml This turns off support for XML.
with-libxml-dir[=DIR] This enables you to specify a custom directory for a PHP XML
library.
disable-dom This turns off Document Object Model support used by XML.
disable-simplexml This turns off simple XML support for PHP.
enable-soap SOAP (Simple Object Access Protocol) is much like XML Remote Proce-
dural Calls (XML-RPC) and is an XML-based remote procedure call.
disable-xml This completely disables all XML extensions.
with-libexpat-dir=DIR This enables a specific set of XML parser functions.
with-xmlrpc[=DIR] This enables XML-RPC.
with-ircg This provides support for XML real-time streaming.
Graphics, Fonts, and PDF
These options allow for graphics, font, and PDF functionality to be added to PHP:
enable-exif This enables Exchangeable Image File Format (EXIF) support.
with-cpdflib[=DIR] This adds the ClibPDF library.
with-jpeg-dir[=DIR] This enables functions used to manipulate JPEG files.
with-tiff-dir[=DIR] This enables functions used to manipulate TIFF files.
with-pdflib[=DIR] This enables basic functions used to manipulate PDF files.
with-png-dir[=DIR] This enables basic functions used to manipulate PNG files.
4337Book.fm Page 290 Saturday, June 19, 2004 5:24 PM
Simpo PDF Merge and Split Unregistered Version -
291
Installing PHP
with-ttf[=DIR] This provides TrueType font support.
with-gd[=DIR] This enables all graphics file formats covered in the GD library: GIF,
JPEG, PNG, SWF, TIFF, and JPEG2000.
with-freetype-dir[=DIR] This adds support for a popular free font engine called FreeType.
with-t1lib[=DIR] This library enables you to generate bitmaps from Type-1 fonts.
enable-gd-native-ttf This gives the GD library support for TrueType fonts.
enable-gd-jis-conv This allows the GD library, if enabled, to convert between Unicode
and JIS (Japanese Industry Standards) character encodings.
with-xpm-dir[=DIR] XPixMap consists of an ASCII image format and C library.
Other Protocols
Other miscellaneous protocols which do not fall into other categories:
with-curl[=DIR] cURL is a command-line tool used for transferring files with URL
syntax, which supports FTP, FTPS, HTTP, HTTPS, and so on. This is a common exten-
sion needed for many online payment gateways.
with-curlwrappers This is a set of wrappers used for cURL.
enable-dio This provides support for Direct I/O functions.
with-fam This is the Posadis monitor module.
enable-ftp This enables a set of client functions that can be used to interface with FTP
servers.
with-gettext[=DIR] This provides functionality for GNU’s gettext. It contains com-
mands to translate strings.
with-gmp[=DIR] This provides support for the GNU Multiple Precision Bignum library.
with-iconv[=DIR] This is another Unicode conversion library from GNU.
with-imap[=DIR] The IMAP library is used for mail procedures in PHP.
with-kerberos[=DIR] This compiles in Kerberos Network Authentication Protocol
support.
with-imap-ssl=[DIR] This provides support for IMAP with SSL.
with-ldap[=DIR] This provides support for the Lightweight Directory Access Protocol.
enable-mbstring This adds support for multi-byte strings and characters used in some
foreign languages.
4337Book.fm Page 291 Saturday, June 19, 2004 5:24 PM
Simpo PDF Merge and Split Unregistered Version -
292
Chapter 10 • PHP: Installation and Configuration
disable-mbregex This disables support for Multi-Byte Regex (JRegex and others).
with-libmbfl[=DIR] This provides more multibyte language support.
with-mcrypt[=DIR] This is a replacement for the old crypt() package, which is an old
Unix file-encryption method.
with-mcve[=DIR] This provides support for Main Street Softworks’ solution to direct
credit-card processing for Linux.
with-mhash[=DIR] Another GNU library, this provides functionality for large-number
hashing algorithms.
with-mime-magic[=FILE] Mime magic will try to determine a file type based on charac-
ters contained within the first part of a file.
with-ming[=DIR] This is a SWF (Small Web File) output library.
with-mnogosearch[=DIR] Lavtech.Com’s mnoGoSearch is a free search engine package.
with-mono This enables PHP to access .NET assemblies via the Mono library.
with-msession[=DIR] This enables PHP to communicate and control the msession
daemon if msession is running on your machine.
with-ncurses[=DIR] Ncurses displays and updates text on text-only machines.
enable-pcntl This enables process-control support in PHP.
without-pcre-regex Do not include built-in support for Perl-type Regex.
with-pfpro[=DIR] This directive enables the ability to use VeriSign Payflow Pro functions.
disable-posix This directive disables POSIX support.
with-pspell[=DIR] Provides spell-checking functionality for PHP.
with-libedit[=DIR] This non-GPL replacement for the Readline library is a spin-off
from NetBSD code.
with-readline[=DIR] This provides support for the GNU Readline library.
with-recode[=DIR] This library provides functionality for converting files between
character types.
enable-shmop This provides support for shared memory operations.
with-snmp[=DIR] This adds Simple Network Management Protocol support into PHP.
enable-sockets This enables PHP socketing control.
4337Book.fm Page 292 Saturday, June 19, 2004 5:24 PM
Simpo PDF Merge and Split Unregistered Version -
293
Installing PHP
with-xsl[=DIR] This adds support for the Extensible Stylesheet Language format.
with-yaz[=DIR] By using this extension, you can easily implement a Z39.50 origin (client)
that searches or scans Z39.50 targets (servers) in parallel.
enable-yp This enables network management of important administrative files; Yellow-
Pages (YP) is also known as NIS.
Downloading and Preparation
Now that we have explained the important configuration directives and extensions, it is up to you
to determine which ones you want to use with your installation. Because we want to ensure that
you will be able to get up and running as smoothly as possible, we are going to show you how to
do a basic PHP installation that will work. Let’s get started by downloading the packages:
1. In the previous chapters of this book, you created a directory for downloading and install-
ing your source files. Move to that directory now:
cd /usr/local/src/webserver
2. Go to www.php.net/downloads.php and select the PHP 5 tarball under the Complete
Source Code section. PHP.net uses a mirroring system, so you will have to choose the mir-
ror that is closest to you for downloading your file. After you find a mirror (the closest is
usually highlighted for you), copy the URL to the files and use the single-quotes in wget to
follow the redirect:
wget ‘ 5.0.0.tar.gz/from/this/mirror’
3. Unpack the tarball:
tar zxpf php-5.0.0.tar.gz
A new directory will be created for you with the contents of the tarball.
Compiling and Installing PHP
The next step is to create your installation script. As we mentioned in previous chapters, it is
always a good idea to create a script that has the configure options for your compilation in case
you need to install again later.
Your script is named php_install and contains the following:
cd php-5.0.0
./configure \
with-apxs=/www/bin/apxs \
with-mysql=/usr/local/mysql \
enable-ftp \
enable-trans-sid
4337Book.fm Page 293 Saturday, June 19, 2004 5:24 PM
Simpo PDF Merge and Split Unregistered Version -
294
Chapter 10 • PHP: Installation and Configuration
This configure script utilizes the Apache SAPI extension for Dynamic Shared Object (DSO)
and the system MySQL installation. The script also enables FTP support and transparent ses-
sion ID support for PHP.
TIP
If you Linux distribution uses RPM packages and you are having problems getting a feature
compiled, you may go to rpm.pbone.net and download the development package for the
feature you are trying to install. Example: if you are enabling the foo package with PHP
( with-foo) and you get a complaint from PHP during compile, simply go do the RPM web-
site and download RPMs for your platform for foo and foo-devel. Install these RPMs and try
to compile again.
This is a basic set of options that do not require anything but Apache and MySQL installed
on your system, so at this point your system should be configured to run this installation with-
out any problems.
NOTE
Depending on which MySQL installation type you performed, you might need to modify the
with-mysql directive to the correct path of libmysqlclient located on your machine.
In Chapter 9, “MySQL: Installation and Administration,” you performed a manual installa-
tion; the path is /usr/local/mysql. With a pre-built package such as RPM, it might be
/usr/mysql.
If you want to enable additional extensions or features, you can do so by adding the directives
for them in this script. Make sure that the last line of the script does not have a trailing back-
slash but that all lines before the last do contain the trailing backslash.
1. Change the permissions on this script to enable you to execute and run it:
chmod 755 php_install
2. Run the installation script and watch for errors:
./php_install
3. At this point, you should see the message Thank you for using PHP in the last portion of
output in your console. If this is the case, you are ready to move on to the
make process:
cd php-5.0.0
make
4. Now you wait a little while and enjoy the show during the make process. If you do not see
any error messages on the last few lines of output, you are clear to proceed with the make
install
:
make install
5. Your next small task is to copy the php.ini example file to the correct location:
cp php.ini-dist /usr/local/lib/php.ini
4337Book.fm Page 294 Saturday, June 19, 2004 5:24 PM
Simpo PDF Merge and Split Unregistered Version -
295
Installing PHP
Configuring Apache to Handle PHP
Now that PHP is installed, you need to configure Apache to handle PHP files by passing them
to the PHP engine for processing. You do this by adding some information into your Apache
configuration file, httpd.conf. Here are the steps:
1. At the very end of your httpd.conf file, add the following line:
AddType application/x-httpd-php .php .php3
2. If you wish to enable the source code highlight extension (.phps) for your files, add the fol-
lowing below the previous line:
AddType application/x-httpd-php-source .phps
NOTE
If you are using mod_ssl with your Apache installation, you might want to find the line that
says AddModule mod_php5.c and move it below the regular AddModule list instead of allow-
ing it to remain in the <IfDefine SSL> section. Depending on which version of PHP you are
installing, this might have already been done for you.
3. Next, there is a directive in Apache called DirectoryIndex and it should be modified to add
PHP index files. Locate the following line:
DirectoryIndex index.html
And change it to the following:
DirectoryIndex index.php default.php index.html index.htm
4. Now you are all set to test PHP. First, you need to completely stop and then start Apache
to ensure that the PHP module was successfully loaded:
apachectl stop
apachectl start
5. If you are using Apache with mod_ssl, you need to start Apache as follows:
apachectl startssl
Now your PHP installation should be complete, and all you have to do is test it.
Testing the PHP Installation
To test your PHP installation, you are going to create a simple script that will display the PHP
information. If the script is executed and parsed properly, it will display a nice HTML page
that is generated by PHP. If it is not executed and parsed properly, it will display the code that
you typed into the script.
Depending on how much of Chapter 8, “Apache Web Server: Installation and Configura-
tion,” you followed, you might have a virtual host configured. If this is the case, you will need
4337Book.fm Page 295 Saturday, June 19, 2004 5:24 PM
Simpo PDF Merge and Split Unregistered Version -
296
Chapter 10 • PHP: Installation and Configuration
to place the test script into your virtual host’s document root; otherwise you will place it into
the default document root.
We’re going to assume that you did not configure any virtual hosts and so will place the test
script into /www/htdocs for the default document root. Follow these steps:
1. Make a file located at /www/htdocs/info.php and add the following contents to it:
<?php
phpinfo();
?>
2. Additionally, you can follow the trend of creating a Hello World script such as /www/
htdocs/hello.php
with the following contents:
<?php
echo “Hello World, PHP Rocks!”;
?>
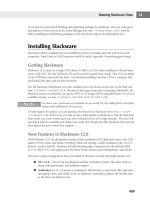
3. Access these scripts in your web browser by going to the web address of the script and check
the output. The output of our phpinfo() function is depicted in Figure 10.1. The output
for the Hello World script would simply be the text Hello World, PHP Rocks!
FIGURE 10.1
phpinfo() function
output
4337Book.fm Page 296 Saturday, June 19, 2004 5:24 PM
Simpo PDF Merge and Split Unregistered Version -