Setting Up LAMP Getting Linux, Apache, MySQL, and PHP Working Together phần 9 potx
Bạn đang xem bản rút gọn của tài liệu. Xem và tải ngay bản đầy đủ của tài liệu tại đây (1.01 MB, 42 trang )
314
Chapter 10 • PHP: Installation and Configuration
session.cookie_lifetime
Default: 0
Allowed: 0, integer
The default is 0, which tells the cookie to expire after the browser is closed. An integer used
here will tell the cookie to expire in the number of seconds provided.
session.cookie_domain
Default: Empty—not defined
Allowed: Any valid domain name
This is the domain name for which the cookie is valid.
session.serialize_handler
Default: php
Allowed: Valid handler
This allows you to specify a custom handler to serialize data.
session.gc_probability :: session.gc_divisor
Default: 1 :: 100
Allowed: Integer :: Integer
This allows you to specify the probability that the garbage collection process is initialized.
Using 1 and 100 would be a 1 percent change.
session.gc_maxlifetime
Default: 1440
Allowed: Positive integer
After this number of seconds, stored data will be seen as “garbage” and cleaned up by the gar-
bage collection process.
session.referer_check
Default: Empty—not defined
Allowed: String
Check HTTP_REFERER to invalidate externally stored URLs containing IDs. HTTP_REFERER has
to contain this substring for the session to be considered valid.
4337Book.fm Page 314 Saturday, June 19, 2004 5:24 PM
Simpo PDF Merge and Split Unregistered Version -
315
Installing PHP
session.entropy_length
Default: 0
Allowed: 0, 1
This indicates the number of bytes to read from the entropy file.
session.entropy_file
Default: Empty—not defined
Allowed: The file used to create the session ID.
This is used to specify an external file that can be used to generate the session ID.
session.cache_limiter
Default: nocache
Allowed: nocache, private, public, NULL
This is used to determine caching aspects of your server. You can leave this blank to avoid
setting anti-caching headers.
session.cache_expire
Default: 180
Allowed: Positive integer
This requested document will expire after this number of minutes.
session.use_trans_sid
Default: 0
Allowed: 0, 1
This allows the session ID to be passed through the URL. This can allow users to exploit the
system by potentially copying the session ID and reusing it later.
session.hash_function
Default: 0
Allowed: 0, 1
The 0 specifies using MD5, whereas 1 uses SHA-1 (160-bits).
4337Book.fm Page 315 Saturday, June 19, 2004 5:24 PM
Simpo PDF Merge and Split Unregistered Version -
316
Chapter 10 • PHP: Installation and Configuration
session.hash_bits_per_character
Default: 4
Allowed: 4, 5, 6
This defines the number of bits stored in each character when converting the binary hash
data to something readable.
4 bits: 0–9, a–f
5 bits: 0–9, a–v
6 bits: 0–9, a–z, A–Z, "-", ","
Sockets
sockets.use_system_read
Default: On
Allowed: On, Off
This tells PHP to use the system read() function instead of the php_read() wrapper.
default_socket_timeout
Default: 60
Allowed: Positive integer
This indicates the default timeout (in seconds) for socket-based streams.
Miscellaneous
bcmath.scale
Default: 0
Allowed: Integer
This indicates the number of decimal digits for all bcmath functions.
browscap
Default: Commented out
Allowed: Path to file (/path/to/file)
The browscap (browser capability) defines the capabilities of certain browsers. This setting
points to the browscap.ini file.
4337Book.fm Page 316 Saturday, June 19, 2004 5:24 PM
Simpo PDF Merge and Split Unregistered Version -
317
PHP Installation and Configuration Checklist
tidy.clean_output
Default: Off
Allowed: On, Off
This option tells PHP’s tidy to clean and repair HTML content automatically. You should
not use this option if you are generating images because tidy will attempt to clean the binary
data as well.
define_syslog_variables
Default: Off
Allowed: On, Off
This directive is used to turn PHP’s syslog variables off and on. For performance reasons,
it is disabled by default. If you need access to the variables, it is recommended to turn them
on for specific pages by using the define_syslog_variables() function.
PHP Installation and Configuration Checklist
In this chapter, we have presented a lot of information as well as shown you how to install and
configure PHP. You should now have a strong understanding of how to do the following:
● Understand what PHP can do for you.
● Download and unpack PHP.
● Build and install PHP.
● Use configuration directives.
● Display PHP information via the web browser.
In the next chapter, you are going to perform some exercises that will enable you to test your
Apache, MySQL, and PHP installation by using them together.
4337Book.fm Page 317 Saturday, June 19, 2004 5:24 PM
Simpo PDF Merge and Split Unregistered Version -
4337Book.fm Page 318 Saturday, June 19, 2004 5:24 PM
Simpo PDF Merge and Split Unregistered Version -
Chapter 11
Testing Your LAMP
Installation
•
Setting Up the Apache Virtual Host
•
Preparing the MySQL Database and User
•
Testing Apache, PHP, and MySQL
•
Troubleshooting
4337c11.fm Page 319 Tuesday, June 29, 2004 3:31 AM
Simpo PDF Merge and Split Unregistered Version -
320
Chapter 11 • Testing Your LAMP Installation
Now that you have everything installed, it is time to perform a few tests that will ensure the ele-
ments are working properly. In this chapter, we are going to cover how to ensure that Apache,
MySQL, and PHP are working together on your Linux system. You will create an Apache vir-
tual host, a MySQL database, and a MySQL user; you will also grant permissions to the data-
base and then create a set of PHP scripts that will enter data into the database and extract it into
formatted HTML.
Keep in mind that this book is not written to teach you development with PHP; therefore,
we are going to give you enough information in this chapter to test the core elements of your
installation. If you wish to learn more about PHP development, you should check out the
resources we have listed in Appendix C, “Getting Support.”
NOTE
This chapter assumes that you already have DNS set up for your domain name. DNS con-
figuration is beyond the scope of this book and therefore is not covered here.
Setting Up the Apache Virtual Host
If you did not set up an Apache virtual host in Chapter 8, “Apache Web Server: Installation and
Configuration,” you should do so now in order to test your skills at editing the Apache con-
figuration file. You’ll create a virtual host for a domain name called
yourtest.com
, which will
reside in the
/home/
yourtest.com
/public_html
directory. Follow these steps:
1.
If you followed our examples in Chapter 8 on creating a separate vhosts directory for con-
figuration files, add a new file there now; otherwise, edit your
httpd.conf
file and append
the following code to it (remembering to substitute a domain name you have access to for
yourtest.com
):
<VirtualHost *>
ServerName yourtest.com
ServerAlias www.yourtest.com
DocumentRoot /home/yourtest.com/public_html
</VirtualHost>
NOTE
If you have not already configured the
NameVirtualHost
directive, you will need to do
so now. Find the
NameVirtualHost
directive and alter the line to the following:
NameVirtualHost *
2.
Create the directories for
yourtest.com
:
mkdir -p /home/
yourtest.com
/public_html
3.
Restart Apache, and your new virtual host should take effect.
4337c11.fm Page 320 Tuesday, June 29, 2004 3:31 AM
Simpo PDF Merge and Split Unregistered Version -
321
Testing Apache, PHP, and MySQL
Preparing the MySQL Database and User
To retrieve information from the database for your PHP script, you’ll first need to create a
database with a table as well as a user for that database. You will begin with creating the data-
base. Follow these steps:
1.
Log in to MySQL as the
root
user (or another user who has access to create new databases,
tables, and users). You should use something similar to the following:
mysql -u
user
-p
2.
After you have logged in, create your database:
CREATE DATABASE my_test;
If the database has successfully been created you will see this:
Query OK, 1 row affected (0.02 sec)
3.
Switch to using the database by typing the following:
USE my_test;
After the command has been executed, you will be told
Database Changed
4.
With our database selected perform:
CREATE TABLE my_table (
my_table_id INT(11) NOT NULL AUTO_INCREMENT,
my_value VARCHAR(30),
my_date DATE,
PRIMARY KEY(`my_table_id`)
);
As a result you should see a
Query OK
statement and be returned to a SQL prompt. You now
have a database and table created.
5.
Now you’ll create a unique user just for this database with full privileges so that you can
connect using PHP. This prevents anyone who might gain access to your PHP script from
tampering with your entire MySQL Server. Run this query:
GRANT ALL PRIVILEGES ON my_test.* TO 'test_user'@'localhost'
IDENTIFIED BY 'test_pass';
That’s it; now you have a database, table, and test user ready for your PHP script.
Testing Apache, PHP, and MySQL
In this section you are going to run a few quick tests to ensure that Apache is parsing your PHP
files properly, and that PHP and MySQL are connecting and working together. You’ll know
4337c11.fm Page 321 Tuesday, June 29, 2004 3:31 AM
Simpo PDF Merge and Split Unregistered Version -
322
Chapter 11 • Testing Your LAMP Installation
if Apache and PHP are working correctly because you will see the output from PHP as we dis-
cuss it throughout the rest of this chapter.
Database Connection Script
To start, you will create your PHP script that is responsible for performing the database con-
nection. This script is named
database-connection.php
and will be located in your virtual
hosts’ document root directory
(/home/mytest/public_html
). This script will contain infor-
mation such as the MySQL host, username, password, and database you will be using for this
script. The script will contain the information in Listing 11.1, assuming you followed our
example in the preceding section, “Preparing the MySQL Database and User.”
➲
Listing 11.1
database-connection.php
Script
<?php
// Database Connection Script
$dbUser = 'test_user';
$dbPass = 'test_pass';
$dbName = 'my_test';
$dbHost = 'localhost';
$sql = mysql_connect($dbHost, $dbUser, $dbPass)
or die (mysql_error());
mysql_select_db($dbName, $sql) or die (mysql_error());
?>
Data Insertion Script
Now that your database connection script is ready to use, let’s create a script that will insert
some information into your database. This script will include the database connection file
(
database-connection.php
) created in Listing 11.1, which in turn makes your database con-
nection available for the
$sql
resource identifier. Next, this script will run a
foreach
loop
that will create 50 entries of data into your database. Take a look at Listing 11.2 for the
database-insert.php
script.
➲
Listing 11.2
database-insert.php
Script
<?php
// Data insertion script
include('database-connection.php');
for($i = 0; $i <= 50; $i++){
if($i % 2) {
$data = $i.' - Odd Result';
} else {
4337c11.fm Page 322 Tuesday, June 29, 2004 3:31 AM
Simpo PDF Merge and Split Unregistered Version -
323
Testing Apache, PHP, and MySQL
$data = $i.'- Even Result';
}
mysql_query("INSERT INTO my_table (my_value, my_date)
VALUES ('$data', now())") or die (mysql_error());
echo "Inserting: $data<br />";
}
echo "Done<br />";
?>
At this point, you should run the
database-insert.php
script from your web browser by
using:
/>
as the URL.
If your MySQL is working properly, you will see some results echoed to your web browser
that will appear similar to the following:
Inserting: 0- Even Result
Inserting: 1 - Odd Result
Inserting: 2- Even Result
Inserting: 3 - Odd Result
Inserting: 4- Even Result
Inserting: 5 - Odd Result
Inserting: 6- Even Result
Inserting: 7 - Odd Result
Inserting: 8- Even Result
Inserting: 9 - Odd Result
Inserting: 10- Even Result
NOTE
We have truncated the output of this script for this book.
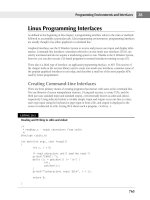
Data Extraction and Formatting Script
Now that your data is inserted into the database, you will perform your final test, which will extract
the data and format it for HTML output with PHP. Take a look at the script in Listing 11.3.
➲
Listing 11.3
database-test.php
Script
<?php
// Data test script
include('database-connection.php');
$sql = mysql_query("SELECT * FROM my_table");
while($row = mysql_fetch_array($sql)){
echo "Database Entry: ".$row['my_table_id']." | Value: ~CA".$row['my_
value']." | Date: ".$row['my_date']."<br />
}
?>
4337c11.fm Page 323 Tuesday, June 29, 2004 3:31 AM
Simpo PDF Merge and Split Unregistered Version -
324
Chapter 11 • Testing Your LAMP Installation
Now that you have your
database-test.php
script created, run it from your web browser by
using
/>
as your URL and you should see some output
such as the following:
Database Entry: 1 | Value: 0- Even Result | Date: 2004-04-01
Database Entry: 2 | Value: 1 - Odd Result | Date: 2004-04-01
Database Entry: 3 | Value: 2- Even Result | Date: 2004-04-01
Database Entry: 4 | Value: 3 - Odd Result | Date: 2004-04-01
Database Entry: 5 | Value: 4- Even Result | Date: 2004-04-01
Database Entry: 6 | Value: 5 - Odd Result | Date: 2004-04-01
Database Entry: 7 | Value: 6- Even Result | Date: 2004-04-01
Database Entry: 8 | Value: 7 - Odd Result | Date: 2004-04-01
Database Entry: 9 | Value: 8- Even Result | Date: 2004-04-01
Database Entry: 10 | Value: 9 - Odd Result | Date: 2004-04-01
NOTE
We have truncated the output of this script for this book.
If your output is the same as ours, then congratulations again! Your Linux, Apache, MySQL,
and PHP are working together in harmony, and you have concluded the installation, testing, and
implementation of these excellent technologies together. If you are having difficulties, take a
look at the next section for problems and causes.
Troubleshooting
It is important for you to understand some of the common problems and why they occur. This
section covers only the problems that might occur for the code and configuration we have
given you, and their potential causes.
●
My scripts are displayed in my web browser exactly as I have coded them.
This problem occurs
when Apache is not parsing your scripts through the PHP engine. You will need to ensure
that the proper configuration directives such as
AddModule
,
LoadModule
, and
AddType
have
been entered into your
httpd.conf
file as described in Chapter 10, “PHP: Installation and
Configuration.”
●
PHP says,
Fatal error: undefined function mysql_connect() in line
x
of
filename
.php
.
This means that you have somehow disabled or not configured MySQL support in PHP. You
should refer to Chapter 10 to learn how to enable MySQL with PHP. By default, we have
shown you how to enable it.
● PHP says, Warning: mysql_connect(): Access denied for user: 'test_user@localhost'
(Using password: YES) in /home/yourdomain.com/public_html/database-connection.php
on line x
. This occurs when your username or password do not match the database username
and password. Follow the steps correctly in the “Preparing the MySQL Database and User”
4337c11.fm Page 324 Tuesday, June 29, 2004 3:31 AM
Simpo PDF Merge and Split Unregistered Version -
325
Testing Your LAMP Installation Checklist
section earlier in this chapter and ensure you have used the correct username and password in
your database-connection.php script.
● PHP says, Access denied for user: 'test_user@localhost' to database 'database'.
This indicates that either you do not have the database and user privileges set properly or
you have not defined them correctly in your database-connection.php script.
● The output from the database is empty. This indicates that either you did not run the database-
insert.php
script or you have an error in one of your other scripts. Check your code against
the code in this chapter and try again.
If you have any additional problems, check the chapter related to your problem type, or seek
help in one of the resources listed in Appendix C.
Testing Your LAMP Installation Checklist
In this brief chapter, you have taken the steps necessary to perform a quick test on the core ele-
ments of your new system. We have shown you how to accomplish the following:
● Create an Apache virtual host.
● Create a MySQL database from the command line.
● Create a MySQL database table from the command line.
● Grant MySQL privileges to a user from the command line.
● Create a database connection PHP script.
● Insert data into MySQL from PHP.
● Extract and format data from MySQL with PHP.
● Troubleshoot the most likely problems to find their solutions.
At this point you should be very familiar with Linux, Apache, MySQL, and PHP. We have
included appendices in this book that provide a quick reference checklist for setting up
LAMP, additional MySQL configuration options, and information about getting support
and finding additional resources.
4337c11.fm Page 325 Tuesday, June 29, 2004 3:31 AM
Simpo PDF Merge and Split Unregistered Version -
4337c11.fm Page 326 Tuesday, June 29, 2004 3:31 AM
Simpo PDF Merge and Split Unregistered Version -
Appendix A
LAMP Quick Installation
4337Book.fm Page 327 Saturday, June 19, 2004 5:24 PM
Simpo PDF Merge and Split Unregistered Version -
328
Appendix A • LAMP Quick Installation
O
ver the course of the years that we have worked in the web development field, we have
performed many LAMP installations. During this time, we have always wanted a quick
reference for setting up LAMP. After you know the
why
of installing everything and you have
a firm grasp of the requirements needed to install certain libraries and the effects that specific
configuration directives will have on your system, you don’t want to go back and search
through pages of text to reference a single command. This appendix will walk you through
the process of installing everything you need based on the default installation from this book.
We are sure that in the years ahead this appendix will serve as a useful reference during your
installations. Everything you need in one place—you can’t ask for more than that.
Because you are now familiar with all the particulars, we will assume in some parts of this
appendix that you remember how to change permissions, continue to the next section, and so
on. If you have trouble with a particular command or area, refer to the appropriate chapter and
take time to review the discussions and explanations for that command or area.
WARNING
This appendix is not a substitute for the expanded information found in the chapters of this
book. It is also not a substitute for updated documentation that might be found in the
source files or official online documentation. Please ensure that you are familiar with
all
aspects of what you are doing
before
you proceed with the quick instructions outlined here.
Linux
This section outlines information covered in Chapter 2, “Installing Linux.” Follow these steps
to install Linux:
1.
After obtaining your Linux distribution, place the first disc in the CD-ROM or DVD drive
and reboot the computer. Make sure that the CD-ROM is in front of the hard disk for boot
order.
2.
Enter the installation procedure in graphic or text mode, and if this is the first time you are
using these discs you might want to verify the integrity of the discs.
3.
Continue on, selecting Server as your installation type, and set up your hard disk partitions.
4.
Use the GRUB boot loader and set up your network accordingly.
5.
Enable the default firewall for now and fill out your miscellaneous settings.
6.
Now it’s time to select your packages. For this installation we will choose the following:
●
X Window System
●
GNOME or KDE (or both) Desktop System
●
Text-Based Internet
4337Book.fm Page 328 Saturday, June 19, 2004 5:24 PM
Simpo PDF Merge and Split Unregistered Version -
329
Security
●
Server Configuration Tools
●
Development Tools
7.
Breeze through the other screens and use the defaults. Begin your installation, changing
discs when prompted.
8.
Create a boot disc if you wish and reboot.
9.
After the first reboot, you will need to fill out some basic forms before you are brought to
the X Window interface. Log in as
root
and open a terminal window. After that window is
open,
vi
the
/etc/inittab
file and change your run level from 5 to 3. Reboot and make sure
everything is working properly.
10.
Use this command to download the latest version of
pine
with
pico
:
wget />
You will need to install it by using the following:
rpm -Uvh pine.i386.rpm
Security
This section covers information in Chapter 6, “Linux Security.” Follow these steps to tighten
up your security:
1.
First, edit your
sshd_config
file:
pico /etc/ssh/sshd_config
2.
Change
# PermitRootLogin yes
to
PermitRootLogin no
3.
Change
#Protocol 2,1
to
Protocol 2
4.
Restart the daemon:
/etc/init.d/sshd restart
5.
Create your custom firewall script:
pico /usr/local/etc/firewall
4337Book.fm Page 329 Saturday, June 19, 2004 5:24 PM
Simpo PDF Merge and Split Unregistered Version -
330
Appendix A • LAMP Quick Installation
6.
Add the following:
#!/bin/sh
# Change the part after the = to where your
# IPTABLES is on your system
IPTABLES=/sbin/iptables
# Flush existing rules
$IPTABLES -F INPUT
# Allow connections going outbound
# from this machine to reply back
$IPTABLES -A INPUT -j ACCEPT -m state -–state \
ESTABLISHED -i eth0 -p icmp
$IPTABLES -A INPUT -j ACCEPT -m state -–state \
ESTABLISHED -i eth0 -p tcp
$IPTABLES -A INPUT -j ACCEPT -m state state \
ESTABLISHED -i eth0 -p udp
#Allow incoming SSH requests
$IPTABLES -A INPUT -p tcp dport 22 -j ACCEPT
#Allow incoming DNS
$IPTABLES -A INPUT -p udp dport 53 -j ACCEPT
$IPTABLES -A INPUT -p tcp dport 53 -j ACCEPT
#Allow incoming HTTP requests (to Web server)
$IPTABLES -A INPUT -p tcp dport 80 -j ACCEPT
$IPTABLES -A INPUT -p tcp dport 443 -j ACCEPT
#Allow Ping echo
$IPTABLES -A INPUT -p icmp -j ACCEPT
# Load Modules
insmod ip_conntrack_ftp
insmod ipt_LOG
4337Book.fm Page 330 Saturday, June 19, 2004 5:24 PM
Simpo PDF Merge and Split Unregistered Version -
331
Security
insmod ipt_REJECT
insmod ipt_limit
insmod ipt_state
# The logging is set so if more than 5 packets are dropped
# in three seconds they will be ignored. This
# helps to prevent a DOS attack
# Crashing the computer the firewall is running on
$IPTABLES -A INPUT -m limit limit 3/second \
limit-burst 5 -i ! lo -j LOG
# Drop and log all other data
$IPTABLES -A INPUT -i ! lo -j DROP
7.
Change the file permissions:
chmod 700 /usr/local/etc/firewall
8.
Activate the firewall:
/usr/local/etc/firewall
9.
Create your service file:
/etc/init.d/
firewall
10.
Add the following lines of code:
#!/bin/sh
#
# This script is responsible for loading the custom
# IPTables Firewall settings.
#
# chkconfig: 345 96 96
#
# processname: /usr/local/etc/firewall
#
# description: Controls the custom built firewall rules
#
# Source function library:
. /etc/init.d/functions
RETVAL=0
start () {
echo "Loading Firewall Rules: "
/usr/local/etc/firewall > /dev/null
touch /var/lock/subsys/firewall
RETVAL=$?
[ $RETVAL -eq 0 ] && success || failure
4337Book.fm Page 331 Saturday, June 19, 2004 5:24 PM
Simpo PDF Merge and Split Unregistered Version -
332
Appendix A • LAMP Quick Installation
echo -n "Status:"
echo
return $RETVAL
}
flush () {
echo -n "Turning Firewall Off"
iptables -F
rm -rf /var/lock/subsys/firewall
RETVAL=$?
[ $RETVAL -eq 0 ] && success || failure
echo
return $RETVAL
}
status () {
echo "Current Firewall Configuration:"
RETVAL=$?
iptables -L
return $RETVAL
}
panic () {
echo "Enabling Panic Mode. Only SSH access allowed!!"
echo -n "You must run '$0 start' to allow other ports "
echo " through the firewall again."
echo -n "Panic Mode Status:"
/sbin/iptables -F
/sbin/iptables -A INPUT -p tcp dport 22 -j ACCEPT
/sbin/iptables -A INPUT -j DROP
[ $RETVAL -eq 0 ] && success || failure
echo
return $RETVAL
}
case "$1" in
start)
start
;;
restart)
start
;;
flush)
flush
;;
stop)
4337Book.fm Page 332 Saturday, June 19, 2004 5:24 PM
Simpo PDF Merge and Split Unregistered Version -
333
flush
;;
status)
status
;;
list)
status
;;
panic)
panic
;;
*)
echo "Usage:$0 {start|stop|restart|flush|status|list|panic}"
exit 1
esac
exit $RETVAL
11.
Change the permissions, add the firewall to the list of enabled services, and test it to make
sure it works:
chmod 700 /etc/init.d/firewall
chkconfig add firewall
service firewall restart
Congratulations—you are now finished with your Linux installation procedure. You might
wish to further customize your installation at this point or you can continue to the next section.
NOTE
You might want to run
up2date
now to make sure your default packages are up-to-date.
NOTE
You might want to create your backup script now, or you can wait until you have installed
everything to make sure all of your wanted directories are included in your backup.
This section covers the information in Chapter 7, “Electronic Mail.”
Now that you have your Linux installation up and running, it’s time to install your mail servers:
1.
Begin by creating your temporary storage for all the packages and source files you are about
to download, and move into it:
mkdir -p /usr/local/src/mailserver
cd /usr/local/src/mailserver
4337Book.fm Page 333 Saturday, June 19, 2004 5:24 PM
Simpo PDF Merge and Split Unregistered Version -
334
Appendix A • LAMP Quick Installation
2.
Download all those packages:
wget />wget />wget />wget />wget />
➥
2.2.2.20040207.tar.bz2
wget />wget 63.tar.gz
wget />
➥
1.20.tgz
wget />wget
/>
3.
Rip those files open with the following:
tar zxpf clamav*.tar.gz
tar jxpf courier-imap*.tar.bz2
tar zxpf daemontools*.tar.gz
tar jxpf maildrop*.tar.bz2
tar zxpf Mail-SpamAssassin*.tar.gz
tar zxpf netqmail*.tar.gz
tar zxpf qmail-scanner*.tgz
tar zxpf tnef*.tar.gz
tar zxpf ucspi-tcp*.tar.gz
tar zxpf vpopmail*.tar.gz
4.
Whew—now that you have your files right where you want them, install your Perl modules
including SpamAssassin:
perl -MCPAN -e shell
cpan> install Bundle::CPAN
cpan> install ExUtils::MakeMaker
cpan> install Time::HiRes
cpan> install DB_File
cpan> install HTML::Parser
cpan> install Net::DNS
cpan> install Mail::SpamAssassin
cpan> quit
5.
Begin the qmail installation by creating your directories:
cd /usr/local/src/mailserver
mkdir /package
mv admin /package
mkdir /var/qmail
mkdir /var/log/qmail
mkdir -p /var/qmail/supervise/qmail-send/log
4337Book.fm Page 334 Saturday, June 19, 2004 5:24 PM
Simpo PDF Merge and Split Unregistered Version -
335
mkdir -p /var/qmail/supervise/qmail-smtpd/log
mkdir -p /var/log/qmail/smtpd
6.
Create all of the needed users and groups:
groupadd nofiles
useradd -g nofiles -d /var/qmail/alias alias
useradd -g nofiles -d /var/qmail qmaild
useradd -g nofiles -d /var/qmail qmaill
useradd -g nofiles -d /var/qmail qmailp
groupadd qmail
useradd -g qmail -d /var/qmail qmailq
useradd -g qmail -d /var/qmail qmailr
useradd -g qmail -d /var/qmail –s /nonexistent qmails
7.
Prepare and build qmail; then configure it with your
fully qualified domain name:
cd /usr/local/src/mailserver/netqmail*
./collate.sh
cd netqmail-1.05
make setup check
./config-fast
fully_qualified_domain_name
8.
Build and install
uscpi-tcp
:
cd /usr/local/src/mailserver/ucspi-tcp*
patch < /usr/local/src/mailserver/netqmail-1.05/other-patches/ucspi-tcp-
0.88.errno.patch
make
make setup check
9.
Do the same for daemontools:
cd /package/admin/daemontools*/src
patch < /usr/local/src/mailserver/netqmail-1.05/other-patches/daemontools-
➥
0.76.errno.patch
cd
package/install
10.
Create your qmail startup scripts:
pico /var/qmail/rc
11.
Add the following text:
#!/bin/sh
exec env - PATH="/var/qmail/bin:$PATH" \
qmail-start "`cat /var/qmail/control/defaultdelivery`"
12. Change the permissions:
chmod 755 /var/qmail/rc
4337Book.fm Page 335 Saturday, June 19, 2004 5:24 PM
Simpo PDF Merge and Split Unregistered Version -
336
Appendix A • LAMP Quick Installation
13. Configure your mailbox type:
echo ./Maildir >/var/qmail/control/defaultdelivery
14. Download your qmail startup script:
cd /var/qmail/bin
wget />mv qmailctl-script-dt70 qmailctl
15. Change the permissions and link the file:
chmod 755 /var/qmail/bin/qmailctl
ln -s /var/qmail/bin/qmailctl /usr/bin
16. Create each of the supervise scripts:
pico /var/qmail/supervise/qmail-send/run
and add the following to it:
#!/bin/sh
exec /var/qmail/rc
17. Make this script executable:
chmod 755 /var/qmail/supervise/qmail-send/run
18. Create another script:
pico /var/qmail/supervise/qmail-send/log/run
Add the following to this script:
#!/bin/sh
exec /usr/local/bin/setuidgid \
qmaill /usr/local/bin/multilog t /var/log/qmail
Make this script executable:
chmod 755 /var/qmail/supervise/qmail-send/log/run
19. Create the next script:
pico /var/qmail/supervise/qmail-smtpd/run
Add the following to this script:
#!/bin/sh
QMAILDUID=’id -u qmaild’
NOFILESGID=’id -g qmaild’
MAXSMTPD=’cat /var/qmail/control/concurrencyincoming’
LOCAL=’head -1 /var/qmail/control/me’
if [ -z "$QMAILDUID" -o -z "$NOFILESGID" -o -z "$MAXSMTPD" -o -z "$LOCAL"
➥]; then
echo QMAILDUID, NOFILESGID, MAXSMTPD, or LOCAL is unset in
echo /var/qmail/supervise/qmail-smtpd/run
4337Book.fm Page 336 Saturday, June 19, 2004 5:24 PM
Simpo PDF Merge and Split Unregistered Version -
337
exit 1
fi
if [ ! -f /var/qmail/control/rcpthosts ]; then
echo "No /var/qmail/control/rcpthosts!"
echo "Refusing to start SMTP listener because it'll create an open
➥relay"
exit 1
fi
exec /usr/local/bin/softlimit -m 20000000 \
/usr/local/bin/tcpserver -v -R -l "$LOCAL" -x /etc/tcp.smtp.cdb -c
➥"$MAXSMTPD" \
-u "$QMAILDUID" -g "$NOFILESGID" 0 smtp /var/qmail/bin/qmail-smtpd
➥2>&1
Make this script executable:
chmod 755 /var/qmail/supervise/qmail-smtpd/run
20. Now for yet another script:
pico /var/qmail/supervise/qmail-smtpd/log/run
Add the following to this script:
#!/bin/sh
exec /usr/local/bin/setuidgid \
qmaill /usr/local/bin/multilog t /var/log/qmail/smtpd
Make this script executable:
chmod 755 /var/qmail/supervise/qmail-smtpd/log/run
21. Link the supervise directories to /service, which is where daemontools will be installed:
ln -s /var/qmail/supervise/qmail-send /var/qmail/supervise/qmail-smtpd
➥/service
22. Stop qmail from running while you perform the next few steps:
qmailctl stop
23. Set the concurrencyincoming script:
echo 20 > /var/qmail/control/concurrencyincoming
chmod 644 /var/qmail/control/concurrencyincoming
24. Control SMTP access:
echo '127.:allow,RELAYCLIENT=""' >>/etc/tcp.smtp
qmailctl cdb
25. Set all permissions:
chmod 755 /var/qmail/rc
chmod 755 /var/qmail/bin/qmailctl
4337Book.fm Page 337 Saturday, June 19, 2004 5:24 PM
Simpo PDF Merge and Split Unregistered Version -
338
Appendix A • LAMP Quick Installation
chmod 755 /var/qmail/supervise/qmail-send/run
chmod 755 /var/qmail/supervise/qmail-send/log/run
chmod 755 /var/qmail/supervise/qmail-smtpd/run
chmod 755 /var/qmail/supervise/qmail-smtpd/log/run
chown qmaill /var/log/qmail /var/log/qmail/smtpd
chmod 644 /var/qmail/control/concurrencyincoming
chmod 644 /etc/tcp.smtp*
26. Use the following to remove all old mail servers and replace sendmail with qmail:
/etc/init.d/sendmail stop
/etc/init.d/postfix stop
rpm -q sendmail
rpm -q exim
rpm -q postfix
The previous rpm -q commands perform a query to see whether the packages are installed.
If they are installed, select the following steps applicable for the packages you have on your
system:
rpm -e mutt
rpm -e fetchmail
rpm -e squirrelmail
rpm -e nodeps sendmail
rpm -e postfix
mv /usr/lib/sendmail /usr/lib/sendmail.old
chmod 0 /usr/lib/sendmail.old
ln -s /var/qmail/bin/sendmail /usr/lib
mv /usr/sbin/sendmail /usr/sbin/sendmail.old
chmod 0 /usr/sbin/sendmail.old
ln -s /var/qmail/bin/sendmail /usr/sbin
27. Create the qmail alias files:
echo root > /var/qmail/alias/.qmail-root
echo root > /var/qmail/alias/.qmail-postmaster
ln -s .qmail-postmaster /var/qmail/alias/.qmail-mailer-daemon
chmod 644 /var/qmail/alias/.qmail-root /var/qmail/alias/.qmail-postmaster
28. Test the installation to make sure it’s running:
qmailctl stop
qmailctl start
qmailctl stat
cd /var/qmail
wget />chmod 755 inst_check
./inst_check
Make sure everything looks okay and get ready for the add-ons.
4337Book.fm Page 338 Saturday, June 19, 2004 5:24 PM
Simpo PDF Merge and Split Unregistered Version -