Visual C++ and MFC Fundamentals programming phần 9 ppt
Bạn đang xem bản rút gọn của tài liệu. Xem và tải ngay bản đầy đủ của tài liệu tại đây (1.2 MB, 68 trang )
Chapter 18: Progress-Based Controls Visual C++ and MFC Fundamentals
586 © FunctionX, Inc.
4. Add another Vertical Scroll Bar to the right of the erxisting one
Change its ID to IDC_SCROLL_GREEN
Add a Control Variable for the new scroll bar and name it m_ScrollGreen
5. Add a Static Text under the new scroll bar
CChange its ID to IDC_VAL_GREEN
Add a CString Value Variable for the new label and name it m_ValGreen
6. Add one more scroll bar control to the right of the others
Change its ID to IDC_SCROLL_BLUE
Add a Control Variable for it and name it m_ScrollBlue
7. Add a Static Text under the new scroll bar
CChange its ID to IDC_VAL_BLUE
Add a CString Value Variable for the new label and name it m_ValBlue
8. Save All
18.4.4 ScrollBar Properties
There are two forms of the scroll bars. The horizontal scroll bar allows the user to scroll
in the left and right directions. The vertical scroll bar allows scrolling up and down.
Visual C++ allows you to visual select the desired one and add to it a host. If you are
programmaticall creating the control, you can add the SBS_HORZ style to get horizontal
scroll bar. This is also the default, meaning that it you do not specify the orientation, the
scroll bar would be horizontal. If you want a vertical scroll bar instead, add the
SBS_VERT style:
BOOL CScrollingDlg::OnInitDialog()
{
CDialog::OnInitDialog();
// TODO: Add extra initialization here
Scroller->Create(WS_CHILD | WS_VISIBLE | SBS_VERT,
CRect(200, 15, 320, 148), this, 0x16);
return TRUE; // return TRUE unless you set the focus to a control
// EXCEPTION: OCX Property Pages should return FALSE
Visual C++ and MFC Fundamentals Chapter 18: Progress-Based Controls
© FunctionX, Inc. 587
}
As mentioned already, you can resize a scroll bar control to have the dimensions of your
choice. If you are programmatically creating the control, it would assume the size
allocated during design or the nWidth and the nHeight members of the rect argument of
the Create() method. Internally, the operating system has a default width for a vertical
scroll bar and a default height for a horizontal scroll bar. If you prefer to use those default
values, you have various options.
If you are visually creating the scroll bar, change the value of the Align property. Imagine
you resize the scroll bar as follows:
If you set the Align property to Top/Left for a horizontal scroll bar, it would keep its top
border and bring its border up to get the default height set by the operating system:
If you select this same value for a vertical scroll bar, it would keep its left border and
narrow the control to assume the default width of the operating system:
Chapter 18: Progress-Based Controls Visual C++ and MFC Fundamentals
588 © FunctionX, Inc.
In the same way, you can set the Align property to a Bottom/Right value to keep the
bottom border for a horizontal scroll bar or the right border for a vertical scroll bar and
resize them to the default height or width respectively.
If you are programmaticall creating the control, to resize a horizontal scroll bar to assume
the default height known to the operating system combine the SBS_HORZ with the
SBS_TOPALIGN and possibly the SBS_BOTTOMALIGN values to its style. On the
other hand, to get the default width of a vertical scroll bar, besides the SBS_VERT style,
add the SBS_LEFTALIGN and the SBS_RIGHTALIGN values:
BOOL CScrollingDlg::OnInitDialog()
{
CDialog::OnInitDialog();
// TODO: Add extra initialization here
Scroller->Create(WS_CHILD | WS_VISIBLE |
SBS_VERT | SBS_LEFTALIGN | SBS_RIGHTALIGN,
CRect(200, 15, 320, 148), this, 0x16);
return TRUE; // return TRUE unless you set the focus to a control
// EXCEPTION: OCX Property Pages should return FALSE
}
We mentioned already that the operating system keeps a default height for a horizontal
scroll bar and a default width for a vertical scroll bar. To get these default values and
apply them to your scroll bar control, call the GetSystemMetrics() function and pass it
either the SM_CXVSCROLL or the SM_CXHSCROLL value. Then add the value to
the x member of the rect argument for the Create() method. Here is an example:
Visual C++ and MFC Fundamentals Chapter 18: Progress-Based Controls
© FunctionX, Inc. 589
BOOL CScrollingDlg::OnInitDialog()
{
CDialog::OnInitDialog();
// TODO: Add extra initialization here
int ButtonWidth = GetSystemMetrics(SM_CXHSCROLL);
Scroller->Create(WS_CHILD | WS_VISIBLE |
SBS_VERT,
CRect(200, 15, 200+ButtonWidth, 148), this, 0x16);
return TRUE; // return TRUE unless you set the focus to a control
// EXCEPTION: OCX Property Pages should return FALSE
}
18.4.5 Scroll Bar Methods
A scroll bar is based on the CScrollBar class. We already that, to programatically create
this control, you can declare a pointer to its class and initialize it using its Create()
method. Since a scroll bar is a value-range control, you must specify its minimum and
maximum values from which extremes the thumb can be navigated. To set the range of
values of a scroll bar, you can call the CScrollBar::SetScrollRange() method. Its syntax
is:
void SetScrollRange(int nMinPos, int nMaxPos, BOOL bRedraw = TRUE);
The nMinPos argument specifies the minimum value of the control. The nMaxPos
argument is the maximum value of the range. The difference between nMaxPos and
nMinPos must not be greater than 32,767. When the values have been changed, you may
want to refresh the control to reflect the change. This is the default bahavior. If for some
reason you do not want the control to be redrawn, pass a third argument as FALSE.
Here is an example:
BOOL CScrollingDlg::OnInitDialog()
{
CDialog::OnInitDialog();
m_Scroller.SetScrollRange(8, 120);
return TRUE; // return TRUE unless you set the focus to a control
// EXCEPTION: OCX Property Pages should return FALSE
}
If the range of a values has already been set for a scroll bar and you want to get its
minimum and its maximum possible values, call the CScrollBar::GetScrollRange()
method. Its syntax is:
void GetScrollRange(LPINT lpMinPos, LPINT lpMaxPos) const;
This method returns two values, lpMinPos and lpMaxPos. Here is an example:
void CScrollingDlg::OnBtnInfo()
{
Chapter 18: Progress-Based Controls Visual C++ and MFC Fundamentals
590 © FunctionX, Inc.
// TODO: Add your control notification handler code here
int Min, Max;
m_Scroller.GetScrollRange(&Min, &Max);
m_MinValue.Format("%d", Min);
m_MaxValue.Format("%d", Max);
UpdateData(FALSE);
}
Once the control has been created and it has the minimum and maximum values set, its
thumb would appear in the minimum position. If you want it to assume another position
within the range, call the CScrollBar::SetScrollPos() method. Its syntax is:
int SetScrollPos(int nPos, BOOL bRedraw = TRUE);
The nPos argument hold the value of the new position for the thumb. This value must be
between the nMinPos and the nMaxPos values of the SetScrollRange() method. You
may need the control to be redraw after this value has been set to reflect the new change,
which is the default behavior. If you do not want the control the control to be redrawn,
pass the FALSE value as a second argument.
Here is an example:
BOOL CScrollingDlg::OnInitDialog()
{
CDialog::OnInitDialog();
// TODO: Add extra initialization here
Scroller->Create(WS_CHILD | WS_VISIBLE |
SBS_VERT | SBS_LEFTALIGN | SBS_RIGHTALIGN,
CRect(200, 15, 240, 148), this, 0x16);
Scroller->SetScrollRange(12, 248);
Scroller->SetScrollPos(165);
return TRUE; // return TRUE unless you set the focus to a control
// EXCEPTION: OCX Property Pages should return FALSE
}
Visual C++ and MFC Fundamentals Chapter 18: Progress-Based Controls
© FunctionX, Inc. 591
If the position of the thumb on a scroll bar control has changed, which happens while the
user is scrolling,, you can get the current position of the thumb by calling the
CScrollBar::GetScrollPos() method. Its syntax is:
int GetScrollPos() const;
This method returns the position of the thumb on the scroll bar.
To set the minimum and the maximum values of a scroll bar, as well as the initial
position of the thumb, you can call the CScrollBar::SetScrollInfo() method. Its syntax is:
BOOL SetScrollInfo(LPSCROLLINFO lpScrollInfo, BOOL bRedraw = TRUE);
The new values to be passed to this method are stored in a SCROLLINFO variable.
Therefore, you should first build that variable. The SCROLLINFO structure is defined as
follows:
typedef struct tagSCROLLINFO {
UINT cbSize;
UINT fMask;
int nMin;
int nMax;
UINT nPage;
int nPos;
int nTrackPos;
} SCROLLINFO, *LPSCROLLINFO;
typedef SCROLLINFO CONST *LPCSCROLLINFO;
The cbSize member variable is the size of the structure in bytes. The fMask value
specifies the type of value that you want to set. The possible values of fMask are:
Value Description
SIF_RANGE Used to set only the minimum and the maximum values
SIF_POS Used to set only the initial position of the scroll thumb
SIF_PAGE Used to set the page size to scroll when using the control
SIF_DISABLENOSCROLL
Used to disable the scroll bar
SIF_ALL Used to perform all allowed operations
The nMin value is used to set the minimum value of the scroll bar while nMax specifies
its maximum value. The nPage value holds the value of the page scrolling. The nPos is
used to set the initial position of the thumb. The nTrackPos member variable must be
ignored if you are setting values for the scroll bar.
Here is an example:
BOOL CScrollingDlg::OnInitDialog()
{
CDialog::OnInitDialog();
// TODO: Add extra initialization here
SCROLLINFO ScrInfo;
ScrInfo.cbSize = sizeof(SCROLLINFO);
ScrInfo.fMask = SIF_ALL;
ScrInfo.nMin = 25;
Chapter 18: Progress-Based Controls Visual C++ and MFC Fundamentals
592 © FunctionX, Inc.
ScrInfo.nMax = 368;
ScrInfo.nPage = 2;
ScrInfo.nPos = 186;
m_Scroller.SetScrollInfo(&ScrInfo);
return TRUE; // return TRUE unless you set the focus to a control
// EXCEPTION: OCX Property Pages should return FALSE
}
If a scroll bar has already been initialized, even it was not initialized using the
SetScrollInfo() method, to get information about its values, you can call the
CScrollBar::GetScrollInfo(). Its syntax is:
BOOL GetScrollInfo(LPSCROLLINFO lpScrollInfo, UINT nMask);
This method returns a SCROLLINFO value that holds the values of the scroll bar. The
possible values of the SCROLLINFO::fMask member variable are:
Value Description
SIF_RANGE Used to retrieve the minimum and the maximum values
SIF_POS
Used to retrieves the current position of the scroll thumb.
The thumb should not be scrolling when the
GetScrollInfo() method is called to get the value
associated with this mask
SIF_PAGE
Used to retrieve the page size to scroll when using the
control
SIF_TRACKPOS
Used to retrieve the current position of the thumb while
the user is scrolling
SIF_ALL Used to retrieve all above values
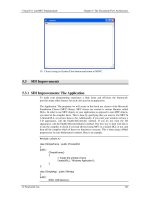
Practical Learning: Using Scroll Bars
1. Using the OnInitDialog() event, set the range of each scroll bar to (0, 255) and set
their initial values to 192
BOOL CPreviewerDlg::OnInitDialog()
{
CDialog::OnInitDialog();
// Set the icon for this dialog. The framework does this automatically
// when the application's main window is not a dialog
SetIcon(m_hIcon, TRUE); // Set big icon
SetIcon(m_hIcon, FALSE); // Set small icon
// TODO: Add extra initialization here
m_ScrollRed.SetScrollRange(0, 255);
m_ScrollRed.SetScrollPos(63);
m_ScrollGreen.SetScrollRange(0, 255);
m_ScrollGreen.SetScrollPos(63);
m_ScrollBlue.SetScrollRange(0, 255);
m_ScrollBlue.SetScrollPos(63);
return TRUE; // return TRUE unless you set the focus to a control
}
Visual C++ and MFC Fundamentals Chapter 18: Progress-Based Controls
© FunctionX, Inc. 593
2. Save All
18.4.6 Scroll Bar Events
As described already, to use a scroll bar, the user clicks either one of its buttons, a thumb
or the scrolling region. When the user clicks, the scroll bar sends a message to its parent
or host, which can be a view, a dialog box, or a form. If the scroll bar is horizontal, the
message sent is WM_HSCROLL, which fires an OnHScroll() event. The CWnd class,
as the parent of all MFC Windows controls and views, carries this event and makes it
available to the child classes (and controls) that can perform the scrolling. The syntax of
the OnHScroll() event is:
afx_msg void OnHScroll(UINT nSBCode, UINT nPos, CScrollBar* pScrollBar);
The nSBCode argument is the type of scrolling that is being performed. Its possible
values are:
Value Description Role
SB_THUMBTRACK The thumb is being dragged to a
specific position
SB_LEFT The thumb has been positioned to the
minimum value of the scroll bar, to
the extreme left.
Used to position the thumb to the
lowest value of the range
SB_LINELEFT The thumb is scrolling to the left one,
character or column at a time
Used to decrease the position of the
thumb, usually by subtracting 1 to the
current value, unless the thumb is
already positioned there
SB_PAGELEFT The thumb is scrolling to the left, one
page at a time
Refers to the page size of the
SCROLLINFO value to decrease the
current position by one page
SB_PAGERIGHT The thumb is scrolling to the right,
one page at a time
Refers to the page size of the
SCROLLINFO value to increase the
current position by one page
SB_LINERIGHT The thumb is scrolling to the right
one, character or column at a time
Used to increase the position of the
thumb, usually by adding 1, unless
the thumb is already positioned there
SB_RIGHT The thumb has been positioned to the
maximum value of the scroll bar, to
the extreme right
Used to position the thumb to the
highest value of the range, unless the
thumb is already positioned there
SB_THUMBPOSITION
Absolute postion
SB_ENDSCROLL End Scroll Used to determine the end of the
scrolling
The nPos argument is used in connection with the SB_THUMBTRACK and the
SB_THUMBPOSITION values of the nSBCode argument. The value of nPos specifies
how much scrolling should be done.
The pScrollBar argument can be used to identify the particular scroll bar control needs to
be dealt with on this OnHScroll() event.
If your scroll bar control is vertical, when the user clicks it, it sends a WM_VSCROLL
message which fires the OnVScroll() event. Its syntax is:
afx_msg void OnVScroll(UINT nSBCode, UINT nPos, CScrollBar* pScrollBar);
Chapter 18: Progress-Based Controls Visual C++ and MFC Fundamentals
594 © FunctionX, Inc.
The nSBCode argument is the type of scrolling that is being performed. Its possible
values are:
Value Description Role
SB_THUMBTRACK The thumb is being dragged to a
specific position
SB_UP The thumb has been positioned to the
maximum value of the scroll bar, to
the extreme right
Used to position the thumb to the
highest value of the range, unless the
thumb is already positioned there
SB_LINEUP The thumb is scrolling up, one line at
a time
Used to increase the position of the
thumb, usually by adding 1, unless
the thumb is already positioned there
SB_PAGEUP The thumb is scrolling up, one page
at a time
Refers to the page size of the
SCROLLINFO value to increase the
current position by one page
SB_PAGEDOWN The thumb is scrolling to the bottom,
one page at a time
Refers to the page size of the
SCROLLINFO value to decrease the
current position by one page
SB_LINEDOWN The thumb is scrolling to the bottom,
one line at a time
Used to decrease the position of the
thumb, usually by subtracting 1 to the
current value, unless the thumb is
already positioned there
SB_BOTTOM The thumb has been positioned to the
minimum value of the scroll bar, to
the bottom side of the scroll bar
Used to position the thumb to the
lowest value of the range
SB_THUMBPOSITION
Absolute postion
SB_ENDSCROLL End Scroll Used to determine the end of the
scrolling
The nPos argument is used in connection with the SB_THUMBTRACK and the
SB_THUMBPOSITION values of the nSBCode argument. The value of nPos specifies
how much scrolling should be done.
The pScrollBar argument can be used to identify the particular scroll bar control needs to
be dealt with on this OnHScroll() event.
Practical Learning: Using the Scroll Bar Events
1. Generate the WM_VSCROLL message of the dialog box and implement it as
follows:
void CPreviewerDlg::OnVScroll(UINT nSBCode, UINT nPos, CScrollBar* pScrollBar)
{
// TODO: Add your message handler code here and/or call default
int CurPos = pScrollBar->GetScrollPos();
switch (nSBCode)
{
case SB_TOP:
CurPos = 0;
break;
case SB_LINEUP:
if (CurPos > 0)
Visual C++ and MFC Fundamentals Chapter 18: Progress-Based Controls
© FunctionX, Inc. 595
CurPos ;
break;
case SB_LINEDOWN:
if (CurPos < 255)
CurPos++;
break;
case SB_BOTTOM:
CurPos = 255;
break;
case SB_ENDSCROLL:
break;
case SB_THUMBPOSITION:
CurPos = nPos;
break;
case SB_THUMBTRACK:
CurPos = nPos;
break;
}
// Set the new position of the thumb (scroll box).
pScrollBar->SetScrollPos(CurPos);
// Update each color based on the positions of the scroll bar controls
ColorRed = 255 - m_ScrollRed.GetScrollPos();
ColorGreen = 255 - m_ScrollGreen.GetScrollPos();
ColorBlue = 255 - m_ScrollBlue.GetScrollPos();
CDialog::OnVScroll(nSBCode, nPos, pScrollBar);
}
2. Create a timer in the OnInitDialog() event as follows:
SetTimer(1, 40, NULL);
return TRUE; // return TRUE unless you set the focus to a control
}
3. Generate a WM_TIMER message for the dialog box and implement it as follows:
void CPreviewerDlg::OnTimer(UINT nIDEvent)
{
// TODO: Add your message handler code here and/or call default
PaintPreviewArea();
CDialog::OnTimer(nIDEvent);
}
4. Test the application
Chapter 18: Progress-Based Controls Visual C++ and MFC Fundamentals
596 © FunctionX, Inc.
5. Close it and return to MSVC
18.5 Flat Scroll Bars
18.5.1 Overview
Besides the Controls toolbox’ regular scroll bar controls, the Win32 and the MFC
libraries provide a more elaborate and friendlier object called the flat scroll bar. This
control provides the same functionality and and features as the above scroll bars but tends
to be friendlier.
18.5.2 Flat Scroll Bar Properties
To add a flat scroll bar control to your application, from the Insert ActiveX dialog box,
double-click Microsoft Flat Scroll Bar Control
Visual C++ and MFC Fundamentals Chapter 18: Progress-Based Controls
© FunctionX, Inc. 597
When a Microsoft Flat Scroll Bar control has been added to a parent window, it appears
flat, its buttons and its thumb have no borders. This display is controlled by the
Appearance property whose default value is 1 – fsbFlat. With this value, a simple line is
drawn around each button and the central thumb. To add a visual effect, you can change
the Appearance’s value to the 2 – fsbTrack3D value. In this case, when the mouse is
positioned on top of a button or the thumb, the button or the thumb’s borders are raised,
creating a 3-D effect:
If you prefer the classic 3-D look with borders permentently raised on the buttons and the
thumb, set the Appearance to 0 – fsb3D.
By default, a newly added flat scroll control is oriented horizontally on its parent window
and display a left and a right pointing arrow buttons. The direction of this control is set
using the Orientation combo box. The default value is 1 – cc2OrientationHorizontal. If
you want a vertical scroll bar, change the Orientation value to 0 -
cc2OrientationVertical.
Like the regular scroll bar, this flat control displays a button equipped with an arrow at
each end and a thumb in the middle. The user can click or hold a button to scroll in the
desired direction. The flat scroll bar control allows you to decide what arrow button the
user would be allowed to use. This can be controlled using the Arrows property. Because
the user can scroll by default in both directions, this property has a 0 – cc2Both value. If
you do not want the user to scroll left on a horizontal scroll bar or to scroll up on a
vertical scroll bar, you can set the Arrows property to 1 – cc2LeftUp. In the same way,
to prevent the user from scrolling in the right direction for a horizontal scroll bar or from
scrolling in the bottom direction for a vertical scroll bar, set the Arrows property to 2 –
cc2RightDown.
The limiting values of the flat scroll bar are set using the Min field for the lowest value
and the Max field for the highest value. The value must be in the range of a short integer,
from 0 to 32767. The Min value should be set lower than the Max value.
Chapter 18: Progress-Based Controls Visual C++ and MFC Fundamentals
598 © FunctionX, Inc.
When a newly added scroll bar has been added to a parent window, it gets the position of
its lowest or Min value. To set a different initial value, use the Value field.
One of the ways the user explores a scroll bar is by clicking one of the arrow buttons.
This causes the middle thumb to move towards the arrow being clicked. By default, one
click corresponds to one unit, which could be one line of text. To control how much value
should be incremented when the user clicks one of the arrow buttons or presses the arrow
keys, change the value of the SmallChange property.
Another way the user can use a scroll bar is by clicking between an arrow button and the
thumb or by pressing either Page Up or Page Down. To control how many units should
be covered by this move, change the value of the LargeChange property.
18.5.3 Flat Scroll Bar Methods and Events
The Microsoft Scroll Bar Control is based on the CFlatSB class which itself is derived
from CWnd.
If the user clicks or holds one of the arrow buttons to scroll, the Flat Scroll Bar fires the
Scroll() event
When the user clicks or holds one of the buttons, the value of the scroll bar changes. The
value changes also if the user drags the thumb. This change of the Value property causes
the Flat Scroll Bar to fire the Change() event.
Visual C++ and MFC Fundamentals Chapter 20: List-Based Controls
© FunctionX, Inc. 599
Chapter 19:
Selection-Based Controls
? Radio Buttons
? Check Boxes
Chapter 20: List-Based Controls Visual C++ and MFC Fundamentals
600 © FunctionX, Inc.
19.1 Radio Buttons
19.1.1 Introduction
A radio button is a control that appears as a (proportionately big) dot surrounded by a
round box ? . In reality, a radio button is accompanied by one or more other radio buttons
that appear and behave as a group. The user decides which button is valid by selecting
only one of them. When he or she clicks one button, its round box fills with a (big) dot:
? . When one button is selected, the other round buttons of the (same) group are empty ? .
The user can select another by clicking a new choice, which empties the previous
selection. This technique of selecting is referred to as mutually-exclusive.
To indicate what a radio butto is used for, each one of them is accompanied by a label.
The label is simply a string and it can be positioned to the left, above, to the right, or
under the round box.
Practical Learning: Introducing Radio Buttons
1. Start Microsoft Visual Studio or Visual C++ if necessary.
Open the Clarksville Ice Scream1 application. If you did not create, then create a
Single Document Interface application named Clarksville Ice Scream1
2. To add a new object, display the Add Resource dialog box and double-click Dialog
3. Change the Caption of the dialog box to
Clarksville Ice Scream – Customer Order
4. Change its ID to IDD_ICESCREAM_ORDER
5. Add a class for the new dialog box and name it CIceScreamOrderDlg
Make sure the class is based on CDialog
6. Press Enter
7. Display the menu editor and change the caption of the first menu item under File
from &New\tCtrl+N to &New Order…\tCtrl+N
Visual C++ and MFC Fundamentals Chapter 20: List-Based Controls
© FunctionX, Inc. 601
8. Change its Prompt to Process a new ice scream order\nNew
9. Add an Event Handler to the New Order item associated with the document class:
10. Implement the event as follows:
#include "stdafx.h"
#include "Clarksville Ice Scream1.h"
#include "ExerciseDoc.h"
#include "IceScreamOrderDlg.h"
. . .
void CExerciseDoc::OnFileNew()
{
// TODO: Add your command handler code here
CIceScreamOrderDlg Dlg;
Dlg.DoModal();
}
11. Test the application and return to MSVC
Chapter 20: List-Based Controls Visual C++ and MFC Fundamentals
602 © FunctionX, Inc.
19.1.2 Creating Radio Buttons
Because they come in a group, to create radio buttons, on the Controls toolbox, click the
Radio Button button and click the desired area on the host window. In the same
way, add one or more radio buttons:
To indicate that the radio buttons belong to a group, you should (with emphasis) place
them inside of a frame, the most common of which is the Group Box control.
Alternatively, you can add them to a Picture frame (other allowed but unlikely frames are
a Static control or an Animation box):
The main advantage of a Group Box control, which explains why it is the most common
container of radio buttons, is that it inherently provides a caption you can use to indicate
what its set of radio buttons is used for.
Two properties are of particular importance to both you and the user: the label and the
state of the control. The label is text that specifies what a particular radio button is used
for. The label should be explicit enough for the user to figure out the role of an item in
the group.
To change the label of a radio button, after adding the control, replace the value of the
Caption field in the Properties window. If the control exists already, to change its
caption, call the CWnd::SetWindowText() method.
Pratical Learning: Creating Radio Buttons
1. From the Controls toolbox, click the Group Box button and click on the upper
left section of the dialog box.
2. Change its Caption to Flavor
3. From the Controls toolbox, click the Radio Button and click inside the Flavor
group box
Visual C++ and MFC Fundamentals Chapter 20: List-Based Controls
© FunctionX, Inc. 603
4. Change its Caption to &Vanilla and change its ID to IDC_FLAVORS
5. Complete the design of the dialog box as follows (when adding the radio buttons,
start with the Vanilla and add those under it. Then add the Container group box and
add its radio buttons. Then add the Ingredient group box and its radio buttons.
Finally, add the Scoops group box followed by its radio buttons. If you do not,
neglect to, or forget to, follow this order, when you have finished, display the Tab
Order and reorder th sequence. This is because we will keep this sequence in mind
when creating the groups in the next section):
Except for the last Edit control, all controls on this table are radio buttons
ID Caption ID Caption
IDC_FLAVORS &Vanilla IDC_CONTAINER Cu&p
IDC_RDO_CREAMOFCOCOA &Cream of Cocoa IDC_RDO_CONE C&one
IDC_RDO_CHOCOLATE C&hocolate Chip IDC_RDO_BOWL Bo&wl
IDC_RDO_BUTTERPECAN &Butter Pecan IDC_INGREDIENT &None
IDC_RDO_CHUNKYBUTTER Ch&unky Butter IDC_RDO_MM &M && M
IDC_RDO_STRAWVAN &Strawberry Vanilla IDC_RDO_MIXEDNUTS Mi&xed Nuts
IDC_RDO_CHOCOCOOKIES Chocol&ate Cookies
IDC_SCOOPS On&e
IDC_SCOOPS_ TWO &Two
IDC_SCOOPS_ THREE Th&ree IDC_PRICE
6. From the resources that accompany this book, import the cup.bmp picture. If you are
using MSVC 6, you will receive a message box. Simply click OK
Change its ID to IDB_CUP
7. In the same way, import the cone.bmp picture and change its ID to IDB_CONE
8. Import the bowl.bmp picture and change its ID to IDB_BOWL
9. Add a Picture control to the right side of the dialog box and change its ID to
IDC_PICTURE
Chapter 20: List-Based Controls Visual C++ and MFC Fundamentals
604 © FunctionX, Inc.
10. Set its Type to Bitmap and, in its Image combo box, select IDB_CUP
11. Set its Center Image property to True
12. Add a Control variable for the Picture control and name it m_Picture
13. Save All
19.1.3 Radio Button Properties
As described already, to select a radio button, the user clicks it. To indicate to the user
that a button has been selected, it should display a dot in its round box. To display this
dot automatically, set the Auto property to True.
When adding a radio button to a host, it displays a text label to the right side of its round
box. If you prefer to position the label to the left of the small circle, set the Left Text
property to True or, at run time, add the BS_LEFTTEXT style:
The label that accompanies a radio button is static text that is included in a rectangular
shape. Since the radio button by default is configured to display one line of text, the
round box is locate to the left side of the label. If you plan to use multiple lines of text for
the label, at design time, change the rectangular area of the control accordingly:
Visual C++ and MFC Fundamentals Chapter 20: List-Based Controls
© FunctionX, Inc. 605
If you are programmatically creating the control, specify an appropriate rect value to the
Create() method. Then, set the Multiline property to True or, at run time, add the
BS_MULTILINE style:
Once the text can fit in the allocated area, you can accept the default alignment of the
label or change it as you see fit. The alignment of text is specified using the Horizontal
Alignment and the Vertical Alignment properties. Here are the possible combinations:
Left Text: False
Horz Align: Default or Left
Vert Align: Top
Left Text: False
Horz Align: Default or Left
Vert Align: Default or Center
Left Text: False
Horz Align: Default or Left
Vert Align: Bottom
Left Text: True
Horz Align: Default or Left
Vert Align: Top
Left Text: True
Horz Align: Default or Left
Vert Align: Default or Center
Left Text: True
Horz Align: Default or Left
Vert Align: Bottom
In the same way, you can add other radio buttons and individually configure each. For
harmony, all radio of a group should have the same design.
For either the user or the programmer, radio buttons must behave as entities of one group.
When you freshly add radio buttons to a host, they are created as a group. If your form or
dialog box will be made of only a few radio buttons, you may not need to do much. If
you plan to use more than one set of radio buttons, then you must separate them into
groups. To do that, set the Group property of each new button of a group to True.
Imagine you will use two sets of group buttons on a dialog box. Add the first radio button
and set its Group property to True (checked) or add the WS_GROUP value to its style;
then, add the other radio buttons of the set but set their Group property to False
(unchecked) or do not add the WS_GROUP value to their styles.
Chapter 20: List-Based Controls Visual C++ and MFC Fundamentals
606 © FunctionX, Inc.
When starting the new set, add a new radio button and set its Group property to True
(checked). Add the other radio buttons with the Group property set to False (unchecked)
or without the WS_GROUP style.
Once the radio buttons belong to the same group, if the user clicks one that is empty ? , it
gets filled with a big dot ? and all the others become empty ? . This is the default and
most common appearance these controls can assume. Alternatively, you can give them
the appearance of a regular command button with 3-D borders. To do this, set the Push-
Like property to True. When the radio buttons appear as command buttons, the control
that is selected appear pushed or down while the others are up:
If you do not want the default 3-D design of radio buttons, you can make them flat by
setting the Flat property to True.
Practical Learning: Configuring Radio Buttons
1. On the dialog box, click the Vanilla radio button and, on the Properties window,
check the Group check box or set its value to True:
2. In the same way check the Group property of the Cup, None, and One radio buttons
or set this property to True for them
3. Set the Group box of all the other radio buttons to unchecked or False
4. Except for the radio buttons in the Flavor group, check the Left Text property of all
the other radio buttons and set their Left Text value to True
Visual C++ and MFC Fundamentals Chapter 20: List-Based Controls
© FunctionX, Inc. 607
5. Execute the application to test the radio buttons
6. Close the dialog box and return to MSVC
19.1.4 Radio Buttons Methods
As a Windows control, the radio button is based on the CButton class which, like all
other constrols, is based on CWnd. As far as the Win32 and the MFC libraries are
concerned, a radio button is first of all, a button. Therefore, to programmatically create a
radio button, declare a variable or a pointer to CButton using its default constructor. Like
all other MFC controls, the CButton class provides a Create() method to initialize it. The
syntax of this method for a button is:
BOOL Create(LPCTSTR lpszCaption, DWORD dwStyle, const RECT& rect , CWnd*
pParentWnd, UINT nID);
The lpszCaption argument is the string of the label that accomponies the radio button.
The differences of radio buttons are set using the dwStyle argument. A radio button must
have the BS_RADIOBUTTON value.
When setting the rect argument, provide enough space for the control because, by default,
it will be confined to that rectangle and cannot display beyond that. Here are two
examples:
BOOL CDialog12Dlg::OnInitDialog()
{
CDialog::OnInitDialog();
// Set the icon for this dialog. The framework does this automatically
// when the application's main window is not a dialog
SetIcon(m_hIcon, TRUE); // Set big icon
SetIcon(m_hIcon, FALSE); // Set small icon
Chapter 20: List-Based Controls Visual C++ and MFC Fundamentals
608 © FunctionX, Inc.
// TODO: Add extra initialization here
CButton *btnSmall = new CButton;
CButton *btnMedium = new CButton;
btnSmall->Create("&Small",
WS_CHILD | WS_VISIBLE | BS_RADIOBUTTON,
CRect(130, 40, 200, 50), this, 0x12);
btnMedium->Create("&Medium",
WS_CHILD | WS_VISIBLE | BS_RADIOBUTTON,
CRect(130, 70, 200, 80), this, 0x14);
return TRUE; // return TRUE unless you set the focus to a control
}
If you want the radio button to get filled with a dot when it has been selected and to
remove the dot from the other radio buttons of the same group, create it with the
BS_AUTORADIOBUTTON style.
While using the radio buttons, the user is presented with the controls and requested to
select one. To make a selection, the user must click the desired choice. The control
selected fills its circle with a (big) dot ? . To programmatically change the state of a radio
button, you have various options.
The easiest way to select a radio button consists of calling the
CWnd::CheckRadioButton() method (actually, you should call this method as
CDialog::CheckRadioButton()). Its syntax is:
void CheckRadioButton(int nIDFirstButton, int nIDLastButton, int nIDCheckButton);
To use this method, you must know the identifiers of the radio buttons involved. The
nIDFirstButton is the identifier of the first radio button of the group. The nIDLastButton
is the identifier of the last radio button of the group. The last argument, nIDCheckButton
is the identifier of the radio button that must be selected. Here is an example:
void CDialog12Dlg::OnBtnSelect2()
{
// TODO: Add your control notification handler code here
CheckRadioButton(IDC_RADIO1, IDC_RADIO3, IDC_RADIO3);
}
To change the state of a radio button, you can call the CButton::SetCheck() method. Its
syntax is:
void SetCheck(int nCheck);
The nCheck value indicates how to fill the control’s circle. To fill it with the selection
dot, pass the value of 0. To deselect a radio button, pass the argument as 1. Here is an
example:
void CDialog12Dlg::OnBtnSelect2()
{
// TODO: Add your control notification handler code here
CButton *btnSecond;
btnSecond = reinterpret_cast<CButton *>(GetDlgItem(IDC_RADIO2));
btnSecond->SetCheck(1);
Visual C++ and MFC Fundamentals Chapter 20: List-Based Controls
© FunctionX, Inc. 609
}
To find out what radio button of a group is selected, you can call the
CWnd::GetCheckedRadioButton(). Its syntax is:
int GetCheckedRadioButton( int nIDFirstButton, int nIDLastButton );
When calling this method, you must specify the identifier of the first radio button of the
group as nIDFirstButton and the identifier of the last radio button of the group as
nIDLastButton. The method returns the identifier of the radio button whose circle is
filled.
Alternatively, to find the selected radio button, call the CButton::GetCheck() method.
Its syntax is:
int GetCheck( ) const;
This method returns 0 if the radio button is not selected. Otherwise, it returns 1 if the
radio button is selected.
If you want to want to find whether a particular radio button is currently selected, you can
call the CWnd::IsDlgButtonChecked() method. Its syntax:
UINT IsDlgButtonChecked(int nIDButton) const;
When calling this method, pass the identifier of the radio button as the nIDButton
argument. This member function will check the state of the radio button. If the radio
button is selected, the method will return 1. If the radio button is not selected, the method
returns 0.
Practical Learning: Selecting Radio Buttons
1. Add a Control variable for the IDC_FLAVORS radio button and name it m_Flavors
2. In the same way, add a Control variable for the IDC_CONTAINER,
IDC_INGREDIENT, and IDC_SCOOPS named m_ Container, m_Ingredient, and
m_Scoops respectively
3. Add a CString value variable for the IDC_PRICE edit control and name it m_Price
Chapter 20: List-Based Controls Visual C++ and MFC Fundamentals
610 © FunctionX, Inc.
4. When the clerk is about to process a new ice scream order, some radio buttons
should be selected already, those that would be the default.
To select the default radio buttons, display the OnInitDialog() event of the dialog
box and change it as follows:
// IceScreamOrderDlg.cpp : implementation file
//
#include "stdafx.h"
#include "Clarksville Ice Scream1.h"
#include "IceScreamOrderDlg.h"
// CIceScreamOrderDlg dialog
IMPLEMENT_DYNAMIC(CIceScreamOrderDlg, CDialog)
CIceScreamOrderDlg::CIceScreamOrderDlg(CWnd* pParent /*=NULL*/)
: CDialog(CIceScreamOrderDlg::IDD, pParent)
, m_Price(_T("$2.60"))
{
}
CIceScreamOrderDlg::~CIceScreamOrderDlg()
{
}
void CIceScreamOrderDlg::DoDataExchange(CDataExchange* pDX)
{
CDialog::DoDataExchange(pDX);
DDX_Control(pDX, IDC_FLAVORS, m_Flavors);
DDX_Control(pDX, IDC_RDO_CUP, m_Container);
DDX_Control(pDX, IDC_IGR_NONE, m_Ingredient);
DDX_Control(pDX, IDC_SCOOPS_ONE, m_Scoops);
DDX_Text(pDX, IDC_PRICE, m_Price);
}
BEGIN_MESSAGE_MAP(CIceScreamOrderDlg, CDialog)
END_MESSAGE_MAP()
// CIceScreamOrderDlg message handlers