iPhone Cool Projects phần 9 pdf
Bạn đang xem bản rút gọn của tài liệu. Xem và tải ngay bản đầy đủ của tài liệu tại đây (820.84 KB, 23 trang )
CHAPTER 7: Going the Routesy Way with Core Location, XML, and SQLite164
Figure 7-5. Selecting frameworks and libraries to link to the project
Let’s take a moment to become familiar with the libraries and frameworks that we just linked
to the project:
N
CoreLocation.framework: This framework provides us with access to the iPhone’s loca-
tion API, which your application uses to help the user find the nearest BART station.
N
SystemConfiguration.framework: This contains APIs that allow us to determine the
configuration of the user’s device. In the case of Routesy, we need to make sure the
network is available before attempting to retrieve prediction data.
N
libsqlite3.dylib: This dynamic C library provides an API for querying the static SQL
database included with our project.
CHAPTER 7: Going the Routesy Way with Core Location, XML, and SQLite 165
N
libxml2.dylib: This dynamic library gives the application access to fast parsing of XML
documents and support for XPath querying, which will help us quickly find the pre-
diction data the user requests.
6. The libxml2 library also requires that you include a reference to the libxml header
files, which are located on your system in the path /usr/include/libxml2. To add the
headers, select the Build tab in the Target Info window that we’ve already opened,
and add the path to the Header Search Paths field, as shown in Figure 7-6.
Figure 7-6. Adding the libxml2 header search paths to the build settings
Invoke the dialog shown in Figure 7-6 by double-clicking the Header Search Paths
field. Make sure that you check the Recursive box so that your application can find all
of the libxml2 headers that you’ll need to build your application.
Now that all of your project dependencies have been set up, we’re ready to get started cod-
ing. First, we need to build the model for your project—the objects that will represent pieces
of data. For Routesy, there are two types of objects: a station and a prediction. You’ll start by
creating an object for each.
CHAPTER 7: Going the Routesy Way with Core Location, XML, and SQLite166
7. Choose File ¢ New File, and under Cocoa Touch Classes, select “NSObject subclass,”
as shown in Figure 7-7. One of the files will be called Station.m, and the other will be
called Prediction.m. When you create these classes, each implementation file (with
extension .m) will automatically be accompanied by a header file (with extension .h).
Figure 7-7. Creating a new NSObject subclass file in the
New File dialog
8. To keep your files organized, let’s also create a
folder (referred to in Xcode as a group) by choosing
Project ¢ New Group. You should name your new
group “model”, and drag the header and implementa-
tion files you just created into this group, as shown in
Figure 7-8.
The structure for these classes is very basic, and maps
closely to the data in our static database and the
information returned by the BART XML feed. To avoid
memory leaks, don’t forget to release instance variables in your objects’ dealloc
methods. Listing 7-1 shows the code for your Station and Prediction classes.
Listing 7-1. Creating the Station and Prediction Model Classes
//
// Station.h
//
#import <Foundation/Foundation.h>
@interface Station : NSObject {
NSString *stationId;
NSString *name;
float latitude;
float longitude;
float distance;
}
Figure 7-8. Organizing your
model classes in a folder
CHAPTER 7: Going the Routesy Way with Core Location, XML, and SQLite 167
@property (copy) NSString *stationId;
@property (copy) NSString *name;
@property float latitude;
@property float longitude;
@property float distance;
@end
//
// Station.m
//
#import "Station.h"
@implementation Station
@synthesize stationId, name, latitude, longitude, distance;
- (void)dealloc {
[stationId release];
[name release];
[super dealloc];
}
@end
//
// Prediction.h
//
#import <Foundation/Foundation.h>
@interface Prediction : NSObject {
NSString *destination;
NSString *estimate;
}
@property (copy) NSString *destination;
@property (copy) NSString *estimate;
@end
//
// Prediction.m
//
#import "Prediction.h"
@implementation Prediction
@synthesize destination, estimate;
CHAPTER 7: Going the Routesy Way with Core Location, XML, and SQLite168
- (void)dealloc {
[destination release];
[estimate release];
[super dealloc];
}
@end
Next, we’ll deal with the controllers in your project. Roughly speaking, a controller is an
object that bridges your application’s model (the objects that contain data) with the view
(what the application displays to the user).
There is already a controller in your project, RootViewController.m, which is the class for the
initial
UITableViewController that is displayed when the user launches your application.
We’ll need a second table view controller to manage the list of predictions the user will see
when selecting a station, so let’s create a class for that too.
9. Choose File ¢ New File, and this time choose
“UITableViewController subclass” as your tem-
plate, as shown in Figure 7-9. Call your new class
PredictionTableViewController.
To keep things organized, now would be a good time to
create a group called “controller” in which to keep your con-
troller classes, just like you did for your model classes in
Figure 7-8. You should place both RootViewController and
PredictionTableViewController in this new group.
Both of these view controller classes have a ton of handy, commented method implementa-
tions in place to help us remember what we need to implement to get our table views up
and running. We’ll implement some of these methods later as we begin to add to our appli-
cation’s functionality.
At this point, we have a great starting point to begin showing the list of stations in the initial
table view.
10. First, we need to add a property to RootViewController so we have somewhere to
store the list of station objects. Add an instance variable to RootViewController.h:
NSMutableArray *stations;
11. Also, add a property to the header:
@property (nonatomic,retain) NSMutableArray *stations;
Figure 7-9. Creating a
UITableViewController
subclass
CHAPTER 7: Going the Routesy Way with Core Location, XML, and SQLite 169
12. At the top of RootViewController.m, in the implementation section, make sure to syn-
thesize your new property:
@synthesize stations;
13. Now, you need to open the database, retrieve the list of stations, and put that list into
the mutable array that we just created. We only need to load the static list of stations
once when the application starts since the list is unchanging, so we’ll load the list by
implementing the viewDidLoad method of RootViewController.
The code in Listing 7-2 initializes the stations array and executes a query against
the database file to get the list of stations. For each row in the database, you’ll allo-
cate a new Station object and add it to the array, as shown in Listing 7-2. You’ll
notice that this code makes extensive use of SQLite C APIs, which you can read about
in more detail at , or in The Definitive Guide to SQLite by
Mike Owens (Apress, 2006).
Listing 7-2. Loading the Station List from the Database
- (void)viewDidLoad {
[super viewDidLoad];
// Load the list of stations from the static database
self.stations = [NSMutableArray array];
sqlite3 *database;
sqlite3_stmt *statement;
NSString *dbPath = [[NSBundle mainBundle]
pathForResource:@"routesy" ofType:@"db"];
if (sqlite3_open([dbPath UTF8String], &database) == SQLITE_OK) {
char *sql = "SELECT id, name, lat, lon FROM stations";
if (sqlite3_prepare_v2(database, sql, -1, &statement, NULL)
== SQLITE_OK) {
// Step through each row in the result set
while (sqlite3_step(statement) == SQLITE_ROW) {
const char* station_id =
(const char*)sqlite3_column_text(statement, 0);
const char* station_name =
(const char*)sqlite3_column_text(statement, 1);
double lat = sqlite3_column_double(statement, 2);
double lon = sqlite3_column_double(statement, 3);
CHAPTER 7: Going the Routesy Way with Core Location, XML, and SQLite170
Station *station = [[Station alloc] init];
station.stationId = [NSString stringWithUTF8String:station_id];
station.name = [NSString stringWithUTF8String:station_name];
station.latitude = lat;
station.longitude = lon;
[self.stations addObject:station];
[station release];
}
sqlite3_finalize(statement);
}
sqlite3_close(database);
}
}
14. To get the UITableView to display rows, you need to implement three basic
methods. First, you need to set the number of sections that your table view
has—in this case, one. This function is already implemented in the template for
RootViewController.m:
- (NSInteger)numberOfSectionsInTableView:(UITableView *)tableView {
return 1;
}
15. Next, the UITableView needs to know how many table cells to display. This is as
simple as returning the number of rows in the array of stations:
- (NSInteger)tableView:(UITableView *)tableView
numberOfRowsInSection:(NSInteger)section {
return [self.stations count];
}
16. Finally, we’ll implement the method that determines what value to display in a cell
when the table view is displayed.
The iPhone SDK uses a clever method of keeping memory usage at a manageable level
when scrolling through long lists of items in a table view. Instead of creating a cell for each
item, which could use vast amounts of memory, the table only allocates as many cells as can
be displayed at once, and when a cell scrolls out of the viewable area, it is queued up to be
reused when a new cell needs to be displayed.
The following method always checks to see if there is an already allocated cell available to
be reused by calling dequeueReusableCellWithIdentifier each time a cell is displayed.
The CellIdentifier string allows your table view to have more than one type of cell. In this
case, we’ll set the identifier to "station".
CHAPTER 7: Going the Routesy Way with Core Location, XML, and SQLite 171
To determine which station corresponds with the cell being displayed, this method provides
a handy NSIndexPath object, which has a property called row. You’ll see from the code
below that we use the row index to retrieve a Station object from the stations array, and
once we have a cell to work with, we can set the
text property of the cell to the name of the
station, as shown in Listing 7-3.
Listing 7-3. Setting Up the Station List Table Cell Text
- (UITableViewCell *)tableView:(UITableView *)tableView
cellForRowAtIndexPath:(NSIndexPath *)indexPath {
static NSString *CellIdentifier = @"station";
Station *station = [self.stations objectAtIndex:indexPath.row];
UITableViewCell *cell = [tableView
dequeueReusableCellWithIdentifier:CellIdentifier];
if (cell == nil) {
cell = [[[UITableViewCell alloc] initWithFrame:CGRectZero
reuseIdentifier:CellIdentifier] autorelease];
}
// Set up the cell
cell.text = station.name;
return cell;
}
17. At the top of RootViewController.m, you’ll need to add two additional #import state-
ments to include dependencies that your new code relies on. At the top of the file,
add the following lines so your project will compile properly:
#import <sqlite3.h>
#import "Station.h"
With the table view code in place, we can finally test Routesy for the first time. In
Xcode, click “Build and Go” in the toolbar, and your application will compile and
launch in the iPhone Simulator. Once the application launches, you’ll be presented
with a view like the one shown in Figure 7-10.
There really isn’t much to see yet. You’ll be able to scroll through the list of stops that are
being loaded from your database, but selecting a row won’t do anything yet.
The next step will be to properly set up the user interface so that tapping a station name will
allow the user to see a list of predictions for that station.
CHAPTER 7: Going the Routesy Way with Core Location, XML, and SQLite172
Figure 7-10. Your station list UITableView in action
We already have a class for the table view controller that will display predictions:
PredictionTableViewController. However, up to this point, we haven’t created an
instance of this class to display.
You may have already noticed that nowhere in the code do we create any instances of
RootViewController either. This is because the project template uses Interface Builder to
create an instance of RootViewController for us. You will mirror this approach when creat-
ing an instance of PredictionTableViewController.
Make sure to save any unsaved files in your project, and then under the Resources folder in
your project, double-click MainWindow.xib to open the user interface file in Interface Builder.
Two windows will be displayed: the document, shown in Figure 7-11, and the window for
the navigation controller that the application uses to navigate back and forth and to man-
age the stack of visible views, shown in Figure 7-12.
CHAPTER 7: Going the Routesy Way with Core Location, XML, and SQLite 173
Figure 7-11. The default Interface Builder document view
Figure 7-12. The Navigation Controller window in Interface Builder
CHAPTER 7: Going the Routesy Way with Core Location, XML, and SQLite174
Many of the objects we’ll be working with are in the hierarchy of views
under Navigation Controller, and these views are impossible to see
unless you change the document View Mode to something more
friendly. For this project, you’ll use the List View, which you can enable
by clicking the center button above View Mode in the document tool-
bar, shown in Figure 7-13.
Now is a good time to become familiar with the way that the
project template has set up this primary user interface file. The
navigation controller provided for us by default has a navigation bar and an instance of
RootViewController, the top-level class that was automatically generated for you when
you created the project and that currently contains the table view that displays the list of
stations.
18. Underneath Root View Controller is an instance of UINavigationItem, which con-
tains information about how this view controller fits into our navigation hierarchy.
Let’s see the information for our root controller by expanding the controller and
clicking the navigation item. Then, in Interface Builder, choose Tools ¢ Inspector.
When the Inspector window pops up, choose the first tab, called Attributes, as shown
in Figure 7-14.
Figure 7-14. Setting properties on the UINavigationItem
Figure 7-13.
Changing the View
Mode to List in
Interface Builder
CHAPTER 7: Going the Routesy Way with Core Location, XML, and SQLite 175
The navigation item has three text attributes displayed in the Inspector window: Title,
Prompt, and Back Button. Title determines what should be displayed in the bar at the top of
the screen when the navigation item’s view controller is visible in the view stack. The Prompt
field allows your application to display a single smaller line of text above the title, and the
Back Button field contains the text that will be displayed on the next screen inside the back
button that will take the user back to this screen.
19. For now, let’s simply type BART Stations into the Title field.
Next, we’re ready to create an instance of PredictionTableViewController, the class you
created earlier in step 9, to use for the second screen.
20. Open the Library window by clicking Tools ¢ Library. Under Cocoa Touch Plugin, in
the Controllers section, grab an instance of Table View Controller, and drag it to the
bottom of your document, as shown in Figure 7-15.
Figure 7-15. Adding a new table view controller to the project
CHAPTER 7: Going the Routesy Way with Core Location, XML, and SQLite176
Initially, the class for our new table view controller is set to UITableViewController.
However, since we already created our own custom controller class,
PredictionTableViewController, we need to tell Interface Builder that
the new controller’s type should match the class we created.
21. Select the table view controller you just dragged into the document, and open the
Inspector window again. Choose the Identity tab, and in the Class field, set the class
to PredictionTableViewController, as shown in Figure 7-16.
Figure 7-16. Setting the class for the Prediction Table View Controller
22. Our second table view controller will also need a navigation item so that we can set a
title for the predictions table. From the Library, drag a navigation item onto your new
table view controller, and set the title in the Inspector window the same way you did
for the root view controller object; see Figure 7-17. Be sure to drop this new naviga-
tion item inside the Prediction Table View Controller as shown so that it’s associated
with the proper view controller.
CHAPTER 7: Going the Routesy Way with Core Location, XML, and SQLite 177
Figure 7-17. Adding a navigation item to the Prediction Table View Controller
Now, you have an instance of PredictionTableViewController loaded into your user
interface XIB, ready to be used in your application. Save the changes in Interface Builder and
return to Xcode.
23. Next, we need to enable the table on the first screen to push the new second
table onto the view stack when the user selects a station. Inside the interface
for RootViewController in RootViewController.h, add #import
"PredictionTableViewController.h"
to your #import statements, and then
declare a new property that you will use to reference your new controller instance:
PredictionTableViewController *predictionController;
24. Set up the property for this new instance variable, but this time, add a reference to
IBOutlet in front of the type in the property declaration. This tells Interface Builder
that you want the ability to connect an object in Interface Builder with this property.
Don’t forget to also synthesize the property in RootViewController.m.
@property (nonatomic,retain)
IBOutlet PredictionTableViewController *predictionController;
CHAPTER 7: Going the Routesy Way with Core Location, XML, and SQLite178
25. Save your changes, switch back to Interface Builder, and click the Root View Control-
ler to select it. In the Inspector window, choose the second tab, called Connections.
You’ll see that there is now an outlet to your predictionController instance. Con-
nect that outlet to your Prediction Table View Controller by dragging the circle from
the outlet to the controller in the document window, as shown in Figure 7-18.
Figure 7-18. Connecting the Prediction Table View Controller to the predictionController outlet
26. Now that your root view controller has access to the new prediction controller that
we created, you can set up the root controller to reveal the predictions table when
you tap on a station name. Table view controllers have a delegate method called
didSelectRowAtIndexPath that you can implement that will be called whenever
you select an item in the table view. We will implement this method to tell our
application to push the prediction controller onto the view stack when you tap a
selection:
- (void)tableView:(UITableView*)tableView
didSelectRowAtIndexPath:(NSIndexPath*)indexPath {
[self.navigationController
pushViewController:self.predictionController animated:YES];
}
CHAPTER 7: Going the Routesy Way with Core Location, XML, and SQLite 179
27. We also need a way to tell the prediction controller what station the user selected.
We can do that by grabbing a reference to the station object and setting it into
a property on the prediction controller. Create an instance variable and prop-
erty called
station on the prediction controller for the station. The type for
this property is
Station, and you should create and synthesize this property on
PredictionTableViewController in the same way you’ve created properties for
other classes during this exercise. When creating new properties and instance vari-
ables, don’t forget to release them in your class’s dealloc method as well, to avoid
memory leaks.
28. Then, back in RouteViewController, we can get a reference to the selected station
using the row index provided in indexPath and set it into the new property we just
created, so that the prediction controller knows which station was selected.
- (void)tableView:(UITableView*)tableView
didSelectRowAtIndexPath:(NSIndexPath*)indexPath{
Station *selectedStation =
[self.stations objectAtIndex:indexPath.row];
self.predictionController.station = selectedStation;
[self.navigationController
pushViewController:self.predictionController animated:YES];
}
UIViewController
, the prediction controller’s base class, has a method called
viewWillAppear that is called before a view is displayed to the user. We can implement this
method on PredictionTableViewController to set the title that will be displayed on the
screen before the prediction screen is displayed to the user.
29. In PredictionTableViewController.m, implement this method:
- (void)viewWillAppear:(BOOL)animated {
[super viewWillAppear:animated];
self.title = self.station.name;
}
30. Build and run your application again, and when you tap a station name, you’ll see
your new table view controller slide into view with the name of the station you
selected displayed at the top of the second screen. We don’t have any data to display
yet, so that will be the next big step.
Bringing Real-Time Predictions to Routesy
Now that we have your model and controllers in place, we’re ready to start loading real-time
predictions from the BART data feed. To keep our application nice and clean, we’ll encapsu-
late the logic for loading feed data into a new class, called BARTPredictionLoader.
CHAPTER 7: Going the Routesy Way with Core Location, XML, and SQLite180
1. Create a new class by choosing File ¢ New File, and choose NSObject as the base
class for your new class.
There are a few things we’ll need to make our BARTPredictionLoader class as useful as pos-
sible. We’re going to create a method that will asynchronously grab the XML data from the
BART feed. We’ll also create a custom protocol so that we can assign a callback delegate, so
that our code can be easily notified when the XML data has finished loading. There will be
two NSMutableData properties: one for the data we’re loading and a copy of the last suc-
cessfully loaded data. Finally, we’ll make a singleton instance of BARTPredictionLoader
that your application can access from anywhere. Listing 7-4 shows what your header defini-
tion should look like.
Listing 7-4. Creating the BARTPredictionLoader Interface
//
// BARTPredictionLoader.h
//
#import <Foundation/Foundation.h>
#import <SystemConfiguration/SystemConfiguration.h>
@protocol BARTPredictionLoaderDelegate
- (void)xmlDidFinishLoading;
@end
@interface BARTPredictionLoader : NSObject {
id _delegate;
NSMutableData *predictionXMLData;
NSMutableData *lastLoadedPredictionXMLData;
}
+ (BARTPredictionLoader*)sharedBARTPredictionLoader;
- (void)loadPredictionXML:(id<BARTPredictionLoaderDelegate>)delegate;
@property (nonatomic,retain) NSMutableData *predictionXMLData;
@property (nonatomic,retain) NSMutableData *lastLoadedPredictionXMLData;
@end
2. Next, you’ll need to actually implement the code to load data from the BART
feed. Let’s start by implementing loadPredictionXML. Notice that this
method takes as an argument a delegate object that implements our protocol,
BARTPredictionLoaderDelegate. Our code will set the delegate into the
_delegate instance variable, where we’ll keep it until we need it.
CHAPTER 7: Going the Routesy Way with Core Location, XML, and SQLite 181
3. Before attempting to call the network, you should make sure that the network is cur-
rently available on the iPhone. The SCNetworkReachability functions provided by
SystemConfiguration.framework will allow you to do just that.
4. Assuming that the reachability flags indicate that the network is available, you can
use NSURLConnection to create an asynchronous connection to load the data from
the BART feed, as shown in Listing 7-5.
Listing 7-5. Checking the Network and Creating a Connection
- (void)loadPredictionXML:(id<BARTPredictionLoaderDelegate>)delegate {
_delegate = delegate;
// Load the predictions XML from BART's web site
// Make sure that bart.gov is reachable using the current connection
SCNetworkReachabilityFlags flags;
SCNetworkReachabilityRef reachability =
SCNetworkReachabilityCreateWithName(NULL,
[@"www.bart.gov" UTF8String]);
SCNetworkReachabilityGetFlags(reachability, &flags);
// The reachability flags are a bitwise set of flags
// that contain the information about
// connection availability
BOOL reachable = ! (flags &
kSCNetworkReachabilityFlagsConnectionRequired);
NSURLConnection *conn;
NSURLRequest *request = [NSURLRequest
requestWithURL:[NSURL
URLWithString:@" /> if ([NSURLConnection canHandleRequest:request] && reachable) {
conn = [NSURLConnection connectionWithRequest:request delegate:self];
if (conn) {
self.predictionXMLData = [NSMutableData data];
}
}
}
5. NSURLConnection’s connectionWithRequest method also takes a delegate argu-
ment. In this case, we’ll set the delegate to self, so that we can implement the
connection’s delegate methods right here in the BARTPredictionLoader class.
NSURLConnection has several delegate methods, three of which we’ll implement:
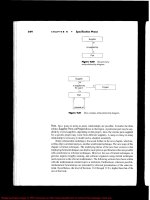
didReceiveResponse, didReceiveData, and connectionDidFinishLoading. The
comments in Listing 7-6 explain how each of the delegate methods works, while
Figure 7-19 shows the order in which these delegate methods are called.
CHAPTER 7: Going the Routesy Way with Core Location, XML, and SQLite182
Listing 7-6. The NSURLConnection’s Delegate didReceiveResponse Method
- (void)connection:(NSURLConnection *)connection
didReceiveResponse:(NSURLResponse*)response {
// didReceiveResponse is called at the beginning of the request when
// the connection is ready to receive data. We set the length to zero
// to prepare the array to receive data
[self.predictionXMLData setLength:0];
}
- (void)connection:(NSURLConnection *)connection
didReceiveData:(NSData *)data {
// Each time we receive a chunk of data, we'll appeend it to the
// data array.
[self.predictionXMLData appendData:data];
}
- (void)connectionDidFinishLoading:(NSURLConnection *)connection {
// When the data has all finished loading, we set a copy of the
// loaded data for us to access. This will allow us to not worry about
// whether a load is already in progress when accessing the data.
self.lastLoadedPredictionXMLData = [self.predictionXMLData copy];
// Make sure the _delegate object actually has the xmlDidFinishLoading
// method, and if it does, call it to notify the delegate that the
// data has finished loading.
if ([_delegate respondsToSelector:@selector(xmlDidFinishLoading)]) {
[_delegate xmlDidFinishLoading];
}
}
connectionDidFinishLoading
Data Array
didReceiveResponse didReceiveData
More data to be loaded
Figure 7-19. NSURLConnection’s delegate methods
CHAPTER 7: Going the Routesy Way with Core Location, XML, and SQLite 183
6. Finally, you’ll need to set up a singleton instance of BARTPredictionLoader so that
you can easily call it from anywhere in your application’s code (see Listing 7-7). The
@synchronized block around the initialization of the prediction loader ensures that
the instance you create will be thread-safe. Refer to Chapter 3 for more detailed
information on how threading works.
With this class method in place, you’ll be able to access the shared instance of
the prediction loader from anywhere by simply calling [BARTPredictionLoader
sharedBARTPredictionLoader]
. For a full explanation of how to properly imple-
ment singletons, see Apple’s Cocoa Fundamentals Guide:
/>CocoaFundamentals/CocoaObjects/CocoaObjects.html#//apple_ref/doc/uid
/TP40002974-CH4-SW32
Listing 7-7. Creating a Shared Instance of BARTPredictionLoader
static BARTPredictionLoader *predictionLoader;
+ (BARTPredictionLoader*)sharedBARTPredictionLoader {
@synchronized(self) {
if (predictionLoader == nil) {
[[self alloc] init];
}
}
return predictionLoader;
}
Now that we have the ability to load our data on demand, we need to figure out where to
use it. Let’s look again at the BART feed at />You’ll notice that the feed contains predictions for all the stations in one very small, quick-
to-load XML file. Normally, we would only load predictions for the station that a user selects,
but this file contains everything, so it makes the most sense to begin loading the data when
our list of stations first loads, so we can be ready with predictions when the user chooses a
station.
7. Let’s revisit the viewDidLoad code in RootViewController.m. First, we need to keep
the user from selecting anything in the table until the predictions are done loading.
Then, we’ll begin loading the XML. Add #import "BARTPredictionLoader.h" to
the imports in RootViewController.m, and then add the following code to the end of
viewDidLoad:
self.tableView.userInteractionEnabled = NO;
[[BARTPredictionLoader sharedBARTPredictionLoader] loadPredictionXML:self];
CHAPTER 7: Going the Routesy Way with Core Location, XML, and SQLite184
8. Remember when we created a protocol for the prediction loader? We need to
attach this protocol to RootViewController to tell BARTPredictionLoader
that RootViewController wants to be notified when the data finishes loading.
In RootViewController.h, you can add the protocol to the end of the interface
declaration:
@interface RootViewController :
UITableViewController <BARTPredictionLoaderDelegate> {
9. Now, we can implement the protocol’s xmlDidFinishLoading method in
RootViewController so that we can reenable the table after the XML loads.
- (void)xmlDidFinishLoading {
self.tableView.userInteractionEnabled = YES;
}
With that out of the way, we can now focus on loading the correct predictions for
the selected station, which means that we need a way to query the loaded XML to
get the predictions for the selected stop. We’re going to query the XML loaded by
BARTPredictionLoader using the XPath implementation provided by libxml2, which
we included when we initially created the project.
Matt Gallagher, author of the popular Cocoa With Love blog (),
provides for free use a set of wrapper functions for performing XPath queries. Since libxml2’s
C API can be difficult to work with, Matt’s PerformXMLXPathQuery function will save us lots
of extra time and effort.
10. Now, we’ll add a method to BARTPredictionLoader called
predictionsForStation that takes the unique station ID as an argument, as
shown in Listing 7-8. We’ll use this XPath query to find the eta elements that match
the unique station ID: //station[abbr='%@']/eta. The PerformXMLXPathQuery
function returns an array of dictionaries containing estimates and destinations for
the station.
TIP
Apple’s Event-Driven XML Programming Guide for Cocoa (le.
com/iphone/library/documentation/Cocoa/Conceptual/XMLParsing/
XMLParsing.html
) lists several helpful resources for working with XML in Cocoa applications.
Listing 7-8. Loading the Real-Time Predictions for a Station
- (NSArray*)predictionsForStation:(NSString*)stationId {
NSMutableArray *predictions = nil;
CHAPTER 7: Going the Routesy Way with Core Location, XML, and SQLite 185
if (self.predictionXMLData) {
NSString *xPathQuery = [NSString stringWithFormat:
@"//station[abbr='%@']/eta", stationId];
NSArray *nodes =
PerformXMLXPathQuery(self.predictionXMLData, xPathQuery);
predictions = [NSMutableArray arrayWithCapacity:[nodes count]];
NSDictionary *node;
NSDictionary *childNode;
NSArray *children;
Prediction *prediction;
for (node in nodes) {
children = (NSArray*)[node objectForKey:@"nodeChildArray"];
prediction = [[Prediction alloc] init];
for (childNode in children) {
[prediction setValue:[childNode objectForKey:@"nodeContent"]
forKey:[childNode objectForKey:@"nodeName"]];
}
if (prediction.destination && prediction.estimate) {
[predictions addObject:prediction];
}
[prediction release];
}
NSLog(@"Predictions for %@: %@", stationId, predictions);
}
return predictions;
}
11. The PredictionTableViewController class needs a property called predictions
to hold the list of predictions that the table will display. Before continuing, you
should declare a property on PredictionTableViewController of type NSArray,
similar to the one you declared on RootViewController, stations.
With this new property in place, we can implement the
PredictionTableViewController viewWillAppear method, which will set the
predictions into the prediction controller before the view appears. We also need
to reload the table data each time the view appears since the user may go back
and change the active station. Our viewWillAppear method now will look like
Listing 7-9.
Listing 7-9. Loading the Predictions Before the View Appears
- (void)viewWillAppear:(BOOL)animated {
[super viewWillAppear:animated];
self.title = self.station.name;
CHAPTER 7: Going the Routesy Way with Core Location, XML, and SQLite186
self.predictions = [[BARTPredictionLoader sharedBARTPredictionLoader]
predictionsForStation:self.station.stationId];
[self.tableView reloadData];
}
12. Finally, we’re ready to start displaying prediction data. Specifically, our table
cells will display the estimate value for each Prediction in the predictions
array. You should implement the three table view methods in
PredictionTableViewController the same way you did for
RootTableViewController. As a reminder, you’ll need to implement
numberOfSectionsInTableView, numberOfRowsInSection, and
cellForRowAtIndexPath. Once you’re got those methods in place,
you’re ready to see your hard work in action.
13. Build and run your application to take a look at the results. When you select a sta-
tion, you’ll see a list of predictions that have been loaded for the station, as shown
in Figure 7-20. Note that you may not see any predictions if no trains are currently in
service.
Figure 7-20. Viewing the predictions for the selected station