Windows Server 2003 Clustering & Load Balancing phần 4 ppt
Bạn đang xem bản rút gọn của tài liệu. Xem và tải ngay bản đầy đủ của tài liệu tại đây (701.68 KB, 41 trang )
Chapter 2: Designing a Clustered Solution with Windows 2000 Advanced Server 105
OsbNetw / Windows Server 2003 Clustering & Load Balancing / Shimonski/ 222622-6 / Chapter 2
cluster, you should consider the following ideas. Remember, planning and
preimplementation design goes a long way before the actual roll out.
Hardware Load Balancers and Software Load Balancers
With NLB clustering, you can implement different hardware scenarios because you can
either use a Windows 2000 Advanced Server to distribute the packets to other nodes or
you can get a dedicated piece of hardware to load balance the packets across the nodes.
Because the hardware requirements are far less stringent than with the Cluster Service
in the beginning of the chapter, you’ll find this section is a shorter read and this whole
cluster hardware solution easier to design. We’ll configure the Windows 2000 Advanced
Server as the load balancer here because it does the job fine and you’ll find it works as
advertised. Most of the load balancers used today in large-scale enterprise-level networks
are either supplied by Foundry or Cisco and are hardware-based. When planning your
design, we’ll use the software-based, load-balancing solution (Windows 2000) and continue
forward with the design.
Topology Maps
To begin your design, you should have a topology map of your network. No Systems
or Network Engineer doing an implementation this important (and somewhat
complicated) should be without network documentation. If you don’t have it, you
either need to get it from another department or create it yourself. You can use anything
from paper to MS Paint to something as hi-tech as Visio 2000. Next, you’ll want to plan
out your server’s initial readiness by going through some preparation work on what
you’ll need to configure this NLB cluster properly. You can see an example of this in
Figure 2-14.
Initial NLB Planning and Readiness Assessment
Now that you’ve designed your network load-balanced solution into the current
infrastructure, let’s look at some of the preplan requirements you’ll need to address
before the actual roll out. First, you want to design the use of two network cards in
each node. You can only use one, but with the demand you’ll be placing on each server
(you want this to be as fast as possible) and the price of NICs today, it’s almost silly not
to set up a dual-homed server. You can get a top-of-the-line NIC card for fewer than
$100. Your private Heartbeat network can run on the second grouping of NICs and
increase your performance. You’ll also want to design the modes to be Unicast mode.
We’ll discuss all the configurations later as we walk through the installation and
configuration of NLB but, before we do that, let’s design the cluster first, so you know
why to configure the cluster a certain way.
P:\010Comp\OsbNetw\622-6\ch02.vp
Monday, March 24, 2003 9:57:47 AM
Color profile: Generic CMYK printer profile
Composite Default screen
106 Windows Server 2003 Clustering & Load Balancing
OsbNetw / Windows Server 2003 Clustering & Load Balancing / Shimonski/ 222622-6 / Chapter 2
As with MSCS, you also want to have fast access to your NLB nodes. You want
to configure 100 Mbps full-duplex access on all network interfaces and, if possible,
Gigabit Ethernet. You also want to use network switches where applicable (Cisco is
my preferred brand). We’ll discuss where you might even want to use a hub, so make
sure you read this entire section before buying your network hardware.
At the end of this NLB section, I offer ways to get around known problems with
NLB and Cisco switch flooding, so when all these items are mentioned, don’t worry
about them not being fully explained. This, of course, is the design stage. Make sure
you plan for all your NLB nodes to do only this function. You don’t want these servers
Figure 2-14. Creating the network load-balanced solution
P:\010Comp\OsbNetw\622-6\ch02.vp
Monday, March 24, 2003 9:57:47 AM
Color profile: Generic CMYK printer profile
Composite Default screen
Chapter 2: Designing a Clustered Solution with Windows 2000 Advanced Server 107
OsbNetw / Windows Server 2003 Clustering & Load Balancing / Shimonski/ 222622-6 / Chapter 2
tied up with other services that aren’t needed. You’ll install a service like IIS on it, but
limit the services only to what is needed for the cluster. You also only want to configure
TCP/IP for each node. Never bind any other protocol to the NIC when implementing
this type of solution: TCP/IP bound to the NIC only.
Make sure that if you plan on using Port Rules, they’re set for all nodes and are
identical. You also want to work with your Security Analyst, Firewall Administrator,
or Network Engineer to make sure you know what ports you can use with NLB. We’ll
configure them later, but you should be aware in preimplementation that you also need
to be working with ports. Again, you might need to get other team members involved
if you don’t have access to getting a block of IP addresses. Planning the usage of IP
addressing before the implementation is important. I saw one instance where a client
ran out of IPs for the block and had to re-subnet the address to allocate more. You don’t
ever want to go through this on a production implementation. The IPs you receive will
be static and subnetted correctly not using network or broadcasting addresses and not
in a DHCP scope. You can’t use DHCP for this implementation. Last, you must be
using Windows 2000 Advanced Server or the network load-balancing driver won’t
show up. This changes if you implement Application Center 2000, which allows for
the load balancing of Windows 2000 Server Edition, which is discussed in Chapter 6.
Load-Balancing System Requirements
Lets look at what you need for your systems. If you plan out your servers, I would
recommend getting a vendor involved to help design what hardware solution you’d
need. This isn’t as strict as setting up MSCS because you don’t have that shared SCSI
bus. You can get high-powered servers to do the job and they won’t need to share
a central storage device.
For this example, we’ll be load balancing two servers. In later chapters, this number
will grow as we use Application Center 2000. To learn the software installation and
configuration, though, we can keep it simple for now. A nice feature with NLB is this:
You can add nodes at any time to reduce the load on the other servers. Network load-
balancing system requirements needed for your design are the same as small hardware
disk drive requirements.
You don’t need a lot of space to implement NLB. The service and driver only use
about 1MB of space. Your memory requirements are going to vary. I would install
what you needed for Windows 2000 (as discussed earlier in this chapter, you would
want at least 256MB of RAM on a production system as your minimum and always
factor in what your applications will use). IIS uses a lot of memory because it stays
memory-resident to increase speed for web site requests. You might want to look at
the last chapter to learn how to use system monitor and how to baseline a test system
to get accurate numbers on how much RAM you need.
P:\010Comp\OsbNetw\622-6\ch02.vp
Monday, March 24, 2003 9:57:47 AM
Color profile: Generic CMYK printer profile
Composite Default screen
108 Windows Server 2003 Clustering & Load Balancing
OsbNetw / Windows Server 2003 Clustering & Load Balancing / Shimonski/ 222622-6 / Chapter 2
In the last chapter, we also look at using stress test tools in a lab environment to
simulate load on your NLB cluster. Other requirements are focused on the network
hardware you’re implementing the NLB cluster with. If you use a network router for
clients to access your NLB solution, you must plan not only for the cluster to operate
in Multicast mode (explained later in the section called, “Multicast Support”), but also
make sure you plan for the purchase of a router that can take an ARP reply with two
different MAC addresses. The two addresses come from the need for the NLB cluster to
have one MAC address in the actual data payload and one MAC address in the header.
If your router doesn’t allot for this functionality, you can add an ARP entry statically
within the router you’re using. If you use a Cisco router, you’ll probably need to add
an entry because the router will have a problem resolving a unicast IP to a multicast
MAC address. In most cases, if you ever have a problem with this design, by working
with Cisco and the TAC (Technical Assistance Center) www.cisco.com/TAC, you can
have your problems resolved rather quickly. They can help you pick out the hardware
you need, the configurations you need to adjust, or show you what to use that’s
already in your infrastructure. Now that you have what you need, let’s install the
service.
NLB SOFTWARE ROLLOUT
In this section, I assume you’ve installed your Windows 2000 Advanced Server on
both NLB servers. If so, you’ll install NLB by enabling the NLB driver WLBS.SYS on
your systems by going to your Network Properties sheet. Go to your Control Panel and
select Network and Dialup Connections. Within this dialog box, you find your Local
Area Connections. I hope you still have them marked from the last section but, if you
don’t, go back through the section on clustering in this chapter to learn how to name
your connections and identify which ones are which. Then open the Public Local Area
Connection by right-clicking it and selecting Properties. In the next illustration, you can
see the Local Area Connection Properties sheet. In this dialog box, there’s one item
of interest to configuring NLB, which is the unchecked Network Load Balancing
option within the components section. Checking this box and clicking OK loads the
driver: Now you have a NLB server. Easy, right? Well, we haven’t configured anything
yet; we’ve only enabled the service to be used. You should still have this property
sheet open, so if you clicked OK, you can backtrack and reopen to this General tab
once again.
P:\010Comp\OsbNetw\622-6\ch02.vp
Monday, March 24, 2003 9:57:48 AM
Color profile: Generic CMYK printer profile
Composite Default screen
Chapter 2: Designing a Clustered Solution with Windows 2000 Advanced Server 109
OsbNetw / Windows Server 2003 Clustering & Load Balancing / Shimonski/ 222622-6 / Chapter 2
If you open this section and do not see the NLB service in the components section,
you might have some issues you aren’t aware of. If you didn’t follow predesign
beforehand, you could be using Windows 2000 Server, which doesn’t carry the service.
You need Windows 2000 Server in its advanced form. If you do have Windows 2000
Advanced Server, you might not have the service installed.
To install the service, click the Install button located on the Network Properties
sheet. Then, click Service when you’re given the option to select a service. Click add,
and then select Network Load Balancing. Once you click OK, the service should appear.
Make sure you clicked the check box to enable it. If a check appears in the box then,
when you select the service, the Properties button within the Network Properties sheet
becomes available. Once you select the Properties button, you’re shown a new dialog
box with three tabs. I highlight them here, but I describe them in depth in the next sections
of this chapter. When you open this new Property sheet, you see three tabs, all of which
are configured to allow NLB to work. Although, up to now, the installation has been
simplistic, don’t be fooled. To get a NLB cluster running properly and optimized isn’t
as small a task as installing the basics of this service. In the dialog box, you’ll be able to
configure Cluster Parameters, Host Parameters, and Port Rules.
P:\010Comp\OsbNetw\622-6\ch02.vp
Monday, March 24, 2003 9:57:48 AM
Color profile: Generic CMYK printer profile
Composite Default screen
110 Windows Server 2003 Clustering & Load Balancing
OsbNetw / Windows Server 2003 Clustering & Load Balancing / Shimonski/ 222622-6 / Chapter 2
Installation and Configuration
First, look at the tabs on the top of the NLB Properties sheet, as seen in the following
illustration. You can see many items to configure for the success of your NLB cluster.
You have the Cluster Parameters, which enable you to specify settings and parameters
for the entire cluster. The Host Parameters tab enables you to specify settings that
apply to a specific host. The Port Rule tab lets you specify the Port Rules used for your
NLB cluster. These settings enable you to control how your NLB cluster will function
under load. Let’s look at them all in greater detail.
Configuring Cluster Parameter
The first tab you encounter is Cluster Parameters. As mentioned, this tab’s settings
let you make settings for the entire cluster. You learn how to configure an IP address
for cluster use, its mask, or a full Internet domain name, how to enable multicasting
instead of unicasting, and how to configure remote access, if needed. Let’s take one
parameter at a time.
Cluster’s IP Addressing and Internet Domain Name
You’ll add an IP address (like 172.161.2 or 10.0.0.10) here, which will denote the virtual
IP (VIP) address, which is used for the entire NLB cluster. Look at Figure 2-15 to see
where this would be used.
P:\010Comp\OsbNetw\622-6\ch02.vp
Monday, March 24, 2003 9:57:48 AM
Color profile: Generic CMYK printer profile
Composite Default screen
The VIP is something you need to set identically without error for every node in the
NLB cluster. An error will cause the service of high-availability to become low-availability.
This node will be unable to participate properly in the cluster. This address also needs
to be something you can resolve via DNS to the full Internet name you place in the
fields below the IP address. Enter the subnet mask for the IP you selected. For this
exercise, I’m using a 24-bit mask, but you can use whatever you selected for the IP
range you blocked off. Make sure the DNS name you’re using is resolvable or you’ll
experience problems with your NLB clusters functionality.
Chapter 2: Designing a Clustered Solution with Windows 2000 Advanced Server 111
OsbNetw / Windows Server 2003 Clustering & Load Balancing / Shimonski/ 222622-6 / Chapter 2
Figure 2-15. High-level overview of VIP placement
P:\010Comp\OsbNetw\622-6\ch02.vp
Monday, March 24, 2003 9:57:48 AM
Color profile: Generic CMYK printer profile
Composite Default screen
112 Windows Server 2003 Clustering & Load Balancing
OsbNetw / Windows Server 2003 Clustering & Load Balancing / Shimonski/ 222622-6 / Chapter 2
Multicast Support
This is, by far, the most confusing of all configurations you can make for a NLB cluster.
You need to think about many factors if you enable multicast support.
First, let’s quickly review the difference among your three main functions: broadcast,
unicast, and multicast. For broadcasting, a node will send a request to every node it can
reach with an address set to all 1’s in binary or a 255.255.255.255 address in decimal. If
a broadcast is used, you can expect every node to receive a packet you transmit whether
or not it was meant for them. A unicast is a point-to-point transmission between two
nodes. Uni, or one is a transmission meant for a single node. When you implement
multicasting, you’re allowing a transmission of data to an addressable “group,” based
on a specific class of addressing. This way, you can get your message to a group of
listening nodes, instead of inundating the entire segment with a broadcast.
When you configure this parameter, you need to take into account the MAC address
to be used for your NLB cluster. When you enable this parameter, it allows the NLB
service to change the cluster node’s MAC address into a multicast-based MAC address.
This parameter makes sure your primary IP address resolves this multicast MAC
via ARP.
The configuration is quite simple until you have to deal with a router connection
that might not automatically allow for this conversion. I mentioned before what you
need to do, depending on what router you have. If you can’t find the configuration
details, call your router vendor’s support line for some support to get the ARP feature
configured properly.
The only problem you might have is deciding to use an old NIC (I mentioned in
presales design to order only the newest and best NICs because they’re cheap) and the
NIC doesn’t allow you the functionality for having the MAC address modified against
the NLB multicasting function. This will be hard to determine and should be thought
of as a last ditch guess on what a problem is by updating the vendor’s drivers, or
buying and installing a newer NIC card. To play it safe, get new NICs and check the
documentation for possible incompatibilities against NLB and multicast support.
When configuring NLB, you need to understand that you can’t mix and match your
multicast and unicast nodes. If you plan to add more nodes in the future, now is a good
time to jot down all your settings for documentation. I make a template for work and,
when the need arises to add nodes, I look at the Word template to cover the settings
that must be identical for the newly added nodes. Don’t mix the multicast and unicast
option because, if you do, the cluster won’t operate correctly.
Remote Control and Remote Password
Moving down on the Properties sheet, you can see an option to set a Remote Control
option and password. When you use the Remote Control option, you’re using the
Windows Load Balancing Service (WLBS) executable program called wlbs.exe. This
P:\010Comp\OsbNetw\622-6\ch02.vp
Monday, March 24, 2003 9:57:48 AM
Color profile: Generic CMYK printer profile
Composite Default screen
functionality is disabled by default because the use of this function is dangerous, unless
it’s protected properly. The password is sent over the wire in cleartext and is a security
risk when used.
As stated earlier in the chapter, there are ways to create strong passwords and this
is another password you’d want to make hard to guess or crack. If you do enable this
function, you’ll also need to know that any router access list or firewall Port Rule needs
to allow UDP ports 1717 and 2504 through. This is what the remote control service uses to
communicate with. To change the password, you can use the wlbs.exe command line
tool, and then use the /PASSW switch to change the passwords. As a recommendation,
I wouldn’t use this at all. Instead, use either terminal services or go to the server console
for security reasons.
Configuring Host Parameters
We just finished working on the actual cluster parameters and those settings were for
the entire cluster. Because they’re for the entire cluster, you might wonder where you
would set the individual host parameters. Set those up by using the Host Parameters
tab, as seen in the next illustration.
Let’s look at each setting and what each one does for the host you’re configuring.
Chapter 2: Designing a Clustered Solution with Windows 2000 Advanced Server 113
OsbNetw / Windows Server 2003 Clustering & Load Balancing / Shimonski/ 222622-6 / Chapter 2
P:\010Comp\OsbNetw\622-6\ch02.vp
Monday, March 24, 2003 9:57:49 AM
Color profile: Generic CMYK printer profile
Composite Default screen
114 Windows Server 2003 Clustering & Load Balancing
OsbNetw / Windows Server 2003 Clustering & Load Balancing / Shimonski/ 222622-6 / Chapter 2
Priority (ID)
Priority or unique host ID is your first configurable setting. This parameter enables you
to change this node’s priority for handling incoming traffic. A priority of 1 is the highest
available priority and this is how they are all set by default to make them all equal.
If you want to change this ID, you would have to do a little detective work on your
servers. Say you have a four-node NLB cluster, and you have three lower-quality servers
and one high-quality server with better hardware that handles traffic faster. You can
make this better server a priority of 1 and make the others lower priorities to handle
less traffic. You want to adjust this for all your NLB cluster nodes to make them all
unique within your cluster.
Again, do some detective work and see what host is better than the others when
setting priority IDs. Also, you want to read the last chapter in the book to learn the
finer art of true analysis and detective work, so you can accurately make that judgment
call on which node is higher quality than the others.
When configuring IDs, make sure you don’t add a new node to the cluster (which
most companies do to decrease the load as needed) without first making the newly
added node a unique priority ID. This is (again) where documentation won’t fail you.
Documentation and design planning are keys to the success of any production cluster.
If you do make the mistake of adding a node with the same ID, the node won’t be accepted
into the NLB cluster. You can find this problem occurring (and recorded) within the
Windows event log. You’ll want to check the Event Viewer constantly within the early
stages of configuration to make sure you have all the bugs and configuration mistakes
corrected. Then, you won’t have to backtrack too far when something doesn’t work.
Initial State
The Initial Cluster State tab is where you can instruct your clustered node to start NLB-
based services upon bootup of the system. If initial state is turned off (check box empty),
then you’ll have to start the nodes manually from the command line. By typing wlbs
stop and/or wlbs start at the command prompt, you can start and stop the NLB services.
At the end for this section, I list more wlbs commands but, for now, you can easily use
these. If you get an error, make sure you have either administrative privileges or that
you installed the NLB services in the network Properties sheet. Leave this checked unless
you have a specific reason for altering it.
Dedicated IP Address and Subnet Mask
When you configure the NLB node’s dedicated IP address and subnet mask, you’re
essentially configuring the uniqueness of the node against the entire cluster for which
you set an IP address within the Cluster Parameters tab. This IP address (and mask) is
used to address each node individually within the entire cluster. Normally, this address
is the original one assigned to the node within the TCP/IP protocol properties. You
don’t want to make this the same IP address as the actual Cluster Address. That is
P:\010Comp\OsbNetw\622-6\ch02.vp
Monday, March 24, 2003 9:57:49 AM
Color profile: Generic CMYK printer profile
Composite Default screen
why it’s important to look at the design phase of the project where you pick out and
assign your IP addresses before you even install the service. It makes this part of the
implementation easier to do, less confusing, and even less prone to error or mistake.
Make sure you assign IP addresses, subnet makes, and default gateways and other
pertinent IP addressing information to your nodes correctly or communication won’t
take place. If you select the IP address you placed in the TCP/IP properties here in the
dedicated address field, make sure the IP addresses are the same in both areas. Finally,
as with any operations and services configured up until now, you can’t use DHCP and
you must provide a static IP address for this service to function properly.
Configuring the Port Rules Tab
One of the greatest features with NLB clustering is the use of Port Rules. A port is
what TCP/IP uses for services-based communication. If you have to connect to a web
server hosting a web site, you’ll most likely (by default) attach via port 80. This can be
changed but, by default, it’s via 80. The IANA, found at www.iana.org, is the keeper
of such port numbers for your review. The port numbers are divided into three ranges:
the Well Known Ports, the Registered Ports, and the Dynamic and/or Private Ports. The
System (Well-Known) Ports are those from 0 through 1023.The User Registered Ports
are those from 1024 through 49151. The Dynamic and/or Private Ports are those from
49152 through 65535. There are 65,535 of them and 0–1023 (the first 1,024) are earmarked
for commonly used specific services, such as SMTP (port 25) and HTTP (port 80).
The combined use of a TCP/IP address and a port creates a socket connection
between nodes. For example, if you want to connect to a web server using HTTP and
the web server’s IP address is 10.1.1.10, you would enter the DNS name that resolves to
that IP address or enter http://10.1.1.10. Because port 80 is well known (and hasn’t been
altered), you should immediately connect to the web server via port 80. The ports can,
however, be altered. If the port is changed, say, to port 8080, then you need to create a
socket connection manually by specifying the port. You could then enter the following
to make a connection with the web server: http://10.1.1.10:8080. Although you needn’t
know all this for setting up this feature, I hope this helps you understand what a port
is. Next, you learn how to configure rules for these ports and their use with the NLB
Port Rules Parameters tab.
Port Rules, Port Range, and Protocols
To configure Port Rules, you need to click the Port Rule tab within the Network Load
Balancing Properties sheet. You’ll automatically recognize the port range explained in
the previous section.
You can configure all ports for both Transport Layer protocols UDP and TCP. (You
can duplicate ports if they’re for the same protocol. Using a different transport protocol,
such as TCP or UDP, for instance, DNS will use port 53 for both TCP and UDP, but
Zone Transfer will only go over the TCP 53 port.)
Chapter 2: Designing a Clustered Solution with Windows 2000 Advanced Server 115
OsbNetw / Windows Server 2003 Clustering & Load Balancing / Shimonski/ 222622-6 / Chapter 2
P:\010Comp\OsbNetw\622-6\ch02.vp
Monday, March 24, 2003 9:57:49 AM
Color profile: Generic CMYK printer profile
Composite Default screen
The reason for setting up these Port Rules is so you can instruct how each node in
the cluster will respond to and handle each protocol-based port. This allows for great
amounts of flexibility if you want to load balance HTTP traffic specifically to a web
server. In the following illustration, you can see the Port Range allowable for this NLB
cluster node and which Transport Layer protocol will differentiate the ports across one
of them if not both.
Within the Port Rules section, you can configure a Filtering mode for your network
traffic. You can set the filtering mode in three ways: Multiple hosts, Single host, and
Disabled. Each of these options is explained in greater detail in following sections.
When configuring the Port Rules tab, be aware of a few items that will either spell
success or defeat of your NLB cluster implementation. When you configure the port
numbers and rules for your NLB cluster, make sure they’re exactly the same for each
node in the cluster. If you don’t set this exactly right, when you try to add a node to the
NLB cluster with a different set of rules, it won’t become part of the NLB cluster. You’ll
notice this doesn’t work because we already discussed how frequently I want you to check
the Event Viewer after making any changes on the cluster or its nodes. In the Event Viewer,
you find entries of the node’s failure to join the cluster because it isn’t set properly. Make
certain the rules entered on each node have matching ranges, protocols, and modes.
Now, in the next and final sections of working with this property sheet, you learn all
the ways you can configure your filtering modes.
116 Windows Server 2003 Clustering & Load Balancing
OsbNetw / Windows Server 2003 Clustering & Load Balancing / Shimonski/ 222622-6 / Chapter 2
P:\010Comp\OsbNetw\622-6\ch02.vp
Monday, March 24, 2003 9:57:49 AM
Color profile: Generic CMYK printer profile
Composite Default screen
OsbNetw / Windows Server 2003 Clustering & Load Balancing / Shimonski/ 222622-6 / Chapter 2
Filtering Mode
As mentioned, you have three modes and, we look at them all in detail here. With
multiple hosts, you can allow multiple nodes in the NLB cluster to handle network data
traffic in a specific way. It filters across multiple nodes, which allows for fault tolerance
and the adjustments in load weight across each node. You can specify different weights
per node or have the weight equally set across them all.
If you set your filtering on single host, you’re telling your node you want it to
handle network traffic distributed across the NLB cluster based on its Priority ID.
The Priority ID (Handling Priority) is adjustable and closely resembles the Priority
ID we set within the Host parameters.
You can also set the filtering to disabled. Setting your node to disabled means all
network traffic coming to that node (and set for the associated Port Rule) is blocked.
To build a Port Rule, modify the setting with one of the three filtering modes, and then
click the Add button on the bottom of the Properties sheet. You can modify and remove a
Port Rule at anytime within the Properties sheet. If you don’t click Add after you adjust
the Port Rule, the new setting won’t take effect.
Client Affinity: None, Single, and Class C
Affinity, the natural drawing of services to one node over another, is set by selecting
Single, Class C, or None. Affinity settings exist because, in today’s web culture, business
is done over the Internet with millions of customers coming to your web sites (or better
yet, e-commerce sites) to shop and do business with you.
A shopper enters a credit card number or wants to make a transaction with your
web server. The hope is that you’re using highly available architecture. If not, what
happens when the server has a hiccup (the server locks up, and so forth), crashes, or if
there’s a flapping WAN route from your shopper to the server? How does that session
pick back up?
Session state is what’s kept when shopping, so when you do have these common
problems, ways exist to adjust how the client’s session state (held with cookies) is
handled based on the following settings.
If you set your client affinity to single, then you’re selecting the option to have many
client requests come to the same clustered node. If you put a web site on a server with
an IP address of 220.1.1.1 /24 and want your clients to access the same node each time,
then you would set a single affinity.
This would only have an affinity for a single IP address, but what if you want to
have multiple web sites with multiple IP addresses? You could then set your affinity
to Class C. With Class C affinity, you can set affinity to a class of addresses, so you can
specify different IP addresses and affinity will be drawn to any node in that class range,
instead of a single IP address.
Chapter 2: Designing a Clustered Solution with Windows 2000 Advanced Server 117
P:\010Comp\OsbNetw\622-6\ch02.vp
Monday, March 24, 2003 9:57:49 AM
Color profile: Generic CMYK printer profile
Composite Default screen
This is especially helpful when you use proxy servers that might cause the appearance
of requests coming from different computers that could disrupt the network load-balancing
solution. If this is the case, you also need to make this part of your design, hence, the
calling for a topology map and an overview of your infrastructure when preparing
the NLB design. Make sure the proxy server(s) are in the same Class C subnet.
Finally, if you set your affinity to None, then you won’t use client-based affinity at
all. The recommendation is that you use single, unless the need arises to use Class C.
Be aware that Class C affinity on an intranet can cripple a NLB machine because all
requests will come from the same Class C subnet.
Load Weight and Equal Load Distribution
Load weight is set within the Multiple Hosts Filtering mode. After you decide on what
affinity setting you want to use, you can set the load weight if you need it to be equally
distributed or skewed differently across nodes in the NLB cluster.
You can either set the load weight to equal (explained in a moment) or to a numerical
range you select. You can set the load from 0 to 100. If you select 0, you disable the
node from handling any traffic, so don’t set it to 0.
The only thing that’s confusing about setting the load is you don’t have to set it
equally across the nodes to equal 100 percent. If you had four nodes, you might be
apt to set them all at 25 percent. What would you do if you then added another node
to the cluster? Would you reset them all to balance out to 100 percent? The nodes will
handle their fraction of the load based on the percentage you set, so each of them
will handle 25 percent of the whole load.
This is a little confusing, but if you start setting this, then you’ll have to understand
the specifics on what to do. For this example, you can leave it to equal and that’s
usually the best way to set it. When you set the load to equal by checking the box in
the Property Sheet, you’re essentially saying that all hosts (multiple hosts) will handle
an equal amount of traffic that makes up the whole.
If you set the single host option, then you only have one parameter you can adjust,
which is the Handling priority. When you create a Port Rule, you’ll want to adjust this
single node on how to handle it. When you set the handling priority to the highest
available handle (which is 1), the node with the highest handle will handle all the
traffic associated for this Port Rule. For this reason, you must set each ID to be unique
because another node in your cluster could have a different Port Rule, which you want
to set, and it would require a different handling ID number to function.
Last, you can disable filtering. This is useful only if you want to block traffic, which
would essentially make the server into a port firewall. This isn’t recommended unless,
for some reason, you want to start blocking incoming traffic on a NLB cluster node.
If you make a mistake on any of the previously mentioned settings, there’s a good
chance that newly added nodes won’t be allowed to participate. The only way to get
clues on why this is so would be in the Event Viewer.
118 Windows Server 2003 Clustering & Load Balancing
OsbNetw / Windows Server 2003 Clustering & Load Balancing / Shimonski/ 222622-6 / Chapter 2
P:\010Comp\OsbNetw\622-6\ch02.vp
Monday, March 24, 2003 9:57:49 AM
Color profile: Generic CMYK printer profile
Composite Default screen
WINDOWS 2000 ADVANCED SERVER NLB INSTALLATION
AND ADVANCED SETTINGS
Now, you have all the power you need to configure network load balancing with a
Windows 2000 Advanced Server solution. You know what hardware you need, what to
install, how to install it, and all the configuration settings needed to control your NLB
cluster. There are, however, some tricks of the trade and tips that can make your life
much easier when rolling out your solution. In this section of the chapter, we look at
problems you might have with network switches when using NLB, why clustering
could appear to be slow, and some advanced configurations.
NLB Cluster Performance Is Slow
Consider the following nightmare: You sell your management team on a faster
solution and it slows it down. Although I’ve had many experiences with clustering
and load-balancing solutions, my favorite is this one. I’ve seen this many times where
resources have been made “highly available” and almost turned into a denial of service!
This happens, so let’s look at some of the most common problems with why NLB might
slow your servers or services down.
Again, the last chapter of this book teaches you the finer details of network and
performance analysis, so you can tweak your solutions and make them quicker, more
reliable, and put them on an even higher level of availability. Here, we cover some
configuration-based issues that can slow down your solution.
With NLB, there’s a common problem when using network switches. Because NLB
operates by sharing a single IP address—the VIP—there’s a phenomenon of unicast
flooding on a network switch. This is by no means the fault of either the NLB service
or the switch because it’s expected behavior.
You might ask why this is such a big deal because a switch should be able to
handle massive amounts of traffic. While that assumption is correct, not all switches
can handle such a flood. This can be so bad it has been known to cause Spanning
Tree (STP) Problems. Because the flooding was bad, the switch was dropping updates
coming from other switches via Bridge Protocol Data Units (BPDUs).
When the requests for the VIP come in, the first one that comes across the switch is
learned and the MAC-to-switch port table is kept in memory. If this switch learns the
cluster’s MAC addresses and maps it in memory to one of its designated ports, the load-
balancing service can’t balance traffic correctly. Ways exist to prevent these problems,
which we outline in the next section.
MAC Source Configuration
If you set the settings to unicast, you can mask the Source MAC address. Masking the
cluster MAC Address forces the NLB cluster nodes to use a “dummy” MAC address
while they send data requests through the switch. The way this works is by tricking
Chapter 2: Designing a Clustered Solution with Windows 2000 Advanced Server 119
OsbNetw / Windows 2000 & Windows Server 2003 Clustering & Load Balancing / Shimonski/ 222622-6 / Chapter 2
P:\010Comp\OsbNetw\622-6\ch02.vp
Monday, March 24, 2003 9:57:49 AM
Color profile: Generic CMYK printer profile
Composite Default screen
the switch into mapping the fake MAC to a port, while sending the frame to all ports
on the switch to which they’re destined to go. When configuring this workaround in
Unicast mode, open the Registry Editor (Regedit.exe) and navigate to the following
Registry key:
HKEY_LOCAL_MACHINE\SYSTEM\CurrentControlSet\Services\WLBS\
Parameters
You can change a value called the MaskSourceMAC, as seen in the next illustration.
When you use unicast, and your NLB host is plugged into a switch, keep the
MaskSourceMAC registry value set to 1, which is the default. If you decide you want
to use a hub, then you can change it to 0 on all nodes.
So why use a hub? A hub won’t function on Layer 2 and memorize MAC addresses.
A hub is basically a multiport repeater that regenerates signals and forwards them to
all ports. If you then uplink this hub to a single switch port, you’ll only worry about
the switch memorizing the hub uplink and the MAC addresses from the hub.
Not to confuse you, but you must also be aware of which NIC card you’re uplinking
to the hub or switch. If you remember our original design, we were to have all the primary
public NICs, which take client requests on one segment, and then all the Internode
traffic will be on a private network segment. You can connect all the cluster network
adapters to the hub you have uplinked to the switch. You can then connect all the other
adapters to another switch, a separate VLAN, or another hub. Because this NLB solution
is scalable up to 32 nodes, you won’t be using a crossover cable, which you might have
used when configuring MSCS.
If you do all the previously mentioned steps, you have a good chance at eliminating
port flooding. One item you might notice is the hub could be a bottleneck if you haven’t
appropriately purchased what you need in terms of speed: Make sure it’s a 10/100 hub
if you’re using Fast Ethernet or you could bottleneck your servers on the hub.
Router ARP Configuration
Adjusting the Source MAC in your configuration will lead to a few different problems
from what you configured when using the Unicast option. You might also find you
could have potential communication problems when you “dummy” the MAC, so as
120 Windows Server 2003 Clustering & Load Balancing
OsbNetw / Windows 2000 & Windows Server 2003 Clustering & Load Balancing / Shimonski/ 222622-6 / Chapter 2
P:\010Comp\OsbNetw\622-6\ch02.vp
Tuesday, March 25, 2003 11:18:15 AM
Color profile: Generic CMYK printer profile
Composite Default screen
mentioned much earlier in the chapter, you’ll want to add a static ARP entry in the
router if you find that router can’t communicate properly with the cluster using a VIP.
The router will want to do an ARP to find the cluster-based VIP’s MAC address. If you
mask the source MAC address, as you learned to do in the last section, you might confuse
the router, so adding the static ARP command will enable you to do that. To add a static
ARP command to a Cisco Router, enter the following:
router#configure terminal
router(config)# arp 10.0.0.1 0070.b3cd.0343
The syntax is as seen in the following:
arp ip-address mac-address
Make sure you save your configuration with a Write Terminal command.
Virtual Network Adapter Confusion
If you’re an old timer who has experience setting up clusters (or trying to) with
Windows NT 4.0 Enterprise Edition, then you might think your configuration isn’t
correct because there’s no virtual adapter made with Windows 2000 Advanced Server.
If you configure Microsoft Windows 2000 Advanced Server NLB service, you won’t
see the creation of a virtual adapter within the network properties or in the Network
Connections dialog box. NT made a WLBS Virtual NIC entry, so don’t get thrown off
if you don’t see it.
Exam Fundamentals
If you decide to take some of the Microsoft Certified Professional Exams to obtain your
MCP or MCSE, you’ll find that Microsoft offers quite a few for you. In this book, I take
the liberty of adding some sections toward the end of the chapter to highlight areas for
you to study. Although this isn’t a study guide (it’s more of a handbook for design and
implementation), I suspect some readers will either want to take the exam or might be
stimulated to take one of the exams from reading this book. In that case, it would be
a waste not to offer at least a paragraph to you on what and where you should focus
your studies. In each chapter, where applicable, I’ll add a section at the end of the chapter
where an exam topic might come into play.
In this chapter, we covered quite a few topics that can be found on the following
two exams:
•
Exam 70–223: Installing, Configuring, and Administering Microsoft Clustering
Services by Using Microsoft Windows 2000 Advanced Server
•
Exam 70–226: Designing Highly Available Web Solutions with Microsoft
Windows 2000 Server Technologies
OsbNetw / Windows Server 2003 Clustering & Load Balancing / Shimonski/ 222622-6 / Chapter 2
Chapter 2: Designing a Clustered Solution with Windows 2000 Advanced Server 121
P:\010Comp\OsbNetw\622-6\ch02.vp
Monday, March 24, 2003 9:57:50 AM
Color profile: Generic CMYK printer profile
Composite Default screen
•
Exam 70–232: Implementing and Maintaining Highly Available Web Solutions
with Microsoft Windows 2000 Server Technologies and Microsoft Application
Center 2000
Both exams cover clustering in depth. For Exam 70–223, be prepared to know
nearly everything in the chapter to include the installation and configuration
of the MSCS and NLB solutions. You’re tested in great detail on preparation and
implementation of these services. For Exam 70–226, you must incorporate all chapters
in this book and use an overall design approach to study. This was the hardest Microsoft
exam I’ve ever taken because the amount of information you needed to remember (even
more than contained in this book) all revolved around proper design and implementation
of all high-availability services. This chapter can help prepare you for both of them.
Exam 70–232: Implementing and Maintaining Highly Available Web Solutions with
Microsoft Windows 2000 Server Technologies and Microsoft Application Center 2000
is another exam covered in this book, but not until we get to the chapters that focus
on Application Center 2000. I feel this exam was fair in its content, which only revolves
around the Application Center 2000 product, but concepts such as affinity and load
balancing are covered. If you want to prepare, most of this chapter (relating to NLB)
can help you get ready for it.
CONCLUSION
Congratulations! You’ve just learned how to design, plan out, configure, and implement
both Windows 2000 Clustering Services (MSCS) and Windows 2000 load-balancing
services (NLB or WLBS) with ease. Although you’re at the end of this chapter, you’ll
continue to build on your theories and discuss even more advanced topics as you move
along into Windows Server 2003 cluster and load balancing, as well as other types of
high-availability solutions.
The most important thing I expect you to get out of this chapter is the fundamentals
and the methodology of determining what’s unique to your environment. No book
could be written to cater to any one reader because, as we all know (or should know),
each network is different and it isn’t easy to add new functionality and solutions to
old networks. Most networks are poorly documented and in need of serious upgrades.
Some aren’t and these are state-of-the-art. One thing is contiguous about all these different
networks: they all need to be up all the time when clients need resources from them.
This chapter showed you options you have and things to think about when trying to
create that Highly Available network solution. In upcoming chapters, you look at
implementing actual system and network services of one the clusters to include WINS,
and Server 2003 enterprise servers like SQL Server 2000. This chapter should have been
the framework for those upcoming chapters. In the next chapter, I show the transition to
Server 2003 and we’ll cluster and load balance Server 2003 as well.
122 Windows Server 2003 Clustering & Load Balancing
OsbNetw / Windows Server 2003 Clustering & Load Balancing / Shimonski/ 222622-6 / Chapter 2
P:\010Comp\OsbNetw\622-6\ch02.vp
Monday, March 24, 2003 9:57:50 AM
Color profile: Generic CMYK printer profile
Composite Default screen
CHAPTER 3
Designing a Clustered
Solution with Windows
Server 2003
123
OsbNetw / Windows Server 2003 Clustering & Load Balancing / Shimonski/ 222622-6 / Chapter 3
P:\010Comp\OsbNetw\622-6\ch03.vp
Monday, March 24, 2003 1:51:22 PM
Color profile: Generic CMYK printer profile
Composite Default screen
Copyright 2003 by The McGraw-Hill Companies, Inc. Click Here for Terms of Use.
I
n this chapter, you walk through the start-to-finish process of designing, installing,
and configuring all aspects of a Windows Server 2003 Enterprise Clustered solution
in a failover design. The cluster will contain two nodes, both running Windows
Server 2003 Enterprise edition. Just as in the last chapter, the nodes are set in an Active/
Passive configuration. In this chapter, however, you look at upgrading the previous
cluster you created in Chapter 2. This type of upgrade comes in the form of a rolling
upgrade, which is a fully functional cluster that’s operational and you upgrade it
completely without disrupting your clients. A rolling upgrade is effective and we
discuss it in great detail within the chapter. With the rolling upgrade, your cluster
should already be configured from the last chapter, so we’ll look at the planning and
design for the upgrade, highlight the major differences between configuring Windows
Server 2003 in a Highly Available solution, and then perform the upgrade. After
performing the upgrade, we’ll look at rolling out Windows Server 2003 in a clustered
solution from scratch—without the upgrade process. Last, we look at the design and
implementation of rolling out a Windows Server 2003 highly available NLB or network
load balanced solution. In this chapter, you’ll find many of the same ideas discussed in
Chapters 1 and 2, but contoured to a solution using Microsoft’s new flagship operating
system (OS): Windows Server 2003.
WINDOWS SERVER 2003 ROLLING UPGRADE
In this section, you learn how to perform a rolling upgrade. This can save you time and
will keep your clients up and running, and connected to resources while you perform
the upgrade. Why not schedule an outage and simply upgrade the servers in the allotted
time frame? While this might seem most logical, remember, the whole point of clustering
is high availability. If you schedule an outage, then you won’t be able to provide resources
to clients. How can you achieve 99.999 percent uptime if your servers are down? You
can’t and that’s why the rolling upgrade exists. A rolling upgrade can upgrade your
servers with a new service pack level (most common) or it can upgrade the entire OS to
something new, which we discuss next.
Planning a Rolling Upgrade with Management
A rolling upgrade must be planned carefully before you do it. If not, you jeopardize
the smooth functioning of your production systems. Planning, research, testing, and a
solid back-out plan are highly advisable. A back-out plan is a detailed list of steps that
will bring you back to the original system state befopre any changes were made. When
performing any maintenance on systems, you should always follow this methodology
anyway. It gives you reassurance (your management team will also be reassured) in
performing high-level maintenance routines on large scale production environments.
In this section, you learn about the planning stage for the upgrade.
124 Windows Server 2003 Clustering & Load Balancing
OsbNetw / Windows Server 2003 Clustering & Load Balancing / Shimonski/ 222622-6 / Chapter 3
P:\010Comp\OsbNetw\622-6\ch03.vp
Monday, March 24, 2003 1:51:23 PM
Color profile: Generic CMYK printer profile
Composite Default screen
Reasons for Upgrade
When performing a rolling upgrade, you’re taking a functional system that has served
you well and changing it to something different. To plan for this change, you should
have the new product you’re moving to on a test system, so you can learn the interface,
the differences, and how to smoothly execute the same functions you were performing
on the old systems. Most often, you’ll want to have a team meeting with management
to discuss “why” you’re going to the new platform in the first place. Remember, you
aren’t rolling out a new cluster solution from scratch. You’re upgrading the current
one, so you’ll want a good reason to perform this upgrade. We discuss all the benefits
you get from moving to Windows Server 2003 later in the chapter, but I’ll mention
one now. We perform the rolling upgrade to take advantage of Windows Server 2003.
This is because the new Server 2003 maximum-supported cluster size has been increased
from two nodes in Windows 2000 Advanced Server to eight nodes in Windows
Server 2003. Your upper management has expressed a need to scale out the current
clustered solution to support more traffic-based requests from the clients because
they’re acquiring a new company and roughly 1,000 more clients will be accessing the
current servers. Because you’ve baselined the servers (you learn about this in Chapter 8),
you know a problem exists with the current solution at peak periods during the day.
Adding more users could surely create a problem. You need to upgrade, but what’s
the best solution? You decide not to go with Datacenter Server for three reasons:
• Microsoft’s newest platform will put you ahead of the end of life (EOL)
support on Windows 2000
• Benefits added by Windows Server 2003 outweigh what’s offered by
Datacenter Server
• With Windows Server 2003, you can scale out to eight servers, an improvement
over Datacenter, which is locked down to four servers, so you have a wider
scaling range to work with
Let’s look at the actual rolling upgrade plan, which is your biggest challenge. Later
in the chapter, you see a design again but, for purposes of an upgrade, you need to
make sure your new solution “fits” into your already designed solution of Windows
Server 2003.
Other Reasons to Upgrade to Windows Server 2003
With Windows Server 2003, you get many new benefits that you might be interested in
implementing. Look at Table 3-1 to view all the new options.
Now, you should have enough reasons to perform this upgrade or any upgrade for
that matter. Be aware, though, because quite a few “gotchas” are along the way, which
we’ll expose!
OsbNetw / Windows Server 2003 Clustering & Load Balancing / Shimonski/ 222622-6 / Chapter 3
Chapter 3: Designing a Clustered Solution with Windows Server 2003 125
P:\010Comp\OsbNetw\622-6\ch03.vp
Monday, March 24, 2003 1:51:23 PM
Color profile: Generic CMYK printer profile
Composite Default screen
126 Windows Server 2003 Clustering & Load Balancing
OsbNetw / Windows Server 2003 Clustering & Load Balancing / Shimonski/ 222622-6 / Chapter 3
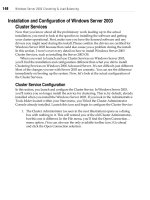
Easy Setup and Configuration The Cluster Service has been changed from the Windows 2000 Advanced
Server and is preinstalled with Windows Server 2003. You can see that when
you get ready to do a fresh cluster installation from scratch, you no longer
need to install the Microsoft Cluster Services, which was necessary in Chapter 2.
While configuring the Cluster Service, all defaults are used to get you up and
running quickly. You can use Cluster Administrator at a later time to customize
your cluster administration.
Third-party software vendors now have access to the cluster-based open
interface. This is a first for Microsoft toward working with vendors to make better
solutions, especially Highly Available solutions.
Larger Clusters Now Supported In Windows 2000 Advanced Server, you could only make two node clusters.
Now you can make up to eight-node clusters in Windows Server 2003, which
gives systems engineers more flexibility to scale out for more redundancy.
Integrates with Active Directory Service Windows Server 2003, when used with clustering services, now has full active
directory integration where the cluster becomes a computer object within the
directory. This is a solution that benefits those who want to take advantage of
delegation and Kerberos authentication.
64-Bit Architecture Windows Server 2003 64-bit Edition has support for server clusters. You can
use the extended architecture to take advantage of larger memory spaces.
If you plan to move to 64-bit support, Windows Server 2003 only supports
Fibre Channel to shared storage on your shared storage bus. Plan accordingly
if you’re going to move to Windows Server 2003 64-bit Edition and use
clustering.
Increased Manageability You can increase manageability with Windows Server 2003 with a new
in-the-box tool called DiskPart (covered in depth in the upcoming section titled
“DiskPart”).
Easy Resource Configuration Windows Server 2003 will allow configuration information replicated to other
nodes like clustered printers and the Microsoft Distributed Transaction
Coordinator (MSDTC).
Also, Microsoft Message Queuing (MSMQ) has been enhanced to allow
trigger support if needed while clustering SQL Server. We will look at
clustering SQL Server later in Chapter 5.
Network Enhancements Windows Server 2003 has highly increased failover protection in a few
forms. The quorum ownership decision after failure is made much quicker
in Server 2003.
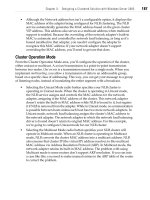
A multicast heartbeat is now used by default with a failover to unicast,
if it’s needed.
Improved Storage Capabilities Windows Server 2003 storage capabilities have been enhanced in many
areas. The distributed file system (DFS) now supports multiple standalone
roots, independent root failover, and has outstanding support for multiple file
shares on different machines to be aggregated into a common namespace.
DFS now also has support for Active/Active-clustered configurations.
If vendor support is available, you can add support for Storage Area
Networks (SANs).
Streamlined Operation Windows Server 2003 provides for better operation, such as rolling upgrade
support (which we do in this chapter). You can also delete clustered resources
without having to take the cluster offline. You can use cluster administrator as
well as Cluster.exe. (We look at these commands in the following sections).
Table 3-1. Viewing Windows Server 2003 Benefits
P:\010Comp\OsbNetw\622-6\ch03.vp
Monday, March 24, 2003 1:51:23 PM
Color profile: Generic CMYK printer profile
Composite Default screen
Chapter 3: Designing a Clustered Solution with Windows Server 2003 127
OsbNetw / Windows Server 2003 Clustering & Load Balancing / Shimonski/ 222622-6 / Chapter 3
Planning a Rolling Upgrade
In this section, you see the steps of performing a rolling upgrade and all the things you
need to consider before you do the upgrade. Because every server platform you might
work on can be different and so many factors exist, I invite you to practice this on your
own lab systems as well. Rehearse the process first. You might also want to get training
or have your staff get training in weak areas of this evolution. Many times, you could
find you aren’t up to speed on OS issues or certain aspects of new technology. Take risks
in a lab that you would never take in real-life production. Be cautious and test, test, test!
Running a Test Lab
A test lab is simple to build. You can use the same test solution we’re using in Chapter 2.
If you recall, we set up a two-node cluster in an Active/Passive state. This is the same
cluster we’ll upgrade in the test lab: a two-node cluster with a shared storage device
on a shared SCSI bus. You perform the rolling upgrade on this lab, so you know how
to use Windows Server 2003 in your production environment, how to eliminate any
compatibility problems you might encounter, and how to practice your arranged
blackout plan if needed.
Planning with Your Vendors
As discussed in Chapter 2, you know about presales support wisely to help your planning
and rollout stages—and this is where you should use it again. When you plan with your
vendors, you can help to eliminate many problems before they occur in the test lab.
The four most common problems are the following:
•
Vendor doesn’t support Windows Server 2003
•
Vendor hasn’t certified Windows Server 2003
•
Vendor hardware doesn’t support Windows Server 2003
•
Vendor software doesn’t support Windows Server 2003
Easier Troubleshooting and Failure Recovery Windows Server 2003 has made troubleshooting much easier though better
logging facilities, as well as a new resource kit tool called
ClusDiag,
which
enables you to compare logs and events on the cluster.
ClusterRecovery
is
also a resource kit tool that enables you to rebuild a disk resource, as well
as the cluster state.
New Cluster Topologies Windows Server 2003 uses a
Majority Node Set,
which is a new quorum
resource that uses something other than a shared disk as a quorum device.
The nice design feature enables you to create topologies that don’t have
shared disks that need to span multisite configurations.
EFS Is Supported on Clustered Disks Windows Server 2003 now supports the Encrypted File System (EFS) on
clustered or shared disks.
Table 3-1. Viewing Windows Server 2003 Benefits
(continued)
P:\010Comp\OsbNetw\622-6\ch03.vp
Monday, March 24, 2003 1:51:23 PM
Color profile: Generic CMYK printer profile
Composite Default screen
Each problem warrants its own explanation. If you purchased Server 2003 from
Microsoft and you have a maintenance contract, you’ll have the support of Microsoft. But,
when Microsoft deems your problem a direct result of your hardware vendor, then
what? Make sure your hardware vendors support the new OS completely by inquiring
if its staff has certified and experienced Microsoft Certified Systems Engineers (MCSE)
who can assist you with this upgrade.
Make sure your vendor has certified Windows Server 2003 with its equipment.
How annoying to hear an OS and software giant like Microsoft isn’t certified to
run on a hardware platform! Luckily for us, hardware vendors usually make sure
Microsoft products are tested and certified first. You can find this out by looking on
the vendor’s web site and seeing if its products (hardware and software) and support
are certified on Windows Server 2003.
Make sure your vendor software does run on and support Windows Server 2003.
This takes the form of hardware drivers as well but, more important, check your
vendor’s management software that comes with servers. With some vendors, such
as Dell and Compaq, you can use their proprietary management software to manage
your server. Test that, too. Last, test every single application you’ll run on your new
Windows Server 2003 Cluster and make sure each one runs as advertised. Make sure
the vendors also support and certify their applications, and you have a number to call
when a bug or problem appears.
Saving Settings on Current Systems
Get a book, a spreadsheet, or any other type of information recording device and record
every single setting you have on your servers that could get misconfigured or altered
if a major meltdown occurs in the upgrade process and you can’t get the server back
online or—worse yet—the backup has a problem and you need to rebuild a server
completely from scratch.
Make sure you have all the old software on hand in case you need to restore the old
system completely to its original state from scratch (Table 3-2 describes information
you should record in case of a disaster).
128 Windows Server 2003 Clustering & Load Balancing
OsbNetw / Windows Server 2003 Clustering & Load Balancing / Shimonski/ 222622-6 / Chapter 3
Disk Configuration Open the Disk Management utility with the Computer Management MMC and record your
volumes, names, sizes, volume types, file types, drive letter assignments—everything.
If you need to re-create your disks, you’ll need this information.
Computer Name Make sure you have your computer name recorded for replacement when needed.
IP Addresses You can record all your IP address information to include interfaces, and all services
available like DNS and WINS.
Domain Information Make sure you fully record all domain connection information. You might have multiple
domains and you’ll need to know which servers are authenticating to which domain
controllers. Also, record the account used to connect the Cluster Service to the domain.
Local Administrative
Password
Know all your password and local account information. If you write this down or store it on
a server share, make sure it’s secured, so no one can break into it and hack your servers
with this information. You’ll need it, however, when you need to re-create your servers.
Table 3-2. Information You Need to Record for a Disaster Scenario
P:\010Comp\OsbNetw\622-6\ch03.vp
Monday, March 24, 2003 1:51:23 PM
Color profile: Generic CMYK printer profile
Composite Default screen
Chapter 3: Designing a Clustered Solution with Windows Server 2003 129
OsbNetw / Windows Server 2003 Clustering & Load Balancing / Shimonski/ 222622-6 / Chapter 3
Current Backups
Make sure you back up your system before you do the upgrade. Remember, the only
way to know if a backup works is to do a sample restore and make sure you can get
your data successfully. I also recommend you have two tapes and you store one
off-site. Here are some tips to help you establish a backup plan:
•
Develop backup and restore strategies with appropriate resources and
personnel, and then test them.
•
A good plan ensures you can quickly recover your data if it’s lost.
•
Give the responsibilities of backup and restore to a designated backup
administrator.
•
Back up an entire volume to prepare for the unlikely event of a disk failure.
This lets you restore the entire volume in one operation.
•
Back up the directory services database (Active Directory) to prevent the loss
of user account and security information. This must be done locally.
• Keep two copies of the backup media. Keep one copy off-site.
• Perform a trial restoration at times to verify your files were properly backed up.
Your backup strategy will be tailored to your organization, but you must have one,
especially if you’re clustering and saving every piece of company data to a shared storage
solution. Make sure you have a plan to back up and restore this data in an emergency.
Also, make sure that your back up software is cluster friendly.
Software and Hardware Plan
You need to obtain any application patches. You’ll also want to ensure that you have
every piece of hardware checked out and drivers ready to go if the upgrade calls for it.
Make sure your NICs are supported, as well as your input devices and anything you
have attached to the servers.
As for Microsoft, make sure you also have its support. If you’re upgrading a server
and have to fall back to the original configuration of Windows 2000 Advanced Server,
make certain you have disks, service packs, and drivers specific to Microsoft supported
hardware on hand.
If you’re upgrading a cluster that has a Server 2003 Solution on it, such as SQL 2000
or Exchange 2000, make sure you’ve thoroughly checked with Microsoft to make sure
it’s supported, service packed, and/or hot fixed, if needed. As a final reference, you’ll
always want to check the Hardware Compatibility List (HCL), but Windows Server 2003
is too new to have many, if any, listings.
The Back-Out Plan
Your back-out plan is all the ideas mentioned in this entire section that relate to a
successful contingency plan in case of disaster. The person or department responsible
for change management or disaster recovery generally handles a back-out plan. You
might not be afforded the luxury of having this in your company. If you don’t, then it’s
P:\010Comp\OsbNetw\622-6\ch03.vp
Monday, March 24, 2003 1:51:23 PM
Color profile: Generic CMYK printer profile
Composite Default screen