microsoft press windows workflow foundation step by step phần 4 ppt
Bạn đang xem bản rút gọn của tài liệu. Xem và tải ngay bản đầy đủ của tài liệu tại đây (587.82 KB, 36 trang )
Chapter 6 Loading and Unloading Instances 105
6. If you expand the Databases node in Object Explorer, you should find the new
WorkflowStore database has been added.
7. Next we’ll need to execute the scripts I mentioned that .NET 3.0 provides for
persistence, starting with the schema script. As before, the scripts are located in
<%WINDIR%>\Microsoft.NET\Framework\v3.0\Windows Workflow Founda-
tion\SQL\EN, where <%WINDIR%> is your Windows directory (typically, C:\Win-
dows). From SQL Server Management Studio’s File menu, select Open and then File,
which brings up the common Open File dialog box. Using the controls in the Open File
dialog box, locate the schema script, SqlPersistenceService_Schema.sql. Select that from
the available scripts, and click the Open button. Note that you’ll need to connect to your
database server once again.
106 Part I Introducing Windows Workflow Foundation (WF)
8. SQL Server Management Studio will load the script into a new window, but before we
actually run the script, remember we’ll need to specify which database we want the
script to run against. Of course, we want to use the WorkflowStore database we just
created. Therefore, locate the WorkflowStore database in the drop-down list of databases
and select it as the target.
9. With the WorkflowStore database designated as the target of the script, execute the
script by clicking the Execute button on the toolbar.
10. Repeat steps 7 through 9 to execute the SqlPersistenceService_Logic.sql script. This loads
the necessary stored procedures into the database.
If everything worked as it should, we now have a database ready for workflow instance
storage. It’s time to plug SqlWorkflowPersistenceService into our workflow processing so that we
can use the database we just created.
Introducing the SqlWorkflowPersistenceService Service
If it becomes necessary to persist an executing workflow, something must actually perform
the persistence action. However, saving and restoring workflow instances is optional—you
don’t have to shuffle workflow instances off to a durable storage medium (such as a database)
if you don’t want to. So it probably makes sense that persistence is implemented by a
pluggable service, SqlWorkflowPersistenceService. WorkflowInstance works in concert with
Chapter 6 Loading and Unloading Instances 107
SqlWorkflowPersistenceService if the service is present when the workflow instance is running
to perform the save and restore tasks.
On the surface, this all sounds relatively simple. If we need to swap a workflow instance out to
the database, we just tell the persistence service to save it for us. But what happens if we’re
using a single database to persist workflows running in different processes? How do workflow
instances actually stop and restart in the middle of their execution?
It’s not uncommon for there to be a single database used for storing workflow instances. But
each instance might have been executing on different machines and possibly within different
processes on any given machine. If a workflow instance is saved and later restored, we must
have a way to also restore the system state that was in effect at the time the workflow instance
was executing. For example, SqlWorkflowPersistenceService stores whether or not the instance
was blocked (waiting for something), its execution status (executing, idle, and so on), and var-
ious and sundry informational items such as serialized instance data and the owner identifier.
All this information is necessary to rehydrate the instance at a later time.
We can control this persistence via the WorkflowInstance object through three methods,
shown in Table 6-1.
As Table 6-1 indicates, we have two methods available for unloading and persisting a work-
flow instance. Which method you use depends on what you intend for your code to do.
Unload waits for the workflow instance to become ready to be persisted. If this takes a long
time, the thread executing the Unload operation also waits a long time. However, TryUnload
will return immediately when asked to unload an executing workflow instance. But there is no
guarantee the workflow instance actually unloaded and persisted to the database. To check
for that, you should examine the return value from TryUnload. If the value is true, the work-
flow instance did unload and persist itself. If the value is false, the workflow instance didn’t
unload and persist. The advantage of TryUnload is that your thread isn’t sitting there waiting.
The disadvantage, or course, is that you might have to repeatedly use TryUnload to force out
the executing workflow instance.
Table 6-1 WorkflowInstance Methods, Revisited
Method Purpose
Load Loads a previously unloaded (persisted) workflow instance.
Tr yUnload Tries to unload (persist) the workflow instance from memory.
Unlike calling Unload, calling Tr yUnload will not block (hold up
execution) if the workflow instance cannot be immediately
unloaded.
Unload Unloads (persists) the workflow instance from memory. Note that
this method blocks the currently executing thread that made this
unload request until the workflow instance can actually unload.
This can be a lengthy operation, depending on the individual
workflow task.
108 Part I Introducing Windows Workflow Foundation (WF)
Unloading Instances
Although there are specific times WF will unload and persist your workflow instance, in
some cases you might want to take control of that yourself. For those situations,
WorkflowInstance.Unload and WorkflowInstance.TryUnload are there to help.
If you call either of these methods without first plugging in the SqlWorkflowPersistenceService,
WF will throw an exception. Of course, if there is a database error of some kind, you’ll also
receive an exception. Therefore, it’s good practice to wrap these calls in try/catch blocks to
keep from crashing your entire application. (Note that’s not to say you have to do anything
with the exception sometimes you may just want to ignore it.)
Let’s try it out! In fact, let’s build a small graphical user interface that provides us with buttons
we can use to force specific application behavior. The application complexity will increase a
little, but we’ll also be moving toward more realistic applications.
The application we’ll build here is still relatively simple-minded. It will have only a few buttons
we can click at specific times to force a workflow instance to unload. (In the next section, we’ll
then load it again.) I’m going to intentionally force a long-running workflow, but unlike the
workflows we’ve seen so far, it won’t use a Delay activity. The reason for this, as you probably
guessed, is simply that Delay activities are special and come with persistence abilities of their
own. Instead, I want to force our workflow instance to unload rather than have it automati-
cally unload as a Delay activity could do. We’ll look at Delay activities and their abilities in the
“Loading and Unloading Instances on Idle” section of this chapter. For this application, I’ll
ask the workflow thread to sleep for 10 seconds to give us plenty of time to push one of our
application’s buttons.
Create a new host application
1. As you have in the previous chapters, open Visual Studio to create a new application
project. However, instead of creating a console-based application, select instead a
Windows-based application. Name it WorkflowPersister. Be sure to create the
application in \Workflow\Chapter6. Follow the steps from Chapter 2 described in
“Adding the workflow assembly references”, “Hosting the workflow runtime” (add
code to the Main method following the call to Application.Run), “Creating the
WorkflowRuntime factory object”, “Starting the workflow runtime,” “Stopping
the workflow runtime,” “Using the workflow runtime factory object,” and “Handling
workflow runtime events” procedures. Finally, add an app.config file following steps 1
and 2 from the previous chapter in “Add SqlTrackingService to your workflow.” (Don’t
forget to add a reference to System.Configuration.)
Chapter 6 Loading and Unloading Instances 109
2. Now add the proper connection string to app.config, one that reflects the database we’ll
be using (remember, the database is called WorkflowStore). Keep in mind that the
connectionString attribute in the add XML element presented here is to be applied as a
single line in the app.config file. Printable line length limitations prevent this from being
shown as a single line.
<connectionStrings>
<add name="StorageDatabase"
connectionString="Data Source=(local)\SQLEXPRESS;
Initial Catalog=WorkflowStore;Integrated Security=True;"/>
</connectionStrings>
3. When you created the WorkflowPersister project, Visual Studio displayed the Windows
Forms visual designer. The preceding step took you to the code editor, where you
modified app.config. Return now to the Windows Forms visual designer by selecting
Form1.cs in Solution Explorer and clicking the View Designer toolbar button. In a man-
ner similar to designing workflows, this visual designer allows you to drag and drop
Windows controls onto the design surface to customize their properties and hook their
events. For now, move the mouse to the Toolbox, select a Button control, and drag it onto
the designer’s surface.
110 Part I Introducing Windows Workflow Foundation (WF)
Then drop it to insert the button into your form.
4. We’ll want to assign some meaningful text to the button so that we know what we’re
clicking. (The control text “button1” just isn’t descriptive enough!) With the button
highlighted (the little squares showing), select the button’s Text property in the Visual
Studio Properties pane and change the text value to Start Workflow.
Chapter 6 Loading and Unloading Instances 111
Note In general it is a good idea to also rename the variable names Visual Studio
assigns to the controls. If you have many controls on your form, pretty soon auto-
generated names such as “button1” become meaningless from a coding perspective. I
won’t worry about that here because we’ll have few controls to deal with, but in any
real-world application you should change the control names to useful values. For this
example, leave the variable names as Visual Studio assigned them so that you won’t
have to translate variable names while typing the code I’m about to present.
5. As you might expect, we’ll want to take some action when the button is clicked. To do
that, we’ll need to inject a button click handler. While in the Properties pane, click the
Events toolbar button (the lightning bolt) and double-click the Click event to add a click
event handler. Visual Studio will automatically switch you to the code view, so return to
the designer for the next step. We’ll add code to the event handler in a later step.
6. The text we added will most likely be too wide for the button as Visual Studio created it,
so we’ll want to stretch the button to be a bit wider. To do so, click the button on the
designer’s surface (if it’s not activated already) and drag the rightmost square to the right
to stretch the button’s width.
112 Part I Introducing Windows Workflow Foundation (WF)
7. Repeat steps 3 through 5 to add two more buttons, one with the text Unload Workflow
and the other with the text Load Workflow. (No need to change the variable names for
this simple example.)
8. Our user interface is now visually established for our workflow testing purposes. Now
it’s time to code some internal application processes we’ll execute in response to appli-
cation events. We’ll need to initialize some things when the application loads, and a
great place to do that is in the Load event handler for the main application form. Click
the title bar of the form in the visual editor to activate the form’s properties. Click the
Events button (as you did for the three button controls), and double-click the Load event
to insert a Load event handler.
Chapter 6 Loading and Unloading Instances 113
9. Once the load event handler is inserted, Visual Studio will switch you to the code view
for the main application form. Because we just added the form’s Load event handler, we
might as well add the initialization code we’ll need. Type the following into the
Form1_Load handler method:
_runtime = WorkflowFactory.GetWorkflowRuntime();
_runtime.WorkflowCompleted +=
new EventHandler<WorkflowCompletedEventArgs>(Runtime_WorkflowCompleted);
_runtime.WorkflowTerminated +=
new EventHandler<WorkflowTerminatedEventArgs>(Runtime_WorkflowTerminated);
We’ve seen code like this before that creates the workflow runtime and hooks some of
the major events we’ll be interested in intercepting.
10. Somewhere we need to declare the _runtime field, so look for the opening brace for the
Form1 class. After the opening brace, type this:
protected WorkflowRuntime _runtime = null;
protected WorkflowInstance _instance = null;
11. If you try to compile the application at this point, it won’t compile. We’ll need to
add a reference to the Windows Workflow Foundation assemblies as we’ve done in
previous chapters—that process is the same whether we’re building a graphical user
interface or a console-based application. So add the workflow assembly references for
System.Workflow.Runtime, System.Workflow.ComponentModel, and System.Workflow.Activ-
ity and then insert the following using declaration at the top of the source file following
the other using declarations:
using System.Workflow.Runtime;
12. Although we now have an application that hosts the workflow runtime, it doesn’t actu-
ally do anything. To make it functional, we’ll need to add some code to the button event
handlers, starting with button1_Click. Scroll through the main application form’s source
file until you find button1_Click, and add this code:
button2.Enabled = true;
button1.Enabled = false;
_instance = _runtime.CreateWorkflow(typeof(PersistedWorkflow.Workflow1));
_instance.Start();
114 Part I Introducing Windows Workflow Foundation (WF)
This code disables the Start Workflow button, enables the Unload Workflow button,
and then starts a new workflow instance. (We’ll add the workflow that it will execute
shortly.)
13. Next, find the Unload Workflow button’s handler, button2_Click, and add the following
code. Here, we’re using the WorkflowInstance.Unload method to unload the workflow
instance and write it to our database. After the workflow instance unloads, we enable the
Load Workflow button (the code for which we’ll add in the next section). Note that if
we sustain an exception while unloading the workflow instance, the Load Workflow
button is not enabled. This makes sense there would be nothing to load if the
unload request failed.
button2.Enabled = false;
try
{
_instance.Unload();
button3.Enabled = true;
} // try
catch (Exception ex)
{
MessageBox.Show(String.Format("Exception while unloading workflow" +
" instance: '{0}'",ex.Message));
} // catch
Note I mentioned this previously in the chapter, but it’s an important point. Keep in
mind that WorkflowInstance.Unload is synchronous. That means the thread making the
attempt to unload the workflow instance will block (wait) and continue to be blocked
until the operation has completed (the instance has unloaded or failed to unload). In
this case, that’s precisely the behavior I want because I don’t want to repeatedly ask
the instance whether it unloaded. But in some cases, you’ll want to use the nonblock-
ing alternative I mentioned, WorkflowInstance.TryUnload. Later, when you add the final
pieces of code and run this application, as you click Unload Workflow, watch closely
and you’ll see the application freeze briefly as it waits for the workflow to unload.
14. Now we turn our attention to the workflow event handlers, Runtime_WorkflowCompleted
and Runtime_WorkflowTerminated. Both of these event handlers will actually perform the
same action, which is to reset the application in preparation for another workflow
instance execution. Add these methods following the click event handler for button2
(the method containing the code we added in the preceding step):
void Runtime_WorkflowCompleted(object sender, WorkflowCompletedEventArgs e){
WorkflowCompleted();
}
void Runtime_WorkflowTerminated(object sender, WorkflowTerminatedEventArgs e)
{
WorkflowCompleted();
}
Chapter 6 Loading and Unloading Instances 115
15. Of course, we’ll now need to create the WorkflowCompleted method. If you’re familiar
with Windows programming, you’re probably aware of a limitation that has existed in
Windows from the earliest days. That limitation is simply that you cannot change win-
dow control state on any thread other than the thread that created the window control.
So if you want to change a control’s text, for instance, you must assign the control’s text
on the same thread that created it. Using any other thread will most likely crash your
application. So if the code we’re about to add seems funny to you, all it’s really doing is
making sure that we’ll enable and disable buttons using only the original, creating,
thread. (Event handlers are almost always invoked on different threads.) If we just
enabled the buttons in the event handlers themselves, the application might work, but
it would more likely crash or hang. Simply copy the code verbatim and place it at the end
of the source file, just prior to the closing brace for the Form1 class, and it should work
correctly:
private delegate void WorkflowCompletedDelegate();
private void WorkflowCompleted()
{
if (this.InvokeRequired)
{
// Wrong thread, so switch to the UI thread
WorkflowCompletedDelegate d = delegate() { WorkflowCompleted(); };
this.Invoke(d);
} // if
else
{
button1.Enabled = true;
button2.Enabled = false;
button3.Enabled = false;
} // else
}
Tip To learn more about thread-safe Windows Forms programming, see the “How to:
Make Thread-Safe Calls to Windows Forms Controls” article at http://
msdn2.microsoft.com/en-us/library/ms171728.aspx.
16. The last thing we’ll need to do before creating the workflow we’ll execute is modify the
WorkflowFactory class. If you precisely followed all the steps from Chapter 5 to create and
modify WorkflowFactory (“Add SqlTrackingService to your workflow”), you would actually
be creating a factory object that provides the tracking service to the workflow runtime.
With some minor adjustments, that same code works here. We’ll change the service
from SqlTrackingService to SqlWorkflowPersistenceService and change the using statement
(from System.Workflow.Runtime.Tracking to System.Workflow.Runtime.Hosting). Open the
WorkflowFactory.cs file for editing.
116 Part I Introducing Windows Workflow Foundation (WF)
17. Instead of including the using statement for System.Workflow.Runtime.Tracking, add the
following:
using System.Workflow.Runtime.Hosting;
using System.Configuration;
18. Finally add the persistence service to the runtime by adding this code following the cre-
ation of the workflow runtime object:
string conn = ConfigurationManager.
ConnectionStrings["StorageDatabase"].
ConnectionString;
_workflowRuntime.AddService(new
SqlWorkflowPersistenceService(conn));
Note Because we inserted code to create a workflow instance from the Persisted-
Workflow.Workflow1 type (in step 12), our host application won’t compile and execute.
We’ll take care of that in the following section.
There you have it! A Windows graphical user interface and host application we can use to
house our workflow. Speaking of workflow, shouldn’t we create one to execute? In fact,
that’s next.
Create a new unloadable workflow
1. We’re again going to add a new sequential workflow library to our existing project as
we’ve done in previous chapters. With the WorkflowPersister application active in Visual
Studio, select Add from the File menu. When the secondary menu pops up, select New
Project. Add a sequential workflow library project named PersistedWorkflow from the
resulting New Project dialog box.
2. After the new project is created and added to the application solution, the workflow
visual designer will appear. Drag a Code activity from the Toolbox and drop it onto the
designer’s surface. In the Visual Studio Properties panel, set the Code activity’s
ExecuteCode property to PreUnload and press the Enter key.
3. Visual Studio will automatically take you to the source code file for your workflow, so
while there, add this code to the newly inserted PreUnload method:
_started = DateTime.Now;
System.Diagnostics.Trace.WriteLine(
String.Format("*** Workflow {0} started: {1}",
WorkflowInstanceId.ToString(),
_started.ToString("MM/dd/yyyy hh:mm:ss.fff")));
System.Threading.Thread.Sleep(10000); // 10 seconds
Chapter 6 Loading and Unloading Instances 117
4. So that we can calculate the duration of time the workflow took (at least the time
between the two Code activity executions), I saved the starting time in a field called
_started. Add that field to your source file just above the constructor:
private DateTime _started = DateTime.MinValue;
5. Now switch back to the designer view and add a second Code activity. To this activity’s
ExecuteCode property add the method name PostUnload. The designer should appear as
you see here.
6. As you add the PostUnload method to the Code activity’s ExecuteCode property, Visual
Studio will again switch you to the source code file for your workflow. There, add the
code necessary for PostUnload:
DateTime ended = DateTime.Now;
TimeSpan duration = ended.Subtract(_started);
System.Diagnostics.Trace.WriteLine(
String.Format("*** Workflow {0} completed: {1}, duration: {2}",
WorkflowInstanceId.ToString(),
ended.ToString("MM/dd/yyyy hh:mm:ss.fff"),
duration.ToString()));
Note You might have noticed that I’m writing information to the trace output
window. Because we have a Windows application rather than a console application,
this is appropriate. However, it also means that when you execute the application, to
see the trace output you’ll need to have a trace window open. The easiest way to do
this is to simply run the application in the Visual Studio debugger and look in the Out-
put window that Visual Studio provides. Alternatively, you can run DBMon.exe, found in
the Windows SDK: <%Program Files%>\Microsoft SDKs\Windows\v6.0\Bin\DBMon.exe
(and remember, “<%Program Files%>” represents the location of the Program Files
directory on your system, typically C:\Program Files). DBMon is designed to capture
and display trace information from all executing applications on your machine.
118 Part I Introducing Windows Workflow Foundation (WF)
7. The final step we need to take is to add a project-level reference to the workflow from our
main application, as we’ve done in previous chapters. Right-click the WorkflowPersister
tree control node in Visual Studio’s Solution Explorer, and select Add Reference. When
the Add Reference dialog box appears, click the Projects tab and select PersistedWork-
flow from the list. Click OK.
Note
You might be tempted to run the application at this time, but wait! If you run
the application and then click the Start Workflow button but do not click the Unload
Workflow button, the application should run without error. But because we’ve not
added the code to reload the persisted workflow instance once unloaded, you
shouldn’t click the Unload Workflow button until we add the code in the next section.
The intention here is that the workflow will begin execution, at which time the first Code
acivity puts its thread to sleep for 10 seconds. During that time, you can click the Unload
Workflow button to unload the workflow. After the 10 seconds expire, the workflow will be
unloaded and persisted to the database. Once that happens, you can take a coffee break, grab
a candy bar, or do anything at all—your workflow is stored in the database, waiting to be
loaded once again. Let’s see how that works.
Loading Instances
WorkflowInstance exhibits the two unload methods—Unload and TryUnload—but it has only a
single Load method. It doesn’t matter how the workflow instance was stored in the database.
Once it is stored, you use WorkflowInstance.Load to bring it back into executing status again.
We’ll now add the appropriate code to our WorkflowPersister application to make this
happen.
Load a persisted workflow
1. With the WorkflowPersister application open for editing in Visual Studio, open the
source code file for the main application form for editing and locate the button3_Click
event handler.
2. Add this code to the button3_Click event handler:
button3.Enabled = false;
try
{
_instance.Load();
} // try
catch (Exception ex)
{
MessageBox.Show(String.Format("Exception while loading workflow" +
" instance: '{0}'", ex.Message));
} // catch
button1.Enabled = true;
Chapter 6 Loading and Unloading Instances 119
Now let’s see if all this actually works. We’ll run two test workflows—one we’ll let run to com-
pletion, and one we’ll force to unload. Then we’ll compare execution times and look inside the
SQL Server database to see what was recorded there.
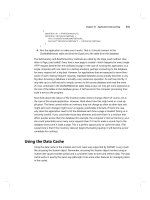
Test the WorkflowPersister application
1. With the WorkflowPersister application open for editing in Visual Studio, press F5 or
select Start Debugging from the Debug menu to execute the application. Fix any compi-
lation errors if there are any. Note that for this test we want to write trace output to the
Output window, so if you don’t already have the Output window available, be sure to
activate it by choosing Output from the Visual Studio View menu.
2. Click the Start Workflow button to create and start a workflow instance. The Start Work-
flow button should become disabled, while the Unload Workflow button will be
enabled. Because we told the workflow thread to sleep for 10 seconds, after 10 seconds
has elapsed the Unload Workflow button should disable itself and the Start Workflow
button should be re-enabled. In this test, the workflow ran to completion, and the dura-
tion of time the workflow executed should total 10 seconds.
3. Click the Start Workflow button again. However, this time click the Unload Workflow
button within the 10-second sleep period. The button will be disabled for the duration
of the 10-second period, after which the Load Workflow button will be enabled. At this
point, your workflow is persisted and will remain unloaded until you reload it.
4. But before you reload the workflow instance, open SQL Server Management Studio
Express as we’ve done in the past and open the WorkflowStore database. Expand the
Tables node, and right-click the InstanceState table and select Open Table from the con-
text menu to open the table for editing. There should be one row in the table. This row
is your persisted workflow instance!
5. Feel free to look at the table; there is no rush. But when you’re ready, go back to your
executing instance of WorkflowPersister and click the Load Workflow button. The Load
Workflow button will then become disabled, while the Start Workflow button will
become enabled.
6. Close the WorkflowPersister application by clicking the X in the upper right corner or
pressing Alt+F4. The application will shut down.
7. The Visual Studio Output window should now contain information regarding the two
workflows we executed (because we wrote trace information to the window as each
workflow instance ran). Activate the Output window by clicking on the Output tab at the
bottom of the Visual Studio application window.
120 Part I Introducing Windows Workflow Foundation (WF)
Note Of course, Visual Studio allows you to move windows such as Output around
and dock them in different locations. If you’ve docked the Output window in a location
other than the bottom of the Visual Studio application window, activate it wherever you
docked it.
8. Scroll to the bottom of the output in the Output window, and look for the text we
injected. (We delineated this text using three asterisks, ***.) You should see something
like the following:
If you look back at the image of the InstanceState table and compare the workflow instance ID
you see there with the second workflow instance ID you see in the Visual Studio Output win-
dow, you should see the same instance ID—15aedcfd-ce83-486c-b55d-3f0ee51b5337 in my case.
This instance took over 2 minutes to execute (the time it took me to take the screen shot for
the image and finally close the test application), whereas the first workflow instance (ID
33d15fce-758c-4461-972f-7a83863cf871) took precisely 10 seconds, as expected. Your instance
IDs and execution times will differ, but the pattern should be the same. Workflow instances
you unload and persist into the SQL Server database will run longer than 10 seconds, and the
IDs shown in the InstanceState table and Visual Studio Output window should match.
To see the persisted workflow instance database record, open SQL Server Management Studio
(Express or otherwise) and expand the WorkflowStore database tree control node (see the
section in the previous chapter, “Add SqlTrackingService to your workflow,” for instructions for
opening the database and viewing a table). Open the InstanceState table while the delay is in
effect and you should find a persisted workflow record there.
Loading and Unloading Instances on Idle
I mentioned earlier in the chapter that for our test application’s workflow we were going to use
System.Threading.Thread.Sleep instead of using a Delay activity to introduce a delay in our
workflow processing. I said at the time that I chose to do this because the Delay activity had
special processing capabilities as far as persistence was concerned. Let’s now look briefly at
what Delay does for us.
If you introduce a Delay activity into your workflow, clearly the intention is to suspend
processing for some period of time, whether it’s an actual time period or a suspension until a
specific point in time, such as a date five days in the future.
Chapter 6 Loading and Unloading Instances 121
When a Delay activity is executed, assuming the workflow runtime has the SqlWorkflowPersis-
tenceService plugged in and is directed to do so, the workflow runtime will automatically per-
sist the workflow instance for you and recall it when the delay period expires. Note that this
will occur regardless of whether the system running the workflow runtime is turned off,
rebooted, or was even replaced in the interim period. (It does assume some system somewhere
is running the workflow runtime with the persistence service included, however!) To enable
this automatic persistence, you’ll add a special constructor parameter to SqlWorkflowPersis-
tenceService when you set up your workflow runtime. (The preceding example omitted this
and would not have persisted workflows automatically.)
The constructor parameter I’m referring to enables the SqlWorkflowPersistenceService’s internal
UnloadOnIdle method to be called when workflow instances idle. The method isn’t normally
called. You must explictly enable it by using an overloaded SqlWorkflowPersistenceService con-
structor. In the example that follows, you’ll use a collection of named parameters, because you
want to provide only the connection string and the unload on idle flag. There are other con-
structors that provide even more flexibility (I describe one following this example). Let’s now
look at an example where the workflow is automatically persisted.
Create a new workflow for on-idle persistence
1. For this example, you’ll use a simple console-based application just so that you can
quickly get a feel for how on-idle persistence works. As you did in Chapter 2, open Visual
Studio and create a new Windows Project, Console Application named WorkflowIdler.
As with the preceding example, create the application in \Workflow\Chapter6. Follow
the steps from Chapter 2 in the Adding the workflow assembly references,” “Hosting the
workflow runtime,” “Creating the WorkflowRuntime factory object,” “Starting the work-
flow runtime,” “Stopping the workflow runtime,” “Using the workflow runtime factory
object,” and “Handling workflow runtime events” procedures.
2. Modify the WorkflowFactory class as you did in steps 16 and 17 of the preceding example,
“Create a new host application.” However, some additional modifications will be neces-
sary. First, add this using statement:
using System.Collections.Specialized;
3. Then, in a manner similar to what you did in step 18 in this chapter’s “Create a new host
application,” add the persistence service after the runtime object itself is created:
NameValueCollection parms = new NameValueCollection();
parms.Add("UnloadOnIdle", "true");
parms.Add("ConnectionString", ConfigurationManager.
ConnectionStrings["StorageDatabase"].
ConnectionString);
_workflowRuntime.AddService(new SqlWorkflowPersistenceService(parms));
4. Add an application configuration file as with the previous example (the connection
string will remain the same). Follow Steps 1 and 2 from the “Add SqlTrackingService to
your workflow” procedure in Chapter 5 regarding adding the app.config file.
122 Part I Introducing Windows Workflow Foundation (WF)
5. Create a separate sequential workflow library project as you did in Chapter 3 to house
our new workflow. (See the section in Chapter 3 entitled “Adding a sequential workflow
project to the WorkflowHost solution.”) Name this workflow library IdledWorkflow.
6. Repeat step 2 and then steps 4 through 6 from the previous example, in the section
entitled “Create a new unloadable workflow.” This places two Code Activities in your
workflow.
7. Adding the second Code Activity in the last step will take you to the Visual Studio code
editor. While there, add this code to the PreUnload method (you added the PostUnload
method code in the preceding step):
_started = DateTime.Now;
System.Diagnostics.Trace.WriteLine(
String.Format("*** Workflow {0} started: {1}",
WorkflowInstanceId.ToString(),
_started.ToString("MM/dd/yyyy hh:mm:ss.fff")));
8. Return to the visual workflow designer and drag a Delay Activity onto the surface and
drop it between the two Code Activities.
9. Assign the Delay Activity’s TimeoutDuration property to be 30 seconds. This should be
enough time to examine the WorkingStore InstanceState database table.
10. With the workflow now complete, add a reference to the workflow from the Workflow-
Idler application. Right-click the WorkflowIdler tree control node in Visual Studio’s
Solution Explorer and select Add Reference. When the Add Reference dialog box
appears, click the Projects tab. Select IdledWorkflow from the list and click OK.
11. Open Program.cs in the WorkflowIdler project for editing. Locate this line of code:
Console.WriteLine("Waiting for workflow completion.");
Chapter 6 Loading and Unloading Instances 123
12. Of course, the application isn’t waiting for workflow completion since no workflow was
started. To create a workflow instance, add this code following the line of code you just
located:
// Create the workflow instance.
WorkflowInstance instance =
workflowRuntime.CreateWorkflow(typeof(IdledWorkflow.Workflow1));
// Start the workflow instance.
instance.Start();
13. Compile the solution by pressing F6. Correct any compilation errors that pop up.
Now, when you execute the WorkflowIdler application, the Delay Activity will force the work-
flow instance to be persisted to the storage database. However, you might wait longer than 30
seconds (up to 2 minutes) for the instance to be reloaded. That’s because the workflow runt-
ime periodically checks for persisted workflows in idle states due to delays, but it is not guar-
anteed that those workflows will wait only for their respective delays. WF polls the database
periodically, looking for idled workflows that were persisted waiting for timer events (Delay
Activity uses a timer). The default polling time is 2 minutes.
Note
The default database polling time can be changed by providing a TimeSpan to the
SqlWorkflowPersistenceService and using the constructor that takes four parameters (the con-
nection string, the unload on idle flag, a TimeSpan indicating how long the current instance
of the persistence service owns this instance of the workflow, and a TimeSpan indicating how
often the database should be polled).
If you want to continue to the next chapter, keep Visual Studio 2005 running, and turn to
Chapter 7, “Basic Activity Operations.” We’ll start digging into some of the activities WF
provides us with.
If you want to stop, exit Visual Studio 2005 now, save your spot in the book, and close it. Just
don’t forget all those persisted workflows in your database!
Chapter 6 Quick Reference
To Do This
Create the workflow persistence
database
After creating a new database for the task, execute within SQL
Server Management Studio Express the SQL scripts you find in
the <%WINDIR%>\Microsoft.NET\Framework\v3.0\Windows
Workflow Foundation\SQL\EN directory within SQL Server
Management Studio. You’ll need to execute both the
SqlWorkflowPersistenceService_Schema.sql script and the
SqlWorkflowPersistenceService_Logic.sql script.
124 Part I Introducing Windows Workflow Foundation (WF)
Use the SqlWorkflowPersistenceService After creating an instance of WorkflowRuntime but before
you call its StartRuntime method, add a new instance of
SqlWorkflowPersistenceService to the runtime services using
WorkflowRuntime.AddService.
Manually unload and persist a workflow
instance
Call WorkflowInstance.Unload or WorkflowInstance.TryUnload.
Keep in mind that the Unload is synchronous and will block
your thread until the unload operation is complete or throws
an exception.
Manually load a previously persisted
workflow instance
Call WorkflowInstance.Load.
Automatically unload, persist, and reload
aworkflow instance
Introduce a Delay activity to your workflow processing and
start SqlWorkflowPersistenceService with the UnloadOnIdle flag
set. When the Delay activity begins execution, the workflow
instance enters the idle state. At that point, SqlWorkflowPersis-
tenceService automatically unloads your workflow and serial-
izes it to the database. Later, after the delay period has expired,
the instance will be reloaded and re-executed.
To Do This
Part II
Working with Activities
In this part:
Chapter 7: Basic Activity Operations . . . . . . . . . . . . . . . . . . . . . . . . . . . . . . 127
Chapter 8: Calling External Methods and Workflows . . . . . . . . . . . . . . . . 151
Chapter 9: Logic Flow Activities . . . . . . . . . . . . . . . . . . . . . . . . . . . . . . . . . . 183
Chapter 10: Event Activities . . . . . . . . . . . . . . . . . . . . . . . . . . . . . . . . . . . . . 209
Chapter 11: Parallel Activities . . . . . . . . . . . . . . . . . . . . . . . . . . . . . . . . . . . . 241
Chapter 12: Policy and Rules. . . . . . . . . . . . . . . . . . . . . . . . . . . . . . . . . . . . . 267
Chapter 13: Crafting Custom Activities . . . . . . . . . . . . . . . . . . . . . . . . . . . . 295
127
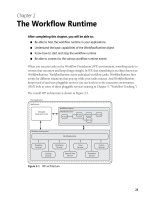
Chapter 7
Basic Activity Operations
After completing this chapter, you will be able to:
■ Know how to use the Sequence activity
■ Know how to use the Code activity
■ Know how exceptions are thrown and handled in workflows
■ Know how to suspend and terminate your workflow instances from workflow code
Up to this point, we’ve seen the basics. We’ve worked a bit with the workflow runtime, which
orchestrates the workflow process. We’ve looked at the workflow instance, which is an execut-
ing workflow. And we’ve dug into a couple of the pluggable services available to us, such as
those used for tracking and persistence. “What’s next?” you ask.
Now it’s time to look at the stars of the show, the activities themselves. Windows Workflow
Foundation (WF) ships with a large set of activities you can use from the moment you install
WF to bring workflow processing to your applications. And given the wide variety of
activities, WF can workflow-enable all sorts of applications, not just those designed to
interact with people.
In this chapter, we’ll go back and formally introduce a couple of activities we’ve already seen—
Sequence and Code. But I believe proper error handling is critical in well-designed and well-
implemented software, so we’ll look at how you throw exceptions using workflow activities,
catch exceptions, and even suspend and terminate your workflows. Let’s start with the
Sequence activity.
Using the Sequence Activity Object
Actually, it’s not entirely correct to say we’ve seen the Sequence activity. The workflow
applications we’ve created have actually used the SequentialWorkflow activity, but the general
idea is the same—this activity contains other activities that are executed in sequence. This is
in contrast to parallel execution, which you might do using the parallel activities we’ll see in
Chapter 11, “Parallel Activities.”
When you execute tasks in a specific order, you’re doing things in sequence. This is often
necessary. For example, imagine you’re making a grilled cheese sandwich for lunch. You find
your griddle or frying pan and place it on the stove. You pull a loaf of bread from the pantry
and butter one side of two slices. Then you pull the cheese from the refrigerator and place
a couple of pieces onto one of the slices of bread, which you’ve placed butter-side down on
the griddle or in the pan. Then you cover the assembly with the second slice of bread,
128 Part II Working with Activities
butter-side up. Finally, cook each side until golden brown (and the cheese melts, which is
critical). Although you might make a grilled cheese sandwich differently, the point is there is
a natural progression of steps to accomplish the task.
In fact, if you find yourself saying things like, “First I do this, then I do that, and finally I do
this other thing,” the Sequence activity is for you. (Conversely, if you find yourself saying, “I can
do this while I do that,” you’ll find Chapter 11 to be helpful as we take a look at parallel activ-
ity execution.) Any time you need to make sure steps in your workflow process execute in a
specific order, consider placing them in a Sequence activity.
The Sequence activity is a composite activity, which we discussed briefly in Chapter 4,
“Introduction to Activities and Workflow Types.” It contains other activities and makes sure
those activities are executed in order. You can place other composite activities inside a parent
Sequence activity, including parallel ones. But the child activities are executed one by one, in
order, even if those child activities themselves contain parallel execution flows.
Let’s build a simple workflow that uses the Sequence activity. We’ll again call upon the services
of our trusty friend, the Code activity, which we’ll discuss in more detail in the next section,
“Using the Code Activity.” To target specific workflow activity behaviors, we’ll generally return
to the console-based application. With console-based applications, you typically write less
code because you’re not maintaining the user interface. (We’ll be building other graphical test
cases as we progress through the book, however.)
Creating a workflow using the Sequence activity
1. To make things easier for you, I’ve created the initial application for the Sequence
sample as well as a completely finished version. The completed version, found in the
\Workflow\Chapter7\Sequencer Completed\ directory, is ready to run. Simply open it,
examine the code as you follow the steps here, and execute it. However, if you want to
type the code and build the workflow I describe here, open the version of the sample in
the \Workflow\Chapter7\Sequencer\ directory. To open either sample application,
drag its .sln file onto an executing copy of Visual Studio.
2. When Sequencer is opened and ready for editing, add a new sequential workflow library
project to the Sequencer solution by clicking File, Add, and then New Project from
Visual Studio’s menu and then choosing Workflow from the project types and Sequen-
tial Workflow Library from the templates list in the Add New Project dialog box. Name
it SequencerFlow. Visual Studio adds the new library project and opens the workflow
visual designer for editing.
3. With the Visual Studio workflow designer showing, drag a Sequence activity from the
Toolbox and drop it onto the designer’s surface.
Chapter 7 Basic Activity Operations 129
4. Next, drag a Code activity from the Toolbox and drop it onto the Sequence activity you
just placed.
5. In its ExecuteCode property, type DoTaskOne and press Enter.
6. Visual Studio automatically brings up the code editor. Locate the DoTaskOne method
Visual Studio just added, and in that method place this code:
Console.WriteLine("Executing Task One ");
130 Part II Working with Activities
7. Perform steps 4, 5 and 6 again, twice, adding methods for DoTaskTwo and
DoTaskThree, and changing the Writeline text appropriately. The workflow visual
designer appears as you see here.
8. Turning to the main application, open the Program.cs file for editing and locate the Main
method. In the Main method, search for the following lines of code:
// Print banner.
Console.WriteLine("Waiting for workflow completion.");
9. Following the code you found in the preceding step, add this code:
WorkflowInstance instance =
workflowRuntime.CreateWorkflow(typeof(SequencerFlow.Workflow1));
instance.Start();
10. Of course, we need to reference the SequencerFlow workflow library from the main
application project. Adding a project-level reference as we’ve done in previous chapters
is more than adequate.
11. Compile the application, and correct any errors you find. Press F5 or Ctrl+F5 to run the
application. Set a breakpoint or run from a command prompt so you’ll be able to see the
output. The output is shown here: