Wireless Home Networking for dummies phần 5 docx
Bạn đang xem bản rút gọn của tài liệu. Xem và tải ngay bản đầy đủ của tài liệu tại đây (972.49 KB, 39 trang )
Apple’s AirPort products use the same Wireless Fidelity (Wi-Fi) IEEE 802.11b
technology that has become the most popular wireless networking standard.
Apple computers equipped with AirPort Cards can connect to any Wi-Fi–com-
patible 2.4 GHz wireless network — regardless of whether the network uses
Apple equipment — including Windows wireless networks.
At the Macworld tradeshow in January 2003, Apple announced a new AirPort
Extreme Card and Base Station that uses the draft IEEE 802.11g technology
that can transfer data up to 54 Mbps and can handle up to 50 Mac and
Windows users simultaneously. These new products are backward compati-
ble with the older AirPort equipment; however, the new AirPort Extreme Card
will install only in Apple computers that have a mini-PCI (Peripheral
Component Interconnect) slot inside.
Pick an AirPort Card, any card
Apple computer models were the first on the market to feature a special wire-
less adapter — the AirPort Card — as an option. The AirPort Card, with a
retail price of $99, is very similar to a PC Card (a Personal Computer Memory
Card International Association [PCMCIA] Card) but is designed to be installed
in a special AirPort slot inside an Apple computer. You should not try to use
it in a PC Card slot found on most laptop computers.
The AirPort Extreme Card is a mini-PCI card. It is designed to fit inside an
Apple computer, such as several of the newest PowerBook G4s, but will not
fit in the original AirPort slot. Likewise, an AirPort Card will not fit in a mini-
PCI slot. The AirPort Extreme card also has a retail price of $99. It will con-
nect to the original AirPort Base Stations but will also connect to the new
AirPort Extreme Base Station that can transmit data up to 54 Mbps, almost
five times faster than the original AirPort.
Lucent designed and manufactures the AirPort Card for Apple and also manu-
factures a very similar card for other vendors (such as ORiNOCO, a Proxim
brand) but with an antenna built into the card. These Lucent PC Cards are
too long and fat to fit in the slot intended for AirPort Cards, but they can be
used in PC Card-slot–equipped PowerBook laptop computers, as well as in
current and older Apple desktop computers, through the use of a special
adapter card that fits into a Macintosh PCI slot.
A few other vendors (such as Proxim) offer wireless networking cards that
will work in Apple Macintosh computers’ PCI slots or PC Card slots, but most
Apple computer users buy the AirPort Card because it can be installed inside
the computer and attached to the built-in antenna.
136
Part III: Installing a Wireless Network
Apple AirPort-ready computers
The Apple computer models that are compatible with the AirPort Card are
ߜ iBook: All iBook models.
ߜ PowerBook: The PowerBook (FireWire) and some PowerBook G4.
Several of the newest PowerBook G4 models are AirPort Extreme-ready
rather than Airport-ready.
ߜ iMac: The iMac (slot-loading except 350 MHz model), iMac (Summer
2000 except Indigo 350 MHz model), iMac (early 2001), iMac (Summer
2001), and iMac (flat panel). You also need an AirPort Card Adapter to
install an AirPort Card into any AirPort-ready, G3-based, slot-loading
iMac.
ߜ Power Mac G4: All models except Power Mac G4 (PCI Graphics).
Apple computers that are equipped for installation of an AirPort Card have
an antenna built into the body of the computer. When you install the AirPort
Card, you attach the AirPort Card to the built-in antenna. (All radios need an
antenna to be able to send and receive radio signals, and wireless networking
cards are no exception.)
You can use any standard PC Card Wi-Fi card in an older PowerBook (or
Power Mac with a PC Card adapter installed) if you can find drivers. The
open source driver project is located at SourceForge (
http://wireless
driver.sourceforge.net/
).
Installing an AirPort Card
Apple considers the AirPort Card a user-installable upgrade, which means
that the procedure is very straightforward and easy to accomplish. The exact
steps vary depending on which computer you have.
Your Apple dealer or local Apple retail store will probably install an AirPort
for you rather cheaply ($20 or so) if you don’t feel comfortable getting inside
your Mac.
If you purchase the AirPort Card in a retail box, it often comes installed in an
iMac AirPort Card adapter. This adapter is required to install the card in an
iMac, but you must remove it if you’re going to install the card in an iBook, a
PowerBook, or a Power Mac G4.
137
Chapter 8: Setting Up a Wireless Mac Network
1. Shut down the computer.
2. Unplug the appropriate cabling:
• For models except the iMac and Power Mac G4: Unplug all cables,
such as the power, keyboard, mouse, printer cables, modem, and
so on.
• For the iMac and Power Mac G4: Leave the power cord plugged in
for now.
3. To avoid discharging damaging static electricity through the AirPort
Card, be sure to touch a metal part on the computer chassis before
touching the AirPort Card to the computer.
Or even better, purchase an electrostatic discharge (ESD) strap from a
local electronics or computer store. Place the strap on your wrist and
clip the end of the cable to the computer’s chassis.
• For the iBook: Turn it over, use a coin to remove the battery cover,
and remove the battery. Turn the computer back over so that the
keyboard is facing up and then release the keyboard by sliding the
two plastic tabs (between the Esc and F1 keys and between the F8
and F9 keys) away from the display. Lift the keyboard, turn it over,
and lay it on the front portion of the computer.
If you are not wearing an ESD strap: To discharge static electric-
ity, touch any one of the metal surfaces inside the iBook with your
hand — not with the AirPort Card.
• For the PowerBook: Remove the battery from the expansion bay. If
you’ve locked down the keyboard, open the locking screw
(between the F4 and F5 keys) and then release the keyboard by
sliding the two plastic tabs away from the display. Lift the key-
board, turn it over, and lay it on the front portion of the computer.
If you are not wearing an ESD strap: To discharge static electric-
ity, touch any one of the metal surfaces inside the PowerBook with
your hand — not with the AirPort Card.
• For the iMac: You can use a coin to open the access panel on the
back of the computer and then touch the metal shield inside the
recessed latch. Then unplug the power cord.
• In a Power Mac G4: You can touch the metal PCI access covers on
the back of the computer and then unplug the power cord.
4. Locate the antenna cable and plug it into the end of AirPort Card.
• In the iBook: The antenna cable is tucked under a wire clip that’s
exposed when you remove the keyboard. Insert the round connector
at the end of the cable into the hole at the end of the AirPort Card.
• In a PowerBook: Remove the screws that hold down the internal
heat shield and lift out the heat shield. Locate the antenna cable
and plug it into the end of the AirPort Card.
138
Part III: Installing a Wireless Network
• In an iMac: The antenna cable is attached to the left rail guide.
Detach it and remove the cap from the end of the cable. Insert the
cable’s connector into the hole at the end of the AirPort Card.
• In a PowerMac G4: Release the latch on the side of the computer
and lower the side. You’ll find the antenna in the side of the PCI
card guide. Plug the cable into the AirPort Card.
5. Insert the card, with the cable attached, into the AirPort Card slot.
• For the iBook: Flip up the wire clip and then slide the card, with
the AirPort label facing down, under the clip and between the edge
guides until it fits snuggly in the slot that’s beneath the back edge
of the trackpad. Then flip down the clip to hold the card and cable
in place. Replace the keyboard, slip the plastic tabs (between the
Esc and F1 keys and between the F8 and F9 keys) closed, and rein-
stall the battery.
• In a PowerBook: Insert the card, with antenna cable attached, into
the AirPort Card slot at the upper-left corner of the compartment
beneath the keyboard, just above the PowerBook’s PC Card slot.
The card’s AirPort label should be facing downward, and any bar
code or product ID numbers should be facing upward. Replace the
heat shield and the keyboard.
• In an iMac: Turn the AirPort Card (still in the iMac AirPort Card
Adapter) sideways and insert the AirPort Card into the slot while
aligning the edges of the card with the card-edge guides. Close the
access panel and reconnect the cables.
• In a Power Mac: Slide the card through the opening in the PCI card
guide and into the AirPort Card socket on the main logic board.
Close the case and reconnect the cables.
“Come in, AirPort Base Station, over . . .”
The Apple access point (AP) is the AirPort Base Station (ABS, to those in the
know). In addition to serving as a wireless AP, it can act as a cable/digital sub-
scriber line (DSL) router and Dynamic Host Configuration Protocol (DHCP)
server, which automatically assigns a network address to every computer on
a network. It even has a built-in dialup modem in case you connect to the
Internet that way.
The ABS can be used to connect to American Online (AOL) — most access
points don’t even have dialup modems any more. And very few can connect
to AOL. If you don’t have broadband and use AOL, consider buying an ABS as
your access point for a Mac network (or even a Windows network) to get this
capability.
139
Chapter 8: Setting Up a Wireless Mac Network
The exterior of the original version of the AirPort Base Station is a gray color
(Graphite). The newest AirPort Base Station is white — the Snow AirPort.
The Graphite AirPort Base Station has one Ethernet port that you can use to
connect to a cable or a DSL modem so that you can share Internet connectiv-
ity among your networked computers. The Snow AirPort Base Station has
two Ethernet ports: a local area network (LAN) and a wide area network
(WAN). The WAN port connects to your broadband modem, and the LAN port
enables you to connect a small, wired network to the Base Station and use
the Base Station as a DHCP server and as a cable/DSL router for your wired
network as well as your wireless network. (Skip back to Chapter 2 for more
about DHCP servers and cable/DSL routers.)
The AirPort Base Station, both the Graphite and Snow versions, also has a 56
Kbps dialup modem that enables you to connect your wireless network to the
Internet via a regular phone line, assuming that you have an account with a
dialup Internet service provider (ISP). (But see the discussion of connecting
to AOL in the “AirPort 2.0 software” section of this chapter.)
The AirPort Extreme Base Station is white, like the Snow version, but is based
on the draft IEEE 802.11g technology rather than IEEE 802.11b technology.
(Jump back to Chapter 2 for more about these two technology standards.) As
a result, the AirPort Extreme Base Station is capable of transmitting data at
54 Mbps, nearly five times faster than the Graphite and Snow AirPort Base
Stations. AirPort Card-equipped Macs can still connect to the AirPort Base
Station Extreme but will not enjoy the higher speed. You need an AirPort
Extreme card equipped Mac to take full advantage of this state-of-the-art Base
Station. In addition, the AirPort Extreme Base Station includes a Universal
Serial Bus (USB) port to which you can connect a printer. All computers
accessing the wireless network can then print to this printer.
Another new feature of the AirPort Extreme Base Station is a bridging feature.
You can now use two base stations together to extend the range of your wire-
less network without the need to run network cabling between the two base
stations.
The AirPort Extreme Base Station offers all these new features and is less
expensive than its predecessors. (Both earlier Base Station models had a
retail price of $299.) There are two models of the AirPort Extreme Base
Station. The basic model has all the features described earlier (sells for
$199), and the deluxe model (retail price of $249) adds a v.90 (56 Kbps)
modem and a port for attaching an external range-extending antenna.
140
Part III: Installing a Wireless Network
Apple AirPort Software Updates
Apple has been a pioneer in wireless networking, but as more and more
people use wireless networking and as the number of companies producing
Wi-Fi equipment grows, Apple has continued to improve its wireless prod-
ucts. Amazingly, the majority of the improvements can be applied to the origi-
nal AirPort Card and AirPort Base Station through software upgrades. In
general, if you keep your Mac OS software current (as of this writing, Mac OS
v. 10.2.3) and your AirPort firmware up to date, you will be able to take
advantage of most of the new wireless networking features. (Note: You
cannot upgrade an AirPort Card to an AirPort Extreme Card through a
firmware update.)
Rather than waiting to release all new features at once, Apple continually
puts out updates to its AirPort software. Read on to discover how each of the
new versions of AirPort software can benefit your wireless network.
AirPort 2.0 software
When Apple released the Snow AirPort Base Station, it upgraded the AirPort
software to version 2.0. Your computer must have Mac OS v. 9.0.4 or later to
install this software. Compared with the original Graphite AirPort Base
Station, AirPort 2.0 adds the following features:
ߜ America Online compatibility: If you use AOL to connect to the Internet
over a dialup phone connection, AOL’s unique login protocol has been a
stumbling block that has prevented you from connecting to the Internet
through your AirPort’s built-in modem — until now. Apple and AOL have
collaborated and come up with a way to enable AOL customers to use
AirPort. At the time of this writing, AirPort is the only wireless AP with a
built-in modem that also works with AOL. (Note: AOL users can wire-
lessly connect to AOL using any Wi-Fi wireless network that’s connected
to the Internet via a cable or DSL modem.)
ߜ 128-bit encryption: The security features have been improved in several
ways including support for 128-bit encryption. Earlier versions of the
base station software supported only 64-bit encryption. Note: You
cannot upgrade the Graphite Base Station to 128-bit encryption, but you
can upgrade your AirPort Cards to 128-bit.
ߜ RADIUS authentication and Cisco LEAP client support: Remote
Authentication Dial-In User Service (RADIUS) and Lightweight Extensible
Authentication Protocol (LEAP) are enhanced security options of inter-
est to corporate and university IS departments . . . and are a nice bonus
for a wireless home network.
141
Chapter 8: Setting Up a Wireless Mac Network
ߜ Support for up to 50 users: The Graphite AirPort Base Station can handle
as many as ten wireless network client devices. The Snow AirPort Base
Station can handle up to 50 users (up to about 30 simultaneously). For
home use, however, you probably will never exceed ten users.
AirPort 2.0.4 software
But Apple didn’t stop adding features with AirPort 2.0. The last version of
AirPort 2.0 software that will install on Mac OS 9 (actually version 9.2.1 or
higher) is AirPort 2.0.4. In addition to the features in AirPort 2.0, it adds the
following:
ߜ Windows VPN support: The AirPort Base Station is now compatible
with Windows Virtual Private Networking (VPN) software that uses
Point-to-Point Tunneling Protocol (PPTP) or Internet Protocol Security
(IPSec). This is big for businesses and home offices of employees who
want to connect to the main company network over the Internet.
ߜ Incoming remote connections: The AirPort Base Station now supports
incoming calls from other computers to the modem port to allow remote
access to the network to which the AirPort Base Station is attached.
ߜ Multiple connections to port-mapped services: This feature is for
advanced users and small business owners who plan to host one or more
servers on their network. If you plan to host a Web server, File Transfer
Protocol (FTP) server, or other public server on your system, you can
now map the public ports on the AirPort Base Station to specific private
ports on one or more computers on your private network. This feature
also comes in handy if you want to connect other devices, such as an
Xbox game console, to the AirPort and to Xbox live gaming service.
Most home broadband ISPs don’t permit you to operate a server on your
home computer because you could potentially hog the bandwidth on their
broadband network. For this reason, many broadband service providers
meter the upload speeds on home accounts to a rate that would be too slow
to host a Web site or other Internet site.
AirPort 2.0.5 software
If you want to take advantage of future upgrades to the AirPort software
beyond version 2.0.4, you’ll have to upgrade your computer’s operating
system to at least OS X version 10.1.5. AirPort 2.0.5 is not available for Mac
OS 9 computers. You can use AirPort 2.0.5 software to configure or upgrade
your AirPort hardware to add the following features:
142
Part III: Installing a Wireless Network
ߜ Updated firmware: Version 2.0.5 of the AirPort software includes the
latest version of the firmware (the product’s feature set stored as soft-
ware on chips inside the card or base station) for both AirPort Cards
and AirPort Base Station (v. 4.0.7). Apple recommends this firmware
update to customers who have problems connecting to their ISP or to
secure Web sites.
ߜ Improved PPPoE support: Many DSL broadband ISPs use a special
protocol — Point-to-Point Protocol over Ethernet (PPPoE) — to provide
a very fast Internet connection over normal telephone lines. AirPort
2.0.5 offers improved PPPoE support compared with previous software
versions.
AirPort 2.1.1 software
The most current AirPort software (at the time of this writing) is AirPort
2.1.1. If your Mac is running OS version 10.2 (Jaguar) or later, you can use
AirPort 2.1.1 to configure or upgrade your AirPort hardware. As is true with
AirPort 2.0.5, version 2.1.1of the AirPort software includes the latest version
of the firmware for both AirPort Cards and AirPort Base Station. In addition,
AirPort 2.1.1 adds the following features:
ߜ Verizon DSL: This update corrects problems that sometimes occurred
with e-mail when an AirPort network was connected to the Internet via
Verizon DSL services.
ߜ Added security: The Base Station administrator (you) can now turn off
the capability to configure the AirPort Base Station over the second
Ethernet port (the WAN port of the Snow Base Station; see the earlier sec-
tion “Come in, AirPort Base Station, over . . .”). This eliminates the possi-
bility that someone could reconfigure your Base Station over the Internet.
ߜ Password compatibility: AirPort 2.1.1 software makes it easier to enter
network passwords when you want to connect to a Microsoft Windows-
based wireless network. The new software automatically distinguishes
between alphanumeric (American Standard Code for Information
Interchange; ASCII) and hexadecimal passwords. With earlier versions of
the software, to connect to a Wired Equivalent Privacy protocol- (WEP)
encrypted Windows-based network, you had to type quotation marks
around alphanumeric values and type a dollar sign character ($) in front
of hexadecimal numbers. Read the “Connecting to Non-Apple-Based
Wireless Networks” section of this chapter for more on this issue.
143
Chapter 8: Setting Up a Wireless Mac Network
OS 9 Wireless Networks
When Apple released the first AirPort wireless network concurrently with the
release of the first iBook, the most current Apple operating system software
was Mac OS 8.6. Apple has since updated the original Mac OS to version 9.2
(9.2.2 at the time of this writing). All Apple computers that are AirPort ready
can be upgraded to Mac OS 9.2, although it might not be a free upgrade. This
section of the chapter covers configuring your AirPort Card in Mac OS 9.2 but
doesn’t cover earlier versions of this operating system. If your computer runs
Mac OS X (which isn’t an update of the original Mac OS; it’s a completely new
operating system), see the “OS X Wireless Networks” section later in this
chapter.
Although you still might be able to find an original (Graphite) AirPort Base
Station to purchase, the most current and full-featured model is the dual-
Ethernet port (Snow) AirPort Base Station with AirPort 2.0 (or higher) soft-
ware. Nonetheless, AirPort 2.0 software will install and configure the Graphite
or Snow AirPort Base Stations. The major differences between the two ver-
sions are the second Ethernet port and 128-bit encryption of the Snow Base
Station. And don’t forget that the new AirPort Extreme Base Station that can
transmit data at 54 Mbps and comes with a built-in print server.
AirPort 2.1.1 is the most current version of the AirPort software at the writing
of this book, but it won’t install under OS 9.2. Consequently, the following dis-
cussion describes the steps and shows screen images that relate to AirPort
2.0.4, which is the last version that will install and set up an AirPort Base
Station on OS 9.
If you have access to a computer that has OS X installed, consider using that
computer to configure your AirPort Base Station. The AOL compatibility fea-
ture of AirPort 2.0.4 software and later versions of the AirPort software can
be added and configured only from OS X.
Even though a CD containing AirPort software is distributed with both the
Base Station and the AirPort Card, check out the Apple Web site
www.info.
apple/support/downloads.html
to make sure that you have the latest
version of the AirPort software before setting up your AirPort network.
To set up an AirPort Base Station using the AirPort 2.0.4 software, you must
have the Base Station itself as well as the following:
ߜ An AirPort-ready computer with an AirPort Card, or a PowerBook G3
with either a Lucent WaveLAN or an ORiNOCO PC Card
ߜ Mac OS v. 9.2.1 or later
144
Part III: Installing a Wireless Network
When you run the AirPort software installation, you first install (or upgrade)
software on your computer and then upgrade the firmware that’s built into
the AirPort Base Station. Finally, you configure the Base Station. The sections
that follow take you through the process step by step.
Installing AirPort software on Mac OS 9
To install AirPort software on your computer, follow these steps:
1. Close all open applications.
The installation process will cause the computer to restart, and you cer-
tainly don’t want to lose any of your work.
2. If you’re installing the software from a CD-ROM, insert the CD-ROM
and double-click the
Install Mac OS 9 file.
Alternatively, you can download the most current version of the soft-
ware from the Apple Web site (
www.info.apple/support/down-
loads.html
) and then double-click the Apple SW Install file.
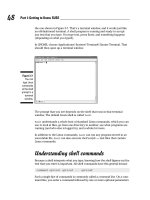
The Welcome window appears, as shown in Figure 8-1.
3. Click the Continue button to display the Select Destination window,
choose the drive where you want the software to be installed from the
Destination Disk list, and then click the Select button to display the
Software License Agreement.
4. Read the license agreement; if you agree, click the Continue button
and then click the Agree button to display the About AirPort window.
Figure 8-1:
The AirPort
2.0.4 Install
AirPort
Welcome
screen.
145
Chapter 8: Setting Up a Wireless Mac Network
5. After reading and/or printing the contents of the About AirPort
window, click the Continue button to display the Install/Remove
Software window.
6. In the Install/Remove Software window, click the Start button to display
a warning screen that the software installation will restart your com-
puter, which requires it to first quit all applications that are running.
You can click the Stop button to abort the installation program and
return to any application that you accidentally left open so that you can
save your work and close it down yourself. You’ll just have to start the
AirPort software installation again when you’re ready.
7. After you click the Continue button, the installer closes all running
applications and then copies the AirPort software to your computer’s
drive.
A message displays that the installation process is finished.
8. Click the Restart button to restart your computer.
Upgrading AirPort Base Station
firmware on OS 9
This section explains how to upgrade the firmware of a new AirPort Base
Station. Upgrading the firmware on your AirPort Base Station through a
direct Ethernet cable connection is the easiest route. Use an Ethernet cable
(either a straight-through cable or a cross-over cable; the Base Station auto-
matically detects the type of cable that you’re using) to connect your com-
puter’s Ethernet port to the Base Station’s LAN port.
To make sure that your computer can recognize the AirPort Base Station in
order to upgrade its firmware, execute the following steps:
1. Open the Control Panels menu by clicking the Apple menu icon (
Ú
)
in the upper-left corner of your screen and then selecting Control
Panels.
2. Choose TCP/IP to display the TCP/IP control panel.
3. Choose Ethernet from the Connect Via pop-up menu and then choose
Using DHCP Server from the Configure pop-up menu.
These settings will cause your computer to request an Internet Protocol
(IP) address from the AirPort Base Station that will enable your com-
puter and the Base Station to communicate.
146
Part III: Installing a Wireless Network
4. Close the control panel; if prompted to save changes, click the Save
button.
5. To check whether TCP/IP is properly configured, repeat Steps 1 and 2.
The IP address should now be listed as 10.0.1.2 with subnet mask
255.255.255.0 and router address 10.0.1.1. If you don’t see these num-
bers, check that the AirPort Base Station is turned on and that the
Ethernet cable is plugged in securely on both ends. Then go through
these steps again.
To upgrade the firmware of a new AirPort Base Station that you’re setting up
for the first time, follow these steps:
1. Double-click the desktop icon for the hard disk on which you installed
the AirPort software.
The AirPort folder is located in the Apple Extras folder, which can be
found in the Applications folder.
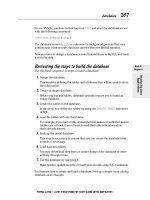
2. When the hard disk’s folder opens, open the Applications (Mac OS 9)
folder, the Apple Extras folder, and the AirPort folder, in that order.
The open AirPort folder is shown in Figure 8-2.
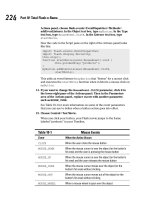
3. Double-click the AirPort Admin Utility icon to display the Select Base
Station window, as shown in Figure 8-3.
You should see
Base Station in the Name list. This is the factory-sup-
plied name for your AirPort Base Station. It should have the IP address
10.0.1.1.
4. Click Base Station to highlight it and then click the Configure button.
A message pops up requesting a password.
Figure 8-2:
The AirPort
2.0.4 AirPort
folder.
147
Chapter 8: Setting Up a Wireless Mac Network
5. Enter public as the password and then click OK.
If the firmware installed in the Base Station is older than the firmware that
was supplied with your updated software, you see a message prompting
you that a newer version of the Base Station software is available.
• In this message window, click the Upload button to install the
newer software.
• If a message pops up stating that uploading the software will cause
the wireless network to be disconnected, click OK.
The new firmware is copied to the Base Station, and a message box
displays showing progress.
6. When the Select Base Station window returns, close it (click the X in
the upper-right corner).
7. Disconnect the Ethernet cable between your computer and the Base
Station.
Configuring the AirPort Base
Station on OS 9
After you’re sure that your AirPort Base Station has the most current
firmware, the easiest way to set it up for use in your wireless home network
is to use the AirPort Setup Assistant. The AirPort Setup Assistant reads the
Internet settings from your computer and transfers them to the Base Station
so that you can access the Internet over your wireless network. To use the
AirPort Setup Assistant, follow these steps:
Figure 8-3:
The AirPort
2.0.4 Select
Base
Station
window.
148
Part III: Installing a Wireless Network
1. Before running the AirPort Setup Assistant, set up your computer to
connect to the Internet by dialup modem or by broadband (cable or
DSL) modem.
Your ISP will provide instructions for getting connected.
• If you connect to the Internet by dialup modem: Connect the tele-
phone line to the phone line port on the Base Station.
• If you connect to the Internet by DSL or cable modem: Use an
Ethernet cable to connect the modem to the Base Station’s WAN
port.
2. Double-click the desktop icon for the hard disk on which you installed
the AirPort software.
3. When the hard disk’s folder opens, open the Applications (Mac OS 9)
folder, the Apple Extras folder, and the AirPort folder, in that order.
4. In the AirPort folder, double-click the AirPort Setup Assistant icon to
display the AirPort Setup Assistant pane, shown in Figure 8-4.
5. Select the Set Up an AirPort Base Station radio button and then click
the right arrow in the lower-right corner of the window to display the
Internet Choice panel.
The Internet Choice panel asks whether your computer is set up to
access the Internet.
6. To copy the Internet settings — such as the logon ID and password to
connect to a dialup ISP or to a DSL account — from your computer to
the Base Station, click Yes.
Figure 8-4:
The OS 9
AirPort
Setup
Assistant
window.
149
Chapter 8: Setting Up a Wireless Mac Network
The Setup Assistant displays the PPPoE panel. Most DSL service
providers use Point-to-Point Protocol over Ethernet (PPPoE).
• If your service provider uses PPPoE: Click the Yes button.
• If your DSL provider doesn’t use PPPoE, or if you connect to the
Internet via a dialup connection or by cable modem: Click the No
button.
If your computer is in range of only your one wireless network, the Setup
Assistant will automatically configure your AirPort Card to select that
network. However, if you happen to be in range of more than one wire-
less network, you’ll be asked to select your network from a list. Your
network will have the name assigned at the factory, similar to Apple
Network xxxxxx where xxxxxx is a hexadecimal number assigned by
the software.
7. Click the right arrow at the lower-right corner of the window to
display the Internet Access panel.
8. In the Internet Access panel, select the Internet settings to use to
configure your Base Station.
• In most cases, you should use the default setting that permits the
Base Station to assign an IP address to each computer on the wire-
less network through its DHCP server’s software. Just leave the set-
ting as it is.
• If your service has assigned a specific IP address to your system,
click the Details button and enter the settings manually in the
panel that pops up as directed by your ISP.
9. Click the right arrow at the lower-right corner of the window to
display Network Name and Password panel.
10. In the Network Name and Password panel, enter the name and pass-
word that you want to use for your wireless network.
11. Click the right arrow to display the Base Station Password panel.
The Base Station Password panel gives you the options to use the net-
work password as your Base Station password or to assign a different
password for changing the settings on your Base Station.
• If you’re the only person who will be entering the password:
Using the same password both places is probably easiest.
• If you plan to share the network password with other users:
Assign a different password to the Base Station so that only you
can change the Base Station’s settings.
12. Click the right arrow to display the Conclusion panel.
The Conclusion panel informs you that the Setup Assistant is ready to
set up your Base Station.
150
Part III: Installing a Wireless Network
13. Click the Go Ahead button to proceed.
After the AirPort Setup Assistant downloads the new settings to the
Base Station, it displays a message that it’s waiting for the Base Station
to restart. As soon as the Base Station restarts, it displays a panel
announcing that it’s finished and that it’s ready to connect to the
Internet.
14. Click the Connect Now button.
The Setup Assistant closes itself, launches Internet Explorer, and con-
nects to the browser’s default home page. You’re in!
Adding a computer to your
AirPort network on OS 9
When you set up your AirPort Base Station by following the directions in the
“Configuring the AirPort Base Station on OS 9” section of this chapter, you
also set up the AirPort Card in the computer that you used to configure the
Base Station. However, you still need to configure the AirPort Cards in the
other Mac computers in your house. Follow these steps:
1. Double-click the desktop icon for the hard disk on which you installed
the AirPort software.
2. When the hard disk’s folder opens, open the Applications (Mac OS 9)
folder, the Apple Extras folder, and the AirPort folder, in that order.
3. In the AirPort folder, double-click the AirPort Setup Assistant icon to
display the AirPort Setup Assistant window (refer to Figure 8-4).
4. Select the Set Up Your Computer to Join an Existing Wireless Network
radio button and then click the right arrow in the lower-right corner
of the window to display the Select an AirPort Network panel.
If your AirPort Base Station is the only wireless network within range, its
network name will be displayed to the right of the AirPort Networks
Available heading.
If you live close enough to a neighbor who also has a wireless network,
you might see the network name of your neighbor’s network.
a. To replace your neighbor’s network name with your own, click
the double arrow to the right of the network name and then
select your network name from the pop-up list that appears.
b. Click the right arrow in the lower-right corner of the window to
go to the next panel.
151
Chapter 8: Setting Up a Wireless Mac Network
5. Type the network password for your wireless network in the
Password text box and then click the right arrow in the lower-right
corner of the window to go to the final panel.
6. Click the Go Ahead button.
7. When a message displays that the AirPort Setup Assistant is done,
click the Connect Now button.
The assistant closes itself and launches Internet Explorer. If a Web page
displays, the connection is a success, and you’ve added another com-
puter to your wireless home network.
OS X Wireless Networks
AirPort 2.1.1 is the most current version of the AirPort software as of the writ-
ing of this book. Consequently, the following discussion describes the steps
and shows screen images that relate to AirPort 2.1.1. If you use a later version
to set up your AirPort network, the screens might look slightly different.
Even though a CD containing AirPort software is distributed with both
the AirPort Base Station and the AirPort Card, check out the Apple Web site
www.info.apple/support/downloads.html to make sure that you have
the latest version of the AirPort software before setting up your AirPort
network.
To set up an AirPort Base Station using the AirPort 2.1.1 software, you must
have the Base Station itself as well as the following:
ߜ An AirPort-ready computer with an AirPort Card
ߜ Mac OS X version 10.2 or later
If you have a third-party wireless networking card in your PowerBook PC Card
slot, use the software that came with the card to configure your network.
When you run the AirPort software installation, you first install (or upgrade)
software on your computer and then upgrade the firmware that’s built into
the AirPort Base Station. Finally, you configure the Base Station. The sections
that follow take you through the process step by step.
152
Part III: Installing a Wireless Network
Installing the AirPort software on OS X
To install AirPort software on your computer under OS X, follow these steps:
1. Close all applications.
The installation process will restart your computer, so save your work
and close all applications before starting the installation procedure.
2. If you’re installing the software from a CD-ROM, insert the CD-ROM
and double-click the
Install Mac OS X.pkg package file.
Alternatively, you can download the most current version of the soft-
ware from the Apple Web site (
www.info.apple/support/downloads.
html
).
If you download the software, the file will bear a
.dmg extension denot-
ing it as a disk image file.
3. Double-click the file name.
The Disk Copy application runs, creates a Disk icon on the desktop, and
then opens the disk in the Finder.
4. Double-click the package file
AirPortSW.pkg in the Finder window.
5. If an Authenticate pane pops up prompting you for a password, enter
the password that you use to log on to your computer.
The Welcome to the AirPort Installer panel displays.
6. Click the Continue button to display Important Information; read this
information and then click the Continue button to display the
Software License Agreement.
7. Read the license agreement; if you agree, click the Continue button
and then click the Agree button to display the Select a Destination
panel.
8. Chose the drive where you want the software to be installed from the
Destination Disk list and then click the Continue button to display the
Easy Install panel.
9. Click the Upgrade button and then click the Continue Installation
button.
The Installation program installs the software and optimizes system per-
formance, showing you a progress bar while it’s doing so.
10. When a message displays announcing that the software installation
was successful, click the Restart button to close the installation soft-
ware and to restart your computer.
153
Chapter 8: Setting Up a Wireless Mac Network
Upgrading AirPort Base Station
firmware on OS X
In this section, we explain how to upgrade the firmware of a new AirPort Base
Station. Upgrading the firmware on your AirPort Base Station through a
direct Ethernet cable connection is easiest. Use an Ethernet cable (either a
straight-through cable or a cross-over cable; the Base Station automatically
detects the type of cable that you’re using) to connect your computer’s
Ethernet port to the Base Station’s LAN port. You can also do the upgrade
over a wireless connection.
To upgrade the firmware of a new AirPort Base Station that you’re setting up
for the first time, follow these steps:
1. Double-click the desktop icon for the hard disk on which you installed
the AirPort software.
2. When the hard disk’s folder opens, open the Applications folder and
then open the Utilities folder.
3. Double-click the AirPort Admin Utility icon to display the Select Base
Station window, shown in Figure 8-5.
You should see
Base Station in the Name list. This is the factory-sup-
plied name for your AirPort Base Station. It should have the IP address
10.0.1.1.
4. Highlight the Base Station name and then click the Configure button.
Figure 8-5:
The OS X
Select Base
Station
window.
154
Part III: Installing a Wireless Network
5. After a message pops up requesting a password, enter public as the
password and then click OK.
• If the firmware installed in the Base Station is older than the
firmware that was supplied with your updated software, you see a
message prompting you that a newer version of the Base Station
software is available. Click the Upload button to install it.
• If a message pops up stating that uploading the software will cause
the wireless network to be disconnected, click OK. The new
firmware is copied to the Base Station.
Note: If the Base Station window displays when you click the Configure
button — rather than a message that a newer version of the Base Station
software is available — your Base Station already contains the most
recent firmware. Close the Base Station window and then close the
AirPort Admin Utility.
6. After a message displays that the system is waiting for the Base Station
to restart and that the Base Station has been successfully updated,
click OK.
7. When the Select Base Station window returns, close it.
8. Disconnect the Ethernet cable between your computer and the Base
Station.
Configuring the AirPort Base
Station on OS X
After you’re sure that your AirPort Base Station has the most current
firmware, the easiest way to set it up for use in your wireless home network
is to use the AirPort Setup Assistant. The AirPort Setup Assistant reads the
Internet settings from your computer and transfers them to the Base Station
so that you can access the Internet over your wireless network. To use the
AirPort Setup Assistant, follow these steps:
1. Before running the AirPort Setup Assistant, set up your computer to
connect to the Internet by dialup modem or by broadband (cable or
DSL) modem.
Check with your ISP for instructions on getting connected.
• If you connect to the Internet by dialup modem: Connect the
telephone line to the phone line port on the Base Station.
• If you connect to the Internet by DSL or cable modem: Use an
Ethernet cable to connect the modem to the Base Station’s WAN
port.
155
Chapter 8: Setting Up a Wireless Mac Network
2. Double-click the desktop icon for the hard disk on which you installed
the AirPort software.
3. When the hard disk’s folder opens, open the Applications folder and
then open the Utilities folder.
4. In the Utilities folder, double-click the AirPort Setup Assistant icon to
display the AirPort Setup Assistant window, as shown in Figure 8-6.
5. Select the Set Up an AirPort Base Station radio button and then click
the Continue button in the lower-right corner of the window.
If your computer is in range of only your one wireless network, the Setup
Assistant automatically configures your AirPort Card to select that net-
work and proceeds to the America Online Access panel. However, if you
happen to be in range of more than one wireless network, you see the
Select an AirPort Network panel that asks you to select your network
from a pop-up list. Your network will have the name assigned at the fac-
tory, similar to Apple Network xxxxxx where xxxxxx is a six-digit hexa-
decimal number. After selecting your network, click the Continue button
to go to the next panel.
6. In the America Online Access panel:
• If you connect to the Internet via AOL: Select the I Am Using
American Online radio button and then click the Continue button.
• If you’re not using AOL: Select the I Am Using Another Internet
Service Provider radio button and then click the Continue button
to display the Internet Access panel.
Figure 8-6:
The OS X
AirPort
Setup
Assistant
window.
156
Part III: Installing a Wireless Network
7. In the Internet Access panel, choose one of the following options and
then click the Continue button:
• Telephone Modem: Select this radio button if you connect to the
Internet through a dialup modem. The AirPort Base Station is one
of the few wireless access points that includes a 56 Kbps modem.
By choosing this option, all the computers connected to your wire-
less network might be able to share a single dialup connection.
If you have one of the new Airport Extreme Base Stations, you might not
have a built-in version. There are two versions, and the less expensive
one does not have a modem.
• Local Area Network: You should select this radio button if your
computer is connected to a high-speed LAN.
• Cable Modem or DSL Using Static IP or DHCP: Select this radio
button if you connect to the Internet by cable modem or by DSL
but only if your ISP doesn’t use the PPP over Ethernet (PPPoE)
protocol.
• Cable Modem or DSL Using PPPoE: If your ISP uses the PPPoE
protocol, select this radio button. It is important that you make a
successful connection to the Internet with your computer con-
nected directly to the cable or DSL modem before attempting to
configure the Base Station. The AirPort Setup Assistant will then be
able to copy the PPPoE settings from your computer to the Base
Station so that the Base Station can log on to the Internet with your
user ID and password. All the computers on your wireless network
will then be able to share the Internet connection without needing
to log on.
The next panel that you see at this step depends on the choice that you
make in Step 7:
• Telephone Modem: If you choose Telephone Modem, you see the
Modem Access panel with text boxes available for various dialup
parameters such as user name, password, and phone number. In
most cases, the setup assistant copies this information from your
computer.
• LAN, or Broadband Using Static IP or DHCP: If you choose either a
LAN or a broadband (cable modem or DSL) connection that doesn’t
use PPPoE, the Ethernet Access panel presents the option to use
DHCP or to assign a static IP address. If your ISP has assigned you
a static IP address — along with other values such as subnet mask,
router address, domain name, and/or DHCP client name — you
have to enter this data if it isn’t automatically copied from your
computer.
157
Chapter 8: Setting Up a Wireless Mac Network
• Broadband Using PPPoE: If you select the Cable Modem or DSL
Using PPPoE option, the PPPoE Access panel presents text boxes
for entering an account name, password, and other account infor-
mation sometimes required by PPPoE providers. Again, in most
cases, this information is automatically copied from your computer.
After you enter the appropriate information, click the Continue button to
display the Network Name and Password panel.
8. In the Network Name and Password panel that appears, enter the
name and password that you want to use for your wireless network
and then click the Continue button to display the Base Station
Password panel.
The Base Station Password panel gives you the options to use the net-
work password as your Base Station password or to assign a different
password for changing the settings on your Base Station. If you’re the
only person who’ll be configuring the computers on the network, using
the same one both places is probably the easiest. However, if you plan to
share the network password with other users, assign a different pass-
word to the Base Station so that only you can change the Base Station’s
settings.
9. Click the Continue button to display the Conclusion panel.
The Conclusion panel informs you that the Setup Assistant is ready to
set up your Base Station.
10. Click the Continue button.
After the Setup Assistant downloads the new settings to the Base
Station, it displays a message that it’s waiting for the Base Station to
reset. As soon as the Base Station resets, the Setup Assistant displays a
panel announcing that it’s finished and that it has been able to configure
this computer to connect to the Internet.
11. Click the Done button to close the AirPort Setup Assistant.
Adding another computer to your
AirPort network on OS X
When you set up your AirPort Base Station by following the directions in the
preceding section (“Configuring the AirPort Base Station on OS X”), you also
set up the AirPort Card in the computer that you used to configure the Base
Station. However, you need to configure the AirPort Cards in the other Mac
computers in your house to enable them to connect to the AirPort network.
Follow these steps:
158
Part III: Installing a Wireless Network
1. Double-click the desktop icon for the hard disk on which you installed
the AirPort software.
2. When the hard disk’s folder opens, open the Applications folder and
then open the Utilities folder.
3. In the Utilities folder, double-click the AirPort Setup Assistant icon to
display the AirPort Setup Assistant window (refer to Figure 8-6).
4. Select the Set Up Your Computer to Join an Existing AirPort Network
radio button and then click the Continue button to display the Select
an AirPort Network panel.
If your AirPort Base Station is the only wireless network within range,
the next panel will prompt you to enter the network password. However,
if you happen to live close enough to neighbors who also have a wireless
network, you might see the network name of that neighbor’s network.
5. Select your network name from the pop-up list and then click the
Continue button to display the Enter Network Password panel.
6. Type the network password for your wireless network in the
Password text box and then click the Continue button to display the
Conclusion panel.
7. Click the Continue button.
8. When a message displays that the AirPort Setup Assistant is finished,
click the Done button.
The assistant closes itself.
Adding a Non-Apple Computer to
Your AirPort Network
One of the reasons why wireless home networking has become so popular is
the interoperability between wireless networking equipment from different
vendors. Apple wireless networking equipment is no exception. You can even
use a Windows or Linux computer to connect to an Apple AirPort Base Station.
The procedure for entering the wireless network parameters in non-Apple
wireless software for configuring a wireless network adapter varies by manu-
facturer. Follow these general steps to add your non-Apple computer (or even
Apple computer with non-Apple wireless hardware and software) to your
AirPort Network:
159
Chapter 8: Setting Up a Wireless Mac Network
1. Select the network name of the AirPort Base Station.
The wireless network adapter configuration software will usually present
a list of available wireless networks in range of the adapter. Select the
network name that you assigned to the AirPort Base Station from the list.
For example, in Windows XP, right-click the Network icon in the notifica-
tion area of the task bar and then select View Available Wireless
Networks from the pop-up menu that appears. Then select the AirPort
Base Stations network name from the list presented in the Wireless
Network Connection dialog box.
2. Enter the network password.
The password that you entered in the AirPort Base Station setup proba-
bly won’t work. Here’s how to find the password — the WEP key — that
will work. Apple uses a different password naming convention than
other wireless manufacturers. Fortunately, Apple has provided the
AirPort Admin Utility that does the conversion for you:
a. Open the AirPort Admin Utility.
b. Select your Base Station from the list and then click the
Configure icon.
c. When presented with a pop-up window, enter the password for
configuring the base station and then click the OK button to dis-
play the main AirPort Admin Utility window.
d. If you’re using OS X, click the Password icon in the toolbar at the
top of the window.
Note: If the toolbar isn’t visible, click the View menu and choose
Show Toolbar.
The utility opens a drop-down window that displays the equivalent
network password (WEP key) that you should enter in the configu-
ration software for your non-Apple wireless network adapter.
e. If you’re using OS 9, choose Equivalent Network Password from
the Base Station menu.
A pop-up window appears with the equivalent network password
(WEP key) that you should enter in the configuration software for
your non-Apple wireless network adapter.
3. Make sure that you set the adapter to obtain an IP address
automatically.
How you do this depends on what kind of PC and which PC operating
system you’re using.
4. Close the configuration software, and you should be connected to the
AirPort network.
If you’re not connected, go through the steps again, paying particular
attention that you enter the equivalent network password correctly.
160
Part III: Installing a Wireless Network