Photoshop CS5_tập 3 pot
Bạn đang xem bản rút gọn của tài liệu. Xem và tải ngay bản đầy đủ của tài liệu tại đây (2.19 MB, 35 trang )
Self study
51Lesson 2, Getting to Know the Workspace
2
6 In the Save Workspace dialog box, type 1st Workspace.
The Actions panel dragged over the History panel.
7 Whenever you want to reload a workspace, whether it’s one that you created or one that
comes standard with Photoshop, simply click the Workspace button in the Application
bar and select the desired workspace from the list.
You have completed the “Getting to Know the Workspace” lesson. You can choose File >
Sav
e and then File > Close to close this le, or keep it open while you continue through
the Self study and Review sections.
Self study
Choose File > Browse to access a practice le in your ps02lessons folder. You can double-click
on ps0202.psd to explore workspaces further.
1 The Application bar contains several buttons that provide quick access to commonly
used features inside Photoshop. One of those buttons, called Arrange Documents, allows
you to arrange several open document windows in di erent ways. Explore the di erent
views that Photoshop provides by choosing various icons found under the Arrange
Documents button.
2 Using the new Content-Aware Spot Healing Brush remove the tree to the right of the
railroad tracks.
3 Click on the tabs of v
arious panels and practice clicking and dragging panels from
one gr
oup to another. You can put your panels back in order when you are nished
experimenting by clicking on the Workspace button in the Application bar and choosing
Essentials.
4 Use the Window menu to open the Info, Histogram, and Layers panels, and then save a
new w
orkspace called color correction. These panels are covered in Lesson 7, “Creating a
Good Image.”
5 Take a look at some of the pre-built workspaces Photoshop has already made for you.
They will change the panel locations,
and some will highlight things in the menu that
are relevant to each workspace. For instance, by selecting New in CS5, you see the new
panels and new features highlighted in the menus.
PSCS5.indb 51PSCS5.indb 51 4/8/2010 5:10:38 PM4/8/2010 5:10:38 PM
52
Review
Adobe Photoshop CS5 Digital Classroom
2
Review
Questions
1 What is the Full Screen mode?
2 Name two ways to t your image to the scr
een.
3 What happens in the Essentials workspace when you exit one panel and select another?
4 How do you save a workspace?
5 Can you delete a workspace?
Answers
1 The Full Screen mode displays a document window on a black background and hides all
interface elements from view.
2 You can t your image to the scr
een by using the View menu, or by double-clicking the
Hand tool (
), right-clicking while you have the Zoom ( ) or Hand tool selected, or by
pressing Ctrl+0 (zero) (Windows) or Command+0 (zero) (Mac OS).
3 When you leave one panel to select another, the initial panel returns to its original
location in the docking area.
4 You can save your own workspace by clicking on the double arrows in the Application
bar and choosing New
Workspace.
5 Yes, you can delete a workspace by clicking on the double arrows in the Application
bar and choosing Delete W
orkspace. Note that you cannot delete any of the default
workspaces.
PSCS5.indb 52PSCS5.indb 52 4/8/2010 5:10:38 PM4/8/2010 5:10:38 PM
53Lesson 3, Using Adobe Bridge
What you’ll learn
in this lesson:
• Navigating Adobe Bridge
• Using folders in Bridge
• Making a Favorite
• Creating metadata
• Using automated tools
Using
Adobe Bridge
Adobe Bridge is the command center of the Creative Suite. In Adobe
Bridge, you can manage and organize your les, utilize and modify
XMP metadata for faster searches, and quickly preview les before
opening them.
Starting up
Before starting, make sure that your tools and panels are consistent by resetting your preferences.
See “Resetting Adobe Photoshop CS5 preferences” on page 3.
You will work with several les from the ps03lessons folder in this lesson. Make sure that you
have loaded the pslessons folder onto your hard drive from the supplied DVD. See “Loading
lesson les” on page 5.
See Lesson 3 in action!
Use the accompanying video to gain a better understanding of how to use some of the features
shown in this lesson. The video tutorial for this lesson can be found on the included DVD.
3
Lesson 3
PSCS5.indb 53PSCS5.indb 53 4/8/2010 5:10:39 PM4/8/2010 5:10:39 PM
54
What is Adobe Bridge?
Adobe Photoshop CS5 Digital Classroom
3
What is Adobe Bridge?
Adobe Bridge is an application included with Adobe Photoshop and the other Adobe Creative
Suite 5 components. Adobe Bridge helps you locate, organize, and browse the documents you
need to create print, web, video, and audio content. If you have Photoshop or any one of the
Creative Suite applications, you can start Adobe Bridge using the File menu, or you can select
the Launch Bridge button (
).
This lesson covers the functionality of the complete Bridge application, not the Mini Bridge that is
available as a panel in your Photoshop workspace.
You can use Bridge to access documents such as images, text les, and even non-Adobe
documents, such as Microsoft Word or Excel les. Using Adobe Bridge, you can also organize
and manage images, videos, and audio les, as well as preview, search, and sort your les
without opening them in their native applications.
Once you discover the capabilities of Adobe Bridge, you’ll want to make it the control center
for your Photoshop projects. With Bridge, you can easily locate les using the Filters panel
and import images from your digital camera right into a viewing area that allows you to
quickly rename and preview your les. This is why the recommended work ow throughout
this book includes opening and saving les in Adobe Bridge. Reading through this lesson
will help you to feel more comfortable with Adobe Bridge, and will also make you aware of
some of the more advanced features that are available to you for your own projects.
Adobe Bridge contains more features when installed as part of one of the Creative Suites. The
tools and features demonstrated in this lesson are available in both the single product install and
the Suite install, unless otherwise noted.
Navigating through Bridge
In order to utilize Adobe Bridge e ectively, you’ll want to know the available tools and how to
access them. Let’s start navigating!
1 Choose File > Browse in Bridge to launch the Adobe Bridge application. If you receive
a dialog box asking if you want Adobe Bridge to launch at start-up select Yes.
PSCS5.indb 54PSCS5.indb 54 4/8/2010 5:10:42 PM4/8/2010 5:10:42 PM
What is Adobe Bridge?
55Lesson 3, Using Adobe Bridge
3
2 Click on the Folders panel to make sure it is forward. Click on Desktop (listed in the
Folders panel). You see the ps03lessons folder that you downloaded to your hard drive.
Double-click on the ps03lessons folder and notice that the contents of that folder are
displayed in the Content panel, in the center of the Adobe Bridge window. You can also
navigate by clicking on folders listed in the Path bar that is located in the upper-left
corner of the content window.
You can view folder contents by double-clicking on a folder, or by selecting the folder in the Path bar.
You can navigate through your navigation history by clicking on the Go back and Go
forward arrows in the upper-left corner of the window. Use the handy Reveal recent
le or go to Recent folder drop-down menu (
) to nd folders and les that you
recently opened.
3 Click on the Go back arrow to return to the desktop view.
A B C D
E
A. Go back. B. Go forward. C. Go to parent or Favorites.
D. Reveal recent le or go to recent folder. E. Path bar.
4 Click on the Go forward arrow to return to the last view, which is the ps03lessons folder.
PSCS5.indb 55PSCS5.indb 55 4/8/2010 5:10:43 PM4/8/2010 5:10:43 PM
56
What is Adobe Bridge?
Adobe Photoshop CS5 Digital Classroom
3
Using folders in Adobe Bridge
Adobe Bridge is used for more than just navigating your le system. Bridge is also used to
manage and organize folders and les.
1 Click on the tab of the Folders panel in the upper-left corner of the Bridge window
to make sure it is still forward. Then click on the arrow to the left of Desktop so that it
turns downward and reveals its contents.
2 Click on Computer to reveal its contents in the center pane of the Bridge window.
Continue to doub
le-click on items, or click on the arrows to the left of the folder names
in the Folder panel, to reveal their contents.
You can use Adobe Bridge to navigate your entire system, much like you would by using your computer’s directory system.
Managing folders
Adobe Bridge is a great tool for organizing folders and les. It is a simple matter of dragging and
dropping to reorder items on your computer. You can create folders, move folders, move les
from one folder to another, and copy les and folders to other locations; any organizing task that
can be performed on the computer can also be performed in Adobe Bridge. This is a great way
to help keep volumes of images organized for easy accessibility, as well as easy searching. The
advantage of using Adobe Bridge for these tasks is that you have bigger and better previews of
images, PDF les, and movies, with much more information about those les at your ngertips.
PSCS5.indb 56PSCS5.indb 56 4/8/2010 5:10:44 PM4/8/2010 5:10:44 PM
What is Adobe Bridge?
57Lesson 3, Using Adobe Bridge
3
3 Click on Desktop in the Folder panel to reveal its contents again.
4 Click on ps03lessons to view its contents. You’ll now add a new folder into that
lessons folder.
5 Click on the Cr
eate a new folder icon (
) in the upper-right corner of the Bridge
window to create a new untitled folder inside the ps03lessons folder. Type the name
Apple Picking.
Creating a new folder in Bridge.
You can use Adobe Bridge to organize images. Since you are able to see a preview of
each le, you can more easily rename them, as well as relocate them to more appropriate
locations in your directory system. In the next step, you will move les from one folder
to the new Apple Picking folder you have just created.
6 Click once on the image named IMG_0902.JPG, then hold down the Shift key and
select image IMG_0910.JPG.
All the images in between are selected.
You can easily reduce and enlarge the size of your thumbnails by pressing Ctrl+plus sign or
Ctrl+minus sign in Windows or Command+plus sign or Command+minus sign in Mac OS.
PSCS5.indb 57PSCS5.indb 57 4/8/2010 5:10:44 PM4/8/2010 5:10:44 PM
58
What is Adobe Bridge?
Adobe Photoshop CS5 Digital Classroom
3
7 Click and drag the selected images to the Apple Picking folder. When the folder becomes
highlighted, release the mouse. The les have now been moved into that folder.
You can select multiple images and organize folders directly in Adobe Bridge.
8 Double-click on the Apple Picking folder to view its contents. You see the two images
that you moved.
9 Click on ps03lessons in the Path bar to return to the ps03lessons folder content.
Making a Favorite
As you work in Photoshop, you will nd that you frequently access the same folders. One of
the many great features in Bridge is that you can designate a frequently used folder as a Favorite,
allowing you to quickly and easily access it from the Favorites panel. This is extremely helpful,
especially if the folders that you are frequently accessing are stored deep in your le hierarchy.
1 Select the Favorites panel in the upper-left corner of the Bridge window to bring it
to the front. In the list of Favorites, click on Desktop. Double-click on the ps03lessons
folder to see the Apple Picking images. Since the Apple Picking folder is going to be
frequently accessed in this lesson, you’ll make it a Favorite.
PSCS5.indb 58PSCS5.indb 58 4/8/2010 5:10:45 PM4/8/2010 5:10:45 PM
Creating and locating metadata
59Lesson 3, Using Adobe Bridge
3
2 Place your cursor over the Apple Picking folder in the center pane (Content), and click
and drag the Apple Picking folder until you see a horizontal line appear in the Favorites
panel. Be careful not to drag this folder into a folder (highlighted with a blue box) in the
Favorites panel. When a cursor with a plus sign (
) appears, release the mouse. The folder
is now listed as a Favorite.
Drag a folder to the bottom of the Favorites panel to make it easier to locate.
3 Click on the Apple Picking folder shown in the Favorites panel to view its contents.
Note that creating a Favorite simply creates a shortcut for quick access to a folder; it does
not copy the folder and its contents.
If your Favorite is created from a folder on an external hard drive or server, you will need to have
the hard drive or server mounted in order to access it.
Creating and locating metadata
Metadata is information that can be stored with images. This information travels with the le,
and makes it easy to search for and identify the le. In this section, you are going to nd out
how to locate and create metadata.
1 Make sure that you are viewing the contents of the Apple Picking folder in the center
pane of Adobe Bridge. If not, navigate to that folder now, or click on the Apple Picking
folder in the Favorites panel.
PSCS5.indb 59PSCS5.indb 59 4/8/2010 5:10:46 PM4/8/2010 5:10:46 PM
60
Creating and locating metadata
Adobe Photoshop CS5 Digital Classroom
3
2 Choose Window > Workspace > Reset Standard Workspaces. This ensures that you
are in the Essentials view and that all the default panels for Adobe Bridge are visible.
Alternatively, you can click Essentials in the Application bar at the top-right of the
Bridge workspace. You may need to maximize your Bridge window after you reset
the workspace.
Note that if you click and hold on the arrow to the right of the workspace presets, you
can choose other workspaces, and even save your own custom workspace.
Resetting the workspace using the Workspace drop-down menu.
3 Click once on IMG_0902.JPG, and look for the Metadata and Keywords panels in the
lower-right area of the Adobe Bridge workspace.
4 If the Metadata panel is not visible, click on the Metadata panel tab. In this panel, you see
the image data that is stored with the le
. Take a few moments to scroll through the data
and view the information that was imported from the digital camera that was used to
take the photo.
Click and drag the bar to the left of the Metadata panel farther to the left if you need to open up
the window.
5 Select the arrow to the left of IPTC Core to reveal its contents. IPTC Core is the
schema for XMP that pro
vides a smooth and explicit transfer of metadata. Adobe’s
Extensible Metadata Platform (XMP) is a labeling technology that allows you to embed
data about a le, known as metadata, into the le itself. With XMP, desktop applications
and back-end publishing systems gain a common method for capturing and sharing,
valuable metadata.
6 On the right side of this list, notice a series of pencils. The pencils indicate that you can
enter infor
mation in these elds.
PSCS5.indb 60PSCS5.indb 60 4/8/2010 5:10:47 PM4/8/2010 5:10:47 PM
Creating and locating metadata
61Lesson 3, Using Adobe Bridge
3
If you are not able to edit or add metadata information to a le, it may be locked. Make sure
that you are not working directly o the Lesson DVD, and then right-click on the le (in Adobe
Bridge) and choose Reveal in Explorer (Windows) or Reveal in Finder (Mac OS). In Windows,
right-click on the le, choose Properties, and uncheck Read-only; in Mac OS, right-click on the
le, choose Get Info, then change the Ownership and Permissions to Read and Write.
7 Scroll down until you can see Description Writer, and click on the pencil next to it. All
editable elds ar
e highlighted, and a cursor appears in the Description Writer eld.
8 Type your name, or type Student.
Reveal the IPTC contents and enter
metadata information.
9 Scroll up to locate the Creator: City text eld. Click on the pencil icon to the right of
the Creator City text eld, type the name of your city, and then press the Tab key. The
cursor is now in the State text eld. Enter your state information.
10 Check the Apply button (
), located in the bottom-right corner of the Metadata panel,
to apply your changes. You have now edited metadata that is attached to the image,
information that will appear whenever someone opens your image in Bridge or views
the image information in Adobe Photoshop, using File > File Info.
PSCS5.indb 61PSCS5.indb 61 4/8/2010 5:10:48 PM4/8/2010 5:10:48 PM
62
Creating and locating metadata
Adobe Photoshop CS5 Digital Classroom
3
Using keywords
Keywords can reduce the amount of time it takes to nd an image on a computer, by using
logical words to help users locate images more quickly.
1 Click on the Keywords tab, which appears behind the Metadata panel. A list of
commonly used keywords appears.
2 Click on the New Keyword button (
) at the bottom of the Keywords panel. Type
Apple into the active text eld, and then press Enter (Windows) or Return (Mac OS).
3 Check the empty checkbox to the left of the apple keyword. This adds the Apple
ke
yword to the selected image.
4 With the Apple keyword still selected, click on the New Sub Keyword button (
). Type
Picking into the active text eld, then press Enter (Windows) or Return (Mac OS).
5 Check the empty checkbox to the left of the picking keyword. You have now assigned a
ke
yword and a sub keyword to the IMG_0902.JPG image.
Notice that the keywords you added appear at the top, under Assigned Keywords.
6 Select the Apple keyword, and then click on the New Keyword button (
) at the bottom
of the Keywords panel; a blank text eld appears. Type New England and press Enter
(Windows) or Return (Mac OS). Then check the checkbox next to New England to
assign the keyword to this image.
A B C
A. New Sub Keyword. B. New Keyword. C. Delete Keyword.
PSCS5.indb 62PSCS5.indb 62 4/8/2010 5:10:49 PM4/8/2010 5:10:49 PM
Creating a Metadata Template
63Lesson 3, Using Adobe Bridge
3
7 Right-click (Windows) or Ctrl+click (Mac OS) on the New England keyword, and
choose the option Rename. When the text eld becomes highlighted, type Fall, press
Enter (Windows) or Return (Mac OS).
You can also enter information directly into the image by opening the image in Adobe Photoshop,
and then choosing File > File Info. The categories that appear on the top include Description,
Camera Data, IPTC, and IPTC Extension, among others. Once it is entered in the File Info
dialog box, the information is visible in Adobe Bridge.
Creating a Metadata Template
Once you have added metadata to an image, you can easily apply it to more by creating a
metadata template. In this exercise, you apply the metadata template from the IMG_0902.JPG
image to some others in the same folder.
1 Make sure that IMG_0902.JPG is selected in Adobe Bridge.
2 Choose Tools > Create Metadata Template. The Create Metadata Template window
appears.
3 In the
Template Name text eld (at the top), type F
all Apple Picking.
In the Create Metadata Template window, you can choose the information that you want
to build into a template. In this exercise, we will choose information that already exists in
the selected le, but if you wanted to, you could add or edit information at this point.
PSCS5.indb 63PSCS5.indb 63 4/8/2010 5:10:50 PM4/8/2010 5:10:50 PM
64
Creating a Metadata Template
Adobe Photoshop CS5 Digital Classroom
3
4 Check the Checkboxes to the left of the following categories; Creator, Creator Email(s),
Description, Keywords, and Description Writer, then press Save.
Select a le and check the information you want to save into a metadata template.
You have just saved a template. Next, you will apply it to several other images in
this folder.
7 Select the IMG_0903.JPG image, and then hold down your Shift key and select the
IMG_0907.JPG image.
All the images in between are now selected.
PSCS5.indb 64PSCS5.indb 64 4/8/2010 5:10:50 PM4/8/2010 5:10:50 PM
Opening a file from Adobe Bridge
65Lesson 3, Using Adobe Bridge
3
8 Choose Tools > Replace Metadata and select Fall Apple Picking. Note that you can also
choose Append Metadata if you are adding metadata to les that already have existing
metadata. The same metadata has now been applied to all the images at once.
Choose the metadata template you want to use to replace metadata in an image or images.
Opening a le from Adobe Bridge
Opening les from Adobe Bridge is a great way to begin the work process in Adobe Photoshop.
Not only is it very visual, but important data stored with the les also makes it easier to locate
the correct le.
1 In the Favorites panel, click on the Apple Picking folder, and then double-click on image
IMG_0910.JPG to open the le in Adobe Photoshop.
Sometimes you will nd that double-clicking on a le opens it in a di erent application than
expected. This can happen if you are working in generic le formats such as JPEG and GIF. To
avoid this problem, you can right-click (Windows) or Ctrl+click (Mac OS) on the image, and
choose Open With to select the appropriate application.
2 Choose File > Close and Go to Bridge to close the le in Photoshop and retur
n to
Adobe Bridge.
3 You can also click once to select an image and then choose File > Open, or use the
ke
yboard shortcut Ctrl+O (Windows) or Command+O (Mac OS).
PSCS5.indb 65PSCS5.indb 65 4/8/2010 5:10:50 PM4/8/2010 5:10:50 PM
66
Searching for files using Adobe Bridge
Adobe Photoshop CS5 Digital Classroom
3
Searching for les using Adobe Bridge
Find the les that you want quickly and easily by using the Search tools built directly into
Adobe Bridge, and taking advantage of the Filter panel.
In this example, you have a limited number of les to search within, but you will have the
opportunity to see how helpful these search features can be.
Searching by name or keyword
What’s the bene t of adding all this metadata if you can’t use it to nd your les later? Using
the Find dialog box in Adobe Bridge, you can narrow your criteria down to make it easy to
nd your les when needed.
1 Click on ps03lessons in the Path bar to return to the ps03lessons folder content.
2 Choose Edit > Find, or use the keyboard shortcut, Ctrl+F (Windows) or Command+F
(Mac OS).
The Find dialog box appears.
3 Select Keywords from the Criteria drop-down menu, and type apple into the third text
eld (r
eplacing Enter Text.) Then press Enter (Windows) or Return (Mac OS). Because
you are looking within the active folder only, you get a result immediately. The image
les, IMG_0902.JPG through IMG_0907.JPG appear.
Search your folders using the tools built right into Adobe Bridge.
PSCS5.indb 66PSCS5.indb 66 4/8/2010 5:10:51 PM4/8/2010 5:10:51 PM
Using the Filter panel
67Lesson 3, Using Adobe Bridge
3
Using the Filter panel
If you have ever been in the position where you knew you put a le into a folder, but just
couldn’t seem to nd it, you will love the Filter panel.
Using the Filter panel, you can look at attributes such as le type, keywords, and date created
or modi ed, in order to narrow down the les that appear in the content window of Adobe
Bridge.
1 Select the Apple Picking folder from the Favorites tab. This is the favorite that you
added earlier in this lesson. Notice that the Filter panel collects the information from the
active folder, indicating the keywords that are being used, as well as modi cation dates
and more.
2 Click to turn down the arrow next to Keywords in the Filter panel, and select Apple
from the list to see that only the image with the
Apple keyword applied is visible. Click
on Apple again to deselect it and view all the images.
Find les quickly by selecting
di erent criteria in the Filters panel.
3 Press the Clear lter button ( ) in the lower-right of the Filter panel to turn o
any lters.
PSCS5.indb 67PSCS5.indb 67 4/8/2010 5:10:51 PM4/8/2010 5:10:51 PM
68
Saving a Collection
Adobe Photoshop CS5 Digital Classroom
3
Saving a Collection
If you like using Favorites, you’ll love using Collections. A Collection allows you to take images
from multiple locations and access them in one central location. Understand that Adobe Bridge
essentially creates a shortcut (or alias) to your les and does not physically relocate them or copy
them to a di erent location.
1 If your Collections tab is not visible, Choose Window > Collections or click on the tab
next to Filter. The Collections panel comes forward.
2 Click on the New Collection button in the lower right of the Collections panel and
type Fall Imag
es into the new collection text eld.
Create a new collection and rename
it Fall Images.
3 Click on Apple Picking in the Favorites tab and drag two images (it does not matter
which ones) to the newly created Fall Images collection.
4 Using the navigation features at the top of Adobe Bridge, click back on ps03lessons, to
retur
n to that folder.
Navigate back to the ps03lessons folder.
5 Take two random soccer images and drag them to the Fall Images collection as well.
PSCS5.indb 68PSCS5.indb 68 4/8/2010 5:10:52 PM4/8/2010 5:10:52 PM
Automation tools in Adobe Bridge
69Lesson 3, Using Adobe Bridge
3
6 Click on the Fall Images collection folder to see that even though you selected images
from two di erent folders, you can easily access them at once in this collection. The les
also remain intact in their original location.
A collection can help you to organize les without actually moving
them to new locations.
Automation tools in Adobe Bridge
Adobe Bridge provides many tools to help you automate tasks. In this section, you will learn
how to access and take advantage of some of these features.
Batch renaming your les
You may have noticed that in the ps03lessons le there are many les that contain iStock in
the lename. These images were downloaded from iStockphoto.com, and instead of changing
the names immediately we have opted to change them simultaneously using the batch rename
feature in Adobe Bridge.
1 Press the Go back arrow in the upper-left of the Adobe Bridge window to go back to
the ps03lessons folder.
Click on the Go back arrow to go back to the ps03lessons folder.
PSCS5.indb 69PSCS5.indb 69 4/8/2010 5:10:52 PM4/8/2010 5:10:52 PM
70
Automation tools in Adobe Bridge
Adobe Photoshop CS5 Digital Classroom
3
2 Choose Edit > Select All, or press Ctrl+A (Windows) or Command+A (Mac OS.) All
the images are selected.
3 Choose
Tools > Batch Rename. The Batch Rename dialog box appears.
In this instance we want a simple uncomplicated name. If you look in the Preview
section at the bottom of the Batch Rename dialog bo
x you can see that the Current
lename and New lename are pretty long strings of text and numbers. You will simplify
this by eliminating some of text from the lenames.
4 In the New Filenames section, type Soccer in the text eld to the right of def
ault
criteria of Text.
5 For the next two criteria, click on the Minus sign button (
) (Remove this text from
the le names) to remove them. The New lename in the Preview section becomes
signi cantly shorter.
6 In the Sequence Number row, change Four Digits to Two Digits. The New lename
is a ver
y simple Soccer01.jpg now. Press the Rename button. All the selected les
automatically have their name changed.
Automated tools for Photoshop: Web Photo Gallery
If you want to share images online, you can use the Web Photo Gallery, which creates a web
site that features a home page with thumbnail images and gallery pages with full-size images.
You select the images you want to include in the site and Adobe Bridge does the rest, from
automatically creating navigation images, like arrows, links, and buttons, to creating Flash
les. This is a fun feature that you can take advantage of quickly, even if you have no coding
experience. If you have coding experience, or if you want to edit the pages further, you can
open the pages in Adobe Dreamweaver or any other HTML editor to customize them.
1 Make sure that you are viewing the contents of the ps03lessons folder, and press Ctrl+A
(Windows) or Command+A (Mac OS) to select all the images.
2 Hold down the Ctrl (Windows) or Command (Mac OS) and click on the Apple Picking
folder to deselect it. If it is easier
, you can leave the folder selected, you will receive a
warning that some of the selected les are not supported image les, but it will not cause
any errors.
3 Click and hold down on the Output drop-down menu in the Application bar, and
choose Output; the w
orkspace changes to reveal an Output panel on the right.
Select multiple images and then select Output.
PSCS5.indb 70PSCS5.indb 70 4/8/2010 5:10:53 PM4/8/2010 5:10:53 PM
Automation tools in Adobe Bridge
71Lesson 3, Using Adobe Bridge
3
If you cannot see all the options in the Output panel, click and drag the vertical bar to the left of
the panel to increase its size.
Click and drag to resize the Output panel.
4 Press the Web Gallery button at the top of the Output panel.
5 Click and hold on the Templates drop-down menu, and choose HTML Gallery. As you
can see,
there are a lot of options to choose from, including Lightroom Flash Galleries. In
this example, you will keep it simple.
6 From the Styles drop-down menu, if it’s not already visible, choose Lightroom.
7 In the Site Info section of the Output panel, type a title in the Gallery Title text eld; for
this example
, you can type My First Web Gallery.
8 You can also add photograph captions if you like, as well as text in the About This
Gallery text eld,
to include more information. In this example, those are left at
their defaults.
9 Using the scroll bar to the right of the Style Info section, click and drag to scroll down
through the r
est of the options. Note that you can add additional contact information,
and de ne colors that you want to use for di erent objects on the page, including text.
PSCS5.indb 71PSCS5.indb 71 4/8/2010 5:10:53 PM4/8/2010 5:10:53 PM
72
Automation tools in Adobe Bridge
Adobe Photoshop CS5 Digital Classroom
3
10 Press the Preview in Browser button that is located in the upper half of the Output
panel; your web site is automatically created.
Note that if you had your Apple Picking folder selected, you will get a warning that
some of the les are not suppor
t image types, Press OK.
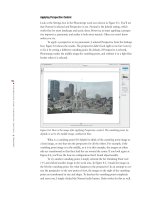
The completed web site, using Web Gallery.
11 Note that the preview is in a browser window. You will want to close that window
before you move to the next part of this lesson.
Saving or uploading your Web Gallery
So now you have an incredible Web Gallery, but what do you do with it? The Web Photo
Gallery feature creates an index page, individual gallery pages, and images, and so you need
someplace to put them. You have a couple of options available if you click the scroll bar to the
right of Site Info and drag down until you see the option under Create Gallery for Gallery
Name. Note that you can choose to save your Gallery to a location on your hard drive, or input
the FTP login information directly in Adobe Bridge to upload your le directly to a server. In
this example, you will save the Web Gallery to in your ps03lessons folder.
PSCS5.indb 72PSCS5.indb 72 4/8/2010 5:10:54 PM4/8/2010 5:10:54 PM
Automation tools in Adobe Bridge
73Lesson 3, Using Adobe Bridge
3
1 Scroll down in the Output panel until you see the Create Gallery section. Click the
Browse button to the right of Save Location. Navigate to the ps03lessons folder on your
desktop, and click Open.
Choose to Save your web gallery.
2 Click on the Save button at the bottom of the Output panel. A dialog box appears,
indicating that you have successfully created a Gallery; press OK.
You have successfully saved your Web Gallery. Use Adobe Bridge to navigate and open
the contents of this folder to see that a folder named My First
Web Gallery is inside your
Adobe Web Gallery folder. Open the contents to see that your components are neatly
organized so that you can open them in your web editor and customize them, or send
them to your web site administrator for uploading.
The completed web site, when saved to the hard drive.
PSCS5.indb 73PSCS5.indb 73 4/8/2010 5:10:54 PM4/8/2010 5:10:54 PM
74
Automation tools in Adobe Bridge
Adobe Photoshop CS5 Digital Classroom
3
Automated tools for Photoshop: PDF contact sheet
By creating a PDF contact sheet, you can assemble a series of images into one le for such
purposes as client approval and summaries of folders.
1 To make it easy to select just the images you want, click on Essentials to change the
Adobe Bridge workspace back to the defaults. If you do not see the contents of the
ps03lessons folder in the content window in Bridge, choose the Favorites panel and
click on Desktop. Double-click on the ps03lessons folder. If you stored the lesson les
elsewhere, use the navigation tools in Bridge to locate your lesson les.
2 Click on the rst soccer image y
ou see and then Shift+click on the last, selecting all the
soccer images, but neither of the folders inside the ps03lessons folder.
3 Select Output from the upper-right of the Adobe Bridge workspace.
4 In the Output panel, click on the PDF button, then from the Template drop-down
menu,
choose 5*8 Contact Sheet.
Choose to create a PDF contact sheet from the Template
drop-down menu.
5 In the Document section of the Output panel, choose U.S. Paper from the Page Preset
drop-down menu.
Scroll down and notice that you have options for nal size,
document quality, and even
security in the Output panel. You will leave these items at the default and scroll down to
the Playback section of this panel.
6 At the bottom of the Output panel check the checkbox to View PDF After Save; then
press the Sa
ve button. The Save As dialog box appears.
PSCS5.indb 74PSCS5.indb 74 4/8/2010 5:10:55 PM4/8/2010 5:10:55 PM
Changing the view
75Lesson 3, Using Adobe Bridge
3
7 In the Save As dialog box, type contact, and then browse to save the le in your
ps03lessons folder; press Save.
A dialog box appears, indicating that you have successfully created a PDF contact sheet;
press OK.
The contact.pdf le is saved in your ps03lessons folder and your contact sheet
is launched in Adobe Acrobat for you to view.
8 After examining your contact sheet in Adobe Acrobat, choose File > Close to close the
contact.pdf le,
and return to Adobe Bridge.
The completed PDF contact sheet.
Changing the view
You can work the way you like by adjusting the look and feel of Adobe Bridge. Changing the
view can help you focus on what is important to see in the Content section of the Bridge
workspace. Whether you need to focus on content or thumbnails, there is a view that can
help you.
1 Before experimenting with the views, make sure that you are in the Essentials workspace
by selecting the Essentials button located in the upper-right in the Bridge workspace.
2 Click on the Click to Lock to Thumbnail Grid button (
) in the lower-right corner of
the Bridge workspace. The images are organized into a grid.
PSCS5.indb 75PSCS5.indb 75 4/8/2010 5:10:55 PM4/8/2010 5:10:55 PM