advanced Flex Application Development Building Rich Media X phần 3 pdf
Bạn đang xem bản rút gọn của tài liệu. Xem và tải ngay bản đầy đủ của tài liệu tại đây (12.45 MB, 51 trang )
Figure 3-22. The wire for sharing an RMX job listing
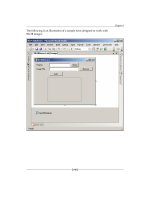
Figure 3-23. Viewing jobs filters
82
CHAPTER 3
8962CH03.qxd 11/7/07 11:36 AM Page 82
The search filters that are revealed in this state allow the user to specify in detail the nature of the job
o
pportunities in which he is interested. We utilize radio buttons, check boxes, lists, text fields and slid-
e
rs as appropriate to the nature of the specific information being filtered. Selecting
Reset Filters
returns all filters to the default state that generates the default search results in the initial state of the
jobs application. Clicking
Apply Filters generates a new job search based on the specified criteria. The
user may also click
C
lose Filters
in order to return to the initial view of the screen, with more vertical
space to display listings.
And at any time, a logged-in member may create a new listing on the network by clicking
Post a Job,
which brings the member to the screen that you see wired in Figure 3-24.
Figure 3-24. Posting a job on the RMX
On this screen, note the entry fields for each information type reviewed at the beginning of this sec-
tion. Unlike the View Filters state of the jobs board, on this screen all fields are required. It is worth
noting that this screen, like the screen on which users upload video to the network, includes no adver-
tising. While advertising is a core business component for the free service the RMX provides, we view
advertising as most appropriate in the content browsing portions of the RMX, and not in the context
of content creation.
Control panel interface
All content generated on the network must be editable by administrators and moderators—this is a
core requirement of any application with user-generated content catalogs. In general, this occurs in
two places: in an interface that enables administrators to manage the content catalog and in an inter-
face that allows moderators to review flagged content
.
83
PLANNING THE APPLICATION: BUILDING THE RMX
8962CH03.qxd 11/7/07 11:36 AM Page 83
Because we were building the jobs application from the ground up as a Flex RIA, and the entire admin-
i
strative control panel is a Flex RIA, we decided the most efficient way to develop the catalog manager
w
as to port the jobs application in the RMX site into the control panel, so that we did not have to
build a completely separate interface for the control panel. This meant we could reduce developer
hours, centralize the code for the application, and make it easier to roll out new features in the future.
You can see the result wired in Figure 3-25.
Figure 3-25. The administrative control panel for managing the catalog of job listings
This screen displays all the jobs created on that administrator’s group site. So, as the administrator of
LA Flash, I can modify or remove listings generated on my site, but I cannot view, modify, or delete the
listings generated on another group’s site, even though those listings will be displayed on my site.
This screen does have some differences from the public jobs board. First, the filters are always visible.
As well, the
Apply, Flag,
and
Shar
e
buttons are absent
. And finally, note that
Edit and Delete buttons are
present. Deleting the listing deletes it from the entire network and is not undoable, so we present a
confirmation dialog box prior to executing the order. Selecting
Edit brings up the same screen as you
saw earlier in Figure 3-24, the job posting screen, but inside the control panel. Again, this represents a
way of reusing the existing code, almost wholesale, to complete an additional feature.
Reviewing flagged job listings occurs in a separate screen to enable moderator-level access, which you
see wired in Figure 3-26.
84
CHAPTER 3
8962CH03.qxd 11/7/07 11:36 AM Page 84
Figure 3-26. The Job Listings Flag Moderation screen
This screen shares many of the same elements and features as the other moderation panels, including
flagged videos, flagged video comments, and flagged profiles. On this Flag Moderation screen, mod-
erators may view all listings from their site that have been flagged. The DataGrid contains an entry for
each flagged listing, with the title, creator, creation date, zip code, views, and number of times the
Apply button was pressed. The DataGrid supports multiple row selection (an option in the Flex
DataGrid component) for easy removal of flags on, or deletion of, multiple listings.
If a single row in the DataGrid is selected, the detail of that posting appears on the right, again with
the
Edit button present, functioning just as it does in Figure 3-25. The Delete button is not present
because of the flag resolution widget, which is common to all Flag Moderation screens. The flag reso-
lution widget displays the reason the flag was applied and enables the moderator to quickly either
remove the flag or delete the flagged content, and, at the same time, optionally generate a warning
e-mail to the member who posted the listing or ban him entirely. Unless done by a network adminis-
trator
, banning only affects a member’s status on a specific RMX site. So if I am banned on Flash in
TO’s site, I can still log in to LA Flash. In future versions, the flag resolution widget will likely include
the information on the member who flagged the content, to identify whether this user is a profligate
flagger, and options for warning or banning the flagger as well.
The event calendar
As the primary function of user groups is to hold meetings, an event calendar is a central function of
this type of community site. Indeed, having an accurate list of upcoming events is a requirement of the
Adobe User Group program. And a calendar is the best way to present this type of information.
85
PLANNING THE APPLICATION: BUILDING THE RMX
8962CH03.qxd 11/7/07 11:36 AM Page 85
Since an event calendar is part of the definition of a successful launch of the RMX, and since there are
m
ore events than just user group meetings that are of interest to user group members, we wanted to
b
uild a calendar system that could accommodate the variety of events of interest to this community.
This includes training workshops, conferences, and Adobe-run presentations.
The event calendar is fundamentally different from the jobs board, not only in the information struc-
tures it supports, but also in how that information is generated. Content in the event calendar is not
user generated; only administrators may create events in the calendar. So there is no interface to post
events in the site, only in the control panels.
Of course, the calendar must display upcoming user group meetings. And since some user groups hold
meetings virtually over Adobe Acrobat Connect, either to complement or to replace their real-life
meetings, we included the ability to tag events with that information. Beyond user group meetings,
there are other types of events we support. Events may also be tagged as Rich Media Institute training
sessions, Adobe presentations (either road shows or Connect sessions), conferences, or the generic
catchall “other.”
Since groups will likely want to display their own events by default on their sites, there should be a
mechanism to allow users to switch the view of the event calendar to restrict events to those of the
group site they are on. The events should be easily browsable in a standard calendar-like interface.
Event details should contain all the required information about the event, including the nature, loca-
tion, description, and RSVP details. Users should be able to share events with a send-to-friend func-
tion. Finally, because users may be accessing the calendar from anywhere in the country, and people
may tune into Connect sessions from many time zones away, it is important to place a time zone field
in the calendar to enable the user to convert the local times of the event for the time zone of the
viewer of the site.
Some user group meetings and events have RSVP requirements. At launch, the RMX event calendar
allows the creator to specify whether or not an event requires an RSVP, and if it does, the address to
which RSVPs should be sent. If a logged-in member clicks
RSVP in the calendar, an e-mail is generated
to the originator of the event with the information on the member who has RSVP’d. In future versions
of the RMX, we plan to make the RSVP system more robust, with an expanded event management sys-
tem, as I explain in Chapter 15.
The spec and wires
As with the jobs board, there are two sets of wires for the event calendar: one for the public site and
one for the control panel moderation.
Site interface
The result of the event calendar usage requirements can be seen in Figure 3-27.
By default, the calendar of the specific group whose site the user is viewing is selected. In this state,
the zip code radius widget is disabled, since all events for that group will be returned. The user may
select the
Entir
e RMX Network
radio button to view all events. The user can filter the calendar by
selecting the type and venue of the event, and the zip code radius in which to search (the zip code
radius widget is disabled if
Connect Session is selected as the venue, since that is not a relevant search
filter when looking for online-only events). Because this is true filtering, rather than searching, results
for the current month are filtered in real time, as the options are updated. Beneath the filters is a
monthly calendar display, with navigation to switch to the next or previous months. In this view, the
number of events on a given day is displayed.
86
CHAPTER 3
8962CH03.qxd 11/7/07 11:36 AM Page 86
Figure 3-27. The event calendar wireframe
Selecting a date in the calendar displays the list of events on that date in the center column. This list
includes an abbreviated description of the event including the time, title, type, venue, location, and
truncated description. Selecting any item in the list reveals the complete event information in the
rightmost column. In that event detail, the user may see all the event information, as well as share the
listing by sending a permalink of the event to a friend. Logged-in members may RSVP for events that
require it. Since events are administrator generated, we felt comfortable in omitting content flagging
from the calendar.
It’s a relatively simple, single-state interface that supports all the preceding requirements.
Control panel interface
As with the jobs board, we opted to build the event manager in the control panel as another instance
of the same application that users experience through the site, and the similarity between Figure 3-27
earlier and Figure 3-28, the wireframes for the event calendar and the control panel event manager,
respectively, are readily apparent.
The key difference in the control panel implementation of the event calendar is that group adminis-
trators may browse only the events that have been generated on their site, not the events from any
other site. Accordingly, the
Calendar radio button options in Figure 3-27 are not present in Figure 3-28.
As well, the administrators may edit or delete the posting. Deleting requires a confirmation and, if
confirmed, deletes the listing from the entire network. Clicking
Edit brings up the same screen as the
Post Event button, which you see wired in Figure 3-29.
87
PLANNING THE APPLICATION: BUILDING THE RMX
8962CH03.qxd 11/7/07 11:36 AM Page 87
Figure 3-28. The control panel event manager
Figure 3-29. The wireframe to create a new event in the calendar
88
CHAPTER 3
8962CH03.qxd 11/7/07 11:36 AM Page 88
On this screen, the administrator may set all the information required to properly index the event in
t
he calendar. As mentioned, editing an event brings up the same screen as wired in Figure 3-29, pop-
u
lated with the information for the event that is being edited. The only difference is that the
Post
Event
button is renamed Save Changes.
Because there is no flagging of events in the calendar, there is no separate screen on which to mod-
erate flagged events as there is for moderating flagged job postings.
The group control panel vs. the network control panel
Throughout this chapter, I have provided examples of the control panel, all of which have been of the
control panel offered to administrators of group and expert sites in order to manage the content on
their individual sites. But the RMX has a separate, network-wide control panel as well. This is a require-
ment to enable network-wide administrators to manage content and membership across the entire
RMX.
Because of the complexity inherent in creating tools to manage a distributed network such as the
RMX, I present most concepts through examination of the individual group sites and control panels.
However, it is worth exploring briefly some of the major differences between individual group control
panels and the network-wide control panel accessible by RMX administrators.
The network control panel has two main differences from the individual group control panels. The
first difference is related to the need for RMX admins to manage the groups and members that con-
stitute the RMX. The screens in this first group exist only in the network-wide control panel, since they
expose functionality relevant only to the RMX admins. The second difference in functionality relates
to the RMX administrative requirement to be able to manage all content across the network, regard-
less of originating group. The network control panel screens in this second category are very similar to
those found in the group control panel, but with slightly different functionality.
The spec and wires
As I described earlier in this chapter, there are four different presentations of the RMX control panel
based on user level (moderator vs. admin and network vs. single group). Here I will briefly address the
differences between the network and the single group in the context of admin-level users.
Screens only visible to RMX admins
Let’s first examine a screen that only exists in the network control panel. In Figure 3-30, you see the
wire for the Partner Management screen.
This screen enables a network admin to manage the information for the sites that constitute the net-
work. There are a couple of UI items worth highlighting here. Note the fact that this DataGrid does not
enable the selection of multiple rows, since there is no functionality associated with selecting multiple
rows in the DataGrid (as opposed to, for example, the functionality in the
Job Listing Flag Moderation
screen in Figure 3-26). Selecting a row in the DataGrid displays the full record of the group in the
panel to the right of the DataGrid. Because of the nature of the interaction on this screen, we require
explicit save functionality—changes to the group record are not logged unless
Save is clicked. As well,
we added a
Revert button to restore all fields in the record to the currently saved record.
89
PLANNING THE APPLICATION: BUILDING THE RMX
8962CH03.qxd 11/7/07 11:36 AM Page 89
Figure 3-30. The Partner Management screen of the network control panel
We also included a button to enable RMX admins to log in to any group control panel directly. This is
a requirement in order to provide proper support to the member groups and does not expose any
login information to any of the admins (meaning an RMX admin does not have access to the pass-
words of the group owner but can still log in to the group owner’s control panel).
Screens that are similar between the network control panel and group control panel
As noted in the description of Figure 3-30, RMX admins have the ability to log in to the group control
panel for any group on the network. But, in terms of maintaining the content catalog across the entire
network, it would be very inefficient and time-consuming to force RMX admins to log in to each group
separately to manage each group’s content separately. So, for the purposes of catalog management,
we have employed a mechanism to enable rapid switching between groups.
To illustrate this feature, first examine the video catalog manager in the group control panel, wired in
Figure 3-31.
This is a standard FlexTube.tv control panel screen for video management. Each group has this screen
in their panels, and group admins use it to manage the catalog of videos on their individual sites.
If an RMX admin wants to manage the video catalog of a group, he may log in through the Partner
Management screen (refer back to Figure 3-30), or alternatively access the catalog manager in the net-
work control panel. Y
ou can see what the catalog manager looks like in this context in Figure 3-32.
90
CHAPTER 3
8962CH03.qxd 11/7/07 11:36 AM Page 90
Figure 3-31. The catalog of active videos in the group control panel
Figure 3-32. The network control panel of an individual group site’s active video catalog
91
PLANNING THE APPLICATION: BUILDING THE RMX
8962CH03.qxd 11/7/07 11:36 AM Page 91
On the upper right of the catalog manager is a ComboBox including a list of all groups in the RMX net-
w
ork. By changing the selected group, the RMX admin may choose which group’s catalog to manage.
T
he catalog manager groups the content catalogs for videos, events, and jobs as subtabs, which are
the key content types managed by the group control panels. Those subtabs correspond exactly to the
top-level tabs of the same name in the group control panel. In this way, RMX admins can quickly
access any content catalog across the network.
Summary
In the first part of this book, you explored the purpose and features of the Rich Media Exchange and
the social and technological contexts in which it exists. The part concluded with this chapter about
planning specific features in the RMX and how, in general terms, you prepare for a project of the
scope and complexity of the RMX. Hopefully, by this point, you have a good understanding of the
nature of the project and the size of the undertaking.
Now, as you start Part 2, you are ready to dive in and explore some of the detailed technical issues in
the actual development of the code that powers the RMX.
92
CHAPTER 3
8962CH03.qxd 11/7/07 11:36 AM Page 92
In this part of the book, we show you how we got to work actually building the RMX, get-
ting into some of the nitty-gritty of wielding the amazingly powerful Flex framework! We
begin in Chapter 4 with a discussion of setting up your work environment with the right
tools and configurations to facilitate all the development that follows. We then dive in
and start with some of the fundamentals of building an application like this, including
styling Flex interfaces, building core navigation and functionality, creating and validating
forms, working with video, and, of course, the bread and butter of online communities,
integrating advertising into your applications. All of these features, while not necessarily
simple, are the building blocks of any contemporary web application.
BUILDING THE RMX CORE FUNCTIONS
Part 2
8962CH04.qxd 11/7/07 4:59 PM Page 93
8962CH04.qxd 11/7/07 4:59 PM Page 94
After all the planning you encountered in Part 1, you are ready to learn more about
many of the specific technologies and coding techniques we used in building the
RMX. But, before actually getting into the code and demonstrating some of the tech-
nical obstacles that we encountered and tackled, I’m going to talk a little bit about
some of the things I think about before I actually begin to produce any code. I’ll start
by going over some additional tools I employ during development to enhance the
Eclipse IDE and then discuss some of the issues I take into consideration when I set
up a new project in Flex.
Setting up the development environment
Right out of the box, Flex Builder provides an outstanding development environ-
ment. Its many useful features designed specifically for the Flex development work-
flow, in particular the code hints engine, supply developers with most of the tools
needed to start a basic Flex application. But no one tool can do everything for every-
one, so in this section I will talk about some additional plug-ins I use to enhance my
development environment, which brings us to the first consideration: whether to use
the Flex Builder stand-alone IDE or the Eclipse plug-in installation.
95
PREPARING TO GET TO WORK
By Omar Gonzalez
Chapter 4
8962CH04.qxd 11/7/07 4:59 PM Page 95
Flex Builder stand-alone or Eclipse plug-in installation
Many Flex developers with little or no previous experience using the Eclipse development environ-
ment wonder whether the Flex Builder stand-alone IDE or the Flex plug-in for Eclipse is the better
o
ption for developing Flex applications. It is important to be clear that, regardless of which you use,
there is no difference in the quality or performance of the compiled application—the choice is purely
one of workflow and developer preference.
The core difference between the tools is in the way that you compile an application. Since Eclipse
includes prepackaged libraries for Java development, when you compile your Flex application in the
Eclipse IDE, a dialog window appears with options to select what type of application you would like to
compile. The rest of the Eclipse plug-in installation for Flex will look mostly identical to that of the
stand-alone Flex Builder installation. So why do I prefer the Eclipse plug-in? There are a couple of
reasons.
The most obvious of reasons is that I was already familiar with working in Eclipse. Eclipse is very pop-
ular in the ColdFusion, Java, and PHP communities, so if you’ve come to Flex from one of those plat-
forms and are already using Eclipse, the plug-in allows you to easily integrate Flex into your existing
development toolkit.
But this is a minor reason when compared to the extensibility of Eclipse. The Flex Builder Eclipse plug-
in is just one of many Eclipse plug-ins that are developed as products—some commercial and some
open source—that help reduce the clutter of your workflow (and desktop) by giving your Eclipse IDE
the power to do more of what you need to do, aside from coding your Flex. There are two plug-ins in
particular I want to discuss in more detail, Subclipse and PHPEclipse. For a good index of plug-ins
available for Eclipse, you can visit
www.eclipseplugincentral.com/, which lists hundreds of them.
Source control, SVN, and Subclipse
Subclipse helps with a major part of developing a huge rich media application, source control (or ver-
sion control). In Chapter 2, you learned how source control can help you to really maintain code
versioning and why any serious developer or development agency should adopt some kind of source
control standard. But how would you go about integrating a source control system into an everyday
workflow without adding yet another application to fuss with to your already busy daily routine? Enter
Subclipse.
Subclipse is an open source Eclipse plug-in developed by Tigris.org. Subclipse provides an interface
through which you can connect and commit source code files to a versioning software application
such as Subversion (SVN) or CVS. (CVS is another source control option; it is older than Subversion,
which was in fact written as an open source alternative to CVS.) Subclipse integrates right into the
Eclipse IDE to provide Subversion support, adding a new perspective to your Eclipse IDE that looks
very much like the built-in CVS client packaged with Flex. The new perspective allows you to connect
to a Subversion repository to check out and commit project files. To learn more about Subclipse and
download it, you can visit
/>Once you’ve got Subclipse installed into your Eclipse development environment, all you’ll need to do
is connect to a Subversion server to start a new repository of code. Some hosting companies include
Subversion as part of their “one-click installs” in their web host control panel suites. There are also a
number of service companies that offer Subversion services for individuals as well as different devel
-
opment team sizes. I prefer paying for the service so that I don’t have to worry about maintaining the
96
CHAPTER 4
8962CH04.qxd 11/7/07 4:59 PM Page 96
source control server or having to deal with security issues, as most Subversion hosts should provide
c
onnectivity through a secure HTTPS connection to keep projects safe.
PHPEclipse
PHPEclipse, another very popular Eclipse plug-in, is one of the best PHP editors in the market today.
Having the ability to edit PHP code within the same IDE as Flex is extremely convenient and acceler-
ates development. I no longer have to open another editor like Dreamweaver to look at a PHP file
with proper color coding and code hinting.
Another helpful feature is capability to create code templates. PHPEclipse lets you make code tem-
plates of things you write every day.
If statements, while loops, switch statements—they can all be
entered as different code templates that you can then bring up instantly, allowing you to tab through
the different parts of a statement that you only need to edit. After writing a
switch statement 100
times, you don’t need to do it by hand every single time. Features like this not only help you become
significantly more productive, but also reduce the possibility of human error.
Its code hints, syntax error checking, and color coding are just some of the features that make
PHPEclipse as popular as it is today. PHPEclipse was developed as an open source project by the
PHPEclipse Project. You can download it and read more about it at
www.phpeclipse.de/.
Planning your application’s structure
Once you have your IDE in order, you must tackle some planning decisions involving the structure of
the database as well as the structure of the project. Going into development without having made
these decisions can really set up a project for a major disaster. If too much work goes into some fea-
tures, and suddenly the development team finds out 8 weeks into a 16-week development run that
the database design will not accommodate other features that had not been planned out, the project
can rapidly turn into a really big mess with half the time left to get it done. That’s why it is vital that
the core design of the database is complete and done in a manner that will allow new features to be
easily added to it without any negative effects on already existing data. With the MySQL database in
place, the next thing to begin to think about is the ActionScript that is going to interact with the PHP
and SQL, which will finally start manipulating the database.
Database design
The database design stage is the very first time that you will begin to consider the documents pro-
duced by the planning stages and put them into action. A
t this stage, you must assume that the design
of the database is executed in a manner that will accommodate all of the data requirements posed by
the application specification document.
Project structure and namespaces
With the
database design in place, you can now start thinking about ActionScript . . . almost. Before
you start making ActionScript and MXML files, you will need a place to put them. Making proper
folder paths, or namespaces, can help your project in a few different ways.
97
PREPARING TO GET TO WORK
8962CH04.qxd 11/7/07 4:59 PM Page 97
First, it will help to organize your code. Having a standard way of organizing your files will not only
h
elp you start new projects faster, but also help in the transitioning of code from one developer to
a
nother within your development team; this way, each new developer who jumps on the project does
not have to figure out where in your list of 50 folders he should look for ItemRenderer components
or ActionScript files.
Another benefit is that you will avoid the possibility of any two classes you write colliding if you hap-
pen to choose the same name. But why would you choose the same name for a new class that you’re
writing as another class you already have? A basic example is in custom control classes. By default, I
prefer buttons to display a hand cursor on hover, but the default on the Button component is to dis-
play the mouse cursor. Instead of writing every button as
<mx:Button buttonMode="true"/>, I use this
class:
package com.almerblank.controls
{
import mx.controls.Button;
public class Button extends mx.controls.Button
{
public function Button()
{
super();
super.buttonMode = true;
}
}
}
Although my class is also named Button, just like
the Flex component I’m extending, I can do this
because its package is
com.almerblank.controls,
which means that it is in the
com/almerblank/
controls
directory within my Flex project, as you
can see in Figure 4-1.
With the class in its package, how can you access
the class to make buttons in your MXML? Using
custom namespace declarations in your Flex
application, you can access custom classes you
make just like any other component. For
instance, if I want to place my
Button class, I
would begin a new tag and immediately start typ-
ing
button; the code hints will display the custom
class as shown in Figure 4-2.
Once you see your new class listed and you select
it
, press Enter
, and Flex Builder will automatically
add the new XML namespace to the list in the
<mx:Application/> tag. The resulting code
should look something like this:
98
CHAPTER 4
Figure 4-1. The Button class can be named Button and
not incur a naming conflict with the Flex Button class
because it’s in its own package.
Figure 4-2. The new class is listed using its class name as
the component name and the folder name as the
namespace.
8962CH04.qxd 11/7/07 4:59 PM Page 98
<?xml version="1.0" encoding="utf-8"?>
<mx:Application xmlns:mx=" layout=
"vertical" xmlns:controls="com.almerblank.controls.*
">
<controls:Button />
<
/mx:Application>
The <mx:Application/> tag now has the default xmlns attribute that is required to use the Flex frame-
work, as well as a new one for the
controls namespace. The namespace actually uses an asterisk to
include everything in the
controls package, so any other new custom classes you write in that pack-
age will have the same namespace as the
Button class. Also note that the path to the control classes
uses periods as opposed to slashes to separate folders; this is important to note for both namespace
paths and item renderer paths.
New project template
Now that I’ve talked a little about the benefits of having good project folder structures and packages
for our classes, I can show you how I like to begin setting up projects. Just as code styles differ from
programmer to programmer, so do the folder structures programmers use to organize their code. Not
only does it differ, but often it keeps evolving as new coding methods, techniques, and design patterns
are learned and applied. As a new programmer becomes more experienced at working with a new
technology like Flex, his needs for different project structures will dictate how his new projects are
developed. And if that programmer starts to employ other frameworks like Cairngorm, the standards
set by the framework of choice will also dictate where he places his files and the overall structure of
his project.
When I start a new project, it looks very similar to
what you see in Figure 4-3.
The main MXML application is the only MXML
file in the root of the project. This should be the
case for all application-type projects that are
entirely contained in a single application. In
projects where multiple Flex applications are
required, each application would sit in the proj-
ect root directory along with the first MXML file
you start with.
Starting with Flex 3, a folder named
src is
included when you begin a new Flex project, and
it is into this folder that the Flex compiler com-
piles MXML files. If you prefer your MXML files
on the root, as I do, you need to change the file
path configuration in the Project Properties dia-
log box. Right-click your project and select
Pr
oject Properties
. In the left menu of this dialog
box, select
Flex Build Path. On the right, in the
Sour
ce Path
tab near the bottom, is a new option
called
Main Source Folder. This option should be
blank if you want your MXML applications to
compile from the root of the Flex project
. This is
99
PREPARING TO GET TO WORK
Figure 4-3. Example of a new project as I start it
8962CH04.qxd 11/7/07 4:59 PM Page 99
also where you can change the location of the output folder, or bin folder, if you want to place it in a
custom location.
The rest of the files for the project go in the
newprojectname folder, which is in com.almerblank. The
bulk of the application files will likely be in the
com.almerblank.newprojectname.views package, or
folder. You’ll notice that in the
com.almerblank.newprojectname.views.mainScreen folder there is a
MainScreen.as file and a MainScreenView.mxml file. This is the naming convention for any MXML file
that instantiates a class in MXML to control layout of objects via MXML. In other words, they have the
same relation as the
Newprojectname.as class and the NewprojectnameView.mxml file that is the main
application. With this naming convention, I can easily see by the MXML file’s name whether there
should be a class associated to it that supports its functionality or whether the file is a pure MXML
component, which is likely mainly for layout purposes.
Within each view in the
com.almerblank.newprojectname.views package is a components folder,
which houses the components for that particular view, if the components are not shared in other parts
of the application. If a component is something to be shared throughout the application, it goes in the
com.almerblank.newprojectname.components package.
The
ir folder holds all item renderers, and the popUps folder holds all pop-ups. The dto folder and
events folder contain only ActionScript classes. In the events folder, I put all the custom events
needed when I begin to develop a new application. The “dto” of
dto folder stands for data transfer
objects, which are the first ActionScript classes I write after writing the main project class. I’ll talk more
about data transfer objects after I discuss the main application class.
The main application class
My main application class always begins looking something like this:
package com.almerblank.newprojectname
{
import mx.core.Application;
public class Newprojectname extends Application
{
public function Newprojectname()
{
super();
}
}
}
This code does nothing more than change the <mx:Application/> MXML tag. As I develop the appli-
cation properties and methods, I can house them in this class for easy access to all parts of the appli-
cation. Although this class extends the
Application class, a custom XML namespace is required to use
the new class as your base tag in your main application. The MXML would look something like this:
100
CHAPTER 4
8962CH04.qxd 11/7/07 4:59 PM Page 100
<?xml version="1.0" encoding="utf-8"?>
<np:Newprojectname
xmlns:np="com.almerblank.newprojectname.*"
xmlns:mx=" layout="absolute">
<
/np:Newprojectname>
An abbreviation of the project name is used as the base namespace, and it is directed to the main
application class package. Now the main application class is ready to have some functionality added.
Let’s say that the application requires an error prompt to be used throughout the application when-
ever something goes wrong. I can add that method to my extended
Application class, making it
accessible to any new MXML application that gets added to the Flex project.
package com.almerblank.newprojectname
{
import mx.core.Application;
public class Newprojectname extends Application
{
public function Newprojectname()
{
super();
}
public function showError():void
{
//do some stuff
Alert.show("You are experiencing an error.", "Error message");
}
}
}
With the new method in place, one way I can access this method is like this:
<?xml version="1.0" encoding="utf-8"?>
<np:Newprojectname
creationComplete="showError();"
xmlns:np="com.almerblank.newprojectname.*"
xmlns:mx=" layout="absolute">
</np:Newprojectname>
This works because I am declaring the event handler in the MXML that instantiates the extended
Application class, Newprojectname.
If I were working in a component
, I could do something like this:
<?xml version="1.0" encoding="utf-8"?>
<mx:Canvas
creationComplete="myApp.showAlert();"
xmlns:mx=" width="400" height="300">
<mx:Script>
<![CDATA[
101
PREPARING TO GET TO WORK
8962CH04.qxd 11/7/07 4:59 PM Page 101
import mx.core.Application;
import com.almerblank.newprojectname.Newprojectname;
[Bindable] private var myApp:Newprojectname =
Newprojectname(Application.application);
]
]>
</mx:Script>
</mx:Canvas>
In a new basic component based off of a Canvas with default settings, I’ve added a small script block.
This block has a single property called
myApp, of type Newprojectname, which is the main class that
extends the
Application class. The property is set to Newprojectname(Application.application),
which casts the
Application.application property as a Newprojectname object, not only providing a
shorter variable to code with, but also producing code hints on the
myApp variable from the
Newprojectname class, which has the core functionality that the application will want to access, which
in this example is the
showAlert() method.
With the main application class ready and the folder structures in place, there is one last bit of prepa-
ration to do, but this time it involves writing ActionScript, so I will get a bit more into some code.
Data transfer objects
The first classes I write that help with advancing application development are data transfer objects,
which are the classes that are contained within the
dto package. Data transfer objects are used to
house the data that goes into the application from the server and vice versa. They are the objects sent
during each remoting call that contain the necessary arguments for each service call. Aside from being
used to send data via remoting, I also use these data transfer objects to collect data from forms in the
user interface, as well as capturing data from a remote service call. An example data transfer object
for a FlexTube.tv member profile looks something like this:
package com.almerblank.yvv.dto
{
[Bindable]
public class Member extends Object
{
public var aboutMe:String;
public var accountType:String;
public var active:String;
public var address1:String;
public var address2:String;
public var alias:String;
public var avatar:String;
public var city:String;
public var country:String;
public var dateSignedUp:String;
public var email:String;
public var firstName:String;
public var lastName:String;
public var phoneBusiness:String;
102
CHAPTER 4
8962CH04.qxd 11/7/07 4:59 PM Page 102
public var phoneCell:String;
public var phoneHome:String;
public var publicEmails:Boolean;
public var publicPhoneNumbers:Boolean;
p
ublic var state:String;
public var website:String;
public var zipCode:String;
public var listings:String;
public function Member(memberObj:Object = null)
{
super();
if (memberObj)
{
this.aboutMe = memberObj["aboutMe"];
this.accountType = memberObj["accountType"];
this.active = memberObj["active"];
this.address1 = memberObj["address1"];
this.address2 = memberObj["address2"];
this.alias = memberObj["alias"];
this.avatar = memberObj["avatar"];
this.city = memberObj["city"];
this.country = memberObj["country"];
this.dateSignedUp = memberObj["dateSignedUp"];
this.email = memberObj["email"];
this.firstName = memberObj["firstName"];
this.lastName = memberObj["lastName"];
this.phoneBusiness = memberObj["phoneBusiness"];
this.phoneCell = memberObj["phoneCell"];
this.phoneHome = memberObj["phoneHome"];
this.publicEmails = memberObj["publicEmails"];
this.publicPhoneNumbers = memberObj["publicPhoneNumbers"];
this.state = memberObj["state"];
this.website = memberObj["website"];
this.zipCode = memberObj["zipCode"];
this.listings = memberObj["listings"];
}
}
}
}
This is a very basic class with no methods other than its constructor, yet it is very useful. Right above
the class declaration is the
Bindable meta tag, which marks the object instance of this class a bindable
object. I can then create an instance of this class as a property of the application that will display the
member data and bind to the properties contained within the class object instance. Consider this
example:
103
PREPARING TO GET TO WORK
8962CH04.qxd 11/7/07 4:59 PM Page 103
<?xml version="1.0" encoding="utf-8"?>
<ft:FlexTube
width="960" height="100%"
styleName="plain" layout="absolute"
x
mlns:mx=" />xmlns:yvv="com.almerblank.yvv.core.*"
xmlns:ft="com.almerblank.flextube.core.*"
xmlns:controls="com.almerblank.flextube.controls.*" xmlns:views=
"com.almerblank.yvv.views.*" xmlns:videoPlayer=
"components.videoPlayer.*">
<views:MemberListing id="memberListing" width="100%">
<mx:Panel
borderThickness="0" borderThicknessBottom="0"
borderThicknessLeft="0" borderThicknessRight="0"
paddingBottom="4" paddingLeft="4" paddingRight="4" paddingTop="4"
layout="vertical" title="User Profile" width="300" height="100%">
<mx:HBox width="100%">
<mx:Image source="{this.memberListing.memberProfile.avatar}"
width="120" height="90" maintainAspectRatio="false"
scaleContent="true" />
<mx:VBox verticalGap="0">
<mx:Label text="{this.memberListing.memberProfile.alias}"
width="155"/>
<mx:Label text="{this.memberListing.memberProfile.
accountType}" width="154"/>
<mx:Label text="{this.memberListing.memberProfile.city
+ ', ' + this.memberListing.memberProfile.state}"
width="154"/>
</mx:VBox>
</mx:HBox>
</views:MemberListing>
</ft:FlexTube>
In this example, I demonstrate how I use data transfer objects to populate the view with data. The
<views:MemberListing> tag is the class that drives the member profile view
. The
id property on the
MXML tag is used to access the properties and methods of the class from other MXML components.
In this
MemberListing class, there is a Member class object instantiated as a public bindable variable
called
memberProfile. The properties I declared in the Member class can now be bound to using the
memberProfile property
, as you see in all the
text properties of the <mx:Label/> tags in the example.
When I receive the result object from the remoting call, I simply pass the result object into the
optional parameter of the constructor, and the constructor takes care of mapping the fields retrieved
104
CHAPTER 4
8962CH04.qxd 11/7/07 4:59 PM Page 104
from the database to my data transfer object, and in turn to the objects displaying the text of each
p
roperty in that data transfer object.
S
etting up data transfer objects not only facilitates the transfer of all data back and forth from the
server, but also frees you from having to continually reference the database structure or remoting
methods and remembering which properties should be sent with each service call and how they
should be spelled. By having these data transfer objects in place before starting to actually write any
application logic, you can ensure that you will always know what properties need to be assigned for all
data structures. In Chapter 8, I’ll talk more about the value of data transfer objects and demonstrate
how I use them in more detail.
Final pointers before writing code
There is nothing worse than coming back to some source code six months or a year later to make a
bug fix or add a new feature and not know where to start. It can be difficult to decipher code you
yourself have written after time has passed and some of your coding habits have changed. This is why
these three points I’m about to cover are very important when you develop larger applications, espe-
cially if you are developing as part of a team.
Variable and method naming
The names you choose for your variables and methods should always be as descriptive as you can
make them. It can be very frustrating to read code that does not follow any kind of naming conven-
tion that will allow you to easily identify what kind of code you are currently reading.
Consider this example:
private function handler(e:*):void
{
var o = e.currentTarget;
o.enable = false;
}
Looking at the method in the preceding example, it is very difficult to figure out its purpose. Let’s ana-
lyze this step by step. The method is named
handler, which gives a hint that it is some type of event
handler. The problem is that you cannot tell what type of event, represented by the letter
e, it is han-
dling, since the event is not strong typed to any particular event type. It is using a wildcard to accept
any kind of object as a parameter. The first line of the function has a variable named
o, with no type,
and it is being set as a reference to
e.currentTarget. Y
ou can’t tell what kind of object
o is nor what
the
currentTarget of the event is. Finally, the function disables whatever the object o is.
Employing some better naming conventions for the variable names and the function name can make
the code much more legible. Take a look at the same example rewritten as follows:
private function onClick(event:MouseEvent):void
{
var loginButton:Button = event.currentTarget as Button;
loginButton.enable = false;
}
105
PREPARING TO GET TO WORK
8962CH04.qxd 11/7/07 4:59 PM Page 105
In this example, the function is written out using names that are a lot more descriptive of what they
r
epresent. You can tell the method is handling a click event because of the method name and the type
o
f event the method is expecting. It is also easy to see that the
c
urrentTarget
p
roperty being refer-
enced is a button for a login-type transaction. Besides making the code easier to read, other benefits
include better code hinting when you’re addressing your objects and better error messages from the
compiler.
Another naming convention I like to use that comes in rather handy is including prefixes for MXML
components so that I can easily find them when I use the code hints. In an application that has a form
with 20 fields, if I have 20 names such as username, e-mail, and password, those field names will all be
scattered throughout the drop-down list of code hints because it is sorted alphabetically. However, if
I use a prefix like tf_username, tf_email, and tf_password, when I pull up my code hints, simply typ-
ing
tf_ will automatically scroll me down and display all the text fields in the form. The same can be
done with buttons (by using btn_) and so on for all of the components you use. You might not like
btn_ and decide to use b_ instead—the point is that you decide on a convention and exploit it to your
benefit.
Commenting source control commits
Regardless of whether you are using Subversion or CVS, when you commit your source code to the
code repository, it is a very good idea to comment on every commit that you send to the repository.
It is also a good idea to commit often. This is one of those habits that seems like it will slow you down,
but the small bit of time you invest in both committing and commenting often will really pay off for
you in the big scheme of things.
When you have more than one person on a particular project, committing often will help to keep
good track of all of the changes that are being made to the source code. As I go through the different
issues in our Mantis bug tracker, I commit my changes to the source code as I resolve issues in Mantis.
And if the change is big, I commit as I reach certain milestones in the feature I’m currently building. If
something goes wrong in the code, I can easily view the history of the file and compare version by
version.
Using the Subclipse Eclipse plug-in, you can right-click any file in the project you have checked out in
your workspace. In the menu options under
Team is the option Show in Resource History. When that
option is clicked, the history of the file is shown in a tab called
SVN Resource History, where you can
see every change that has ever been made to that file, including the revision number and the com-
ment that was entered when the file was changed. The
SVN Resource History tab usually appears next
to the
Console tab by default. Y
ou can double-click any of the tabs in Eclipse to maximize the tab to
full size, as shown in Figure 4-4.
This view shows only 25 comments at a time. On the top right of the screen is a button to refresh the
view
, one to get the next 25 results, and another to view all results if you need to search through com-
mits that are much older than the first 25 comments.
106
CHAPTER 4
8962CH04.qxd 11/7/07 4:59 PM Page 106