Lab Excercise - Cisco IDS Appliance Software Upgrade And Cisco IDS Event Viewer _ www.bit.ly/taiho123
Bạn đang xem bản rút gọn của tài liệu. Xem và tải ngay bản đầy đủ của tài liệu tại đây (495.46 KB, 16 trang )
Lab 2 Exercise—Cisco IDS Appliance
Software Upgrade and Cisco IDS Event
Viewer
Objectives
In this lab exercise you will complete the following tasks:
n
Update IDS appliance software using the IDS Device Manager (IDM).
n
Check the IDS appliance software version.
n
Install the Cisco IDS Event Viewer (IEV) software on the PC.
n
Add the IDS appliance to the list of devices monitored by the IEV.
n
Monitor IDS appliance events using the IEV.
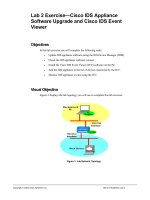
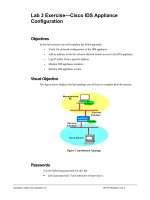
Visual Objective
Figure-1 displays the lab topology you will use to complete this lab exercise:
Figure-1: Lab Network Topology
Copyright 2003, Cisco Systems, Inc.
IDS 4.0 Roadshow Lab 2
Passwords
Use the following passwords for this lab:
•
Lab Gear password: Your instructor will provide it.
•
IDS appliance username/password: The default account name and password are
cisco. However, the password for the cisco user should have been changed to
emmapeel in Lab 1.
•
PC client: The username is Administrator and the password is cisco
•
VNC password: When you connect to the PC, use a password of cisco at the VNC
screen.
Task 1—Access the Remote Pod and Login to the PC
Access the remote lab environment via a web browser and an Internet connection. You will
login to the lab pod environment, access the appropriate device console(s), and login to the
actual device(s) used in the lab.
Step 1
Access your lab pod using the Internet Explorer web browser. If you need help,
review the Accessing the Remote Lab Equipment section of the IDS 4.0 Roadshow
Lab 1 lab guide (Figure-2).
Step 2
Access the PC by first clicking on the green oval labeled PC Desktop. If you need
help, review the instructions starting with the After a Successful Login section of the
IDS 4.0 Roadshow Lab 1 lab guide (Figure-3).
Step 3
The VNC login screen should appear. Login with password cisco.
Step 4
You may need to login to the PC itself. If so, click on Send Ctrl-Alt-Del near the top
of the window. Login as Administrator with password cisco.
Step 5
You will be presented with a view of the PC desktop.
Figure-2: Example PC Desktop
IDS 4.0 Roadshow Lab 2
Copyright 2003, Cisco Systems, Inc.
Task 2—Check Network Connectivity Between the PC and the
IDS Appliance.
To do this lab, the IDS appliance should be configured as per Lab 1 (Cisco Intrusion Detection
System (IDS) Appliance Initial Configuration).
You should now be logged into the PC.
Check connectivity between the PC and the IDS appliance by doing the following steps.
Step 1
At the PC desktop, click on the Start->Run… menu and open a command window by
typing cmd into the Run window. Click OK and a command window should appear.
Step 2
At the command prompt, type ping 10.0.01. The output should look similar to that
shown in the figure below:
Figure-3: Successful ping of the IDS appliance
Step 3
If the pings are not successful, check that the IDS appliance is configured properly as
per Lab 1. You may want to double-check the PC network configuration settings if
the IDS appliance appears to be configured properly.
Step 4
Launch Internet Explorer on the PC by double clicking its icon on the PC desktop or
by selecting it from the Start->Programs->Internet Explorer menu.
Step 5
Access the IDS appliance by specifying a URL of https://10.0.0.1.
Note
IDS Device Manager Traffic is encrypted, so make sure you use HTTPS.
Step 6
In the first Security Alert window, click OK.
Step 7
Click Yes when prompted to accept the IDS appliance certificate.
Step 8
Login to the IDS Device Manager as the cisco user using the password that was
configured in Lab 1 (the instructions said to use emmapeel).
Step 9
You should now be at the IDS Device Manager home page.
Copyright 2003, Cisco Systems, Inc.
IDS 4.0 Roadshow Lab 2
Task 3—Upgrade the IDS Appliance Software.
This task involves accessing the Cisco IDS Device Manager (IDM), and upgrading the IDS
appliance software to the latest version. The first step would be to go to Cisco’s web site and
download the new patch or IDS appliance signature update. As part of the lab, we have done that
for you already. The software you will need already resides on the PC.
Note
You can use SCP, FTP, HTTP, or HTTPS. In this lab, we will be using HTTP.
Complete the following steps to upgrade the IDS appliance software:
Step 1
You should now be at the IDS Device Manager home page. Click on the
Administration tab (arrow 1 in the figure below) on the area bar. The Administration
sub-area bar is displayed. Your IDS Device Manager window should look like the one
below in Figure 4:
1
2
Figure-4: IDS Device Manager Administration page
Step 2
Now click on Update (arrow 2) in Figure 4 (above).
Step 3
You should now be at the Update area of the Administration tab as show in the
figure below:
IDS 4.0 Roadshow Lab 2
Copyright 2003, Cisco Systems, Inc.
Figure-5: IDS Device Manager Update page
Step 4
Enter the following into the URI section of the Update settings box:
http:///IDS-K9-sp-4.0-2-S42.rpm.pkg
Note
Step 5
Click Apply to Sensor. After about five minutes, the update will complete and the
IDS appliance will reboot automatically with the updated system image.
Note
Step 6
There may not be any messages that inform you of the completion. The IDS appliance
will not communicate via the console or IDM during the upgrade process.
Try logging back into the IDS appliance via the console. If you get a console prompt,
the update should be complete.
Note
Step 7
If you are also logged into the IDS appliance via the console, log out before doing the
software update. No password is needed since we are using anonymous HTTP.
This process will take about 5 minutes to complete. If you try to log back in using IDM,
you may get a message that an update is in progress.
Login to the IDM application.
Copyright 2003, Cisco Systems, Inc.
IDS 4.0 Roadshow Lab 2
Task 4—Check the IDS Appliance Software Version
This task involves checking to make sure that the software upgrade completed. Complete the
following steps to check the IDS appliance software version by using the IDS Device Manager
application.
Note
You could also check the software version by using the show version command from
the IDS appliance CLI.
Step 1
If you are not already logged into the IDS Device Manager, login as the cisco user
using the appropriate password.
Step 2
Click on the Administration tab (arrow 1 in the figure below) on the area bar. The
Administration sub-area bar is displayed. Then click on Support in the
Administration sub-area bar (arrow 2):
1
2
Figure-6: IDS Device Manager Administration page
Step 3
IDS 4.0 Roadshow Lab 2
A Table of Contents (TOC) area opens on the left side of the Support window. Click
on System Information (arrow 3 in Figure-7 below) to get the IDS appliance
software version along with various other important pieces of information (arrow 4 in
Figure-7 below). Verify that the IDS appliance version is now 4.0(2)S42:
Copyright 2003, Cisco Systems, Inc.
3
4
Figure-7: IDS Device Manager System Information Output
Task 5—Install the IDS Event Viewer Software on the PC
This task involves installing the IDS Event Viewer (IEV) application. The first step
would be to go the Cisco website and download the latest IEV installation package
available. For this lab, that download has already been done for you. The installation
software you will need, IEV-4.0-1-S37, resides on the PC desktop.
Complete the following steps to install the IEV software on the PC:
Step 1
Launch the IEV installation application from the PC’s desktop by double clicking on
the icon for the file IEV-4.0-1-S37 (arrow 1 in Figure-8 below).
Copyright 2003, Cisco Systems, Inc.
IDS 4.0 Roadshow Lab 2
1
Figure-8: IDS Event Viewer Installer on PC Desktop
Step 2
The Cisco IDS Event Viewer 4.0 Welcome window opens. Click Next to continue
the installation wizard process. The Select Destination Location window opens.
Step 3
Accept the default installation location and click Next to continue with the wizard
installation process. The Select Program Manager Group window opens.
Step 4
Accept the default Program Manager group and click Next to continue with the
installation wizard process. The Start Installation window opens.
Step 5
Click Back if any mistakes were made. Otherwise, click Next to continue with the
installation. The Installing window displays the IEV installation progress.
Step 6
The IEV application files are copied to the destination location. The IEV file copy
process takes approximately 2–4 minutes depending on system performance.
Step 7
Once the files are copied, the Installation Complete window opens.
Step 8
Click Finish to complete the IEV installation wizard process.
Step 9
The Install dialog window opens.
Step 10 Click OK to restart the system and complete the installation process.
Note
When the PC reboots, you will lose connectivity to it and the VNC window will contain
an error message. Just wait a minute and go back to the main lab diagram and click on
the PC and establish a new session.
Step 11 After the PC has rebooted, login again as Administrator with password cisco. You
should see a Cisco IDS Event Viewer shortcut icon on the PC desktop (arrow 2 in
Figure-9 below).
IDS 4.0 Roadshow Lab 2
Copyright 2003, Cisco Systems, Inc.
2
Figure-9: IDS Event Viewer Application Shortcut on PC Desktop
Task 6—Add the IDS Appliance as a Device to be Monitored
by the IEV
This task involves launching the IEV application and adding the IDS appliance as a
device that IEV will monitor. Complete the following steps to add the IDS appliance
to the list of devices monitored by the IEV:
Step 1
Double click on the Cisco IDS Event Viewer icon on the desktop to launch the IEV
OR choose Start>Programs>Cisco Systems>Cisco IDS Event Viewer>Cisco IDS
Event Viewer. The Cisco IDS Event Viewer application opens.
Step 2
Choose File>New>Device… from the main menu. The Device Properties window
opens.
Step 3
The following table contains the IDS appliance parameters to enter and a description
of each. Figure-10 shows what the Device Properties window should look like after
the information has been entered:
Cisco IDS Settings
Parameters
Description
Sensor IP Address
10.0.0.1
The IP address of the IDS appliance
Sensor Name
sensor
Alphanumeric identifier for the IDS
appliance
User Name
cisco
User name to use for communications
Password
emmapeel
Password to use with User Name
Copyright 2003, Cisco Systems, Inc.
IDS 4.0 Roadshow Lab 2
Figure-10: Device Properties for IDS appliance
Step 4
Enter the new IDS appliance information and click OK to save the information. A
Certificate Information window will open and you will be prompted with “Do you
want to trust the following certificate?” Click on Yes to accept the certificate. The
IDS appliance with the name sensor should appear in the Devices folder (as shown
below in Figure-11).
Figure-11: IDS Appliance “sensor” Added to Devices
Note
IDS 4.0 Roadshow Lab 2
If IDS Event Viewer cannot connect to the IDS appliance, a red X appears next to the
device name to indicate that no connection is present.
Copyright 2003, Cisco Systems, Inc.
Task 7—Monitor IDS Appliance Events Using the IDS Event
Viewer
This task involves using the IEV to monitor events detected by the IDS appliance.
The Hack Server (show in Figure-1, Visual Objective) is constantly generating a
variety of attacks. Complete the following steps to monitor the IDS appliance using
IEV:
Step 1
Right click on the sensor entry under Devices. Select Device Status. Figure-12 shows
what this step should look like:
Figure-12: Choosing Device Status for Device “sensor”
Step 2
The Device Status window opens. Take a few moments to examine the information
returned. Figure-13 shows what this step should look like:
Figure-13: Device Status for Device “sensor”
Copyright 2003, Cisco Systems, Inc.
IDS 4.0 Roadshow Lab 2
Step 3
Double-click Sig Name Group in the Views folder. The Sig Name Group view is
displayed in the right pane. Figure-14 shows this step:
Figure-14: The “Sig Name Group” View
Step 4
You can expand the columns in order to make the information a bit more readable.
Position the cursor over a line which delineates a column; when the cursor changes to
a double-arrow line hold the mouse button down and drag the column line to make the
column wider. Figure-15 shows this step:
Figure-15: Expanding a Column in the View
Note
IDS 4.0 Roadshow Lab 2
If you don’t see any alarms, try refreshing the alarm view by clicking on the Refresh
Views icon (circle arrow) in the icon menu bar. You can also double-click on Sig Name
Group in the Views folder. If the number of alarms doesn’t increase, or there still aren’t
any alarms, it could be that the Hack Server isn’t generating alarms. Contact the
instructor in this case.
Copyright 2003, Cisco Systems, Inc.
Step 5
Right-click an alarm and choose Expand Whole Details from the drop-down menu.
The Expanded Details Dialog window opens. Figure-16 and Figure-17 show this
step:
Figure-16: “Expand Whole Details” Menu
Note
The alarm named WWW IIS Internet Printing Overflow is a good one to use. This
alarm will have all the properties mentioned in this Task.
Figure-17: “Expand Whole Details” View
Copyright 2003, Cisco Systems, Inc.
IDS 4.0 Roadshow Lab 2
Step 6
Right-click on an alarm in the Expanded Details Dialog window and choose View
Alarms. The Alarm Information Dialog window opens. Figure-18 and Figure-19
show this step:
Figure-18: “View Alarms” Menu
Figure-19: “Alarm Information” Dialog View
Step 7
Right-click a column heading and choose Show All Columns from the drop-down
menu to display all the data associated with the alarm. Figure-20 shows this step:
Figure-20: “Show All Columns” Menu
IDS 4.0 Roadshow Lab 2
Copyright 2003, Cisco Systems, Inc.
Step 8
Right-click the alarm and choose Show Context from the drop-down menu to view
the context data associated with the alarm. The Decoded Alarm Context window
opens and displays the context data. Figure-21 and Figure-22 show this step:
Figure-21: “Show Context” Menu
Note
Context data will show details of the packet that triggered the alarm. Not all signatures
provide context data, so if Show Context is grayed out, pick another alarm and try
again.
Figure-22: “Decoded Alarm Context” Window
Step 9
Close the Decoded Alarm Context, Alarm Information Dialog, and the Expanded
Details Dialog windows. You should be back at the Sig Name Group view.
Note
Copyright 2003, Cisco Systems, Inc.
You may need to drag a window in order to see the close box in the upper right of the
window. You can also close windows by selecting the appropriate window in the
Windows Task Bar (usually at the bottom of the screen), right-clicking on the name, and
then selecting Close.
IDS 4.0 Roadshow Lab 2
Step 10 Right-click an alarm and choose NSDB Link… from the drop-down menu to view the
Network Security Database entry associated with the alarm. The Network Security
Database window opens as a web browser window and displays the signature
description. Figure-23 and Figure-24 show this step:
Figure-23: NSDB Link Menu
Figure-24: Example Network Security Database (NSDB) Entry
Step 11 Close the Network Security Database window.
Step 12 Repeat Steps 5−9 to view the context data associated with the other IDS appliance
events that have been generated.
You have successfully completed this Lab when you have updated the IDS appliance
system software, installed the IDS Event Viewer software, and monitored IDS
appliance events using the IEV software.
IDS 4.0 Roadshow Lab 2
Copyright 2003, Cisco Systems, Inc.