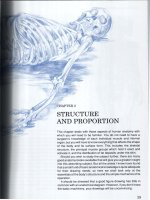
Drawing manga expressions and poses
Bạn đang xem bản rút gọn của tài liệu. Xem và tải ngay bản đầy đủ của tài liệu tại đây (13.23 MB, 82 trang )
ISBN 978-1-4488-4800-3
NEW YORK
This edition published in 2012 by:
The Rosen Publishing Group, Inc.
29 East 21st Street
New York, NY 10010
Additional end matter copyright © 2012 by The Rosen Publishing Group, Inc.
All rights reserved. No part of this book may be reproduced in any form without
permission in writing from the publisher, except by a reviewer.
Library of Congress Cataloging-in-Publication Data
Southgate, Anna.
Drawing manga expressions and poses / Anna Southgate, Keith Sparrow.
p. cm.—(Manga magic)
Includes bibliographical references and index.
ISBN 978-1-4488-4800-3 (library binding: alk. paper)
ISBN 978-1-4488-4804-1 (pbk.: alk. paper)
ISBN 978-1-4488-4808-9 (6-pack: alk. paper)
1. Face in art—Juvenile literature. 2. Expression in art—Juvenile literature.
3. Human figure in art—Juvenile literature. 4. Comic books, strips, etc.—Japan—
Technique—Juvenile literature. 5. Cartooning—Technique—Juvenile literature.
I. Sparrow, Keith. II. Title.
NC1764.8.F33S68 2012
741.5'1—dc22
2011012230
Manufactured in the United States of America
CPSIA Compliance Information: Batch #S11YA: For further information, contact Rosen Publishing, New York, New York, at 1-800-237-9932.
All other content copyright © 2007 Axis Publishing Limited, London.
CONTENTS
Introduction 4
Materials and Equipment 6
Female Figures 10
Male Figures 27
Female Faces 45
Male Faces 55
Expressions, Emotions,
and Character Types 65
Glossary 71
For More Information 73
For Further Reading 77
Index 79
A
INTRODUCTION
sweaty brow. A nervous smile. A wink of the eye. These
are all ways to use facial expressions to convey emotion in a story. In manga, a great deal of information about
the action shines through in the expressions and poses
of the characters. Manga (mahn-gah) is a style of art that appears in
Japanese comic books and graphic novels. The style is unique: characters typically have large, pronounced eyes and slender, angular bodies.
Drawing manga is fun because it allows you to create any kind
of character you want. There really isn’t any genre or style of story
that manga hasn’t affected. What can be tricky about drawing
manga, though, are the facial details. But if you follow the stepby-step directions in this book, you can ensure your characters’
eyes flash “determined” and not “depressed.” Eyes are crucial. For
instance, a sassy girl might have longer eyelashes when she’s trying
to win the attention of the school heartthrob. But when he turns
her down, you could draw dark rings around her eyes to show her
unhappiness. It’s important to remember that every character
you create can be truly unique when you add emotive flourishes.
A pose can also say a lot about the character you draw.
Suppose you have created a cool mech warrior deep-space pilot:
Does he stand up straight and take charge of every situation,
or does he slouch with his hands in his flight suit pockets, waiting
for the action to come to him? Conveying movement in a static
image can be hard, but with practice you’ll be able to make sure
your character looks like he’s springing into action and not crouching scared. So grab your gear and get drawing!
4
5
MATERIALS AND EQUIPMENT
You do not need to spend a fortune to get started in drawing and coloring good
manga art. You do, however, need to choose your materials with some care to get
the best results from your work. Start with a few basics and add to your kit as your
style develops and you figure out what you like working with.
Artists have their preferences when it comes to equipment. Regardless of personal
favorites, you will need a basic set of materials that will enable you to sketch, ink, and
color your manga art. The items discussed here are only a guide—don’t be afraid to
experiment to find out what works best for you.
paper
You will need two types of paper—one for creating sketches, the other for producing
finished color artwork.
For quickly jotting down ideas, almost any piece of scrap paper will do. For more
developed sketching, though, use tracing paper. Tracing paper provides a smooth surface, helping you sketch freely. It is also forgiving—any mistakes can easily be erased
several times over. Typically, tracing paper comes in pads. Choose a pad that is around
24 pounds (90 grams per square meter) in weight for the best results—lighter tracing
paper may buckle and heavier paper is not suitable for sketching.
Once you have finished sketching out ideas, you will need to transfer them to
the paper you want to produce your finished colored art on. To do this, you will
have to trace over your pencil sketch, so the
Graphite pencils are
paper you choose cannot be too opaque or
ideal for getting your
ideas down on paper
“heavy”—otherwise you will not be able to
and producing your inisee the sketch underneath. Choose a paper
tial drawing. The pencil
around 16 lb (60 gsm) for this.
drawing is probably the
The type of paper you use is also impormost important stage in
creating your artwork.
tant. If you are going to color using marker
Choose an HB and a 2B
pens, use marker or layout paper. Both of
to start with.
these types are very good at holding the
ink found in markers. Other paper of the
same weight can cause the marker ink to
bleed, that is, the ink soaks beyond the
inked lines of your drawing and produces
fuzzy edges. This does not look good.
You may wish to color your art using
other materials, such as colored pencils
or watercolors. Drawing paper is good for
graphite pencil and inked-only art (such as
6
MATERIALS AND EQUIPMENT
Working freehand
allows great freedom of expression
and is ideal when
you are working out
a sketch, but you will
find times when precision is necessary.
Use compasses or a
circle guide for circles
and ellipses to keep
your work sharp.
Choose compasses
that can be adjusted
to hold both pencils
and pens.
that found in the majority of manga comic books), while heavyweight watercolor
paper holds wet paint and colored inks and comes in a variety of surface textures.
Again, don’t be afraid to experiment: you can buy many types of paper in single
sheets while you find the ones that suit your artwork best.
pencils
The next step is to choose some pencils for your sketches. Pencil sketching is probably the most important stage. It always comes first when producing manga art (you
cannot skip ahead to the inking stage). Make sure you choose pencils that feel good
in your hand and allow you to express your ideas freely.
Pencils are manufactured in a range of hard and soft leads. Hard leads are designated by the letter H and soft leads by the letter B. Both come in six levels—6H
is the hardest lead and 6B is the softest. In the middle is HB, a halfway mark between
the two ranges. Generally, an HB and a 2B lead will serve most sketching purposes,
with the softer lead being especially useful for loose, “idea” sketches, and the harder
lead for more final lines.
Alternatively, you can opt for mechanical pencils. Also called self-propelling pencils,
these come in a variety of lead grades and widths. They never lose their points, making
sharpening traditional wood-cased pencils a thing of the past. Whether you use one is
entirely up to you—it is possible to get excellent results whichever model you choose.
sharpeners and erasers
If you use wooden pencils, you will need to get a quality sharpener; this is a small
but essential piece of equipment. Electric sharpeners work very well and are also
7
DRAWING MANGA EXPRESSIONS AND POSES
Felt-tip pens
are the ideal
way to ink
your sketches.
A fineliner,
medium-tip pen
and sign pen
should meet all
of your needs,
whatever your
style and preferred subjects.
A few colored
felt-tip pens can
be a good addition to your kit,
allowing you to
introduce color
at the inking
stage.
very fast; they last a long time, too. Otherwise, a handheld sharpener is
fine. One that comes with a couple of spare blades can be a worthwhile
investment, ensuring that your pencils are always sharp.
Along with a sharpener, you will need an eraser for removing any
visible pencil lines from your inked sketches prior to coloring. Choose a
high-quality eraser that does not smudge the pencil lead, scuff the paper, or
leave dirty fragments all over your work. A soft “putty” eraser works best,
since it absorbs pencil lead rather than just rubbing it away. For this reason,
putty erasers do become dirty with use. Keep yours clean by trimming it
carefully with scissors every now and then.
inking pens
The range of inking pens can be bewildering, but some basic rules will help
you select the pens you need. Inked lines in most types of manga tend to
be quite bold, so buy a thin-nibbed pen, about 0.5 mm (.02 inches) and a
medium-size nib, about 0.8 mm (.03 in). Make sure that the ink in the pens is
waterproof; this ink won’t smudge or run. Next, you will
need a medium-tip felt pen. Although you won’t need
to use this pen very often to ink the outlines of your
characters, it is still useful for filling in small detailed areas
of solid black. The Pentel sign pen does this job well.
Last, consider a pen that can create different line widths
according to the amount of pressure you put on the tip.
These pens replicate brushes and allow you to create
flowing lines such as those seen on hair and clothing. The
Pentel brush pen does this very well, delivering a steady
supply of ink to the tip from a replaceable cartridge.
Test-drive a few pens at your art store to see
which ones suit you best. All pens should produce
clean, sharp lines with a deep black pigment.
markers and coloring aids
Many artists use markers, rather than paint, to color their
artwork because markers are easy to use and come
in a huge variety of colors and shades. Good-quality
markers, such as those made by Chartpak, Letraset, or
Copic, produce excellent, vibrant results. They allow
you to build up multiple layers of color so that you can
create rich, detailed work and precise areas of shading.
8
MATERIALS AND EQUIPMENT
Markers come in a
wide variety of colors, which allows
you to achieve
subtle variations
in tone. In addition to a thick nib
for broad areas of
color, the Copic
markers shown
here feature a thin
nib for fine detail.
Make sure that you use your markers with marker or layout paper to avoid bleeding.
Markers are often refillable, so they last a long time. The downside is that they are
expensive, so choose a limited number of colors to start with, and add as your needs
evolve. As always, test out a few markers in the art store before buying any.
Markers are not the only coloring media. Paints and gouache also produce excellent results, and can give your work a distinctive look. Add white gouache, which
comes in a tube, to your work to create highlights and sparkles of light. Apply it in
small quantities with a good-quality watercolor brush.
It is also possible to color your artwork on a computer. This is quick to do,
although obviously there is a high initial cost. It also tends to produce flatter color
than markers or paints.
drawing aids
Most of your sketching will be done freehand,
but there are situations, especially with
human-made objects such as the edges of
buildings or the wheels of a car, when your
line work needs to be crisp and sharp to
create the right look. Rulers, circle guides, and
compasses all provide this accuracy. Rulers
are either metal or plastic; in most cases,
plastic ones work best, though metal ones
tend to last longer. For circles, use a circle
guide, which is a plastic sheet with a wide
variety of different-sized holes stamped out
of it. If the circle you want to draw is too big
for the circle guide, use a compass that can
hold a pencil and inking pen.
A selection of warm and cool grays
is a useful addition to your marker
colors. Most ranges feature several
different shades. These are ideal for
shading on faces, hair, and clothes.
9
FEMALE FIGURES
view from above
Drawing views from above involves foreshortening, which is a way of showing
how the eye interprets distances in unusual perspectives. Here, the torso will be
dramatically shorter than usual, and the feet will be smaller to indicate the distance
from the eye. The character is looking up at the viewer so that the face will be clearly
visible. This makes the pose more dramatic.
Draw an egg shape with the
chin facing off to one side.
Use an ellipse and triangle
for the pelvis, lines for the
legs and arms, and a circle
for the shoulder joint.
Start to add clothing
details: the collar and
sleeves of the shirt, the
ribbing on the sweater
vest and socks, and the
skirt. Add her shoes last.
10
Start to flesh out the body
by adding a torso. Then draw
in the arms, with elbows and
hands. Complete this stage by
drawing the legs, with knee
joints, and feet.
Note that there is no
neck visible from this
angle. Now add facial
features: large manga
eyes, eyebrows, a tiny
nose, and a mouth.
Add hair and fingers.
This time go to the next
stage and ink your drawing.
Choose the most important
lines to ink, and work carefully on top of the pencil
marks. You can use solid
black in some areas to give
your drawing more impact,
such as the shadow under
the chin, and her shoes.
Add some fine lines to
indicate creases and folds in
the clothing.
FEMALE FIGURES
kneeling, leaning forward
Drawing a figure with bended arms or legs can present a new challenge. This
character is kneeling down and leaning toward the viewer. Her weight is supported
by her outstretched arms and she is looking attentively with a slightly tilted head.
Draw an egg head, a curving
line for the back and ovals
for the buttocks and thighs.
Draw a curving horizontal
out to the shoulders, and
lines for the arms.
Ink all the main lines of the
drawing. Then ink the area
of neck where the collar
sits, and the swimsuit.
Leave some areas white
to add color detail later.
Add the neck and
shoulders, then give her
a torso. Next give her
arms, with hands on the
floor, then flesh out her
legs, and add a foot.
Put in the facial features of
large eyes with eyebrows,
tiny nose, and mouth. Add
long flowing hair, then start
to block out the darkest
areas of the drawing.
When the ink is dry, erase the
pencil lines. Color her skin pale pink,
then give her some red hair, leaving a white
highlight on each side. Finally use a mid blue
for the areas of detail on the swimsuit.
11
DRAWING MANGA EXPRESSIONS AND POSES
standing with attitude
As a graphic storytelling medium, manga relies heavily on body language to convey
the personality and moods of its characters. This manga girl is standing with her
arms folded and her weight on her back leg, with an arched back and slightly inclined
head, giving her a sulky, confrontational look.
Draw an egg-shaped head,
then a center line. Bisect this
and add circles for shoulder
joints and lines for arms.
Add a triangle for the pelvis
and stick legs and feet.
She is looking away to her
left, so give her pupils that
are looking in this direction. Add eyebrows, nose,
and mouth, then give her
some shaggy cropped hair.
12
Flesh out the arms and add a
torso by joining the arms and
pelvis. Draw circles for the
hip joints, then draw in the
legs. Add in large ellipses for
the feet.
Now work on the details
of the clothing. She is
wearing a fitted cropped
top with a collar, tight
jeans with a belt, and
large futuristic boots.
Ink the main lines, then use
solid black for the shadow on
the neck. Ink in the cuff of a
glove, then use a fineliner to
indicate folds in the clothing.
FEMALE FIGURES
sitting pretty
A sitting posture is an interesting challenge to a manga artist. Here is a girl in a
long demure dress, sitting attentively on a large footstool. Her hands are clasped
between her knees and her back is arched up, giving her an innocent air.
Draw an egg head and a curving center line, then bisect
the line with a horizontal line.
Add circles for the shoulder
joints and lines for the arms.
Draw an ellipse for the pelvis
and circles for the knees.
Join the head and shoulders,
and flesh out the arms. Give
her a torso. Add flesh to the
top of her left leg by joining the hip and knee joints.
Add both lower legs and the
pointed feet.
Ink all the
main lines of her face, figure,
and clothing, then ink around
the footstool, and block out the
shadow areas on her legs and
on the stool legs. Color her hair,
leaving white highlights on the
crown and on each side of her head.
Now start to get
some detail into her
face and clothing. Add
large eyes, a tiny nose,
and a smiling mouth.
Give her shoulderlength straight hair
and spiky bangs. She
is wearing a fitted
demure dress and
ballet pumps.
Use the signpen to color the
pumps. Then color her
face, neck, the bit of
visible hand, and her
legs pale pink. Use
darker pink to create
the shadow cast by
her hair on her face and
neck. Finally use a bright
red to color her dress.
13
DRAWING MANGA EXPRESSIONS AND POSES
running fast
In this pose the straight leading leg is showing the speed of the girl’s movement,
and there is a slight foreshortening on the trailing leg. Note in a running stance how
the arms and legs operate on opposite sides, so if the left leg is forward, then the
right arm is also forward, and vice versa.
Draw a balloon-shaped head
with pointed chin. Add a center
line. Use circles for the shoulders, elbow, hips, and knees,
and join with lines for the
legs and arms. Add simple fists.
Flesh out the body. Add a neck,
work along the arms and fists,
then down the torso. Work
down the nearest leg, adding
a running shoe, then flesh out
the back leg and shoe.
Work around the figure, inking the
main lines of the head, body, clothing,
and shoes. Use the inking pen to add
folds in the clothing and socks. When
the ink is dry, erase any pencil lines.
14
Give her eyes, a nose,
a mouth, and one ear.
Add spiky bangs and
tied-back hair. Create
the T-shirt and shorts,
add socks, and refine
the shoes.
Color her skin pale pink, and
blend in red-brown shadows.
Give her bright blue hair, with
darker blue shadows. Add
blue-gray for the T-shirt. Finally,
color the shoes pink.
FEMALE FIGURES
running leap
Here, a tough-looking action girl in a futuristic jumpsuit leaps into view. Her long
flowing hair trails behind her, giving a useful emphasis to her movement. Her left leg
is bent tightly forward at the knee, suggesting she has just used this leg to push off
from a point behind. The body is tightly compacted for flight, except for the right leg,
which is stretched out ready for a landing.
Create an egg-shaped head
with pointed chin, then use
a curved line for the spine.
Use circles for the shoulder
joints, elbow, and knees, and
a large circle for the hip. Add
straight lines for the bent
arm and both the legs.
Start to add some detail to
her clothing, then use your
pencil to create areas of
shading on her top and cuffs,
and on the flashes on her
pants. Give her pumping fists
and shade these, too.
Add some detail to the
body. Add the neck
and flesh out the torso.
Add the arms and legs,
making the top of the
leg closest to you fairly
muscular. Draw in simply
shaped hands and feet.
Next work on the facial
details, giving her large
expressive eyes with
arched eyebrows, and a
small nose and mouth. Use
a few simple lines to create
her hair, which is streaming
out behind her.
Ink all the main lines
of your composition.
Then use the fineliner
to indicate some folds
in the clothing around
the elbow and knees.
When the ink is dry,
carefully erase any
pencil lines you no
longer need.
15
DRAWING MANGA EXPRESSIONS AND POSES
over the shoulder
A good understanding of the figure from all sides will be useful when tackling an
unusual pose like this. A beautiful but tough-looking girl looks back over her shoulder
toward you. Her weight is balanced evenly and her knees are slightly bent in case
a fast movement is necessary. The forward tilt of the head indicates a guarded
curiosity, as if she’s heard a noise behind her that might be a threat. Her outfit is
feminine but practical, loose around the legs but with tight cuffs.
Draw an egg-shaped
head with a pointed
chin, and a curved
spine. Add circles
for the shoulders
and elbows, and join
with lines. Draw two
ellipses for the buttocks and a straight
line for the waist, and
join these to create
hips. Draw lines for
the legs and triangles
for the feet.
With the basic body
in place, it’s time to
add facial details.
Give her large eyes, a
button nose, and a
tiny mouth. Add the
ear that can be seen,
then give her spiky
bangs and use a few
pencil lines to indicate hair.
16
Join the head and
shoulder line to create a neck. Draw the
curve of her visible
side, then flesh out
the arms and legs.
Note that only one
hand can be seen.
Add clothing details.
She has a stand-up
collar and sash trim
over her right shoulder. Loose and flowing
below-the-knee pants
complete her outfit.
FEMALE FIGURES
model behavior
This character is striking a tongue-in-cheek modelling pose, as suggested by one
hand on the hip and the other playing with her hair. She’s coyly bending her left leg,
and she has a happy smiling expression with closed eyes. Note the small, pointed
ears, which are a feature on many manga characters, and give a slight fantasy air.
Long blazing orange hair completes the look.
Start with an egg shape for
the head. Add a center line
and a shoulder line. Add
circles for the shoulder, hip,
knee, and elbow joints, and
lines for the limbs.
Get some detailing into
her face. Her eyes are narrow slits, and her mouth
is a grin. Add spiky bangs
and knee-length flowing
locks down her back.
Flesh out the body, working
from the neck along the arms
and down the torso and legs.
Draw the fingers of her right
hand on her hip.
Add details on the clothes.
She is wearing a cropped top
and shorts with white trimming. Shade these lightly in
pencil. Add shoes, and a
couple of bangles on her wrist.
Ink, then color your girl.
Use pale pink for her skin,
leaving white highlights and
adding dark beige shadows.
Give her striking orange
hair, leaving a white highlight
on top. To complement the
orange, make her suit and
pumps acid green.
17
DRAWING MANGA EXPRESSIONS AND POSES
walking on air
Here is a simple but graceful pose, which can be used to indicate a happy carefree
mood or a free-spirited girl. Her expression is wide-eyed and smiling, and she has
one leg bent up at the knee and her arms stretched out wide on both sides of her,
as if she’s enjoying the breeze blowing over her. In manga a character can literally
defy gravity and walk on air if the mood strikes her.
Draw an egg-shaped head and a
center line. Bisect this with a horizontal line for the shoulders, and
two lines for the arms. Draw a
triangle for the hips, ovals
for the knee joints,
and verticals for
the legs.
Add facial features: large eyes, a small
nose, and an open mouth. Give her
spiky bangs and flowing hair. Add her
hands and outstretched fingers.
18
Start to flesh out the figure. Give her a slim neck,
ovals for the shoulders,
and add the outstretched
arms. Her waist is tiny,
going into the pelvis.
Add legs, and the foot
of her right leg.
Now add clothing. She is dressed majorettestyle in a buttoned shirt with collar and
epaulettes, shorts, and boots. Shade the collar, epaulettes, shorts, and boots; only the
cuff and foot of the right boot can be seen.
FEMALE FIGURES
sitting daydreaming
Nothing beats a quiet moment sitting and daydreaming. Imagine this manga girl
sitting on the grass on a cool summer evening. Her hands are clasping her shins and
she’s looking happily upward at the viewer, with her head tilted backward in an open
and relaxed pose.
Draw an oval head, two
circles for the two shoulder
joints and the hip, a rectangle with a curved profile
for the torso, and straight
lines for the arms and legs.
Create the basic profile. Her
back is a curve: sketch one
line joining both shoulder
joints, and one from the chin
down. Add the legs.
Add spiky bangs, with a ponytail down her back. Then start
to indicate her clothing: she
is wearing a cropped top with
detailing around the neck and down
the front, and shorts with cuff detail.
Indicate the top of her boots.
Make two parallel horizontal lines across her face and
use these as guides for her
large eyes and tiny ears.
Add a nose and mouth,
then flesh out the arms.
Start to ink your sketch,
concentrating on the most
important lines. Add more facial
detail, inking the pupils and
around the twin highlights in
each eye. Outline the
mouth and add
two or three tiny
vertical lines to
the nose.
19
DRAWING MANGA EXPRESSIONS AND POSES
wielding a sword
Not all manga girls are shy and fragile creatures. Here is a good example of a
confident action girl who is ready for a fight with sword poised. Her stance is
balanced with legs apart for stability, and the long sash at her waist is used to give a
dramatic effect of movement and tension.
Draw an oval head, and
a center line down to a
triangle for the pelvis. Add
lines for the legs, with ovals
for the knee joints. Add oval
shoulder and elbow joints.
Ink in the main lines of your
sketch. Then use a brush pen
to color in the black areas
of her costume: the fitted top, and
the detail on the pants and shoes.
There is an area of shadow on the
skirt cape, and a fold in its band.
20
Add flesh to your basic
shape. Join the neck
and shoulders, then
create a torso, with
trim waist. Add legs
and feet, then the arms.
Work in facial features of
eyes, nose, and mouth. Add
a spiky hairdo: continue this
down to her waist. Draw
a sword in her hands, and
start to indicate clothing.
The outfit has a bold
black-and-white pattern, so
minimal color can be used.
Add some light gray shadows
to the arms and legs to give
depth, then color her face
and neck a fleshy pink, with
darker beige shadows under
the fringe and neck. Use an
orange for the pupils, and add
some pale mauve shadow to
her white hair. Add gold color
to the sword hilt, and a rich
purple to the sash. Finish
with some soft white pencil highlights on the sash
and body, and some
blue-gray shadows
on the blade.
FEMALE FIGURES
down on one knee
A difficult pose to get right is kneeling down, which again requires a good knowledge
of your character’s body shape. Here is a warrior girl taking a moment of rest. She
is propping herself up with her traditional katana sword in its sheath, and surveying
the view. Her body is balanced with left knee up and the right on the ground, with
her right hand resting across the thigh.
Draw circles for the head,
shoulder joints, and one
visible elbow, with lines to
join the shoulders and for
the arms. Draw a curved
spine, and an oval for the
hip joint. The legs at this
stage are both angled lines.
Refine the profile of her
face, then add a neck.
Add a torso with a trim
waist, and two curves for
breasts. Flesh out her left
arm, adding an outline
hand. Next flesh out her
legs. Both are bent at the
knee: the knee of her
right leg is on the ground,
while her left knee is
in the air, with her foot
steadying her. Indicate
both feet.
Work next on her facial features.
Give her large eyes with double
highlights, eyebrows, a snub
nose, and small mouth. Add her
right ear and flesh out her right
arm, adding fingers resting on
her left thigh. Now indicate the
sword: this runs behind her hand
and down to the ground on a
plane with her right leg and left
toe. Draw a line for the hilt.
21
DRAWING MANGA EXPRESSIONS AND POSES
Give her a hairband, and then
add spiky hair above it and
down her back. Now start
to get some details into
the clothing. Give her a
military-style jacket with
stand-up collar, fabric
closures, and decorative
flashes on the sleeves. Her
pants also have decorative
flashes. Then add detail
to the sword.
Ink in the main lines of your sketch. Refine
the clothing details and add detail to the
boots. Create a rectangular pattern on the
sword. Next use black to color her pupils,
and create the shadow on her neck and on
the underside of the hilt.
22
The coloring is a dull,
military-style gray for the
uniform, with bright yellow trim. Use a pale beige
for the skin, and a bright
green for her hair. Use
darker tones for shading
to give extra weight to
the figure.
FEMALE FIGURES
popular female poses
There are several poses that recur in manga time and time again, and it is worth
drawing these so that you can tell more of your story through your characters’ body
language, as well as through their faces and clothes.
below This pose is worried:
the girl is anxious and nervous. Her knees are knocked
together and she is slightly
hunched over in a defensive
body position.
above This is a demure, submissive girl in a Japanese kimono.
Breaking free of tradition and
leading the exciting life of a modern young woman is a common
theme.
above Here’s a girl who is running
away from something in alarm. She is
leaning forward and away from the
danger, while her eyes are glancing
fearfully back toward it.
right Under threat, this girl is poised
and ready to defend herself. Her stance
is resolute, with her legs set wide apart
and her arms crossed in front of her.
The hands are ready for action.
23
DRAWING MANGA EXPRESSIONS AND POSES
left Assertive, but not in the least
aggressive, this is a confident pose.
The girl is sitting in a comfortable
pose, looking happy and slightly
mischievous.
below With her feet planted
firmly on the floor, and her
hand brought up into a fist,
this girl has a gutsy air. This
is a common pose in manga,
designed to say, “I did it.”
right With fists at the ready
and fiery hair, this is a feisty
pose. Even though she is wearing a stylish dress, this girl is not
afraid to get her hands dirty.
left This girl has a wistful pose,
as if daydreaming. Her chin is
resting on her hands and her
knees are together with her
feet apart. She’s gazing into
the distance with a slight smile
and her eyes show a hint of
concentration.
24