Download test bank for microbiology a laboratory manual 9th edition by cappuccino
Bạn đang xem bản rút gọn của tài liệu. Xem và tải ngay bản đầy đủ của tài liệu tại đây (888.47 KB, 61 trang )
Test Bank for Microbiology A Laboratory
Manual 9th Edition by Cappuccino
Link full download:
/>
1
EXPERIMENT 1
Culture Transfer Techniques
Aseptic technique forms the basis for the successful
manipulation of organisms in the microbiological
laboratory. The development of proper aseptic
transfer methods can be acquired only through the
repetitive performance of this task until the steps
involved become second nature to the student. To
accomplish this end, it is advisable to allow students
to practice this technique using cultures and sterile
media in various forms, for example, agar slants,
agar deeps, and broths. The necessary manual
dexterity required for the handling of culture tubes
and closures while flaming inoculating instruments
will be acquired through repetition.
Equipment
Materials
Cultures
Procedural Points to
Emphasize
1.
Beginning students in microbiology have
difficulty appreciating the diminutive size of
microorganisms. Thus, they have the tendency
to procure excessive amounts of inoculum for
transfer. It should be stressed that the
inoculating instrument needs only to touch the
growth, not to be dragged over the agar, to
obtain a sufficient number of cells for the
transfer. When broth cultures are used, the
organisms must be suspended by vigorous
tapping of the bottom of the tube. A single
loopful will suffice for use as the inoculum.
2.
It should be stressed that the transfer procedure
should be performed as rapidly as possible.
However, to ensure that viable cells are
obtained from the stock culture, the hot loop or
needle must be cooled by tapping it against the
inner surface of the culture tube before securing
the inoculum.
24-hour nutrient broth culture of S. marcescens
(labeled ―A‖)
24-hour nutrient agar slant culture of S.
marcescens
Sterile water (labeled ―B‖)
Per Lab
Group
Microincinerator or
Bunsen burner
1
Inoculating
loop/needle
1
Glassware marking
pencil
1
Media
Per Lab
Group
2
Nutrient broth tube
3
Nutrient agar slant
tube
3
Nutrient agar deep
tube
3
Experiment 1
Per Class
Per Class
3.
The students should be reminded that the entire
inoculating wire must be flamed until it turns
red.
c. Insertion of a hot needle directly into or
onto the culture medium must not be done, as
this will kill the cells.
d. Flaming the neck of the test tube is a
precaution intended to kill any organisms that
might be present on the neck of the tube or the
inner surface of the closure if the aseptic
procedure has been compromised.
Tip
Considering students are novices and lack the
necessary manual dexterity at this point, it is
wise for the instructor to circulate through the
laboratory and assist students who are unable to
manipulate the uncapping and recapping of
culture tubes while holding the transfer
instrument.
Additional Reading
Lypson, M. L., Hamstra, S. J., Ross, P. T.,
Gruppen, L. D., & Colletti, L. M. (2010). An
assessment tool for aseptic technique in resident
physicians: A journey towards validation in the
real world of limited supervision. The Journal
of Graduate Medical Education, 2(1):85–9.
2.
The purposes of the subculturing procedure are
intended to establish a routine method for the
transfer from one medium to another for the
preparation and maintenance of stock cultures
and to provide media for the performance of
microbiological test procedures.
3.
A straight inoculating needle is used to
inoculate an agar deep tube in order to maintain
the redox potential of the medium.
4.
The absence of pigmentation on some S.
marcescens colonies is not necessarily
indicative of contamination. This organism is
capable of producing variants that may not
produce any pigment. Thus, some colonies are
red, while others are colorless. Also, the rate of
pigment production may vary within one
culture, producing a mixture of pigmented and
nonpigmented colonies.
5.
To determine the presence of contamination in
the S. marcescens culture, make Gram-stained
preparations of both a colony suspected of
contamination and a pigmented colony. Streakplate preparations of both colonies may also be
helpful for a comparison of cultural
characteristics.
Answers to Review Questions
1.
a. The inoculating instrument is flamed prior
to inoculation to prevent contamination of the
stock cultures. Flaming after inoculation
prevents contamination of the laboratory table
when the instrument is returned to the table.
b. The test tube closures are held in the
manner prescribed to maintain their sterility.
Once removed, they must be kept between the
fingers of the hand and never placed on the
laboratory tabletop.
3
EXPERIMENT 2
Techniques for Isolation of Pure Cultures
The purposes of this experiment are to instruct
students in the preparation of pure cultures from a
mixed microbial population and to compare the
cultural characteristics of the resultant agar plate and
agar slant cultures. Toward this end, students are
first introduced to two methods that are used to
separate microorganisms, namely the streak-plate
and spread-plate techniques. The ensuing transfer of
isolated colonies onto agar slants will also enhance
the students’ ability to use aseptic techniques
(Figures 2.1, 2.2, and 2.3). An alternate method for
guiding students with limited laboratory experience
through the process of making a streak plate has
now been added and illustrated in Figure 2.3. This
method utilizes a quadrant approach that may be
easier for the students to visualize than the
traditional four-way method illustrated in Figure 2.1.
Media
PART A
Trypticase® soy agar
plates
PART B
Trypticase soy agar
slants
PART A
24- to 48-hour nutrient broth cultures of:
1:3 S. marcescens/M. luteus mixture
1:10 E. coli/M. luteus mixture
Environmental culture obtained by students
PART B
24- to 48-hour streak-plate and/or spread-plate
cultures of:
1:3 S. marcescens/M. luteus mixture
1:10 E. coli/M. luteus mixture
Environmental culture from Part A
4
Experiment 1
Per Class
3
Per Lab
Group
Per Class
4
Equipment
Per Lab
Group
Materials
Cultures
Per Lab
Group
Microincinerator or
Bunsen burner
1
Inoculating loop/needle
1
500-ml beaker of 95%
ethyl alcohol
1
Turntable
1
L-shaped bent glass rod
1
1-ml tube of sterile
water
1
Cotton swabs
as
needed
Test tube rack
1
Per Class
Procedural Points to
Emphasize
1.
2.
Students should be made aware that the streakplate technique is the most frequently used
procedure for the separation of organisms from
a mixed culture, whereas spread-plate
preparations are used preferentially for the
quantitation of cell populations.
b. It is essential that the inoculating
instrument be flamed and cooled prior to the
inoculation of each area of the plate.
c. Once the inoculum is obtained from the
previously streaked area, the loop or needle
should not be passed over that area again during
the streaking process.
4.
Additional Readings
Glasson, J. H., Guthrie, L. H., Nielsen, D. J., &
Bethell, F. A. (2008). Evaluation of an
automated instrument for inoculating and
spreading samples onto agar plates. Journal of
Clinical Microbiology, 46(4):1281–4.
Gröbner, S., Beck, J., Schaller, M., Autenrieth,
I. B., & Schulte, B. (2012). Characterization of
an Enterococcus faecium small-colony variant
isolated from blood culture. International
Journal of Medical Microbiology, 302(1):40–4.
Students should be apprised of the following
when performing the streak-plate procedure:
a. Petri dish covers should never be
completely removed; this will avoid exposing
the medium and the cover to exogenous
contamination. The cover should be raised and
held at the smallest angle that is sufficient for
the introduction of the inoculating wire, and it
should be done only for as long as it takes to
inoculate each designated area of the plate.
3.
presented in Experiment 3, is frequently omitted. In
order to gain an awareness of differences in cultural
characteristics, it is suggested that students observe
their culture preparations from Experiment 3 to note
these variations.
As this is the first time students are performing
plate inoculations, they should be reminded of
the fact that agar plate cultures are always
incubated in an inverted position.
Spread-plate technique: Using a ―lazy-Susan‖
Petri dish turntable and a sterile bent glass rod,
a drop of mixed culture is placed on the surface
of the agar and is spread by spinning the
turntable and moving the glass rod back and
forth over the agar surface. In this way, the
culture is distributed evenly and should produce
distinct discrete colonies.
Optional Procedural Additions
or Modifications
Because of the time constraints in the laboratory, an
expanded examination of cultural characteristics, as
Answers to Review Questions
1.
A pure culture can be obtained from a mixed
culture only by first performing a streak-plate or
spread-plate inoculation for the separation of
the organisms into discrete colonies.
2.
If Quadrant 4 of a streak-plate inoculation
contains more growth than Quadrant 3, either
the inoculating wire was repeatedly dragged
through Quadrant 3 or, more likely, it entered
Quadrant 1 during its inoculation.
3.
The inoculating needle is the instrument of
choice to isolate individual discrete colonies
because it is thin enough to touch the center of
the colony.
The center of the colony is the best area for
isolation and transfer to an agar slant as a
subculture. An inoculating loop is too imprecise
and therefore unsatisfactory.
4.
The purity of a chosen colony may be
determined by the following:
a. Subculturing the isolate in a broth medium
or on an agar slant medium
b. Gram staining the subculture following
incubation to verify its purity
5
EXPERIMENT 3
Cultural Characteristics of Microorganisms
Cultural characteristics are determined genetically
for each particular organism. As such, these
characteristics remain constant and are reproducible.
This property of colonial constancy is important
because it allows the microbiologist to use these
macroscopic growth patterns as an aid in the
identification of various microbial species. A
standard descriptive vocabulary has been developed
to describe the cultural and colonial appearance of
microorganisms grown in artificial culture media.
This vocabulary is used in a source such as Bergey’s
Manual of Systematic Bacteriology.
Materials
Equipment
Per Lab
Group
Microincinerator or
Bunsen burner
1
Inoculating loop
1
Inoculating needle
1
Glassware marking
pencil
1
Crushed ice
Cultures
24-hour nutrient broth cultures of:
P. aeruginosa
B. cereus
M. luteus
E. coli
Procedural Points to
Emphasize
1.
A single cell dividing by binary fission on agar
divides thousands of times, producing a single
round colony. Its appearance is determined by
fundamental characteristics, such as pigment
production, type of cell wall, presence or
absence of a capsule, and motility.
2.
These characteristics are under genetic control;
however, the cell’s macroscopic expression may
be tempered by environmental conditions, such
as temperature, nutrients, and pH.
3.
Because of environmental conditions, growth
patterns may not always coincide exactly with
those illustrated in the figures in the manual.
Media
6
Nutrient agar plates
5
Nutrient agar slants
5
Nutrient gelatin tubes
5
Experiment 2
as needed
Organisms are prepared in bulk (inoculated into 500
ml of broth) and then dispensed in 10-ml aliquots in
sterile 16 100-mm test tubes.
72- to 96-hour Trypticase soy broth culture of:
M. smegmatis
Per Lab
Group
Per Class
Per Class
Copyright © 2017 Pearson Education, Inc.
Tip
Additional Reading
Gelatin cultures: For the rapid resolidification
of liquefied gelatin, cultures should be
refrigerated for about 30 minutes. This process
can be expedited by placing liquefied tubes in a
beaker of crushed ice for a few minutes to
determine if gelatin remains liquefied.
Sutula, J., Coulthwaite, L., & Verran, J. (2012).
Culture media for differential isolation of
Lactobacillus casei Shirota from oral samples.
Journal of Microbiological Methods [Epub
ahead of print] PubMed PMID: 22484087.
7
EXPERIMENT 4
Microscopic Examination of Stained Cell
Preparations
The compound microscope is an indispensable tool
in the study of microbiology. Instructors may find
that some of their students’ past experience with
microscopy has been limited to the use of the lowand high-power objectives, which provide only
sufficient magnification for viewing eukaryotic
cells. However, the visualization of microorganisms,
particularly prokaryotes, requires that the students
become adept in the use of the oil-immersion
objective.
Materials
Equipment
Per Lab
Group
Compound
microscope
1
Lens paper
as needed
Immersion oil
as needed
Xylol
as needed
Per Class
Slides
Stained slides of selected microorganisms, prepared
by the instructor, may be substituted for the
commercial slide preparations. Following their use,
the immersion oil can be removed from the slides
with the application of xylol and gentle blotting with
lens paper.
Cultures
S. aureus
B. subtilis
A. itersonii
S. cerevisiae
Human blood smear
8
Experiment 3
Procedural Points to
Emphasize
1.
Students should be made aware of the fact that
the microscope is an expensive piece of
equipment, and, therefore, proper care is
required at all times. To prevent damage to the
microscope, it is important to emphasize the
proper means of transporting it to and from the
laboratory bench. Also, to maintain the
instrument in proper working condition,
students must check the objective lenses for the
presence of residual oil at the start and end of
each laboratory session. Oil is removed with
lens paper; the lenses are then cleaned with
Windex® and wiped with dry lens paper. Xylol
is never to be used by students for the removal
of oil from the lens system of the microscope.
Copyright © 2017 Pearson Education, Inc.
2.
In addition to the instructions in the manual for
the proper use of the oil-immersion objective,
the following are some suggestions that may be
helpful to facilitate student use of this objective.
2.
b. The coarse adjustment is used to bring the
specimen into view.
a. Following the addition of the immersion oil
to the slide or its coverslip, rotate the nosepiece
to the oil objective in the direction that does not
bring the high-power objective into contact with
the immersion oil.
b. Viewing specimens under oil immersion
requires more light than under the lower-power
objectives. To ensure proper light transmission
through the specimen, the condenser must be
fully raised to the fixed platform, and the iris
diaphragm must be adjusted. Students should
also be made aware of the fact that differences
in specimen density will require the
readjustment of the iris diaphragm with each
slide preparation.
c. Because microscopes are parfocal, when
focusing under the oil-immersion objective, the
coarse adjustment is never used. The fineadjustment knob is turned slowly in both
directions until the specimen is in sharp focus.
Additional Reading
Santos, M. J., Cavaleiro, F., Campos, P., Sousa,
A., Teixeira, F., & Martins, M. (2010). Impact
of amoeba and scuticociliatidia infections on the
aquaculture European sea bass (Dicentrarchus
labrax L.) in Portugal. Veterinary Parasitology,
171(1–2):15–21.
a. The iris diaphragm adjusts the amount of
light coming through the specimen.
c. The fine adjustment brings the specimen
into sharp focus.
d. The condenser directs the light from the
light source into the lens system.
e. The mechanical stage controls the position
of the specimen over the central opening in the
stage.
3.
a. Inability to bring the specimen into sharp
focus may be caused by an insufficient or an
excessive amount of oil on the slide or failure to
position the fine adjustment at the midpoint of
its range prior to focusing with the coarseadjustment knob. Repeat the procedure for
focusing under oil immersion with special
attention to the instructions above.
b. Insufficient light may be corrected by
raising the Abbé condenser completely and
adjusting the iris diaphragm.
c. Accumulation of dust particles and debris
on the ocular lens or the prepared slide is a
frequent cause of the appearance of artifacts in
the microscopic field. Clean both with lens
paper and Windex.
Answers to Review Questions
1.
The body tube of a microscope is never lowered
while looking through the ocular lens to ensure
that the objective lens and the slide are not
damaged by the forceful contact between the
two.
9
EXPERIMENT 5
Microscopic Examination of Living Microorganisms
Using a Hanging-Drop Preparation or a Wet Mount
Visualization of the single-celled bacteria in the
unstained state is a challenging experience for
beginning students of microbiology. To lower the
frustration level of students, the instructor should
apprise them of the fact that differentiating living
bacteria from microscopic debris is an arduous task.
Materials
Cultures
24-hour nutrient broth cultures of:
P. aeruginosa
S. aureus
B. cereus
P. vulgaris
Hay infusion* or pond water (optional)
*
See Appendix 3 for preparation of hay infusion broth.
Equipment
Per Lab
Group
Compound
microscope
1
Microincinerator or
Bunsen burner
1
Inoculating loop
1
Depression slides
4–6
Glass microscope
slides
4–6
Coverslips
4–6
Petroleum jelly
as needed
Cotton swabs
as needed
Eyedropper
10 Experiment 4
Copyright © 2017 Pearson Education, Inc.
1
Per Class
Procedural Points to
Emphasize
1.
It may be helpful to the students for the
instructor to prepare a demonstration to clarify
the distinction between Brownian movement
and bacterial motility.
2.
As this may be the first time that students are
required to transfer microorganisms from sterile
cultures, it is important to stress the principles
of aseptic transfer techniques. Review the steps
as outlined in Experiment 2.
3.
This is a good opportunity to instruct the
students in the proper procedures for the
disposal of contaminated materials and
equipment. The immersion of the hanging-drop
slides into a container of disinfectant is
recommended.
Additional Reading
2.
Living microbial preparations are done to detect
physiologic processes, such as motility and
binary fission, and to observe their natural size
and shape. Stained smears, on the other hand,
distort the size, shape, and arrangement and
allow you to view only dead organisms; thus, it
is not possible to see motility.
3.
True motility is a directional movement, while
with Brownian movement, the microorganisms
vibrate at a constant rate without progressing in
any particular direction.
4.
True motility and uniformity in the shape of the
particles can be used as criteria for
differentiation of living organisms from debris.
The distinction between viable and nonviable
particles may not always be accurate,
particularly when viewing the smaller lifeforms. Similarities between refractive indices,
size, shape, and their movement may preclude
distinction between the particles.
Minion, J., Pai, M., Ramsay, A., Menzies, D., &
Greenaway, C. (2011). Comparison of LED and
conventional fluorescence microscopy for
detection of acid fast bacilli in a low-incidence
setting. PLoS One, 6(7):e22495.
Answers to Review Questions
1.
Bacteria are more difficult to observe in an
unstained state because of their small size, the
movement of cells caused by Brownian
movement or motility, and their refractive
index, which is similar to that of water.
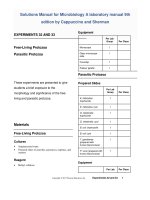
11
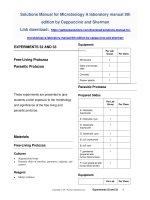
EXPERIMENTS 6 AND 7
Preparation of Bacterial Smears
Simple Staining
These initial staining exercises are designed to
instruct students in the proper technique for the
preparation of a bacterial smear, which is the
prerequisite for all staining procedures. In addition,
the microscopic observation of the stained smears is
intended to familiarize students with cellular
morphology—the size, shape, and arrangement of
bacteria. The performance of these experiments will
also reinforce the use of the oil-immersion lens.
Materials
Both broth and agar slant cultures of the selected
organisms should be available in order for students
to gain experience in performing aseptic transfers
and bacterial smear preparations from both types of
cultures.
Equipment
Per Lab
Group
Glass microscope
slides
7
Microincinerator or
Bunsen burner
1
Inoculating loop
1
Inoculating needle
1
Glassware marking
pencil
1
Preparation of Bacterial Smears
Simple Staining
Cultures
Cultures
24-hour cultures of:
Nutrient agar slant of B. cereus
Nutrient agar broth of S. aureus
24-hour cultures of:
Nutrient agar slant of B. cereus
Nutrient agar slant of E. coli
Nutrient broth of S. aureus
12
Experiment 5
Copyright © 2017 Pearson Education, Inc.
Per Class
Reagents
4.
When heat fixing a smear, students should be
instructed to pass the slide through the outer
portion of the flame to prevent overheating the
smear. Excess heat can distort the morphology
through plasmolysis of the cell wall.
5.
In performing the staining procedure, students
are frequently afraid to sufficiently wash their
slides following the application of each staining
reagent. It should be emphasized that if the
smear is heat fixed properly prior to the start of
the staining procedure, then this fear is
unfounded. Furthermore, they should be
instructed to wash both sides of the slide under
running water to remove all residual stain, as it
may interfere with the microscopic recognition
of the microorganisms.
Methylene blue
Crystal violet
Carbol fuchsin
Equipment
Per Lab
Group
Microscope
1
Glass microscope
slides
3
Bibulous paper
Per Class
as needed
Staining tray/rack
1
Tips
Microincinerator or
Bunsen burner
1
Inoculating needle
1
Glassware marking
pencil
1
Agar cultures are used in this experiment to help
the student prepare smears of the correct
thickness. A good smear should allow the student
to read newsprint through the smear. Broth
cultures, on the other hand, allow the student to
view the morphological characteristics on the
smear because the cells are widely separated and
do not clump on the smear.
These slides could be saved and used in
Experiment 9. Finished slides can be wrapped
in paper toweling and secured with a rubber
band.
Procedural Points to
Emphasize
1.
2.
3.
As the students are still novices in aseptic
transfer techniques, a review of this procedure
is recommended.
Students should be cautioned to clean slides
well. A dirty or greasy slide will produce a poor
smear preparation because grease may prevent
the smear from adhering to the glass. Likewise,
grease may cause the suspension to coalesce
and not spread evenly on the slide. Dust
particles on a slide might easily be mistaken for
microorganisms.
Students tend to use too much inoculum when
preparing their bacterial smears from agar slant
cultures. It should be stressed that a sufficient
number of organisms will be obtained by
touching the surface of the culture with a loop
or needle without digging into the agar. It
should also be mentioned that broth cultures
should be gently mixed to suspend the
microorganisms that may have settled in the
bottom of the tube prior to the transfer of the
loopful of inoculum to the slide.
Additional Readings
Weinstein, R. A., Bauer, F. W., Hoffman, R. D.,
Tyler, P. G., Anderson, R. L., & Stamm, W. E.
(1975). Factitious meningitis. Diagnostic error
due to nonviable bacteria in commercial lumbar
puncture trays. Journal of the American
Medical Association, 233(8):878–9.
Youssef, D., Shams, W., Ganote, C. E., & AlAbbadi, M. A. (2011). Negative image of
blastomyces on diff-quik stain. Acta Cytologica,
55(4):377–81.
Copyright © 2017 Pearson Education, Inc.
Experiments 6 and 7
13
Answers to Review Questions
Preparation of Bacterial Smears
1.
2.
3.
4.
14
Simple Staining
1.
Thick smears do not allow sufficient light to
pass through the preparation for good
visualization of the organisms. Also, dense
smears
contain
tightly
packed
and
superimposed cells that do not lend themselves
to accurate determination of cell shape and
arrangement.
Basic dyes are used preferentially for bacterial
staining because the chromogen is cationic and
has an affinity for the negatively charged DNA.
Also, the bacterial cell surface generally has a
negative charge, which attracts the basic stain.
2.
Air-drying prevents the cells from shrinkage
and distortion, thereby protecting their size and
shape, and allows for the visualization of the
natural cellular morphology.
Simple staining procedures cannot be used for
purposes other than the determination of cell
morphology.
The
structural
bacterial
components are too small to be viewed with a
simple light microscope.
3.
Failure to heat fix the E. coli smear would result
in the loss of the smear during the staining
process. Heat is required to cause coagulation of
bacterial proteins, which then adhere to the
glass slide. The sparse number of remaining
cells would not be readily discernible.
4.
The coffee-discolored laboratory coat is not
permanently stained, and the color will wash
out. The reason for this is that the coffee is not a
stain. It is only a chromogen and lacks the
auxochrome component. Therefore, ionization
cannot occur, and there will be no binding to the
cloth fibers.
Excessive heating may distort the morphology,
causing plasmolysis of the cell wall. On the
other hand, an improperly heat-fixed smear
could wash off the slide.
The presence of grease from fingers or any
other exogenous source may interfere with the
adherence of the culture to the slide and will
result in the production of an unsatisfactory
smear. The presence of dirt or dust on the glass
surface will produce artifacts in the stained
smear and serve as a source of confusion for the
student viewing the organisms in the stained
smear.
Experiments 6 and 7
Copyright © 2017 Pearson Education, Inc.
EXPERIMENT 8
Negative Staining
Negative staining is presented as an alternative
technique to the hanging-drop procedure for the
observation of living cells. Because the smears are
not heat fixed and the stain used does not penetrate
into the cells, the organisms remain viable.
Procedural Points to
Emphasize
1.
As bacterial smear preparations for negative
staining differ to some extent from conventional
staining procedures, students should be
reminded not to heat fix the smear. Also it may
be advisable to demonstrate the technique for
spreading the smear with the aid of a second
glass slide.
2.
As the bacteria are not killed during the
negative-staining procedure, students should be
instructed in the importance of discarding the
slides into a beaker containing disinfectant
following their microscopic examination.
Materials
Cultures
24-hour nutrient agar slant cultures of:
M. luteus
B. cereus
A. itersonii
Reagent
Nigrosin stain
Optional Procedural Additions
or Modifications
Equipment
Per Lab
Group
Microscope
1
Glass microscope
slides
6
Lens paper
Per Class
The experimental procedure may be modified to
include the staining of an organism by both simple
and negative staining to allow students to compare
the observed results.
Tips
The instructor should emphasize that these
organisms are not heat fixed and thus are viable.
Students should be given the option to use
disposable gloves.
Some labs reuse slides for negative staining.
Only new and clean slides should be used in
this experiment.
as needed
Staining tray/rack
1
Microincinerator or
Bunsen burner
1
Inoculating loop
1
Copyright © 2017 Pearson Education, Inc.
Experiments 6 and 7
15
such as nigrosin, is required so that it does not
bind to the negatively charged cell surface.
Additional Reading
Baradkar, V., Mathur, M., De, A., Kumar, S., &
Rathi, M. (2009). Prevalence and clinical
presentation of Cryptococcal meningitis among
HIV seropositive patients. Indian Journal of
Sexually Transmitted Diseases, 30(1):19–22.
Answers to Review Questions
1.
16
2.
Negative staining allows the visualization of
living microbial cells that have not undergone
distortion by heat fixation.
3.
The nigrosin is an anionic acidic stain and does
not have an affinity for the negatively charged
cell surfaces. As such, the dye colors the
background, and the cells remain unstained.
Methylene blue as a basic, cationic dye cannot
be used in negative staining. An acidic stain,
Copyright © 2017 Pearson Education, Inc.
EXPERIMENT 9
Gram Stain
The Gram stain is one of the first procedures to be
performed for the identification of microorganisms.
As such, it is the ―workhorse‖ for microbiologists in
both academic and health-related fields. In the
classroom setting, it serves as the prototype for a
variety of other differential staining procedures.
Materials
Cultures
18- to 24-hour nutrient agar slant cultures of:
E. coli
B. cereus
S. aureus
Reagents
Crystal violet
Gram’s iodine
95% ethyl alcohol
Safranin
Equipment
Per Lab
Group
Microscope
1
Glass microscope
slides
4
Staining tray
1
Lens paper
as needed
Bibulous paper as
needed
as needed
Microincinerator or
Bunsen burner
1
Inoculating
loop/needle
1
Copyright © 2017 Pearson Education, Inc.
Per Class
Experiment 8
17
American Journal
132(1):18–25.
Procedural Points to
Emphasize
1.
2.
As the Gram stain is the most frequently
performed differential staining technique, the
instructor should explain the functions of the
chemicals used in differential staining as well as
the chemical basis of this procedure.
The most critical step in all differential staining
procedures, including the Gram stain, is the
decolorization process. Students should be
cautioned that the density of the smear will be a
major factor in determining the amount of
decolorizing agent necessary for proper
decolorization of the smear. Thus, the method
used by the instructor should be explained and
demonstrated. The authors have found that this
step can be best achieved by the application of
95% ethyl alcohol in a dropwise fashion with
intermittent washing. When the water bubble
clinging to the edge of the slide is almost clear,
decolorization is complete.
3.
It should again be stressed that thorough
washing of the slides under running water
between the applications of all staining reagents
is essential to remove excess chemicals.
4.
Caution students to blot with bibulous paper
and not to rub the bibulous paper.
Tips
Fresh cultures, 18–24 hours old, are necessary
for optimum Gram staining reactions. Older
cultures tend to produce gram-variable results.
Aqueous crystal violet should be fresh and
filtered before use.
Washing of stained smears should be done
carefully. Overwashing should be avoided so as
not to overdecolorize the preparation.
Clothespins may be used as slide holders if
desired.
Considering this is the first time students are
performing a differential stain, the instructor may
wish to demonstrate the method for the class.
Additional Reading
18
Uehara, Y., Yagoshi, M., Tanimichi, Y.,
Yamada, H., Shimoguchi, K., Yamamoto, S.,
Yanai, M., & Kumasaka, K. (2009). Impact of
reporting gram stain results from blood culture
bottles on the selection of antimicrobial agents.
of
Clinical
Pathology,
Answers to Review Questions
1.
Simple staining uses a single dye and stains all
cells and their cytological components the same
color. Thus, these procedures can be used only to
determine cell morphology. Differential staining
utilizes two stains of contrasting colors that allow
for the separation of bacteria into groups, for
example, Gram stain, or for the visualization of
cellular structures, for example, flagella.
2.
a. The primary stain is the first stain used and
imparts color to all cells.
b. The mordant is a chemical that acts as an
intensifier in the Gram staining procedure. It
forms a complex with the crystal violet, which
cannot be easily removed from gram-positive
cells with the decolorizing agent.
c. The decolorizing reagent functions to
remove the primary stain only from some cell
types or cell structures, thus allowing for their
differentiation, on the basis of color, following
the application of the counterstain.
d. The counterstain is the second, contrastingcolor stain that is applied. This stain will be
absorbed only by decolorized cells.
3.
Considering bacteria cannot be separated on the
basis of differences in cell morphology,
differential staining, using dyes of contrasting
colors, allows for the microscopic separation of
organisms into groups based on a difference in
color.
4.
Decolorization is the most crucial step. The basis
of the Gram stain is the ease with which the
primary stain can be removed by the decolorizing
agent. Therefore, overdecolorization will remove
the primary stain from gram-positive organisms,
causing many cells to appear to be gram negative.
Insufficient decolorization fails to remove the
primary stain from organisms that are gram
negative, thereby resulting in a gram-positive
reaction.
5.
With increasing age of a culture, the ability of
organisms to absorb the stain becomes variable
because of changes in cell wall structure. Thus,
a uniformly colored preparation is not possible
and results in a gram-variable reaction with the
B. cereus cells ranging in color from intense
blue to pink. This phenomenon of gram
variability is noted more frequently with gram-
Copyright © 2017 Pearson Education, Inc.
positive organisms. Included among these are
members of the genus Bacillus.
Copyright © 2017 Pearson Education, Inc.
Experiment 9
19
EXPERIMENT 10
Acid-Fast Stain
The acid-fast stain is a highly specialized diagnostic
staining procedure that is used to identify members
of the genus Mycobacterium. Its application in the
clinical setting is for the diagnosis of tuberculosis
and leprosy.
Equipment
Per Lab
Group
Microscope
1
Glass microscope
slides
3
72- to 96-hour Trypticase soy broth (TSB) culture
of:
M. smegmatis
18- to 24-hour TSB culture of:
Staining tray
1
Hot plate
1
Lens paper
as needed
Bibulous paper
as needed
Materials
Cultures
S. aureus
Reagents
20
Carbol fuchsin
Acid-alcohol (3% HCl plus 95% ethyl alcohol)
Methylene blue
Microincinerator or
Bunsen burner
1
Inoculating loop
1
250-ml beaker
1
Copyright © 2017 Pearson Education, Inc.
Per Class
liter of medium will reduce the tendency of the
mycobacteria to clump.
Procedural Points to
Emphasize
1.
Considering that mycobacteria have a tendency
to clump, students should be instructed to
vigorously spread the inoculum on the slide to
separate the organisms.
2.
When preparing the mixed-culture smear,
students should be cautioned to use a more
concentrated sample of M. smegmatis than S.
aureus.
3.
If the heatless modification of the Ziehl-Neelsen
method is used, add 2 drops of Tergitol per 100
ml of carbol fuchsin.
Additional Reading
In order to obtain a satisfactory acid-fast
reaction using the heat method, the following
points should be stressed:
Wilmer, A., Bryce, E., & Grant J. (2011). The
role of the third acid-fast bacillus smear in
tuberculosis screening for infection control
purposes: A controversial topic revisited.
Canadian Journal of Infectious Diseases and
Medical Microbiology, 22(1):e1–3.
a. The carbol fuchsin–covered smear must be
heated for the required period of time.
Answers to Review Questions
b. The carbol fuchsin must be maintained at a
steaming rather than a boiling temperature to
prevent rapid evaporation of the stain.
1.
The application of heat or a surface-active agent
is essential to soften the waxy cell wall
components to facilitate the penetration of the
primary stain into the cells.
2.
Acid-alcohol is used preferentially over 95%
ethyl alcohol to ensure that the primary stain is
removed from the non–acid-fast organisms.
3.
The acid-fast staining procedure is used for the
diagnosis of leprosy and tuberculosis, both of
which are caused by members of the genus
Mycobacterium.
4.
Application of heat or a surface-active agent is
not required during the application of the
counterstain. The acid-fast organisms, because
of the waxy nature of their cell walls, are not
decolorized, and the red stain remains trapped
inside the cells. The non–acid-fast organisms
lack the lipoidal cell wall components.
Therefore, the primary stain is easily removed
during decolorization, and the colorless cells are
readily stained by the counterstain.
5.
The presence of acid-fast bacilli in the gastric
washing suggests that the tubercle bacilli,
released from the lungs, were swallowed by the
child rather than eliminated by coughing. This
evidence is suggestive of a tuberculosis
infection.
c. Additional applications of carbol fuchsin
will be required during the heating process even
though the slide is maintained at a steaming
temperature.
d. Following the application of heat, the slide
preparations must be allowed to cool prior to
their vigorous washing with water to prevent
breakage of the slides.
Tips
The steps for decolorization should be reviewed
so as not to overdecolorize the smear.
Clothespins may be used as slide holders.
Students should be reminded to blot the stained
smear with bibulous paper but not to rub the
bibulous paper over the wet slide.
Three- to four-day cultures of M. smegmatis are
required to maximize the bacteria’s growth.
Specialized media, such as the LowensteinJensen medium, may be used to culture
Mycobacterium sp. If a broth medium is used,
the addition of 0.4- to 1.0-percent Tween 80 per
Copyright © 2017 Pearson Education, Inc.
Experiment 10
21
EXPERIMENT 11
Differential Staining for Visualization of Bacterial
Cell Structures
These differential staining procedures are used to
demonstrate anatomical structures that may be present
in bacteria, namely the endospore and the capsule.
The procedures, although of academic interest, are
not frequently performed.
Materials
Cultures
PART A: Spore Stain
48- to 72-hour nutrient agar slant culture of:
B. cereus
48- to 72-hour thioglycollate broth culture of:
C. sporogenes
Equipment
Per Lab
Group
Microscope
1
Glass microscope
slides
8
Staining tray
1
Bibulous paper
as
needed
Lens paper
as
needed
PART B: Capsule Stain
48-hour skim milk cultures of:
A. viscolactis
L. mesenteroides
E. aerogenes
Hot plate
1
Microincinerator or
Bunsen burner
1
Reagents
Inoculating loop
1
PART A: Spore Stain
Malachite green
Safranin
PART B: Capsule Stain
1% crystal violet
20% copper sulfate (CuSO4•5 H2O)
22
Per Class
Procedural Points to
Emphasize
Spore Stain
1.
Reemphasize the precautions outlined in
Experiment 8 for the application of dyes with
heat. As in the acid-fast staining procedure, the
absorption of the primary stain requires the
application of sufficient heat.
Copyright © 2017 Pearson Education, Inc.
2.
3.
Be sure to tell students not to allow malachite
green to evaporate from the smear during
heating.
Be careful not to wash more than 35–45
seconds with tap water or the malachite green
stain will overdecolorize. Overdecolorization is
a common mistake made by students.
Capsule Stain
1.
2.
Answers to Review Questions
1.
Because of the impervious nature of the protein
spore coats, the stain-covered smear is heated to
ensure penetration of the stain into the spore.
2.
The function of water is to remove excess
primary stain from the spore. The vegetative cells
lack an affinity for this stain; thus it is removed
by water, rendering the vegetative cells colorless.
3.
a. Acid-alcohol would not decolorize the
stained spore, and the final observations would
be the same as with the use of water.
Caution students to avoid vigorous spreading
with the loop or needle during smear
preparation because of the fragile nature of the
capsular material. Also, remind students that
water is not used in this procedure for washing.
b. If safranin is applied with heat, both the
endospore and the vegetative cell will accept
the stain and appear red in color. Tap water will
not remove the stain, and, therefore, malachite
green would not be accepted. Both the
endospore and the vegetative cell will be red.
Remind the students not to heat fix the capsule
smears.
Optional Procedural Additions
or Modifications
Projected slides, commercially prepared slides, or
colored transparencies can be used to acquaint
students with these cytological structures.
c. Failure to apply heat with the primary stain
will not allow the stain to penetrate into the
endospore. The vegetative cell will be red, and
the endospore will be colorless and refractile.
4.
The capsule is a viscous structure with a
polysaccharide/protein composition that is
found outside of the cell wall of some
microorganisms. It is of medical significance as
its presence renders the cell resistant to the
phagocytic activities of WBCs, thereby
increasing the virulence of the organism.
5.
The capsule is nonionic and as such will not bind
with the cationic primary stain, crystal violet. In
this method, copper sulfate is used rather than
water to wash out excess stain from the cell.
During this process, the copper sulfate is
absorbed into the capsule, giving it a light blue
color in contrast to the deep purple color of the
cell.
Additional Readings
Jöbstl, M., Heuberger, S., Indra, A., Nepf, R.,
Köfer, J., & Wagner, M. (2010). Clostridium
difficile in raw products of animal origin.
International Journal of Food Microbiology,
138(1–2):172–5.
Martin, M., Turco, J. H., Zegans, M. E.,
Facklam, R. R., Sodha, S., Elliott, J. A.,
…Whitney, C. G. (2003). An outbreak of
conjunctivitis due to atypical Streptococcus
pneumoniae. New England Journal of Medicine,
348(12):1112–21.
Copyright © 2017 Pearson Education, Inc.
Experiment 11
23
EXPERIMENT 12
Nutritional Requirements: Media for the Routine
Cultivation of Bacteria
The purpose of this experiment is twofold. First, it
will evaluate synthetic (chemically defined) media,
complex (chemically undefined) media, and
enriched media for their ability to support microbial
growth. Second, students will ascertain the degree of
fastidiousness of selected microorganisms.
Equipment
Per Lab
Group
Microincinerator or
Bunsen burner
1
1-ml serological
pipettes
3
Saline suspensions of 24-hour Trypticase soy broth
cultures, with adjusted absorbances 0.05 at 600 nm
(or equilibrated to the 0.5 McFarland Standard):
E. coli
A. faecalis
S. mitis
Mechanical pipetting
device
1
Glassware marking
pencil
1
Test tube rack
1
Media
Spectrophotometer
1
Materials
Cultures
3 x 100 ml each
Per Lab
Group
Inorganic synthetic
broth
3
Glucose salts broth
3
Nutrient broth
3
Yeast extract broth
3
24
Per Class
Per Class
Procedural Points to
Emphasize
1.
As this is the first time students will be using a
spectrophotometer, they should be given a
complete explanation and a demonstration of its
use. Ancillary information should include the
following reminders:
a. The organisms in each culture must be
resuspended. However, the cultures must be
allowed to stabilize until the bubbling subsides
prior to the determination of the A readings.
Otherwise, erroneous readings will be obtained.
Copyright © 2017 Pearson Education, Inc.
b. The outside of all culture tubes must be
wiped with lens paper to remove finger marks
before their insertion into the test tube well.
2.
Uninoculated media tubes, representative of the
media in which the cultures have been grown,
are used as blanks. As the different media
exhibit variations in color, the blanks must be
used to standardize the spectrophotometer to
100% T prior to obtaining the A readings of the
cultures.
3.
Artificial media are used for the routine
cultivation of microorganisms as the peptones
and beef extract are sufficient to provide the
nutritional growth requirements for most
microorganisms. Thus, knowledge of the
specific nutritional needs of the organism is not
needed.
4.
Heterotrophic organisms require the use of
organic carbon sources and, in some cases,
organic nitrogen sources and vitamin
supplements. These organisms would not grow
in an inorganic medium.
5.
a. If the organism showed minimal growth in
a basic artificial medium, yeast extract could be
added as a supplement, as it contains all the B
vitamins.
c. All culture tubes must be inserted into the
test tube well in the same position. The etched
marking on the test tube may be used as a
guide.
d. The test tube well cover must be closed
prior to obtaining A readings.
2.
Students should be reminded that pipetting by
mouth is prohibited.
Optional Procedural Additions
or Modifications
If a spectrophotometer is not available, observation
of the turbidity of the cultures may be made visually
and recorded on a scale of 0 through 4+.
Additional Reading
Lindqvist,
R.
(2006).
Estimation
of
Staphylococcus aureus growth parameters from
turbidity data: Characterization of strain
variation and comparison of methods. Applied
and Environmental Microbiology, 72(7):4862–
70.
Answers to Review Questions
1.
Absorbance is directly proportional to the
amount of microbial growth, whereas percent T
is inversely proportional to the number of cells
present.
b. To determine the specific vitamin needs of
the organism, a vitamin assay is required. In
performing the assay, the control would contain
all the vitamins. Each of the remaining assay
culture media would contain all the vitamins
present in the control culture with the deletion
of one different vitamin from each test tube.
Culture tubes lacking growth in the absence of a
particular vitamin would indicate that this
vitamin is an essential growth factor.
Copyright © 2017 Pearson Education, Inc.
Experiment 12
25