THIẾT KẾ GIAO DIỆN TRÊN ANDROID Bài 8: Các mẫu pattern khác
Bạn đang xem bản rút gọn của tài liệu. Xem và tải ngay bản đầy đủ của tài liệu tại đây (628.61 KB, 32 trang )
THIẾT KẾ GIAO DIỆN TRÊN
ANDROID
Bài 8: Các mẫu pattern
khác
Nội dung bài học
1. Action Bar
2. Notification
3. Navigation Drawer
2
1. Action Bar
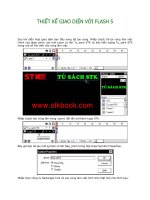
Action bar gồm 4 vùng chức năng sau:
1. App Icon – Thường hiển thị log hoặc icon của ứng dụng.
2. View Control –Không gian để hiển thị tiêu đề của ứng dụng.
Tuy nhiên cũng có thể thiết kế để chuyển sang các view khác bằng
cách sử dụng spinner hoặc tab
3. Action Buttons –Một action quan trọng của ứng dụng có thể
được đặt ở đây
4. Action Overflow – Chứa các action ít thực hiện dưới dạng các
menu.
1. Action Bar
Ví dụ 4 vùng chức năng sau của action bar:
1. Action Bar
Thêm một Action Bar Icon (Action button) và một Action item (Overflow
icon)
<?xml version="1.0" encoding="utf-8"?>
<menu xmlns:android=" >
<!-- Search / will display always -->
android:title="@string/action_search"
android:showAsAction=“always" />
<!-- Refresh -->
android:title="@string/action_refresh"
android:showAsAction="ifRoom" />
<!-- Help -->
android:title="@string/action_help"
android:showAsAction="never"/>
</menu>
1. Action Bar
Giải thích:
android:icon – để định nghĩa một icon.
android:title – tiêu đề của icon.
android:showAsAction –cách thức hiển thị của icon
ifRoom : Hiển thị nếu không gian trên màn hình cho
phép.
Never: Không bao giờ đặt lên action bar
Always: luôn hiển thị trên màn hình
withText: Hiển thị icon cùng với tên dạng text
collapseActionView: kèm theo một layout với icon,
thường kết hợp sử dụng với:
android:actionLayout android:actionViewClass
1. Action Bar
Thực hiện một sự kiện click item icon
@Override
public boolean onOptionsItemSelected(MenuItem item) {
// Take appropriate action for each action item click
switch (item.getItemId()) {
case R.id.action_search:
// search action
return true;
case R.id.action_refresh:
// refresh
return true;
case R.id.action_help:
// help action
return true;
default:
return super.onOptionsItemSelected(item);
}
}
1. Action Bar
Sử dụng split action bar:
Khi một action chạy, các action item sẽ được hiển thị xuống
dưới của mành hình chạy.
<manifest ...>
<activity uiOptions="splitActionBarWhenNarrow" ... >
</activity>
</manifest>
1. Action Bar
Cho phép Up/ Back Navigation
<application ... >
<!-- The main/home activity (has no parent activity) -->
...
</activity>
<!-- A child of the main activity -->
android:label="@string/title_activity_display_message"
android:parentActivityName="com.example.myfirstapp.MainActivity" >
<!-- Parent activity meta-data to support API level 7+ -->
android:value="com.example.myfirstapp.MainActivity" />
</activity>
</application>
1. Action Bar
Nếu muốn Hiding / Showing một Action Bar
ActionBar actionBar = getActionBar();
// hide the action bar
actionBar.hide();
// show the action bar
actionBar.show();
Thay đổi một Action Bar Icon bằng một icon khác:
ActionBar actionBar = getActionBar();
// set the icon
actionBar.setIcon(R.drawable.ico_actionbar);
1. Action Bar
Thêm một ActionView
ActionView là một widget, xuất hiện trên action bar như một
substitute khi nhấn chọn vào nút action bar.
Một ActionView cho phép thực hiện hành động action một
cách nhanh chóng mà không phải thay đổi fragment, hoặc
activity đang thực hiện
Ví dụ: như một Searchview action bar được nhúng như hình
dưới.
1. Action Bar
Khai báo một action view, sử dụng thuộc tính
actionLayout hoặc actionViewClass: :
<menu …>
android:icon="@drawable/ic_action_search"
yourapp:showAsAction="ifRoom|collapseActionView"
yourapp:actionViewClass="android.support.v7.widget.SearchView" /></menu>
Thực hiện code:
public boolean onCreateOptionsMenu(Menu menu) {
getMenuInflater().inflate(R.menu.main_activity_actions, menu);
MenuItem searchItem = menu.findItem(R.id.action_search);
SearchView searchView = (SearchView)
MenuItemCompat.getActionView(searchItem);
// Configure the search info and add any event listeners
...
return super.onCreateOptionsMenu(menu);
}
1. Action Bar
Demo Action Bar
2. Notification
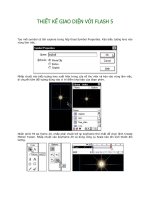
Một thông báo (notification) là một tin nhắn, thông điệp được
hiển thị trong một thời gian ngắn trên thanh trạng thái của thiết bị
nhằm gây sự chú ý của người dùng.
Thông thường một thông báo là được tự động kích hoạt nhằm
thông báo tới người dùng
Có hai kiểu hiển thị:
Normal view
Big view
1. Content title
2. Large icon
3. Content text
4. Content info
5. Small icon
6. Time mà thông báo được
nhận.
7. The details area.
2. Notification
Để thông báo đến cho người sử dụng, có thể thực hiện một
trong những cách sau:
Thông báo hiển thị trên thanh trạng thái, người dùng có
thể khởi tạo bằng cách chọn vào thông báo.
Thông báo cho người sử dụng bằng một tín hiệu rung
(vibrating) hoặc sound của thiết bị.
Thông báo bằng các chớp sáng màn hình như tin nhắn.
Thông báo bằng các chớp sáng các đèn LED có sẵn trên
thiết bị
2. Notification
Cách thực hiện:
final int NOTIF_ID = 1234;
final NotificationManager notifManager = (NotificationManager)
getSystemService(NOTIFICATION_SERVICE);
final Notification note = new Notification(R.drawable.ic_launcher,"New E-mail",
System.currentTimeMillis());
PendingIntent intent = PendingIntent.getActivity(this, 0, new Intent(this,
MainActivity.class), 0);
note.setLatestEventInfo(this, "New E-mail", "You have one unread message.", intent);
Trước tiên, sẽ lấy ra đối tượng Notification của Activity.
final int NOTIF_ID = 1234;
final NotificationManager notifManager = (NotificationManager)
getSystemService(NOTIFICATION_SERVICE);
Sau đó, tạo ra một chú ý hiển thị trên thanh status trên cùng
của thiết bị.
final Notification note = new Notification(R.drawable.ic_launcher,"New E-mail",
System.currentTimeMillis());
2. Notification
Tiếp tục là tạo một Intent để gửi Notification khi cần.
PendingIntent intent = PendingIntent.getActivity(this, 0, new Intent(this,
MainActivity.class), 0);
Và cuối cùng, chúng ta gán nội dung hiển thị Notification khi
mở rộng thanh status xuống.
note.setLatestEventInfo(this, "New E-mail", "You have one unread message.",
intent);
Sau khi chuẩn bị xong đối tượng Notification, ta sẽ sử dụng
lệnh sau để gửi đi thông báo:
mNotificationManager.notify(mId, mBuilder.build());
Thông báo này sẽ không tự mất đi, người dùng phải xóa nội
dung thông báo trên thanh status, hoặc có thể xóa thông báo này
từ ứng dụng của mình, sử dụng lệnh sau:
mNotificationManager.cancel(NOTIF_ID)
2. Notification
Tạo một Notification đơn giản
NotificationCompat.Builder mBuilder = new NotificationCompat.Builder(this)
.setSmallIcon(R.drawable.notification_icon)
.setContentTitle("My notification")
.setContentText("Hello World!");
// Creates an explicit intent for an Activity in your app
Intent resultIntent = new Intent(this, ResultActivity.class);
// The stack builder object will contain an artificial back stack for the started Activity.
// This ensures that navigating backward from the Activity leads out of
// your application to the Home screen.
TaskStackBuilder stackBuilder = TaskStackBuilder.create(this);
// Adds the back stack for the Intent (but not the Intent itself)
stackBuilder.addParentStack(ResultActivity.class);
// Adds the Intent that starts the Activity to the top of the stack
stackBuilder.addNextIntent(resultIntent);
PendingIntent resultPendingIntent =
stackBuilder.getPendingIntent( 0, PendingIntent.FLAG_UPDATE_CURRENT);
mBuilder.setContentIntent(resultPendingIntent);
NotificationManager mNotificationManager =
(NotificationManager) getSystemService(Context.NOTIFICATION_SERVICE);
// mId allows you to update the notification later on.
mNotificationManager.notify(mId, mBuilder.build());
2. Notification
Tạo kiểu big view cho notification:
NotificationCompat.Builder mBuilder = new NotificationCompat.Builder(this)
.setSmallIcon(R.drawable.notification_icon)
.setContentTitle("Event tracker")
.setContentText("Events received")
NotificationCompat.InboxStyle inboxStyle = new NotificationCompat.InboxStyle();
String[] events = new String[6];
// Sets a title for the Inbox style big view
inboxStyle.setBigContentTitle("Event tracker details:");
...
// Moves events into the big view
for (int i=0; i < events.length; i++) {
inboxStyle.addLine(events[i]);
}
// Moves the big view style object into the notification object.
mBuilder.setStyle(inBoxStyle);
...
// Issue the notification here.
2. Notification
Cập nhật notification:
Đoạn code sau thể hiện một notification được cập nhật để thông
báo số sự kiện đã xảy ra. (ví dụ thông báo số lượng tin nhắn mới)
mNotificationManager =
(NotificationManager) getSystemService(Context.NOTIFICATION_SERVICE);
// Sets an ID for the notification, so it can be updated
int notifyID = 1;
mNotifyBuilder = new NotificationCompat.Builder(this)
.setContentTitle("New Message")
.setContentText("You've received new messages.")
.setSmallIcon(R.drawable.ic_notify_status)
numMessages = 0;
// Start of a loop that processes data and then notifies the user
...
mNotifyBuilder.setContentText(currentText)
.setNumber(++numMessages);
// Because the ID remains unchanged, the existing notification is updated.
mNotificationManager.notify(
notifyID,
mNotifyBuilder.build());
...
2. Notification
Demo Notification
3. Navigation Drawer
Navigation Drawer là một bảng điều hướng xuất hiện khi vuốt
trên màn hình từ cạnh trái sang cạnh phải hay từ cạnh phải sang
trái. Ngoài ra Navigation Drawer còn có thể xuất hiện khi ban chạm
vào 1 biểu tượng trên thanh Action bar.
3. Navigation Drawer
Style:
Độ rộng của navigation drawer phụ thuộc vào nội dung mà
bạn muốn hiển thị, nhưng nên ở trong khoảng 240 dp đến 320
dp.
Chiều cao của mỗi item không nên nhỏ hơn 48 dp.
Xem ví dụ dưới để tham khảo:
3. Navigation Drawer
Tạo một Navigation Drawer
Tạo một drawer layout:
Để tạo một navigation drawer,
trước tiên cần khai báo một đối
tượngDrawerLayout:
Chú ý tới thuộc tính
android:layout_gravity=”start/end”
Nếu bạn đặt là start thì Navigation
Drawer sẽ được gọi từ trái qua phải
còn nếu là end thì Navigation Drawer sẽ
đươc gọi từ bên phải qua trái.
android:id="@+id/drawer_layout"
android:layout_width="match_parent"
android:layout_height="match_parent">
<!-- The main content view -->
android:layout_width="match_parent"
android:layout_height="match_parent" />
<!-- The navigation drawer -->
android:layout_height="match_parent"
android:layout_gravity="start"
android:choiceMode="singleChoice"
android:divider="@android:color/transparent"
android:dividerHeight="0dp"
android:background="#111"/>
</android.support.v4.widget.DrawerLayout>
...
3. Navigation Drawer
2. Khởi tạo Drawer List:
public class MainActivity extends Activity {
private String[] mPlanetTitles;
private DrawerLayout mDrawerLayout;
private ListView mDrawerList;
...
@Override
public void onCreate(Bundle savedInstanceState) {
super.onCreate(savedInstanceState);
setContentView(R.layout.activity_main);
mPlanetTitles = getResources().getStringArray(R.array.planets_array);
mDrawerLayout = (DrawerLayout) findViewById(R.id.drawer_layout);
mDrawerList = (ListView) findViewById(R.id.left_drawer);
// Set the adapter for the list view
mDrawerList.setAdapter(new ArrayAdapter<String>(this,
R.layout.drawer_list_item, mPlanetTitles));
// Set the list's click listener
mDrawerList.setOnItemClickListener(new DrawerItemClickListener());
...
}
}