C lab05
Bạn đang xem bản rút gọn của tài liệu. Xem và tải ngay bản đầy đủ của tài liệu tại đây (179.39 KB, 9 trang )
LAB GUIDE – SEMESTER 2 – ACCP I 10
COURSE: Programming in C#
LAB: 05
Amendment Record
Date
Version
01/09/2009
1.0
Effective Date
Change
Author
Update
TuNN
C# - Lab 5 – Namespace and Exception Handling
Programming in C#
Lab 5
Objectives:
At the end of this session, you will able to understand:
Namespace
Exception Handling
Part I: Getting started (60 minutes)
Exercise 1: Using namespace
Step 1: Open Visual Studio 2005
Step 2: Select the menu File->New->Project to create console based project named ‘Namespace’ and
Solution named Session05 as following
Step 3: Rename the class file ‘program.cs‘ to ‘Namespace.cs’
Step 4: Replace code in ‘Namespace.cs’ with given code
using System;
2
C# - Lab 5 – Namespace and Exception Handling
using Customer;
using Order;
namespace Customer
{
class Cust_details
{
public string strName;
public void getName()
{
Console.WriteLine("Enter your name :");
strName = Console.ReadLine();
}
}
}
namespace Order
{
class Grocery_items
{
public void Ord_grocery()
{
Cust_details objCust1 = new Cust_details();
objCust1.getName();
Console.WriteLine("Hello {0}", objCust1.strName);
Console.WriteLine("You have ordered grocery items");
}
}
class Bakery_items
{
public void Ord_bakery()
{
Cust_details objCust2 = new Cust_details();
objCust2.getName();
Console.WriteLine("Hello {0}", objCust2.strName);
Console.WriteLine("You have ordered bakery items");
}
}
}
class OrderTest
{
public static void Main()
{
string choice;
Console.WriteLine("What would you like to order? 1-Grocery Items, 2Bakery Items");
choice = Console.ReadLine();
if (choice == "1")
{
Grocery_items objGrocery = new Grocery_items();
objGrocery.Ord_grocery();
}
else
{
if (choice == "2")
{
Bakery_items objBakery = new Bakery_items();
objBakery.Ord_bakery();
}
else
{
3
C# - Lab 5 – Namespace and Exception Handling
Console.WriteLine("Enter either 1 or 2");
}
}
}
Console.ReadLine();
}
Step 5: Select menu File -> Save to save the file
Step 6: Select Build -> Build ‘Namespace.cs’ option to build the project
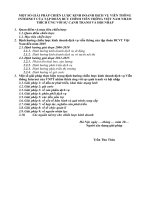
Step 7: Select Debug -> Start without Debuging to execute the program
The output of the program as following
Exercise 2: Exception Handling
Step 1: Add a console based project ‘ExHandling1’ to the solution
Step 2: Right click on project ‘ExHandling1’ -> set as Startup project
Step 3: Rename the class file ‘Program.cs’ to ‘ExHandling1.cs’
Step 4: Replace the code in ‘ExHandling1.cs’ with the given code
using System;
using System.Collections.Generic;
using System.Text;
namespace Bai05
{
class Vidu1
{
static void Main(string[] args)
{
byte[] a = new byte[5];
//nhap mang
try
{
for (int i = 0; i <= 5; i++)
{
Console.WriteLine("a[{0}]=", i + 1);
a[i] = Convert.ToByte(Console.ReadLine());
}
}
catch (FormatException ex)
{
4
C# - Lab 5 – Namespace and Exception Handling
//Console.WriteLine(ex.Message);
Console.WriteLine("Khong duoc nhap ki tu cho mang so");
}
catch (OverflowException ex)
{
//Console.WriteLine(ex.Message);
Console.WriteLine("Khong duoc nhap gia tri nam ngoai mien 0255");
}
catch (IndexOutOfRangeException ex)
{
//Console.WriteLine(ex.Message);
Console.WriteLine("Loi vuot qua pham vi cua mang");
}
}
}
//in mang
for (int i = 0; i < 5; i++)
Console.Write(" {0}", a[i]);
}
Step 5: Select menu File -> Save to save the file
Step 6: Select Build -> Build ‘ExHandling1’ option to build the project
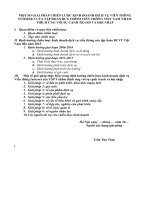
Step 7: Select Debug -> Start without Debuging to execute the program
The output of program as following
Exercise 3: Write a program to accept a number and print multiplication table of that number. Use exception
handling to ensure that user enters only numeric values and the number entered is greater than zero.
Step 1: Add a console based project ‘ExHandling2’ to the solution
Step 2: Right click on project ‘ExHandling2’ -> set as Startup project
Step 3: Rename the class file ‘Program.cs’ to ‘ExHandling1.cs’
Step 4: Replace the code in ‘ExHandling2.cs’ with the given code
using System;
public class InvalidInput : ApplicationException
{
public InvalidInput()
: base("Enter a number greater than Zero"){}
}
class TestExcep
{
public static void Main()
5
C# - Lab 5 – Namespace and Exception Handling
{
int intCnt;
int intNum = 0;
Console.WriteLine("Enter a number :");
try
{
intNum = Convert.ToInt32(Console.ReadLine());
if (intNum <= 0)
{
throw new InvalidInput();
}
}
catch (InvalidInput objInvalidInput)
{
Console.WriteLine(objInvalidInput.Message);
}
catch (System.FormatException objFormatException)
{
Console.WriteLine(objFormatException.Message);
}
finally
{
if (intNum > 0)
{
for (intCnt = 1; intCnt <= 10; intCnt++)
Console.WriteLine(intCnt * intNum);
}
}
Console.ReadLine();
}
}
Step 5: Select menu File -> Save to save the file
Step 6: Select Build -> Build ‘ExHandling2’ option to build the project
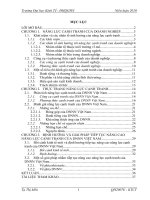
Step 7: Select Debug -> Start without Debuging to execute the program
The output of program as following
Exercise 4: Throw statement
Step 1: Add a console based project ‘ExHandling3’ to the solution
6
C# - Lab 5 – Namespace and Exception Handling
Step 2: Right click on project ‘ExHandling3’ -> set as Startup project
Step 3: Rename the class file ‘Program.cs’ to ‘ExHandling1.cs’
Step 4: Replace the code in ‘ExHandling3.cs’ with the given code
using System;
class MainClass
{
public static int AnExceptionFunction(int value)
{
if (value == 0) // Can't divide by zero
throw new DivideByZeroException("Divide By 0 error!");
int x = 20 / value;
return x;
}
public static void Main()
{
int value = 0;
try
{
value = AnExceptionFunction(10); // This works ok
Console.WriteLine("Value = {0}", value);
AnExceptionFunction(0); // This doesn't
Console.WriteLine("Value = {0}", value);
}
catch (Exception e)
{
Console.WriteLine("Caught an exception {0}. Continuing", e);
}
Console.WriteLine("Done");
}
}
Step 5: Select menu File -> Save to save the file
Step 6: Select Build -> Build ‘ExHandling3’ option to build the project
Step 7: Select Debug -> Start without Debuging to execute the program
The output of program as following
Exercise 5: Finally statement
Step 1: Add a console based project ‘FinallyStmt’ to the solution
Step 2: Right click on project ‘FinallyStmt -> set as Startup project
7
C# - Lab 5 – Namespace and Exception Handling
Step 3: Rename the class file ‘Program.cs’ to ‘FinallyStmt.cs’
Step 4: Replace the code in ‘FinallyStmt.cs’ with the given code
using System;
using System.IO;
class FinallyDemo
{
static void Main(string[] args)
{
FileStream outStream = null;
FileStream inStream = null;
try
{
//mo file de ghi du lieu
outStream = File.OpenWrite("DestinationFile.txt");
//mo file de doc du lieu
inStream = File.OpenRead("BogusInputFile.txt");
//cac cau lenh doc du lieu tu file
}
catch (Exception ex)
{
Console.WriteLine(ex.ToString());
}
finally
{
if (outStream != null)
{
outStream.Close();
Console.WriteLine("outStream closed.");
}
if (inStream != null)
{
inStream.Close();
Console.WriteLine("inStream closed.");
}
}
}
}
The output of program as following
Part II : Workshop – 15 minutes
Students open workshop in CD ROM, then View, Run, Think about it
8
C# - Lab 5 – Namespace and Exception Handling
Part III: Do it yourself
Exercise 1:
Create a namespace called Customer and add a class to it having a method that accepts customer name.
Create another namespace called Order and two classes within it, one for grocery items and the other for
bakery products. The Main() program should accept customer name and a choice indicating whether the
customer has selected to order grocery items or bakery products. Accordingly, the appropriate class should
be called and a message displayed informing the user about the choice.
Exercise 2:
Write a custom exception named AmountException to handle the following business issues
When
Senior Lecture gets less than 60,000 salary
When
bonus is more than 10,000
Your exception class should have a field named personName to store the person's name.
Write a Test program to work with various class objects and their behaviours. Add some code to
demonstrate the polymorphism. Also show the functionality of your custom exception class by
adding some appropriate code.
Part IV: Homework
Exercise 1: Do assignment of module 10 in CD ROM
Exercise 2: Do assignment of module 11 in CD ROM
References
1) CD ROM C# Programming, Aptech Education
2) />3) MSDN Document
9