Dragging a Movie Clip Instance within a Boundary
Bạn đang xem bản rút gọn của tài liệu. Xem và tải ngay bản đầy đủ của tài liệu tại đây (17.85 KB, 7 trang )
< Day Day Up >
Dragging a Movie Clip Instance within a Boundary
Being able to drag the ball movie clip instance around the screen is critical to our
project's interactivity. The ball's position onscreen will determine the volume and
panning of the bouncing sound. If we were to allow users to freely drag the
basketball_mc movie clip instance onscreen, however, our scene would not be realistic
because the user could drag and bounce the ball over the crowd, the backboard, and so
forth. Obviously, we need to restrict dragging to the area denoted by the court.
There are several ways of scripting so that an object can be dragged only within a certain
area. In this exercise, you'll learn how to control the draggable area by tracking the
mouse's movement and allowing dragging to occur only when the mouse pointer is within
a certain area onscreen.
1. Open basketball2.fla.
Continue using the file you were working with at the end of the preceding
exercise.
Before you continue, it's important to think through the problem at hand; that is,
how to drag the ball movie clip instance in sync with the mouse movement, and
how to constrain that dragging to a specific area onscreen.
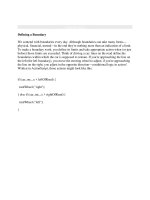
The first objective is to establish the draggable area, or boundary, of our screen. In
Flash, you define a boundary by determining four coordinates: top, bottom, left,
and right. Our script will use these coordinates to restrict movement within that
area. For this exercise, the coordinates that represent the four sides of our
boundary will be as follows:
Top boundary = 220
Bottom boundary = 360
Left boundary = 60
Right boundary = 490
As shown by the arrows, all coordinates are based on the distance of that side from
the top and left sides of the stage.
TIP
An easy and visual method of determining boundary coordinates is to draw a
simple box on the stage. Resize it and position it in the area that will serve as the
boundary in the scene. Select the box and then open the Info panel. Using the
information in the X, Y, W, and H boxes, you can determine the four coordinates
of your boundary: Y is the top boundary, X is the left boundary, Y + H is the
bottom boundary, and X + W is the right boundary. After you've determined the
four coordinates of your boundary, delete the box. There are other, more dynamic
ways of setting a border, but this technique is the most straightforward.
Because we want the basketball to move only when the mouse pointer is within
the boundary, in scripting terms we need to check for a condition before the ball
can be dragged. Logically, this might be translated as follows: If the mouse
pointer's position is within the coordinates of the boundary, drag the
basketball_mc movie clip instance; otherwise, stop dragging.
We'll need to instruct the script to check for this condition on a regular basis
because the mouse is in frequent motion. Using the onMouseMove event handler,
we can check for this condition each time the mouse is moved. This will allow our
script to act instantly to enable or prevent the basketball_mc movie clip instance
from being dragged.
We now have all the information necessary to proceed.
2. With the Actions panel open, select Frame 1 of the Actions layer. After the line of
script from the preceding exercise creating the bounce Sound object, add the
following lines of script:
3.
4. var leftBoundary:Number = 60;
5.
6. var rightBoundary:Number = 490;
7.
8. var topBoundary:Number = 220;
9.
10. var bottomBoundary:Number = 360;
11.
These variables contain the x and y coordinates of our boundary.
Next, we'll add an if statement that constantly checks the position of the mouse
and allows the ball to be dragged only if the mouse pointer is within the boundary
we just defined.
3. Add the following lines at the end of the current script:
4.
5.
6. this.onMouseMove = function() {
7.
8. if (_xmouse > leftBoundary && _ymouse > topBoundary && _xmouse <
rightBoundary &&
9.
10. _ymouse < bottomBoundary) {
11.
12. basketball_mc.startDrag(true);
13.
14. } else {
15.
16. stopDrag();
17.
18. }
19.
20. }
21.
Using an onMouseMove event handler, the if statement is analyzed each time the
mouse is moved.
With this if statement, we're checking to determine that four conditions are true. If
they are, dragging will commence; if not, dragging will cease. We're checking the
current horizontal and vertical positions of the mouse pointer (_xmouse and
_ymouse, respectively) to see how they compare to the boundaries we defined
earlier.
Let's look at a couple of possible scenarios to understand the logic behind this if
statement. Suppose that during playback of the movie, the mouse pointer is moved
to where its horizontal position (_xmouse) is 347 and its vertical position
(_ymouse) is 285. By plugging in these values as well as the values that define our
boundaries, the if statement would look similar to the following:
if (347 > 60 and 347 < 490 and 285 > 220 and 285 < 390)
In this circumstance, the if statement would evaluate to true because all the
conditions are true—347 is greater than 60 and less than 490, and 285 is greater
than 220 and less than 390. In this scenario, dragging is allowed.
Let's look at one more scenario. Suppose that during playback of the movie, the
mouse pointer is moved to a horizontal position of 42 and a vertical position of
370. If we plug in these values, the if statement looks like this: