Reviewing Animation Basics
Bạn đang xem bản rút gọn của tài liệu. Xem và tải ngay bản đầy đủ của tài liệu tại đây (1.82 MB, 50 trang )
the lean forward and the rise. That takes time, too. Explore and
understand real-life timings. Once you get a feel for them, start to
modify and play with them.
Animé, Japanese animation, makes great symbolic use of modi
-
fied timings to convey different feelings. Characters hang in the air
much longer than they “should” before crashing back down to the
ground with an impact that belies their apparent mass. This obvious
departure from reality crafts feelings of great power and other
-
worldliness. Animé uses timing to sculpt how you, the viewer, feel
about what you’re seeing. Something just barely perceptibly outside
of reality makes a viewer feel uncomfortable. Slowed timing appears
dreamlike. Often, when timing is artfully used to sculpt feelings, the
audience only gets the impact of the feelings, and is unaware of the
reasons why.
Timing is also a rhythmic device. Just like music, animation has
beats, rhythms, and tempos. You want to keep things interesting for
the viewer and not have everything fall on the same timings. This
makes a scene read dull and flat. If your scene has keyframes every
eight frames, it will read like mush. You have to break up the keys,
stagger them, and syncopate them. Get the audience to expect
something by setting up a pattern, and then break that pattern
(ONE, two, three, four, one, two, three, four, one, TWO, three,
four...). Keep them on their toes, when their toes need to be kept
on. Slow, languid scenes need this special attention to timing even
more than frenetic scenes to keep the audience from losing interest,
yet maintaining their dreamy flow.
Timing is also important to get across the relationships between
objects and mass. Massive objects don’t get moving as quickly as
slight ones do, but when they do, they’re quite a challenge to stop.
A light object or character can leap up from the ground more quickly
than a heavy one. Lighter items can seem to float a bit more before
gravity begins to exert its effect. Heavier items can seem to be
pulled greedily back down to Earth.
Everything you do with timing helps the audience to differenti
-
ate between the shapes they see on screen.
240
Chapter 10: Reviewing Animation Basics
10.2 Squash and Stretch
Squash and stretch is one of the keystones of good animation. Even
the most realistic of animations needs to have some element of
squash and stretch in it. Animation is all about the emotional impact
of experience; you alter the outline of a thing (not the volume) to
give the audience a visual interpretation of the forces impacting it.
1. Load Objects\Props\Ball.lwo into Layout.
2. Make a 21-frame sequence (from 0-20) where the ball bounces
similar to Figure 10.1.
241
Chapter 10: Reviewing Animation Basics
Note:
Animation is experience. If you don’t live it in your heart, it
won’t come out of your scene.
Note:
Since stopwatches are such physical objects, and you may leave
for work and forget it, I’ve included a small animation timer on
the CD under Extras\AnimationTimer\. There are two files that
are, in essence, the same thing. One is just the bare .swf
(Flash4 file), and the other is an .exe (executable program)
exported as a stand-alone from Flash to run on Windows
machines. If you’re on a Mac, open up your Internet browser
(with the Flash4 plug-in installed from ) and
drag the .swf file into the open Internet browser window. You
can also choose File|Open and browse to the .swf file. You can
e-mail this tiny .swf (only 68K) to yourself so you’ll never be
without a way to time animations! It does frames, feet/frames,
SMPTE, and seconds. It converts between these formats, and
you can use it to do some rudimentary frame-offset calcula-
tions. (Click on the “Help?” icon to find out more!)
In order for the ball to really give the impression that the force
of gravity is pulling it down to the ground where it impacts and
springs back up again, we have to push reality a bit.
242
Chapter 10: Reviewing Animation Basics
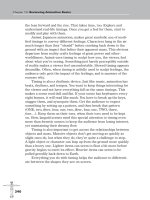
Figure 10.1. This bouncing ball has good timing to it: It accelerates
toward the ground, springs back up, then decelerates as it nears
the top of its rebound. The timing may be good, but it has no
squash and stretch to it. (You can find the scene to study in
Scenes\chapters\ch10\Figure_10-01.lws.)
Figure 10.2. Just using stretch and rotate to put rudimentary
squash and stretch on the ball gives a visual read to the forces
acting upon it. (See Scenes\chapters\ch10\Figure_10-02.lws.)
3. Now, using whatever techniques you’d like, add some squash
and stretch to your bouncing ball scene.
Compare what you’ve got with Scenes\chapters\ch10\Figure_
10-02.lws if you need to. Always remember to preserve the volume of
the object. When you squash in Y, the object has to expand in X and Z
in order to preserve the mass we perceive it to have. We’re not get-
ting rid of mass, we’re displacing it. (Think of a water balloon. When
you squeeze or stretch it, there’s still the same amount of water in
it — until it pops, that is.)
243
Chapter 10: Reviewing Animation Basics
Note:
A more believable take on this would be to use bones to flatten
the ball around the area of impact where it hits the ground. I also
like to stretch objects into wedge-like shapes with the point of the
wedge leading the eye into the coming motion.
Note:
LightWave, having introduced Bezier interpolation for splines, has
made it a whole lot easier to get nice, smooth motion curves.
Don’t be afraid to drop the old TCB splines in favor of these more
controllable curves. However, because you have more ability to
noodle with the Bezier handles, you can more easily throw things
out of whack. I’ve also noticed that Bezier splines almost always
need some kind of adjustment and are rarely interpolated cor-
rectly (for my tastes) by default.
244
Chapter 10: Reviewing Animation Basics
Note:
Something to be said about working with spline curves is that they should have
the absolute minimum number of keyframes needed to keep the item moving,
and they should be as elegant as possible. “Elegant” is a relative term and does
not necessarily mean “smooth.” The curves should be a linear interpretation of
the action. I like to think that the curves should be pretty if the motion is to be
flowing and beautiful, or harsh if the motion is to be percussive and violent.
Figure 10.3. Here are the scale curves for my bouncing ball.
The way our character is set up, stretching the neck, arms, and
legs is easy. We pull the controls for the head, hands, and feet away
from where the IK chain can reach and things stretch. You can
squash individual parts of his body by scaling that individual control;
all children of that control will be equally affected (squash the hand
and the fingers will also squash). You can even squash and stretch
the bones controlled by IK, like the thighs, calves, biceps, and fore-
arms, but be careful when doing so. IK calculations are complex, and
adding stretching into the mix can make normally dependable IK
chains unpredictable.
As always, when you’re done squashing and stretching and your
character is at rest, make sure you return him to his original, at rest
proportions. Multiple instances of squashing and stretching can be
going on simultaneously in a complex and explosive scene, but you
always need to return the parts that aren’t being acted upon by
extreme forces to the proportions the audience has come to expect.
245
Chapter 10: Reviewing Animation Basics
Newbie Note:
Squash and stretch doesn’t just happen with entire objects; it
happens with parts of objects separately, too. It happens with
legs, hands, arms, torsos, fingers, heads — any part of the
character that can visibly have a force acting upon it. Drop a
weight into our character’s arms and his legs should squash to
show the impact the sudden introduction of the weight has on
his body as a system. As our character’s hand whips up to catch
a fly ball, his hand and fingers elongate over the course of the
frames. The hand travels the greatest distance to accentuate
the feeling of speed. (You can think of this like handcrafting
motion blur.)
10.3 Gesture and Line of Motion
Gesture is the most important part of an animation drawing (or
pose). Gesture is what makes a silhouette read with purpose and
intent and helps the viewer understand the motives behind the
character. Gesture is the ultimate distillation of an idea into form
(2D or 3D). Line of motion is the path that flows through and defines
the gesture.
246
Chapter 10: Reviewing Animation Basics
Figure 10.4. Some poses we’ve visited before, and the thumbnail drawings
(quick, loose drawings to get the gesture, idea, and feel of a pose — not the
anatomy of a pose) that inspired them. Notice how clearly the line of motion
(represented by the thick line running through the center of each thumbnail
drawing) reads through both the thumbnail and the finished pose.
The line of motion is the “big picture” read we get from a pose.
It tells us what is going on and where we should look. It gives us an
idea of what has happened a moment before and what to expect to
happen next. This line of motion should be clear and readable in all
your poses. The more simple and readable it is, the stronger it will
be. You can think of it like a graphic design element with arms and
legs. It has to telegraph as powerfully as any sales pitch you’ve ever
had. The line of motion has to read clearly, even on the break downs
(the main poses you have to put between the key poses that keep a
character’s motion true to the vision you have in your mind) and
inbetweens (all the frames that come between keys and break
downs).
Lines of motion should be clearly readable and have at least
some curve to them, unless you are using that straight, rigid graphic
concept for effect (like using the character as an arrow). Lines of
motion should also be no more complex than an “S” shape. Our
minds generally don’t bother to figure out the complexities of a
super squiggly line; it just reads as chaos. Unless you’re using that
chaos for effect, it will have much less power than a strong, simple
shape.
Reversing the line of motion keeps it interesting and builds
strength in the pose. You can also have parts of your pose reverse
their arcs, too, like an arm that reverses the direction of its curve as
the hand rises from rest. Reversing a curve is a powerful graphic
element; the audience’s eye will be drawn to it. Because of this, you
should carefully orchestrate these reversals, like a symphonic con
-
ductor. Too many reversals in a short span of time will exhaust the
viewer. Too many reversals happening all at once over different
parts of the character will splay the audience’s focus and lose their
interest. Through an animation, line of motion is like the bass beat
that drives the scene.
247
Chapter 10: Reviewing Animation Basics
Advanced Note:
The concept of curves and reversals can be extended
throughout multiple characters in a scene, paying attention to
how each interacts with another to create an overall line of
motion that moves over the visual plane of the screen.
10.4 Anticipation
Anticipation is leading the eye with motion. You are using a preced
-
ing action to lead the audience’s eye to what is going to happen next
or to an important area that they will need to be focusing on. The
concept of anticipation really comes from stage magicians who need
you to look at their right hand while their left puts a pigeon into a
wineglass.
Filmmaking has always been about leading the audience’s eye.
(When we take the 3D information and squeeze it onto a 2D plane,
the audience needs help so they don’t miss what’s important.) Lots
of motifs have been developed to help catch the audience’s eye,
from carefully planned editing, to a splash of color in an otherwise
dull set, to a breeze that ruffles the curtains right before the hero
enters.
1. Load your setup scene.
2. Save it as a revision for Section 10.4 in your working directory
for Chapter 10.
248
Chapter 10: Reviewing Animation Basics
Note:
Motion leads our eye. In the wild, a fox can seem to disap-
pear in a field not three feet away if he stands still. When he
moves, our eyes lock onto that movement. Anticipation is
moving an important part of the character’s body to draw our
eye to that spot so we don’t miss the action that follows.
Before some fast action happens with the character’s hand,
flex his fingers just a little while the rest of his body remains
still or in a moving hold (see Section 10.8). You can use
“leading the eye with motion” (anticipation) as any other
rhythmic device at your disposal. You can tease the audience
with it, building patterns and getting them to look in a certain
direction expecting more of the same, then wait until their
expectations have died down before hitting them with that big
knockout punch! (This is classic horror movie timing.)
249
Chapter 10: Reviewing Animation Basics
Note:
The exercises in this book are about to get a lot more subjective. For
the exercises that follow, there is no “right” way and there is no
“wrong” way. There is only what looks good for the scene. It isn’t my
goal to turn you into a clone of me. I’m going to do my best to give
you the tools and let you decide what you do with them. What it will
take to let the exercises truly do their best for you is for you to honestly
and humbly appraise what you see in your finished scenes. You have
to ask yourself, “Is this something that would fit flawlessly into the best
animated feature I’ve ever seen?” You have to be honest with yourself
about the answer. If the answer is “no,” then you have to go through
both the animation basics and the advanced animation mechanics as
checklists to see if your scene has everything in it that it needs. Evalu
-
ate your animation from as many different viewable angles as you
have time. When all angles read convincingly for your character’s
intent (and being), your scene should give you a bit of a shudder and
an innate knowledge that if you saw this on the big screen, sand
-
wiched by the best animation you’ve ever seen, it would fit right in.
Figure 10.5. This composite image shows my take on our character
anticipating, jumping, and landing. (He “jumps down” before he jumps up.)
Pose Copying
I’d like to make a concerted effort to not leave anyone behind, even if
you’ve never animated before. There are a few scenes included on the
companion CD where you’ll be able to do a kind of “moving life draw
-
ing in 3D,” which will get you further ahead in understanding
animation than any amount of reading ever will. Remember, though,
this is simply copying animation. In order to get the full impact of that
particular section, once you’ve done a spot-on copy of the animation,
take a short break and go back and (referencing only your imagination)
do the animation from scratch. Make it your animation. Take what
you’ve learned by copying and push it farther; explore and experiment.
You will be building confidence by going through the motions (building
“muscle memory”) and then using the experience to make your own
decisions. Do this with as many of the exercises as you need; you can
cover a lot of ground this way.
250
Chapter 10: Reviewing Animation Basics
Figure 10.6. This is an image sequence of the same animation. (Shown on twos, a new
drawing for every other frame, running at 24 fps.)
To do this exercise as an exploration of moving life drawing:
1. From your working revision (created in step 2 of this section),
select File|Load|Load Items From Scene….
2. Choose Scenes\chapters\ch10\Figure_10-05.lws. (In response
to the request to load lights as well as objects, choose No.)
3. Select the Thinguy_F (2) object.
4. Choose Items|Replace|Replace With Object File….
5. Select Objects\Final\Thinguy_LifeDrawing_F.lwo and click
Open.
6. Under Display|Display Options|Schematic View, make sure
Drag Descendants is checked.
7. In a Schematic view, with Thinguy_LifeDrawing_F still selected,
drag it and its hierarchy away from Thinguy_F’s hierarchy so it
doesn’t get in the way as you work.
8. Change the end frame to 29 (assuming you’re working in 24 fps,
as both my setup and animation are) and you’re ready to start
matching my animation, pose for pose, frame for frame.
9. Scrub through the animation. See where the extremes are and
copy those poses first.
10. Scrub back through the animation and reposition him to the
model where he drifts farthest from the model’s animation. (This
is in essence what a break down is.)
11. Repeat this process until your character matches the model’s
animation perfectly.
As you copy the poses, look for the other animation principles going on
in the scene as well. There’s squash and stretch, drag, follow-through,
circular motion, overlapping action, and there’s even altering realistic
timing to get him to snap up from the ground as he leaps. As you go
over these points in this and the next chapter, think back on what
you did here. Think not only of how things in my scene worked
but how you can make them better!
251
Chapter 10: Reviewing Animation Basics
3. Animate the character anticipating, jumping, and landing.
“ … which is a kind of integrity, if you look on every exit, as an
entrance … someplace else.”
— The Player, Rosencrantz and Guildenstern Are Dead
252
Chapter 10: Reviewing Animation Basics
Note:
If you choose to have your character’s
fingers clench into fists as I have done,
you’ll run into that lovely issue of
gimbal lock. I had to switch to local
coordinates in order to get the *Base
bone of the two outer fingers to not
leave a gap between themselves and
the character’s middle finger. The
problem is that when you go back to
parent coordinates, you find yourself
presented with a problem: There are
some huge numbers (+/– 90 or more)
in heading and bank. If you have
already created other keys for these
bones where heading and bank are
more reasonable (+/– 80 or less),
those fingers will look wrong when
they inbetween from one keyframe to
the other. My solution was to click in
the numeric input box for heading, and
leaving the value intact, type in
“180–”totheleft of the current value
(say 117.00). When you press Enter,
LightWave figures what 180 – 117 is
and leaves “63.00” as the value for
heading. I repeated this for bank, and
got something that was a pretty darn
close approximation of what I had got
-
ten using local coordinates. The only
difference between the rotations is that
this set inbetweens just fine with a
keyframe of 0H, 0P, 0B.
Note:
Before I animate anything, regard
-
less of whether it is for money or
just practice, I try to come up with a
reason for the character to be doing
the action. It helps to get personality
into the scene so it doesn’t read as
a flat and boring (even if it is a
well-animated) bit of purposeless
action. Before getting into this
scene, ask yourself, “Why would this
guy be jumping?” Is he startled? Did
he win a lottery? Is he avoiding a
sweep kick, and why is someone
throwing a sweep kick at him (how
does he feel about having someone
throw said sweep kick at him)?
When you’re comfortable with the
answers to these questions, those
answers will read through the scene
as the character’s intent and pur-
pose. Even if this little snippet is all
the world ever sees of this guy
jumping, there will be a feeling that
this guy has a life, a soul, an opin-
ion about and a reason for jumping.
(Think Degas — a slice out of time.
You want the audience to feel that
the character came from some
moment before, and that he’s gone
somewhere a moment after the
scene ends.) Doing this will leave
your audience wanting more.
10.5 Drag
Drag is a pretty simple concept. Hold up a (clean) shirt. Move your
hand moderately fast to the right. The bottom of the shirt lags
behind your hand. This is drag.
Drag happens on nearly everything in animation. You can make
a scene look multitudes better by making sure drag is appropriately
applied to hands, fingers, toes, elbows, and heads. It’s like squash
and stretch in that it may not happen in real life quite as much as we
show it in animation, but it gives a visual representation of how an
action feels.
If you were to see someone next to you in the café acting with
the amount of drag that feels natural on a cartoon character, you’d
probably seriously think about changing tables (or restaurants).
Drag isn’t about what looks real, it’s about what looks good.
Sensuous villains tend to let drag and follow-through unroll
their every action. (“Oozing charm from every pore, he oiled his
way around the floor. . . ” — Professor Higgins, My Fair Lady)
253
Chapter 10: Reviewing Animation Basics
Figure 10.7. As the wrist moves up, the fingers and palm drag behind.
Cartoon items can show their mass with respect to other car
-
toon items by how much drag (and follow-through) they have as
they animate.
Almost every animated action, even the most realistic acting,
needs to have some element of drag in order to make it read well to
an audience.
1. Load in Scenes\chapters\ch10\Section_10-05_Setup.lws.
2. Paying special attention to drag on the fingers and palm, ani
-
mate ThinGuy reaching up with his left hand and grabbing that
floating handle.
254
Chapter 10: Reviewing Animation Basics
Figure 10.8. We’ll be using this scene to practice drag.
Note:
All of the scenes I’ll be handing you
to work with are at 24 fps. If you
need to practice at another frame
rate, feel free to make adjustments
accordingly.
Newbie Note:
Newbies, my take on the scene is:
Scenes\chapters\ch10\Section_
10-05_F.lws. Load items from the
scene and copy if you need to!
As you work, here are some suggestions to bear in mind: Raise
the character’s hand above the handle first, then let it settle down
upon it (don’t just go straight for the handle; that’s boring). Take a
quick read ahead in the next section on follow-through to help you
refresh your mind as to what happens when the hand reaches the
top of its arc and begins to settle onto the handle. Let the fingers
unfold with their own follow-through, but make sure they don’t do it
all at the same time; try to keep at least a one- to two-frame differ
-
ence between each digit.
Give your scene as much screen time as you need to have your
character’s intent play out. Is he scared of the handle? Does the
handle represent some kind of long-sought-after goal? Is he going to
save the world with this handle (if it were part of a switch assembly)
or destroy it?
3. When you’re satisfied with your work, load in Scenes\chap
-
ters\ch10\Section_10-05_F.lws and compare your solutions
with mine.
Are there any ideas that come to mind as you’re watching and
comparing the scenes? Can the solutions I came up with for drag,
anticipation, or timing help you in making your scene better?
4. Take another pass through your scene. See if there are ways in
which it can be plussed (pushed beyond where it is) to make it
more entertaining or read better.
255
Chapter 10: Reviewing Animation Basics
Note:
You’ll notice that this scene starts on Frame 0. The character’s
rest pose is on frame –100. With the rest pose at –100, I can
still go back to it in case I need to straighten anything out, but it
is far enough away from Frame 0 that it won’t have too much
of an adverse effect on the motion curves (causing the character
to inbetween in an unwanted way from 0 to the first keyframe).
If you do notice the motion paths going off their intended
course between 0 and the first keyframe, you can always set the
frame counter at 0, and make a keyframe for all items at –1.
(This works best if you’re using TCB splines. It doesn’t work
quite as well for hermite or Bezier splines.) Remember, though,
to rekey –1 if you make adjustments to the pose on Frame 0!
10.6 Follow-Through
Follow-through is the counterpoint to drag. When you hold up that
(clean) shirt, and move your hand to the right, then stop, the shirt
flows beyond the stopping point of your hand. This is follow-
through. (The shirt then settles gently back to where your hand
stopped. This is settling.)
256
Chapter 10: Reviewing Animation Basics
Figure 10.9. The wrist moves upward, beyond its settling point, then comes back down to
rest. The palm and fingers continue to flow upward (they follow-through), even as the wrist
begins to settle back down. (The palm and fingers then drag behind the wrist to settle
slightly after it does.)
Note:
Some of the subtlety of the animation is lost in the above figure. (There
are many things about animation that can be best understood when
seen as animation.) Load in Scenes\chapters\ch10\Figure_10-09.lws.
As you watch it as a preview or scrub through the frames, watch the
graceful, fluid nature of the hand. See how the motion almost unfurls
but still has some snap to it as the fingers follow-through. Notice also
that the pinky settles first, then the middle finger, and finally the index
finger and thumb. (This variation in timing keeps the fingers from
twinning and is almost unnoticeable unless you go looking for it, but
adds a wealth of life to the motion.)
1. Load in Scenes\chapters\ch10\Section_10-06_Setup.lws.
2. Giving yourself three seconds of screen time to complete the
action, I want you to have our character place both his hands
on the crystal ball.
257
Chapter 10: Reviewing Animation Basics
Figure 10.10. Here’s the scene we’ll be working with for this exercise. The
character’s initial pose is almost identical to the previous exercise, but his intent
is entirely different.
Newbie Note:
Newbies, between the last couple of exercises, you’ve learned a
lot. I want you to work this scene from scratch with the rest of us. If
you’re really unhappy with how you do on it, you can always go
back and work with posing to my scene. But I think you’ll surprise
yourself with how well you actually do on your own here.
We’re going to be working with some acting here. The scene is
still very much open to interpretation, but I want you to make his
movements very fluid and mystical. He is moved by an irritable
power he doesn’t quite understand but doesn’t fear; the blood of his
gypsy ancestors runs deep in his veins. He raises both his hands
over the scrying sphere and lays them gently, reverently, almost
sensuously along its sides to gaze deep into the mists of time.
As you work, focus on all that you know, all that we’ve gone
over so far. Make sure there’s appropriate anticipation, drag, and
follow-through. With the exception of the scene length of three sec-
onds, you have carte blanche as to how much action to put in there.
Make sure that whatever action you do put in reads clearly; that
there is enough action to keep the scene interesting (by the end of
the scene, the audience will want to see what happens next), but
that there isn’t too much going on and we overwhelm the audience.
(You don’t want total sensory overload; people lose interest very
fast when they’re overwhelmed.)
After you’ve finished the scene and you’re watching it play out
before you, ask yourself if your character reads with the same per
-
sonality you envisioned him to have before starting the scene. Has
he remained true to your vision? If not, has he improved? Did you
find new ways of making his characteristics show through even
more?
This is a scene that should have a lot of fluidity to it. It should
really play up the drag and follow-through, not just on the fingers
and hands but on the elbows, back, and head, too. You’re allowed to
go over the top with the whole “mystical” thing on this scene. Ham
it up!
258
Chapter 10: Reviewing Animation Basics
Note:
An animator is an actor with a pencil, stylus, or mouse.
In this sense, being an animator is the best job in the
world.
3. Before you go on, jot down on paper some notes about your
scene and where you feel things could be improved (there
should always be at least some areas you feel can be
improved). Take note of the good things going on, too, the
things that read well and touch on what we’ve gone over so far.
4. Save a revision of your scene.
5. Take a look at what answers I came up with for this scene in
Scenes\chapters\ch10\Section_10-06_F.lws.
As you watch what I did, keep in mind that there are no “rights”
and no “wrongs.” There is simply my take on things and yours.
Since there is no overall story arc to which we are adhering, we
don’t have to worry about our guy being in character; all we have to
concern ourselves with is: Does the action look believable? Does
the action look good? Are there any areas in which things can be
improved?
259
Chapter 10: Reviewing Animation Basics
Note:
It’s a lot easier to pull something back from the edge of over
-
acting and tone it down than it is to try to get something that is
dry and straight to read with more warmth and richness. When
in doubt of what the director wants with a scene, I usually err
on the side of subtle intensity. I can always pull it back if the
director thinks it’s too much.
Note:
Scenes\chapters\ch10\Section_10-06_F.lws is just to give you
ideas and another viewpoint on how things can be done. The
greatest thing you can do for yourself as an animator is to
explore as many ways to do a thing as possible. Find as many
different solutions to problems as you can. Talk with other ani
-
mators, get their ideas on things, find new angles and insights,
and share what you have learned. The broader the range of
experience you can bring to your work, the more deep, rich,
and fulfilling it will become, not just to do, but to watch as well.