3D game engine programming all in one
Bạn đang xem bản rút gọn của tài liệu. Xem và tải ngay bản đầy đủ của tài liệu tại đây (19.57 MB, 849 trang )
<span class='text_page_counter'>(1)</span><div class='page_container' data-page=1></div>
<span class='text_page_counter'>(2)</span><div class='page_container' data-page=2></div>
<span class='text_page_counter'>(3)</span><div class='page_container' data-page=3></div>
<span class='text_page_counter'>(4)</span><div class='page_container' data-page=4>
<b>3D </b>
<b>Game Programming</b>
<b>A ll in One</b>
</div>
<span class='text_page_counter'>(5)</span><div class='page_container' data-page=5>
<b>Reference Group:</b>
Andy Shafran
<b>Publisher:</b>
Stacy L. Hiquet
<b>Senior Marketing Manager:</b>
Sarah O’Donnell
<b>Marketing Manager:</b>
Heather Hurley
<b>Manager of Editorial Services:</b>
Heather Talbot
<b>Acquisitions Editor:</b>
Mitzi Koontz
<b>Associate Marketing Manager:</b>
Kristin Eisenzopf
<b>Series Editor:</b>
André LaMothe
<b>Developmental Editors:</b>
Dave Astle and Kevin Hawkins
<b>Project Editor:</b>
Jenny Davidson
<b>Technical Reviewers:</b>
Michael Dawson and Les Pardew
<b>Retail Market Coordinator:</b>
Sarah Dubois
<b>Copy Editor:</b>
Laura Gabler
<b>Interior Layout Tech:</b>
Jill Flores
<b>Cover Designer:</b>
Steve Deschene
<b>CD-ROM Producer:</b>
Brandon Penticuff
<b>Indexer:</b>
Sharon Shock
<b>Proofreaders:</b>
Sandi Wilson and Sara Gullion
form or by any means, electronic or mechanical, including
photocopy-ing, recordphotocopy-ing, or by any information storage or retrieval system
with-out written permission from Course PTR, except for the inclusion of
brief quotations in a review.
The Premier Press logo and related trade dress are trademarks of Premier
Press and may not be used without written permission.
UltraEdit is a registered trademark of IDM Computer Solutions, Inc.,
Paint Shop Pro 8 is a trademark of Jasc Corporation, Inc. Audacity and
QuArK 6.3 use are subject to the GNU General Public License. Chain
Reaction and Reaction Engine SDK are trademarks of Monster Studios.
UVMapper 0.25—copyright ©1998-2002 Stephen L Cox, All rights
reserved. ThinkTanks is a trademark of BraveTree Productions, LLC. Orbz
is a trademark of Mind Vision Software. Marble Blast Gold is a trademark
of GarageGames. MilkShape 3D is a trademark of chUmbaLum sOft.
All other trademarks are the property of their respective owners.
<i>Important:</i>Course PTR cannot provide software support. Please contact
the appropriate software manufacturer’s technical support line or Web
site for assistance.
Course PTR and the author have attempted throughout this book to
distinguish proprietary trademarks from descriptive terms by following
the capitalization style used by the manufacturer.
Information contained in this book has been obtained by Course PTR
from sources believed to be reliable. However, because of the possibility
of human or mechanical error by our sources, Course PTR, or others, the
Publisher does not guarantee the accuracy, adequacy, or completeness of
any information and is not responsible for any errors or omissions or the
results obtained from use of such information. Readers should be
partic-ularly aware of the fact that the Internet is an ever-changing entity. Some
facts may have changed since this book went to press.
Educational facilities, companies, and organizations interested in
multi-ple copies or licensing of this book should contact the publisher for
quantity discount information. Training manuals, CD-ROMs, and
por-tions of this book are also available individually or can be tailored for
specific needs.
ISBN: 1-59200-136-X
Library of Congress Catalog Card Number: 2004090733
Printed in the United States of America
04 05 06 07 08 BH 10 9 8 7 6 5 4 3 2 1
Course PTR, a division of Course Technology
25 Thomson Place
</div>
<span class='text_page_counter'>(6)</span><div class='page_container' data-page=6></div>
<span class='text_page_counter'>(7)</span><div class='page_container' data-page=7>
I
would like to thank Dave Wilkes for his encouragement to do this book, and the otherguys at Wilkes Associates for just putting up with me, especially during the early days
of its creation.
I also want to thank my editors, Mitzi Koontz, Laura Gabler, Mike Dawson, Les Pardew,
Kevin Hawkins, and Dave Astle, and especially the ever-patient Jenny Davidson (she
laughs at my jokes!). A big thank you to André LaMothe for pushing the idea, and
mak-ing it happen.
Many thanks and a tip o’ the hat go to those Four Guys in a Garage: Jeff Tunnell, Rick
Overman, Mark Frohnmayer, and Tim Gift. These are the perpetrators of Torque, and the
founders of GarageGames. An amazing crew. Thanks to Desmond Fletcher for his
assis-tance (knowing and unknowing) with subjects as diverse as particles, terrain, and clouds.
Many thanks go to Melv May, Harold Brown, Anthony Rosenbaum, Phil Carlisle, Dave
Wyand, Matthew Fairfax, Pat Wilson, Ryan Parker, Simon Windmill, Kevin Ryan, Joe
Mar-uschak, Joel Baxter, Justin Mette and the 21-6 gang, and Frank Bignone, for their many
contributions to the Torque engine and its game development community. Hearty thanks
to Nick Palmer for allowing me to use his music, which appears on the CD.
I also want to thank every player who came to Tubettiworld in those halcyon DF2 days
and made it his or her virtual home. They made it a great place to play and socialize
online. I would like to list them all, but obviously I can’t. To the late John “Tufat” Tucker,
the gentleman—I salute you, !S. Then there are, in no particular order: AceTW, his evil
twin Malfunction, Strata, Spector, Roadkill, Midnight, Oz Mal, Deadbolt, Insomniac,
Checkfire, Norway, Animal, Qdad, MickyD, Buster, Major Chip Hazard, Pirate, Kotch, C2,
FF6, IRS Agent, and Kdawg—I mustn’t neglect to mention Dr. Evil and the great work he
</div>
<span class='text_page_counter'>(8)</span><div class='page_container' data-page=8>
and his gang are doing with the TXP stuff. Last, but certainly not least, Jim, The Nailer, the
epitome of the Online Game Player, and an all around great guy. I hope that everything
works out, Jim.
Along the way, there have been many others in various places that deserve some mention:
KILLER and his gang, who do what cornered rats do best—fight back. Many other game
developers can learn a thing or two about hard work from those guys. Onchas, Cowboy,
Badger, and the rest of the “Allies”—keep up the good work. Same with you “Axis”
play-ers (except that your days are numbered!). Also a hearty !S to the Playnet forum denizens
who opened a second front as soon as the war started (Teh?).
I’m sure I’ve forgotten to acknowledge someone, and I’ll probably get e-mails to that
effect, but that’s the risk one embraces.
</div>
<span class='text_page_counter'>(9)</span><div class='page_container' data-page=9>
viii
<b>KENNETHC. FINNEY</b> is the Principal Software Engineer at Wilkes Associates, Inc. in the
</div>
<span class='text_page_counter'>(10)</span><div class='page_container' data-page=10>
<b>ANDRÉLAMOTHE</b>, CEO, Xtreme Games LLC, has been involved in the computing
</div>
<span class='text_page_counter'>(11)</span><div class='page_container' data-page=11>
Introduction . . . .xxvi
<b>Chapter 1</b>
Introduction to 3D Game Development . . . .1
<b>Chapter 2</b>
Introduction to Programming . . . .31
<b>Chapter 3</b>
3D Programming Concepts . . . .89
<b>Chapter 4</b>
Game Programming . . . .123
<b>Chapter 5</b>
Game Play . . . .157
<b>Chapter 6</b>
Network . . . .205
<b>Chapter 7</b>
Common Scripts . . . .235
<b>Chapter 8</b>
Introduction to Textures . . . .275
<b>Chapter 9</b>
Skins . . . .309
<b>Chapter 10</b>
Creating GUI Elements . . . .335
<b>Chapter 11</b>
</div>
<span class='text_page_counter'>(12)</span><div class='page_container' data-page=12>
<b>Chapter 12</b>
Terrains . . . .365
<b>Chapter 13</b>
Introduction to Modeling with MilkShape . . . .381
<b>Chapter 14</b>
Making a Character Model . . . .415
<b>Chapter 15</b>
Making a Vehicle Model . . . .465
<b>Chapter 16</b>
Making Weapons and Items . . . .479
<b>Chapter 17</b>
Making Structures . . . .499
<b>Chapter 18</b>
Making the Game World Environment . . . .513
<b>Chapter 19</b>
Creating and Programming Sound . . . .539
<b>Chapter 20</b>
Game Sound and Music . . . .559
<b>Chapter 21</b>
Creating the Game Mission . . . .583
<b>Chapter 22</b>
The Game Server . . . .609
<b>Chapter 23</b>
The Game Client . . . .631
<b>Chapter 24</b>
The End Game . . . .659
<b>Appendix A</b>
The Torque Game Engine Reference . . . .667
<b>Appendix B</b>
Game Development Resources on the Internet . . . .741
<b>Appendix C</b>
Game Development Tool Reference . . . .749
<b>Appendix D</b>
</div>
<span class='text_page_counter'>(13)</span><div class='page_container' data-page=13>
<b>Introduction . . . .xxvi</b>
<b>Chapter 1 </b> <b>Introduction to 3D Game Development . . . .1</b>
The Computer Game Industry . . . .1
3D Game Genres and Styles . . . .2
Game Platforms . . . .8
Game Developer Roles . . . .11
Publishing Your Game . . . .15
Elements of a 3D Game . . . .16
Game Engine . . . .16
Scripts . . . .17
Graphical User Interface . . . .19
Models . . . .19
Textures . . . .20
Sound . . . .20
Music . . . .21
Support Infrastructure . . . .21
The Torque Game Engine . . . .23
Descriptions . . . .23
Using Torque in This Book . . . .28
Moving Right Along . . . .29
</div>
<span class='text_page_counter'>(14)</span><div class='page_container' data-page=14>
<b>Chapter 2</b> <b>Introduction to Programming . . . .31</b>
UltraEdit-32 . . . .31
Program Setup and Configuration . . . .32
Setting Up Projects and Files . . . .32
Search and Replace . . . .35
Find in Files . . . .38
grep . . . .39
Bookmarks . . . .42
Macros . . . .43
UltraEdit Review . . . .44
Controlling Computers with Programs . . . .45
Programming Concepts . . . .48
How to Create and Run the Example Programs . . . .48
Hello World . . . .49
Expressions . . . .52
Variables . . . .53
Operators . . . .60
Loops . . . .64
Functions . . . .66
Conditional Expressions . . . .71
Branching . . . .74
Debugging and Problem Solving . . . .82
Best Practices . . . .86
Moving Right Along . . . .87
<b>Chapter 3</b> <b>3D Programming Concepts . . . .89</b>
3D Concepts . . . .89
Coordinate Systems . . . .90
3D Models . . . .92
3D Shapes . . . .94
Displaying 3D Models . . . .95
Transformation . . . .95
Rendering . . . .98
Scene Graphs . . . .103
3D Audio . . . .104
3D Programming . . . .104
Programmed Translation . . . .105
</div>
<span class='text_page_counter'>(15)</span><div class='page_container' data-page=15>
Programmed Scaling . . . .113
Programmed Animation . . . .115
3D Audio . . . .119
Moving Right Along . . . .122
<b>Chapter 4</b> <b>Game Programming . . . .123</b>
Torque Script . . . .123
Strings . . . .124
Objects . . . .125
DataBlocks . . . .128
Game Structure . . . .129
Server versus Client Design Issues . . . .132
Common Functionality . . . .133
Preparation . . . .133
Root Main . . . .134
Control Main . . . .139
Initialization . . . .141
Client . . . .144
Server . . . .149
Player . . . .151
Running Emaga4 . . . .153
Moving Right Along . . . .155
<b>Chapter 5</b> <b>Game Play . . . .157</b>
The Changes . . . .157
Folders . . . .157
Modules . . . .158
Control Modules . . . .158
control/main.cs . . . .159
Client Control Modules . . . .160
control/client/client.cs . . . .160
control/client/interfaces/menuscreen.gui . . . .162
control/client/interfaces/playerinterface.gui . . . .165
control/client/interfaces/splashscreen.gui . . . .169
control/client/misc/screens.cs . . . .169
control/client/misc/presetkeys.cs . . . .171
Server Control Modules . . . .175
control/server/server.cs . . . .175
</div>
<span class='text_page_counter'>(16)</span><div class='page_container' data-page=16>
control/server/weapons/weapon.cs . . . .186
control/server/weapons/crossbow.cs . . . .190
control/server/misc/item.cs . . . .197
Running Emaga5 . . . .202
Moving Right Along . . . .203
<b>Chapter 6</b> <b>Network . . . .205</b>
Direct Messaging . . . .205
CommandToServer . . . .206
CommandToClient . . . .207
Direct Messaging Wrap-up . . . .209
Triggers . . . .209
Area Triggers . . . .209
Animation Triggers . . . .209
Weapon State Triggers . . . .210
Player Event Control Triggers . . . .210
GameConnection Messages . . . .211
What GameConnection Messages Do . . . .212
Specifics . . . .212
Finding Servers . . . .217
Code Changes . . . .217
New Modules . . . .218
Dedicated Server . . . .230
Root Main Module . . . .230
Control—Main Module . . . .231
Control—Initialize Module . . . .231
Testing Emaga6 . . . .232
Moving Right Along . . . .233
<b>Chapter 7</b> <b>Common Scripts . . . .235</b>
Game Initialization . . . .235
Selected Common Server Modules . . . .240
The Server Module . . . .240
The Message Module . . . .241
The MissionLoad Module . . . .242
The MissionDownload Module . . . .246
The ClientConnection Module . . . .250
</div>
<span class='text_page_counter'>(17)</span><div class='page_container' data-page=17>
Selected Common Code Client Modules . . . .258
The Canvas Module . . . .259
The Mission Module . . . .261
The MissionDownload Module . . . .262
The Messages Module . . . .266
A Final Word . . . .268
Moving Right Along . . . .273
<b>Chapter 8</b> <b>Introduction to Textures . . . .275</b>
Using Textures . . . .275
Paint Shop Pro . . . .279
Installing Paint Shop Pro . . . .279
Getting Started . . . .279
Working with Files . . . .283
Paint Shop Pro Features . . . .290
Moving Right Along . . . .307
<b>Chapter 9</b> <b>Skins . . . .309</b>
UV Unwrapping . . . .309
The Skin Creation Process . . . .310
Making a Soup Can Skin . . . .311
The Soup Can Skinning Procedure . . . .311
Testing the Soup Can Skin . . . .315
Making a Vehicle Skin . . . .316
The Dune Buggy Diversion . . . .316
Testing the Runabout Skin . . . .321
Making a Player Skin . . . .322
The Head and Neck . . . .322
Hair and Hands . . . .327
The Clothes . . . .329
Trying It on for Size . . . .333
Moving Right Along . . . .333
<b>Chapter 10</b> <b>Creating GUI Elements . . . .335</b>
Controls . . . .336
GuiChunkedBitmapCtrl . . . .337
GuiControl . . . .339
GuiTextCtrl . . . .339
</div>
<span class='text_page_counter'>(18)</span><div class='page_container' data-page=18>
GuiCheckBoxCtrl . . . .341
GuiScrollCtrl . . . .342
GuiTextListCtrl . . . .343
GuiTextEditCtrl . . . .344
The Torque GUI Editor . . . .345
The Cook’s Tour of the Editor . . . .345
Moving Right Along . . . .349
<b>Chapter 11</b> <b>Structural Material Textures . . . .351</b>
Sources . . . .352
Photography . . . .352
Original Artwork . . . .357
Scaling Issues . . . .358
Tiling . . . .359
Texture Types . . . .360
Irregular . . . .360
Rough . . . .361
Pebbled . . . .361
Woodgrain . . . .361
Smooth . . . .361
Patterned . . . .362
Fabric . . . .362
Metallic . . . .362
Reflective . . . .362
Plastic . . . .362
Moving Right Along . . . .363
<b>Chapter 12</b> <b>Terrains . . . .365</b>
Terrains Explained . . . .365
Terrain Characteristics . . . .365
Terrain Data . . . .367
Terrain Modeling . . . .367
Height Maps . . . .368
Terrain Cover . . . .369
Tiling 369
Creating Terrains . . . .370
The Height-Map Method . . . .370
Applying Terrain Cover . . . .378
</div>
<span class='text_page_counter'>(19)</span><div class='page_container' data-page=19>
<b>Chapter 13</b> <b>Introduction to Modeling with MilkShape . . . .381</b>
MilkShape 3D . . . .381
Installing MilkShape 3D . . . .381
The MilkShape 3D GUI . . . .382
Navigating in Views . . . .383
View Scale and Orientation . . . .383
The Soup Can Revisited . . . .384
Menus 391
The Toolbox . . . .398
The Preferences Dialog Box . . . .404
UVMapper . . . .406
The File Menu . . . .407
The Edit Menu . . . .407
The Help Menu . . . .407
UV Mapping . . . .407
Moving Right Along . . . .414
<b>Chapter 14</b> <b>Making a Character Model . . . .415</b>
Modeling Techniques . . . .415
Shape Primitives . . . .415
Incremental Polygon Construction . . . .415
Axial Extrusion . . . .416
Arbitrary Extrusion . . . .417
Topographical Shape Mapping . . . .417
Hybrids . . . .417
The Base Hero Model . . . .417
The Head . . . .418
The Torso . . . .423
Matching the Head to the Torso . . . .429
The Legs . . . .430
Integrating the Legs to the Torso . . . .432
The Arms . . . .433
Integrating the Arms to the Torso . . . .438
The Hero Skin . . . .438
Character Animation . . . .443
Animating Characters in Torque . . . .443
Building the Skeleton . . . .446
</div>
<span class='text_page_counter'>(20)</span><div class='page_container' data-page=20>
Exporting the Model for Torque . . . .458
The Torque DTS Exporter for MilkShape . . . .459
The Torque Game Engine (DTS) Exporter Dialog Box . . . .459
Special Materials . . . .460
Animation Sequences . . . .463
Moving Right Along . . . .464
<b>Chapter 15</b> <b>Making a Vehicle Model . . . .465</b>
The Vehicle Model . . . .466
The Sketch . . . .466
The Model . . . .467
The Wheels . . . .476
Testing Your Runabout . . . .477
Moving Right Along . . . .478
<b>Chapter 16</b> <b>Making Weapons and Items . . . .479</b>
The Health Kit . . . .479
The Model . . . .479
Testing the Health Kit . . . .480
A Rock . . . .481
Testing the Rock . . . .483
Trees . . . .483
The Solid Tree . . . .485
Testing the Solid Tree . . . .487
The Billboard Tree . . . .488
Testing the Billboard Tree . . . .489
The Tommy Gun . . . .490
Making the Model . . . .490
Skinning the Tommy Gun . . . .494
Testing the Tommy Gun . . . .495
The Tommy Gun Script . . . .497
Moving Right Along . . . .497
<b>Chapter 17</b> <b>Making Structures . . . .499</b>
Installing QuArK . . . .500
Using the Installer . . . .500
Configuration . . . .500
</div>
<span class='text_page_counter'>(21)</span><div class='page_container' data-page=21>
Building Bridges . . . .505
Building a House . . . .508
Moving Right Along . . . .512
<b>Chapter 18</b> <b>Making the Game World Environment . . . .513</b>
Skyboxes . . . .513
Creating the Skybox Images . . . .516
Adjusting for Perspective . . . .518
The Sky Mission Object . . . .519
Cloud Layers . . . .521
Cloud Specifications . . . .521
Cloud Textures . . . .522
Fog . . . .523
Storms . . . .524
Setting Up Sound . . . .524
Storm Materials . . . .528
Lightning . . . .529
Rain 531
A Perfect Storm . . . .532
Water Blocks . . . .533
Terraforming . . . .534
Moving Right Along . . . .538
<b>Chapter 19</b> <b>Creating and Programming Sound . . . .539</b>
Audacity . . . .540
Installing Audacity . . . .540
Using Audacity . . . .540
Audacity Reference . . . .542
OpenAL . . . .550
Audio Profiles and Data Blocks . . . .550
Audio Descriptions . . . .551
Trying It Out . . . .553
Koob . . . .555
Moving Right Along . . . .558
<b>Chapter 20</b> <b>Game Sound and Music . . . .559</b>
Player Sounds . . . .559
Footsteps . . . .560
</div>
<span class='text_page_counter'>(22)</span><div class='page_container' data-page=22>
Weapon Sounds . . . .565
Vehicle Sounds . . . .572
Environmental Sounds . . . .578
Interface Sounds . . . .579
Music . . . .580
Moving Right Along . . . .582
<b>Chapter 21</b> <b>Creating the Game Mission . . . .583</b>
Game Design . . . .583
Requirements . . . .584
Constraints . . . .585
Koob 586
Torque Mission Editor . . . .587
World Editor . . . .589
Terrain Editor . . . .590
Terrain Terraform Editor . . . .592
Terrain Texture Editor . . . .592
Mission Area Editor . . . .593
Building the World . . . .594
Particles . . . .594
The Terrain . . . .605
Items and Structures . . . .606
Moving Right Along . . . .608
<b>Chapter 22</b> <b>The Game Server . . . .609</b>
The Player-Character . . . .609
Player Spawning . . . .609
Vehicle Mounting . . . .611
The Model . . . .611
Server Code . . . .612
Vehicle . . . .617
Model 617
</div>
<span class='text_page_counter'>(23)</span><div class='page_container' data-page=23>
<b>Chapter 23</b> <b>The Game Client . . . .631</b>
Client Interfaces . . . .632
MenuScreen Interface . . . .632
SoloPlay Interface . . . .634
Host Interface . . . .635
FindServer Interface . . . .635
ChatBox Interface . . . .636
MessageBox Interface . . . .640
Client Code . . . .642
MenuScreen Interface Code . . . .642
SoloPlay Interface Code . . . .643
Host Interface Code . . . .647
FindServer Interface Code . . . .648
ChatBox Interface Code . . . .650
MessageBox Interface Code . . . .652
Game Cycling . . . .655
Final Change . . . .657
Moving Right Along . . . .657
<b>Chapter 24</b> <b>The End Game . . . .659</b>
Testing . . . .660
Basics . . . .660
Regression . . . .660
Play Testing . . . .661
Test Harnesses . . . .661
Hosted Servers . . . .661
Dedicated Servers . . . .662
FPS Game Ideas . . . .662
Other Genres . . . .663
Modifying and Extending Torque . . . .664
Go For It . . . .665
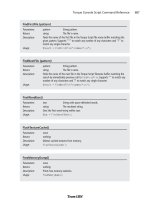
<b>Appendix A The Torque Game Engine Reference . . . .667</b>
</div>
<span class='text_page_counter'>(24)</span><div class='page_container' data-page=24>
<b>Appendix B</b> <b>Game Development Resources on the Internet . . . .741</b>
Torque-Related Web Sites . . . .741
Game Development Web Sites . . . .743
<b>Appendix C</b> <b>Game Development Tool Reference . . . .749</b>
Shareware and Freeware Tools . . . .750
Modeling . . . .750
Image Editing . . . .751
Programming Editing . . . .751
Audio Editing . . . .752
Retail Tools . . . .752
GNU General Public License . . . .754
<b>Appendix D QuArK Reference . . . .755</b>
The Map Editor . . . .755
Configuration Utility . . . .764
General . . . .764
Map . . . .766
map2dif Reference . . . .767
</div>
<span class='text_page_counter'>(25)</span><div class='page_container' data-page=25>
In the past few years, game development has become a huge subject, covering so
many areas of technology and expertise that learning all the various aspects of game
development would be a huge undertaking that would easily take 5-10 years to
mas-ter. One of my goals with the Premier <i>Game Development</i>series was to cover each
and every area of game development in depth, in a highly technical manner.
How-ever, sometimes you just want to know “how” to do something; you’re not really
interested in every single detail. Along these lines, I experimented with a totally
beginner book titled <i>Game Programming All in One</i>, in which the reader is assumed
to know nothing about game development, not even how to program! The book
you’re holding is really a follow-up to that book, albeit on a slightly different path.
Instead of teaching general game programming from the ground up, <i>3D Game </i>
<i>Programming All in One</i>teaches you how to make 3D games—period.
This book isn’t so much about developing 3D engines, complex 3D math, or even
physics, but how to create 3D games and what the high level major components of
them are. As the author Kenneth Finney and I discussed and developed the book, we
decided that the goal shouldn’t be to exhaustively teach 3D game development—that
would take 5,000 pages. Instead, the book should have the single goal—given a
reader is familiar with C/C++, teach him how to make a 3D game as quickly as
pos-sible, leverage as much technology as pospos-sible, but still give the reader enough
back-ground information on the low-level aspects of 3D game development that if he did
want to write everything from the rendered to the physics engine, he would have at
least an idea of what they do.
</div>
<span class='text_page_counter'>(26)</span><div class='page_container' data-page=26>
wants to learn how to build 3D games, but doesn’t necessarily want to spend 5-10
years learning how to build a 3D game engine from the ground up! In no time you
will be creating amazing games based on a state-of-the-art engine. Then, if you so
desire, you can always delve deeper into 3D engine design with further studies.
Sincerely,
André LaMothe
</div>
<span class='text_page_counter'>(27)</span><div class='page_container' data-page=27>
<b>Beginnings</b>
<i>“Hi, I’m using your software and I was wondering—can you tell me how I can make a</i>
<i>computer game? I don’t have much money, but I have this terrific idea for a shooter-like</i>
<i>XYZ game, except I’ll make it do…”</i>
During the past several years while working on the Tubettiland “Online Campaign”
soft-ware and more recently while working on the <i>Tubettiworld</i> game, I figure I’ve received
more than a hundred queries from people of all ages about how to get started making
games. There were queries from 40-year-olds and 13-year-olds and every age in between.
Most e-mails were from guys I would estimate to be in their late teens or early 20s.
After about the 30th response or so, I gave up trying to help these people out in detail and
started to just point them to Web sites where they could gather the information they
needed. Finally I stopped responding completely. But this bugged me to no end (I still get
several of these e-mails in a month), so every now and then I will respond with the Web
links or some pointers. However, whenever I do answer, I often get drawn into long e-mail
exchanges for which I just don’t have the time. Eventually I have to beg out of the
exchange, usually by being nonresponsive at some point. Then I feel bad again.
I see this book as a sort of e-mail to everyone I haven’t responded to. It’s been rattling
around in my head for about two years now, and I have to get it out!
<b>About This Book</b>
If you want to, you will be able to take this book and a computer, go into a room without
Internet access, and emerge with a completed, ready-to-play first-person shooter game
</div>
<span class='text_page_counter'>(28)</span><div class='page_container' data-page=28>
within weeks. You will then be able to spend as much time as you want to dream up your
game play concepts, and you will have the ability to add them to <i>your</i>game.
You might think this is a bold claim, but you can see for yourself. Go ahead and turn to
the Table of Contents, or take a quick flip-through skim of the chapters. It’s all there. If
you follow through and do the exercises and work, you will arrive at the other end of the
journey with experience, not just book learnin’.
<b>Believe in Yourself</b>
Computer games are a $9 billion per year industry. A growing part of this industry is
peo-ple like you—part of a growing segment of the gamer population that doesn’t just want
to play the games but believes that you can <i>make</i> them better than the game companies
can. Your problem may be that you lack the right combination of training, experience, and
tools needed to turn your dreams into reality. This book is for you.
Every year more and more colleges offer game development programs, and every few
months a new online indie game developer site launches on the Web. There is no lack of
training available for those with the money to pay, and there is no lack of books for those
of you who want to create your own engines or other specialized parts of a game.
The key element missing is a resource that takes the inspired and aspiring game developer
by the hand and walks him through all the steps and tools required to make a fully
fea-tured game. This book is that resource. With the exception of game music composition
(which itself could be a complete book series), you, the Gentle Reader, will <i>learn how to</i>
<i>create every part of the game yourself</i>by using a well-defined toolkit of programs,
knowl-edge, skills, and ideas. Sound, music, art, and code libraries are included on the
compan-ion CD for you to use if you lack a certain artistic or creative flair.
<b>What You Bring to the Party</b>
I assume that you have more than a passing familiarity with computer games, especially
the first-person shooter genre. Throw in some computer savvy, add a reasonably capable
computer system, sprinkle with desire, and you should be good to go!
<i><b>Skills</b></i>
</div>
<span class='text_page_counter'>(29)</span><div class='page_container' data-page=29>
I’m going to show you how to create your own artwork, but you don’t need to be an artist.
The companion CD features a large collection of art you can use in your game.
<i><b>System</b></i>
All of the development tools, including the engine, are also included on the companion
CD. All of these tools are priced such that even though the shareware version may be
included on the CD, the actual registered versions are less than $100.
You will need a Windows-based computer to use this book. (The table below outlines the
minimum system requirements.) It is possible for Macintosh and Linux users to use this
book to create a game, because the game engine used—Torque—is also available for those
platforms. However, not all of the required development tools are available on Mac and
Linux, so the book’s focus will be on Windows on Intel.
<b>What the Book Offers</b>
In this book we are going to look at all aspects of game development, a journey from first
principles to the completed game.
<i><b>Concepts</b></i>
We are going to take a look at various aspects of the game industry to give you the
oppor-tunity to see where you might fit in and what sort of opportunities there are. We’ll also
examine the elements of a 3D game, game design issues, and game genres.
<i><b>Programming</b></i>
Next, you’ll be introduced to the programming concepts that you will need to understand
in the course of using the book. You will see how to structure program code, create loops,
call functions, and use globally and locally scoped variables. We’ll use a subset of an
object-oriented programming language called Torque Script, which is built into the
System Requirements
Processor Pentium II/500MHz minimum
Operating System Windows 98/ME/2000/XP
Video Card 3D graphics accelerated video card, NVidia GeForce 2–32MB
equivalent or better
Display 17-inch recommended
Input Devices keyboard and mouse
</div>
<span class='text_page_counter'>(30)</span><div class='page_container' data-page=30>
Torque Engine. Hands-on sample programs that you can try are available on the
com-panion CD. We’ll move on to examining the 3D concepts that you will need to understand
some of the more sophisticated activities later in the book. This will provide a foundation
for both the programming and the modeling tasks that you will take on later.
<i><b>Torque</b></i>
Once you’ve been powered up with sufficient knowledge and understanding of the main
concepts in 3D game development, we’ll get into using the Torque Engine in detail. You
will learn how to handle client/server programming, how to control the player-character,
how to send messages between players, how to create and control AI bots, and much more.
Concepts will be presented with exercises and sample programs, which are available on
the CD. Although we will cover some of the more intricate low-level workings of the
Torque Engine in order to understand it better, it’s important to realize that as an
inde-pendent game developer you’ll benefit more from mastering the higher-level functions
that utilize the engine for us, so you can worry about other stuff—like game play.
With-out game play, you won’t have a game.
<i><b>Textures</b></i>
Next, the book will show you everything you need to know about game textures: how to
create them, how to modify and manipulate them, and how to use them in the game. The
coverage is comprehensive; all of the texture types and their uses are discussed: skins, tiles,
terrain, skyboxes, height maps, GUI widgets, and more. You will be guided through
exer-cises in creating each of the texture types. A library of textures is available on the
com-panion CD to fill in any gaps in your texture needs.
<i><b>Models</b></i>
Then we get to the meat of a 3D game—the models. In these chapters we will be delving
into the world of low-poly modeling. We’ll talk about the general principles involved in
ways that can be applied to other tools, such as the expensive 3D MAX or Maya. But the
practical focus will be geared toward using MilkShape, UVMapper, and other low-cost
tools that are included on the companion CD.
</div>
<span class='text_page_counter'>(31)</span><div class='page_container' data-page=31>
<i><b>Sound and Music</b></i>
After modeling, you will encounter the icing on the game cake: sound and music. You will
discover how to select, create, and modify sounds for use in your game. You will also get
some advice about selecting musical themes and how to integrate music into your game.
<i><b>Integration</b></i>
After picking up the required programming skills, and learning how to use the art creation
and modeling tools, you will learn how to knit all the parts together to create a game,
pop-ulate your game world, and then test and troubleshoot your game. Finally, we look at
where you can go with your shiny new 3D game developer’s toolkit of ideas, knowledge,
skills, and software tools.
<b>The Companion CD</b>
The companion CD contains quite a few resources. Following is a quick description. For
more detail, check the appendixes.
<i><b>Source Code</b></i>
The book’s CD contains all of the Torque Script source code in sample form and final
form. The samples will be aligned with the exercises in each chapter. The scripts for the
final completed game will be included in its own directory tree. The game will be usable
immediately upon installation from the CD so that you can have an instant and extensive
preview of what is to come.
<i><b>Game Engine</b></i>
The CD will contain the complete Torque Game Engine with its executable, DLLs, and all
required GUI and support files. It is a fully featured game engine that includes advanced
networking capabilities, blended animations, built-in server-side anticheat capabilities,
BSP support, a strong and complete object-oriented C++-like scripting language, and
many other advanced features.
<i><b>Tools</b></i>
The following shareware tools are included on the CD:
■ MilkShape 3D for 3D player and item modeling
■ QuArK for 3D interior modeling
■ Paint Shop Pro for texture and image manipulation
■ <sub>Audacity for sound editing and recording</sub>
</div>
<span class='text_page_counter'>(32)</span><div class='page_container' data-page=32>
<i><b>Goodies</b></i>
The CD also includes a few extras that aren’t mentioned in the book or that are only
briefly touched on:
■ <sub>Retail games created with Torque:</sub><i><sub>Orbz, ThinkTanks, Marble Blast, Chain Reaction</sub></i>
■ Additional image and audio libraries
■ Open Source utility source code
<b>Go Get ’em!</b>
</div>
<span class='text_page_counter'>(33)</span><div class='page_container' data-page=33></div>
<span class='text_page_counter'>(34)</span><div class='page_container' data-page=34>
1
<b>Introduction to </b>
<b>3D Game Development</b>
B
efore we get into the nitty-gritty details of creating a game, we need to cover somebackground so that we can all work from the same page, so to speak. In the first
part of this chapter, we will establish some common ground regarding the 3D
game industry in the areas that matter—the types of games that are made and the
differ-ent roles of the developers that make them. In the second part of the chapter, we'll
estab-lish what the essential elements of a 3D game are and how we will address them.
Throughout the book you will encounter references to different <i>genres</i>, or types, of games,
usually mentioned as examples of where a particular feature is best suited or where a
cer-tain idea may have originally appeared. In this chapter we will discuss the most common
of the 3D game genres. We will also discuss game development roles; I will lay out "job
descriptions" for the roles of producer, designer, programmer, artist, and quality
assur-ance specialist (or game tester). There are various views regarding the lines that divide the
responsibilities so my descriptions are fairly generic.
Finally, we will discuss the concept of the 3D game engine. If ever there is going to be an
area of dispute between a writer and his readers in a book like this, a discussion of what
constitutes a 3D game engine will be it. I do have a trump card, though. In this book we
will be using the Torque Game Engine as our model of what constitutes a fully featured
3D game engine. We will use its architecture as the framework for defining the internal
divisions of labor of 3D game engines.
<b>The Computer Game Industry</b>
</div>
<span class='text_page_counter'>(35)</span><div class='page_container' data-page=35>
its own celebrities. It is quite a bit more informal and relaxed than other high-tech fields
in many ways but is quicker paced with a higher burnout rate. There are independent
game developers, or indies, and big-name studios, but the computer game industry tends
to be more entrepreneurial in spirit.
Just as in the motion picture industry, an indie developer is one that is not beholden to
other businesses in their industry that can direct their efforts. Indies fund their own
efforts, although they sometimes can get funding from outside sources, like a venture
cap-italist (good luck finding one). The key factor that makes them independent is that the
funding does not come from <i>downstream</i>industry sources that would receive the
devel-oper's product, like a major game development house, publisher, or distributor.
Indies sell their product to distributors and publishers after the product is complete, or
nearly so. If a developer creates a product under the direction of another company, they
are no longer independent.
A good measure of the "indie-ness" of a developer is the answer to the following two
questions:
■ Can the developer make any game he wants, in whatever fashion he wants?
■ Can the developer sell the game to whomever he wants?
If the answer is "yes" in both cases, then the developer is an indie.
Of course, another strong similarity with movies is that, as I pointed out earlier, games are
typically classified as belonging to different genres.
<b>3D Game Genres and Styles</b>
Game development is a creative enterprise. There are ways to categorize the <i>game genres</i>,
but I want you to keep in mind that while some games fit each genre like a glove, many
others do not. That's the nature of creativity. Developers keep coming up with new ideas;
sometimes they are jockeying for an advantage over the competition and sometimes they
are just scratching an itch. At other times, calculating marketing departments decide that
mixing two popular genres is a surefire path to a secure financial future.
The first rule of creative design is that there are no rules. If you are just scratching an itch,
then more power to you. If you are looking to make a difference in the gaming world, you
should at least understand the arena. Let's take a look at the most common 3D genres
around today and a few that are interesting from a historical perspective. When you are
trying to decide what sort of game you want to create, you should try understanding the
genres and use them as guides to help focus your ideas.
</div>
<span class='text_page_counter'>(36)</span><div class='page_container' data-page=36>
some are still in development. Almost all of them use the same Torque Game Engine we
will use in this book to develop our own game.
By no means is this a definitive list; there are many genres that don't exist in the 3D
gam-ing realm, and the number of ways of combingam-ing elements of genres is just too large to
bother trying to enumerate. If you take pride in your creativity, you might resist attempts
to pigeonhole your game idea into one of these genres, and I wouldn't blame you. When
trying to communicate your ideas to others, however, you will find it useful to use the
gen-res as shorthand for various collections of featugen-res, style, and game play.
<i><b>Action Games</b></i>
Action games come in several forms. The most popular are the <i>First-Person Point-of-View</i>
(1st PPOV) games, where your player-character is armed, as are your opponents. The
game play is executed through the eyes of your character. These sorts of games are
usual-ly called <i>First-Person Shooter </i>(FPS) games. Game play variations include <i>Death Match</i>,
<i>Capture the Flag</i>,<i>Attack & Defend</i>, and<i>King-of-the-Hill</i>. Action games often have
multi-player online play, where your opponents are enemies controlled by real people instead of
by a computer. Success in FPS games requires quick reflexes, good eye-hand coordination,
and an intimate knowledge of the capabilities of your in-game weapons. Online FPS
games are so popular that some games have no single-player game modes.
Some action games are strictly 3rd PPOV, where you view your player-character, or <i>avatar</i>,
while also viewing the rest of the <i>virtual world</i>your avatar inhabits (see Figure 1.1).
<i>Half-Life 2</i>,<i>Rainbow Six</i>, and<i>Delta Force: Blackhawk Down</i>are popular examples of
FPS-style action games.
<i><b>Adventure Games</b></i>
Adventure games are basically
about exploring, where
player-characters go on a quest, find
things, and solve puzzles. The
pioneering adventure games
were text based. You would
type in movement commands,
and as you entered each new
area or room, you would be
given a brief description of
where you were. Phrases like
"You are in a maze of twisty
passages, all alike" are now
gaming classics. The best
</div>
<span class='text_page_counter'>(37)</span><div class='page_container' data-page=37>
adventure games play like interactive books or stories, where you as the player decide what
happens next, to a certain degree.
Text adventures evolved into text-based games with static images giving the player a
bet-ter idea of his surroundings. Eventually these merged with 3D modeling technology. The
player was then presented with either a first- or third-person point of view of the scene
his character was experiencing.
Adventure games are heavily story based and typically very linear. You have to find your
way from one major accomplishment to the next. As the story develops, you soon become
more capable of predicting where the game is going. Your success derives from your
abil-ity to anticipate and make the best choices.
Some well-known examples of adventure games are <i>The King's Quest</i>series,<i>The Longest</i>
<i>Journey</i>, and<i>Syberia</i>.
Online adventure games have not really come into their own yet, although some games are
emerging that might fit the genre. They tend to include elements of FPS action games and
<i>Role-Playing Games</i>(RPGs) to fill out the game play, because the story aspect of the game
is more difficult to accomplish in an online environment. Players advance at different
speeds, so a monolithic linear story line would become pretty dreary to a more advanced
player. An example of an online action-adventure-FPS hybrid game is <i>Tubettiworld</i> (see
Figure 1.2), being developed by my all-volunteer team at Tubetti Enterprises.
<i><b>Role-Playing Games</b></i>
Role-playing games are very popular; that popularity can probably find its roots in our
early childhood. At younger
than age six or seven, we often
imagined and acted out
excit-ing adventures inspired by our
action figures and other toys or
children's books. As was also
true for strategy games, the
more mature forms of these
games first evolved as
pen-and-paper games, such as <i>Dungeons</i>
<i>& Dragons</i>.
These games moved into the
computer realm with the
com-puter taking on more of the
data-manipulation tasks of the
game masters. In role-playing
games, the player is usually
</div>
<span class='text_page_counter'>(38)</span><div class='page_container' data-page=38>
responsible for the
develop-ment of his game character's
skills, physical appearance,
loy-alties, and other
characteris-tics. Eventually the game
envi-ronment moved from each
player's imaginations onto the
computer, with rich 3D fantasy
worlds populated by visually
satisfying representations of
buildings, monsters, and
crea-tures (see Figure 1.3). RPGs are
usually science fiction or
fan-tasy based, with some
histori-cally oriented games being
popular in certain niches.
<i><b>Maze and Puzzle Games</b></i>
Maze and puzzle games are somewhat similar to each other. In a maze game you need to
find your way through a "physical" maze in which your routes are defined by walls and
other barriers. Early maze games were 2D, viewed from the top; more recent ones play
more like 3D adventure or FPS games.
Puzzle games are often like maze games but with problems that need to be solved, instead
of physical barriers, to find your way through.
Mazes also make their
appear-ance in arcade pinball-style
games such as <i>Marble Blast</i>(see
Figure 1.4) by GarageGames. It
is a maze-and-puzzle hybrid
game where you compete
against the clock in an effort to
navigate a marble around
physical barriers. The puzzle
aspect lies in determining the
fastest (though not necessarily
the most direct) route to the
finish line.
Puzzle games sometimes use
puzzles that are variations of the
shell game or that are more
<b>Figure 1.3 </b>Myrmidon—a science fiction RPG, another
Torque-based game, being developed by 21-6 Productions.
</div>
<span class='text_page_counter'>(39)</span><div class='page_container' data-page=39>
indirect problem-solving puzzles where you must cause a series of things to happen in order
to trigger some further action that lets you advance. Many puzzle games utilize direct
prob-lem-solving modes where the puzzle is presented visually. You then need to manipulate
on-screen icons or controls in the correct sequences to solve the problem. The best puzzles are
those where the solution can be deduced using logic. Puzzles that require pure
trial-and-error problem-solving techniques tend to become tedious rather quickly. A historic
exam-ple of a puzzle game is <i>The Incredible Machine</i>series by Dynamix. The latest variation of this
type is the new game <i>Chain Reaction</i>by Monster Studios (see Figure 1.5).
<i><b>Simulator Games</b></i>
The goal of a simulator (or <i>sim</i>)
game is to reproduce a
real-world situation as accurately as
possible. The measure of the
simulation accuracy is usually
called its <i>fidelity</i>. Most
simula-tors put a heavy emphasis on the
fidelity of the visual appearance,
sounds, and physics of the game.
The point is total immersion in
the game environment, so that
you get the feeling you are
actu-ally there. You may be flying a
jet fighter or driving a
thor-oughbred Grand Prix racing
car. The game mirrors the
real-life experience to the maximum
the developers can manage.
Simulators usually require
spe-cialized input devices and
con-trollers, such as aircraft
joy-sticks and rudder pedals. Many
simulator enthusiasts build
complete physical cockpit
mockups to enhance the
immersion experience.
<i>Falcon 4</i>, <i>Grand Prix Legends</i>,
and <i>Center World</i> (see Figure
1.6) are examples of simulator
games.
<b>Figure 1.5 </b>Chain Reaction—a puzzle game by Monster
Studios using its Reaction Engine.
</div>
<span class='text_page_counter'>(40)</span><div class='page_container' data-page=40>
<i><b>Sports Games</b></i>
Sports games are a variation of
the simulator class of games in
which the developer's intent is
to reproduce the broad
experi-ence of the game as accurately
as possible. You can participate
in a sports game at various
lev-els and watch the action play
out in a realistic 3D
environ-ment (see Figure 1.7).
Unlike the action-oriented
flight and driving simulators,
sports games usually have a
manager or season angle.
While playing the game, you
can also take on the role of
coach, owner, or team manager. You can execute draft picks and trades or groom new
players like any major league ball organization would. In a modern sports simulator you
could be managing budgets, and you might play or race a regular year's schedule, playing
in different stadiums or arenas or racing on different tracks.
<i><b>Strategy Games</b></i>
Strategy games began as pen-and-paper games, like war games, that have been around for
centuries. As computer technology evolved, computer-based tables and random-number
generators replaced the decision-making aspects of strategy games traditionally
embod-ied by lookup charts and dice rolls.
Eventually the tabletop battlefields (or sandbox battlefields) with their cardboard
mark-ers or die-cast military miniatures moved into the computmark-ers as well. The early tabletop
games were usually turn based: Each player would in turn consider his options and issue
"orders" to his units. Then he would throw the dice to determine the result of the orders.
The players would then modify the battlefield based upon the results. After this, the
play-ers would observe the new shape of the battlefield and plot their next moves. The cycle
then repeated itself.
The advent of computer-based strategy games brought the concept of <i>real time</i>to the
forefront. Now the computer determines the moves and results and then structures the
battlefield accordingly. This has given birth to the Real-Time Strategy (RTS) genre. It does
this on a time scale that reflects the action. Sometimes the computer will compress the
time scale, and other times the computer will operate in real time, where one minute of
</div>
<span class='text_page_counter'>(41)</span><div class='page_container' data-page=41>
time in the game action takes one minute in the real world. The player issues orders to his
unit as he deems them to be necessary. Recently, strategy games have moved into the 3D
realm, where players can view the battlefield from different angles and perspectives as they
plot their next moves (see Figure 1.8).
There are strategy games that exist outside the world of warfare. Some examples include
business strategy games and political strategy games. Some of these games are evolving
into <i>strategic simulations</i>, like the well-known <i>SimCity</i>series of games.
<b>Game Platforms</b>
This book is about computer games written for personal computers. There are three
dom-inant operating systems: Microsoft Windows, Linux, and Mac OS. For some of these
sys-tems there are quite a few different flavors, but the differences within each system are
usu-ally negligible, or at least manageable.
Another obvious game platform type is the home game console, such as the Sony
PlayStation or the Nintendo GameCube. These are indeed important, but because of the
closed nature of the development tools and the expensive licenses required to create
games for them, they are beyond the scope of this book.
Other game platforms include <i>Personal Digital Assistants</i> (PDAs), such as palm-based
computers, and cell phones that support protocols that permit games to be played on
them. Again, these platforms are also beyond the scope of this book.
Now that those little disclaimers are out of the way, let's take a closer look at the three game
platforms of interest. It's
important to note that by using
the Torque Game Engine, you
will be able to develop what
amounts to a single code base
for a game that you can ship for
<i>all three platforms</i>: Windows,
Linux, and Macintosh!
<i><b>Windows</b></i>
Windows has various historical
versions, but the current
fla-vors are Windows 2000,
Windows XP, and the
special-ized Windows CE. In this book
the expectation will be that you
are developing on or for a
</div>
<span class='text_page_counter'>(42)</span><div class='page_container' data-page=42>
<b>Some Popular Retail 3D Games and Their Genres</b>
If you are still unclear about what a particular genre is about, take a look at the following table. It
is a list of current "big-name" game titles (including one or two that are not yet released). Be
aware that you may find a Web site or magazine somewhere that classifies these games in a
slightly different way. That's cool—don't worry about it.
<b>Game</b> <b>Publisher</b> <b>Genre</b>
</div>
<span class='text_page_counter'>(43)</span><div class='page_container' data-page=43>
Windows XP target system, because that is the version that Microsoft is now selling to the
home computer market.
Within Windows XP, we will be using OpenGL and Direct3D as our low-level graphics
<i>Application Programming Interfaces </i>(APIs). These APIs provide a means for our engine to
access the features of the video adapters in our computers. Both OpenGL and Direct3D
provide basically the same services, but each has its own strengths and weaknesses. With
Torque you will have the choice of letting your end users use either API.
OpenGL's greatest strength lies in its availability with different computer systems. An
obvious benefit is that the developer can create a game that will work on most
comput-ers. OpenGL is an open-source product. In a nutshell, this means that if there is a
partic-ular capability you want that OpenGL lacks, you can get access to the OpenGL source
code and rebuild it the way you want. This assumes you have the skills, time, and tools
necessary to get the job done, but you <i>can</i>do it.
DirectX is proprietary—it is the creation and intellectual property of Microsoft
Corporation. Its biggest advantage is that it tends to support more features than OpenGL,
and the 3D video adapter manufacturers tend to design their hardware to work with
DirectX as much as they can. With DirectX you get a much more complete and the most
advanced feature set. Unfortunately, you are limited to Windows-based systems if you put
all your eggs in the DirectX basket.
The Torque Game Engine uses both APIs and gives you a rather straightforward set of
techniques to set up your game with either. This means that in a Windows version of your
game, you can offer your users the option of using the API that best suits their video
adapter.
<i><b>Linux</b></i>
For most people, the single most important reason to use Linux is the price—it's free. You
may have to pay to get a distribution of Linux on CD with manuals at a store, but you are
paying for the cost of burning the CD, writing and printing the manuals, and distribution.
You don't have to pay for the operating system itself. In fact, you can download Linux
from many different locations on the Internet.
As a game developer, you will have a threefold interest in targeting Linux:
■ Linux is a growing marketplace, and any market that is growing is a good target.
Although the market is growing, it is still smaller than the Windows market. The
place where Linux is growing is in universities, colleges, and other postsecondary
institutions—and this is probably where your best computer gaming audience is.
■ There are few computer games available for Linux desktops; most developers focus
</div>
<span class='text_page_counter'>(44)</span><div class='page_container' data-page=44>
be a bigger fish in a smaller ocean. That gets you exposure and a reputation that
you can build on. And that's nothing to sneeze at.
■ <sub>Linux offers a more configurable and secure environment for unattended Internet</sub>
game servers. Linux servers can be run in a console mode that requires no fancy
graphics, buttons, or mice. This allows you to utilize slower computers with less
mem-ory for servers and still get the computing power you need for your game server.
Unlike other operating systems, Linux comes in a variety of flavors known as <i>distributions</i>.
There are many ongoing arguments about the merits of one distribution or another. Some
of the more popular distributions are Red Hat, SuSE, Mandrake, Turbolinux, Debian, and
Slackware. Although they may be organized differently in some cases and each has its own
unique graphical look and feel, they are all based on the same kernel. It is the kernel that
defines it as Linux.
<i><b>Macintosh</b></i>
The Macintosh is used a great deal in art-related fields and in the art departments of many
businesses. Although the price point might not be as good as Linux (where the OS and
most software is free), the Macintosh operating system is typically more accessible to the
less tech-savvy users among us.
As with Linux, there has also traditionally been a dearth of computer games available for the
Mac. So the big fish–small ocean factor applies here as well. Go ahead and make a splash!
<b>n o t e</b>
One minor disadvantage of working with cross-platform software like Torque is the issue of
nam-ing conventions. In this book, wherever possible, I will head off the potential conflicts with a note
that will cast a particular naming approach in stone for the duration of this book.
An example that will probably become obvious pretty quickly is the concept of directories or
fold-ers. The latter is shorter and easier to type, and the term will be used often. To save my editors the
hassle, I will use folders. If you are a directories person, please just play along, okay?
<b>Game Developer Roles</b>
</div>
<span class='text_page_counter'>(45)</span><div class='page_container' data-page=45>
<i><b>Producer</b></i>
A game producer is essentially the game project's leader. The producer will draw up and
track the schedule, manage the people who do the hands-on development work, and
man-age the budget and expenditures. The producer may not know how to make any part of a
game at all, but he is the one person on a game project who knows everything that is
hap-pening and why.
It's the producer who needs to poke the other developers in the ribs when they seem to be
lagging. The producer needs to be aware when different members of the team are in need
of some tool, knowledge, or resource and arrange to provide the team members with what
they need.
Sometimes producers just need to spray a liberal dose of Ego-in-a-Can to refresh a
despondent developer who keeps smashing into the same brick wall over and over while
the clock ticks down.
The producer will also be the interface for the team to the rest of the world, handling
media queries, negotiating contracts and licenses, and generally keeping the big noisy
bothersome world off the backs of the development team.
<i><b>Designer</b></i>
If you are reading this, I have no doubt that you want to be a game designer. And why not?
Game designers are like fun engineers—they create fun out of their imaginations. As a
game designer, you will decide the theme and rules of the game, and you will guide the
evolution of the overall feel of the game. And be warned—it had better be fun!
There are several levels of designers: lead designer, level designer, designer-writer,
charac-ter designer, and so on. Large projects may have more than one person in each design role.
Smaller projects may have only one designer or even a designer who also wears a
pro-grammer's or artist's hat! Or both!
Game designers need to be good communicators, and the best ones are great
collabora-tors and persuaders. They need to get the ideas and concepts out of their heads and into
the heads of the rest of the development team. Designers not only create the concept and
feel of the game as a whole, but also create levels and maps and help the programmers
stitch together different aspects of the game.
</div>
<span class='text_page_counter'>(46)</span><div class='page_container' data-page=46>
Unlike the producer, a designer needs to understand the technical aspects of the game and
how the artists and programmers do what they do.
<i><b>Programmer</b></i>
Game programmers write program code that turns game ideas, artwork, sound, and
music into a fully functional game. Game programmers control the speed and placement
of the game artwork and sound. They control the cause-and-effect relationships of events,
translating user inputs through internal calculations into visual and audio experiences.
There can be many different specializations in programming. In this book you will be
doing a large amount of programming of game rules, character control, game event
man-agement, and scoring. You will be using Torque Script to do all these things.
For online game programming, specialization may also be divided between client code
and server code. It is quite common to specify character and player behavior as a
partic-ular programmer specialty. Other specialty areas might be vehicle dynamics,
environ-mental or weather control, and item management.
Other programmers on other projects might be creating parts of the 3D game engine, the
networking code, the audio code, or tools for use with the engine. In our specific case
these specializations aren't needed because Torque looks after all of these things for us. We
are going to focus on making the game itself.
<i><b>Visual Artist</b></i>
During the design stages of development, game artists draw sketches and create
story-boards to illustrate and flesh out the designers' concepts. Figure 1.9 demonstrates a
con-ceptual design sketch created by a visual artist, and used by the development team as a
ref-erence for modeling and programming work. Later they will create all the models and
tex-ture artwork called for by the design document, including characters, buildings, vehicles,
and icons.
The three principal types of 3D art are models, animations, and textures.
■ <sub>3D modelers design and build player-characters, creatures, vehicles, and other</sub>
mobile 3D constructs. In order to ensure the game gets the best performance
pos-sible, model artists usually try to make the least complex model that suits the job.
A 3D modeler is very much a sculptor working with digital clay.
■ Animators make those models move. The same artist quite often does both
model-ing and animation.
</div>
<span class='text_page_counter'>(47)</span><div class='page_container' data-page=47>
reduce the model complexity by using highly detailed and cleverly designed
tex-tures. The intent is to fool the eye into seeing more detail than is actually there. If a
3D modeler molds a sculpture in digital clay, the texture artist paints that sculpture
with digital paint.
<i><b>Audio Artist</b></i>
Audio artists compose the music and sound in a game. Good designers work with
cre-ative and inspired audio artists to create musical compositions that intensify the game
experience.
Audio artists work closely with the game designers, determining where the sound effects
are needed and what the character of the sounds should be. Audio artists often spend
quite a bit of time experimenting with sound-effect sources, looking for different ways to
generate the precise sound needed. Visit an audio artist at work and you might catch him
slapping rulers and dropping boxes in front of a microphone. After capturing the basic
sound, an audio artist will then massage the sound with sound-editing tools to vary the
pitch, to speed it up or slow it down, to remove unwanted noise, and so on. It's often a
</div>
<span class='text_page_counter'>(48)</span><div class='page_container' data-page=48>
tightrope walk, balancing realistic sounds with the need to exaggerate certain
characteris-tics in order to make the right point in the game context.
<i><b>Quality Assurance Specialist</b></i>
<i>Quality Assurance</i>(QA) is a somewhat fancy name for <i>testing</i>. The general field of QA is
more extensive than that, of course, but in the game business game testers take the brunt
of the QA load. The purpose of testing is to ensure that a finished game is really
fin-ished, with as few bugs or problems as humanly possible. QA testing requires the
qual-ity assurance specialist, or game tester, to play each part of a game, trying to smooth out
all glitches and bugs.
Most of the problems QA testing will find are visual or behavioral: text that doesn't
correct-ly wrap on an edge, characters that don't jump correctcorrect-ly, or a level that has buildings
mis-placed. Testing can find game play problems; these are usually related more to the design
than the programming. An example could be that the running speed of a player might not
be fast enough to escape a particular enemy when it should be more than fast enough.
QA specialists need to be methodical in order to increase the chances of finding a bug.
This might mean replaying a certain part of a game many times to the point of boredom.
QA specialists need to be able to communicate well in order to write useful and
mean-ingful bug reports.
<b>Publishing Your Game</b>
You can self-publish, of course. Whip up a Web site, add a shopping cart system, get your
site added to various search engines, and sit back to wait for the dough to roll in, right?
Well, it<i>might</i>work.
If you really think you have the next killer game and want it to sell, however, you need to
hook up with someone who knows what they are doing. That would be a publisher. If you
are an independent game developer, you will probably have difficulty attracting the
atten-tion of the big-name publishers. They usually know what they are looking for, are
nor-mally only interested in developers with proven track records, and probably already know
whom they want to deal with anyway.
But all is not lost—there are options available for the indie. The one I recommend is
GarageGames (). Besides offering competitive publishing
terms for indie developers, GarageGames also created the Torque Game Engine, which it
has graciously agreed to allow me to include on the CD for this book. Torque is the
tech-nology behind the popular and successful <i>Tribes</i>series of games. I'm going to help you
learn how to use Torque as an enormous lever in creating your game.
</div>
<span class='text_page_counter'>(49)</span><div class='page_container' data-page=49>
source code for the engine, so you can turn any game dream into a reality—for only $100!
That's a hundred bucks for full access to the inner workings of an award-winning AAA 3D
game engine. As Neo would say, "Whoa!"
I have no qualms about suggesting that you go to GarageGames. They are the guys behind
the<i>Tribes</i>franchise, which is now owned by Sierra. They know their stuff, but they are not
some big faceless corporate entity. They're basically a handful of guys who've made their
splash in the corporate computer game industry, and now they're doing their level best to
help the independent game developers of the world make their own splashes.
And no, they aren't paying for this book!
<b>Elements of a 3D Game</b>
The architecture of a modern 3D game encompasses several discrete elements: the engine,
scripts, GUI, models, textures, audio, and support infrastructure. We're going to cover all
of these elements in detail in this book. In this section I'll give you some brief sketches of
each element to give you a sense of where we are going.
<b>Game Engine</b>
Game engines provide most of the significant features of a gaming environment: 3D scene
rendering, networking, graphics, and scripting, to name a few. See Figure 1.10 for a block
diagram that depicts the major feature areas.
Game engines also allow for a sophisticated rendering of game environments. Each game
uses a different system to organize how the visual aspects of the game will be modeled.
This becomes increasingly important as games are becoming more focused on 3D
envi-ronments, rich textures and forms, and an overall realistic feel to the game. Textured
Polygon rendering is one of the most common forms of rendering in FPS games, which
tend to be some of the more visually immersive games on the market.
By creating consistent graphic
ments and populating those
environ-ments with objects that obey specific
physical laws and requirements,
gam-ing engines allow games to progress
sig-nificantly along the lines of producing
more and more plausible narratives.
Characters are constrained by rules that
have realistic bases that increase the
gamer's suspension of disbelief and
draw him deeper into the game.
</div>
<span class='text_page_counter'>(50)</span><div class='page_container' data-page=50>
By including physics formulas, games are able to realistically account for moving bodies,
falling objects, and particle movement. This is how FPS games such as <i>Tribes 2</i>,<i>Quake 3</i>,
<i>Half-Life 2</i>, or <i>Unreal II</i>are able to allow characters to run, jump, and fall in a virtual game
world. Game engines encapsulate real-world characteristics such as time, motion, the
effects of gravity, and other natural physical laws. They provide the developer with the
ability to almost directly interact with the gaming world created, leading to more
immer-sive game environments.
As mentioned earlier, this book will employ the Torque Game Engine from GarageGames
(). The Torque is included on the CD with this book. Later on
we will discuss Torque in more detail—and you will understand why Torque was chosen.
<b>Scripts</b>
As you've just seen, the engine provides the code that does all the hard work, graphics
ren-dering, networking, and so on. We tie all these capabilities together with scripts.
Sophisticated and fully featured games can be difficult to create without scripting
capa-bility.
Scripts are used to bring the different parts of the engine together, provide the game play
functions, and enable the game world rules. Some of the things we will do with scripts in
this book include scoring, managing players, defining player and vehicle behaviors, and
controlling GUI interfaces.
Following is an example of a Torque script code fragment:
// Beer::RechargeCompleteCB
// args: %this - the current Beer object instance
// %user - the player connection user by id
//
// description:
// Callback function invoked when the energy recharge
// the player gets from drinking beer is finished.
// Note: %this is not used.
function Beer:: RechargeCompleteCB (%this,%user)
{
// fetch this player's regular recharge rate
// and use it to restore his current recharge rate
// back to normal
%user.setRechargeRate(%user.getDataBlock().rechargeRate);
}
// Beer::OnUse
</div>
<span class='text_page_counter'>(51)</span><div class='page_container' data-page=51>
// %user - the player connection user by id
//
// description:
// Callback function invoked when the energy recharge
// the player gets from drinking beer is finished.
//
function Beer::OnUse(%this,%user)
{
// if the player's current energy level
// is zero, he can't be recharged, because
// he is dying
if (%user.getEnergyLevel() != 0)
{
// figure out how much the player imbibed
// by tracking the portion of the beer used.
%this.portionUsed += %this.portion;
// check if we have used up all portions
if (%this.portionUsed >= %this.portionCount)
{
// if portions used up, then remove this Beer from the
// player's inventory and reset the portion
%this.portionUsed = 0;
%user.decInventory(%this,1);
}
// get the user's current recharge rate
// and use it to set the temporary recharge rate
%currentRate = %user.getRechargeRate();
%user.setRechargeRate(%currentRate +%this.portionCount);
// then schedule a callback to restore the recharge rate
// back to normal in 5 seconds. Save the index into the schedule
// list in the Beer object in case we need to cancel the
// callback later before it gets called
%this.staminaSchedule = %this.schedule(5000,"RechargeCompleteCB",%user);
// if the user player hasn't just disconnected on us, and
// is not a 'bot.
if (%user.client)
{
</div>
<span class='text_page_counter'>(52)</span><div class='page_container' data-page=52>
// send the appropriate message to the client system message
// window depending on whether the Beer has been finished,
// or not. Note that whenever we get here portionUsed will be
// non-zero as long as there is beer left in the tankard.
if (%this.portionUsed == 0)
messageClient(%user.client, 'MsgBeerUsed', '\c2Tankard polished off');
else
messageClient(%user.client, 'MsgBeerUsed', '\c2Beer swigged');
}
}
}
The example code establishes the rules for what happens when a player takes a drink of
beer. Basically, it tracks how much of the beer has been consumed and gives the player a
jolt of energy for five seconds after every mouthful. It sends messages to the player's client
screen telling him what he's done—had a sip or polished off the whole thing. It also plays
a sound effect of the player sighing in relief and contentment with every drink.
<b>Graphical User Interface</b>
The <i>Graphical User Interface</i>(GUI) is typically a combination of the graphics and the
scripts that carries the visual appearance of the game and accepts the user's control inputs.
The player's <i>Heads Up Display</i>(HUD), where health and score are displayed, is part of the
GUI. So are the main start-up menus, the settings or option menus, the dialog boxes, and
the various in-game message systems.
Figure 1.11 shows an example main screen using the <i>Tubettiworld</i>game. In the upper-left
corner, the text that says "Client 1.62" is an example of a GUI text control. Stacked along
the left side from the middle down are four GUI button controls. The popsicle-stick
snap-per logo in the lower right and the <i>Tubettiworld</i>logo across the top of the image are GUI
bitmap controls that are overlayed on top of another GUI bitmap control (the
back-ground picture). Note that in the figure the top button control (Connect) is currently
highlighted, with the mouse cursor over the top of it. This capability is provided by the
Torque Game Engine as part of the definition of the button control.
In later chapters of this book we will spend a good deal of time contemplating, designing,
and implementing the GUI elements of our game.
<b>Models</b>
</div>
<span class='text_page_counter'>(53)</span><div class='page_container' data-page=53>
kind. Our player's character is
a model. The world he tromps
on is a special kind of model
called <i>terrain</i>. All the
build-ings, trees, lampposts, and
vehicles in our game world are
models.
In later chapters we will spend
a great deal of time creating
and texturing models,
animat-ing them, and then insertanimat-ing
them into our game.
<b>Textures</b>
In a 3D game, textures are an
important part of rendering
the models in 3D scenes.
Textures (in certain cases called
<i>skins</i>—see Figure 1.13) define
the visually rendered
appear-ance of all those models that go
into a 3D game. Proper and
imaginative uses of textures on
3D models not only will
enhance the model's
appear-ance but will also help reduce
the complexity of the model.
This allows us to draw more
models in a given period of
time, enhancing performance.
<b>Sound</b>
Sound provides the contextual flavoring in a 3D game, providing audio cues to events and
background sounds that imply environments and context, as well as 3D positioning cues
for the player. Judicious use of appropriate sound effects is necessary for making a good
3D game. Figure 1.14 shows a sound-effect waveform being manipulated in a
waveform-editing program.
<b>Figure 1.11 </b>An example of a main menu GUI.
</div>
<span class='text_page_counter'>(54)</span><div class='page_container' data-page=54>
<b>Music</b>
Some games, especially multiplayer games, use
little music. For other games, such as
single-player adventure games, music is an essential
tool for establishing story line moods and
con-textual cues for the player.
Composing music for games is beyond the scope
of this book. During the later chapters, however,
I will point out places where music might be
useful. It is always helpful to pay attention to
your game play and whatever mood you are
try-ing to achieve. Addtry-ing the right piece of music
just might be what you need to achieve the
desired mood.
<b>Support Infrastructure</b>
This is more important for
per-sistent multiplayer online
games than single player games.
When we ponder game
infra-structure issues, we are
consid-ering such things as databases
for player scores and
capabili-ties, auto-update tools, Web
sites, support forums, and,
finally, game administration
and player management tools.
The following infrastructure
items are beyond the scope of
this book, but I present them
here to make you aware that you should spend time considering what you might need to do.
<i><b>Web Sites</b></i>
A Web site is necessary to provide people with a place to learn news about your game,
find links to important or interesting information, and download patches and fixes for
your game.
A Web site provides a focal point for your game, like a storefront. If you intend to sell your
game, a well-designed Web site is a necessity.
<b>Figure 1.13 </b>The textures used as the
skin of the old-style helicopter.
</div>
<span class='text_page_counter'>(55)</span><div class='page_container' data-page=55>
<i><b>Auto-update</b></i>
An auto-update program accompanies your game onto the player's system. The updater
is run at game start-up and connects via the Internet to a site that you specify, looking for
updated files, patches, or other data that may have changed since the user last ran the
pro-gram. It then downloads the appropriate files before launching the game using the
updat-ed information.
Games like <i>Delta Force: Blackhawk Down</i>,<i>World War II Online</i>, and <i>Everquest</i> have an
auto-update feature. When you log in to the game, the server checks to see if you need to
have any part of your installation upgraded, and if so, it automatically transfers the files
to your client. Some auto-updaters will download a local installer program and run it on
your machine to ensure that you have the latest files.
<i><b>Support Forums</b></i>
Community forums or bulletin boards are a valuable tool for the developer to provide to
customers. Forums are a vibrant community where players can discuss your game, its
fea-tures, and the matches or games they've played against each other. You can also use forums
as a feedback mechanism for customer support.
<i><b>Administrative Tools</b></i>
If you are developing a persistent online game, it will be important to obtain Web-based
tools for creating and deleting player accounts, changing passwords, and managing
what-ever other uses you might encounter. You will need some sort of hosted Web service with
the ability to use CGI-, Perl-, or PHP-based interactive forms or pages. Although this is
not strictly necessary, you really should invest in a database to accompany the
adminis-trative tools.
<i><b>Database</b></i>
If you intend your game to offer any sort of<i>persistence</i>where players' scores,
accomplish-ments, and settings are saved—and need to be protected from fiddling by the players on
their own computers—then you probably need a database back end. Typically, the
admin-istrative tools just mentioned are used to create player records in the database, and the
game server communicates with the database to authenticate users, fetch and store scores,
and save and recall game settings and configurations.
</div>
<span class='text_page_counter'>(56)</span><div class='page_container' data-page=56>
<b>The Torque Game Engine</b>
I've mentioned the Torque Game Engine several times already. I think now would be a
good time to take a little deeper look at the engine and how you will be using it.
Appendix A provides a reference for the Torque Game Engine, so look there if you really
need more detail.
<b>Descriptions</b>
The following descriptions are by no means exhaustive, but a cup of coffee would go well
with this section. Go ahead and make some—I'll wait. Black with two sweeteners, please.
Moving right along, you should note that the main reason for including this section is to
give you, the Gentle Reader, the right sense of how much behind-the-scenes work is done
for you by the engine.
<i><b>Basic Control Flow</b></i>
The Torque Game Engine initializes libraries and game functions and then cycles in the
main game loop until the program is terminated. The main loop basically calls platform
library functions to produce platform events, which then drive the main simulation.
Torque handles all of the basic event procession functions as follows:
■ Dispatches Windows mouse movement events to the GUI
■ <sub>Processes other input-related events</sub>
■ Calculates elapsed time based on the time scale setting of the simulation
■ Manages processing time for server objects
■ Checks for server network packet transmissions
■ <sub>Advances simulation event time</sub>
■ Processes time for client objects
■ Checks for client network packet transmission
■ Renders the current frame
■ <sub>Checks for network time-outs</sub>
<i><b>Platform Layer</b></i>
</div>
<span class='text_page_counter'>(57)</span><div class='page_container' data-page=57>
<i><b>Console</b></i>
The console library provides the foundation for Torque-based games. The console has
both a compiler and an interpreter. All GUIs, game objects, game logic, and interfaces are
handled through the console. The console language is called Torque Script and is similar
to a typeless C++, with some additional features that facilitate game development. You
can load console scripts using a command from the console window as well as
automati-cally from files.
<i><b>Input Model</b></i>
Input events are translated in the platform layer and then posted to the game. By default
the game checks the input event against a global action map that supersedes all other
action handlers. If there is no action specified for the event, it is passed on to the GUI
sys-tem. If the GUI does not handle the input event, it is passed to the currently active
(non-global) action map stack.
Platform-specific code translates Win32, Xwindows, or Mac events into uniform Torque
input events. These events are posted into the main application event queue.
Action maps translate platform input events to console commands. Any platform input
event can be bound in a single generic way—so in theory, the game doesn't need to know
if the event came from the keyboard, the mouse, the joystick, or some other input device.
This allows users of the game to map keys and actions according to their own
preferences.
<i><b>Simulation</b></i>
A stream of events drives the game from the platform library:InputEvent,MouseMoveEvent,
PacketReceive-Event, TimeEvent, QuitEvent, ConsoleEvent, ConnectedReceive-Event,
ConnectedAcceptEvent, and ConnectedNotifyEvent. By journaling the stream of events from
the platform layer, the game portion of the simulation session can be deterministically
replayed for debugging purposes.
The simulation of objects is handled almost entirely in the game portion of the engine.
Objects that need to be notified of the passage of time can be added to one of the two
process lists: the global server or global client process list, depending on whether the
object is a server object or a client ghost.
</div>
<span class='text_page_counter'>(58)</span><div class='page_container' data-page=58>
<i><b>Resource Manager</b></i>
The Torque Engine uses many game resources. Terrain files, bitmaps, shapes, material
lists, fonts, and interiors are all examples of game resources. Torque has a resource
man-ager that it uses to manage large numbers of game resources and to provide a common
interface for loading and saving resources. Under the auspices of Torque's resource
man-ager, only one instance of a resource will ever be loaded at a time.
<i><b>Graphics</b></i>
Torque does not perform its own graphics rasterization; instead, it uses the OpenGL
graphics API. Torque includes a utility library that extends OpenGL to support
higher-level primitives and resources.
Torque has a collection of utility functions that add support for complex primitives and
resources like fonts and bitmaps and that add simple functions for more easily managing
textures and 2D rasterization.
Torque includes a texture manager that tracks the loading and unloading of all textures in
the game. Only one instance of a texture is ever loaded at a given time; after loading it is
handed off to OpenGL. When the game switches graphics modes or video devices, the
tex-ture manager can transparently reload and redownload all the game's textex-tures.
Torque supports several bitmap file types: PNG, JPEG, GIF, BMP, and the custom BM8
format, an 8-bit color texture format used to minimize texture memory overhead.
The GUI library manages the user interface of Torque games. It is designed specifically for
the needs of game user interface development. The Canvas object is the root of the active
GUI hierarchy. It dispatches mouse and keyboard events, manages update regions and
cursors, and calls the appropriate render methods when it is time to draw the next frame.
TheCanvas keeps track of content controls, which are separate hierarchies of controls that
render from bottom to top. The main content control is a screen in the shell that can be
covered by any number of floating windows or dialog boxes.
A Profile class maintains common instance data across a set of controls. Information such
as font face, colors, bitmaps, and sound data are all stored in instances of the Profile class,
so that they don't need to be replicated on each control.
</div>
<span class='text_page_counter'>(59)</span><div class='page_container' data-page=59>
<i><b>3D Rendering</b></i>
The Torque library has a modular, extensible 3D world rendering system. Game
subclass-es first define the camera orientation and field of view and then draw the 3D scene using
OpenGL drawing commands. A class manages the setting up of the viewport, as well as
the model view and projection matrices. A function returns the viewing camera of the
current control object (the object in the simulation that the player is currently
control-ling), and then the engine calls the client scene graph object to render the world.
On the client, a scene graph library is responsible for traversing the world scene and
deter-mining which objects in the world should be rendered given the current camera position,
while on the server, it determines what objects should be sent to each client based on that
client's position in the world. The world is divided into zones, which are volumes of space
bounded by solid areas and portals. The outside world is a single zone, and interior objects
can have multiple interior zones. The engine finds the zone of a given 3D point and which
object owns that zone. The engine then determines which zone or zones contain an object
instance. At render time the scene is traversed starting from the zone that contains the
camera, clipping each zone's objects to the visible portal set from the zones before it. The
engine also performs the scoping of network objects, deciding whether a given object
needs to be dealt with by a client.
Every world object in the scene that can be rendered is derived from a single base class. As
the world is traversed, visible objects are asked to prepare one or more render images that
are then inserted into the current scene. Render images are sorted based on translucency
and then rendered. This system permits an interior object with multiple translucent
win-dows to render the building first, followed by other objects, followed by the building's
windows. Objects can insert any number of images for rendering.
<i><b>Terrain</b></i>
</div>
<span class='text_page_counter'>(60)</span><div class='page_container' data-page=60>
Water is dynamically rendered based on distance, making nearby water more tessellated
and detailed. Water coverage of an area can be set to seed fill from a point on the surface,
allowing the water to fill a depression to form a lake without leaking outside the corners.
<i><b>Interiors</b></i>
The interior library manages the rendering, collision, and disk-file services for interior
objects, such as buildings. An interior resource class manages the data associated with a
single definition of an interior, and multiple instances may exist at any one time. Interiors
manage zones for the scene graph and may have subobjects that render a mirrored view.
A light manager class generates lightmaps for all currently loaded interiors. Lightmaps are
shared among instances whenever possible. Interior resources are built and lit by an
inte-rior importer utility. The source files are Quake-style .map files that are little more than
lists of convex physical constructive solid geometry "brushes" that define the solid areas of
the interior. Special brushes define zone portal boundaries and objects like lights.
<i><b>Shapes and Animation</b></i>
A library manages the display and animation of shape models in the world. This library's
shape resource class can be shared between multiple shape instances. The shape class
manages all the static data for a shape: mesh data, animation keyframes, material lists,
decal information, triggers, and detail levels. An instance class manages animation,
ren-dering, and detail selection for an instance of a shape. The instance class uses the thread
class to manage one of the concurrently running animations on an instance. Each thread
can be individually advanced in time or can be set on a time scale that is used when all
threads are advanced. A thread can also manage transitions between sequences.
Animation sequences can be composed of node/bone animation (for example, joints in
an explosion), material animation (a texture animation on an explosion), and mesh
ani-mation (a morphing blob; note that most mesh aniani-mations can be accomplished with
node scale and rotation animations). Animations can also contain visibility tracks so that
some meshes in the shape are not visible until an animation is played.
<i><b>Networking</b></i>
</div>
<span class='text_page_counter'>(61)</span><div class='page_container' data-page=61>
and server, it still behaves as a client connected to a server, but the netcode has a
short-cir-cuit link to other netcode in the same game instance, and no data goes out to the network.
Bandwidth is a problem because of the large, open terrain environments Torque supports,
as well as the large number of clients Torque can handle—up to 128 or more per server,
which means that there is a high probability that many different objects can be moving and
updating at the same time. Torque uses several strategies to maximize available bandwidth.
■ It sends updates to what is most important to a client at a greater frequency than it
updates data that is less important.
■ It sends only the absolute minimum number of bits needed for a given piece of
data.
■ It only sends the part of the object state that has changed.
■ It caches common strings and data so that they need only be transmitted once.
<i>Packet loss</i>is a problem because the information in lost data packets must somehow be
retransmitted, yet in many cases the data in the dropped packet, if sent again directly, will
be stale by the time it gets to the client.
<i>Latency</i> is a problem in the simulation because the network delay in data transmission
makes the client's view of the world perpetually out of sync with the server. Twitch-style
FPS games, for which Torque was initially designed, require instant control response in
order to feel anything but sluggish. Also, fast-moving objects can be difficult for highly
latent players to hit. In order to solve these problems, Torque employs the following
strate-gies:
■ <i>Interpolation</i>is used to smoothly move an object from where the client thinks it is
to where the server says it is.
■ <i>Extrapolation</i>is used to guess where the object is going based on its state and rules
of movement.
■ <i>Prediction</i>is used to form an educated guess about where an object is going based
on rules of movement and client input.
The network architecture is layered: At the bottom is the OS/platform layer, above that the
notify protocol layer, followed by the NetConnection object and event management layer.
<b>Using Torque in This Book</b>
As you've seen, the Torque Game Engine is powerful, feature rich, flexible, and
control-lable. What we will do in this book is create all of the different elements of the game that
we'll need and then write game control script code to tie it all together.
</div>
<span class='text_page_counter'>(62)</span><div class='page_container' data-page=62>
At first glance that may not seem to be too daunting a task. But remember, we will be
wearing <i>all</i>of the game developer hats. So we will be creating our own models (players,
buildings, decorations, and terrains), recording our own sound effects, placing all of these
things in a virtual world of our own fabrication, and then devising game rules and their
scripted implementations to make it all happen.
Daunted yet?
Hey, it's not going to be <i>that</i>hard. We've got Torque!
<i><b>The CD</b></i>
There are several different setup options available from the CD. The simplest and most
complete is the Full Install. The most minimal installation will install the Torque Engine
Executable and the appropriate file paths for a sample game, with supporting scripts.
<i>Installing Torque</i>
If you want to install only the Torque Game Engine, without the various chapter files,
extra utilities, or demo games, then do the following:
1. Browse to your CD in the \Torque folder.
2. Locate the Setup.exe file and double-click it to run it.
3. Click the Next button for the Welcome screen.
4. Click the Next button for the Destination screen, taking the default program group
location.
5. At the Select Components screen there is a Full Installation drop-down menu.
Select this menu by clicking in it, and change it by selecting Custom Installation.
Then click the Next button.
6. From the Components list, select Torque and click the Next button.
7. Select the defaults for the remaining screen, clicking Next for each one.
<b>Moving Right Along</b>
There you go. You now have the basic Torque Game Engine plus a sample game installed.
Enjoy!
</div>
<span class='text_page_counter'>(63)</span><div class='page_container' data-page=63></div>
<span class='text_page_counter'>(64)</span><div class='page_container' data-page=64>
31
<b>Introduction to </b>
<b>Programming</b>
M
y intent with this chapter is to help you understand programming conceptsand techniques and leave you with a foundation upon which you can build
more advanced skills. By the end of this chapter, you will be proficient with a
powerful programming editor; understand how to create, compile, and run programs
you've written yourself; have a reasonable sense of programming problem-solving
meth-ods; and become familiar with valuable debugging tips and techniques.
<b>UltraEdit-32</b>
To write our programs, we will need to use a <i>text editor</i>, or <i>programming editor</i>. This kind
of editor differs from a word processor, which is what most people use for writing
docu-ments, books, memos, and church bulletins.
A good programming editor has several useful features:
■ <sub>A project feature that allows you to organize your source files</sub>
■ A fully featured grep (find, search, and replace) capability
■ Syntax highlighting
■ A function finder or reference
■ <sub>Macro capability</sub>
■ Bookmarks
■ Text balancing or matching
</div>
<span class='text_page_counter'>(65)</span><div class='page_container' data-page=65>
<b>Program Setup and Configuration</b>
After you insert the companion CD into your computer's CD drive, use Windows
Explorer to browse your way on the CD into the folder called 3DGPAi1. Find setup.exe,
double-click it, and follow the installation instructions.
Next, browse your way on the CD into the folder called UltraEdit-32. Find setup.exe,
dou-ble-click it, and follow the installation instructions.
Finally, browse your way on the CD into the folder called UE Tools. Find setup.exe and
double-click it to run it and follow the installation instructions. This will install UE
Project Maker in the 3DGPAi1 folder on your C drive. This tool will automatically
gener-ate project files that you can use with UltraEdit-32.
<b>Setting Up Projects and Files</b>
<b>n o t e</b>
Use the UE sample folder in the 3DGPAi1 folder.
Like any decent editor environment, UltraEdit-32 allows us to organize the files we want
to work with using a <i>projects</i>concept. You can create, in UltraEdit-32, virtual folders and
save links to your files in these folders. By doing this, you can create a quick and
conve-nient access channel to files that are stored anywhere, even somewhere on the network!
Setting up your projects can be a bit tedious, however, depending on your needs. To help
you with setup, I have written a utility called <i>UltraEdit Project Maker</i>(UEPM), which is
included on the companion CD. I'll tell you more about using UEPM later, but right now,
let's dive in and manually set up a project.
<b>grep? What Kind of Name Is That?</b>
</div>
<span class='text_page_counter'>(66)</span><div class='page_container' data-page=66>
<i><b>Configuring UltraEdit</b></i>
To configure UltraEdit, follow these steps:
1. Launch UltraEdit by selecting Start, Program Files, UltraEdit, UltraEdit-32 Text
Editor.
2. Close any open files you may have in UltraEdit by selecting Window, Close All Files.
3. In UltraEdit, select View, Views/Lists, File Tree View. A new docked window will
appear on the left side (see Figure 2.1). This is the File Tree View.
4. In the File Tree View there is a drop-down combo box (it has a down-pointing
arrow at its right end; see Figure 2.2). If the text in the combo box does not say
"Project Files," then click the arrow on the right and select Project Files from the
list that drops down. When the name has been set to Project Files, we refer to this
as the Project View.
5. Right-click in the white area of the Project View to get a pop-up menu. Select
Show Names Only.
6. If the Project View is
free-floating (not docked), then
repeat the right-click and
this time select Allow
Docking if it isn't already
selected. Then click and
hold (grab) the colored bar
at the top of the File List
View/Project View window
where it says "File List
View" and drag it to the left
side of your UltraEdit
win-dow such that the colored
bar remains in the dark
gray space, but the left side
of the view window
disap-pears off the left side of the
UltraEdit window. You
should see the outline of
the view window change
from a wide gray line to a
thin black line. Let go of
the mouse button and the
view will be docked.
<b>Figure 2.1 </b>Locating the File Tree/Project View.
</div>
<span class='text_page_counter'>(67)</span><div class='page_container' data-page=67>
7. Select the menu item Project, New Project/Workspace. Browse your way to
C:\3DGPAi1\UESampleProject. A Save dialog box will appear. Type in the project
name (<b>uesample</b>), and make sure you have the Project Files type selected in the
combo box of the dialog box. Next, the Project dialog box will appear. If you are given
an alert that tells you the file already exists, and asks if you want to save, click "Yes".
8. Click the Relative Paths and Relative to Project File check boxes and make sure
they are checked.
9. Click New Group and type in <b>SubFolder</b>and then click on the OK button. The
SubFolder entry will appear in the list.
10. Select the SubFolder entry so that it is highlighted, and then click New Group and
type in<b>SubSubFolder</b>, then click on the OK button. The SubSubFolder entry will
appear in the list nested under SubFolder. You may need to click on the SubFolder
icon to make the plus sign appear next to SubFolder, and then click on the plus
sign to ensure that SubSubFolder appears nested inside.
11. Select the root entry (it's marked by the [ - ] symbol). Next click on the New
Group button and type in <b>SubFolderTwo</b>. The SubFolderTwo entry will appear in
the list.
12. Double-check your entries and compare the results with Figure 2.3. Click Close to
make the dialog box go away.
13. Using the menu item File,
Open, browse your way to
C:\3DGPAi1\UESam-pleProject and open the
file called sample file 1.txt.
Do the same for
C:\3DGPAi1\UESam-pleProject\sample file
2.txt. You should now have
only these two files open.
14. Open the Project dialog
box again, by selecting
Project, File/Settings, and
click the root entry to
select it.
15. Click +All Open Files.
The two open files will be
added to the project's file
list at the root level. Close
the Project dialog box.
</div>
<span class='text_page_counter'>(68)</span><div class='page_container' data-page=68>
16. Close both of your open files.
17. Next, open C:\3DGPAi1\UESampleProject\SubFolder\sample file 3.txt and
C:\3DGPAi1\UESampleProject\SubFolder\sample file 4.txt.
18. Now reopen the Project dialog box, select the SubFolder entry, and click +All Open
Files.
19. Close all of your open files.
20. Repeat steps 18 and 19 for the files located in
C:\3DGPAi1\UESampleProject\Sub-FolderTwo and C:\3DGPAi1\UESampleProject\SubFolder\SubSubFolder, ensuring
that you add the file links in the appropriate project folder.
After following these steps, you should
have a Project Setup dialog box that looks
like Figure 2.4, and your Project View
should look like Figure 2.5. You may need
to click on the plus sign in front of the
folder entries in order to expand the
fold-ers to match the view in the figure.
As the saying goes, there is more than one
way to skin a cat, and in this case there are
other ways to set up your project. You can
do it all from within the Project/Workspace
dialog box using the Add File button. You
can also use the Add Active File button to
add whatever file is currently the one being
edited in UltraEdit. You can experiment
and find the method that works best for
you. I tend to use a combination of All Files
and Add Active File, depending on my needs at
the time.
Go ahead and open a few files and close them
again, to get a feel for how the Project View
works.
<b>Search and Replace</b>
The search capabilities of UltraEdit are quite
extensive and thorough. I'm going to focus on
the few most important: finding specific text,
finding specific text and replacing it, jumping to
a line number, and advanced searching using
<b>Figure 2.4 </b>Final form of the
Project/Workspace Setup dialog box.
</div>
<span class='text_page_counter'>(69)</span><div class='page_container' data-page=69>
wildcards and patterns. To practice the various features, open the UESample project, and
open the file called sample file 1.txt. It has some text extracted from an early revision of
Chapter 1 that we can hack away at.
<i><b>Find</b></i>
Select the Search, Find menu item, and you should get the Find dialog box (see Figure
2.6). Make sure the option check boxes match the ones in Figure 2.6. Now, type in the
word you want to find, then click the OK button. The Find dialog box will go away, your
text insertion point will jump to the first found instance of the word you want, and the
word will be highlighted. Try this using the word "indie". See that?
Okay, now get your Find dialog box back and try doing this with the various options.
Notice that the Find operates on the currently active file in the editor. Check out the
var-ious options, like searching "down" the file and then searching back "up" the file. Change
your search word to "INDIE" (all capital letters) and then try your search again. Note that
the Find still locates the word. Now try it with the Match Case option checked. Notice that
you get an error message: Search String Not Found.
When searching, you will often have more than one match to your search criteria. If you
are not using the List Lines option, then you can move through each match in the text by
using Search, Find Next to continue to find matching terms as you move toward the end
of the file (down). Using Search, Find Prev will do the same thing moving toward the start
of the file (up). However, you will probably want to quickly get acquainted with using the
keyboard shortcut F3 for Find Next and Ctrl+F3 for Find Prev.
<b>T i p</b>
A quick and convenient way to search for other occurrences of a word that is already written and
visible in the active window is to highlight the word (double-click it), press Ctrl+F (the shortcut for
Find), and then press Enter. The insertion point will jump to the next occurrence of the word. Then
keep pressing F3 to move to the next, and the next, and the next, ad infinitum. UltraEdit will keep
starting over from the beginning of the file until it finds no more matches.
A feature of the Find dialog box that I think
is particularly useful is the List Lines
Containing String option. With this checked,
all instances of the word you are looking for
will be listed as complete lines in a separate
window. Try it by searching for the word
"action" with case sensitivity turned off. This
should give you a window with a list of lines
in it. Each line contains at least one instance
</div>
<span class='text_page_counter'>(70)</span><div class='page_container' data-page=70>
of the search term you used. If you double-click a line, you will see the text and insertion
point in your edit window jump to where that line is located and highlight the line.
<i><b>Replace</b></i>
Select the Search, Replace menu item, and you should get the Replace dialog box (see
Figure 2.7). This dialog box is similar to the Find dialog box, but with more options and
a field in which to enter the replacement text.
<b>Special Find Characters</b>
When using Find, there are some things you may want to search for that are not normal
alphanu-meric characters or punctuation marks—the end of a line, for example.
These are handled by using special characters that are a combination of an escape character and
a symbol. The escape character is the caret ("^"; you get this when you hold down the Shift key
and type the number "6" on North American keyboards) and is paired with a symbol that is a
nor-mal character. Whenever Find sees the combination of the caret in front of a character, it knows it
is doing a special character search.
Of course, the first special character is the caret itself; otherwise we would never be able to do a
search for a caret in text. Look at the following table for a list of the most common special Find
characters.
These do not require you to turn on the Regular Expressions switch in the Find dialog box, although
they are the same as some of the Regular Expressions entries.
Special Characters Used in a Basic Find Function
<b>Special Symbol</b> <b>What the Program Looks For</b>
^^ caret character ("^"; sometimes called Up Arrow)
^s highlighted text (only while a macro is running)
^c contents of the Clipboard (only while a macro is running)
^b page break
^p new line (carriage return and line feed) (Windows/DOS files)
^r new line (carriage return only) (Macintosh files)
</div>
<span class='text_page_counter'>(71)</span><div class='page_container' data-page=71>
<b>Find in Files</b>
The Find in Files feature is UltraEdit's closest
implementation of grep, which I mentioned
earlier in the chapter. The basic Find in Files
capability allows you to specify what word or
phrase you are looking for and where to look
for it in files other than the one you are
cur-rently editing (the <i>active</i> file). Figure 2.8
shows the Find in Files dialog box. You'll
notice that you can specify one of three
dif-ferent sets of files to search.
First, you can search through the <i>Listed</i>files. This means you can specify a file name search
pattern with extension and a folder to look in. This is quite similar to the built-in
Windows Search or Find feature. You can use wildcards to fine-tune which files will be
checked. Searching with the In Files/Types box set to "new*.txt", for example, will search
inside files with the names newfile.txt, new_data.txt, and so on. Setting the pattern to "*.*"
will cause the program to search inside every file it finds in the specified folder. If you have
the Search Sub Directories box checked, then it will also look inside every file inside every
folder contained in the specified folder.
When the program finds a match in the file with the word you are looking for, it will
print a listing at the bottom of the UltraEdit window containing a reference to the file
where the word was found, plus the line in which it was found. If you double-click the
line in the bottom window, UltraEdit will open the file and position the line in your
window for viewing.
Next, you can search only in the <i>Open Files</i>—that is, only within the files that are currently
open in the editor. If you click the Open Files radio button in the Search In: box, you see
that now you only enter the word to
search for; you don't need to specify file
names or a folder.
Finally, the method I use the most is to
search in <i>Project Files</i>. With this option
checked, the program will search
through all of the files in the project you
currently have open—and only those
files. It doesn't matter whether the files
are open or not.
<b>Figure 2.7 </b>The Replace dialog box set for a
basic search-and-replace operation.
</div>
<span class='text_page_counter'>(72)</span><div class='page_container' data-page=72>
<b>grep</b>
The grep capability in UltraEdit (also see the sidebar earlier in this chapter) is an advanced
way of finding text within files and replacing it with other text when desired. You can use
it in Search-related topics covered so far by putting a check mark in the Regular
Expressions box—then Find will operate using standard UNIX-like grep or the older
UltraEdit-specific form of grep.
You can configure UltraEdit to use its own grep syntax or the UNIX-style syntax in the
configuration menu. Select the Advanced, Configuration menu item and then select the
Find tab. Change the check box labeled UNIX-style Regular Expressions to suit your taste.
<i><b>UltraEdit-Style grep Syntax</b></i>
Table 2.1 shows the available UltraEdit-style grep functions. Let's do a few example grep
searches to get a feel for how it works. Use the file sample file 1.txt from the UESample
project to do the searches. For this section make sure you have the UltraEdit
configura-tion setting for UNIX style Regular Expressions turned off.
Let us suppose that we want to find some reference to dungeons in games in the sample
file. We'll grep for (notice that I'm verbing the noun here!) the term "game*dungeon".
Press Ctrl+F to bring up the Find dialog box, and then make sure the Regular Expressions
box is checked. Type in the search term <b>game*dungeon</b>, and click the Find Next button.
The string it finds starts with "game" and ends with "dungeon". The words that appear in
between were inconsequential to the search, because the asterisk means that the search
program will match any string of characters of any length between the words "game" and
"dungeon", as long as it doesn't encounter a new line character or a carriage return. Try it
again, but this time use the term "computer*game" and see what you find. Remember that
you can use F3 as a shortcut to find the next match.
The operator that is the same as the asterisk, only different, is the question mark ("?").
Instead of matching any number of any characters, it will match only one instance of any
character. For example, "s?n" matches "sun", "son", and "sin" but not "sign" or "soon".
Here are some more examples of how the matching criteria work:
Be+st will find "best", "beest", "beeeest", and so on, but will not find "bst".
[aeiou] will find every lowercase vowel.
[,.?] will find a literal ",", ".", or "?".
[0-9a-z] will find any digit or lowercase letter.
</div>
<span class='text_page_counter'>(73)</span><div class='page_container' data-page=73>
<i><b>UNIX-Style Syntax</b></i>
The UNIX-style syntax is used in the same way as the UltraEdit-style, but is different in
many ways. The advantages of using the UNIX style are:
■ It is somewhat of a standard, so you may be familiar with it from elsewhere.
■ <sub>It has more capabilities than the UltraEdit syntax.</sub>
■ <sub>At some point in the future it may be the only syntax for grep supported by</sub>
UltraEdit, when the program's author decides to stop supporting the old
UltraEdit-style.
You can see the differences by checking out Table 2.2. The first obvious difference is that
the escape character has changed from the caret to the back slash. Our example searches
would be a little different; the asterisk doesn't match any character anymore, now it
matches any number of occurrences of the character that appears just before it. Also, now
we use the period "." to match any single character instead of the question mark.
<b>Table 2.1</b>
UltraEdit-Style grep Syntax
<b>Symbol</b> <b>Purpose</b>
% Matches the start of line. Indicates the search string must be at the beginning of a line
but does not include any line terminator characters in the resulting string selected.
$ Matches the end of line. Indicates the search string must be at the end of a line but
does not include any line terminator characters in the resulting string selected.
? Matches any single character except newline.
* Matches any number of occurrences of any character except newline.
+ Matches one or more instances of the preceding character. At least one occurrence of
the character must be found. Does not match repeated newlines.
++ Matches the preceding character/expression zero or more times. Does not match
repeated newlines.
^b Matches a page break.
^p Matches a newline (CR/LF) (Windows/DOS Files).
^r Matches a newline (CR Only) (Mac Files).
^n Matches a newline (LF Only) (UNIX Files).
^t Matches a tab character.
[ ] Matches any single character, or range in the brackets.
^{A^}^{B^} Matches expression A OR B.
^ Overrides the following regular expression character.
</div>
<span class='text_page_counter'>(74)</span><div class='page_container' data-page=74>
Before proceeding, make sure you have your editor set to use the proper UNIX-style
syntax in the Advanced, Configuration menu under the Find tab.
Now—to go back to our dungeon games example, the way the search term in UNIX-style
grep syntax would look is "game.*dungeon".
Compare these examples with the ones for the UltraEdit-style:
be+st matches "best", "beest", "beeeest", and so on, BUT NOT "bst".
be*st matches "best", "beest", "beeeest", and so on, AND "bst".
[aeiou] matches every lowercase vowel.
[,.?] matches a literal ",", ".", or "?".
[0-9a-z] matches any digit, or lowercase letter.
[^0-9] matches any character except a digit (^ means <i>NOT</i>the following).
<b>Table 2.2</b>
UNIX-Style grep Syntax
<b>Symbol</b> <b>Purpose</b>
\ Indicates the next character has a special meaning. "n" on its own matches the character
"n". "\n" matches a linefeed or newline character. See examples below (\d, \f, \n ).
^ Matches or anchors the beginning of line.
$ Matches or anchors the end of line.
* Matches the preceding character zero or more times.
+ Matches the preceding character one or more times. Does not match repeated newlines.
Matches any single character except a newline character. Does not match repeated newlines.
(expression) Tags an expression to use in the replace command. A regular expression may have up
to 9 tagged expressions, numbered according to their order in the regular expression.
The corresponding replacement expression is \x, for x in the range 1-9. Example: If
(h.*o) (f.*s) matches "hello folks", \2 \1 would replace it with "folks hello".
[xyz] A character set. Matches any characters between brackets.
[^xyz] A negative character set. Matches any characters NOT between brackets.
\d Matches a number character. Same as [0-9].
\D Matches a non-number character. Same as [^0-9].
\f Matches a form-feed character.
\n Matches a linefeed character.
\r Matches a carriage return character.
\s Matches any white space including space, tab, form-feed, and so on, but not newline.
\S Matches any non-white space character but not newline.
\t Matches a tab character.
\v Matches a vertical tab character.
\w Matches any word character including underscore.
\W Matches any non-word character.
</div>
<span class='text_page_counter'>(75)</span><div class='page_container' data-page=75>
<b>Bookmarks</b>
One feature I use quite frequently is the Bookmark capability. Its purpose is to help you find
your way around large files quickly. When you are working in an area that you think you
may need to come back to later, just set a bookmark, and then when you are working in
another place in your document, you can use the Goto Bookmark command to jump
through each bookmark you've set until you find the one you want. This sure beats scrolling
through all your open files looking for that one spot you worked on two hours ago!
To set a bookmark, click your mouse on a line of text and then select the menu item Search,
Toggle Bookmark. The line where the bookmark is set will be highlighted in a different
color (See Figure 2.9). In the figure, the lower highlighted line is the bookmarked line.
To remove a bookmark,
click your mouse in the
highlighted bookmark
line, and select Search,
Toggle Bookmark again.
This will turn off the
bookmark for that line.
To remove all bookmarks,
select Search, Clear All
Bookmarks, and all
book-marks that you
previous-ly set will vanish.
<b>t i p</b>
If you are using the Project View, when you close your documents, all the bookmarks you've set will
be saved, and restored the next time you open that document. This does not happen with
docu-ments that are not associated with the Project View.
To navigate between the bookmarks, select Search, Goto Bookmark and your insertion
point will jump to the next bookmark in sequence. You can also select Search, Goto
Previous Bookmark, to jump in the reverse direction from bookmark to bookmark.
</div>
<span class='text_page_counter'>(76)</span><div class='page_container' data-page=76>
<b>t i p</b>
Most commands available in the menus have keyboard shortcuts available. Rather than listing
them here, I'll just point you to the menu items. The keyboard shortcuts for the command, if
avail-able, are written next to the menu selection. Some menu items, like Clear All Bookmarks, have no
shortcut assigned, but don't despair. You can assign your keyboard shortcuts by using the Key
Mapping tab in the Advanced, Configuration menu, and following the instructions. Note that the
command names in the list are written with their main menu entry as the first part of the
com-mand. The Clear All Bookmarks command is written as SearchClearBookmarks. The commands are
listed in alphabetical order.
<b>Macros</b>
<i>Macro commands</i>are like shortcuts. You can string together a whole series of tedious
edit-ing operations into a group, called a <i>macro</i>, that you can invoke at any time later by a
sim-ple keystroke, or menu item, or toolbar button.
UltraEdit has two forms of macros—the standard and the Quick Record macro. Let's take
a look at both, starting with the Quick Record macro.
<i><b>Quick Record Macro</b></i>
The<i>Quick Record macro</i>is a bare-bones macro function.
1. Select the Macro, Quick Record menu item (or press Shift+Ctrl+R).
2. Start performing all the editing actions you want recorded. In this case just type in
the text <b>blah blah blah</b>somewhere.
3. Select Macro, Stop Quick Recording (or press Shift+Ctrl+R again).
Now replay your edit actions over again at any place in your text by simply placing your
text insertion point where appropriate, and typing Ctrl+M, or selecting the Macro, Play
Again menu item.
You can only ever have one Quick Record macro—each time you record one, it replaces
the earlier recording.
<i><b>Standard Macro</b></i>
<i>Standard macros</i>are a bit more complex. The procedure for recording them is somewhat
similar, but you can assign them to key combinations of your choice, or to menus, or even
to toolbar buttons. This gives you much more flexibility than the Quick Record macro,
but at the cost of a bit of setup twiddling, of course.
</div>
<span class='text_page_counter'>(77)</span><div class='page_container' data-page=77>
1. Place your insertion point in a blank line somewhere.
2. Select the Macro, Record menu item.
3. In the Macro Name box, give it a name, something like "InsertCool".
4. Click the mouse in the HotKey edit box to the right of where it says "Press New
Key" and then press and hold Shift+Ctrl+I.
5. Click the OK button.
6. Type in the phrase <b>This is cool</b>.
7. Select Macro, Stop Recording.
8. Place your insertion point at the end of the line with the phrase "This is cool" in it.
9. Select the Macro, Record menu item.
10. In the Macro Name box, give it a name, something like "MakeCapital".
11. Click the mouse in the HotKey edit box to the right of where it says "Press New
Key", and then press and hold Shift+Ctrl+M.
12. Click the OK button.
13. Type the following key sequence, one at a time (don't type the text in parentheses):
Home
Shift+Ctrl+Right Arrow
F5
End
. (that's a period)
spacebar
14. Now type the phrase <b>Capital Idea!</b>
15. Now select the Macro, Stop Recording menu item.
There, that's done. So now let's test it out.
First, find or create a blank line, place your insertion point on it, and then press
Shift+Ctrl+I. See the text that gets inserted? Okay, now leave your text insertion point in
that new text, anywhere, and then press Shift+Ctrl+M. You should end with a line that
says, "This is cool. Capital Idea!", with the same capitalization. Macros <i>are</i>cool!
<b>UltraEdit Review</b>
</div>
<span class='text_page_counter'>(78)</span><div class='page_container' data-page=78>
UltraEdit has a good Help feature that covers all aspects of the program, so I encourage
you to use it.
Remember that UltraEdit is an <i>editor</i>, not a <i>word processor</i>, so there aren't a great deal of
formatting features in the program, which is just as well because we are using it to write
code and not to write documents or books. The focus is on the steak, not the sizzle.
Speaking of steak, it is now time to get to the meat of this chapter, coming up next!
<b>Controlling Computers with Programs</b>
When you create a computer program, you are creating a set of instructions that tell the
computer exactly and completely what to do. Now before you jump all over me and
ham-mer me with comments like, "Well, duh! Of course programming a computer is like telling
it what to do," I want you to read the first sentence again. It is not an analogy, and it is not
some kind of vague and airy all-encompassing cop-out.
Everything that a computer does, at any time, is decided by at least one programmer. In
the vast majority of cases, the computer's instructions—contained in <i>programs</i>—are the
work-product of hundreds, if not thousands, of programmers. All of the programs that a
computer uses are organized and classified in many different ways. The organization helps
us humans keep track of what they do, why we need them, how to link one program with
another, and other useful things. The computer's operating system is a huge collection of
programs designed to work in conjunction with other programs, or sometimes to work
alone, but in the context created by other programs.
We leverage the efforts of other programmers when we sit down to program a computer
for any purpose. One of the results of many that have gone before is the creation of
<i>programming languages</i>. Computers operate using a language that is usually unique to
each brand and model, called <i>machine code</i>. Machine code is designed to directly control
the computer's electronics—the hardware. Machine code is <i>not</i>very friendly to humans.
To give you an idea, we'll look at an example of machine code that tells a computer using
an Intel 80386 chip to add together two numbers and save the result somewhere. What we
will do is add A and B together and leave the result in C. To start, A will equal 4 and B will
equal 6.
So our formula will be a simple math problem:
A=4
B=6
C = A + B
</div>
<span class='text_page_counter'>(79)</span><div class='page_container' data-page=79>
11000111000001010000000000000000000000000000000000000010000000000000000000000000110001110
00001010000000000000000000000000000000000000110000000000000000000000000101000010000000000
00000000000000000000000000001100000101000000000000000000000000000000001010001100000000000
000000000000000000000
Now go ahead and look carefully at that and tell yourself honestly whether you could work
with a computer using machine code for longer than, oh, about 12 minutes! My personal
best is somewhere around 30 seconds, but that's just me. The number system used here is
the<i>binary</i>system.
Each one of those 1s and 0s is called a <i>bit</i>and has a precise meaning to the computer. This
is all the computer actually understands—the ones, the zeros, their location and
organi-zation, and when and how they are to be used. To make it easier for humans to read
machine code at those rare times when it is actually necessary, we normally organize the
machine code with a different number system, called <i>hexadecimal</i> (or <i>hex</i>), which is a
base-16 number system (rather than base-10 like the <i>decimal</i>system we use in everyday
work). Every 4 bits becomes a hex numeral, using the symbols from 0 to 9 and the letters
A to F. We pair two hex numerals to carry the information contained in 8 bits from the
machine code. This compresses the information into an easier-to-read and more
man-ageable size. Here is the same calculation written in the hex form of machine code:
C7 05 00 00 00 00 04 00 00 00 C7 05 00 00 00 00 06 00 00 00 A1 00 00 00 00 03 05 00 00
00 00 A3 00 00 00 00
Much better and easier on the eyes! There are many people who work close to the
com-puter hardware who work in hex quite often, but it still is pretty obscure. Fortunately,
there is a human-readable form of the machine code for every microprocessor or
com-puter, which in general is known as <i>assembly language</i>. In this case we use words and
sym-bols to represent meaningful things to us as programmers. Tools called <i>assemblers</i>convert
assembly language programs to the machine code we looked at earlier. Here is the Intel
80386 Assembler version of our little math problem:
mov DWORD PTR a, 4 ; (1)
mov DWORD PTR b, 6 ; (2)
mov eax, DWORD PTR a ; (3)
add eax, DWORD PTR b ; (4)
mov DWORD PTR c, eax ; (5)
</div>
<span class='text_page_counter'>(80)</span><div class='page_container' data-page=80>
and notes about the program. In this case I've used the comment space to mark the line
numbers for reference.
Now that, my friends, is a program! Small and simple, yes, but it is clear and explicit and
in complete control of the computer.
As useful as assembly language code is, you can see that it is still somewhat awkward. It is
important to note that some large and complex programs have been written in assembly
language, but it is not done often these days. Assembly language is as close to the
com-puter hardware as one would ever willingly want to approach. You are better served by
using a <i>high-level language</i>. The next version of our calculation is in a powerful high-level
language called C. No, really! That's the name of the language. Here is our calculation
written in C:
a=4; // (1)
b=6; // (2)c=a+b; // (3)
Now, if you're thinking what I think you're thinking, then you're thinking, "Hey! That code
looks an awful lot like the original formula!" And you know what? I think you are right.
And that's part of the point behind this rather long-winded introduction: When we
pro-gram, we want to use a programming language that best represents the elements of the
problem we want to solve. Another point is that quite a few things are done for the
pro-grammer behind the scenes—there is a great deal of complexity. Also, you should realize
that there are even more layers of complexity "below" the machine code, and that is the
electronics. We're not even going to go there. The complexity exists simply because it is the
nature of the computer software beast. But be aware that the same hidden complexity can
sometimes lead to problems that will need to be resolved. But it's not magic—it's software.
The C language you've just seen is what is known as a <i>procedural</i>language. It is designed
to allow programmers to solve problems by describing the procedure to use, and defining
the elements that are used during the procedure. Over time, programmers started looking
for more powerful methods of describing problems, and one such method that surfaced
was called <i>object-oriented programming</i>(OOP).
</div>
<span class='text_page_counter'>(81)</span><div class='page_container' data-page=81>
<b>Programming Concepts</b>
For the rest of this chapter, we are going to explore basic programming techniques. We
will be using Torque Script for all of our code examples and running our little programs
in the Torque Engine to see what they do.
Now, we just covered the simple math problem in the previous section. I showed you what
the program looked liked in binary machine language, hex machine language, assembly
language, and finally C/C++. Well, here is one more version—Torque Script:
%a=4; // (1)
%b=6; // (2)
%c=%a+%b; // (3)
Notice the similarity to C/C++? Even the comments are done the same way!
As demonstrated, Torque Script is much like C/C++. There are a few exceptions, the most
notable being that Torque Script is <i>typeless</i>and does not require <i>forward declarations</i>of
variables. Also, as you can see for yourself in the preceding code, Torque Script requires
<i>scope prefixes</i>(the percent signs) on its variable names.
The goal for you to achieve by the end of this chapter is the ability to put together simple
programs to solve problems and have enough understanding of program techniques to
make sensible decisions about the approaches to take.
<b>How to Create and Run the Example Programs</b>
There is an ancient and well-understood programming cycle called the <i></i>
<i>Edit-Compile-Link-Run</i>cycle. The same cycle applies with Torque, with the exception being that there is no
link step. So for us, it can be thought of as the <i>Edit-Compile-Run</i>cycle. A further wrinkle
to toss in is the fact that Torque will automatically compile a source file (that is, a program
<b>Typeless? Forward Declarations? Huh?</b>
In many languages, variables have a characteristic called type. In its simplest form, a type merely
specifies how much memory is used to store the variable. Torque Script doesn't require you to
spec-ify what type your variable has. In fact, there is no way to do it!
</div>
<span class='text_page_counter'>(82)</span><div class='page_container' data-page=82>
file that ends with .cs) into the binary byte code file (ends with .cs.dso), if there is no
bina-ry version of the file, or if the source file has changed since the last binabina-ry was created.
So I guess my point is, for us the cycle can now be regarded as the <i>Edit-Run</i>cycle.
■ Put all user programs in the folder C:\3DGPAi1\CH2 as filename.cs where
"file-name" is a name you've either made up yourself or one that I've suggested here in
the book.
■ <sub>Run from command shell tge -CH2 filename.cs.</sub>
<b>Hello World</b>
Our first program is somewhat of a tradition. Called the <i>Hello World</i>program, it is used
as an early confidence builder and test program to make sure that the Gentle Reader (that
would be you, if you are reading this book!) has everything in place on his computer to
successfully edit, compile, and run a program.
So, assuming that you've installed both UltraEdit and the Torque Game Engine, use your
newly learned UltraEdit skills to create a new file with the name HelloWorld.cs and save
it in the folder C:\3DGPAi1\CH2. Type into the file these lines of code:
// ========================================================================
// HelloWorld.cs
//
// This module is a program that prints a simple greeting on the screen.
//
// ========================================================================
function main()
//
---// Entry point for the program.
//
---{
print("Hello World");
}
Save your work. Now, use the following procedure to run your program:
1. From your Windows Start menu select the Start, Run.
2. Type <b>command</b>in the edit box offered. This will open a Command window or
MS-DOS Prompt window.
</div>
<span class='text_page_counter'>(83)</span><div class='page_container' data-page=83>
4. Next, type <b>tge -ch2 HelloWorld.cs</b>. A Torque window will open up, and you
should see something like Figure 2.10, with "Hello World" in yellow at the upper
left of the screen. Cool, huh?
<b>t i p</b>
If you don't get the expected result on your screen, then look in the log file, named console.log,
located in the C:\3DGPAi1 folder. If there were any errors in your program, diagnostic information
will be deposited there. It might be something as simple as a typo in the file name.
Let's have a closer look at the code. The first thing you will notice is this stuff:
// ========================================================================
// HelloWorld.cs
//
// This module is a program that prints a simple greeting on the screen.
//
// ===============================================================
This is the <i>module header block</i>. It is not executable code—it's what we call a <i>comment</i>. The
double-slash operator ("//") tells the Torque Engine to ignore everything from the slashes
to the end of the line.
So if the engine ignores it, why do we use it? Well, it's included in order to document what
the module does so that later when we've completely forgotten the details, we can easily
refresh our memory. It also is included to help other programmers who may come along
and need to understand the module so they can add new features or fix bugs.
There are no real rules
regard-ing the format of these
head-ers, but most programmers or
development shops have some
sort of template that they want
followed. At a minimum, the
header should include the
module file name, copyright
notices, and a general
descrip-tion of what the code in the
module is for. Sometimes we
might include other details
that are necessary for a person
to understand how the module
is used.
</div>
<span class='text_page_counter'>(84)</span><div class='page_container' data-page=84>
Then there is this part:
function main()
That is <i>executable code</i>. It is the declaration of the function block called main(). Following
that, there is this:
//
---// Entry point for the program.
//
---This is the <i>function header</i>. The function header is included in order to describe the
specifics of a function—what it does, how it does it, and so on. In this case it is fairly
sim-ple, but function headers can get to be quite descriptive, as you'll see later. Again, this is
not executable code (note the double slash) and is not required to make your program
work. The dashes could just as well be stars, equals signs, or nothing at all. It is good
prac-tice to always use function headers to describe your functions.
Finally comes this:
{
print("Hello World");
}
That would be the <i>function body</i>—the guts of the function where the work is done. The
function body is also sometimes called a <i>function block</i>, and more generically (when used
in other contexts that you'll see later) called a <i>code block</i>.
All sample programs in this chapter must have something called <i>function main()</i>. Don't
worry about why that is for the moment—we'll get into that later. Just take it as a given
that it is necessary for your programs to work properly.
It is important to note the way a <i>function block</i>is made. It always begins with the keyword
function followed by one or more spaces and whatever name you want it to have. After the
name comes the argument list (or parameter list). In this case there are no parameters.
Then comes the opening, or left, brace (or curly bracket). After the opening brace comes
the body of the function, followed by the closing, or right, brace.
All functions have this same structure. Some functions can be several pages long, so the
structure may not be immediately obvious, but it's there.
</div>
<span class='text_page_counter'>(85)</span><div class='page_container' data-page=85>
<b>n o t e</b>
Experienced C programmers will recognize the main function as the required initial entry point for
a C program, although the syntax is slightly different. Torque doesn't require this organization for
its scripts—it is purely for learning purposes.
<b>Expressions</b>
When we write program code, most of the lines, or<i>statements</i>, that we create can be
eval-uated. A statement can be a single Torque Script line of any kind terminated by a
semi-colon, or it can be a <i>compound statement</i>, which is a sequence of statements enclosed in
left and right braces that acts as a single statement. A semicolon does not follow the
clos-ing right brace. Here is an example of a statement:
print("Hi there!");
Here is another example:
if (%tooBig == true) print("It's TOO BIG!");
And here is one final example of a valid statement:
{
print("Nah! It's only a little motorcycle.");
}
Statements that can be evaluated are called <i>expressions</i>. An expression can be a complete
line of code or a fragment of a line, but the important fact is that it has a value. In Torque
the value may be either a number or text (a string)—the difference is in how the value is
used. Variables are explained in the next section, but I'll sneak a few in here without
detailed coverage in order to illustrate expressions.
Here is an expression:
5 + 1
This expression <i>evaluates</i>to 6, the value you get when 5 and 1 are added.
Here is another expression:
%a = 67;
This is an <i>assignment statement</i>, but more importantly right now, it is an expression that
evaluates to 67.
Another:
</div>
<span class='text_page_counter'>(86)</span><div class='page_container' data-page=86>
This expression evaluates to 1. Why? Because true evaluates to the value 1 in Torque. Okay,
so I hadn't told you that yet—sorry about that. Also,false evaluates to 0. We can say the
statements evaluate to true orfalse, instead of 1 and 0. It really depends on whatever
makes sense in the usage context. You'll notice that the evaluation of the statement is
determined by whatever expression is to the right of the equal sign. This is a pretty
hard-and-fast rule.
Consider this code fragment:
%a = 5;
if (%a > 1 )
What do you figure that the (%a > 1 ) evaluates to, if%a has been set to 5? That's right—
it evaluates to true. We would read the line as "if %a is greater than 1." If it was written as
(%a > 10 ), it would have been false, because 5 is not greater than 10.
Another way we could write the second line is like this:
if ( (%a > 1 ) == true )
It would be read as "if the statement that %a is greater than 1 is true." However, the
Department of Redundancy Department could have written that example. The first way I
showed you is more appropriate.
Just for your information, in the preceding examples,%a and%isOpen are <i>variables</i>, and
that's what is coming up next.
<b>Variables</b>
Variables are chunks of memory where values are stored. A program that reads a series of
numbers and totals them up will use a variable to represent each number when it's entered
and another variable to represent the total. We assign names to these chunks of memory
so that we can save and retrieve the data stored there. This is just like high school algebra,
where we were taught to write something like "Let v stand for the velocity of the marble''
and so on. In that case v is the identifier (or name) of the variable. Torque Script
identifi-er rules state that an identifiidentifi-er must do the following:
■ It must not be a Torque Script keyword.
■ It must start with an alphabetical character.
</div>
<span class='text_page_counter'>(87)</span><div class='page_container' data-page=87>
isOpen Today X the_result item_234 NOW
These are not legal identifiers:
5input miles-per-hour function true +level
It's up to you as the programmer to choose the identifiers you want to use. You should
choose them to be significant to your program and what it is doing. You should always try
to use meaningful identifiers. You should note that Torque is not case-sensitive. Lowercase
letters are <i>not</i>treated as distinct from uppercase letters.
You assign values to variables with an assignment statement:
$bananaCost = 1.15;
$appleCost = 0.55;
$numApples = 3;
$numBananas = 1;
Notice that each variable has a dollar sign ("$") preceding it. This is the <i>scope</i>prefix. This
means that the variable has <i>global</i>scope—it can be accessed from anywhere in your
pro-gram, inside any function, or even outside functions and in different program files.
There is another scope prefix—the percent sign ("%"). The scope of variables with this
prefix is <i>local</i>. This means that the values represented by these variables are valid only
<b>Table 2.3</b>
Torque Script Keywords
<b>Keyword</b> <b>Description</b>
break Breaks execution out of a loop.
case Indicates a choice in a switch block.
continue Causes execution to continue at top of loop.
default Indicates the choice to make in a switch block when no cases match.
do Indicates start of a do-while type loop block.
else Indicates alternative execution path in an if statement.
false Evaluates to 0, the opposite of true.
for Indicates start of a for loop.
function Indicates that the following code block is a callable function.
if Indicates start of a conditional (comparison) statement.
new Creates a new object data block.
return Indicates return from a function.
</div>
<span class='text_page_counter'>(88)</span><div class='page_container' data-page=88>
within a function, and only within the specific functions where they are used. We will
delve into scoping in more detail later.
Using our fruit example, we can calculate the number of fruit as follows:
[$numFruit = $numBananas + $numApples;
And we can calculate the total cost of all the fruit like this:
$numPrice = ($numBananas * $bananaCost) + ($numApples * $appleCost);
Here is a complete small program you can use to try it out yourself.
// ========================================================================
// Fruit.cs
//
// This module is a program that prints a simple greeting on the screen.
// This program adds up the costs and quantities of selected fruit types
// and outputs the results to the display
// ========================================================================
function main()
//
---// Entry point for the program.
//
---{
$bananaCost=1.15;// initialize the value of our variables
$appleCost=0.55; // (we don't need to repeat the above
$numApples=3; // comment for each initialization, just
$numBananas=1; // group the init statements together.)
$numFruit=0; // always a good idea to initialize *all* variables!
$total=0; // (even if we know we are going to change them later)
print("Cost of Bananas(ea.):$"@$bananaCost);
// the value of $bananaCost gets concatenated to the end
// of the "Cost of Bananas:" string. Then the
// full string gets printed. same goes for the next 3 lines
print("Cost of Apples(ea.):$"@$appleCost);
print("Number of Bananas:"@$numBananas);
print("Number of Apples:"@$numApples);
$numFruit=$numBananas+$numApples; // add up the total number of fruits
$total = ($numBananas * $bananaCost) +
</div>
<span class='text_page_counter'>(89)</span><div class='page_container' data-page=89>
//(notice that statements can extend beyond a single line)
print("Total amount of Fruit:"@$numFruit); // output the results
print("Total Price of Fruit:$"@$total@"0");// add a zero to the end
// to make it look better on the screen
}
Save the program in the same way you did the Hello World program. Use a name like
fruit.cs and run it to see the results. Note that the asterisk ("*") is used as the
multiplica-tion symbol and the plus sign ("+") is used for addimultiplica-tion. These <i>operators</i>—as well as the
parentheses used for evaluation precedence—are discussed later in this chapter.
<i><b>Arrays</b></i>
When your Fruit program runs, a variable is accessed in expressions using the identifier
associated with that variable. At times you will need to use long lists of values; there is a
special kind of variable called an <i>array</i>that you can use for lists of related values. The idea
is to just use a single identifier for the whole list, with a special mechanism to identify
which specific value—or <i>element</i>—of the list you want to access. Each value has
numeri-cal position within the array, and we numeri-call the number used to specify the position the <i>index</i>
of the array element in question.
Let us say you have a list of values and you want to get a total, like in the previous
exam-ple. If you are only using a few values (no more than two or three), then a different
iden-tifier could be used for each variable, as we did in the Fruit program.
However, if you have a large list—more than two or three values—your code will start to
get awkwardly large and hard to maintain. What we can do is use a loop, and <i>iterate</i>
through the list of values, using the indices. We'll get into loops in detail later in this
chap-ter. Here is a new version of the Fruit program that deals with more types of fruit. There
are some significant changes in how we perform what is essentially the same operation. At
first glance, it may seem to be more unwieldy than the Fruit program, but look again,
especially in the computation section.
// ========================================================================
// FruitLoopy.cs
//
// This module is a program that prints a simple greeting on the screen.
// This program adds up the costs and quantities of selected fruit types
// and outputs the results to the display. This module is a variation
// of the Fruit.cs module
</div>
<span class='text_page_counter'>(90)</span><div class='page_container' data-page=90>
//
---// Entry point for the program.
//
---{
//
// --- Initialization
---//
%numFruitTypes = 5; // so we know how many types are in our arrays
%bananaIdx=0; // initialize the values of our index variables
%appleIdx=1;
%orangeIdx=2;
%mangoIdx=3;
%pearIdx=4;
%names[%bananaIdx] = "bananas"; // initialize the fruit name values
%names[%appleIdx] = "apples";
%names[%orangeIdx] = "oranges";
%names[%mangoIdx] = "mangos";
%names[%pearIdx] = "pears";
%cost[%bananaIdx] = 1.15; // initialize the price values
%cost[%appleIdx] = 0.55;
%cost[%orangeIdx] = 0.55;
%cost[%mangoIdx] = 1.90;
%cost[%pearIdx] = 0.68;
%quantity[%bananaIdx] = 1; // initialize the quantity values
%quantity[%appleIdx] = 3;
%quantity[%orangeIdx] = 4;
%quantity[%mangoIdx] = 1;
%quantity[%pearIdx] = 2;
%numFruit=0; // always a good idea to initialize *all* variables!
%totalCost=0; // (even if we know we are going to change them later)
//
// --- Computation
---//
</div>
<span class='text_page_counter'>(91)</span><div class='page_container' data-page=91>
for (%index = 0; %index < %numFruitTypes; %index++)
{
print("Cost of " @ %names[%index] @ ":$" @ %cost[%index]);
print("Number of " @ %names[%index] @ ":" @ %quantity[%index]);
}
// count up all the pieces of fruit, and display that result
for (%index = 0; %index <= %numFruitTypes; %index++)
{
%numFruit = %numFruit + %quantity[%index];
}
print("Total pieces of Fruit:" @ %numFruit);
// now calculate the total cost
for (%index = 0; %index <= %numFruitTypes; %index++)
{
%totalCost = %totalCost + (%quantity[%index]*%cost[%index]);
}
print("Total Price of Fruit:$" @ %totalCost);
}
Type this program in, save it as C:\3DGPAi1\book\FruitLoopy.cs, and then run it.
Of course, you will notice right away that I've used comments to organize the code into
two sections,<i>initialization</i>and<i>computation</i>. This was purely arbitrary—but it is a good
idea to label sections of code in this manner, to provide signposts, as it were. You should
also notice that all the variables in the program are local, rather than global, in scope. This
is more reasonable for a program of this nature, where having everything contained in
one function puts all variables in the same scope.
Next you will see that I've actually created three arrays:name,cost, andquantity. Each array
has the same number of elements, by design. Also, I have assigned appropriately named
variables to carry the index values of each of the fruit types. This way I don't need to
remember which fruit has which index when it comes time to initialize them with their
names, prices, and counts.
</div>
<span class='text_page_counter'>(92)</span><div class='page_container' data-page=92>
For a further illuminating exercise, try this: Rewrite FruitLoopy.cs to perform exactly the
same operations, but without using arrays at all. Go ahead—take some time and give it a
try. You can compare it with my version in the C:\3DGPAi1\Book\Exercises folder, named
FermentedFruit.cs.
Now, the final exercise is purely up to you and your mind's eye: Imagine that you have 33
types of fruit, instead of five. Which program would you rather modify—ParedFruit.cs or
FermentedFruit.cs? Can you see the advantage of arrays now?
Another thing to point out is that the initialization section of the code would probably
read in the values from a database or an external file with value tables in it. It would use
a loop to store all the initial values—the names, costs, and quantities. Then the code
would really be a lot smaller!
To review, an array is a data structure that allows a collective name to be given to a group
of elements of the same type. An individual element of an array is identified by its own
unique index (or subscript).
An array can be thought of as a collection of numbered boxes, each containing one data
item. The number associated with the box is the index of the item. To access a particular
item, the index of the box associated with the item is used to access the appropriate box.
The index must be an integer and indicates the position of the element in the array.
<i><b>Strings</b></i>
We've already encountered strings in our earlier example programs. In some languages
strings are a special type of array, like an array of single characters, and can be treated as
such. In Torque, strings are in essence the only form of variable. Numbers and text are
stored as strings. They are handled as either text or numbers depending on which
opera-tors are being used on the variables.
As we've seen, two basic string operations are <i>assignment</i>and<i>concatenation</i>, as illustrated
here:
%myFirstName = "Ken";
%myFullName = %myFirstName @ " Finney";
In the first line, the string "Ken" is assigned to %myFirstName, then the string " Finney" is
concatenated (or appended) to %myFirstName, and the result is assigned to %myFullName.
Familiar stuff by now, right? Well, try this one on for size:
%myAge = 30; // (actually it isn't you know !)
%myAge = %myAge + 12; // getting warmer !
</div>
<span class='text_page_counter'>(93)</span><div class='page_container' data-page=93>
I'm sure you can figure out what the value of the variable %aboutMe is. That's right, it's one
long string—"My name is Ken Finney and I am 42 years old."—with the number values
embedded as text, not numbers. Of course, that isn't my age, but who's counting?
What happened is that the Torque Engine figured out by the context what operation you
wanted to perform, and it converted the number to a string value before it added it to the
larger string.
There is another form of string variable called the <i>tagged string</i>. This is a special string
for-mat used by Torque to reduce bandwidth utilization between the client and the server.
We'll cover tagged strings in more detail in a later chapter.
<b>Operators</b>
Table 2.4 is a list of operators. You will find it handy to refer back to this table from time
to time.
<b>Table 2.4 </b>
Torque Script Operators
<b>Symbol</b> <b>Meaning</b>
+ Add
⫺ Subtract
* Multiply
/ Divide
% Modulus
++ Increment by 1
-- Decrement by 1
+= Addition totalizer
-= Subtraction totalizer
*= Multiplication totalizer
/= Division totalizer
%= Modulus totalizer
@ String append
( ) Parentheses—operator precedence promotion
[ ] Brackets—array index delimiters
{ } Braces—indicate start and end of code blocks
SPC Space append macro (same as @ " " @)
TAB Tab append macro (same as @ "\t" @)
NL New line append (same as @ "\n" @)
~ (Bitwise NOT) Flips the bits of its operand
| (Bitwise OR) Returns a 1 in a bit if bits of either operand is 1
</div>
<span class='text_page_counter'>(94)</span><div class='page_container' data-page=94>
Operators range from the familiar to the mighty weird. The familiar will be the ones like
add ("+") and subtract ("⫺"). A little strange for those who are adept with standard
sec-ondary school math but new to programming languages is the multiplication symbol—
an asterisk ("*"). The division symbol, though not the regular handwritten one, is still a
somewhat familiar slash ("/"). A mighty weird one would be the vertical pipe ("|"), which
is used to perform an OR operation on the bits of a variable.
Some of the operators are probably self-explanatory or understandable from the table.
Others may require some explanation, which you will find in the following sections of this
chapter.
You'll recall that strings and numbers are treated the same; there is, however, one
excep-tion, and that is when comparing strings to strings or numbers to numbers. We use
dif-ferent operators for those comparisons. For number comparisons, we use = = (that's not
a typo—it's two equal signs in a row; read it as "is identical to") and for string
compar-isons, we use $= (read it as "string is identical to"). These operators will be discussed more
in the sections called "Conditional Expressions" and "Branching."
^ (Bitwise XOR) Returns a 1 in a bit position if bits of one but not both operands are 1
<< (Left-shift) Shifts its first operand in binary representation the number of bits to the
left specified in the second operand, shifting in 0s from the right
>> (Sign-propagating right-shift) Shifts the first operand in binary representation the
number of bits to the right specified in the second operand, discarding bits shifted off
|= Bitwise OR with result assigned to the first operand
&= Bitwise AND with result assigned to the first operand
^= Bitwise XOR with result assigned to the first operand
<<= Left-shift with result assigned to the first operand
>>= Sign-propagating right-shift with result assigned to the first operand
! Evaluates the opposite of the value specified
&& Requires both values to be true for the result to be true
|| Requires only one value to be true for the result to be true
== Left-hand value and right-hand value are equal
!= Left-hand value and right-hand value are not equal
< Left-hand value is less than right-hand value
> Left-hand value is greater than right-hand value
<= Left-hand value is less than or equal to right-hand value
>= Left-hand value is greater than or equal to right-hand value
$= Left-hand string is equal to right-hand string
!$= Left-hand string is not equal to right-hand string
// Comment operator—ignore all text from here to the end of the line
; Statement terminator
</div>
<span class='text_page_counter'>(95)</span><div class='page_container' data-page=95>
<i><b>Operator Precedence</b></i>
An issue with evaluating expressions is that of<i>order of evaluation</i>. Should%a + %b * %c be
evaluated by performing the multiplication first or by performing the addition first? In
other words, as %a + (%b * %c) or as (%a + %b) * %c?
Torque and other languages (such as C/C++) solve this problem by assigning priorities to
operators; operators with high priority are evaluated before operators with low priority.
Operators with equal priority are evaluated in left-to-right order. The priorities of the
operators seen so far are, in order of high to low priority, as follows:
( )
* / %
+
-=
Therefore,%a + %b * %c is evaluated as if it had been written as %a + (%b * %c) because
multiplication (*) has a higher priority than addition (+). If the + needed to be evaluated
first, then parentheses would be used as follows: (%a + %b) * %c.
If you have any doubt, then use extra parentheses to ensure the correct order of
evalua-tion. Note that two arithmetic operators cannot be written in succession.
<i><b>Increment/Decrement Operators</b></i>
There are some operations that occur so frequently in assignment statements that Torque
has shorthand methods for writing them. One common situation is that of incrementing
or decrementing an integer variable. For example,
%n = %n + 1; // increment by one
%n = %n - 1; // decrement by one
Torque has an increment operator (++) and a decrement operator (--). Thus
%n++;
can be used for the increment and
%n--;
can be used for the decrement.
</div>
<span class='text_page_counter'>(96)</span><div class='page_container' data-page=96>
<i><b>Totalizers</b></i>
<i>Totalizers</i>are a variation on the increment and decrement theme. Instead of bumping a
value up or down by 1, a totalizer does it with any arbitrary value. For example, a
com-mon situation that occurs is an assignment like this:
%total = %total + %more;
where a variable is increased by some amount and the result is assigned back to the
orig-inal variable. This type of assignment can be represented in Torque by the following:
%total += %more;
This notation can be used with the other arithmetic operators (+,-,*,/, and%), as you can
see in the following:
%prod = %prod * 10;
which can be written as this:
%prod *= 10;
You can use totalizers in compound assignment statements quite easily as well. Here's an
example:
%x = %x/(%y + 1);
becomes
%x /= %y + 1;
and
%n = %n % 2;
becomes
%n %= 2;
Be careful on that last one! The percent sign in front of the number 2 is the modulus
oper-ator, not a scope prefix. You can tell by the space that separates it from the 2—or in the
case of the totalizer example, you can tell by the fact that the percent sign is adjacent to
the equal sign on the right. They are certainly subtle differences, so make sure you watch
for them if you work in code that uses these constructs.
</div>
<span class='text_page_counter'>(97)</span><div class='page_container' data-page=97>
<b>Loops</b>
<i>Loops</i> are used for repetitive tasks. We saw an example of a loop being used in the
FruitLoopy sample program. This loop was used to step through the available types of
fruit. The loop was a <i>bounded</i>one that had a specified start and end, a characteristic built
into the loop construct we used, the for loop. The other kind of loop we are going to look
at is the while loop.
<i><b>The while Loop</b></i>
The following piece of Torque Script demonstrates a while loop. It gets a random number
between 0 and 10 from the Torque Engine and then prints it out.
// ========================================================================
// WhilingAway.cs
//
// This module is a program that demonstrates while loops. It prints
// random values on the screen as long as a condition is satisfied.
//
// ========================================================================
function main()
//
---// Entry point for the program.
//
---{
%value = 0; // initialize %value
while (%value < 7) // stop looping if %n exceeds 7
{
%value = GetRandom(10); // get a random number between 0 and 10
print("value="@%value ); // print the result
} // now back to the top of the loop
// ie. do it all again
}
Save this program as C:\3DGPAi1\book\WhilingAway.cs and run it. Note the output. Now
run it again. Note the output again—and the fact that this time it's different. That's the
randomness in action, right there. But the part that we are really interested in right now
is the fact that as long as the number is less than 7, the program continues to loop.
The general form of a while statement is this:
</div>
<span class='text_page_counter'>(98)</span><div class='page_container' data-page=98>
While the condition is true the statement is executed over and over. Each time the
condi-tion is satisfied and the statement is executed is called an <i>iteration</i>. The statement may be
a single statement (terminated by a semicolon) or code block (delimited by braces) when
you want two or more statements to be executed. Note the following points: It must be
possible to evaluate the condition on the first entry to the while statement or it will never
be satisfied, and its code will never be executed. This means that all variables used in the
condition must have been given values before the while statement is encountered. In the
preceding example the variable %value was started at 0 (it was initialized) and it was given
a random number between 0 and 10 during each iteration of the loop.
Now you have to make sure that at least one of the variables referenced in the condition
can be changed in the statement portion that makes up the body of the loop. If you don't,
you could end up stuck in an <i>infinite loop</i>. In the preceding example by making sure that
the randomly chosen %value would always <i>eventually</i> cause the condition to fail (10 is
greater than 7), we ensure that the loop will stop at some point. In fact, the random
num-ber code will return 7, 8, 9, and 10 at some point or other—any one of which will cause
the code to break out of the loop.
Here is the important thing about while loops: The condition is evaluated <i>before</i>the loop
body statements are executed. If the condition evaluates to false when it is first encountered,
then the body is never entered. In the preceding example if we had initialized %value with 10,
then no execution of the statements in the body of the while loop would have happened.
And now here's a little exercise for you. Write a program, saving it as
C:\3DGPAi1\book\looprint.cs. Make the program print all the integers starting at 0 up to
and including 250. That's a lot of numbers! Use a while loop to do it.
<i><b>The for Loop</b></i>
When programming, we often need to execute a statement a specific number of times.
Consider the following use of a while statement to output the numbers 1 to 10. In this case
the integer variable i is used to control the number of times the loop is executed.
%count = 1;
while (%count <= 10)
{
print("count="@%count);
%count++;
}
Three distinct operations take place:
</div>
<span class='text_page_counter'>(99)</span><div class='page_container' data-page=99>
■ <b><sub>Update.</sub></b><sub>Updates the value of the control variable before executing the loop again</sub>
(%count++).
Thefor statement is specially designed for these cases—where a loop is to be executed
starting from an initial value and iterates until a control condition is satisfied, meanwhile
updating the value of the control variable each time around the loop. It has all three
oper-ations rolled up into its principal statement syntax. It's sort of the Swiss army knife ofloop
statements.
The general form of the for statement is
for ( initialize ; evaluate ; update )
statement
which executes the initialize operation when the for statement is first entered. The
evalu-ate operation is then performed on the test expression; if it evaluevalu-ates to true, then the loop
statement is executed for one iteration followed by the update operation. The cycle of test,
iterate, update continues until the test expression evaluates to false; control then passes to
the next statement in the program.
<b>Functions</b>
<i>Functions</i>save work. Once you've written code to solve a problem, you can roll the code
into a function and reuse it whenever you encounter that problem again. You can create
functions in a manner that allows you to use the code with different starting parameters
and either create some effect or return a value to the code that uses the function.
</div>
<span class='text_page_counter'>(100)</span><div class='page_container' data-page=100>
In the "Arrays" section earlier in this chapter we calculated a total price and total count of
several types of fruit with the FruitLoopy program. Here is that program modified
some-what (okay, modified a <i>lot</i>) to use functions. Take note of how small the main function has
become now that so much code is contained within the three new functions.
// ========================================================================
// TwotyFruity.cs
//
// This program adds up the costs and quantities of selected fruit types
// and outputs the results to the display. This module is a variation
// of the FruitLoopy.cs module designed to demonstrate how to use
// functions.
// ========================================================================
function InitializeFruit($numFruitTypes)
//
---// Set the starting values for our fruit arrays, and the type
// indices
//
// RETURNS: number of different types of fruit
//
//
---{
$numTypes = 5; // so we know how many types are in our arrays
$bananaIdx=0; // initialize the values of our index variables
$appleIdx=1;
$orangeIdx=2;
$mangoIdx=3;
$pearIdx=4;
$names[$bananaIdx] = "bananas"; // initialize the fruit name values
$names[$appleIdx] = "apples";
$names[$orangeIdx] = "oranges";
$names[$mangoIdx] = "mangos";
$names[$pearIdx] = "pears";
$cost[$bananaIdx] = 1.15; // initialize the price values
$cost[$appleIdx] = 0.55;
$cost[$orangeIdx] = 0.55;
$cost[$mangoIdx] = 1.90;
$cost[$pearIdx] = 0.68;
</div>
<span class='text_page_counter'>(101)</span><div class='page_container' data-page=101>
$quantity[$appleIdx] = 3;
$quantity[$orangeIdx] = 4;
$quantity[$mangoIdx] = 1;
$quantity[$pearIdx] = 2;
return($numTypes);
}
function addEmUp($numFruitTypes)
//
---// Add all prices of different fruit types to get a full total cost
//
// PARAMETERS: %numTypes –the number of different fruit that are tracked
//
// RETURNS: total cost of all fruit
//
//
---{
%total = 0;
for (%index = 0; %index <= $numFruitTypes; %index++)
{
%total = %total + ($quantity[%index]*$cost[%index]);
}
return %total;
}
//
---// countEm
//
// Add all quantities of different fruit types to get a full total
//
// PARAMETERS: %numTypes –the number of different fruit that are tracked
//
// RETURNS: total of all fruit types
//
//
---function countEm($numFruitTypes)
{
%total = 0;
</div>
<span class='text_page_counter'>(102)</span><div class='page_container' data-page=102>
%total = %total + $quantity[%index];
}
return %total;
}
function main()
//
---// Entry point for program. This program adds up the costs
// and quantities of selected fruit types and outputs the results to
// the display. This program is a variation of the program FruitLoopy
//
//
---{
//
// --- Initialization
---//
$numFruitTypes=InitializeFruit(); // set up fruit arrays and variables
%numFruit=0; // always a good idea to initialize *all* variables!
%totalCost=0; // (even if we know we are going to change them later)
//
// --- Computation
---//
// Display the known statistics of the fruit collection
for (%index = 0; %index < $numFruitTypes; %index++)
{
print("Cost of " @ $names[%index] @ ":$" @ $cost[%index]);
print("Number of " @ $names[%index] @ ":" @ $quantity[%index]);
}
// count up all the pieces of fruit, and display that result
%numFruit = countEm($numFruitTypes);
print("Total pieces of Fruit:" @ %numFruit);
// now calculate the total cost
%totalCost = addEmUp($numFruitTypes);
</div>
<span class='text_page_counter'>(103)</span><div class='page_container' data-page=103>
Save this program as C:\3DGPAi1\book\TwotyFruity.cs and run it in the usual way. Now
go and run your FruitLoopy program, and compare the output. Hopefully, they will be
exactly the same.
In this version all the array initialization has been moved out of the main function and into
the new InitializeFruit function. Now, you might notice that I have changed the arrays
to be global variables. The reason for this is that Torque does not handle passing arrays to
functions in a graceful manner. Well, actually it does, but we would need to use
ScriptObjects, which are not covered until a later chapter, so rather than obfuscate things
too much right now, I've made the arrays into global variables. This will serve as a useful
lesson in contrast between global and local variables anyway, so I thought, why not?
The global arrays can be accessed from within any function in the file. The local ones
(with the percent sign prefix), however, can only be accessed within a function. This is
more obvious when you look at the addEmUp andcountEm functions. Notice that they both
use a variable called %total. But they are actually two <i>different</i>variables whose scope does
not extend outside the functions where they are used. So don't get mixed up!
Speaking ofaddEmUp andcountEm, these functions have another construct, called a <i>parameter</i>.
Sometimes we use the word <i>argument</i>instead, but because we are all friends here, I'll stick
with parameter.
<i><b>Functions with No Parameters</b></i>
The function main has no parameters, so you can see that parameters are not always
required. Because the arrays are global, they can be accessed from within any function, so
we don't<i>need</i>to try to pass in the data for them anyway.
<i><b>Functions with Parameters and No Return Value</b></i>
Parameters are used to pass information into a function, as witnessed with the functions
addEmUp andcountEm. In both cases we pass a parameter that tells the function how many
types of fruit there are to deal with.
The function declaration looked like this:
function addEmUp(%numTypes)
{
and when we actually used the function we did this:
%totalCost = addEmUp($numFruitTypes);
where $numFruitTypes indicates how many types of fruit there are—in this case, five. This
is known as a <i>call</i>to the function addEmUp. We could have written it as
</div>
<span class='text_page_counter'>(104)</span><div class='page_container' data-page=104>
but then we would have lost the flexibility of using the variable to hold the value for the
number of fruit types.
This activity is called <i>parameter passing</i>. When a parameter is passed during a function
call, the value passed into the function is assigned to the variable that is specified in the
function declaration. The effect is something like %numTypes = $numFruitTypes; now this
code doesn't actually exist anywhere, but operations are performed that have that effect.
Thus, %numTypes (inside the function) receives the value of $numFruitTypes (outside the
function).
<i><b>Functions That Return Values</b></i>
The function InitializeFruit returns a number for the number of different fruit types
with this line:
return(%numTypes);
and the functions addEmUp andcountEm both have this line:
return %total;
Notice that the first example has the variable sitting inside some parentheses, and the
sec-ond example does not. Either way is valid.
Now what happens is that when Torque encounters a return statement in a program, it
gath-ers up the value in the return statement, and then exits the function and resumes execution
at the code where the function was called. There isn't always a return statement in a function,
so don't be annoyed if you see functions without them. In the case of the InitializeFruit
function, that would have been the line near the start ofmain that looks like this:
$numFruitTypes=InitializeFruit(); // set up fruit arrays and variables
If the function call was part of an assignment statement, as above, then whatever value was
gathered at the return statement inside the function call is now assigned in the assignment
statement. Another way of expressing this concept is to say that the function <i>evaluated</i>to
the value of the return statement inside the function.
Return statements don't need to evaluate to anything, however. They can be used to
sim-ply stop execution of the function and return control to the calling program code with a
return value. Both numbers and strings can be returned from a function.
<b>Conditional Expressions</b>
</div>
<span class='text_page_counter'>(105)</span><div class='page_container' data-page=105>
%x < %y
(read as %x is less than %y), which evaluates to true if the value of the variable %x is less
than the value of the variable %y. The general form of a conditional expression is
operandA relational_operator operandB
The operands can be either variables or expressions. If an operand is an expression, then
the expression is evaluated and its value used as the operand. The relational operators
allowable in Torque are shown in Table 2.5.
<b>n o t e</b>
Another name for logic that involves only the values true orfalse isBoolean logic.
Note that equality is tested for using the operator = = because= is already used for
assign-ing values to variables. The condition evaluates to true if the values of the two operands
satisfy the relational operator and false if they don't.
Here are some examples:
%i < 10
%voltage >= 0.0
%total < 1000.0
%count != %n
%x * %x + %y * %y < %r * %r
Depending on the values of the variables involved, each of the preceding expressions is
true orfalse. If%x has the value 3,%y is 6, and %r is 10, the last expression evaluates to
true, but if %x was 7 and %y was 8, then it would evaluate to false.
<b>Table 2.5</b>
Relational Operators
<b>Symbol</b> <b>Meaning</b>
< less than
> greater than
<= less than or equal to
>= greater than or equal to
== equal to
</div>
<span class='text_page_counter'>(106)</span><div class='page_container' data-page=106>
The value of a logical expression can be stored in a variable for later use. Any numerical
expression can be used for the value of a condition, with 0 being interpreted as false and
1 as true.
This means that the value a logical expression evaluates to can be used in arithmetical
operations. This is often done by programmers, but it is a practice not to be
recommend-ed. It can lead to code obscurity, creating a program that is difficult to understand.
<i><b>Logical Expressions</b></i>
We can create more complex conditions than those that can be written using only the
rela-tional operators described in the preceding section. There are explicit logical operators for
combining the logical values true andfalse.
The simplest logical operator is NOT, which is represented in Torque by the exclamation
point ("!"). It operates on a single operand and returns false if its operand is true andtrue
if its operand is false.
The operator AND, represented by two ampersands ("&&"), takes two operands and is true
only if both of the operands are true. If either operand is false, the resulting value is false.
The final logical operator is OR, which is represented by two vertical pipes ("||"). It results
intrue if either operand is true. It returns false only if both its operands are false.
The logical operators can be defined by truth tables as seen in Table 2.6. The "F"
charac-ter is used for false and "T" is used for true in these tables.
These tables show that NOT reverses the truth value of the operand A; that the AND of
two operands is only true if both operands are true; and that the OR of two operands is
true if either or both of its operands are true. Now we can write pretty complex logical
operations.
If%i has the value 15, and %j has the value 10, then the expression (i > 10) && (j > 0) is
evaluated by evaluating the relation i > 10 (which is true), then evaluating the relation
%j > 0 (which is also true), to give true. If%j has the value -1, then the second relation would
<b>Table 2.6</b>
Logical Operator Truth Tables
<b>NOT (!)</b> <b>OR (||)</b> <b>AND (&&)</b>
<b>A</b> <b>!A</b> <b>A</b> <b>B</b> <b>A OR B</b> <b>A</b> <b>B </b> <b>A AND B</b>
F T T T T T T T
</div>
<span class='text_page_counter'>(107)</span><div class='page_container' data-page=107>
befalse, so the overall expression would be false. Ifi has the value 5, then the first relation
would be false, and the expression will be false irrespective of the value of the second
rela-tion. Torque does not even evaluate the second relation in this situarela-tion. Similarly, if the first
relation is true in an OR (||) expression, then the second relation will not be evaluated. This
short-circuit evaluation enables many logical expressions to be efficiently evaluated.
<i><b>Examples Using Logical Operators</b></i>
Note that in the last example that follows, an actual truth value (0 or false) was used as
one of the operands of&&. This means that whatever the value of%i, this logical expression
evaluates to false. In these examples parentheses have been used to clarify the order of
operator application.
(%i < 10) && (%j > 0)
((%x + %y) <= 15) || (%i == 5)
!((%i >= 10) || (%j <= 0))
(%i < 10) && 0
You've got to be careful not to confuse the assignment operator = with the logical
equal-ity operator = =. Using Table 2.6 with the following expression
x + y < 10 && x/y == 3 || z != 10
shows that the operators are evaluated in the order /,+,<,= =,!=,&&, and||. This is the same
as using parentheses on the expression in this way:((((x + y) < 10) && ((x/y) == 3)) ||
(z != 10)).
Similarly, the expressions given above could be written without parentheses as follows:
i < 10 && j > 0
x + y <= 15 || i == 5
!(i >= 10 || j <= 0)
i < 10 && 0
Now that we've covered the logical expressions (or conditions) in Torque, let's move on
and take a look at the conditional control mechanisms in Torque.
<b>Branching</b>
</div>
<span class='text_page_counter'>(108)</span><div class='page_container' data-page=108>
interested in the scenic route? Just as we've seen earlier with looping, there are conditions
that will dictate what path your code will take.
That act of taking one path over others available is branching. Branching starts out with
some sort of decision-making test. In addition to the two looping statements we've
already covered—which employ branching of sorts—there are also two branch-specific
statements: the if statement and the switch statement.
<i><b>The if Statement</b></i>
The simplest way to select the next thing to do in a program based upon conditions is to
use the if statement. Check this out:
if (%n > 0)
print("n is a positive number");
This will print out the message n is a positive number only if%n is positive. The general
form of the if statement is this:
if (condition)
statement
where condition is any valid logical expression as described in the "Conditional
Expressions" section we saw earlier.
Thisif statement adds %something to the variable %sum if%something is positive:
if (%something > 0)
%sum += %something;
If%something isn't positive, then the program branches <i>past</i>the totalizer statement, and so
%sum doesn't get incremented by %something.
This next piece of code also adds %something to %sum, but it also increments a positive
num-ber counter called %poscount:
if (%something > 0)
{
%sum += %something;
%counter++;
}
Note how in the second example a compound statement has been used to carry out more
than one operation if the condition is true. If it had been written like this:
</div>
<span class='text_page_counter'>(109)</span><div class='page_container' data-page=109>
then if%something was greater than 0 the next statement would be executed—that is,%sum
would incremented by the amount of%something. But the statement incrementing %counter
is now going to be treated as the next statement in the program and not as part of the if
statement. The program execution is not going to branch around it. The effect of this
would be that %counter would be incremented every time it is encountered, no matter
whether%something is positive or negative.
The statements within a compound statement can be any Torque statements. In fact,
anotherif statement could be included. For example, the following code will print a
mes-sage if a quantity is negative and a further mesmes-sage if no overdraft has been arranged:
if ( %balance < 0 )
{
print ("Your account is overdrawn. Balance is: " @ %balance );
if ( %overdraft <= 0 )
print ("You have exceeded your overdraft limit");
}
Now we could have done the same thing using two sequential if statements and more
complex conditions:
if ( %balance < 0 )
print ("Your account is overdrawn. Balance is: " @ %balance );
if ( %balance < 0 && %overdraft <= 0 )
print ("You have exceeded your overdraft limit");
You should note that one of these versions will generally execute a little bit faster than the
second when dealing with accounts that are not overdrawn. Before I tell you later in this
chapter, see if you can figure out which one, and why.
<i><b>The if-else Statement</b></i>
A simple if statement only allows a single branch to a simple or compound statement
when a condition holds. Sometimes there are alternative paths, some that need to be
exe-cuted when the condition holds, and some to be exeexe-cuted when the condition does not
hold. The two forms can be written this way:
if (%coffeeholic == true)
print ("I like coffee.");
if (%coffeeholic == false)
print ("I don't like coffee.");
</div>
<span class='text_page_counter'>(110)</span><div class='page_container' data-page=110>
if statement. The following example of an if-else statement writes out one message if the
variable %coffeeholic is positive and another message if%coffeeholic is negative:
if (%coffeeholic == true)
print ("I like coffee.");
else
print ("I don't like coffee.");
The general form of the if-else statement is this:
if ( condition )
statementA
else
statementB
If the condition is true, thenstatementA is executed; otherwise statementB is executed. Both
statementA andstatementB may be either simple or compound statements.
The following if-else statement evaluates if a fruit is fresh or not, and if it is, the
state-ment increstate-ments a fresh fruit counter. If the fruit isn't fresh, the statestate-ment increstate-ments the
rotten fruit counter. I'm going to program my refrigerator's fruit crisper to do this one day
and send me reports over the Internet. Well, I can wish, can't I?
if (%fruitState $= "fresh")
{
%freshFruitCounter++;
}
else
{
%rottenFruitCounter++;
}
Time for another sample program! Type the following program in and save it as
C:\3DGPAi1\book\Geometry.cs and then run it.
// ========================================================================
// geometry.cs
//
// This program calculates the distance around the perimeter of
// a quadrilateral as well as the area of the quadrilateral and outputs the
// values. It recognizes whether the quadrilateral is a square or a rectangle and
// modifies its output accordingly. Program assumes that all angles in the
// quadrilateral are equal. Demonstrates the if-else statement.
</div>
<span class='text_page_counter'>(111)</span><div class='page_container' data-page=111>
//
---// This function does the shape analysis and prints the result.
//
// PARAMETERS: %theWidth - horizontal dimension
// %theHeight - vertical dimension
//
// RETURNS: none
//
---{
// calculate perimeter
%perimeter = 2 * (%theWidth+%theHeight);
// calculate area
%area = %theWidth * %theHeight;
// first, set up the dimension output string
%prompt = "For a " @ %theWidth @ " by " @
%theHeight @ " quadrilateral, area and perimeter of ";
// analyze the shape's dimensions and select different
// descriptors based on the shape's dimensions
if (%theWidth == %theHeight) // if true, then it's a square
%prompt = %prompt @ "square: ";
else // otherwise it's a rectangle
%prompt = %prompt @ "rectangle: ";
// always output the analysis
print (%prompt @ %area @ " " @ %perimeter);
}
function main()
//
---// Entry point for the program.
//
---{
// calculate and output the results for three
// known dimension sets
</div>
<span class='text_page_counter'>(112)</span><div class='page_container' data-page=112>
What we've done here is analyze a shape. In addition to printing its calculated
measure-ments, we modify our output string based upon the (simple) analysis that determines if it
is a square or a rectangle. I realize that a square <i>is</i>a rectangle, but let's not get too picky,
okay? Not yet, at least.
<i><b>Nesting if Statements</b></i>
You saw earlier in "The if Statement" section how an if statement can contain another if
statement. These are called <i>nestedif statements</i>. There is no real limit to how deep you can
nest the statements, but try to be reasonable and only do it if it is absolutely necessary for
functional reasons. It might be good to do it for performance reasons, and that's fine as well.
By the way, I had asked if you could tell which of the two examples would execute faster,
remember that? The answer is that the nested version will execute faster when there is no
overdraft condition. This is because only one condition is tested, resulting in less work for
the computer to do. The sequential version will always perform both tests, no matter what
the bank balance is.
Theif andif-else statements allow a choice to be made between two possible
alterna-tives. Well, sometimes we need to choose between more than two alternaalterna-tives. For
exam-ple, the following sign function returns ⫺1 if the argument is less than 0, returns +1 if the
argument is greater than 0, and returns 0 if the argument is 0.
function sign (%value)
// determines the arithmetic sign of a value
//
// PARAMETERS: %value – the value to be analyzed
//
// RETURNS: -1 - if value is negative
// 0 - if value is zero
// 1 - if value is positive
{
if (%value < 0) // is it negative ?
{
return -1;
}
else // nope, not negative
{
if (%value == 0) // is it zero ?
{
return 0;
}
</div>
<span class='text_page_counter'>(113)</span><div class='page_container' data-page=113>
return 1;
}
}
}
So there you go. The function has an if-else statement in which the statement following
theelse is also an if-else statement. If%value is less than 0, then sign returns⫺1, but if
it is not less than 0, the statement following the else is executed. In that case if%value is
equal to 0, then sign returns 0; otherwise it returns 1. I used the compound statement
form in order to make the nesting stand out more. The nesting could also be written like
this:
if (%value < 0) // is it negative ?
return -1;
else // nope, not negative
if (%value == 0) // is it zero ?
return 0;
else // nope, then it must be positive
return 1;
This is nice and compact, but it can sometimes be hard to discern where the nesting
prop-erly happens, and it is easier to make mistakes. Using the compound form formalizes the
nesting a bit more, and personally, I find it more readable.
Newbie programmers sometimes use a sequence ofif statements rather than nested
if-else statements when the latter should be used. They would write the guts of the sign
function like this:
if (%value < 0)
%result = -1;
if (%value == 0)
%result = 0;
if (%value > 0)
%result = 1;
return %result;
It would work and it's fairly easy to read, but it's inefficient because all three conditions
are always tested.
</div>
<span class='text_page_counter'>(114)</span><div class='page_container' data-page=114>
<i><b>The switch Statement</b></i>
We just explored how we can choose between more than two possibilities by using nested
if-else statements. There is a sleeker and more readable method available for certain kinds
of multiple choice situations—the switch statement. For example, the following switch
statement will set a game's weapon label based upon a numeric weapon type variable:
switch (%weaponType)
{
case 1: %weaponName = "knife";
case 2: %weaponName = "pistol";
case 3: %weaponName = "shotgun";
case 4: %weaponName = "bfg1000";
default: %weaponName = "fist";
}
Here is what that would look like using if-else:
if (%weaponType == 1)
%weaponName = "knife";
else if (%weaponType == 2)
%weaponName = "pistol";
else if (%weaponType == 3)
%weaponName = "shotgun";
else if (%weaponType == 4)
%weaponName = "bfg1000";
else
%weaponName = "fist";
It's pretty obvious from that simple example why the switch statement is so useful.
The general form of a switch statement is this:
switch ( selection-variable )
{
case label1:
statement1;
case label2:
statement2;
...
case labeln:
statementn;
default:
</div>
<span class='text_page_counter'>(115)</span><div class='page_container' data-page=115>
The selection-variable may be a number or a string or an expression that evaluates to a
number or a string. The selection-variable is evaluated and compared with each of the
case labels. The case labels all have to be different. If a match is found between the
selec-tion-variable and one of the case labels, then the statements that follow the matched case
until the next case statement will be executed. If the value of the selection-variable can't
be matched with any of the case labels, then the statements associated with default are
executed. The default is not required but should only be left out if it is certain that the
selection-variable will always take the value of one of the case labels.
Here is another example, which writes out the day of the week depending on the value of
the number variable %day.
switch (%day)
{
case 1 :
print("Sunday");
case 2 :
print("Monday");
case 3 :
print("Tuesday");
case 4 :
print("Wednesday");
case 5 :
print("Thursday");
case 6 :
print("Friday");
case 7 :
print("Saturday");
default :
print("Not a valid day number");
}
<b>Debugging and Problem Solving</b>
</div>
<span class='text_page_counter'>(116)</span><div class='page_container' data-page=116>
The log output is pretty verbose and should guide you to the problem area pretty quickly.
It writes out a piece of code around the problem area and then inserts a pair of sharp
char-acters ("##") on either side of the exact spot where the compiler thinks there is a problem.
Once you've fixed the first problem, don't assume you are done. Quite often, once one
problem is fixed, the compiler marches on through the code and finds another one. The
compiler always aborts as soon as it encounters the first problem.
Of the large number of programming errors that the compiler catches and identifies, here
are a few specific ones that frequently crop up:
■ <sub>Missing semicolon at the end of a statement.</sub>
■ Missing a slash in double-slash comment operator.
■ Missing% or$ (scope prefix) from variable names.
■ Using uninitialized variables.
■ <sub>Mixing global and local scope prefixes.</sub>
■ Unbalanced parentheses or braces.
In a later chapter we will cover how to use the console mode in Torque. That will give us
access to three built-in Torque functions—echo,warn, anderror—which are quite useful
for debugging.
Without using those three functions, the best tool for debugging programs you've
creat-ed is the print statement. You should print out interim results throughout your code that
will tell you how your program is progressing.
Tell you what—here is a different version of the TwotyFruity program. Type it in and save
it as C:\3DGPAi1\book\WormyFruit.cs. I've put five bugs in this version. See if you can
spot them (in addition to any you might introduce while typing).
// ========================================================================
// WormyFruit.cs
//
// Buggy version of TwotyFruity. It has five known bugs in it.
// This program adds up the costs and quantities of selected fruit types
// and outputs the results to the display. This module is a variation
// of the FruitLoopy.cs module designed to demonstrate how to use
// functions.
// ========================================================================
function InitializeFruit(%numFruitTypes)
//
---// Set the starting values for our fruit arrays, and the type
</div>
<span class='text_page_counter'>(117)</span><div class='page_container' data-page=117>
//
// RETURNS: number of different types of fruit
//
//
---{
$numTypes = 5; // so we know how many types are in our arrays
$bananaIdx=0; // initialize the values of our index variables
$appleIdx=1;
$orangeIdx=2;
$mangoIdx=3;
$pearIdx=3;
$names[$bananaIdx] = "bananas"; // initialize the fruit name values
$names[$appleIdx] = "apples";
$names[$orangeIdx] = "oranges";
$names[$mangoIdx] = "mangos";
$names[$pearIdx] = "pears";
$cost[$bananaIdx] = 1.15; // initialize the price values
$cost[$appleIdx] = 0.55;
$cost[$orangeIdx] = 0.55;
$cost[$mangoIdx] = 1.90;
$cost[$pearIdx] = 0.68;
$quantity[$bananaIdx] = 1; // initialize the quantity values
$quantity[$appleIdx] = 3;
$quantity[$orangeIdx] = 4;
$quantity[$mangoIdx] = 1;
$quantity[$pearIdx] = 2;
return(%numTypes);
}
function addEmUp($numFruitTypes)
//
---// Add all prices of different fruit types to get a full total cost
//
// PARAMETERS: %numTypes –the number of different fruit that are tracked
//
// RETURNS: total cost of all fruit
//
</div>
<span class='text_page_counter'>(118)</span><div class='page_container' data-page=118>
---{
%total = 0;
for (%index = 0; %index <= $numFruitTypes; %index++)
{
%total = %total + ($quantity[%index]*$cost[%index]);
}
return %total;
}
//
---// countEm
//
// Add all quantities of different fruit types to get a full total
//
// PARAMETERS: %numTypes –the number of different fruit that are tracked
//
// RETURNS: total of all fruit types
//
//
---function countEm($numFruitTypes)
{
%total = 0;
for (%index = 0; %index <= $numFruitTypes; %index++)
{
%total = %total + $quantity[%index];
}
}
function main()
//
---// Entry point for program. This program adds up the costs
// and quantities of selected fruit types and outputs the results to
// the display. This program is a variation of the program FruitLoopy
//
//
---{
//
// --- Initialization
---//
</div>
<span class='text_page_counter'>(119)</span><div class='page_container' data-page=119>
%numFruit=0 // always a good idea to initialize *all* variables!
%totalCost=0; // (even if we know we are going to change them later)
//
// --- Computation
---//
// Display the known statistics of the fruit collection
for (%index = 0; %index < $numFruitTypes; %index++)
{
print("Cost of " @ $names[%index] @ ":$" @ $cost[%index]);
print("Number of " @ $names[%index] @ ":" @ $quantity[%index]);
}
// count up all the pieces of fruit, and display that result
%numFruit = countEm($numFruitTypes));
print("Total pieces of Fruit:" @ %numFruit);
// now calculate the total cost
%totalCost = addEmUp($numFruitTypes);
print("Total Price of Fruit:$" @ %totalCost);
}
Run the program, and use the original TwotyFruity output as a specification to tell you
whether or not this program is working correctly.
<b>Best Practices</b>
Programming is as much an art as it is anything else. There are often quite strenuous
dis-cussions between programmers about the best way to do certain things. However, there is
consensus on a few practices that are considered to be good.
So take the following list as a guideline, and develop a style that is comfortable for you.
■ Use module and function header comments to document your code.
■ Sprinkle lots of commentary through your code, and make sure that it actually
explains what is happening.
■ Don't comment obvious things. Save the effort for the stuff that matters.
■ <sub>Use white space (blank lines and spaces) to improve readability.</sub>
■ Indent your code with readability in mind.
</div>
<span class='text_page_counter'>(120)</span><div class='page_container' data-page=120>
■ <sub>Organize your code into separate modules, and make sure the module file name is</sub>
appropriate for the content, and vice versa.
■ <sub>Restrict the number of lines of code you put in a module. Pick a size that suits</sub>
you—about 1,000 lines should be near your upper limit.
■ <sub>Use descriptive and meaningful variable names.</sub>
■ While keeping your variable names descriptive, don't let the names get too long.
■ Never embed tabs in code—use spaces instead. When you view your code later,
you may have different tab settings, and therefore find the code hard to read. Using
spaces guarantees that the visual appearance is consistent. Three spaces for an
indent is a good number.
■ <sub>Be consistent in your programming style decisions.</sub>
■ Be alert to what programming decisions you make that work well for you, and try
to consistently employ those techniques.
■ Keep a change log of your work so you can keep track of the evolution of your
programs.
■ Use revision control software to manage your program versions.
<b>Moving Right Along</b>
You've now bitten off a fairly big chunk o' stuff. You've learned a new tool—in fact, a new
<i>kind</i>of tool—the programmer's editor. After getting a handle on UltraEdit-32, we looked
at how software does its thing, bringing people and computer hardware together by using
programming languages.
We then went off and started bullying the computer around, using one of those
pro-gramming languages called Torque Script.
</div>
<span class='text_page_counter'>(121)</span><div class='page_container' data-page=121></div>
<span class='text_page_counter'>(122)</span><div class='page_container' data-page=122>
89
<b>3D Programming </b>
<b>Concepts</b>
I
n this chapter we will discuss how objects are described in their three dimensions indifferent 3D coordinate systems, as well as how we convert them for use in the 2D
coordinate system of a computer display. There is some math involved here, but don't
worry—I'll do the heavy lifting.
We'll also cover the stages and some of the components of the rendering pipeline—a
con-ceptual way of thinking of the steps involved in converting an abstract mathematical
model of an object into a beautiful on-screen picture.
<b>3D Concepts</b>
In the real world around us, we perceive objects to have measurements in three directions,
or dimensions. Typically we say they have height, width, and depth. When we want to
rep-resent an object on a computer screen, we need to account for the fact that the person
viewing the object is limited to perceiving only two actual dimensions: height, from the
top toward the bottom of the screen, and width, across the screen from left to right.
<b>n o t e</b>
Remember that we will be using the Torque Game Engine to do most of the rendering work
involved in creating our game with this book. However, a solid understanding of the technology
described in this section will help guide you in your decision-making later on when you will be
designing and building your own models or writing code to manipulate those models in real time.
</div>
<span class='text_page_counter'>(123)</span><div class='page_container' data-page=123>
such as shading, shadows, and textures. The entire process of calculating the appearance
of the 3D model—converting it to an entity that can be drawn on a two-dimensional (2D)
screen and then actually displaying the resulting image—is called<i>rendering</i>.
<b>Coordinate Systems</b>
When we refer to the dimensional measurement of an object, we use number groups
called<i>coordinates</i>to mark each <i>vertex</i>(corner) of the object. We commonly use the
vari-able names X, Y, and Z to represent each of the three dimensions in each coordinate
group, or triplet. There are different ways to organize the meaning of the coordinates,
known as <i>coordinate systems</i>.
We have to decide which of our variables will represent which dimension—height, width,
or depth—and in what order we intend to reference them. Then we need to decide where
the zero point is for these dimensions and what it means in relation to our object. Once
we have done all that, we will have defined our coordinate system.
When we think about 3D objects, each of the directions is represented by an <i>axis</i>, the
infi-nitely long line of a dimension that passes through the zero point. Width or left-right is
usually the X-axis, height or up-down is usually the Y-axis, and depth or near-far is
usu-ally the Z-axis. Using these constructs, we have ourselves a nice tidy little <i>XYZ-axis system</i>,
as shown in Figure 3.1.
Now, when we consider a single
object in isolation, the 3D space
it occupies is called <i>object space</i>.
The point in object space where
X, Y, and Z are all 0 is normally
the <i>geometric center</i> of an
object. The geometric center of
an object is usually inside the
object. If positive X values are
to the right, positive Y values
are up, and positive Z values are
away from you, then as you can
see in Figure 3.2, the coordinate
system is called <i>left-handed</i>.
The Torque Game Engine uses a slightly different coordinate system, a <i>right-handed</i>one.
In this system, with Y and Z oriented the same as we saw in the left-handed system, X is
positive in the opposite direction. In what some people call <i>Computer Graphics Aerobics</i>,
we can use the thumb, index finger, and middle finger of our hands to easily figure out the
handedness of the system we are using (see Figure 3.3). Just remember that using this
</div>
<span class='text_page_counter'>(124)</span><div class='page_container' data-page=124>
technique, the thumb is always the Y-axis,
the index finger is the Z-axis, and the
mid-dle finger is the X-axis.
With Torque, we also orient the system in a
slightly different way: The Z-axis is
up-down, the X-axis is somewhat left-right,
and the Y-axis is somewhat near-far (see
Figure 3.4). Actually,<i>somewhat</i>means that
we specify left and right in terms of looking
down on a map from above, with north at
the top of the map. Right and left (positive
and negative X) are east and west,
respec-tively, and it follows that positive Y refers to
north and negative Y to south. Don't forget
that positive Z would be up, and negative Z
would be down. This is a right-handed
sys-tem that orients the axes to align with the
way we would look at the world using a
map from above. By specifying that the zero
point for all three axes is a specific location
on the map, and by using the coordinate
system with the orientation just described,
we have defined our <i>world space</i>.
Now that we have a coordinate system, we
can specify any location on an object or in a
world using a coordinate triplet, such as
(5,⫺3,⫺2) (see Figure 3.5). By convention,
this would be interpreted as X=5, Y=⫺3,
Z=⫺2. A 3D triplet is always specified in
XYZ format.
Take another peek at Figure 3.5. Notice anything? That's right—the Y-axis is vertical
with the positive values above the 0, and the Z-axis positive side is toward us. It is still
a right-handed coordinate system. The right-handed system with <i>Y-up</i> orientation is
often used for modeling objects in isolation, and of course we call it <i>object space</i>, as
described earlier. We are going to be working with this orientation and coordinate
sys-tem for the next little while.
<b>Figure 3.2 </b>Left-handed coordinate system with
vertical Y-axis.
</div>
<span class='text_page_counter'>(125)</span><div class='page_container' data-page=125>
<b>3D Models</b>
I had briefly touched on the
idea that we can simulate, or
model, any object by defining
its shape in terms of its
signifi-cant<i>vertices</i>(plural for <i>vertex</i>).
Let's take a closer look, by
start-ing with a simple 3D shape,
or <i>primitive</i>—the cube—as
depicted in Figure 3.6.
The cube's dimensions are two
units wide by two units deep
by two units high, or 2⫻2⫻2. In this
draw-ing, shown in object space, the geometric
center is offset to a position outside the
cube. I've done this in order to make it
clear-er what is happening in the drawing, despite
my statement earlier that geometric centers
are usually located inside an object. There
are times when exceptions are not only
pos-sible, but necessary—as in this case.
Examining the drawing, we can see the
object's shape and its dimensions quite
clearly. The lower-left-front corner of the
cube is located at the position where X=0,
Y=1, and Z=⫺2. As an exercise, take some
time to locate all of the other vertices
(cor-ners) of the cube, and note their coordinates.
If you haven't already noticed on your own,
there is more information in the drawing
than actually needed. Can you see how we
can plot the coordinates by using the
guidelines to find the positions on the axes
of the vertices? But we can also see the
actual coordinates of the vertices drawn
right in the chart. We don't need to do
both. The axis lines with their index tick
marks and values really clutter up the
drawing, so it has become somewhat
accepted in computer graphics to not
<b>Figure 3.4 </b>Right-handed coordinate system with vertical
Z-axis depicting world space.
<b>Figure 3.5 </b>A point specified using an XYZ
coordinate triplet.
</div>
<span class='text_page_counter'>(126)</span><div class='page_container' data-page=126>
bother with these indices. Instead we try to use the minimum amount of information
necessary to completely depict the object.
We only really need to state whether the object is in object space or world space and
indi-cate the raw coordinates of each vertex. We should also connect the vertices with lines that
indicate the edges.
If you take a look at Figure 3.7 you will see how easy it is to extract the sense of the shape,
compared to the drawing in Figure 3.6. We specify which space definition we are using by the
small XYZ-axis notation. The color code indicates the axis name, and the axis lines are drawn
only for the positive directions. Different modeling tools use different color codes, but in this
book dark yellow (shown as light gray) is the X-axis, dark cyan (medium gray) is the Y-axis,
and dark magenta (dark gray) is the Z-axis. It is also common practice to place the XYZ-axis
key at the geometric center of the model.
Figure 3.8 shows our cube with the geometric
center placed where it reasonably belongs
when dealing with an object in object space.
Now take a look at Figure 3.9. It is obviously
somewhat more complex than our simple
cube, but you are now armed with everything
you need to know in order to understand it. It
is a screen shot of a four-view drawing from
the popular shareware modeling tool
MilkShape 3D, in which a 3D model of a
soc-cer ball was created.
In the figure, the vertices are marked with red
dots (which show as black in the picture), and
the edges are marked with light gray lines. The
axis keys are visible, although barely so in some views
because they are obscured by the edge lines. Notice the grid
lines that are used to help with aligning parts of the model.
The three views with the gray background and grid lines are
2D construction views, while the fourth view, in the
lower-right corner, is a 3D projection of the object. The upper-left
view looks down from above, with the Y-axis in the vertical
direction and the X-axis in the horizontal direction. The
Z-axis in that view is not visible. The upper-right view is
look-ing at the object from the front, with the Y-axis vertical
<b>Figure 3.7 </b>Simple cube with reduced
XYZ-axis key.
</div>
<span class='text_page_counter'>(127)</span><div class='page_container' data-page=127>
and the Z-axis horizontal; there
is no X-axis. The lower-left
view shows the Z-axis vertically
and the X-axis horizontally
with no Y-axis. In the
lower-right view, the axis key is quite
evident, as its lines protrude
from the model.
<b>3D Shapes</b>
We've already encountered
some of things that make up
3D models. Now it's time to
round out that knowledge.
As we've seen, vertices define
the shape of a 3D model. We
connect the vertices with lines
known as <i>edges</i>. If we connect
three or more vertices with edges to create a closed figure,
we've created a <i>polygon</i>. The simplest polygon is a
trian-gle. In modern 3D accelerated graphics adapters, the
hardware is designed to manipulate and display millions
and millions of triangles in a second. Because of this
capability in the adapters, we normally construct our
models out of the simple triangle polygons instead of the
more complex polygons, such as rectangles or pentagons
(see Figure 3.10).
By happy coincidence, triangles are more than up to the
task of modeling complex 3D shapes. Any complex
poly-gon can be decomposed into a collection of triangles,
commonly called a <i>mesh</i>(see Figure 3.11).
The area of the model is known as the <i>surface</i>. The
polyg-onal surfaces are called facets—or at least that is the
tra-ditional name. These days, they are more commonly
called faces. Sometimes a surface can only be viewed
from one side, so when you are looking at it from its
"invisible" side, it's called a <i>hidden surface</i>, or <i>hidden face</i>.
A<i>double-sided face</i> can be viewed from either side. The
edges of hidden surfaces are called <i>hidden lines</i>. With
<b>Figure 3.9 </b>Screen shot of sphere model.
<b>Figure 3.10 </b>Polygons of
varying complexity.
<b>Figure 3.11 </b>Polygons
</div>
<span class='text_page_counter'>(128)</span><div class='page_container' data-page=128>
most models, there are faces on the back side
of the model, facing away from us, called
<i>backfaces</i> (see Figure 3.12). As mentioned,
most of the time when we talk about faces in
game development, we are talking about
tri-angles, sometimes shortened to <i>tris</i>.
<b>Displaying 3D Models</b>
After we have defined a model of a 3D object
of interest, we may want to display a view of it.
The models are created in object space, but to
display them in the 3D world, we need to
con-vert them to world space coordinates. This
requires three conversion steps beyond the actual creation of the model in object space.
1. Convert to world space coordinates.
2. Convert to view coordinates.
3. Convert to screen coordinates.
Each of these conversions involves mathematical operations performed on the object's
vertices.
The first step is accomplished by the process called <i>transformation</i>. Step 2 is what we call
<i>3D rendering</i>. Step 3 describes what is known as <i>2D rendering</i>. First we will examine what
the steps do for us, before getting into the gritty details.
<b>Transformation</b>
This first conversion, to world space coordinates, is necessary because we have to place our
object somewhere! We call this conversion <i>transformation</i>. We will indicate where by
applying transformations to the object: a scale operation (which controls the object's
size), a <i>rotation</i>(which sets orientation), and a <i>translation</i>(which sets location).
World space transformations assume that the object starts with a transformation of
(1.0,1.0,1.0) for scaling, (0,0,0) for rotation, and (0,0,0) for translation.
Every object in a 3D world can have its own 3D transformation values, often simply called
<i>transforms</i>, that will be applied when the world is being prepared for rendering.
<b>t i p</b>
Other terms used for these kinds of XYZ coordinates in world space are Cartesian coordinates, or
rectangular coordinates.
</div>
<span class='text_page_counter'>(129)</span><div class='page_container' data-page=129>
<i><b>Scaling</b></i>
We scale objects based upon a triplet
of scale factors where 1.0 indicates a
scale of 1:1.
The scale operation is written
simi-larly to the XYZ coordinates that are
used to denote the transformation,
except that the scale operation shows
how the size of the object has
changed. Values greater than 1.0
cate that the object will be made larger, and values less than 1.0 (but greater than 0)
indi-cate that the object will shrink.
For example, 2.0 will double a given dimension, 0.5 will halve it, and a value of 1.0 means
no change. Figure 3.13 shows a scale operation performed on a cube in object space. The
original scale values are (1.0,1.0,1.0). After scaling, the cube is 1.6 times larger in all three
dimensions, and the values are (1.6,1.6,1.6).
<i><b>Rotation</b></i>
The rotation is written in the same way that XYZ coordinates are used to denote the
trans-formation, except that the rotation shows how much the object is rotated around each of
its three axes. In this book, rotations will be specified using a triplet of degrees as the unit
of measure. In other contexts, radians might be the unit of measure used. There are also
other methods of representing rotations that are used in more complex situations, but this
is the way we'll do it in this book. Figure 3.14 depicts a cube being rotated by 30 degrees
around the Y-axis in its object space.
It is important to realize that the order of the rotations applied to the object matters a
great deal. The convention we will use is the <i>roll-pitch-yaw</i> method, adopted from the
aviation community. When we rotate the object, we roll it around its longitudinal (Z)
axis. Then we pitch it around the
lateral (X) axis. Finally, we yaw it
around the vertical (Y) axis.
Rotations on the object are applied
in object space.
If we apply the rotation in a
differ-ent order, we can end up with a
very different orientation, despite
having done the rotations using the
same values.
<b>Figure 3.13 </b>Scaling.
</div>
<span class='text_page_counter'>(130)</span><div class='page_container' data-page=130>
<i><b>Translation</b></i>
Translation is the simplest of the transformations and the first that is applied to the object
when transforming from object space to world space. Figure 3.15 shows a translation
operation performed on an object. Note that the vertical axis is dark gray. As I said
earli-er, in this book, dark gray represents the Z-axis. Try to figure out what coordinate system
we are using here. I'll tell you later in the chapter. To translate an object, we apply a
vec-tor to its position coordinates. Vecvec-tors can be specified in different ways, but the notation
we will use is the same as the XYZ triplet, called a <i>vector triplet</i>. For Figure 3.15, the
vec-tor triplet is (3,9,7). This indicates that the object will be moved three units in the
posi-tive X direction, nine units in the
positive Y direction, and seven
units in the positive Z direction.
Remember that this translation is
applied in world space, so the X
direction in this case would be
east-ward, and the Z direction would be
down (toward the ground, so to
speak). Neither the orientation nor
the size of the object is changed.
<i><b>Full Transformation</b></i>
So now we roll all the
operations together. We
want to orient the cube a
certain way, with a
cer-tain size, at a cercer-tain
location. The
transfor-mations applied are scale
(s)=1.6,1.6,1.6, followed
by rotation (r)=0,30,0,
and then finally
transla-tion (t)=3,9,7. Figure
3.16 shows the process.
<b>Figure 3.15 </b>Translation.
</div>
<span class='text_page_counter'>(131)</span><div class='page_container' data-page=131>
<b>n o t e</b>
The order that we use to apply the transformations is important. In the great majority of cases, the
correct order is scaling, rotation, and then translation. The reason is that different things happen
depending on the order.
You will recall that objects are
created in object space, then
moved into world space. The
object's origin is placed at the
world origin. When we rotate the
object, we rotate it around the
appropriate axes with the origin
at (0,0,0), then translate it to its
new position.
If you translate the object first,
then rotate it (which is still going
to take place around (0,0,0), the
object will end up in an entirely
different position as you can see
in Figure 3.17.
<b>Rendering</b>
<i>Rendering</i> is the process of converting the 3D mathematical model of an object into an
on-screen 2D image. When we render an object, our primary task is to calculate the
appearance of the different faces of the object, convert those faces into a 2D form, and
send the result to the video card, which will then take all the steps needed to display the
object on your monitor.
We will take a look at several different techniques for rendering, those that are often used
in video game engines or 3D video cards. There are other techniques, such as ray-casting,
that aren't in wide use in computer games—with the odd exception, of course—that we
won't be covering here.
In the previous sections our simple cube model had colored faces. In case you haven't
noticed (but I'm sure you did notice), we haven't covered the issue of the faces, except
briefly in passing.
A<i>face</i>is essentially a set of one or more contiguous co-planar adjacent triangles; that is,
when taken as a whole, the triangles form a single flat surface. If you refer back to Figure
3.12, you will see that each face of the cube is made with two triangles. Of course, the faces
are transparent in order to present the other parts of the cube.
</div>
<span class='text_page_counter'>(132)</span><div class='page_container' data-page=132>
<i><b>Flat Shading</b></i>
Figure 3.18 provides an example of various face
config-urations on an irregularly shaped object. Each face is
presented with a different color (which are visible as
dif-ferent shades). All triangles with the label A are part of
the same face; the same applies to the D triangles. The
triangles labeled B and C are each single-triangle faces.
When we want to display 3D objects, we usually use
some technique to apply color to the faces. The
sim-plest method is <i>flat shading</i>, as used in Figure 3.17. A
color or shade is applied to a face, and a different color
or shade is applied to adjacent faces so that the user
can tell them apart. In this case, the shades were
select-ed with the sole criterion being the neselect-ed to distinguish one face from the other.
One particular variation of flat shading is called <i>Z-flat shading</i>. The basic idea is that the
farther a face is from the viewer, the darker or lighter the face.
<i><b>Lambert Shading</b></i>
Usually color and shading are applied in a manner
that implies some sense of depth and lighted space.
One face or collection of faces will be lighter in shade,
implying that the direction they face has a light source.
On the opposite side of the object, faces are shaded to
imply that no light, or at least less light, reaches those
faces. In between the light and dark faces, the faces are
shaded with intermediate values. The result is a
shad-ed object where the face shading provides information
that imparts a sense of the object in a 3D world,
enhancing the illusion. This is a form of flat shading
known as <i>lambert shading</i>(see Figure 3.19).
<i><b>Gouraud Shading</b></i>
A more useful way to color or shade an object
is called <i>gouraud shading</i>. Take a look at Figure
3.20. The sphere on the left (A) is flat shaded,
while the sphere on the right (B) is gouraud
shaded. Gouraud shading smoothes the colors
by averaging the <i>normals</i> (the vectors that
indicate which way surfaces are facing) of the
<b>Figure 3.18 </b>Faces on an
irregularly shaped object.
<b>Figure 3.19 </b>Lambert-shaded
object.
</div>
<span class='text_page_counter'>(133)</span><div class='page_container' data-page=133>
vertices of a surface. The normals are used to modify the color value of all the pixels in a face.
Each pixel's color value is then modified to account for the pixel's position within the face.
Gouraud shading creates a much more natural appearance for the object, doesn't it?
Gouraud shading is commonly used in both software and hardware rendering systems.
<i><b>Phong Shading</b></i>
<i>Phong shading</i>is a much more sophisticated—and computation-intensive—technique for
rendering a 3D object. Like gouraud shading, it calculates color or shade values for each
pixel. Unlike gouraud shading (which uses only the vertices' normals to calculate average
pixel values), phong shading computes additional normals for each pixel between vertices
and then calculates the new color values. Phong shading does a remarkably better job (see
Figure 3.21), but at a substantial cost.
Phong shading requires a great deal of processing for even a simple scene, which is why
you don't see phong shading used much in real-time 3D games where frame rate
perfor-mance is important. However, there are games made where frame rate is not as big an
issue, in which case you will often find phong shading used.
<i><b>Fake Phong Shading</b></i>
There is a rendering technique that looks almost as
good as phong shading but can allow fast frame
rates. It's called <i>fake phong shading</i>, or sometimes
<i>fast phong shading</i>, or sometimes even <i>phong </i>
<i>approx-imation rendering</i>. Whatever name it goes by, it is <i>not</i>
phong rendering. It is useful, however, and does
indeed give good performance.
Fake phong shading basically employs a bitmap,
which is variously known as a <i>phong map</i>, a <i></i>
<i>high-light map</i>, a <i>shade map</i>, or a <i>light map</i>. I'm sure
there are other names for it as well. In any event,
the bitmap is nothing more than a generic template
of how the faces should be illuminated (as shown in
Figure 3.22).
As you can tell by the nomenclature, there is no real
con-sensus about fake phong shading. There are also several
different algorithms used by different people. This
diver-sity is no doubt the result of several people
independent-ly arriving at the same general concept at roughindependent-ly the
same time—all in search of better performance with
high-quality shading.
<b>Figure 3.21 </b>Phong-shaded sphere.
</div>
<span class='text_page_counter'>(134)</span><div class='page_container' data-page=134>
<i><b>Texture Mapping</b></i>
Texture mapping is covered in more detail in Chapters 8
and 9. For the sake of completeness, I'll just say here that
<i>texture mapping</i>an object is something like wallpapering
a room. A 2D bitmap is "draped" over the object, to
impart detail and texture upon the object, as shown in
Figure 3.23.
Texture mapping is usually combined with one of the
shading techniques covered in this chapter.
<i><b>Shaders</b></i>
When the word is used alone,<i>shaders</i>refers to <i>shader programs</i>that are sent to the video
hardware by the software graphics engine. These programs tell the video card in great detail
and procedure how to manipulate vertices or pixels, depending on the kind of shader used.
Traditionally, programmers have had limited control over what happens to vertices and
pixels in hardware, but the introduction of shaders allowed them to take complete control.
<i>Vertex shaders</i>, being easier to implement, were first out of the starting blocks. The
shad-er program on the video card manipulates vshad-ertex data values on a 3D plane via
mathe-matical operations on an object's vertices. The operations affect color, texture coordinates,
elevation-based fog density, point size, and spatial orientation.
<i>Pixel shaders</i>are the conceptual siblings of vertex shaders, but they operate on each
dis-crete viewable pixel. Pixel shaders are small programs that tell the video card how to
manipulate pixel values. They rely on data from vertex shaders (either the
engine-specif-ic custom shader or the default video card shader function) to provide at least triangle,
light, and view normals.
Shaders are used in addition to other rendering operations, such as texture mapping.
<i><b>Bump Mapping</b></i>
<i>Bump mapping</i>is similar to texture mapping. Where texture maps <i>add</i>detail to a shape,
bump maps <i>enhance</i>the shape detail. Each pixel of the bump map contains information
that describes aspects of the physical shape of the object at the corresponding point, and
we use a more expansive word to describe this—the <i>texel</i>. The name texel derives from <i></i>
<i>tex-ture pixel</i>.
Bump mapping gives the illusion of the presence of bumps, holes, carving, scales, and
other small surface irregularities. If you think of a brick wall, a texture map will provide
the shape, color, and approximate roughness of the bricks. The bump map will supply a
</div>
<span class='text_page_counter'>(135)</span><div class='page_container' data-page=135>
detailed sense of the roughness of the brick, the mortar, and other details. Thus bump
mapping enhances the close-in sense of the object, while texture mapping enhances the
sense of the object from farther away.
Bump mapping is used in conjunction with most of the other rendering techniques.
<i><b>Environment Mapping</b></i>
<i>Environment mapping</i> is similar to texture mapping, except that it is used to represent
effects where environmental features are reflected in the surfaces of an object. Things like
chrome bumpers on cars, windows, and other shiny object surfaces are prime candidates
for environment mapping.
<i><b>Mipmapping</b></i>
<i>Mipmapping</i>is a way of reducing the amount of computation
needed to accurately texture-map an image onto a polygon.
It's a rendering technique that tweaks the visual appearance of
an object. It does this by using several different textures for the
texture-mapping operations on an object. At least two, but
usually four, textures of progressively lower resolution are
assigned to any given surface, as shown in Figure 3.24. The
video card or graphics engine extracts pixels from each
texture, depending on the distance and orientation of the
surface compared to the view screen.
In the case of a flat surface that recedes away from the
viewer into the distance, for pixels on the nearer parts of
the surface, pixels from the high-resolution texture are
used (see Figure 3.25). For the pixels in the middle
dis-tances, pixels from the medium-resolution textures are
used. Finally, for the faraway parts of the surface, pixels
from the low-resolution texture are used.
<b>t i p</b>
Anti-aliasing is a software technique used in graphics display systems to make curved and
diago-nal lines appear to be continuous and smooth. On computer monitors the pixels themselves aren't
curved, but collectively they combine together to represent curves. Using pixels within polygon
shapes to simulate curves causes the edges of objects to appear jagged. Anti-aliasing, the
tech-nique for smoothing out these jaggies, or aliasing, usually takes the form of inserting
intermediate-colored pixels along the edges of the curve. The funny thing is, with textual displays this has the
paradoxical effect of making text blurrier yet more readable. Go figure!
<b>Figure 3.24 </b>Mipmap
textures for a stone surface.
</div>
<span class='text_page_counter'>(136)</span><div class='page_container' data-page=136>
<b>Scene Graphs</b>
In addition to knowing how to construct and render 3D objects, 3D engines need to know
how the objects are laid out in the virtual world and how to keep track of changes in
sta-tus of the models, their orientation, and other dynamic information. This is done using a
mechanism called a <i>scene graph</i>, a specialized form of a <i>directed graph</i>. The scene graph
maintains information about all entities in the virtual world in structures called <i>nodes</i>.
The 3D engine traverses this graph, examining each node one at a time to determine how
to render each entity in the world. Figure 3.26 shows a simple seaside scene with its scene
graph. The nodes marked by ovals are <i>group nodes</i>, which contain information about
themselves and point to other nodes. The nodes that use rectangles are <i>leaf nodes</i>. These
nodes contain only information about themselves.
Note that in the seaside scene graph, not all of the nodes contain all of the information
that the other nodes have about themselves.
Many of the entities in a scene don't even need to be rendered. In a scene graph, a node
can be anything. The most common entity types are 3D shapes, sounds, lights (or
light-ing information), fog and other environmental effects, viewpoints, and event triggers.
</div>
<span class='text_page_counter'>(137)</span><div class='page_container' data-page=137>
When it comes time to render the scene, the Torque Engine will "walk" through the nodes
in the tree of the scene graph, applying whatever functions to the node that are specified.
It then uses the node pointers to move on to the next node to be rendered.
<b>3D Audio</b>
Audio and sound effects are used to heighten the sense of realism in a game. There are
times when the illusion is greatly enhanced by using position information when
generat-ing the sound effects. A straightforward example would be the sound generated by a
near-by gunshot. By calculating the amplitude—based on how far away the shot occurred—
and the direction, the game software can present the sound to a computer's speakers in a
way that gives the player a strong sense of where the shot occurred. This effect is even
bet-ter if the player is wearing audio headphones. The player then has a good sense of the
nature of any nearby threat and can deal with it accordingly—usually by massive
applica-tion of return fire.
The source location of a game sound is tracked and managed in the same way as any other
3D entity via the scene graph.
Once the game engine has decided that the sound has been triggered, it then converts
the location and distance information of the sound into a stereo "image" of the sound,
with appropriate volumes and balance for either the right or left stereo channel. The
methods used to perform these calculations are much the same as those used for 3D
object rendering.
Audio has an additional set of complications—things like fade and drop-off or cutoff.
<b>3D Programming</b>
With the Torque Engine, most of the really grubby low-level programming is done for
you. Instead of writing program code to construct a 3D object, you use a modeling tool
(which we cover in later chapters) to create your object and a few lines of script code to
insert the object in a scene. You don't even need to worry about where in the scene graph
the object should be inserted—Torque handles that as well, through the use of
informa-tion contained in the datablocks that you define for objects.
Even functions like moving objects around in the world are handled for us by Torque,
sim-ply by defining the object to be of a certain class and then inserting the object appropriately.
The kinds of objects we will normally be using are called <i>shapes</i>. In general, shapes in
Torque are considered to be dynamic objects that can move or otherwise be manipulated
by the engine at run time.
</div>
<span class='text_page_counter'>(138)</span><div class='page_container' data-page=138>
the classes know how their objects should respond to game stimuli and are able to respond
in the game with motion or some other behavior inherent to the object's class definition.
Usually, you will let the game engine worry about the low-level mechanics of moving your
3D objects around the game world. However, there will probably be times while creating a
game that you are going to want to cause objects to move in some nonstandard way—some
method not defined by the class definition of the object. With Torque, this is easy to do!
<b>Programmed Translation</b>
When an object in 3D world space moves, it is <i>translating</i>its position, in a manner
simi-lar to that shown earlier in the discussion about transformations.
You don't, however, absolutely need to use the built-in classes to manipulate shapes in
your game world. For example, you can write code to load in an <i>Interior</i>(a class of objects
used for structures like buildings) or an <i>Item</i> (a class of objects used for smaller mobile
and static items in a game world, like signs, boxes, and powerups). You can then move that
object around the world any way you like.
You can also write code to monitor the location of dynamic shapes that are moving
around in the world, detect when they reach a certain location, and then arbitrarily move,
or<i>teleport</i>, those objects to some other location.
<i><b>Simple Direct Movement</b></i>
What we are going to do is select an object in a 3D scene in Torque and then move it from
one location to another using some script instructions entered directly into the game
con-sole. The first step is to identify the object.
1. In the 3DGPAi1 folder locate the Run Chapter 3 shortcut and double-click it to
launch the demo.
2. Click Start.
3. Using the mouse, turn your player-character to the left or right a bit, if necessary,
until you have a good view of the pyramid.
4. Press F11. Torque's built-in World Editor will appear. As you move your cursor
over the scene, you'll notice it change to a hand icon.
5. Click the hand on the pyramid to select it.
</div>
<span class='text_page_counter'>(139)</span><div class='page_container' data-page=139>
7. Press the Tilde ("~")
key, and the console
will pop open. The
console interface
allows us to directly
type in program
code and get
immediate results.
8. In the console
window, type
<b></b>
<b>echo(1353.get-Transform() );</b>and
then press the Enter
key. Don't forget to
include the
semi-colon at the end of
the line before you
press the Enter key.
You should get a result like 49.2144 -66.1692 0.4 0 0 -1 9.74027, which is the
trans-form of the pyramid. The first three numbers are the XYZ coordinates of the
geo-metric center of the pyramid. The next three are the axis normals, which in this case
indicates that the Z-axis is pointing straight up. The final value indicates how much
rotation is applied around the rotation axes. We'll look at rotation in more detail a
little later. Here, the rotation amount (in degrees) is applied to only the Z-axis.
9. In the console window, type <b>1353.setTransform("0 0 190 0 0 1 0");</b>and then press
the Enter key.
10. Press the Escape key to remove the console window, and take a look. You will
notice that the pyramid has moved.
11. Take the next several minutes to experiment with different transforms. Try rotating
the pyramid around different axes or several axes at the same time.
12. When you are done, press the Tilde key to exit the console window, press Escape to
exit the World Editor, and then press Escape one more time to exit the game.
<b>t i p</b>
In the little exercise in the "Simple Direct Movement" section, you saw a command that looked like
this:echo(1353.getTransform() );. The number 1353 is an object ID, and the getTransform()
part is what is called a method of that object. A method is a function that belongs to a specific
objectclass. We'll cover these topics in more detail in a later chapter.
</div>
<span class='text_page_counter'>(140)</span><div class='page_container' data-page=140>
<i><b>Programmed Movement</b></i>
Now we are going to explore how we can move things in the 3D world using program
code. We are going to use the Item class to create an object based on a model of a stylized
heart, insert the object in the game world, and then start it slowly moving across the
ter-rain—all using Torque Script.
Something to know about the Item class is that Torque defines it as being affected by
grav-ity. So if we insert the object into the scene at some distance above the ground level of the
terrain, the object will actually fall to the ground—a little more slowly than it would in the
real world, but what the hey! It's a game, after all. Anyway, this also means that we have to
specify a mass and a friction drag value in order to prevent the item from sliding down
hills if it lands on a slope.
Okay, now—so on to the program. Type the following code module into a file and save
the file as 3DGPAi1\CH3\moveshape.cs.
// ========================================================================
// moveshape.cs
//
// This module contains the definition of a test shape, which uses
// a model of a stylized heart. It also contains functions for placing
// the test shape in the game world and moving the shape.
// ========================================================================
datablock ItemData(TestShape)
//
---// Definition of the shape object
//
---{
// Basic Item properties
shapeFile = "~/data/shapes/items/heart.dts";
mass = 1; //we give the shape mass and
friction = 1; // friction to stop the item from sliding
// down hills
};
function InsertTestShape()
//
---// Instantiates the test shape, then inserts it
// into the game world roughly in front of
// the player's default spawn location.
</div>
<span class='text_page_counter'>(141)</span><div class='page_container' data-page=141>
// An example function which creates a new TestShape object
%shape = new Item() {
datablock = TestShape;
rotation = "0 0 1 0"; // initialize the values
// to something meaningful
};
MissionCleanup.add(%shape);
// Player setup
%shape.setTransform("-90 -2 20 0 0 1 0");
echo("Inserting Shape " @ %shape);
return %shape;
}
function MoveShape(%shape, %dist)
//
---// moves the %shape by %dist amount
//
---{
%xfrm = %shape.getTransform();
%lx = getword(%xfrm,0); // get the current transform values
%ly = getword(%xfrm,1);
%lz = getword(%xfrm,2);
%lx += %dist; // adjust the x axis position
%shape.setTransform(%lx SPC %ly SPC %lz SPC "0 0 1 0");
}
function DoMoveTest()
//
---// a function to tie together the instantiation
// and the movement in one easy to type function
// call.
//
---{
%ms = InsertTestShape();
MoveShape(%ms,15);
}
</div>
<span class='text_page_counter'>(142)</span><div class='page_container' data-page=142>
datablock is the shapeFile property, which tells Torque where to find the model that will be
used to represent the object. The mass and friction values, as mentioned previously, prevent
the item from sliding down hills because of the pernicious tug of gravity.
The function InsertTestShape() creates a new instance of TestShape with the call to new
Item(). It specifies the TestShape datablock, defined earlier, and then sets the object's
rota-tion to some sensible values.
Next, MissionCleanup.add(%shape); adds the shape instance to a special mission-related
group maintained by Torque. When the mission ends, objects assigned to this group are
deleted from memory (cleaned up) before a new mission is started.
After that, the program sets the initial location of the object by setting the transform.
Next, the echo statement prints the shape's handle to the console.
Finally, the shape's handle (ID number) is returned from the function. This allows us to
save the handle in a variable when we call this function, so that we can refer to this same
item instance at a later time.
The function MoveShape accepts a shape handle and a distance as arguments, and uses these
to move whatever shape the handle indicates.
First, it gets the current position of the shape using the %shape.getTransform() method of
the Item class.
Next, the program employs the getword() function to extract the parts of the transform
string that are of interest and store them in local variables. We do this because, for this
particular program, we want to move the shape in the X-axis. Therefore, we strip out all
three axes and increment the X value by the distance that the object should move. Then
we prepend all three axis values to a dummy rotation and set the item's transform to be
this new string value. This last bit is done with the %shape.setTransform() statement.
TheDoMoveTest() function is like a wrapper folded around the other functions. When we call
this function, first it inserts the new instance of the shape object using the InsertTestShape()
function and saves the handle to the new object in the variable %ms. It then calls the
MoveShape() function, specifying which shape to move by passing in the handle to the shape
as the first argument and also indicating the distance with the second argument.
To use the program, follow these steps:
1. Make sure you've saved the file as 3DGPAi1\CH3\moveshape.cs.
2. Run the Chapter 3 demo using the shortcut in the 3DGPAi1 folder.
3. Press the Start button when the CH3 demo screen comes up.
</div>
<span class='text_page_counter'>(143)</span><div class='page_container' data-page=143>
5. Bring up the console window by pressing the Tilde key.
6. Type in the following, and press Enter after the semicolon:
exec("CH3/moveshape.cs");
You should get a response in the console window similar to this:
Compiling CH3/moveshape.cs...
Loading compiled script CH3/moveshape.cs.
This means that the Torque Engine has compiled your program and then loaded it
into memory. The datablock definition and the three functions are in memory,
waiting with barely suppressed anticipation for your next instruction.
<b>t i p</b>
About those slashes… You've probably noticed that when you see the file names and paths
writ-ten out, the back slash ("\") is used, and when you type in those same paths in the console
win-dow, the forward slash ("/") is used. This is not a mistake. Torque is a cross-platform program that
is available for Macintosh and Linux as well as Windows. It's only on Windows-based systems that
back slashes are used—everyone else uses forward slashes.
Therefore, the back slashes for Windows-based paths are the exception here. Just thought I'd clear
that up!
7. Type the following into the console window:
$tt = InsertTestShape();
You should see the following response:
Inserting Shape 1388
The number you get may be different—that's not an issue. But it will probably be
the same. Take note of the number.
You also may see a warning about not locating a texture—that's of no importance
here either.
8. Close the console window. You should see a heart on the ground in front of your
player.
9. Type the following into the console:
echo($tt);
Torque will respond by printing the contents of the variable $tt to the console
window. It should be the same number that you got as a response after using the
InsertTestShape instruction above.
</div>
<span class='text_page_counter'>(144)</span><div class='page_container' data-page=144>
11. Press the Tilde key to close the console window. You should see the heart move
away from you to the left.
You should be familiar with opening and closing the console window by now, so I
won't bother explaining that part in the instruction sequences anymore.
12. Now, type this into the console, and close the console quickly afterward:
DoMoveTest();
What you should see now is the heart dropping from the air to the ground; it then
moves away just like the first heart, except not as far this time.
The reason why the heart drops from the air is because the object's initial location was set
in the InsertTestShape() function to be -90 -2 20, where the Z value is set to 20 units up.
As mentioned earlier, Torque will automatically make objects of the Item class fall under
gravity until they hit something that stops the fall. If you don't close the console window
quickly enough, you won't see it fall.
Go ahead and experiment with the program. Try moving the item through several axes at
once, or try changing the distance.
<b>Programmed Rotation</b>
As you've probably figured out already, we can rotate an object programmatically (or
directly, for that matter) using the same setTransform() method that we used to translate
an object.
Type the following program and save it as 3DGPAi1\CH3\turnshape.cs.
// ========================================================================
// turnshape.cs
//
// This module contains the definition of a test shape.
// It contains functions for placing
// the test shape in the game world and rotating the shape
// ========================================================================
datablock ItemData(TestShape)
//
---// Definition of the shape object
//
---{
// Basic Item properties
shapeFile = "~/data/shapes/items/heart.dts";
mass = 1; //we give the shape mass and
</div>
<span class='text_page_counter'>(145)</span><div class='page_container' data-page=145>
// down hills
};
function InsertTestShape()
//
---// Instantiates the test shape, then inserts it
// into the game world roughly in front of
// the player's default spawn location.
//
---{
// An example function which creates a new TestShape object
%shape = new Item() {
datablock = TestShape;
rotation = "0 0 1 0"; // initialize the values
// to something meaningful
};
MissionCleanup.add(%shape);
// Player setup
%shape.setTransform("-90 -2 20 0 0 1 0");
echo("Inserting Shape " @ %shape);
return %shape;
}
function TurnShape(%shape, %angle)
//
---// turns the %shape by %angle amount.
//
---{
%xfrm = %shape.getTransform();
%lx = getword(%xfrm,0); // first, get the current transform values
%ly = getword(%xfrm,1);
%lz = getword(%xfrm,2);
%rx = getword(%xfrm,3);
%ry = getword(%xfrm,4);
%rz = getword(%xfrm,5);
%angle += 1.0;
%rd = %angle; // Set the rotation angle
%shape.setTransform(%lx SPC %ly SPC %lz SPC %rx SPC %ry SPC %rz SPC %rd);
}
</div>
<span class='text_page_counter'>(146)</span><div class='page_container' data-page=146>
//
---// a function to tie together the instantiation
// and the movement in one easy to type function
// call.
//
---{
%ts = InsertTestShape();
TurnShape(%ts,30);
}
The program is quite similar to the moveshape.cs program that you were just working
with. You can load and run the program in exactly the same way, except that you want to
useDoTurnTest() instead ofDoMoveTest() andTurnShape() instead ofMoveShape().
Things of interest to explore are the variables %rx,%ry,%rz, and %rd in the TurnShape()
function. Try making changes to each of these and observing the effects your changes
have on the item.
<b>Programmed Scaling</b>
We can also quite easily change the scale of an object using program code.
Type the following program and save it as 3DGPAi1\CH3\sizeshape.cs.
// ========================================================================
// Sizeshape.cs
//
// This module contains the definition of a test shape, which uses
// a model of a stylized heart. It also contains functions for placing
// the test shape in the game world and then sizing the shape.
// ========================================================================
datablock ItemData(TestShape)
//
---// Definition of the shape object
//
---{
// Basic Item properties
shapeFile = "~/data/shapes/items/heart.dts";
mass = 1; //we give the shape mass and
friction = 1; // friction to stop the item from sliding
// down hills
};
</div>
<span class='text_page_counter'>(147)</span><div class='page_container' data-page=147>
//
---// Instantiates the test shape, then inserts it
// into the game world roughly in front of
// the player's default spawn location.
//
---{
// An example function which creates a new TestShape object
%shape = new Item() {
datablock = TestShape;
rotation = "0 0 1 0"; // initialize the values
// to something meaningful
};
MissionCleanup.add(%shape);
// Player setup
%shape.setTransform("-90 -2 20 0 0 1 0");
echo("Inserting Shape " @ %shape);
return %shape;
}
function SizeShape(%shape, %scale)
//
---// moves the %shape by %scale amount
//
---{
%shape.setScale(%scale SPC %scale SPC %scale);
}
function DoSizeTest()
//
---// a function to tie together the instantiation
// and the movement in one easy to type function
// call.
//
---{
%ms = InsertTestShape();
SizeShape(%ms,5);
}
</div>
<span class='text_page_counter'>(148)</span><div class='page_container' data-page=148>
You'll note that we don't call the object's %shape.getScale() function (there is one), because
in this case, we don't need to. Also notice that the three arguments to our call to
%shape.setScale() all use the same value. This is to make sure the object scales equally in
all dimensions. Try making changes to each of these and observing the effects your
changes have on the item.
Another exercise would be to modify the SizeShape function to accept a different
parame-ter for each dimension (X, Y, or Z) so that you can change all three to different scales at
the same time.
<b>Programmed Animation</b>
You can animate objects by stringing together a bunch of translation, rotation, and scale
operations in a continuous loop. Like the transformations, most of the animation in
Torque can be left up to an object's class methods to perform. However, you can create
your own ad hoc animations quite easily by using the schedule() function.
Type the following program and save it as 3DGPAi1\CH3\animshape.cs.
// ========================================================================
// animshape.cs
//
// This module contains the definition of a test shape, which uses
// a model of a stylized heart. It also contains functions for placing
// the test shape in the game world and then animating the shape using
// a recurring scheduled function call.
// ========================================================================
datablock ItemData(TestShape)
//
---// Definition of the shape object
//
---{
// Basic Item properties
shapeFile = "~/data/shapes/items/heart.dts";
mass = 1; //we give the shape mass and
friction = 1; // friction to stop the item from sliding
// down hills
};
function InsertTestShape()
</div>
<span class='text_page_counter'>(149)</span><div class='page_container' data-page=149>
// the player's default spawn location.
//
---{
// An example function which creates a new TestShape object
%shape = new Item() {
datablock = TestShape;
rotation = "0 0 1 0"; // initialize the values
// to something meaningful
};
MissionCleanup.add(%shape);
// Player setup
%shape.setTransform("-90 -2 20 0 0 1 0");
echo("Inserting Shape " @ %shape);
return %shape;
}
function AnimShape(%shape, %dist, %angle, %scale)
//
---// moves the %shape by %dist amount, and then
// schedules itself to be called again in 1/5
// of a second.
//
---{
%xfrm = %shape.getTransform();
%lx = getword(%xfrm,0); // first, get the current transform values
%ly = getword(%xfrm,1);
%lz = getword(%xfrm,2);
%rx = getword(%xfrm,3);
%ry = getword(%xfrm,4);
%rz = getword(%xfrm,5);
%lx += %dist; // set the new x position
%angle += 1.0;
</div>
<span class='text_page_counter'>(150)</span><div class='page_container' data-page=150>
if (%scale < 5.0) // and hasn't gotten too big
%scale += 0.3; // make it bigger
else
$grow = false; // if it's too big, don't let it grow more
}
else // if it's shrinking
{
if (%scale > 3.0) // and isn't too small
%scale -= 0.3; // then make it smaller
else
$grow = true; // if it's too small, don't let it grow smaller
}
%shape.setScale(%scale SPC %scale SPC %scale);
%shape.setTransform(%lx SPC %ly SPC %lz SPC %rx SPC %ry SPC %rz SPC %rd);
schedule(200,0,AnimShape, %shape, %dist, %angle, %scale);
}
function DoAnimTest()
//
---// a function to tie together the instantiation
// and the movement in one easy to type function
// call.
//
---{
%as = InsertTestShape();
$grow = true;
AnimShape(%as,0.2, ⫺1, ⫺2);
}
This module is almost identical to the MoveShape() module we worked with earlier.
The function AnimShape accepts a shape handle in %shape, a distance step as %dist, an angle
value as %angle, and a scaling value as %scale and uses these to transform the shape
indi-cated by the %shape handle.
First, it obtains the current position of the shape using the %shape.getTransform() method
of the Item class.
As with the earlier MoveShape() function, the AnimShape() function fetches the transform of
the shape and updates one of the axis values.
</div>
<span class='text_page_counter'>(151)</span><div class='page_container' data-page=151>
Then it adjusts the scale value by determining if the shape is growing or shrinking.
Depending on which way the size is changing, the scale is incremented, unless the scale
exceeds the too large or too small limits. When a limit is exceeded, the change direction is
reversed.
Next, the scale of the shape is changed to the new values using the %shape.setScale()
method for the shape.
Finally, the function sets the item's transform to be the new transform values within the
%shape.setTransform() statement.
The DoAnimTest() function first inserts the new instance of the shape object using the
InsertTestShape() function and saves the handle to the new object in the variable %as. It
then calls the AnimShape() function, specifying which shape to animate by passing in the
handle to the shape as the first argument and also indicating the discrete movement step
distance, the discrete rotation angle, and the discrete size change value with the second,
third, and fourth arguments.
To use the program, follow these steps:
1. Make sure you've saved the file as 3DGPAi1\CH3\animshape.cs.
2. Run the Chapter 3 demo using the shortcut in the 3DGPAi1 folder.
3. Press the Start button when the demo screen comes up.
4. Make sure you don't move your player-character after it spawns into the game
world.
5. Bring up the console window.
6. Type in the following, and press Enter after the semicolon:
exec("CH3/animshape.cs");
You should get a response in the console window similar to this:
Compiling CH3/animshape.cs...
Loading compiled script CH3/animshape.cs.
This means that the Torque Engine has compiled your program and then loaded it
into memory. The datablock definition and the three functions are in memory,
waiting to be used.
7. Now, type the following into the console, and close the console quickly afterward:
DoAnimTest();
</div>
<span class='text_page_counter'>(152)</span><div class='page_container' data-page=152>
Go ahead and experiment with the program. Try moving the item through several axes at
once, or try changing the distance.
<b>3D Audio</b>
Environmental sounds with a 3D component contribute greatly to the immersive aspect
of a game by providing positional cues that mimic the way sounds happen in real life.
We can control 3D audio in the scene in much the same way we do 3D visual objects.
Type the following program and save it as 3DGPAi1\CH3\animaudio.cs.
// ========================================================================
// animaudio.cs
//
// This module contains the definition of an audio emitter, which uses
// a synthetic water drop sound. It also contains functions for placing
// the test emitter in the game world and moving the emitter.
// ========================================================================
datablock AudioProfile(TestSound)
//
---// Definition of the audio profile
//
---{
filename = "~/data/sound/testing.wav"; // wave file to use for the sound
description = "AudioDefaultLooping3d"; // monophonic sound that repeats
preload = false; // Engine will only load sound if it encounters it
// in the mission
};
function InsertTestEmitter()
//
---// Instantiates the test sound, then inserts it
// into the game world to the right and offset somewhat
// from the player's default spawn location.
//
---{
// An example function which creates a new TestSound object
%emtr = new AudioEmitter() {
position = "0 0 0";
rotation = "1 0 0 0";
scale = "1 1 1";
</div>
<span class='text_page_counter'>(153)</span><div class='page_container' data-page=153>
useProfileDescription = "1";
type = "2";
volume = "1";
outsideAmbient = "1";
referenceDistance = "1";
maxDistance = "100";
isLooping = "1";
is3D = "1";
loopCount = "-1";
minLoopGap = "0";
maxLoopGap = "0";
coneInsideAngle = "360";
coneOutsideAngle = "360";
coneOutsideVolume = "1";
coneVector = "0 0 1";
minDistance = "20.0";
};
MissionCleanup.add(%emtr);
// Player
setup-%emtr.setTransform("-200 -30 12 0 0 1 0"); // starting location
echo("Inserting Audio Emitter " @ %emtr);
return %emtr;
}
function AnimSound(%snd, %dist)
//
---// moves the %snd by %dist amount each time
//
---{
%xfrm = %snd.getTransform();
%lx = getword(%xfrm,0); // first, get the current transform values
%ly = getword(%xfrm,1);
%lz = getword(%xfrm,2);
%rx = getword(%xfrm,3);
%ry = getword(%xfrm,4);
%rz = getword(%xfrm,5);
%lx += %dist; // set the new x position
%snd.setTransform(%lx SPC %ly SPC %lz SPC %rx SPC %ry SPC %rz SPC %rd);
schedule(200,0,AnimSound, %snd, %dist);
</div>
<span class='text_page_counter'>(154)</span><div class='page_container' data-page=154>
function DoMoveTest()
//
---// a function to tie together the instantiation
// and the movement in one easy to type function
// call.
//
---{
%ms = InsertTestEmitter();
AnimSound(%ms,1);
}
DoMoveTest(); // by putting this here, we cause the test to start
// as soon as this module has been loaded into memory
In this program, we also have a datablock, but you'll notice that it is different this time.
This datablock defines an <i>audio profile</i>. It contains the name of the wave file that contains
the sound to be played, a descriptor that tells Torque how to treat the sound, and a flag to
indicate whether the engine should automatically load the sound or wait until it
encoun-ters a need for the sound. In this case, the engine will wait until it knows it needs the file.
TheInsertTestEmitter function is structured the same as the earlier InsertTestShape
func-tion, but this time it creates the object with a call to new AudioEmitter, and there are quite
a few properties to be set. These properties will be explained in much greater detail in
Chapters 19 and 20.
Another difference to note is the last line, which is a call to DoMoveTest. This allows us to
load and run the program in one go, using the exec call. After the Torque Engine compiles
the program, it loads it into memory and runs through the code. In our earlier program,
like the AnimShape module, Torque would encounter the datablock and function
defini-tions. Because they are definitions, they aren't executed, just loaded into memory. The last
line, however, is not a definition. It is a statement that calls a function. So when Torque
encounters it, Torque looks to see if it has the function resident in memory, and if so, it
executes the function according to the syntax of the statement.
To use the program, follow these steps:
1. Make sure you've saved the file as 3DGPAi1\CH3\ animaudio.cs.
2. Run the Chapter 3 demo using the shortcut in the 3DGPAi1 folder.
3. Press the Start button when the demo screen comes up.
4. Make sure you don't move your player-character after it spawns into the game world.
5. Bring up the console window.
</div>
<span class='text_page_counter'>(155)</span><div class='page_container' data-page=155>
You should get a response in the console window similar to this:
Compiling CH3/animaudio.cs...
Loading compiled script CH3/animaudio.cs.
You should also begin to hear the dripping sound off to the right-hand side. If you
wait without moving your player in any way, not even using the mouse to turn his
head, you will notice the sound slowly approach you from the left, pass over to the
right in front of you, and then pass off into the distance to the left. Pretty neat, huh?
<b>Moving Right Along</b>
So, we've now seen how 3D objects are constructed from vertices and faces, or polygons.
We explored how they fit into that virtual game world using transformations and that the
transformations are applied in particular order—scaling, rotation, and then finally
trans-lation. We also saw how different rendering techniques can be used to enhance the
appear-ance of 3D models.
Then we learned practical ways to apply those concepts using program code written using
Torque Script and tested with the Torque Game Engine.
</div>
<span class='text_page_counter'>(156)</span><div class='page_container' data-page=156>
123
<b>Game Programming</b>
I
n the preceding two chapters you were introduced to a few new concepts:program-ming, 3D graphics, manipulating 3D objects, and stuff like that. Most of it was fairly
broad, in order to give you a good grasp of what you can do to make your game.
The next bunch of chapters get down and dirty, so to speak. We're going to muck around
with our own hands examining things, creating things, and making things happen.
In this chapter we're going to hammer at the Torque Script for a while, writing actual code
that will be used to develop our game. We'll examine in detail how the code works in order
to gain a thorough understanding of how Torque works. The game we are going to create
has the rather unoriginal name of <i>Emaga</i>, which is just <i>agame</i> spelled backward. The
Chapter 4 version will be called <i>Emaga4</i>. Of course, you may—and probably should—
substitute whatever name you wish!
<b>Torque Script</b>
As I've said before, Torque Script is much like C/C++, but there are a few differences.
Torque Script is typeless—with a specific exception regarding the difference between
numbers and strings—and you don't need to pre-allocate storage space with variable
dec-larations.
All aspects of a game can be controlled through the use of Torque Script, from game rules
and nonplayer character behavior to player scoring and vehicle simulation. A script
com-prises <i>statements</i>,<i>function declarations</i>, and<i>package declarations</i>.
</div>
<span class='text_page_counter'>(157)</span><div class='page_container' data-page=157>
variables, and you don't declare variables before using them. If you read a variable before
writing it, it will be an empty string or zero, depending on whether you are using it in a
string context or a numeric context.
The engine has rules for how it converts between the script representation of values and
its own internal representation. Most of the time the correct script format for a value is
obvious; numbers are numbers (also called <i>numerics</i>), strings are strings, the tokens true
andfalse can be used for ease-of-code-reading to represent 1 and 0, respectively. More
complicated data types will be contained within strings; the functions that use the strings
need to be aware of how to interpret the data in the strings.
<b>Strings</b>
<i>String</i> constants are enclosed in single quotes or double quotes. A single-quoted string
specifies a <i>tagged</i>string—a special kind of string used for any string constant that needs
to be transmitted across a connection. The full string is sent once, the first time. And then
whenever the string needs to be sent again, only the short tag identifying that string is
sent. This dramatically reduces bandwidth consumption by the game.
A double-quoted (or <i>standard</i>) string is not tagged; therefore, whenever the string is used,
storage space for all of the characters contained in the string must be allocated for
what-ever operation the string is being used for. In the case of sending a standard string across
connections, all of the characters in the string are transmitted, every single time the string
is sent. Chat messages are sent as standard strings, and because they change each time they
are sent, creating tag ID numbers for chat messages would be pretty useless.
Strings can contain formatting codes, as described in Table 4.1.
<b>Table 4.1</b>
Torque Script String Formatting Codes
<b>Code</b> <b>Description</b>
\r Embeds a carriage return character.
\n Embeds a new line character.
\t Embeds a tab character.
\xhh Embeds an ASCII character specified by the hex number (hh) that follows the <i>x</i>.
\c Embeds a color code for strings that will be displayed on-screen.
\cr Resets the display color to the default.
\cp Pushes the current display color onto a stack.
\co Pops the current display color off the stack.
\cn Usesn as an index into the color table defined by
</div>
<span class='text_page_counter'>(158)</span><div class='page_container' data-page=158>
<b>Objects</b>
<i>Objects</i>are instances of object classes, which are a collection of properties and methods
that together define a specific set of behaviors and characteristics. A Torque object is an
<i>instantiation</i>of an object class. After creation, a Torque object has a unique numeric
iden-tifier called its <i>handle</i>. When two handle variables have the same numeric value, they refer
to the same object. An <i>instance</i>of an object can be thought of as being somewhat like a
<i>copy</i>of an object.
When an object exists in a multiplayer game with a server and multiple clients, the server
and each client allocate their own handle for the object's storage in memory. Note that
datablocks (a special kind of object) are treated differently—more about this a little later.
<b>n o t e</b>
Methods are functions that are accessible through objects. Different object classes may have some
methods that are common between them, and they may have some methods that are unique to
themselves. In fact, methods may have the same name, but work differently, when you move from
one object class to another.
Properties are variables that belong to specific objects and, like methods, are accessed through
objects.
<i><b>Creating an Object</b></i>
When creating a new instance of an object, you can initialize the object's fields in the new
statement code block, as shown here:
%handle = new InteriorInstance()
{
position = "0 0 0";
rotation = "0 0 0";
interiorFile = %name;
};
</div>
<span class='text_page_counter'>(159)</span><div class='page_container' data-page=159>
<i><b>Using Objects</b></i>
To use or control an object, you can use the object's handle to access its properties and
functions. If you have an object handle contained in the local variable %handle, you can
access a property of that object this way:
%handle.aproperty = 42;
Handles are not the only way to access objects. You can assign objects a name that can be
used to access the object, if you don't have a handle at hand. Objects are named using
strings, identifiers, or variables containing strings or identifiers. For example, if the object
in question is named MyObject, all of the following code fragments (A, B, C, D) are the same.
<b>A</b>
MyObject.aproperty = 42;
<b>B</b>
"MyObject".aproperty = 42;
<b>C</b>
%objname = MyObject;
%objname.aproperty = 42;
<b>D</b>
%objname = "MyObject";
%objname.aproperty = 42;
These examples demonstrate accessing a property field of an object; you invoke object
methods (functions) in the same way. Note that the object name—MyObject— is a string
literal, not a variable. There is no % or$ prefixed to the identifier.
<i><b>Object Functions</b></i>
You can call a function referenced through an object this way:
%handle.afunction(42, "arg1", "arg2");
</div>
<span class='text_page_counter'>(160)</span><div class='page_container' data-page=160>
<b>Namespaces</b>
Namespaces are means of defining a formal context for variables. Using namespaces allows us to
use different variables that have the same name without confusing the game engine, or ourselves.
If you recall the discussion in Chapter 2 about variable scope, you will remember that there are two
scopes: global and local. Variables of global scope have a "$" prefix, and variables of local scope have
a "%" prefix. Using this notation, we can have two variables—say,$maxplayers and%maxplayers—
that can be used side-by-side, yet whose usage and meaning are completely independent from each
other.%maxplayer can only be used within a specific function, while $maxplayer can be used
any-where in a program. This independence is like having two namespaces.
In fact,%maxplayer can be used over and over in different functions, but the values it holds only
apply within any given specific function. In these cases, each function is its own de facto namespace.
We can arbitrarily assign variables to a namespace by using special prefixes like this:
$Game::maxplayers
$Server::maxplayers
We can have other variables belonging to the namespace as well:
$Game::maxplayers
$Game::timelimit
$Game::maxscores
The identifier between the "$" and the "::" can be completely arbitrary—in essence it is a qualifier.
By qualifying the following variable, it sets a context in which the variable is meaningful.
Just as functions have a de facto namespace (the local scope), objects have their own namespaces.
Methods and properties of objects are sometimes called member functions and member variables.
The "member" part refers to the fact that they are members of objects. This membership defines
the context, and therefore the namespace, of the methods and properties (member functions and
member variables).
So, you can have many different object classes that have properties of the same name, yet they
refer only to the objects that belong to that class. You can also have many different instances of
an object, and the methods and properties of each instance belong to the individual instance.
In these examples:
$myObject.maxSize
$explosion.maxSize
$beast.maxSize
</div>
<span class='text_page_counter'>(161)</span><div class='page_container' data-page=161>
When an object's function is called, the first parameter is the handle of the object
con-taining the function. Therefore, the function definition of the afunction method in the
preceding example would actually have four parameters in its parameter list, the first of
which will be the %this parameter. Note that only the last three parameters are used when
you call the afunction method. The first parameter that corresponds to the %this
parame-ter in the definition is automagically inserted by the engine when you call the function.
You may be familiar with the this token in C/C++; however, in Torque there is nothing
special about it. By prior convention, that variable name is often used when referring to
an object's handle within one of its methods, but you could call that parameter anything
you want.
If you want to access a field of an object, you always have to use something that evaluates
to an object handle or a name followed by a dot followed by the field name, as in the A,
B, C, and D code fragments seen earlier. The only exception to this rule is in the sequence
of field initialization statements when creating an object with the new statement.
<b>Datablocks</b>
A<i>datablock</i> is a special kind of object containing a set of characteristics that are used to
describe another object's properties. Datablock objects exist simultaneously on the server
and all its connected clients. Every copy of a given datablock uses the same handle whether
it is on the server or a client.
By convention, datablock identifiers have the form <i>Name</i>Data.VehicleData,PlayerData, and
ItemData are all examples of datablock identifiers. Although datablocks <i>are</i>objects, we
typ-ically don't explicitly call them objects when referring to them, in order to avoid
seman-tic confusion with regular objects.
AVehicleData datablock contains many attributes describing the speed, mass, and other
properties that can be applied to a Vehicle object. When created, a Vehicle object is
ini-tialized to reference some already-existing VehicleData datablocks that will tell it how to
behave. Most objects may come and go throughout the course of the game, but datablocks
are created once and are not deleted. Datablocks have their own specific creation syntax:
datablock ClassIdentifier(NameIdentifier)
{
InitializationStatements
};
The value of this statement is the handle of the created datablock.
</div>
<span class='text_page_counter'>(162)</span><div class='page_container' data-page=162>
The assignment statements assign values to datablock field identifiers. It's possible for the
contents of these fields to be accessible by both the script code and the engine code—and
in fact that is often the case. In that situation you, of course, need to assign a value to the
field that makes sense for the type of information it's supposed to be holding.
You don't have to restrict yourself to only initializing (and later using) fields that are
accessible by the engine code. An object can have other fields as well; the engine code can't
read them, but the scripts can.
Finally, note that there's a variation on the datablock creation syntax:
datablock ClassIdentifier(NameIdentifier : CopySourceIdentifier)
{
InitializationStatements
};
CopySourceIdentifier specifies the name of some other datablock from which to copy
field values before executing InitializationStatements. This other datablock must be of
the same class as the datablock you are creating, or a <i>superclass</i>of it. This is useful if you
want to make a datablock that should be almost exactly like a previously created
data-block (with just a few changes) or if you want to centralize the definitions of some
char-acteristics in one datablock that can then be copied by multiple other datablocks.
<b>Game Structure</b>
When you create your game, you can use pretty well any organizational structure you like.
Your game will comprise script program modules, graphics images, 3D models, audio
files, and various other data definition modules.
The only real limitation in how you structure your game folders is that the <i>root main </i>
<i>mod-ule</i>must reside in the same folder as the Torque Engine executable, and this folder will be
the<i>game root folder</i>.
The least you should do to sensibly organize your game folders is to have a subtree that
contains<i>common</i>code, code that would be essentially the same between game types and
variations, and another subtree that would contain the <i>control</i>code and specific resources
that pertain to a particular game, game type, or game variation. GarageGames uses these
two basic subtrees, common and control, in its sample games, although the company uses
different names (such as <i>fps</i>,<i>rw</i>,<i>racing</i>, and<i>show</i>) for variations of the control subtree. See
Figure 4.1 for a simple breakdown diagram.
In the game we are creating, we will call the control subtree <i>control</i>.
</div>
<span class='text_page_counter'>(163)</span><div class='page_container' data-page=163>
.cs file, so you must make sure to hang on
to your original source files and back them
up regularly.
When you launch TGE, it looks for the
module main.cs located in the same folder
(the<i>game root folder</i>, shown below, which
shows the general tree format used for the
Emaga set of tutorial sample games used in
this book) as the TGE executable. In this
chapter we will be using a simplified
ver-sion of this tree. In the distribution of TGE
you receive with the CD, the executable is
called tge.exe. The particular main.cs file
located in the game root folder can be
thought of as the <i>root main module</i>. This
expression is useful for distinguishing that particular main.cs module from others with
the same name that aren't in the game root folder.
emaga (game root folder)
common
client
debugger
editor
help
lighting
server
ui
cache
control
client
misc
interfaces
data
maps
models
avatars
items
markers
weapons
particles
sound
structures
</div>
<span class='text_page_counter'>(164)</span><div class='page_container' data-page=164>
docks
hovels
towers
server
misc
players
vehicles
weapons
These other main.cs modules are the root modules for the packages in the game. Although
it isn't explicitly designated as such, the root main module functions as the root package
of the game.
It's important to realize that the folder structure outlined above is not cast in stone. Note
that although it is similar, it is still not exactly the same as the format used in the Torque
sample games. As long as the root main module is in the same folder as the tge.exe
exe-cutable, you can use whatever folder structure suits your needs. Of course, you will have
to ensure that all of the hard-coded paths in the source modules reflect your customized
folder structure.
Figure 4.2 shows the
simplified folder tree
we will be using for
this chapter's sample
game, Emaga4. The
rectangles indicate
folder names, the
partial rectangles
with the wavy
bot-toms are source files,
and the lozenge
shapes indicate
bina-ry files. Those items
that are not in gray
are the items we will
be dealing with in
this chapter.
</div>
<span class='text_page_counter'>(165)</span><div class='page_container' data-page=165>
<b>Server versus Client Design Issues</b>
The Torque Engine provides built-in client/server capability. In fact, the engine is
designed and built around the client/server model to such a degree that even if you are
going to create a single-player game, you will still have both a server side and a client side
to your code.
<b>Packages, Add-ons, Mods, and Modules</b>
If you find the terminology confusing, don't fret—it is a little bit less than straightforward at first
blush.
The first thing to understand is that the term Mod is an abbreviated, or truncated, form of the word
modification. Mods are changes that people make to existing games, customizing the games to
look or play differently. The term is often used in the independent game development scene. The
wordMod is often capitalized.
What we are doing when we create the Emaga game is in many ways similar to creating a Mod—
much like a certain kind of Mod that is often called a Total Conversion. Torque, however, is not a
game, it is an engine. So we are in reality not modifying an existing game, but, rather, we are
cre-ating our own.
Also, there is a bit of an extra wrinkle here: When we create our game, we are going to provide
some features that will allow other people to modify our game! To avoid total confusion, we are
going to call this capability an add-on capability rather than a Mod capability. And we'll refer to
the new or extra modules created by other people for our game as add-ons.
Amodule is essentially the melding of a program source file in text form with its compiled version.
Although we usually refer to the source code version, both the source file version and the compiled
(object code, or in the case of Torque, byte code) version are just different forms of the same module.
Apackage is a Torque construct that encapsulates functions that can be dynamically loaded and
unloaded during program execution. Scripts often use packages to load and unload the different
game types and related functions. Packages can be used to dynamically overload functions using
the parent::function() script mechanism in the packaged function. This is useful for writing
scripts that can work with other scripts without any knowledge of those scripts.
To replace the graphical Help features in the Torque demo, for example, you could create one or
more source code modules that define the new Help features and that together could compose a
Mod to the graphical Help package and that could also be considered a Mod to the Torque demo
game as a whole.
</div>
<span class='text_page_counter'>(166)</span><div class='page_container' data-page=166>
A well-designed online multiplayer game puts as much of the decision-making activity
into the hands of the server as possible. This greatly reduces the chances that dishonest
players could modify their clients to enable cheating or otherwise gain advantage over
other more honest players.
Conversely, a well-designed online multiplayer game only uses the client side to manage
the interface with the human player—accepting input, displaying or generating output,
and providing setup and game navigation tools.
This emphasis on server-side decisions has the potential to rapidly drain network
band-width. This can lead to <i>lag</i>, a situation where a player's actions are not reflected on the
server in a timely fashion. Torque has a highly optimized networking system designed to
mitigate against these kinds of problems. For example, most strings of data are
transmit-ted only once between clients and the game server. Anytime a string that has already been
transmitted needs to be sent again, a <i>tag</i>is sent instead of the full string. The tag is
noth-ing more than a number that identifies the strnoth-ing to be used, so the full strnoth-ing need not be
sent again. Another approach is an update <i>masking</i>system that allows the engine to only
provide updates from the server to its clients of data that has actually changed since the
last update.
We will follow these guidelines when designing our sample game.
<b>Common Functionality</b>
The common subtree contains code and resources for the following capabilities:
■ Common server functions and utilities, such as authentication
■ Common client functions and utilities, such as messaging
■ In-game world editor
■ <sub>Online debugger</sub>
■ Lighting management and lighting cache control code
■ Help features and content files
■ User interface definitions, widget definitions, profiles, and images
We will not be using all of these features in the code we'll be looking at in this chapter, but
by the end of the book, we <i>will</i>be using all of it!
<b>Preparation</b>
</div>
<span class='text_page_counter'>(167)</span><div class='page_container' data-page=167>
1. In your 3DGPAi1\ RESOURCES folder, locate the EmagaCh4KitInstall.exe
pro-gram.
2. Run the kit installer. You can install the chapter kit anywhere you like—the default
will be to put it in the root folder of your C drive, and this is where I'll assume it is
in this book.
You probably won't use more than 15MB of disk space, but you should have the rest
avail-able for backups and temporary files and so on.
You will note that there is no main.cs file in the same folder as tge.exe. This is by design,
because that is one of the files you will be creating. Also note that there are no .cs files in the
control folder either. Again, this is intentional—you will be creating them from this chapter.
The code in Emaga4 is pretty well the bare minimum in terms of the game control code.
In later chapters, we will expand on this skeletal implementation as we add more and
more useful features and flesh out the game.
<b>Root Main</b>
Once it has found the root main module, Torque compiles it into a special binary version
containing<i>byte code</i>, a machine-readable format. The game engine then begins executing
the instructions in the module. The root package can be used to do anything you like, but
the convention established with the GarageGames code is that the root package performs
the following functions:
■ <sub>Performs generic initialization</sub>
■ Performs the command line parameter parsing and dispatch
■ Defines the command line help package
■ Invokes packages and add-ons (Mods)
Here is the root main.cs module. Type it in and save it as Emaga4\main.cs. You can skip
the comments if you like, in order to minimize your typing.
//---// ./main.cs
//
// root main module for 3DGPAI1 emaga4 tutorial game
//
// Copyright (c) 2003 by Kenneth C. Finney.
</div>
<span class='text_page_counter'>(168)</span><div class='page_container' data-page=168>
$usageFlag = false; //help won't be displayed unless the command line
//switch ( -h ) is used
$logModeEnabled = true; //track the logging state we set in the next line.
SetLogMode(2); // overwrites existing log file & closes log file at exit.
// ========================================================================
// ======================= Function Definitions ===========================
// ========================================================================
function OnExit()
//---// This is called from the common code modules. Any last gasp exit
// activities we might want to perform can be put in this function.
// We need to provide a stub to prevent warnings in the log file.
//---{
}
function ParseArgs()
//---// handle the command line arguments
//
// this function is called from the common code
//
//---{
for($i = 1; $i < $Game::argc ; $i++) //loop thru all command line args
{
$currentarg = $Game::argv[$i]; // get current arg from the list
$nextArgument = $Game::argv[$i+1]; // get arg after the current one
$nextArgExists = $Game::argc-$i > 1;// if there *is* a next arg, note that
$logModeEnabled = false; // turn this off; let the args dictate
// if logging should be enabled.
switch$($currentarg)
{
</div>
<span class='text_page_counter'>(169)</span><div class='page_container' data-page=169>
$usageFlag = true;
$argumentFlag[$i] = true;
}
}
}
function Usage()
//---// Display the command line usage help
//---{
// NOTE: any logging entries are written to the file 'console.log'
Echo("\n\nemaga4 command line options:\n\n" @
" -h, -? display this message\n" );
}
function LoadAddOns(%list)
//---// Exec each of the startup scripts for add-ons.
//---{
if (%list $= "")
return;
%list = NextToken(%list, token, ";");
LoadAddOns(%list);
Exec(%token @ "/main.cs");
}
// ========================================================================
// ================ Module Body - Inline Statements =======================
// ========================================================================
// Parse the command line arguments
ParseArgs();
// Either display the help message or start the program.
if ($usageFlag)
{
EnableWinConsole(true);// send logging output to a Windows console window
Usage();
EnableWinConsole(false);
Quit();
</div>
<span class='text_page_counter'>(170)</span><div class='page_container' data-page=170>
else
{
// scan argument list, and log an Error message for each unused argument
for ($i = 1; $i < $Game::argc; $i++)
{
if (!$argumentFlag[$i])
Error("Error: Unknown command line argument: " @ $Game::argv[$i]);
}
if (!$logModeEnabled)
{
SetLogMode(6); // Default to a new log file each session.
}
// Set the add-on path list to specify the folders that will be
// available to the scripts and engine. Note that *all* required
// folder trees are included: common and control as well as the
// user add-ons.
$pathList = $addonList !$= "" ? $addonList @ ";control;common" : "control;common";
SetModPaths($pathList);
// Execute startup script for the common code modules
Exec("common/main.cs");
// Execute startup script for the control specific code modules
Exec("control/main.cs");
// Execute startup scripts for all user add-ons
Echo("--- Loading Add-ons ---");
LoadAddOns($addonList);
Echo("Engine initialization complete.");
OnStart();
}
This is a fairly robust root main module. Let's take a closer look at it.
In the Initializations section, the $usageFlag variable is used to trigger a simple Help
dis-play for command line use of tge.exe. It is set to false here; if the user specifies the -? or
-h flags on the command line, then this flag will be set to false.
</div>
<span class='text_page_counter'>(171)</span><div class='page_container' data-page=171>
The stub routine OnExit() is next. A <i>stub routine</i>is a function that is defined but actually
does nothing. The common code modules have a call to this routine, but we have nothing
for it to do. We could just leave it out, but a good policy is to provide an empty stub to
avoid warning messages from appearing in our log file—when the Torque Engine tries to
call a nonexistent function, it generates a warning.
Then there is the ParseArgs() function. Its job is to step through the list of command line
arguments, or parameters, and perform whatever tasks you want based upon what
argu-ments the user provided. In this case we'll just include code to provide a bare-bones usage,
or Help, display.
Next is the actual Usage() function that displays the Help information.
This is followed by the LoadAddOns() routine. Its purpose is to walk through the list of
add-ons specified by the user on the command line and to load the code for each. In Emaga4
there is no way for the user to specify add-ons or Mods, but (you knew there was a <i>but</i>
coming, didn't you?) we still need this function, because we treat our common and
con-trol modules as if they were add-ons. They are always added to the list in such a way that
they get loaded first. So this function is here to look after them.
After the function definitions we move into the in-line program statements. These
state-ments are executed at load time—when the module is loaded into memory with the Exec()
statement. When Torque runs, after the engine gets itself sorted out, it always loads the
root main module (this module) with an Exec() statement. All of the other script
mod-ules are loaded as a result of what this module does.
The first thing that happens is a call to the ParseArgs() function, which we saw earlier. It
sets the $usageFlag variable for us, you will recall.
Next is the block of code that examines the $usageFlag and decides what to do: either
play the usage Help information or continue to run the game program. If we are not
dis-playing the usage information, we move into the code block after the else.
The first thing we do in here is check to see if there are any unused arguments from the
command line. If there are, that means the program doesn't understand the arguments
and there was some kind of error, which we indicate with the Error() function and a
useful message.
After that we set the log mode, if logging has been enabled.
Next, we build the lists that help Torque find our add-ons. We notify Torque about the
required folder paths by passing the list to the SetModPaths() function.
</div>
<span class='text_page_counter'>(172)</span><div class='page_container' data-page=172>
After that we do the same thing for the control code modules, the details of which we will
cover later in this chapter.
Then we actually start loading the add-ons using the previously defined LoadAddOns()
function.
Finally, we make a call to OnStart(). This will call all versions ofOnStart() that appear in
the add-on packages in order of their appearance in $addonList, with common being first,
control next, and finally this root main module. If there is an OnStart() defined in
com-mon, then it gets called. Then the one in control, and so on.
When we get to the end of the module, the various threads initiated by the OnStart() calls
are ticking over, doing their own things.
So now what? Well, our next point of interest is the control/main.cs module, which we
called with the Exec() function just before we started loading the add-ons.
<b>Control Main</b>
The main.cs module for the control code is next on our tour. Its primary purposes in
Emaga4 are to define the control package and to call the control code initialization
func-tions. (In later chapters we will expand on the role of this module.) Following is the
con-trol/main.cs module. Type it in and save it as Emaga4\control\main.cs.
//---// control/main.cs
// main control module for 3DGPAI1 emaga4 tutorial game
//
// Copyright (c) 2003 by Kenneth C. Finney.
//---//
//---// Load up defaults console values.
// Defaults console values
//---// Package overrides to initialize the mod.
package control {
function OnStart()
//---// Called by root main when package is loaded
</div>
<span class='text_page_counter'>(173)</span><div class='page_container' data-page=173>
//---{
Parent::OnStart();
Echo("\n--- Initializing control module ---");
// The following scripts contain the preparation code for
// both the client and server code. A client can also host
// games, so they need to be able to act as servers if the
// user wants to host a game. That means we always prepare
// to be a server at anytime, unless we are launched as a
// dedicated server.
Exec("./initialize.cs");
InitializeServer(); // Prepare the server-specific aspects
InitializeClient(); // Prepare the client-specific aspects
}
function OnExit()
//---// Called by root main when package is unloaded
//---{
Parent::onExit();
}
}; // Client package
ActivatePackage(control); // Tell TGE to make the client package active
Not a whole lot happens in here at the moment, but it is a necessary module because it
defines our control package.
First, the <i>parent</i>OnStart() function is called. This would be the version that resides in root
main, which we can see doesn't have anything to do.
Then the initialize.cs module is loaded, after which the two initialization functions are
called.
Finally, there is the OnExit()function, which does nothing more than pass the buck to the
OnExit() function in the root main module.
</div>
<span class='text_page_counter'>(174)</span><div class='page_container' data-page=174>
<b>Initialization</b>
The control/initialize.cs module will, in later chapters, become two different modules—
one for the server code and one for the client code. Right now, we have a fairly limited
amount of work to do, so we'll just house the initialization functions for the two ends in
<b>Debugging Scripts Using the trace() Function</b>
The engine adds extra commentary to the log file. Extremely useful are the notations that tell you
when the engine execution has just begun executing in a particular function or is just about to
leave a particular function. The trace lines include the values of any arguments used when the
func-tion is entered and the contents of the return value when leaving a funcfunc-tion.
Here is a fragmentary example of what the trace output can look like:
Entering GameConnection::InitialControlSet(1207)
Setting Initial Control Object
Entering Editor::checkActiveLoadDone()
Leaving Editor::checkActiveLoadDone - return 0
Entering GuiCanvas::setContent(Canvas, PlayGui)
Entering PlayGui::onWake(1195)
Activating DirectInput...
keyboard0 input device acquired.
Leaving PlayGui::onWake - return
Entering GuiCanvas::checkCursor(Canvas)
Entering (null)::cursorOff()
Leaving (null)::cursorOff - return
Leaving GuiCanvas::checkCursor - return
Leaving GuiCanvas::setContent - return
Leaving GameConnection::InitialControlSet - return
Entering (null)::DoYaw(-9)
Leaving (null)::DoYaw - return -0.18
Entering (null)::DoPitch(7)
Leaving (null)::DoPitch - return 0.14
Entering (null)::DoYaw(-6)
To turn on the trace function, add the following statement to the first line of your root main.cs file:
trace(true);
To turn off the trace function, insert this statement at the place in the code where you would like
to turn tracing off:
</div>
<span class='text_page_counter'>(175)</span><div class='page_container' data-page=175>
the same module. Here is the control/initialize.cs module. Type it in and save it as
Emaga4\control\initialize.cs.
//============================================================================
// control/initialize.cs
//
// control initialization module for 3DGPAI1 emaga4 tutorial game
//
// Copyright (c) 2003 by Kenneth C. Finney.
//============================================================================
function InitializeServer()
//---// Prepare some global server information & load the game-specific module
//---{
Echo("\n--- Initializing module: emaga server ---");
// Specify where the mission files are.
$Server::MissionFileSpec = "*/missions/*.mis";
InitBaseServer(); // basic server features defined in the common modules
// Load up game server support script
Exec("./server.cs");
createServer("SinglePlayer", "control/data/maps/book_ch4.mis");
}
function InitializeClient()
//---// Prepare some global client information, fire up the graphics engine,
// and then connect to the server code that is already running in another
// thread.
//---{
Echo("\n--- Initializing module: emaga client ---");
</div>
<span class='text_page_counter'>(176)</span><div class='page_container' data-page=176>
$pref::Video::allowOpenGL = true;
$pref::Video::displayDevice = "OpenGL";
// Make sure a canvas has been built before any gui scripts are
// executed because many of the controls depend on the canvas to
// already exist when they are loaded.
InitCanvas("Egama4 - 3DGPAi1 Sample Game"); // Start the graphics system.
Exec("./client.cs");
%conn = new GameConnection(ServerConnection);
%conn.connectLocal();
}
First is the InitializeServer() function. This is where we set up a global variable that
indi-cates to the game engine the folder tree where the <i>map</i>(also called <i>mission</i>) files will be
located.
Next, we prepare the server for operation by performing the common code initialization
using the InitBaseServer() function. This allows us to get the server code running full-bore,
which we can do using the createServer() call. We tell the function that this will be a
single-player game and that we are going to load up the map control/data/maps/book_ch4.mis.
After that, we load the module that contains the game code, which is server-side code.
Then we do the client-side initialization in the InitializeClient() function. This is a bit
more involved. After performing the common code initialization with InitBaseClient(),
we set up some global variables that the engine uses to prepare the graphics system for
start-up.
And that happens with the InitCanvas() call. The parameter we pass in is a string that
spec-ifies the name of the window that the game will be running in.
Then we load the control/client.cs module, which we'll cover next in this chapter.
We're getting warm now!
Next, we create a connection object using the GameConnection() function. This gives us an
object that we will use from now on when referring to the connection.
</div>
<span class='text_page_counter'>(177)</span><div class='page_container' data-page=177>
<b>Client</b>
The control/client.cs module is chock-full of good stuff. This is another module that will
need to have some of its code divested when it grows in later chapters. The main activities
taking place in here are as follows:
■ Creation of a key map with key bindings
■ Definition of a callback that gets called from with Torque to generate a 3D view
■ Definition of an interface to hold the 3D view
■ <sub>Definition of a series of functions that hook key commands to avatar motion</sub>
■ A series of stub routines
Here is the control/client.cs module. Type it in and save it as Emaga4\control\client.cs.
//============================================================================
// control/client.cs
//
// This module contains client specific code for handling
// the setup and operation of the player's in-game interface.
//
// 3DGPAI1 emaga4 tutorial game
//
// Copyright (c) 2003 by Kenneth C. Finney.
//============================================================================
if ( IsObject( playerKeymap ) ) // If we already have a player key map,
playerKeymap.delete(); // delete it so that we can make a new one
new ActionMap(playerKeymap);
$movementSpeed = 1; // m/s for use by movement functions
//---// The player sees the game via this control
//---new GameTSCtrl(PlayerInterface) {
profile = "GuiContentProfile";
noCursor = "1";
};
function PlayerInterface::onWake(%this)
//---// When PlayerInterface is activated, this function is called.
</div>
<span class='text_page_counter'>(178)</span><div class='page_container' data-page=178>
//---{
$enableDirectInput = "1";
activateDirectInput();
// restore the player's key mappings
playerKeymap.push();
}
function GameConnection::InitialControlSet(%this)
//---// This callback is called directly from inside the Torque Engine
// during server initialization.
//---{
Echo ("Setting Initial Control Object");
// The first control object has been set by the server
// and we are now ready to go.
Canvas.SetContent(PlayerInterface);
}
//============================================================================
// Motion Functions
//============================================================================
function GoLeft(%val)
//---// "strafing"
//---{
$mvLeftAction = %val;
}
function GoRight(%val)
//---// "strafing"
//---{
</div>
<span class='text_page_counter'>(179)</span><div class='page_container' data-page=179>
function GoAhead(%val)
//---// running forward
//---{
$mvForwardAction = %val;
}
function BackUp(%val)
//---// running backwards
//---{
$mvBackwardAction = %val;
}
function DoYaw(%val)
//---// looking, spinning or aiming horizontally by mouse or joystick control
//---{
$mvYaw += %val * ($cameraFov / 90) * 0.02;
}
function DoPitch(%val)
//---// looking vertically by mouse or joystick control
//---{
$mvPitch += %val * ($cameraFov / 90) * 0.02;
}
function DoJump(%val)
//---// momentary upward movement, with character animation
//---{
$mvTriggerCount2++;
}
</div>
<span class='text_page_counter'>(180)</span><div class='page_container' data-page=180>
//============================================================================
function Toggle3rdPPOVLook( %val )
//---// Enable the "free look" feature. As long as the mapped key is pressed,
// the player can view his avatar by moving the mouse around.
//---{
if ( %val )
$mvFreeLook = true;
else
$mvFreeLook = false;
}
function Toggle1stPPOV(%val)
//---// switch between 1st and 3rd person point-of-views.
//---{
if (%val)
{
$firstPerson = !$firstPerson;
}
}
//============================================================================
// keyboard control mappings
//============================================================================
// these ones available when player is in game
playerKeymap.Bind(keyboard, up, GoAhead);
playerKeymap.Bind(keyboard, down, BackUp);
playerKeymap.Bind(keyboard, left, GoLeft);
playerKeymap.Bind(keyboard, right, GoRight);
playerKeymap.Bind( keyboard, numpad0, DoJump );
playerKeymap.Bind( mouse, xaxis, DoYaw );
playerKeymap.Bind( mouse, yaxis, DoPitch );
playerKeymap.Bind( keyboard, z, Toggle3rdPPOVLook );
playerKeymap.Bind( keyboard, tab, Toggle1stPPOV );
// these ones are always available
</div>
<span class='text_page_counter'>(181)</span><div class='page_container' data-page=181>
//============================================================================
// The following functions are called from the client common code modules.
// These stubs are added here to prevent warning messages from cluttering
// up the log file.
//============================================================================
function onServerMessage()
{
}
function onMissionDownloadPhase1()
{
}
function onPhase1Progress()
{
}
function onPhase1Complete()
{
}
function onMissionDownloadPhase2()
{
}
function onPhase2Progress()
{
}
function onPhase2Complete()
{
}
function onPhase3Complete()
{
}
function onMissionDownloadComplete()
{
}
Right off the bat, a new ActionMap calledplayerKeymap is created. This is a structure that
holds the mapping of key commands to functions that will be performed—a mechanism
often called <i>key binding</i>, or <i>key mapping</i>. We create the new ActionMap with the intent to
populate it later in the module.
</div>
<span class='text_page_counter'>(182)</span><div class='page_container' data-page=182>
Then we define a method for the PlayerInterface control that describes what to do when
the control becomes active ("wakes up"). It's not much, but what it does is activate
DirectInputin order to grab any user inputs at the keyboard or mouse and then make the
playerKeymap bindings active.
Next, we define a callback method for the GameConnection object (you know, the one we
created back there in control/main.cs). The engine invokes this method internally when
the server has established the connection and is ready to hand control over to us. In this
method we assign our player interface control to the Canvas we created earlier in the
InitializeClient() function in the control/initialize.cs module.
After that, we define a whole raft of motion functions to which we will later bind keys.
Notice that they employ global variables, such as $mvLeftAction. This variable and others
like it, each of which starts with $mv, are seen and used internally by the engine.
Then there is a list of key bindings. Notice that there are several variations of the Bind calls.
First, there are binds to our playerKeymap, which makes sense. Then there are binds to the
GlobalActionMap; these bindings are available at all times when the program is running, not just
when an actual game simulation is under way, which is the case with a normal action map.
Finally, there is a list of stub routines. All of these routines are called from within the
com-mon code package. We don't need them to do anything yet, but as before, in order to
min-imize log file warnings, we create stub routines for the functions.
<b>Server</b>
The control/server.cs module is where game-specific server code is located. Most of the
functionality that is carried in this module is found in the form of methods for the
GameConnection class. Here is the control/server.cs module. Type it in and save it as
Emaga4\control\server.cs.
//============================================================================
// control/server.cs
//
// server-side game specific module for 3DGPAI1 emaga4 tutorial game
// provides client connection management and player/avatar spawning
//
// Copyright (c) 2003 by Kenneth C. Finney.
//============================================================================
function OnServerCreated()
//---// Once the engine has fired up the server, this function is called
</div>
<span class='text_page_counter'>(183)</span><div class='page_container' data-page=183>
Exec("./player.cs"); // Load the player datablocks and methods
}
//============================================================================
// GameConnection Methods
// Extensions to the GameConnection class. Here we add some methods
// to handle player spawning and creation.
//============================================================================
function GameConnection::OnClientEnterGame(%this)
//---// Called when the client has been accepted into the game by the server.
//---{
// Create a player object.
%this.spawnPlayer();
}
function GameConnection::SpawnPlayer(%this)
//---// This is where we place the player spawn decision code.
// It might also call a function that would figure out the spawn
// point transforms by looking up spawn markers.
// Once we know where the player will spawn, then we create the avatar.
//---{
%this.createPlayer("0 0 220 1 0 0 0");
}
function GameConnection::CreatePlayer(%this, %spawnPoint)
//---// Create the player's avatar object, set it up, and give the player control
// of it.
//---{
if (%this.player > 0)//The player should NOT already have an avatar object.
{ // If he does, that's a Bad Thing.
Error( "Attempting to create an angus ghost!" );
}
</div>
<span class='text_page_counter'>(184)</span><div class='page_container' data-page=184>
dataBlock = HumanMaleAvatar; // defined in player.cs
client = %this; // the avatar will have a pointer to its
}; // owner's connection
// Player setup...
%player.setTransform(%spawnPoint); // where to put it
// Give the client control of the player
%this.player = %player;
%this.setControlObject(%player);
}
//============================================================================
// The following functions are called from the server common code modules.
// These stubs are added here to prevent warning messages from cluttering
// up the log file.
//============================================================================
function ClearCenterPrintAll()
{
}
function ClearBottomPrintAll()
{
}
The first function,OnServerCreated, manages what happens immediately after the server is
up and running. In our case we need the player-avatar datablocks and methods to be
loaded up so they can be transmitted to the client.
Then we define some GameConnection methods. The first one,OnClientEnterGame, simply
calls the SpawnPlayer method, which then calls the CreatePlayer method using the
hard-coded transform provided.
CreatePlayer then creates a new player object using the player datablock defined in
con-trol/player.cs (which we will review shortly). It then applies the transform (which we
created manually earlier) to the player's avatar and then transfers control to the player.
Finally, there are a couple more stub routines. That's the end of them—for now—I
promise!
<b>Player</b>
</div>
<span class='text_page_counter'>(185)</span><div class='page_container' data-page=185>
Here is the control/player.cs module. Type it in and save it as Emaga4\control\player.cs.
//---// control/player.cs
//
// player definition module for 3DGPAI1 emaga4 tutorial game
//
// Copyright (c) 2003 by Kenneth C. Finney.
//---datablock PlayerData(HumanMaleAvatar)
{
className = Avatar;
shapeFile = "~/player.dts";
emap = true;
renderFirstPerson = false;
cameraMaxDist = 4;
mass = 100;
density = 10;
drag = 0.1;
maxdrag = 0.5;
maxEnergy = 100;
maxDamage = 100;
maxForwardSpeed = 15;
maxBackwardSpeed = 10;
maxSideSpeed = 12;
</div>
<span class='text_page_counter'>(186)</span><div class='page_container' data-page=186>
minJumpSpeed = 20;
maxJumpSpeed = 30;
runForce = 4000;
jumpForce = 1000;
runSurfaceAngle = 70;
jumpSurfaceAngle = 80;
};
//---// Avatar Datablock methods
//---function Avatar::onAdd(%this,%obj)
{
}
function Avatar::onRemove(%this, %obj)
{
if (%obj.client.player == %obj)
%obj.client.player = 0;
}
The datablock used is the PlayerData class. It is piled to the gunwales with useful stuff.
Table 4.2 provides a summary description of each of the properties.
There are many more properties available for the avatar, which we aren't using right now.
We can also define our own properties for the datablock and access them, through an
instance object of this datablock, from anywhere in the scripts.
Last but not least, there are two methods defined for the datablock. The two basically
define what happens when we add a datablock and when we remove it. We will encounter
many others in later chapters.
<b>Running Emaga4</b>
</div>
<span class='text_page_counter'>(187)</span><div class='page_container' data-page=187>
<b>Table 4.2 </b>
Emaga4 Avatar Properties
<b>Property</b> <b>Description</b>
className Defines an arbitrary class that the avatar can belong to.
shapeFile Specifies the file that contains the 3D model of the avatar.
emap Enables environment mapping on the avatar model.
renderFirstPerson When true, causes the avatar model to be visible when in first-person
point-of-view mode.
cameraMaxDist Maximum distance from the avatar for the camera in third-person
point-of-view mode.
mass The mass of the avatar in terms of the game world.
density Arbitrarily defined density.
drag Slows down the avatar through simulated friction.
maxdrag Maximum allowable drag.
maxEnergy Maximum energy allowed.
maxDamage Maximum damage points that can be sustained before the avatar is killed.
maxForwardSpeed Maximum speed allowable when moving forward.
maxBackwardSpeed Maximum speed allowable when moving backward.
maxSideSpeed Maximum speed allowable when moving sideways (strafing).
minJumpSpeed Below this speed, you can't make the avatar jump.
maxJumpSpeed Above this speed, you can't make the avatar jump.
jumpForce The force, and therefore the acceleration, when jumping.
runForce The force, and therefore the acceleration, when starting to run.
runSurfaceAngle Maximum slope (in degrees) that the avatar can run on.
jumpSurfaceAngle Maximum slope (in degrees) that the avatar can jump on, usually somewhat
less than runSurfaceAngle.
<b>Table 4.3 </b>
Emaga4 Navigation Keys
<b>Key</b> <b>Description</b>
Up Arrow Run forward
Down Arrow Run backward
Left Arrow Run (strafe) left
Right Arrow Run (strafe) right
Numpad 0 Jump
z Free look (hold key and move mouse)
Tab Toggle player point of view
</div>
<span class='text_page_counter'>(188)</span><div class='page_container' data-page=188>
After you have created all
of the modules, you can
run Emaga4 simply
by double-clicking on
Emaga4\tge.exe. You will
"spawn" in to the game
world above the ground,
and drop down. When
you hit the ground, your
view will shake from the
impact. If you turn your
player around, using the
mouse, you will see the
view shown in Figure 4.4.
After spawning, you can
run around the
country-side, admire your avatar
with the Tab and z keys, and jump.
<b>Moving Right Along</b>
You should have a fairly simple game now. I'll be the first to admit that there is not much
to do within the game, but then that wasn't the point, really. By stripping down to a
bare-bones code set, we get a clearer picture of what takes place in our script modules.
By typing in the code presented in this chapter, you should have added the following files
in your emaga4 folder:
C:\emaga4\main.cs
C:\emaga4\control\main.cs
C:\emaga4\control\client.cs
C:\emaga4\control\server.cs
C:\emaga4\control\initialize.cs
C:\emaga4\control\player.cs
The program you have will serve as a fine skeleton program upon which you can build
<i>your</i>game in the manner that <i>you</i>want.
By creating it, you've seen how the responsibilities of the client and server portions of the
game are divvied out.
</div>
<span class='text_page_counter'>(189)</span><div class='page_container' data-page=189></div>
<span class='text_page_counter'>(190)</span><div class='page_container' data-page=190>
157
<b>Game Pl ay</b>
I
n Chapter 4 we created a small game, Emaga4. Well, not really a game—more of areally simple virtual reality simulation. We created a few important modules to get
the ball rolling.
In this chapter we'll build on that humble beginning and grow toward something with
some game play challenge in it, called Emaga5. There will be some tasks to perform (<i>goals</i>)
and some things to make those tasks just that much harder (<i>dramatic tension</i>).
To make this happen we'll have to add a fair number of new control modules, modify
some of the existing ones, and reorganize the folder tree somewhat. We'll do that in
reverse order, starting with the reorganization.
<b>The Changes</b>
You will recall that there are two key branches in the folder tree: common and control. As
before, we won't worry about the common branch.
<b>Folders</b>
The control branch contained all of our code in the Chapter 4 version. For this chapter
we'll use a more sophisticated structure. When you run the EmagaCh5KitInstall program,
it will automatically create the new folder tree for you. It's important for you to become
familiar with it, so study Figure 5.1 for a few minutes.
</div>
<span class='text_page_counter'>(191)</span><div class='page_container' data-page=191>
The new folder tree is
the one we will be
sticking with for the
rest of the book. We
will be adding a
cou-ple more folder nodes
for specialized
fea-tures in later
chap-ters, but otherwise,
this is the final form.
<b>Modules</b>
You will not need to
type in the root main
module again, because
it won't be any
differ-ent this time around.
In the control branch,
the first major
differ-ence is that the initialize.cs module has been split in two, with a client version and a server
version. Each of the new modules is now located in its respective
branches—control/serv-er/ and control/client/. They still perform the same tasks as before, but splitting the
initial-ize functions and putting them in their permanent homes prepares us for all our later
organizational needs.
There were also the two modules: control/server.cs and control/client.cs. We will now
expand these and relocate them as control/server/server.cs and control/client/client.cs,
respectively.
The final module from Chapter 4 is player.cs. We will be expanding it greatly and
relocat-ing it to control/server/players/player.cs.
Furthermore, we will add several new modules to handle various functional features of
the game. We'll address each file as we encounter it in the chapter.
Make sure you have run the EmagaCh5KitInstall program before proceeding, because it
creates our folder tree for us.
<b>Control Modules</b>
As before, the control modules are where we focus our game-specific energies. In the root
control folder is the control main module. The rest of the code modules are divided
</div>
<span class='text_page_counter'>(192)</span><div class='page_container' data-page=192>
between the client and server branches. The data branch is where our art and other data
definition resources reside.
<b>control/main.cs</b>
Type in the following code and save it as the control main module at
C:\Emaga5\con-trol\main.cs. In order to save on space, there are fewer source code comments than in the
last chapter.
//---// control/main.cs
// Copyright (c) 2003 by Kenneth C. Finney.
//---Exec("./client/presets.cs");
Exec("./server/presets.cs");
package control {
function OnStart()
{
Parent::OnStart();
Echo("\n++++++++++++ Initializing control module ++++++++++++");
Exec("./client/initialize.cs");
Exec("./server/initialize.cs");
InitializeServer(); // Prepare the server-specific aspects
InitializeClient(); // Prepare the client-specific aspects
}
function OnExit()
{
Parent::onExit();
}
}; // Client package
ActivatePackage(control); // Tell TGE to make the client package active
</div>
<span class='text_page_counter'>(193)</span><div class='page_container' data-page=193>
<b>Client Control Modules</b>
Modules that affect only the client side of the game are contained in the control/client
folder tree. The client-specific activities deal with functions like the interface screens and
displays, user input, and coordinating game start-up with the server side of the game.
<b>control/client/client.cs</b>
Many features that were in client.cs in the last chapter are now found in other modules.
The key mapping and interface screen code that were located in this module, client.cs,
have been given homes of their own, as you'll see later. Type in the following code and save
it as C:\Emaga5\control\client\client.cs.
//============================================================================
// control/client/client.cs
// Copyright (c) 2003 by Kenneth C. Finney.
//============================================================================
function LaunchGame()
{
createServer("SinglePlayer", "control/data/maps/book_ch5.mis");
%conn = new GameConnection(ServerConnection);
%conn.setConnectArgs("Reader");
%conn.connectLocal();
}
function ShowMenuScreen()
{
// Start up the client with the menu...
Canvas.setContent( MenuScreen );
Canvas.setCursor("DefaultCursor");
}
function SplashScreenInputCtrl::onInputEvent(%this, %dev, %evt, %make)
{
if(%make)
{
ShowMenuScreen();
}
}
//============================================================================
// stubs
//============================================================================
function onServerMessage()
</div>
<span class='text_page_counter'>(194)</span><div class='page_container' data-page=194>
function onMissionDownloadPhase1()
{
}
function onPhase1Progress()
{
}
function onPhase1Complete()
{
}
function onMissionDownloadPhase2()
{
}
function onPhase2Progress()
{
}
function onPhase2Complete()
{
}
function onPhase3Complete()
{
}
function onMissionDownloadComplete()
{
}
We've added three new functions, the first of which is LaunchGame(). The code contained
should be familiar from Emaga4. This function is executed when the user clicks on the
Start Game button on the front menu screen of the game—the other options available on
the front screen are Setup and Quit.
Next is ShowMenuScreen(), which is invoked when the user clicks the mouse or hits a key
when sitting viewing the splash screen. The code it invokes is also familiar from Emaga4.
The third function,SplashScreenInputCtrl::onInputEvent(), is a callback method used by a
GuiInputControl, in this case the SplashScreenInputCtrl, which is attached to the splash
screen for the narrow purpose of simply waiting for user input, and when it happens,
closing the splash screen. We get the user input value in the %make parameter. Figure 5.2
shows what the splash screen looks like.
</div>
<span class='text_page_counter'>(195)</span><div class='page_container' data-page=195>
<b></b>
<b>control/client/interfaces-/menuscreen.gui</b>
All of the user interface and
dis-play screens now have modules
of their own, and they reside in
the interfaces branch of the
client tree. Note that the
exten-sion of these modules is .gui.
Functionally, a .gui is the same as
a .cs source module. They both
can contain any kind of valid
script code, and both compile to
the .dso binary format. Type in
the following code and save it as
C:\Emaga5\control\client\inter-faces\menuscreen.gui.
new GuiChunkedBitmapCtrl(MenuScreen) {
profile = "GuiContentProfile";
horizSizing = "width";
vertSizing = "height";
position = "0 0";
extent = "640 480";
minExtent = "8 8";
visible = "1";
helpTag = "0";
bitmap = "./interfaces/emaga_background";
useVariable = "0";
tile = "0";
new GuiButtonCtrl() {
profile = "GuiButtonProfile";
horizSizing = "right";
vertSizing = "top";
position = "29 300";
extent = "110 20";
minExtent = "8 8";
visible = "1";
command = "LaunchGame();";
helpTag = "0";
text = "Start Game";
groupNum = "-1";
buttonType = "PushButton";
</div>
<span class='text_page_counter'>(196)</span><div class='page_container' data-page=196>
};
new GuiButtonCtrl() {
profile = "GuiButtonProfile";
horizSizing = "right";
vertSizing = "top";
position = "29 350";
extent = "110 20";
minExtent = "8 8";
visible = "1";
command = "Canvas.pushDialog(SetupScreen);";
helpTag = "0";
text = "Setup";
groupNum = "-1";
buttonType = "PushButton";
};
new GuiButtonCtrl() {
profile = "GuiButtonProfile";
horizSizing = "right";
vertSizing = "top";
position = "29 400";
extent = "110 20";
minExtent = "8 8";
visible = "1";
command = "Quit();";
helpTag = "0";
text = "Quit";
groupNum = "-1";
buttonType = "PushButton";
};
};
What we have here is a hierarchical definition of nested objects. The outer object that
con-tains the others is the MenuScreen itself, defined as a GuiChunkedBitmapCtrl. Many video cards
have texture size limits; for some nothing over 512 pixels by 512 pixels can be used. The
ChunkedBitmap splits large textures into sections to avoid these limitations. This is usually
used for large 640 by 480 or 800 by 600 background artwork.
</div>
<span class='text_page_counter'>(197)</span><div class='page_container' data-page=197>
The definition ofGuiContentProfile is pretty simple:
if(!IsObject(GuiContentProfile)) new GuiControlProfile (GuiContentProfile)
{
opaque = true;
fillColor = "255 255 255";
};
Basically, the object is opaque (no transparency allowed, even if an alpha channel exists in
the object's source bitmap image). If the object doesn't fill the screen, then the unused
screen space is filled with black (RGB = 255 255 255).
After the profile, the sizing and position information properties are set. See the sidebar
titled "Profile Sizing Settings: horizSizing and vertSizing" for more information.
The extent property defines the horizontal and vertical dimensions of MenuScreen. The
minExtent property specifies the smallest size that the object can have.
Thevisible property indicates whether the object can be scene on the screen. Using a "1"
will make the object visible; a "0" will make it invisible.
The last significant property is the bitmap property—this specifies what bitmap image will
be used for the background image of the object.
There are three GuiButtonCtrl objects contained in the MenuScreen. Most of the properties
are the same as found in the GuiChunkedBitmapCtrl. But there are a few that are different
and important.
The first is the command
proper-ty. When the user clicks this
button control, the function
specified in the command
proper-ty is executed.
Next, the text property is where
you can enter the text label that
will appear on the button.
Finally, the buttonType property
is how you specify the particular
visual style of the button.
Figure 5.3 shows the MenuScreen
in all its glory.
</div>
<span class='text_page_counter'>(198)</span><div class='page_container' data-page=198>
<b>control/client/interfaces/playerinterface.gui</b>
ThePlayerInterface control is the interface that is used during the game to display
infor-mation in real time. The Canvas is the container for PlayerInterface. Type in the following
code and save it as C:\Emaga5\control\client\interfaces\playerinterface.gui.
new GameTSCtrl(PlayerInterface) {
profile = "GuiContentProfile";
horizSizing = "right";
vertSizing = "bottom";
position = "0 0";
extent = "640 480";
<b>Profile Sizing Settings: horizSizing and vertSizing</b>
These settings are used to define how to resize or reposition an object when the object's container
is resized. The outermost container is the Canvas; it will have a starting size of 640 pixels by 480
pix-els. The Canvas and all of the objects within it will be resized or repositioned from this initial size.
When you resize a container, all of its child objects are resized and repositioned according to their
horizSizing andvertSizing properties. The resizing action will be applied in a cascading
man-ner to all subobjects in the object hierarchy.
The following property values are available:
<b>Center</b> The object is positioned in the center of its container.
<b>Relative</b> The object is resized and repositioned to maintain the same size and position relative
to its container. If the parent size doubles, the object's size doubles as well.
<b>Left</b> When the container is resized or moved, the change is applied to the distance between
the object and the left edge of the screen.
<b>Right</b> When the container is resized or moved, the change is applied to the distance between
the object and the right edge of the screen.
<b>Top</b> When the container is resized or moved, the change is applied to the distance between
the object and the top edge of the screen.
<b>Bottom</b> When the container is resized or moved, the change is applied to the distance between
the object and the bottom edge of the screen.
<b>Width</b> When the container is resized or moved, the change is applied to the extents of the
object.
</div>
<span class='text_page_counter'>(199)</span><div class='page_container' data-page=199>
minExtent = "8 8";
visible = "1";
helpTag = "0";
noCursor = "1";
new GuiCrossHairHud() {
profile = "GuiDefaultProfile";
horizSizing = "center";
vertSizing = "center";
position = "304 224";
extent = "32 32";
minExtent = "8 8";
visible = "1";
helpTag = "0";
bitmap = "./interfaces/emaga_gunsight";
wrap = "0";
damageFillColor = "0.000000 1.000000 0.000000 1.000000";
damageFrameColor = "1.000000 0.600000 0.000000 1.000000";
damageRect = "50 4";
damageOffset = "0 10";
};
new GuiHealthBarHud() {
profile = "GuiDefaultProfile";
horizSizing = "right";
vertSizing = "top";
position = "14 315";
extent = "26 138";
minExtent = "8 8";
visible = "1";
helpTag = "0";
showFill = "1";
displayEnergy = "0";
showFrame = "1";
fillColor = "0.000000 0.000000 0.000000 0.500000";
frameColor = "0.000000 1.000000 0.000000 0.000000";
damageFillColor = "0.800000 0.000000 0.000000 1.000000";
pulseRate = "1000";
pulseThreshold = "0.5";
value = "1";
};
new GuiBitmapCtrl() {
</div>
<span class='text_page_counter'>(200)</span><div class='page_container' data-page=200>
vertSizing = "top";
position = "11 299";
extent = "32 172";
minExtent = "8 8";
visible = "1";
helpTag = "0";
bitmap = "./interfaces/emaga_healthwidget";
wrap = "0";
};
new GuiHealthBarHud() {
profile = "GuiDefaultProfile";
horizSizing = "right";
vertSizing = "top";
position = "53 315";
extent = "26 138";
minExtent = "8 8";
visible = "1";
helpTag = "0";
showFill = "1";
displayEnergy = "1";
showFrame = "1";
fillColor = "0.000000 0.000000 0.000000 0.500000";
frameColor = "0.000000 1.000000 0.000000 0.000000";
damageFillColor = "0.000000 0.000000 0.800000 1.000000";
pulseRate = "1000";
pulseThreshold = "0.5";
value = "1";
};
new GuiBitmapCtrl() {
profile = "GuiDefaultProfile";
horizSizing = "right";
vertSizing = "top";
position = "50 299";
extent = "32 172";
minExtent = "8 8";
visible = "1";
helpTag = "0";
bitmap = "./interfaces/emaga_healthwidget";
wrap = "0";
};
</div>
<!--links-->