Tài liệu OpenBSD & GNU pdf
Bạn đang xem bản rút gọn của tài liệu. Xem và tải ngay bản đầy đủ của tài liệu tại đây (104.25 KB, 19 trang )
1
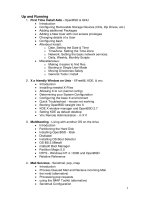
Up and Running
1. First Time Install Aids - OpenBSD & GNU
Introduction
Configuring Removable Storage Devices (CDs, Zip Drives, etc.)
Adding additional Packages
Adding a New User with root access privileges
Changing details of a User
Configuring bash
Afterboot Install:
o Date. Setting the Date & Time
o TimeZone. Setting the Time Zone
o Network. Setting the basic network services.
o Daily, Weekly, Monthly Scripts
Miscellaneous:
o Making it easier to find files
o Booting in Single User Mode
o Moving Directories Safely
o General Tools I install
2. X a friendly Window on Unix - XFree86, KDE, & vnc
Introduction
Installing needed X-Files
Allowing X to run (kernel config)
Determining your System Configuration
Configuring the base X environment
Quick Troubleshoot - mouse not working
Booting OpenBSD straight into X
KDE X window manager and OpenBSD 2.7
Setting KDE as default desktop
Vnc Remote Administration - in X11
3. Multibooting - Living with another OS on the drive
Introduction
Partitioning the Hard Disk
Installing OpenBSD - fdisk
Disklabel
Installing OS Boot Selector
OS-BS 2.0Beta8
mattsoft Boot Manager
Partition Magic 5.0
NTFS - Windows NT 4 / 2000 and OpenBSD
Relative Reference
4. Mail Services - Sendmail, pop, imap
Introduction
Process Queued Mail and Recieve incoming Mail
the inetd (alternative)
Processing pop requests
using the IMAP Toolkit (alternative)
Sendmail Configuration
2
who am i?
slow startup - gethostbyname() blocks
Relaying Access Denied
Simple Diagnostics
What's in the QUEUE
Debug and Verbose Mode
Looking up MX Records
Server Services
5. File & Printer sharing, MS Windows – Samba
Introduction
Installing the Packaged Version
Starting samba with each reboot
Starting through inetd
Testing the installation
SWAT - The Samba Web Administration Tool
Adding Users
Rolling your own Samba Server
Co-habiting with Windows NT PDC
Adding the Samba Server to the Primary Domain Controller
Joining the Samba server to the Primary Domain Controller
Updating the /etc/samba/smb.conf
Using stunnel to secure SWAT password communications
6. Database Server - mySQL
Introduction
Installing
Testing the Installation
Starting MySQL
Stopping MySQL
Usability Assistance Tip
Related Reference
7. FTP - Setting up a secure ftp server - ftpd
Introduction
Configure ftp Login
Configure Directory ownership, permissions
Restrict User Access
Enable ftpd through /etc/rc.conf
8. DNS Server - named
Introduction
Preliminary Information
Starting named
named.boot - Configuring DNS
resolv.conf - name resolution path
db.mydomain.com.zone - Authoritative forward lookup
db.mydomain.com.rev - Authoritative reverse name lookup
db.localhost.zone - The special localhost ip
db.localhost.rev - reverse name lookup on localhost
db.all-zero.rev - reverse name lookup on 0.0.0.0 address
db.all-one.rev - reverse name lookup no 255.255.255.255 address
root.cache
3
Creating Dynamic Web Services
9. Web Services - Apache
Introduction
Setting Apache to start every time the system is started/restarted
Manually starting Apache
Testing that it works
Setting some status configurations
Creating User personal web pages
Restart apache
Create public_html in user accounts
Access user accounts with the URL form http://server-
name/~user-id/
Securing the Site with SSL
10.Server Scripting PHP - php3
Introduction
Installing php3
compiling from source
configuring apache
testing the installation
11.Horde/PHPLib - horde, PHPLib
Introduction
Installing
Configuring horde/PHPLib
Configuring Apache
Testing the horde installation
Testing the PHPLib installation
12.Webmail - IMP
Introduction
Pre-requisites
Installing
Configuring IMP
Securing the Installation
Customizing IMP
Introduction
The Cover Page
The Page Title
13.Web Group Ware - TWIG
Introduction
Requirements
Extracting the Distribution Files
Configuring Apache
Configuring MySQL
Configuring TWIG
Basic configuration
PHPLib conflict problems
4
Testing TWIG
Related References
Works in Progress
14.Firewalls - Keeping the bad sorts out - ipf & ipnat
15.Restricted SuperUser access - sudo
16.Secured Communications - ssh & ssl
Introduction
Self-signed Certificates
Remote Access with ssh
Configuring ssh
Configuring sshd
Copying a file through SSH
17.Web Caching/Proxying - squid
Introduction
Installation
Starting Squid
Transparent Proxy
Access Controls (ACLS)
Cache Utilization Analysis Tools
5
Introduction
The installation instructions that comes with OpenBSD is pretty much
straight forward. If you bought the CD then it will be a nicely printed CD sleeve,
clear instructions. If you've downloaded the files from the Internet then read the
INSTALL.architecture file (for example if you are installing it on an Intel class
machine, then the file to read is INSTALL.386)
Outlined here are additional installation items that is likely to be helpful
for someone new to OS installations or has come from another Unix. For those
really new to Unix I suggest you read the complete section you are interested in
before attempting to follow the instructions.
The initial purpose of this documentation was to record what I had to do
to get OpenBSD into a workable configuration. A few of my friends wanted to try
out Unix so here evolves my notes for my better understanding and for others
new to OpenBSD.
Warning: If you are not familiar with using the vi text editor, or similar
variants on OpenBSD (ex, view) I would suggest that it will make life much
easier for you if you find a tutorial on "vi" somewhere on the 'net and get
familiar. Most things in Unix requires editing text files, and it takes a while to get
a graphical system up and running so editing usually requires a character based
editor (like vi).
Documentation? Linux has the LDP, OpenBSD has the man pages.
Although the LDP are much nicer in hand holding, OpenBSD's man pages are
so convenient for us who are not 'live' on the NET. INSTALL.386 has a section
"Using online OpenBSD documentation," scan through it if you are new to Unix,
it has some helpful pointers on how to better make use of man pages.
There is a real nice introductory, short, tutorial for those totally new to Unix at
/>You should at least read through the tutorial for a guide to what you will do here
(and reference.)
Configuring Removable Storage Devices
(e.g. CD Drives, Zip Drives, etc.)
Configuration in /etc/fstab
[Ref: mount(8) mount file systems;
mount_msdos(8) mount an MS-DOS file system,
mount_cd9660(8) mount an ISO-9660 filesystem]
[Ref: fstab(5) - static information about the filesystems]
To simplify my installation process (low bandwidth people) I need to
configure access to my CD-ROM drive.
Use dmesg | less to look for the device name detected as the cdrom drive. CD
drives are often detected as device cd# (like cd0 or cd1). 'dmesg' is a
command-line program in OpenBSD that lists boot-time information (such as
what OpenBSD detects as devices on your system during startup.) less is
another command-line program, this program lets you browse through a file by
using space (next page) up-arrow, down-arrow, and "q" for quit.
6
Edit the /etc/fstab file to tell OpenBSD that I have the cdrom drive setup
and this helps simplify my mounting command. If you do not yet know how to
use the vi editor or other editors available during the default install, I suggest
that practicing with vi will improve your enjoyment of Unix (OpenBSD.)
File: /etc/fstab
# "#" starts comments
#
# device mount-point fs_type mnt options check priority
#
/dev/wd0a / ffs auto,rw 1 1
# The following is an example of what you may need to add
#
/dev/cd0a /mnt/cdrom cd9660 noauto,ro 0 0
/dev/fd0a /mnt/floppy msdos noauto,rw 0 0
Although the CDROM device is detected by the kernel during each boot,
and during installation the device is not automatically configured for use. I have
also included above how to configure floppy disk access (assuming /dev/fd0 is
the controller and /dev/fd0a is the a drive.) I specify msdos file format since I
mostly work with msdos floppy drives (Winx) and have no need to transfer any
other format floppies.
I now create the nodes (points) for where the file systems can be
mounted by issuing the following commands:
# mkdir /mnt
# mkdir /mnt/cdrom
# mkdir /mnt/floppy
I can now access the CD-ROM drive by entering the below command at
the system prompt.
# mount /mnt/cdrom
Note that you will receive a read error if a CD is not in the drive. This is
because mount doesn't actually configure the device, but attempts to find the
file-system on the device, and mount the filesystem. To correctly mount on any
device, we require a valid file-system on that device.
Similarly you can access the floppy drive. I've selected the above
mounting location (/mnt) because I have a background in RedHat Linux
distributions and am used to this convention where some BSD documentation’s
I have read prefer the /cdrom layout.
Example : iwill motherboard with ATAPI IDE CD, SCSI CDR and SCSI Zip drive
dmesg outputs a lot of junk with the below information included that seems valid
for removable drives.
cd0 at scsibus0 targ 1 lun 0: <E-IDE, CD-ROM 45X, 32> SCSI0 5/cdrom
removable
cd1 at scsibus1 targ4 lun 0: <PLEXTOR, CD-R PX-R412C, 1.04> SCSI2
5/cdrom removable
sd0: 96MB, 96 cyl, 64 head, 32 sec, 512 bytes/sec, 196608 sec total
fd0 at fdc0 drive 0: 1.44MB 80 cyl, 2 head, 18 sec
The command "dmesg | less" lets us navigate up and down the list
(using arrow keys) and I can quit "less" by typing in "q" to quit.
7
I test the ability to access the devices by first creating the 'node' or
directory to mount the devices and using the mount command to check where
the device 'special' is located.
/mnt/cdrom - for the E-IDE CDROM (filesystem: cd9660)
/mnt/cdr - for the CDR (filesystem: cd9660)
/mnt/floppy - for the floppy drive (filesystem: msdos)
/mnt/zip - for the Iomega SCSI ZIP drive (filesystem: msdos)
We're choosing cd9660 as the filesystem for CD drives as this is
OpenBSD's name for ISO-9660 CDROM filesystem. We use msdos in this
example since all other machines sharing zip drives and floppies are MSWin
platforms which share MSDOS FAT filesystems (fat16, fat32) Examples for
using mount (as I do below) are also listed with the mount man pages.
# mkdir /mnt
# mkdir /mnt/cdrom
# mkdir /mnt/cdr
# mkdir /mnt/floppy
# mkdir /mnt/zip
We start looking at the devices from /dev/???a ... b ... c ... until we find it.
Where ??? is the device we are reviewing. Put a CD into the CD Drive and/or
floppies into floppy etc. We need to make sure we have a valid media (disk)
inside each drive for the mounting process to find the disk we want to mount.
We use the "-v" option so we can get some debugging information from the
mount command.
# mount -v -t cd9660 /dev/cd0a /mnt/cdrom
/dev/cd0a on /mnt/cdrom type cd9660 (local, read-only)
# mount -v -t cd9660 /dev/cd1a /mnt/cdr
/dev/cd1a on /mnt/cdr type cd9660 (local, read-only)
# mount -v -t msdos /dev/fd0a /mnt/floppy
/dev/fd0a on /mnt/floppy type msdos (rw, local, uid=0, gid=0, mask=0755)
The above three devices seemed to work easily with the first 'device' but
the mounted zip took a little while longer to find as shown with the testing below.
# mount -v -t msdos /dev/sd0a /mnt/zip
mount_msdos: /dev/sd0a on /mnt/zip: Device not configured
# mount -v -t msdos /dev/sd0b /mnt/zip
mount_msdos: /dev/sd0a on /mnt/zip: Device not configured
# mount -v -t msdos /dev/sd0c /mnt/zip
/dev/sd0c on /mnt/zip type msdos (rw, local, uid=0, gid=0, mask=0755)
We now know where the devices can be located and can confidently
specify our devices into the /etc/fstab file system table.
Edit: /etc/fstab
/dev/cd0a /mnt/cdrom cd9660 ro,noauto 0 0
/dev/cd1a /mnt/cdr cd9660 rw,noauto 0 0
/dev/sd0c /mnt/zip msdos rw,noauto 0 0
/dev/fd0a /mnt/floppy msdos rw,noauto 0 0
Now, all we need to do to access one of the devices above is to use
"mount /mnt/????" (where ???? is the directory created above) and mount will
look up the device setting/file system from the /etc/fstab file.
As an extra note for those sharing files with the FAT file system you may
be interested in reading the mount_msdos man pages for more information
about support for long filenames.

