Tài liệu Lab 4.2.5b Connectivity Tests – Traceroute docx
Bạn đang xem bản rút gọn của tài liệu. Xem và tải ngay bản đầy đủ của tài liệu tại đây (355.56 KB, 6 trang )
Lab 4.2.5b Connectivity Tests – Traceroute
Objective
• Use the traceroute Cisco IOS command from source router to destination router.
• Use the tracert MS-DOS command from source workstation to destination router. Verify that
the network layer between source, destination, and each router along the way is working
properly.
• Retrieve information to evaluate the end-to-end path reliability.
• Determine delays at each point over the path and whether the host can be reached.
Background/Preparation
The traceroute command, abbreviated as trace, is an excellent utility for troubleshooting the
path that a packet takes through an internetwork of routers. It can help to isolate problem links and
routers along the way. The traceroute command uses ICMP packets and the error message
generated by routers when the packet exceeds its Time-To-Live (TTL). The Windows version of this
command is tracert.
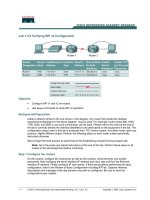
Setup a network similar to the one in the previous diagram. Any router that meets the interface
requirements may be used. Possible routers include 800, 1600, 1700, 2500, 2600 routers, or a
combination. Refer to the chart at the end of the lab to correctly identify the interface identifiers to be
1 - 6 CCNA 2: Routers and Routing Basics v 3.0 - Lab 4.2.5b Copyright 2003, Cisco Systems, Inc.
used based on the equipment in the lab. The configuration output used in this lab is produced from
1721 series routers. Any other router used may produce slightly different output. The following steps
are intended to be executed on each router unless specifically instructed otherwise.
Start a HyperTerminal session as performed in the Establishing a HyperTerminal session lab.
Note: Go to the erase and reload instructions at the end of this lab. Perform those steps on all
routers in this lab assignment before continuing.
Step 1 Configure the routers
a. If there are any difficulties configuring hostname or passwords, refer to the Configuring Router
Passwords lab If there are any difficulties configuring interfaces or the routing protocol, refer to
the Configuring Host Tables lab.
b. This lab requires that IP hostnames are configured.
c. Verify the routers configurations by performing a show running-config on each router. If not
correct, fix any configuration errors and verify.
Step 2 Configure the workstations
a. The configuration for the host connected to the Gadsden Router is:
IP Address 192.168.14.2
IP subnet mask 255.255.255.0
Default gateway 192.168.14.1
b. The configuration for the host connected to the Birmingham Router is:
IP Address 192.168.16.2
IP subnet mask 255.255.255.0
Default gateway 192.168.16.1
Step 3 Ping from the workstation
a. From a Windows host, click on Start > Programs > Accessories > Command Prompt. This
will open a Command Prompt window.
b. To test that the TCP/IP stack and default gateway on the workstation are configured and working
properly, use the MS-DOS window to ping the routers by issuing the following command:
C:\>ping 192.168.14.1
c. The ping should respond with successful results. If not, check the configurations on the host
and directly connected router.
Step 4 Test Layer 3 connectivity
a. Using the command prompt enter ping and the IP address of all routers interfaces.
This will test Layer 3 connectivity between the workstation and the routers.
b. Is the output from the workstation ping command the same as the output from the ping
command from a router?
__________________________________________________________________________
Step 5 Login to the router in user mode
a. Login to the Gadsden user EXEC prompt.
Step 6 Discover the trace options
a. Enter trace at the router prompt.
b. What did the router respond with?
_____________________________________________
2 - 6 CCNA 2: Routers and Routing Basics v 3.0 - Lab 4.2.5b Copyright 2003, Cisco Systems, Inc.
Step 7 Use the help function with trace
a. Enter trace ? at the router prompt.
b. What did the router respond with?
__________________________________________
Step 8 Continue discovering of the trace options
a. Enter into the privileged EXEC mode and type trace ?.
b. What did the router respond with?
_____________________________________________
c. Was there anything different between the two trace outputs?
__________________________
d. There should have been an added option of <cr>. This allows an extended ping at the privileged
EXEC mode. This is unavailable at the user EXEC mode.
Step 9 Use the trace command
a. Enter trace ip xxx.xxx.xxx.xxx where xxx.xxx.xxx.xxx is the IP address of the target
destination.
Note: Use one of the end routers and trace IP to the other end host. The router will respond
with:
GAD#traceroute 192.168.16.2
Type escape sequence to abort.
Tracing the route to 192.168.16.2
1 BHM (192.168.15.2) 16 msec 16 msec 16 msec
2 192.168.16.2 16 msec 16 msec 12 msec
GAD#
b. If the output is not successful, check the router and host configurations.
Step 10 Continue using trace
Login to the other routers and repeat the trace command.
Step 11 Use the trace command from a workstation
a. From the console workstation, click on Start >Programs > Accessories > Command Prompt.
An MS-DOS Command Prompt window will open.
Enter tracert and the same IP address used in Step 9.
b. The first hop is the default gateway or the near side router interface on the LAN that the
workstation is connected to. List the host names and IP addresses of the routers that the ICMP
packet was routed through as well as any other entries displayed in the table below.
Host Name IP Address
c. There is one more entry in the output of the tracert command when the trace is from the
computer command prompt to the target host.
Why?
__________________________________________________________________________
3 - 6 CCNA 2: Routers and Routing Basics v 3.0 - Lab 4.2.5b Copyright 2003, Cisco Systems, Inc.
Step 12 Trace to Cisco and other common Web sites
a. From a Window host that has Internet access, click on Start > Programs > Accessories >
Command Prompt. An MS-DOS Command Prompt window will open.
C:\>tracert www.cisco.com
C:\>tracert www.yahoo.com
C:\>tracert www.aol.com
b. This procedure will show the IP address and the route of the destination.
c. What is the IP address of www.cisco.com?
_______________________________________
d. How many hops did it take to get to www.cisco.com?
_______________________________
If a packet passes through a router it is considered one hop and the TTL of the packet is
decremented by one.
Step 13 Look at the ip route traces to Cisco, Yahoo, and AOL
a. Where are the differences in the traces?
__________________________________________________________________________
__________________________________________________________________________
__________________________________________________________________________
b. Why are they always the same in the beginning?
___________________________________
Upon completion of the previous steps, logoff by typing exit. Turn the router off.
4 - 6 CCNA 2: Routers and Routing Basics v 3.0 - Lab 4.2.5b Copyright 2003, Cisco Systems, Inc.
Erasing and reloading the router
Enter into the privileged EXEC mode by typing enable.
If prompted for a password, enter class. If “class” does not work, ask the instructor for assistance.
Router>enable
At the privileged EXEC mode, enter the command erase startup-config.
Router#erase startup-config
The responding line prompt will be:
Erasing the nvram filesystem will remove all files! Continue?
[confirm]
Press Enter to confirm.
The response should be:
Erase of nvram: complete
Now at the privileged EXEC mode, enter the command reload.
Router(config)#reload
The responding line prompt will be:
System configuration has been modified. Save? [yes/no]:
Type n and then press Enter.
The responding line prompt will be:
Proceed with reload? [confirm]
Press Enter to confirm.
In the first line of the response will be:
Reload requested by console.
After the router has reloaded the line prompt will be:
Would you like to enter the initial configuration dialog? [yes/no]:
Type n and then press Enter.
The responding line prompt will be:
Press RETURN to get started!
Press Enter.
The router is ready for the assigned lab to be performed.
5 - 6 CCNA 2: Routers and Routing Basics v 3.0 - Lab 4.2.5b Copyright 2003, Cisco Systems, Inc.


