Tài liệu Installation of Linux pptx
Bạn đang xem bản rút gọn của tài liệu. Xem và tải ngay bản đầy đủ của tài liệu tại đây (2.12 MB, 27 trang )
1 - 27 IT Essentials II v2.0 - Lab 9.2.1 Copyright 2002, Cisco Systems, Inc.
Lab 9.2.1: Installation of Linux
Estimated Time: 50 minutes
Objective
• Install the Red Hat distribution of Linux
• Configure the Linux settings as needed
• Create a boot disk
Equipment
The following equipment and documentation is required for this exercise:
• Red Hat Linux CDs
• Extra floppy disk
• PC Hardware inventory documentation
• Linux documentation
Procedures
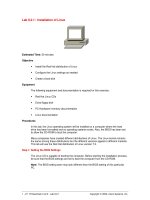
In this lab, the Linux operating system will be installed on a computer where the hard
drive has been formatted and no operating systems exists. Also, the BIOS has been set
to allow the CD-ROM to boot the computer.
Many companies have created different distributions of Linux. The Linux kernel remains
the same among these distributions but the different versions appeal to different markets.
This lab will use the Red Hat distribution of Linux version 7.2.
Step 1: Setting the BIOS Settings
The Linux CD is capable of booting the computer. Before starting the installation process,
be sure that the BIOS settings are set to boot the computer from the CD-ROM.
Note: The BIOS setting seen may look different than the BIOS setting of this particular
PC.
2 - 27 IT Essentials II v2.0 - Lab 9.2.1 Copyright 2002, Cisco Systems, Inc.
Step 2: Installation Options, Graphical or Text Mode
Place the Red Hat CD in the computer and turn on the computer. On boot up, this screen
will open first. To install Linux in the graphical mode, press the Enter key and Linux will
go to the next screen. If the enter key is not pressed in approximately thirty seconds,
Linux will start the installation process in the graphical mode.
3 - 27 IT Essentials II v2.0 - Lab 9.2.1 Copyright 2002, Cisco Systems, Inc.
Step 3: Language Selection
English is the default language for the Linux installation. Select another if necessary. The
language selected will help Red Hat find a time zone later in the installation process.
Select the appropriate language and click the Next button.
4 - 27 IT Essentials II v2.0 - Lab 9.2.1 Copyright 2002, Cisco Systems, Inc.
Step 4: Keyboard Configuration
Red Hat will auto-detect the keyboard. If another keyboard is wanted, select the correct
model here. If an exact match cannot be found, choose a Generic one.
The default Red Hat keyboard layout is English. Choose another layout if needed.
Dead keys allow the creation of special characters with multiple keystrokes (such as Ñ,
Ô, and Ç). Dead keys are enabled by default but if not needed, select Disable dead
keys.
To test your keyboard, use the blank text field at the bottom of the screen.
When finished, click the Next button to continue.
5 - 27 IT Essentials II v2.0 - Lab 9.2.1 Copyright 2002, Cisco Systems, Inc.
Step 5: Mouse Configuration
Red Hat will auto-detect the mouse, and most of the time the user will simply need to
read this screen and click the Next button. Be sure to check the Emulate 3 Buttons.
If another type of mouse is desired, select it here. Select a mouse type that is compatible
with the system if an exact match cannot be found.
If a mouse cannot be found that is compatible with the system, select one of the Generic
options.
6 - 27 IT Essentials II v2.0 - Lab 9.2.1 Copyright 2002, Cisco Systems, Inc.
Step 6: Welcome to Red Hat Linux
The Welcome screen is for informational purposes only. Read the help text in the left
panel for instructions and information to register Red Hat.
After reading this screen, click the Next button.
7 - 27 IT Essentials II v2.0 - Lab 9.2.1 Copyright 2002, Cisco Systems, Inc.
Step 7: Install Options
Read the installation options text and then select the Custom installation.
Click the Next button.
8 - 27 IT Essentials II v2.0 - Lab 9.2.1 Copyright 2002, Cisco Systems, Inc.
Step 8: Disk Partitioning
Partitioning divides the hard drive into sections that work as individual hard drives.
On this screen, a user can choose to perform automatic partitioning, partition manually
using Disk Druid, or to partition manually using the DOS utility fdisk.
For this installation, select the Automatic partitioning option and Red Hat will
automatically partition the hard drive.
After the automatic partition option has been selected, click the Next button.
9 - 27 IT Essentials II v2.0 - Lab 9.2.1 Copyright 2002, Cisco Systems, Inc.
Step 9: Automatic Partitioning
The following are the automatic partitioning options:
• Remove all Linux partitions on this system — This option will remove existing
Linux partitions and will leave other partitions intact. Select this option for this lab.
• Remove all partitions on this system — This option will remove all partitions on the
hard drive which may include partitions used by other operating systems such as
Windows.
• Keep all partitions and use existing free space — This option will keep the
partitions and use the free space (if any) to create a Linux partition.
The Review option is selected by default. Leave this box checked.
Click Next once the selections have been made in order to proceed.
10 - 27 IT Essentials II v2.0 - Lab 9.2.1 Copyright 2002, Cisco Systems, Inc.
Step 10: Partitioning the System
This screen displays how Red Hat has automatically determined the hard drive setup.
Note: Red Hat will create one partition for the Linux Kernel (/boot), one for the files and
applications (/), and a swap file to store data that does not fit into RAM.
A user has the option to edit the settings. For the purpose of this lab, accept the default
settings and click the Next button.