Tài liệu Baby Cameo docx
Bạn đang xem bản rút gọn của tài liệu. Xem và tải ngay bản đầy đủ của tài liệu tại đây (1.31 MB, 13 trang )
Brenda Hoddinott
H-15 BEGINNER: FOCUS ON PEOPLE
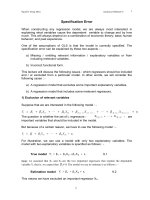
A profile of an infant’s tiny face, shaded with
hatching lines, provides insights into his or her facial
proportions in relation to the head size.
Skills presented include: understanding the ratio of facial mass to cranial mass of a baby;
drawing the facial profile of a baby’s head and face proportionately correct; and using hatching
lines for shading the textures and forms of an infant’s facial profile.
This lesson is divided into three parts:
¬ UNDERSTANDING INFANTS’ FACIAL PROPORTIONS: The facial proportions of
babies follow different guidelines than adults. By using the correct guidelines, portraits of
babies look like babies, rather than mini adults. The most common mistake of beginners,
when attempting to draw a baby’s portrait, is to make the face too big in proportion to the
size of the skull.
¬ PLANNING AND SKETCHING: Take the phone off the hook, find your drawing paper,
let the dog in, sharpen your pencil and find your ruler! The goal is to draw the profile of a
baby’s face in proper proportion to the size of his or her head.
¬ SHADING THE FACE AND HAIR: The face and features are shaded with hatching and
the soft texture of the hair is rendered with short curved hatching lines. In portraits of babies,
you need to keep the overall shading soft and without too much contrast, so as to retain the
gentle appearance of the face.
Suggested drawing supplies include good quality white drawing paper, various grades of
graphite pencils, kneaded and vinyl erasers, and a ruler.
Recommended for artists from age 12 to adult with basic drawing skills, as well as fine art
educators in home school, academic and recreational environments.
13 PAGES – 17 ILLUSTRATIONS
Published by Hoddinott Fine Art Publishers, Halifax, NS, Canada – 2003 (Revised 2006)
Copyright to all articles, images, text, projects, lessons and exercises within this drawing class belong to Brenda Hoddinott and
may not be reproduced or used for any commercial purposes whatsoever without the written permission of Brenda Hoddinott.
Web site or
2
UNDERSTANDING INFANTS’ FACIAL PROPORTIONS
The facial proportions of babies follow different guidelines than adults. Proportion is the
relationship in size of one component of a drawing to another or others. By using the correct
guidelines, portraits of babies look like babies, rather than mini adults.
For this discussion, you need to be familiar with two terms. The facial mass refers to the lower
section of a human head, also called the face or facial area. The cranial mass is the upper section
of the head, often referred to as the cranium or skull.
In the first drawing below, you can clearly see how tiny a baby’s facial mass is in proportion to
the cranial mass. Note the lines that visually separate the head into sections (like pieces of a pie).
Excluding the neck, the head is divided into four and a half segments. The itty bitty face takes up
only one section and the cranial mass takes up all the rest of the shape (Shape refers to the
outward outline of a form). Hence, a baby’s head is more than three times bigger than the face.
The most common mistake of beginners, attempting to draw a baby’s portrait, is to make the face
too big, in proportion to the size of the skull. To further emphasize how proportionately tiny a
baby’s face is, compare the ratio of cranial mass to facial mass in an adult head. The adult head
is divided into three pieces (excluding the neck). The face is one piece, and the cranial mass is
two pieces. The adult’s cranial mass is twice the size of his facial mass.
ILLUSTRATION 15-01 ILLUSTRATION 15-02
Babies’ faces come in various shapes and sizes, but most follow the same basic guidelines. The
first step, towards understanding how to draw portraits of babies, is to get a realistic sense of
how tiny their faces actually are. Drawing the size of the face, proportionate to the mass of the
head, is the key to correctly rendering portraits of babies.
In the first drawing in Illustration 15-03, the entire baby’s head, including his ears, fits inside the
circle. The shape of the head is similar to that of an egg, but considerably shorter. Observe that
the tiny face fits into the small space below the horizontal half of the total shape. In the profile
(the side view), only the chin and a tiny section of the upper lip are outside the circle.
Copyright to all articles, images, text, projects, lessons and exercises within this drawing class belong to Brenda Hoddinott and
may not be reproduced or used for any commercial purposes whatsoever without the written permission of Brenda Hoddinott.
Web site or
3
ILLUSTRATION 15-03
The next time you see a baby,
take time to closely examine the
head and the proportions of the
features.
First of all, take note of how tiny
his or her facial mass is
compared to the size of the
cranial mass. Check out the
locations of the eyes, nose,
mouth and ears.
Also note how tiny an infant’s neck is compared to the size of the head. No need to wonder why
young infants can’t hold their heads up by themselves! With a realistic sense of how tiny babies’
faces actually are, you are well on your way toward drawing their portraits. Look closely at the
profile drawing of a baby in Illustration 15-04. Note the five horizontal lines:
¬ AB is halfway between the top of the head and the bottom of the chin
¬ CD is halfway between AB and EF
¬ EF is halfway between AB and IJ
¬ GH is halfway between EF and IJ
¬ IJ identifies the bottom of the bone in the chin (lower jaw), not the bottom of the soft tissue
under the chin. Infants often have what is commonly called a “double chin”.
ILLUSTRATION 15-04
Note the location of the
baby’s features in relation
to the five lines:
¬ Eyebrows: are on
line AB.
¬ Eyes: are in between
lines AB and CD.
¬ Nose: is in between
lines CD and EF.
¬ Mouth: is in between
lines EF and GH.
¬ Chin: touches line IJ.
Copyright to all articles, images, text, projects, lessons and exercises within this drawing class belong to Brenda Hoddinott and
may not be reproduced or used for any commercial purposes whatsoever without the written permission of Brenda Hoddinott.
Web site or
4
PLANNING AND SKETCHING
Draw along with me in a fun exercise where you draw an infant’s face proportionate to the size
of the head. Take the phone off the hook, find your drawing paper, let the dog in, sharpen your
pencil and find your ruler!
ILLUSTRATION 15-05
1) Draw a square and divide it into four equal
smaller squares.
The size of your square determines the size of the
infant’s head. Mine is very tiny, 5 by 5 inches, but
feel free to make your square larger. The four smaller
squares will help you set up accurate proportions for
drawing the baby’s facial profile and head.
2) Lightly sketch a small circle in the lower left
square to represent the size of a baby’s face.
Sketching refers to a quick, rough representation or
outline of a planned drawing subject.
ILLUSTRATION 15-06
The bad
news is that no lesson can
teach how you to draw a
circle. The good news is
that practice is a great
teacher. In other words, you
teach yourself.
Drawing a circle freehand
becomes simple with lots of
practice. A couple of
helpful hints include:
¬ Rotate your paper and
look at your drawing
from different
perspectives. This little
trick often allows you
see the problem areas.
¬ Look at the reflection of
your circle in a mirror
to help you to see areas
in need of fixing.
Copyright to all articles, images, text, projects, lessons and exercises within this drawing class belong to Brenda Hoddinott and
may not be reproduced or used for any commercial purposes whatsoever without the written permission of Brenda Hoddinott.
Web site or
5
ILLUSTRATION 15-07
3) Lightly sketch a big circle
in the big square to
represent the size of a
baby’s head.
The goal is to draw the
profile of a baby’s face in
proper proportion to the size
of his or her head.
When you see the size of the
face represented as a small
circle, and the head as the
large circle, you may be quite
surprised by how tiny an
infant’s face actually is!
ILLUSTRATION 15-08
4) Sketch the shapes of the
face within the small circle.
The tiny facial profile fits
entirely into the small circle.
5) Add a curved line to
represent the back of the
neck.
Curved lines are created
when a straight line curves
(or bends). Curved lines can
be drawn thick or thin.
6) Sketch the outline of the ear
in the lower right square.