Tài liệu Using Component Methods doc
Bạn đang xem bản rút gọn của tài liệu. Xem và tải ngay bản đầy đủ của tài liệu tại đây (42.73 KB, 15 trang )
< Day Day Up >
Using Component Methods
As should be obvious by now, both the UIObject and UIComponent classes have
methods that are inherited by all component instances. In addition, different component
types have methods that are unique to themselves. For brevity, we'll only mention a few
examples here before moving on to the exercise for this section.
Common Methods
The following methods are common to all component instances:
move(x, y) moves a component instance to the specified x and y coordinates. For
example: myButton_pb.move(100, 200);
setSize(width, height) resizes a component instance to the specified width and height
values. For example: myButton_pb.setSize(250, 150);
getFocus() returns a value of the current object that has focus. For example, var
myVariable:String = myButton_pb.getFocus(); assigns myVariable a string value
representing the name of the component instance that currently has focus.
setFocus() sets the focus to a particular component instance. For example,
myButton_pb.setFocus() gives focus to the myButton_pb instance.
NOTE
For more information on what focus means and how it's used, see "Using the
FocusManager Component" later in this lesson.
There are other methods that are inherited by all instances, but these are the most
common.
Component-Specific Methods
While most components have methods specific to themselves, most of these methods are
used to do one of the following:
•
Add something to a component instance, such as a piece of data or a graphic
•
Get (return) information about a component instance; for example, what item is
currently selected in a combobox
•
Tell (set) the component instance to do something, such as scroll up or down, or
highlight a specific piece of data
•
Sort the component's data in a specific manner
NOTE
There are too many component-specific methods to list here. For a complete listing of the
methods of a component class, look up its entry in the ActionScript dictionary.
Component-specific methods can be found under each component listing in the Actions
Toolbox section of the Actions panel.
In the following exercise, we'll use component methods to dynamically insert, delete, and
manipulate the data within our List component as well as to dynamically insert icon
graphics. In addition, we'll use component methods to control and communicate with
several other component instances.
1. Open Components3.fla.
In the preceding exercise, we set up the framework for using component events via
Listener objects; however, we didn't script our Listener objects to do anything
when events were triggered. In this exercise, we'll insert scripts that cause the
application to perform an action when these events occur.
2. With the Actions panel open and Frame 1 selected, insert the following script just
below inputURL_tiListener.focusIn = function () {:
3.
4. deleteURL_pb.enabled = false;
5.
6. openURL_pb.enabled = false;
7.
8. windowOption.enabled = false;
9.
10. enableWindowGraphics(false);
11.
12. addURL_pb.enabled = true;
13.
In the preceding exercise, we registered the inputURL_tiListener object to listen
for the focusIn event in relation to the inputURL_ti component instance. The
script we've just inserted tells the Listener object what to do when this event
occurs in relation to that instance. When the user clicks inside the inputURL_ti
instance (gives it focus), this script will execute.
The purpose of this script is to reset various elements to their initial state. The
deleteURL_pb and openURL_pb Button instances are disabled, the radio buttons
within the windowOption group are disabled, the enableWindowGraphics()
function is called (making the graphics associated with the radio buttons
transparent), and the addURL_pb instance is enabled.
We're resetting these various elements to their initial states. Other scripts we'll add
shortly will change these states as the user interacts with the application; this script
places these elements into the appropriate state for inputting a new URL. This will
become clearer as we progress.
It's important to understand that the addURL_pb button is enabled (as shown in
the last line of the script) when the inputURL_ti instance is given focus for
inputting a new URL. This occurs because the two instances work in tandem.
When typing a URL, the user adds it to the list by clicking the addURL_pb button,
requiring that instance to be enabled. We'll script the functionality that adds the
URL in a moment, but first let's take a look at some of the items in the library that
play an important role in one of the following steps.
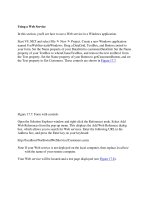
3. Choose Window > Library to open the Library panel.
You'll find two folders within the library that contain movie elements, as well as
four additional movie clips not contained within a folder. These movie clips
represent icon graphics. Here's how they'll be used by our application.
When the user enters a URL containing www, not only will that URL be added to
the listURL_lb instance, but our application will be scripted to detect that a www
address has been entered. The appropriate icon graphic will be shown next to the
URL in the list, which in this case would be the movie clip named symbolWWW.
If the user enters a URL containing ftp, the symbolFTP movie clip will be used.
Entering mailto causes symbolMail to be used. If none of the aforementioned URL
types is entered, our app will assume that an errant URL has been added and the
symbolNone movie clip will be shown next to that URL.
This functionality is made possible as the result of the capability of List
component instances to dynamically attach icon graphics, which are nothing more
than movie clips that have been given linkage identifier names. Let's look at how
one of these movie clips is set up.
4. Right-click (Control-click on a Macintosh) the symbolWWW movie clip in the
library and choose Linkage from the menu that appears.
This opens the Linkage Properties dialog box, which shows that this movie clip
has been given a linkage name of symbolWWW. (Yes, it's the same name as the
movie clip itself; it was done this way for simplicity.)
The remaining three movie clips have also been given identifier names
representative of their movie clip names. Giving movie clips identifier names
allows us to dynamically insert them into our project as it plays, something we'll
script next.
5. Click OK to close the Linkage Properties dialog box. With the Actions panel open,
insert the following script just below addURL_pbListener.click = function () {:
6.
7. listURL_lb.enabled = true;
8.
9. listURL_lb.addItemAt (0, inputURL_ti.text);
10.
11. listURL_lb.selectedIndex = 0;
12.
13. listURL_lb.iconFunction = function (item:Object):String {
14.
15. var tempString:String = item.label;
16.
17. if (tempString.indexOf ("www.") >= 0) {
18.
19. return "symbolWWW";
20.
21. } else if (tempString.indexOf ("mailto:") >= 0) {
22.
23. return "symbolMail";
24.
25. } else if (tempString.indexOf ("ftp.") >= 0) {
26.
27. return "symbolFTP";
28.
29. } else {
30.
31. return "symbolNone";
32.
33. }
34.
35. };
36.
37. inputURL_ti.text = "";
38.