Tài liệu Teach Yourself PL/SQL in 21 Days- P9 doc
Bạn đang xem bản rút gọn của tài liệu. Xem và tải ngay bản đầy đủ của tài liệu tại đây (2.63 MB, 50 trang )
Debugging Your Code and Preventing Errors 377
13
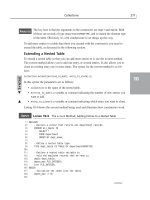
1: DECLARE
2: v_MyChar VARCHAR2(20) := ‘test’;
3: v_NUMBER NUMBER;
4: v_Date DATE := SYSDATE;
5: v_counter INTEGER;
6: BEGIN
7: DBMS_OUTPUT.PUT_LINE(‘This is a Test’);
8: DBMS_OUTPUT.PUT_LINE(‘Of Syntax Error Debugging’);
9: For v_COUNTER IN 1..5 LOOP
10: DBMS_OUTPUT.PUT_LINE(‘You are in loop: ‘
11: || v_counter);
12: END LOOP;
13: END;
14: /
This is a Test
Of Syntax Error Debugging
You are in loop: 1
You are in loop: 2
You are in loop: 3
You are in loop: 4
You are in loop: 5
PL/SQL procedure successfully completed.
Finally, you get some good results. The purpose of this example is to demonstrate the
following:
• One syntax error sometimes masks others. Fixing that one will bring the others to
light.
• The line number that Oracle flags as containing the error might not necessarily be
the location of the true error.
•Taking the time to type in your code carefully saves a lot of time during program
testing.
You can see from the number of iterations that we went through with this one piece of
code that you can save a lot of time by catching syntax errors as you write code. The
next section gives you some tips to help you do just that.
Preventing Syntax Errors
It would be nice if it were possible to somehow prevent all syntax errors from occurring.
Unfortunately, you are a human being, humans do make mistakes, and nothing you do
will ever change that. There are, however, some things that you can do to reduce your
chances of ever writing syntax errors into your code.
I
NPUT
O
UTPUT
17 7982 ch13 11/30/99 1:10 PM Page 377
Please purchase PDF Split-Merge on www.verypdf.com to remove this watermark.
One thing you can do is become familiar with the most common types of errors. I’ve
found that the list of common syntax errors includes
•Using
=
where
:=
belongs
• Leaving off the semicolon at the end of a statement
•Using
ELSEIF
when
ELSIF
is correct
•Using double quotes (
“
) for strings instead of single quotes (
‘
)
Keep these common errors in mind as you write code. Also, determine what your person-
al list of common mistakes is, and keep that in mind as well. Just the act of being con-
sciously aware of these potential mistakes will lessen the chance that you will make one
of them.
The following are some other things you can do that you might find helpful:
•Format your code. Indent constructs such as loops and
IF
statements so that you
can easily follow the logic flow, and so that you can easily spot missing
END IF
s,
END
s,
LOOP
statements, and so forth.
• Double-check expressions containing parentheses immediately after you write
them. The number of left parentheses should match the number of right parenthe-
ses.
• If you are coding an
IF
statement, start by writing the
IF
and
ENDIF
lines. That
way, you know that you have the beginning and ending of the statement written
correctly. Then back up and insert the needed code between those two lines.
• Do the same thing when coding loops as when coding
IF
statements. Write the
beginning and ending lines first.
You can also use an editor that recognizes PL/SQL syntax, or that at least can check for
mismatched parentheses and quotation marks.
378 Day 13
One programmer’s editor that I find very helpful in this regard is MultiEdit.
MultiEdit matches parentheses for you, highlights quoted strings, and bold-
faces many SQL and PL/SQL keywords. You can find out more about
MultiEdit by visiting
.
Note
Handling Logic Errors
Unlike syntax errors, logic errors do not stop a program from compiling. Logic
errors are those that are caused when you misunderstand the problem at hand, or
N
EW
T
ERM
17 7982 ch13 11/30/99 1:10 PM Page 378
Please purchase PDF Split-Merge on www.verypdf.com to remove this watermark.
Debugging Your Code and Preventing Errors 379
13
when you misunderstand the solution. They are mistakes that you make in the logical
flow of a program, not in the syntax of the code that you write. After a program is com-
piled and tested, logic errors can still occur. Possible logic errors include the following:
• Not using proper order of operations
•Using the wrong calculation
•Using loops that never terminate
Logic errors are the hardest errors to debug, primarily because the compiler can’t even
begin to tell you where such an error occurs. You are totally on your own when it comes
to finding and fixing logic bugs. The main steps in debugging logic errors are to identify
the problem, narrow down the location of the problem, and then fix the problem.
The next few sections talk about problems that can occur because the order of operations
is not understood, or because of loops that aren’t coded correctly. Following that, you’ll
find a section talking about things you can do to help debug logic errors.
Order of Operations
Remember when students would ask if there are any real-world applications of
math? Well, understanding the order of operations is critical, not only in algebra,
but in PL/SQL and every programming language, database, and spreadsheet package you
might use. The order of operations states the order of precedence each operator is given.
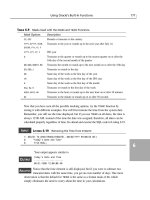
Table 13.1 covers just a few of these levels, with the top level being the highest-priority
order. Day 3, “Writing PL/SQL Expressions” covers this topic in detail.
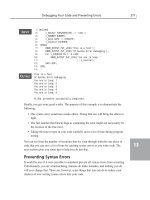
T
ABLE
13.1
Simple Order of Operations, from Highest to Lowest
Operator Description
()
Parentheses
*
,
/
Multiplication, division
+
,
-
Addition, subtraction
If two or more operators are on the same priority level, then the expression is evaluated
from left to right. Take the following equation, which looks as if it should add two num-
bers and multiply 9 by the result:
5 + 3 * 9
Whenever I ask this question in the classroom, at least one quarter of the class tells me
the answer is 72. However, the order of operations tells you that multiplication should
N
EW
T
ERM
17 7982 ch13 11/30/99 1:10 PM Page 379
Please purchase PDF Split-Merge on www.verypdf.com to remove this watermark.
come first. In this case, 3 * 9 = 27, and when you add 5, you get the correct answer, 32.
What if you wanted to arrive at 72? You would use parentheses around the expression
you want to evaluate first:
(5 + 3) * 9 = 72
Misunderstanding the order of operations is a very common problem in areas of busi-
ness, finance, statistics, and scientific application programming. On Day 3, you learned a
great deal about this issue of operator precedence.
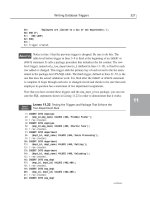
Nonterminating Loops
Another common logic problem is loops that never terminate. As an example, take a look
at the code in Listing 13.2.
L
ISTING
13.2
An Example of an Infinite Loop
1: DECLARE
2: v_MyNumber NUMBER := 0;
3: BEGIN
4: LOOP
5: IF v_MyNumber = 7 THEN
6: EXIT;
7: END IF;
8: v_MyNumber := v_MyNumber + 2;
9: END LOOP;
10: END;
11: /
As you can see, this loop will never exit because
v_MyNumber
will never evaluate
to 7. Since it starts at zero, and is incremented by two each time, it will go from
6 to 8--skipping 7. To fix this, you could rewrite line 5 so that it looks like this:
IF v_MyNumber >= 7 THEN
This is a much safer way to terminate a loop, because it doesn’t matter whether the
v_MyNumber
value is an exact match or not. It won’t matter if the increment in line 8 is a
2 or a 3 or a 1. Whenever the value becomes greater than or equal to 7, the loop will ter-
minate.
Debugging Approaches for Logic Errors
When you find that you have a logic error somewhere in your code, there are several
things you can do to find it:
380 Day 13
I
NPUT
A
NALYSIS
17 7982 ch13 11/30/99 1:10 PM Page 380
Please purchase PDF Split-Merge on www.verypdf.com to remove this watermark.
Debugging Your Code and Preventing Errors 381
13
• Set up a test environment
• Set up some realistic test data
• Narrow down the scope of the problem until you find it
The first two items are things you should do before you even begin development. As for
the third item, finding the exact location of a bug is often easier said than done. However,
there are some techniques that you can use to better enable yourself to do that. The fol-
lowing sections describe these three items in more detail.
Setting Up a Test Environment
Although testing might seem like common sense, you would not believe how many
major corporations either don’t have test environments for all their applications or simply
put code into production without thoroughly testing the code in a test environment. This
problem occurred at one firm that used a program to calculate the raises for employees.
The managers would enter a percentage such as .05. Unfortunately, the code took the
current pay rate multiplied by the percentage of the raise and assigned this to the new
value of the hourly rate. So people with a 5% raise on $10.00 per hour now were making
50 cents per hour! The formula should have been
pay_rate * (1+raise)
. Imagine
being the IT manager trying to explain this “glitch” to your coworkers.
Unfortunately, this problem is more common than it might seem. Another case concerns
code that that works fine when initially placed in production, but it affects code in later
production processes. Whenever possible, you should set up a test environment and test
extensively. It’s best to have someone else actually do the testing. Programmers often
prefer to test by themselves due to an often unspoken fear that a third party will find
more bugs. Well, that’s often true! Take advantage of it.
Setting Up Test Data
After you have set up your test environment, you need to test the code with sample data.
One method to determine test data is to come up with a spreadsheet with a list of all pos-
sible values, or ranges of values, and then manually calculate the output. The whole pur-
pose of programming is to work with the inputs, and output the desired results. Use test
data that might not be used currently in the system, but that could possibly be entered by
the user, and so on. For example, if a program uses only positive numbers, enter a nega-
tive number as test data. In addition to testing the unusual cases, your test environment
should also include a reasonable volume of typical production data.
Setting up test data and testing all possible outcomes is critical in debugging any applica-
tion. A major advantage of having a predefined test environment is that it allows you to
document a series of tests and repeat them each time you modify your code. Taking a lit-
tle extra time to do thorough testing will benefit you greatly down the road.
17 7982 ch13 11/30/99 1:10 PM Page 381
Please purchase PDF Split-Merge on www.verypdf.com to remove this watermark.
Narrowing Down the Location of a Bug
Suppose you encounter a case in which outputs do not match the desired output. What
steps do you take next? No matter what, you need to narrow down the search area, espe-
cially because large-scale applications have millions of lines of code. The steps I would
take to troubleshoot for a logic error bug are as follows:
1. Determine the overall process.
2. Determine where, when, and how frequently the error occurs.
3. Determine what outputs are invalid.
4. Determine what inputs and calculations make up those outputs.
5. Determine what does work. (This question can help in determining the cause.)
6. Define the problem.
7. Trace inputs, intermediate computations, and outputs.
8. Step away from the problem.
9. Ask for help. Software bugs have been discovered this way!
10. Document the solution.
The next few sections talk briefly about each of these steps.
Determining the Overall Process
Before you can troubleshoot, you should have some idea of the overall process and how
it relates to the business. If you have no reinsurance knowledge, it will make trouble-
shooting a reinsurance application much more difficult. If you have been called in to
troubleshoot someone else’s problem, take time to learn the nature of the processes
involved. Often that can help you more quickly focus on the specific module of code that
is causing the trouble.
Determining Where, When, and How Frequently the Error Occurs
You should know where in the system the problem is occurring. What forms are
involved? What data is involved? When does the problem occur and how frequently?
Every time a user clicks the Send button? Every time a form is saved and the data is
inserted into the table? Only when uniform #23 is inserted into the basketball database?
Finding the answers to all these questions will help to determine the root problem.
Determining What Outputs Are Invalid
When attempting to define the problem, if it is not a systems crash but an error on out-
put, attempt to define all outputs that are invalid. Such questions for a banking industry
could be: Which accounts get a service fee when they are not supposed to? How much is
382 Day 13
17 7982 ch13 11/30/99 1:10 PM Page 382
Please purchase PDF Split-Merge on www.verypdf.com to remove this watermark.
Debugging Your Code and Preventing Errors 383
13
the service fee? (You can use this information to see which variable references this value
in a table.) How often does the error occur? What was the last transaction that occurred
before the service fee? (Perhaps a trigger is causing the problem when updating the
table.) What date does the error occur? (If the date is fixed, this will help to narrow down
the problem area.) In reality, there should be no random problems, even though the prob-
lems might initially seem random. You should eventually see a pattern evolve, which will
lead you to the problem.
Determining What Inputs and Calculations Make Up Those Outputs
If you know a bank fee is accessed, for example, you should begin researching the mod-
ules, programs, triggers, procedures, and so on that are involved with processing that fee.
What tables do your inputs come from? Knowing the specific program elements involved
can help you trace the problem more effectively.
Determining What Does Work
Asking the question “What does work?” might seem like an odd idea, but believe it or
not, it is very effective. If you suspect that a procedure is bad, because the data you pass
to the procedure is not processing properly, check the other modules that access this pro-
cedure. If they all have the same problem, it is the module. If all of them process proper-
ly, and you pass the same number of parameters, maybe it is something in your module.
If the range of values you pass is different than that of the other modules accessing the
procedure, it could be an out-of-range error in the procedure.
Defining the Problem
Usually, defining the problem is the most difficult part. If you have worked your way
through proper troubleshooting and the asking of questions, you should now be able to
determine the root cause of the problem, and where to start your search to fix the prob-
lem. Many people try to define the problem first, and take away the symptoms with
“workaround” coding rather than find the true root cause, which could resurface at any
time.
Tracing Inputs, Intermediate Computations, and Outputs
To help narrow down a problem to a specific module, and then to specific lines of code
within that module, you can use the
DBMS_OUTPUT
package to output the values of key
variables as the code executes. You can also write a debugging package—as you’ll see
later in this lesson—to log this information to a text file or a database table. Writing
debug output to a file eliminates the problem of having it scroll off the screen too quick-
ly, and also prevents display forms from being overwritten.
17 7982 ch13 11/30/99 1:10 PM Page 383
Please purchase PDF Split-Merge on www.verypdf.com to remove this watermark.
Stepping Away from the Problem
Have you ever had the solution to the problem stare you in the face but you did not see
it? All too often, we get so involved in trying to find and eliminate the bug that we get
too frustrated and start to repeat steps that we have already eliminated.
When faced with a situation like this, it often helps to take a break and get away from the
problem. If whatever you’re doing now isn’t working, your whole approach to the prob-
lem may be flawed. You may need to give your subconscious mind some time to come
up with a fresh approach. So instead of working late, beating your head against the wall,
and frustrating yourself, go home. In the morning, you may find that you’ve thought up a
fresh approach, or you may even “see” the solution that you missed the night before.
Asking for Help
If after you examine the code, it appears that you have followed all punctuation and syn-
tax rules, and you have a complete understanding of the function package, procedure,
and so on, don’t be afraid to ask another consultant or programmer for help. Sometimes
an extra set of eyes can pinpoint the problem. In addition, you might learn some new tips
and tricks to speed up development or troubleshooting the next time around.
Documenting the Solution
You should document the solution, on paper, in the program (if possible), and ideally in
an Oracle database of troubleshooting solutions. This will help you if the problem
reoccurs and you can’t remember what you did to fix it. Also, if you do this, you are on
your way to building an expert system that might be of some value to other clients or end
users. This is probably one of the most important processes you should complete after
you have solved the problem. If you’re too busy to document right after solving the prob-
lem, you might live to regret the decision if a similar error occurs and you have to spend
more time trying to solve the problem again. Make the time!
Using Tools to Help in Debugging a Program
Tools can be an invaluable debugging aid, especially if you have access to a source code
debugger. Historically, this has not been one of PL/SQL’s strong points. Oracle doesn’t
supply a debugger at all for server-level stored procedures and triggers. Developer 2000,
a client-side development tool, does include debugging capabilities. There are also some
third-party tools on the market, many of which are mentioned on Day 1, “Learning the
Basics of PL/SQL.”
A good debugging tool will allow you to step through the execution of a procedure or a
function one line at a time, examining variables as you go. This enables you to quickly
pinpoint most problems. If you don’t have a debugging tool available, there are still a
384 Day 13
17 7982 ch13 11/30/99 1:10 PM Page 384
Please purchase PDF Split-Merge on www.verypdf.com to remove this watermark.
Debugging Your Code and Preventing Errors 385
13
couple things you can do. The
DBMS_OUTPUT
package can often be used to good effect.
You can use it to display the values of key variables as a procedure executes. If you want
to get a bit more involved, you can create a simple debugging package to log debugging
messages to a disk file.
Using
DBMS_OUTPUT
as a Debugging Tool
The
DBMS_OUTPUT
package is described in great detail on Day 17, “Writing to Files and
the Display.” This package will either pass information to a buffer that can be retrieved,
or it can display information to the screen. (When debugging a process, if I use
DBMS_OUTPUT
,I almost always output to the screen.)
The primary use for
DBMS_OUTPUT
when debugging is to display the values of key vari-
ables as a procedure or function executes. This is a time-honored approach to debugging.
The key is to display information that will allow you to narrow down the focus of your
search. For example, if you display a critical variable before and after a function call, and
the value was correct before the call but incorrect afterward, you should focus your
future efforts on the code that you called.
If you are using SQL*Plus to compile procedures in the database, you must issue the fol-
lowing command in order to see any output:
SET SERVEROUTPUT ON
To disable sending output to the screen, you would turn off
SERVEROUTPUT
, like this:
SET SERVEROUTPUT OFF
If you use
DBMS_OUTPUT
as a debugging tool, and you are debugging server code by using
SQL*Plus, don’t forget to turn on
SERVEROUTPUT
.
Writing a
DEBUG
Package
DBMS_OUTPUT
is nice if you are debugging a procedure or function that you can invoke
from SQL*Plus. However, if you need to run a client-side program in order to debug the
interaction between that program and the stored procedure, you won’t be able to use
SQL*Plus to view the output. In such a case, you might want to consider creating a sim-
ple debugging package to log debug messages to a file. One such implementation is
shown in Listings 13.3 and 13.4. This
DEBUG
package allows you to do just two things:
•Take the system date and time, comments, and the contents of a variable, and write
these to a file while the program executes.
• Reset the file (erase the file) to start a new debugging run.
I
NPUT
I
NPUT
17 7982 ch13 11/30/99 1:10 PM Page 385
Please purchase PDF Split-Merge on www.verypdf.com to remove this watermark.
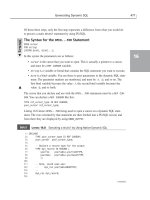
The statement in Listing 13.3 creates the package header, which defines the procedures
available within the package.
L
ISTING
13.3
Defining the
DEBUG
Package Components
1: CREATE OR REPLACE PACKAGE DEBUG AS
2: /* Procedure OUT is used to output a comment of your
3: choice, along with the contents of the variable. The
4: Procedure OUT statement defines the format of the function */
5: PROCEDURE OUT(p_Comments IN VARCHAR2, p_Variable IN VARCHAR2);
6:
7: /* Procedure Erase is used to erase the contents of the file.
8: Used to start a new debugging process. Good idea to call
9: this function first. */
10: PROCEDURE Erase;
11: END DEBUG; -- End Definition of package DEBUG
12: /
Package Created
After creating the package header, you can now enter and execute the package body as
shown in Listing 13.4.
386 Day 13
I
NPUT
O
UTPUT
This version of the package body assumes that the
UTL_FILE_DIR
initializa-
tion parameter is pointing to a directory named
c:\a
. The directory used for
the
debug.txt
file must be one that
UTL_FILE_D
IR points to. You need to
adjust the directory name in this procedure to match the
UTL_FILE_DIR
set-
ting in your environment. See Day 17 for more information on using the
UTL_FILE
package.
Note
L
ISTING
13.4
Creating the
DEBUG
Package Components
1: CREATE OR REPLACE PACKAGE BODY DEBUG AS
2: PROCEDURE OUT(p_Comments IN VARCHAR2,p_Variable IN VARCHAR2) IS
3: v_MyFHOUT UTL_FILE.FILE_TYPE; -- Declare File Handle
4: BEGIN
5: /* Use A to append all output being sent to the file */
6:
7: v_MyFHOUT := UTL_FILE.FOPEN(‘c:\a’,’debug.txt’,’a’);
8:
9: /* Display System Time and Date as MM-DD-YY HH:MM:SS
10: followed by comments and the contents of the
11: variables. Each element is surrounded by quotation marks and
12: separated by a comma to create a comma separated value file */
13:
14: UTL_FILE.PUT_LINE(v_MyFHOUT,’”’||
I
NPUT
17 7982 ch13 11/30/99 1:10 PM Page 386
Please purchase PDF Split-Merge on www.verypdf.com to remove this watermark.
Debugging Your Code and Preventing Errors 387
13
15: TO_CHAR(SYSDATE,’mm-dd-yy HH:MM:SS AM’)
16: || ‘“,”Comment: ‘ || p_Comments ||
17: ‘“,”’ || p_Variable || ‘“‘);
18:
19: /* Close the file handle which points to debug.txt */
20: UTL_FILE.FCLOSE(v_MyFHOUT);
21:
22: EXCEPTION
23: /* Create Exception to simply display error code and message */
24: WHEN OTHERS THEN
25: DBMS_OUTPUT.PUT_LINE
26: (‘ERROR ‘ || to_char(SQLCODE) || SQLERRM);
27: NULL; -- Do Nothing
28: END OUT; -- End Execution of Procedure OUT
29:
30:
31: PROCEDURE Erase IS
32: v_MyFH UTL_FILE.FILE_TYPE; -- Create File Handle
33: BEGIN
34: /* Open file to overwrite current file contents. Doing this
35: erases the contents of the original file completely */
36:
37: v_MyFH := UTL_FILE.FOPEN(‘c:\a’,’debug.txt’,’w’);
38:
39: -- Close the file handle which points to debug.txt
40: UTL_FILE.FCLOSE(v_MyFH);
41:
42: EXCEPTION
43: -- Create Exception to simply display error code and message
44: WHEN OTHERS THEN
45: DBMS_OUTPUT.PUT_LINE
46: (‘ERROR ‘ || to_char(SQLCODE) || SQLERRM);
47: NULL;
48: END Erase; -- End Procedure Erase
49:
50: BEGIN
51: Erase; -- Erase contents of the file
52:
53: END DEBUG; -- End procedure DEBUG
54:/
Package body created.
You can now examine the components of the newly created
DEBUG
package.
The
DEBUG.OUT
Procedure
The
DEBUG.OUT
procedure enables you to log debugging messages to a file called
debug.txt
. The procedure automatically includes the system date and time with each
O
UTPUT
17 7982 ch13 11/30/99 1:10 PM Page 387
Please purchase PDF Split-Merge on www.verypdf.com to remove this watermark.
message. The procedure accepts two parameters: a debug message and the variable you
are tracking. Each time you call it,
DEBUG_OUT
appends the message and the value of the
variable to the file named
debug.txt
.
The
DEBUG.ERASE
Procedure
The
DEBUG.ERASE
procedure erases the contents of the
debug.txt
file by opening a han-
dle to the file in replace mode (
‘W’
) and then closing the file. This process creates an
empty file. You should make at least one call to
DEBUG_ERASE
at the start of each debug-
ging run to ensure that you start with a clean file.
An Example of Using the
DEBUG
Package
One possible use for the
DEBUG
package is to log the inputs and outputs from a function
that you are testing. Listing 13.5 shows a function representing a variation on Oracle’s
built-in
ADD_MONTHS
function. This function is named
ADD_MON
, and includes calls to
DEBUG.OUT
to log both the input date and the date that it returns.
L
ISTING
13.5
The
ADD_MON
Function, with Calls to the DEBUG Package
1: CREATE OR REPLACE FUNCTION add_mon (date_in DATE,
2: months_to_add NUMBER)
3: RETURN DATE AS
4: /*Similar to the built-in ADD_MONTHS, but this function
5: leaves the date alone as much as possible. The day is only
6: adjusted if it is out of range for the new month.*/
7: day_in VARCHAR2(3);
8: day_work VARCHAR2(3);
9: date_out DATE;
10: date_work DATE;
11: BEGIN
12: debug.out (‘DATE_IN = ‘,
13: TO_CHAR(date_in,’yyyy mm dd hh mi ss’));
14:
15: --Grab the input day.
16: day_in := TO_NUMBER(TO_CHAR(date_in,’dd’));
17:
18: --Now, add the number of months requested by the caller
19: date_work := ADD_MONTHS(date_in, months_to_add);
20:
21: --Get the day of the month for the new date.
22: day_work := TO_NUMBER(TO_CHAR(date_work,’dd’));
23:
24: --If the day is unchanged, we are golden. If it was
25: --adjusted downward, that’s because the new month didn’t
26: --have as many days. If it was ajdusted upwards, we
27: --want to set it back to where it was.
28: IF day_in = day_work THEN
388 Day 13
I
NPUT
17 7982 ch13 11/30/99 1:10 PM Page 388
Please purchase PDF Split-Merge on www.verypdf.com to remove this watermark.
Debugging Your Code and Preventing Errors 389
13
29: date_out := date_work;
30: ELSIF day_work < day_in THEN
31: date_out := date_work;
32: ELSE
33: date_out := date_work - (day_work - day_in);
34: END IF;
35:
36: --Return the new date to the caller.
37: debug.out (‘DATE_OUT = ‘,
38: TO_CHAR(date_out,’yyyy mm dd hh mi ss’));
39: RETURN date_out;
40: END;
41: /
Unlike the built-in
ADD_MONTHS
function,
ADD_MON
does not change the day of the
month unless it is forced to. The only situation where that occurs is if the new
month has fewer days than the starting month. To help in debugging this function, two
calls to
DEBUG.OUT
have been added. The first call logs the date coming in, and the sec-
ond call logs the date going out. After executing the function a few times, you can look
in the log to verify that the results are what you expect.
Listing 13.6 shows a test run being made on the
ADD_MON
function.
L
ISTING
13.6
Testing the
ADD_MON
Function
1: SQL> EXECUTE debug.erase;
2:
3: PL/SQL procedure successfully completed.
4:
5: SQL>
6: SQL> --The built-in ADD_MONTHS function keeps the date at
7: SQL> --the end of the month when it is there to begin with.
8: SQL> SELECT TO_CHAR(
9: 2 ADD_MONTHS(TO_DATE(‘29-FEB-2000’,’DD-MON-YYYY’),1),
10: 3 ‘DD-MON-YYYY’)
11: 4 FROM dual;
12:
13: TO_CHAR(ADD
14: -----------
15: 31-MAR-2000
16:
17: SQL>
18: SQL> --The ADD_MON function preserves the date as it is, except
19: SQL> --when it is out of range for the new month.
20: SQL> SELECT TO_CHAR(
21: 2 ADD_MON(TO_DATE(‘29-FEB-2000’,’DD-MON-YYYY’),1),
22: 3 ‘DD-MON-YYYY’)
A
NALYSIS
I
NPUT
/
O
UTPUT
continues
17 7982 ch13 11/30/99 1:10 PM Page 389
Please purchase PDF Split-Merge on www.verypdf.com to remove this watermark.
23: 4 FROM dual;
24:
25: TO_CHAR(ADD
26: -----------
27: 29-MAR-2000
28:
29: SQL>
30: SQL> SELECT TO_CHAR(
31: 2 ADD_MON(TO_DATE(‘15-FEB-2000’,’DD-MON-YYYY’),1),
32: 3 ‘DD-MON-YYYY’)
33: 4 FROM dual;
34:
35: TO_CHAR(ADD
36: -----------
37: 15-MAR-2000
38:
39: SQL>
40: SQL> SELECT TO_CHAR(
41: 2 ADD_MON(TO_DATE(‘31-JAN-2000’,’DD-MON-YYYY’),1),
42: 3 ‘DD-MON-YYYY’)
43: 4 FROM dual;
44:
45: TO_CHAR(ADD
46: -----------
47: 29-FEB-2000
Line 1 contains a crucial call to
DEBUG.ERASE
. This call creates an empty
debug.txt
file for use by subsequent calls to
DEBUG.OUT
. Lines 6–15 demonstrate
how the built-in
ADD_MONTHS
function operates. Because the input date
29-Feb
represent-
ed the last day of the month, the output date was adjusted so that it also represented the
last day of the month. Instead of returning
29-Mar
,
ADD_MONTHS
returned
31-Mar
. Lines
18–27 demonstrate how
ADD_MON
’s behavior is different.
ADD_MON
adds one month, but
preserves the day, resulting in the value
29-Mar
. The remaining lines test some other
cases that
ADD_MON
must handle correctly.
Having executed these tests, you’ll find that the
debug.txt
file contains these entries:
“09-12-99 12:09:40 PM”,”Comment: DATE_IN = “,”2000 02 29 12 00 00”
“09-12-99 12:09:40 PM”,”Comment: DATE_OUT = “,”2000 03 29 12 00 00”
“09-12-99 12:09:40 PM”,”Comment: DATE_IN = “,”2000 02 15 12 00 00”
“09-12-99 12:09:40 PM”,”Comment: DATE_OUT = “,”2000 03 15 12 00 00”
“09-12-99 12:09:41 PM”,”Comment: DATE_IN = “,”2000 01 31 12 00 00”
“09-12-99 12:09:41 PM”,”Comment: DATE_OUT = “,”2000 02 29 12 00 00”
These entries allow you to verify that the
ADD_MON
function is operating as expected.
390 Day 13
L
ISTING
13.6
continued
A
NALYSIS
17 7982 ch13 11/30/99 1:10 PM Page 390
Please purchase PDF Split-Merge on www.verypdf.com to remove this watermark.
Debugging Your Code and Preventing Errors 391
13
Preventing Errors and Planning for
Debugging in the Future
If your code needs to be debugged in the future, you can plan ahead of time to make it
easier through the use of liberal commenting and properly formatted code. To reduce the
probability of errors, you should approach the design phase by checking for all possible
scenarios and outcomes. In addition, you should design your code in modules, not only
to reduce the amount of code to sort through when a problem occurs, but to be able to
reuse those modules in the future.
Defining Requirements and Planning Projects
When you develop a new application, you should spend a significant amount of time
defining the requirements of the users. Not only does this require some knowledge of the
business, but it should cover all possible input and desired output scenarios. Someone
knowledgeable in the industry should verify all calculations. What do you gain by sitting
with the end users and verifying the application? You begin to understand the business
and its needs, and you might be able to make suggestions that could aid in decision-
making processes, reduce work time for manual processing, improve productivity, and so
on. Not only that, it is easier to troubleshoot the system and identify problems before the
application is placed in production. I can’t stress enough how important it is to under-
stand and plan for the application in the beginning: Doing so will save you a lot of time
and aggravation at the tail end of the project.
Always verify your understanding of the requirements with the business
users of the system. Tell them what you think you heard them say in the first
place. Make sure that they agree that you have a correct understanding of
the problem at hand.
Tip
There is one pitfall in obtaining user requirements, which I found out the hard way. I
coded an application that I felt met the user requirements for a financial department.
After reviewing the application with the end user, and discussing the outputs and how the
calculations worked, I wound up redesigning the application to meet the new perceived
needs. Unfortunately, due to a language barrier, I had the application coded correctly the
first time, and the new changes were wrong. Not only should you relay back to the end
user what you perceive their requirements are, but if possible, you should try to verify the
process you are about to code with at least one other knowledgeable resource. The next
time I ran into a similar problem, by working with two resources, I was able to resolve
any issues about what should be coded.
17 7982 ch13 11/30/99 1:10 PM Page 391
Please purchase PDF Split-Merge on www.verypdf.com to remove this watermark.
Using a Modular Approach to Coding
When developing your applications, you should take a modular approach to make debug-
ging easier. This also gives you the added benefit of creating reusable code. For instance,
in a payroll application, you could design modules to do the following:
• Calculate gross wage
• Calculate FICA
• Calculate federal withholdings
• Calculate state withholdings
•Withhold for benefits such as flexible spending or insurance
If a problem occurs that is related to gross wages, you can easily narrow down which
procedure(s) is broken and then fix the bug. In addition, modules have another important
aspect: You can test the modules independently of one another.
Commenting Code
One of the greatest benefits you can provide for yourself and other Oracle developers is
to liberally comment your code. Although you could provide documentation manuals, in
practice these manuals tend to get “misplaced” in almost every environment. Adding
comments to your code will help, whether you are trying to debug the application or sim-
ply modifying the application to meet new requirements.
Proper labeling of variables is also important. Poorly worded variables confuse the devel-
oper and waste valuable time for people who are trying to follow the logic of the pro-
gram. Listing 13.7 reflects code that can be very confusing at first glance.
L
ISTING
13.7
Poorly Commented Code
1: CREATE OR REPLACE FUNCTION RAISE(
2: p1 INTEGER,
3: p2 NUMBER)
4: RETURN NUMBER IS
5: p3 NUMBER;
6: BEGIN
7: IF p1 = 1 THEN
8: p3 := p2 * 1.10;
9: ELSIF p1 = 2 THEN
10: p3 := p2 * 1.05;
11: ELSIF p1 = 3 THEN
12: p3 := p2 * 1.04;
13: ELSIF p1 = 4 THEN
14: p3 := p2 * 1.03;
15: ELSIF p1 = 5 THEN
16: p3 := p2 ;
392 Day 13
I
NPUT
17 7982 ch13 11/30/99 1:10 PM Page 392
Please purchase PDF Split-Merge on www.verypdf.com to remove this watermark.
Debugging Your Code and Preventing Errors 393
13
17: ELSE
18: p3 := p2 * 1.02;
19: END IF;
20: RETURN p3; --
21: END RAISE;
22: /
A quick glance at this code shows that there are no comments, and that the vari-
able names are not mnemonic. In order to follow the code, you would have to
first determine what
p1
,
p2
, and
p3
are. You also do not know what the function raises:
An hourly pay rate? The cost of benefits? Someone’s GPA? The elevation of a building
under construction?
Raise can mean many things, so a clarification is very important. The same code is pro-
vided again in Listing 13.8, with comments that easily clarify the function.
L
ISTING
13.8
Proper Commenting and Naming of Variables
1: CREATE OR REPLACE FUNCTION RAISE(
2: p_paylevel INTEGER, -- parameter for input of raise level
3: p_payrate NUMBER) -- parameter for input of pay rate
4: /* The purpose of this function is to calculate ANNUAL raises
5: for all of the hourly employees, based upon their raise level
6: values 1-4 and all others. */
7:
8: /* On June 24, 1997, added feature to eliminate consultant raise,
9: which is pay level 5 */
10:
11: RETURN NUMBER IS
12: v_newrate NUMBER; -- New Hourly Rate After Raise
13: BEGIN
14: IF p_paylevel = 1 THEN
15: v_newrate := p_payrate * 1.10; -- Promotion Raise
16: ELSIF p_paylevel = 2 THEN
17: v_newrate := p_payrate * 1.05; -- Exceeds Rate
18: ELSIF p_paylevel = 3 THEN
19: v_newrate := p_payrate * 1.04; -- Hi Meets Rate
20: ELSIF p_paylevel = 4 THEN
21: v_newrate := p_payrate * 1.03; -- Meets Rate
22: ELSIF p_paylevel = 5 THEN
23: v_newrate := p_payrate ; -- Consultants who get no raise
24: ELSE
25: v_newrate := p_payrate * 1.02; -- All Others
26: END IF;
27: RETURN v_newrate; -- Returns new paylevel rate to procedure
28: END RAISE;
29: /
A
NALYSIS
I
NPUT
17 7982 ch13 11/30/99 1:10 PM Page 393
Please purchase PDF Split-Merge on www.verypdf.com to remove this watermark.
You can now follow the function, its purpose, what the variables are, and any
modifications made at a later date. What a difference commenting and proper
naming of variables makes!
Writing Assertions into Code
An assertion,in programming terms, is a test for a fact that should be true.
Assertions serve several functions. Their primary function is to prevent errors
from propagating further downstream in a process. Say you had a function that was never
supposed to return a negative value. You could actually place a check in your function to
be sure that a negative value is never accidentally returned. Listing 13.9 shows one
approach that you might take to this problem.
L
ISTING
13.9 A Function That Should Never Return a Negative Value
1: CREATE OR REPLACE FUNCTION do_calc
2: RETURN NUMBER AS
3: return_value NUMBER;
4: BEGIN
5: ...
6: ...
7: IF return_value < 0 THEN
8: RAISE_APPLICATION_ERROR (
9: -20000,’DO_CALC: Negative value returned.’);
10: END IF;
11:
12: RETURN return_value;
13: END;
14: /
Lines 5–6 represent whatever computations are performed by this function. Lines
7–10 check the result immediately before the function returns the value that it
computed. If the value is negative, instead of returning the erroneous value, the function
raises an error.
A test like the one shown in Listing 13.9 is an assertion. Should you make a mistake
coding the
DO_CALC
function, or should some future maintenance programmer induce an
error, the assertion would fire, and you would immediately be alerted to the problem.
Assertions also, in a manner of speaking, serve as a form of documentation to future
maintenance programmers. They are like a comment, but with a loaded gun.
Coding assertions as shown in Listing 13.9 isn’t too practical. You don’t have any central
control over whether they fire, and you can’t make global changes to their behavior. A
more robust approach is to create a procedure such as the one shown in listing 13.10.
394 Day 13
A
NALYSIS
N
EW
T
ERM
I
NPUT
A
NALYSIS
17 7982 ch13 11/30/99 1:10 PM Page 394
Please purchase PDF Split-Merge on www.verypdf.com to remove this watermark.
Debugging Your Code and Preventing Errors 395
13
L
ISTING
13.10
An
ASSERT
Function
1: CREATE OR REPLACE PROCEDURE ASSERT (
2: condition IN BOOLEAN,
3: message IN VARCHAR2) AS
4: BEGIN
5: IF NOT condition THEN
6: RAISE_APPLICATION_ERROR (-20000,message);
7: END IF;
8: END;
9: /
This
ASSERT
procedure evaluates any condition passed to it, and raises an error if
that condition is not true. Listing 13.11 shows how you could apply this to the
DO_CALC
function in Listing 13.9.
L
ISTING
13.11
Using the
ASSERT
Procedure in the
DO_CALC
Function
1: CREATE OR REPLACE FUNCTION do_calc
2: RETURN NUMBER AS
3: return_value NUMBER;
4: BEGIN
5: ...
6: ...
7: ASSERT (return_value >= 0,’DO_CALC: Return value is negative.’);
8: RETURN return_value;
9: END;
10: /
The three-line
IF
statement from Listing 13.10 has been replaced by a one-line
call to
ASSERT
. The readability of the code is improved—you know what a call to
ASSERT
means, and centralizing the assertion logic in one procedure gives you a place
where you can turn it off when you don’t need it.
Formatting Code
Another ounce of error prevention is the proper formatting of code. Here are some for-
matting suggestions that you can either adopt or modify for your specific environment:
•For each new block of code, indent two to five spaces.
•Use uppercase for keywords.
•Use mixed case for variable names.
•Precede variable names with a
v_
for variable,
p_
for parameters, and so on.
•Use one statement per line.
I
NPUT
I
NPUT
A
NALYSIS
A
NALYSIS
17 7982 ch13 11/30/99 1:10 PM Page 395
Please purchase PDF Split-Merge on www.verypdf.com to remove this watermark.
Using Proper Indentation
Every time you start a new block of code, such as a loop, an
IF
statement, or a nested
block, you should indent to make the code more readable. Listing 13.12 shows an exam-
ple of poorly indented code.
L
ISTING
13.12
Code with No Indentations
1: DECLARE
2: v_MyNumber NUMBER := 0;
3: BEGIN
4: LOOP
5: IF v_MyNumber > 7 THEN
6: EXIT;
7: v_MyNumber := v_MyNumber + 2;
8: END LOOP;
9: END;
10: /
This code is very difficult to follow. At a glance, you cannot easily discern where
the declarations begin and end, where the loop ends, or where the
IF
statement
terminates.
If you reformat the code as shown in Listing 13.13, you can follow the program more
easily.
L
ISTING
13.13
Code with Proper Indentation
1: DECLARE
2: v_MyNumber NUMBER := 0;
3: BEGIN
4: LOOP
5: IF v_MyNumber > 7 THEN
6: EXIT;
7: v_MyNumber := v_MyNumber + 2;
8: END LOOP;
9: END;
10: /
Not only is the code now easier to read, but the indentation makes it obvious that
an
ENDIF
statement is missing after line 6.
396 Day 13
I
NPUT
A
NALYSIS
I
NPUT
A
NALYSIS
17 7982 ch13 11/30/99 1:10 PM Page 396
Please purchase PDF Split-Merge on www.verypdf.com to remove this watermark.