Tài liệu Configure Multicast Routing on the RSM using the PIM DM Protocol docx
Bạn đang xem bản rút gọn của tài liệu. Xem và tải ngay bản đầy đủ của tài liệu tại đây (209.52 KB, 12 trang )
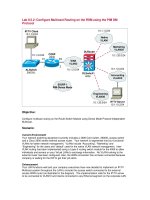
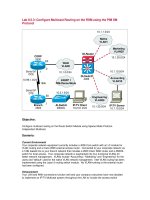
Lab 9.5.2: Configure Multicast Routing on the RSM using the PIM DM
Protocol
Accounting
VLAN10
10.1.10.0/24
Marketing
VLAN20
10.1.20.0/24
10.1.1.0/24
Native
VLAN1
Engineering
VLAN30
10.1.30.0/24
IP/TV Server
10.1.10.2/24
DLSwitch
4006
WAN
VLAN2
10.1.2.0/24
ALSwitch
2900XL
DLRouter
IP/TV Client
10.1.3.2/24
.1
.2.1
E0E1
CORP
2600
10.1.3.0/24
EIGRP 1
PIM-Dense Mode
Objective:
Configure multicast routing on the Route Switch Module using Dense Mode Protocol-Independent
Multicast.
Scenario:
Current Environment
Your network switching equipment currently includes a 4006 Core switch, 2900XL access switch
and a Cisco 2600 series external access router. Your network is segmented into four functional
VLANs for better network management. VLANs include “Accounting”, “Marketing” and
“Engineering” for the users and “default” used for the native VLAN network management. Inter-
VLAN routing has been implemented using a Layer-3 routing switch module for the 4006 to allow
individuals and servers on your Virtual LANs to exchange information. No VLAN-trunking to the
external router has been configured. Also, the WAN connection has not been connected because
company is waiting for the ISP to get their job done.
Enhancement
Your LAN functions well and your company executives have now decided to implement an IP/TV
Multicast system throughout the LAN to include the access switch connected to the external
access WAN router (as illustrated in the diagram). The implementation calls for the IP/TV server
to be connected to VLAN10 and clients connected to any Ethernet segment on the corporate LAN
including the external access router as illustrated in the diagram. PIM-Dense Mode has been
selected as the multicast routing protocol for corporate LAN multicast traffic.
Design:
Switched Network VTP Configuration Information:
Switch VTP Domain VTP Mode VTP Pruning
DLSwitch CORP Server Enabled
ALSwitch N/A N/A N/A
VLAN Configuration Information:
VLAN
ID
VLAN
Name
VLAN
Subnet
VLAN
Gateway
1 Default “Native” 10.1.1.0/24 10.1.1.1
2 WAN 10.1.2.0/24 10.1.2.1
10 Accounting 10.1.10.0/24 10.1.10.1
20 Marketing 10.1.20.0/24 10.1.20.1
30 Engineering 10.1.30.0/24 10.1.30.1
Other LAN Configuration Information:
Network Description Subnet Gateway
3 External 10.1.3.0/24 10.1.3.1
Switch VLAN Port Assignments
Switch VLAN
1
VLAN
2
VLAN
10
VLAN
20
VLAN
30
Trunk
DLSwitch 6-18 5 19-24 25-30 31-34 3,4
ALSwitch N/A N/A N/A N/A N/A N/A
Cisco 4006 DLRouter Interface Configuration Information:
Interface IP Address VLAN
PortChannel 1.1 10.1.1.1/24 Native 1
PortChannel 1.2 10.1.2.1/24 2
PortChannel 1.10 10.1.10.1/24 10
PortChannel 1.20 10.1.20.1/24 20
PortChannel 1.30 10.1.30.1/24 30
Cisco 2600 Internet Router Interface Configuration Information:
Interface IP Address NAT
Serial 0/0 N/A N/A
Serial 0/1 N/A N/A
FastEthernet 0/0 10.1.2.2/24 N/A
FastEthernet 0/1 10.1.3.1/24 N/A
Routing Protocols
Description Protocol ID
LAN/WAN EIGRP 1
MULTICAST PIM-Dense N/A
Notes:
Lab Tasks:
1. Cable the lab as shown in the diagram. We will not spend time in this lab reviewing or
answering questions on basic LAN configurations, as this lab will focus on multicasting. Also
this LAB requires that you have already performed the IP/TV installation and configuration
LAB provided by your instructor and that both the server and viewer are available for use.
2. The first device to be configured will be the distribution layer switch DLSwitch. Access the
switch through the console port and enter privileged mode. Clear your NVRAM and reload.
Switch> (enable) clear config all
Switch> (enable) reset
After the switch resets, enter privileged mode and issue the command show config.
Simply review the default configuration. It is often helpful to be aware of clean
configurations settings as with all devices.
3. Configure the DLSwitch with the following information:
a. Configure the prompt DLSwitch on the 4006 switch.
Switch> (enable) set prompt DLSwitch>
or
Switch> (enable) set system name DLSwitch>
* Note: Verify using DLSwitch> (enable) show config
b. Configure VTP information on the 4006 switch.
DLSwitch> (enable) set vtp domain corp
DLSwitch> (enable) set vtp mode server
* Note: Verify using DLSwitch> (enable) show vtp domain
c. Create corporate VLAN’s.
DLSwitch> (enable) set vlan 1 name default
DLSwitch> (enable) set vlan 2 name WAN
DLSwitch> (enable) set vlan 10 name Accounting
DLSwitch> (enable) set vlan 20 name Marketing
DLSwitch> (enable) set vlan 30 name Engineering
* Note: Verify using DLSwitch> (enable) show vlan
d. Set port channel admin groups.
DLSwitch> (enable) set port channel 2/1-2 156
DLSwitch> (enable) set port channel 2/3-4 157
* Note: Verify using DLSwitch> (enable) show config
e. Assign port VLAN memberships. If you use the show vlan command you will see
that all VLANs default to VLAN 1.
DLSwitch> (enable) set vlan 2 2/5
DLSwitch> (enable) set vlan 10 2/19-24
DLSwitch> (enable) set vlan 20 2/25-30
DLSwitch> (enable) set vlan 30 2/31-34
* Note: Verify using DLSwitch> (enable) show vlan
f. Establish VLAN trunking.
DLSwitch> (enable) set trunk 2/1 nonegotiate dot1q 1-1005
DLSwitch> (enable) set trunk 2/2 nonegotiate dot1q 1-1005
DLSwitch> (enable) set trunk 2/3 nonegotiate dot1q 1-1005
DLSwitch> (enable) set trunk 2/4 nonegotiate dot1q 1-1005
* Note: the show trunk command will not yet display necessary information
because the trunk links may not yet be active. Ensure the config commands are
entered though.
g. Establish Fast EtherChannel on trunking interfaces.
DLSwitch> (enable) set port channel 2/1-2 mode on
DLSwitch> (enable) set port channel 2/3-4 mode on
* Note: Verify using DLSwitch> (enable) show channel
h. Set the spanning tree portfast option enabled on the 4006 for the port that will
connect to our external router.
DLSwitch> (enable) set spantree portfast 2/5 enable
i. Enable CGMP on the switch. CGMP enables the switch to process multicast
requests.
DLSwitch> (enable) set cgmp enable
j. We’ll also enable CGMP leave processing.
DLSwitch> (enable) set cgmp leave enable
k. Verify complete configuration using DLSwitch> (enable) show config. Your
main focus is to verify that the switch will function as directed.
4. Configure the DLRouter with the following information:
a. Configure the hostname DLRouter on the 4006 L3 module.
Router(config)#hostname DLRouter
* Note: Verify using DLRouter#show run
b. Configure the DLRouter on the 4006 L3 module for multicast routing.
Router(config)#ip multicast-routing
* Note: Verify using DLRouter#show run
c. Configure the VLAN interface addressing and trunking information. This is a bit
tricky. Port-channel1 is inherently talking to the native VLAN through a trunk. Simply
setting an IP address allows accessing the Router for management. However, all
other VLANs are required to be set up as sub-interfaces into the PortChannel along
with the trunking encapsulation, VLAN ID and IP address. Take note that on sub-
interface 1.2 or actually any we could have used IP PIM SPARSE-DENSE-MODE.
This would allow the external router to run either PIM sparse or dense for greater
flexibility. Of course PIM DENSE would be ok on its own but introducing you to
added variations of commands provides you with a better-rounded background.
DLRouter(config)#interface Port-channel1
DLRouter(config-if)#ip address 10.1.1.1 255.255.255.0
DLRouter(config-if)#ip pim dense-mode
DLRouter(config-if)#ip cgmp
DLRouter(config-if)#no shutdown
DLRouter(config)#interface Port-channel1.2
DLRouter(config-if)#encapsulation dot1Q 2
DLRouter(config-if)#ip address 10.1.2.1 255.255.255.0
DLRouter(config-if)#ip pim dense-mode
DLRouter(config-if)#ip cgmp
DLRouter(config)#interface Port-channel1.10
DLRouter(config-if)#encapsulation dot1Q 10
DLRouter(config-if)#ip address 10.1.10.1 255.255.255.0
DLRouter(config-if)#ip pim dense-mode
DLRouter(config-if)#ip cgmp
DLRouter(config)#interface Port-channel1.20
DLRouter(config-if)#encapsulation dot1Q 20
DLRouter(config-if)#ip address 10.1.20.1 255.255.255.0
DLRouter(config-if)#ip pim dense-mode
DLRouter(config-if)#ip cgmp


