Tài liệu ASP.NET 1.1 Insider Solutions- P4 pdf
Bạn đang xem bản rút gọn của tài liệu. Xem và tải ngay bản đầy đủ của tài liệu tại đây (667.83 KB, 50 trang )
<ItemTemplate>
<%# DataBinder.Eval(Container.DataItem, _
“Freight”, “${0:f2}”) %>
</ItemTemplate>
<EditItemTemplate>
<asp:TextBox Columns=”3” id=”txtFreight” runat=”server”
Text=’<%# Container.DataItem(“Freight”) %>’ />
</EditItemTemplate>
</asp:TemplateColumn>
<asp:BoundColumn DataField=”ShipperName”
HeaderText=”Via” ReadOnly=”True”/>
</Columns>
</asp:DataGrid>
</SelectedItemTemplate>
<FooterTemplate>
</FooterTemplate>
</asp:DataList>
The Important Points of the
DataList
Control Declaration
The
DataList
control displays the list of customers, and you add to it three attributes that
control its behavior in terms of viewing the order list for each customer. You set the
DataKeyField
attribute to the
CustomerID
column in the source row set so that you can easily get
the ID of the customer for the current row:
DataKeyField=”CustomerID”
You also specify the names of two event handlers. The routine named
DoItemSelect
will be
executed when any control within the
DataList
control causes a postback, and the routine
named
BindOrdersGrid
will be executed each time a row in the
DataList
control is bound to its
source data:
OnItemCommand=”DoItemSelect”
OnItemDataBound=”BindOrdersGrid”
The
DataList
control declaration uses a header and a footer row to achieve the appearance of the
dark bands above and below the list, with the header containing just the plain text “Customer
List” and the footer containing a nonbreaking space character (
) to preserve the row
height.
4
Working with Nested List Controls
138
LISTING 4.10 Continued
06 0672326744 CH04 5/4/04 12:22 PM Page 138
Please purchase PDF Split-Merge on www.verypdf.com to remove this watermark.
139
A Master/Detail Display with
DataList
and
DataGrid
Controls
In the
<ItemTemplate>
section, you use an
ImageButton
control to generate the drop-down button.
The declaration of the
ImageButton
control sets
CommandName
to
“Select”
; this value is used to
detect whether the
ImageButton
button was clicked when the
ItemCommand
event was raised. You
also specify the image file for the button (in the
images
subfolder of the application root), the
size, and the alternate text that will provide the pop-up ToolTip:
<asp:ImageButton CommandName=”Select”
ImageUrl=”~/images/click-down.gif”
Width=”16” Height=”17” runat=”server”
AlternateText=”Click to view orders” />
The remainder of the
<ItemTemplate>
content is made up of the usual
Container.DataItem
(“column-name”)
data binding statements that display values from the customer row.
The
<SelectedItemTemplate>
section of the
DataList
control declaration comes next. This contains
the content that will only be displayed for the single row that is in selected mode when the
DataList
control is bound to its data source. (If no row is selected, this content will not be
displayed.) In this template, you provide another
ImageButton
control that allows the user to
close the list. You use a different
CommandName
setting this time (
“UnSelect”
), and you use a differ-
ent image and alternate text (see Figure 4.8):
<asp:ImageButton CommandName=”UnSelect”
ImageUrl=”~/images/click-up.gif”
Width=”16” Height=”17” runat=”server”
AlternateText=”Click to hide orders” />
FIGURE 4.8 The buttons to open and close
the lists of orders.
Then, after the same set of
Container.DataItem(“column-name”)
data binding statements as in the
<ItemTemplate>
section (because you want to display the customer details in both modes) comes
the declaration of the nested
DataGrid
control.
The Important Points of the
DataGrid
Control Declaration
The
DataGrid
control that displays the order details for the selected customer is placed in the
<SelectedItemTemplate>
element of the
DataList
control, so it will be generated and displayed
only for the row (if any) that is currently in selected mode.
In the opening tag, you add the attributes that wire up event handlers for the three events you
want to handle: the
EditCommand
event that occurs when an Edit link is clicked, the
UpdateCommand
event that occurs when an Update link is clicked, and the
CancelCommand
event that occurs when
06 0672326744 CH04 5/4/04 12:22 PM Page 139
Please purchase PDF Split-Merge on www.verypdf.com to remove this watermark.
a Cancel link is clicked. You also specify the
OrderID
column from the source row set as the
DataKeyField
value and turn off autogeneration of columns in the
DataGrid
control:
DataKeyField=”OrderID”
OnEditCommand=”DoItemEdit”
OnUpdateCommand=”DoItemUpdate”
OnCancelCommand=”DoItemCancel”
AutoGenerateColumns=”False”
To create the Edit, Update, and Cancel links in each row, you declare the first column within
the
<Columns>
element of the
DataGrid
control as an
<EditCommandColumn>
element. In it, you can
set the text that will be displayed for the three links:
<asp:EditCommandColumn EditText=”Edit”
CancelText=”Cancel” UpdateText=”Update” />
The rest of the columns for the
DataGrid
control are declared either as read-only
BoundColumn
controls like this:
<asp:BoundColumn DataField=”column-name”
HeaderText=”column-heading” ReadOnly=”True” />
or as
<TemplateColumn>
elements that display the value as text when in normal mode or in a
TextBox
control when in edit mode:
<asp:TemplateColumn HeaderText=”Ordered”>
<ItemTemplate>
<%# DataBinder.Eval(Container.DataItem, “OrderDate”, _
“{0:dd MMM yyyy}”) %>
</ItemTemplate>
<EditItemTemplate>
<asp:TextBox Columns=”8” id=”txtOrderDate”
runat=”server”
Text=’<%# DataBinder.Eval(Container.DataItem, _
“OrderDate”, “{0:dd MMM yyyy}”) %>’ />
</EditItemTemplate>
</asp:TemplateColumn>
Populating the
DataList
Control
You’ll recognize much of the code used to populate the
DataList
control and the nested
DataGrid
controls because it is very similar to the code in the previous example, where you populate
4
Working with Nested List Controls
140
06 0672326744 CH04 5/4/04 12:22 PM Page 140
Please purchase PDF Split-Merge on www.verypdf.com to remove this watermark.
141
A Master/Detail Display with
DataList
and
DataGrid
Controls
nested
DataGrid
controls using a
DataReader
instance. However, one major change in this
example is that you are supporting postbacks,
to allow the user to show or hide order details
and edit them.
The first consequence of this, taking into
account the fact that you have enabled view-
state for this page, is that you must be sure to
populate the
DataList
control only when the
page first loads and not following a postback.
Listing 4.11 shows the
Page_Load
event
handler for this example, and it contains the
functions that create the
DataReader
instance
required to provide the data for the
DataList
and
DataGrid
controls. This time, you only
need two row sets—the lists of customers and
orders—and these are provided by the two
functions named
GetCustomers
and
GetOrders
.
Each one uses the same
GetReader
function as
in the previous example to generate the
DataReader
instance and return it.
LISTING 4.11 The
Page_Load
Event Handler and Functions That Generate the Row Sets
from the Database
Sub Page_Load()
If Not Page.IsPostback Then
dtl1.DataSource = GetCustomers()
dtl1.DataBind()
End If
End Sub
Function GetCustomers() As OleDbDataReader
Dim sSelect As String _
= “SELECT CustomerID, CompanyName, City, Country, Phone “ _
& “FROM Customers WHERE CustomerID LIKE ‘c%’”
Return GetReader(sSelect)
End Function
Using Viewstate with List Controls
Not enabling viewstate is a common error
newcomers make when using data binding
and postbacks with the list controls in
ASP.NET. If viewstate is not enabled, the list
control will not maintain its state; there will
be no values in it after a postback. However,
if you repopulate it in the
Page_Load
event
after every postback, the list control may not
behave properly. For example, it may not
display the selected row or raise events on
the server when controls in the grid (such as
the Edit links) are activated. The solution is to
enable viewstate and only populate the list
control in the
Page_Load
event handler the
first time the page is loaded. Afterward, you
repopulate the list control only when you
change a property such as
SelectedIndex
or
EditIndex
, in order to display the rows in the
appropriate modes. And you only do so in the
event handler that handles the mode change,
as you’ll see in this example.
06 0672326744 CH04 5/4/04 12:22 PM Page 141
Please purchase PDF Split-Merge on www.verypdf.com to remove this watermark.
Function GetOrders(sKey As String) As OleDbDataReader
Dim sSelect As String _
= “SELECT Orders.OrderID, Orders.OrderDate, “ _
& “Orders.RequiredDate, Orders.ShippedDate, Orders.Freight, “ _
& “Shippers.CompanyName As ShipperName “ _
& “FROM Orders JOIN Shippers “ _
& “ON Orders.ShipVia = Shippers.ShipperID “ _
& “WHERE CustomerID=’” & sKey & “‘“
Return GetReader(sSelect)
End Function
Function GetReader(sSQL As String) As OleDbDataReader
‘ get DataReader for rows from Northwind tables
Dim sConnect As String _
= ConfigurationSettings.AppSettings(“NorthwindOleDbConnectString”)
Dim oConnect As New OleDbConnection(sConnect)
Try
oConnect.Open()
Dim oCommand As New OleDbCommand(sSQL, oConnect)
Return oCommand.ExecuteReader(CommandBehavior.CloseConnection)
Catch oErr As Exception
‘ be sure to close connection if error occurs
If oConnect.State <> ConnectionState.Closed Then
oConnect.Close()
End If
‘ display error message in page
lblErr.Text = oErr.Message & “<p />”
End Try
End Function
4
Working with Nested List Controls
142
LISTING 4.11 Continued
06 0672326744 CH04 5/4/04 12:22 PM Page 142
Please purchase PDF Split-Merge on www.verypdf.com to remove this watermark.
143
A Master/Detail Display with
DataList
and
DataGrid
Controls
Populating the
DataGrid
Control
As each row in the
DataList
control is bound to its source data, the
ItemDataBound
event is raised.
This causes the
BindOrdersGrid
event handler that you specified for the
OnItemDataBound
attribute
of the
DataList
control to execute. Listing 4.12 shows the
BindOrdersGrid
event handler, and you
can see that the first task is (as usual) to examine the row type.
However, in this case, the nested
DataGrid
control will exist only if the current row in
the
DataList
control is in selected mode, so you check to see whether the row type is
ListItemType.SelectedItem
. If it is, you get the customer ID from the
DataKeys
collection, get a
reference to the nested
DataGrid
control in this row, and then bind the
DataGrid
control to the
result of the
GetOrders
function shown in Listing 4.11. The customer ID is passed to the
GetOrders
function so that it returns only the order rows for the current customer.
LISTING 4.12 The
BindOrdersGrid
Event Handler for the
ItemDataBound
Event
Sub BindOrdersGrid(sender As Object, e As DataListItemEventArgs)
‘ see what type of row (header, footer, item, etc.) caused the event
Dim oType As ListItemType = CType(e.Item.ItemType, ListItemType)
‘ only process it if it’s the Selected row
If oType = ListItemType.SelectedItem Then
‘ get value of CustomerID for this row from DataKeys collection
Dim sKey As String = dtl1.DataKeys(e.Item.ItemIndex)
‘ get a reference to the DataGrid control in this row
Dim oGrid As DataGrid = CType(e.Item.FindControl(“dgr1”), DataGrid)
‘ bind nested “orders” DataGrid to DataReader
oGrid.DataSource = GetOrders(sKey)
oGrid.DataBind()
End If
End Sub
Selecting a Row in the
DataList
Control
You’ve seen how the nested
DataGrid
control is populated for the row that is in selected mode.
To put the row into this mode, you handle the
ItemCommand
event of the
DataList
control. Recall
that you included the attribute
OnItemCommand=”DoItemSelect”
in the declaration of the
DataList
control, so any postback that is initiated by a control within the
DataList
control will raise the
ItemCommand
event and execute the
DoItemSelect
event handler routine.
06 0672326744 CH04 5/4/04 12:22 PM Page 143
Please purchase PDF Split-Merge on www.verypdf.com to remove this watermark.
Listing 4.13 shows the
DoItemSelect
event handler. The first step is to determine which control
caused the postback, and you do this by examining the
CommandName
property of the control
referenced by the sender argument passed to the event handler. You set this property on the two
ImageButton
controls that display the up and down images in the first column of the
DataList
control.
LISTING 4.13 The Event Handler for the
ItemCommand
Event of the
DataList
Control
Sub DoItemSelect(sender As Object, e As DataListCommandEventArgs)
‘ see if it was the Select button that was clicked
If e.CommandName = “Select” Then
‘ set the SelectedIndex property of the list to this item’s index
dtl1.SelectedIndex = e.Item.ItemIndex
dtl1.DataSource = GetCustomers()
dtl1.DataBind()
End If
‘ see if it was the Un-Select button that was clicked
If e.CommandName = “UnSelect” Then
‘ set the SelectedIndex property of the list to -1
dtl1.SelectedIndex = -1
dtl1.DataSource = GetCustomers()
dtl1.DataBind()
End If
End Sub
If the down image was clicked (
CommandName=”Select”
), you want to put that row into selected
mode by setting the
SelectedIndex
property of the
DataList
control to the index of the row. You
get the index of the current row from the
ItemIndex
property of the current
DataListItem
instance, set the
SelectedIndex
property, and then repopulate the
DataList
control. The control
will automatically display the current row in selected mode by using the contents of the
<SelectedItemTemplate>
element instead of the
<ItemTemplate>
element.
Alternatively, if the
CommandName
property of the control that caused the postback is set to
“UnSelect”
, you know that the user clicked the up button in this row. In this case, you just set
the
SelectedIndex
property to
-1
and repopulate the
DataList
control to display all the rows in
normal mode.
4
Working with Nested List Controls
144
06 0672326744 CH04 5/4/04 12:22 PM Page 144
Please purchase PDF Split-Merge on www.verypdf.com to remove this watermark.
145
A Master/Detail Display with
DataList
and
DataGrid
Controls
Editing a Row in the
DataGrid
Control
If a row in the
DataList
control is in selected
mode, the
DataGrid
control that displays the
orders for the selected customer is visible. The
first column of this
DataGrid
control contains
the three links, Edit, Update, and Cancel,
depending on whether that
DataGrid
control
row is currently in edit mode. So you have to
handle three events that can be raised by the
DataGrid
control. You specified the event
handlers as attributes when you declared the
DataGrid
control:
OnEditCommand=”DoItemEdit”
OnUpdateCommand=”DoItemUpdate”
OnCancelCommand=”DoItemCancel”
The event handlers for the
EditCommand
event,
named
DoItemEdit
, and the
CancelCommand
event, named
DoItemCancel
, are shown in Listing 4.14.
The one issue you have to contend with is that the
DataGrid
control is nested within one of the
rows of the parent
DataList
control. So to get a reference to it, you can search for it within the
Controls
collection of the row in the
DataList
control that is currently selected.
LISTING 4.14 The Event Handlers for Switching Into and Out of Edit Mode
Function GetDataGridRef() As DataGrid
‘ get a reference to the DataGrid in the selected DataList row
Dim oRow As DataListItem = dtl1.Items(dtl1.SelectedIndex)
Return CType(oRow.FindControl(“dgr1”), DataGrid)
End Function
Sub DoItemEdit(sender As Object, e As DataGridCommandEventArgs)
‘ get a reference to the DataGrid control in this row
Dim oGrid As DataGrid = GetDataGridRef()
‘ set the EditItemIndex of the grid to this item’s index
oGrid.EditItemIndex = e.Item.ItemIndex
‘ bind grid to display row in new mode
‘ get CustomerID from the DataKeys collection of the DataList
Accessing the Controls in a Row in the
DataList
Control
Each row in a
DataList
control is repre-
sented by a
DataListItem
instance in the
DataListCommandEventArgs
object that is
passed to the
ItemDataBound
and
ItemCreated
event handlers. The
DataListItem
object is very similar to the
DataGridItem
object discussed earlier in this
chapter. It has the same commonly used
members shown in Table 4.1 for the
DataGridItem
object, with the exception of
the
DataSetIndex
property and the
Cells
collection (because the individual values in a
DataList
control are not output as HTML
table cells). Likewise, the individual rows in a
Repeater
control are represented by the
RepeaterItem
object, which provides a
slightly more restricted set of properties.
06 0672326744 CH04 5/4/04 12:22 PM Page 145
Please purchase PDF Split-Merge on www.verypdf.com to remove this watermark.
oGrid.DataSource = GetOrders(dtl1.DataKeys(dtl1.SelectedIndex))
oGrid.DataBind()
End Sub
Sub DoItemCancel(sender As Object, e As DataGridCommandEventArgs)
‘ get a reference to the DataGrid control in this row
Dim oGrid As DataGrid = GetDataGridRef()
‘ set EditItemIndex of grid to -1 to switch out of Edit mode
oGrid.EditItemIndex = -1
‘ bind grid to display row in new mode
‘ get CustomerID from the DataKeys collection of the DataList
oGrid.DataSource = GetOrders(dtl1.DataKeys(dtl1.SelectedIndex))
oGrid.DataBind()
End Sub
The function named
GetDataGridRef
shown at the start of Listing 4.14 does this by first getting a
reference to the
DataListItem
object that represents the selected row in the
DataList
control,
using the current
SelectedIndex
property of the
DataList
control to locate it. You know that one
row must be selected; otherwise, the
DataGrid
control would not be visible and the user could
not have clicked the Edit link or the Cancel link. Then you can use the
FindControl
method
exposed by the selected
DataListItem
object to locate the
DataGrid
control.
Then, in the
DoItemEdit
routine, you can use
the
GetDataGridRef
function to get a reference
to the
DataGrid
control and set
EditItemIndex
to the index of the row containing the Edit
link that was clicked. To display the grid with
this row in edit mode, you repopulate it,
using the
GetOrders
routine shown in Listing
4.11. This requires the ID of the currently
selected customer, and you can get that easily
enough from the
DataList
control’s
DataKeys
collection—by specifying the current
SelectedIndex
value of the
DataList
control as
the row index for the
DataKeys
collection.
To switch the row out of edit mode when the
user clicks the Cancel link, you just get a
4
Working with Nested List Controls
146
LISTING 4.14 Continued
Using the Sender Argument As a
Reference to the Source Control
You may have realized that there is a simpler
approach to getting a reference to the nested
DataGrid
control than is used in this
example. In fact, you saw the alternative
technique in previous examples in this
chapter. You can use the sender argument
passed to the event handler instead; this
argument is, of course, a reference to the
control that raised the event. However, the
function provided in this example is intended
to demonstrate another way that you can
achieve the same result, and it may come in
handy in other situations.
06 0672326744 CH04 5/4/04 12:22 PM Page 146
Please purchase PDF Split-Merge on www.verypdf.com to remove this watermark.
147
A Master/Detail Display with
DataList
and
DataGrid
Controls
reference to the
DataGrid
control (again using
the
GetDataGridRef
function), set
EditItemIndex
to
-1
, and repopulate the grid.
The remaining event handler, named
DoItemUpdate
, is executed when the user clicks
the Update link after changing some values in
the text boxes within the grid. This is a more
complicated routine, although much of the
code is concerned with trapping data input
errors.
Listing 4.15 shows the complete event handler, and you can see that the first task is to get a
reference to the
DataGrid
control. Then you can get references to each of the
TextBox
controls in
the row by using the
FindControl
method of the current
DataGridItem
instance.
LISTING 4.15 The Event Handler for the
UpdateCommand
Event of the
DataGrid
Control
Sub DoItemUpdate(sender As Object, e As DataGridCommandEventArgs)
‘ get a reference to the DataGrid control in this row
Dim oGrid As DataGrid = GetDataGridRef()
‘ get a reference to the text boxes
Dim oOrdered As TextBox _
= CType(e.Item.FindControl(“txtOrderDate”), TextBox)
Dim oRequired As TextBox _
= CType(e.Item.FindControl(“txtRequiredDate”), TextBox)
Dim oShipped As TextBox _
= CType(e.Item.FindControl(“txtShippedDate”), TextBox)
Dim oFreight As TextBox _
= CType(e.Item.FindControl(“txtFreight”), TextBox)
‘ verify that the values are valid
Dim dOrderDate, dRequDate, dShipDate As DateTime
Dim cFreight As Decimal
Try
dOrderDate = DateTime.Parse(oOrdered.Text)
Catch
lblErr.Text = “ERROR: Invalid value entered for Order Date”
Exit Sub
End Try
Try
dRequDate = DateTime.Parse(oRequired.Text)
Catch
lblErr.Text = “ERROR: Invalid value entered for Required Date”
Exit Sub
Using the
UpdateCommand
Event
Notice that you don’t have to worry about what
type of row you’re dealing with here, as you do
when handling the
ItemDataBound
and
ItemCreated
events. The
UpdateCommand
event is only raised for the row that is already
in edit mode, so you know that the controls
defined in the
<EditItemTemplate>
section
will be present in this row.
06 0672326744 CH04 5/4/04 12:22 PM Page 147
Please purchase PDF Split-Merge on www.verypdf.com to remove this watermark.
End Try
Try
dShipDate = DateTime.Parse(oShipped.Text)
Catch
lblErr.Text = “ERROR: Invalid value entered for Shipped Date”
Exit Sub
End Try
Try
cFreight = Decimal.Parse(oFreight.Text)
Catch
lblErr.Text = “ERROR: Invalid value entered for Freight Cost”
Exit Sub
End Try
‘ create a suitable SQL statement and execute it
Dim sSQL As String
sSQL = “UPDATE Orders SET OrderDate=’” _
& dOrderDate.ToString(“yyyy-MM-dd”) & “‘, “ _
& “RequiredDate=’” _
& dRequDate.ToString(“yyyy-MM-dd”) & “‘, “ _
& “ShippedDate=’” _
& dShipDate.ToString(“yyyy-MM-dd”) & “‘, “ _
& “Freight=” & cFreight.ToString() & “ “ _
& “WHERE OrderID=” & oGrid.DataKeys(e.Item.ItemIndex)
ExecuteSQLStatement(sSQL)
‘ set EditItemIndex of grid to -1 to switch out of Edit mode
oGrid.EditItemIndex = -1
‘ bind grid to display row in new mode
‘ get CustomerID from the DataKeys collection of the DataList
oGrid.DataSource = GetOrders(dtl1.DataKeys(dtl1.SelectedIndex))
oGrid.DataBind()
End Sub
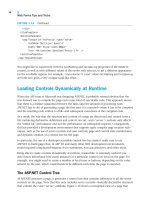
The code in Listing 4.15 extracts the values from the four
TextBox
controls, using a
Try...Catch
construct to detect invalid values and catch errors. If an invalid data type conversion occurs for
the
Parse
method, the
Catch
section of each construct displays the error message in a
Label
control located above the
DataList
control in the page and prevents further processing by
exiting from the event handler routine. Figure 4.9 shows the result when an invalid value is
detected.
4
Working with Nested List Controls
148
LISTING 4.15 Continued
06 0672326744 CH04 5/4/04 12:22 PM Page 148
Please purchase PDF Split-Merge on www.verypdf.com to remove this watermark.
149
A Master/Detail Display with
DataList
and
DataGrid
Controls
Next, the routine builds up a SQL statement. It uses the values from the
TextBox
controls,
together with the current order ID extracted from the
DataKeys
collection of the current
DataGrid
control. This SQL statement is passed to a separate routine named
ExecuteSQLStatement
, which
we’ll look at shortly. Of course, you could use a stored procedure to update the database if
preferred.
Finally, you switch the current row in the
DataGrid
control out of edit mode and repop-
ulate it to display the updated values.
Updating the Original Data in
the Database
The final section of code in the sample page
is the
ExecuteSQLStatement
routine, shown in
Listing 4.16. There’s nothing new or exciting
here: You just create a
Connection
instance and
a
Command
instance, open the
Connection
instance, and execute the SQL statement by
calling the
ExecuteNonQuery
method. If it
doesn’t update just one row, or if an error
occurs, you display a suitable error message.
LISTING 4.16 The Routine to Push the Updates Back into the Database
Sub ExecuteSQLStatement(sSQL)
‘ execute SQL statement against the original data source
Dim sConnect As String = ConfigurationSettings.AppSettings( _
“NorthwindOleDbConnectString”)
FIGURE 4.9
Catching data entry errors and
invalid values in the master/detail
sample page.
Concurrent Update Checking
Notice that you don’t perform full concurrent
update error checking here. If the data is
updated by another user while the page is
displayed, the second user’s changes will be
overwritten. To avoid this, you would have to
check the existing value in every column of
the row in the database against its original
value when the page was first displayed. This
is easier to do when the data you use to
populate the page is held in a
DataSet
instance. With a
DataReader
instance (as in
this example), you would probably decide to
store the original values in hidden controls in
the row that is in edit mode or use a time-
stamp or GUID column in the database that
indicates whether the row has been changed
concurrently.
06 0672326744 CH04 5/4/04 12:22 PM Page 149
Please purchase PDF Split-Merge on www.verypdf.com to remove this watermark.
Dim oConnect As New OleDbConnection(sConnect)
Try
oConnect.Open()
Dim oCommand As New OleDbCommand(sSQL, oConnect)
If oCommand.ExecuteNonQuery() <> 1 Then
lblErr.Text &= “ERROR: Could not update the selected row”
End If
oConnect.Close()
Catch oErr As Exception
‘ be sure to close connection if error occurs
If oConnect.State <> ConnectionState.Closed Then
oConnect.Close()
End If
‘ display error message in page
lblErr.Text &= “ERROR: “ & oErr.Message & “<p />”
End Try
End Sub
Summary
The topic covered in this chapter is quite narrow, focusing only on the use of nested list
controls in ASP.NET pages. However, as you’ve seen, there are plenty of issues to understand,
several interesting problems to solve, and a great many options for how to go about the process.
This chapter describes how to use a
DataSet
instance or a
DataReader
instance and discusses the
performance implications. It also shows how you can perform the binding declaratively to a
function or by handling the
ItemDataBound
event and generating the row set you need that way.
And, as mentioned previously, you can mix and match the techniques and the data sources in
almost any combination to achieve the desired end result.
As well as addressing four basic techniques, this chapter looks at the nature of the objects that
are available in the event handlers, such as the
DataGridItem
and
DataListItem
objects. It is vital
that you understand what they offer and how to get the most from them. When you nest list
controls, which event is being raised and how to handle it can quickly become confusing.
4
Working with Nested List Controls
150
LISTING 4.16 Continued
06 0672326744 CH04 5/4/04 12:22 PM Page 150
Please purchase PDF Split-Merge on www.verypdf.com to remove this watermark.
151
Summary
One issue that is mentioned a couple times in this chapter and that often causes problems as
you develop pages that use complex combinations of list controls is that you must be sure your
event handlers test what type of row they are handling. Bear in mind that the
FindControl
method cannot detect errors in your code at compile time because it only searches for controls
at runtime and silently returns
null
(
Nothing
in Visual Basic .NET) if it can’t find the control it’s
looking for. The result is a runtime error that can be hard to track down.
This chapter finishes up with a look at how a combination of list controls, in this case a
DataList
control and a
DataGrid
control, can be used to build collapsible master/detail pages with
very little effort. And, along the way, this chapter discusses more ways for detecting the source
of events and postbacks and managing the edit process inside a list control.
06 0672326744 CH04 5/4/04 12:22 PM Page 151
Please purchase PDF Split-Merge on www.verypdf.com to remove this watermark.
06 0672326744 CH04 5/4/04 12:22 PM Page 152
Please purchase PDF Split-Merge on www.verypdf.com to remove this watermark.
PART II
Reusability
5 Creating Reusable Content
6 Client-Side Script Integration
7 Design Issues for User Controls
8 Building Adaptive Controls
9 Page Templates
07 0672326744 Pt 2 5/4/04 12:24 PM Page 153
Please purchase PDF Split-Merge on www.verypdf.com to remove this watermark.
07 0672326744 Pt 2 5/4/04 12:24 PM Page 154
Please purchase PDF Split-Merge on www.verypdf.com to remove this watermark.
5
Creating
Reusable
Content
A
lthough the general public’s view of
computer programmers as a breed apart
might be less than complimentary, we are
really no different from any other people
when it comes to having a hatred of dull,
repetitive work. When writing code, experi-
enced programmers are constantly on the
lookout for ways to encapsulate chunks that
are reusable and save the effort of having to
write the same code repeatedly. Subroutines
and functions are obvious examples of ways
to do this within a single application;
components, DLLs, and .NET assemblies
provide the same kind of opportunities
across different applications.
However, when building Web pages and
Web-based interfaces for your applications,
it can be difficult to choose the obvious or
the most efficient approach for creating
reusable content. Traditional techniques
have been to read from disk-based template
files and to use disk-based include files that
rely on the server-side include feature of
most Web server systems.
Of course, the use of external code in the
form of COM or COM+ components, and in
ASP.NET, the use of .NET assemblies, is also
prevalent in Web pages. However, the
complexity of the plumbing between
IN THIS CHAPTER
Techniques for Creating Reusable
Content 156
Building a
ComboBox
User Control 169
Using the
ComboBox
Control 189
Populating the
ComboBox
Control 194
BEST PRACTICE:
Editing the Connection String 194
Summary 196
08 0672326744 CH05 5/4/04 12:26 PM Page 155
Please purchase PDF Split-Merge on www.verypdf.com to remove this watermark.
COM/COM+ components and the host application has never really been an ideal approach
when working with Web pages that have extremely short transitory lifetimes on the server.
These components work much better when instantiated within an executable application where
they have a longer lifetime.
In ASP.NET, the ideal solution from a component point of view is to use native .NET managed
code assemblies. These are, of course, the building blocks of ASP.NET itself, and they provide the
classes that implement all the ASP.NET controls we use in our pages. However, the .NET
Framework provides several techniques that are extremely useful and efficient and that can
provide high levels of reuse for interface declarations and runtime code.
Techniques for Creating Reusable Content
Before delving too deeply into any of the specific techniques for creating reusable content, we’ll
briefly summarize those that are commonly used within ASP.NET Web applications:
n
Server-side include files
n
ASP.NET user controls
n
Custom master page and templating techniques
n
ASP.NET server controls built as .NET assemblies
n
Using COM or COM+ components via COM Interop
Server-Side Include Files
Many people shun the use of server-side includes in ASP.NET, preferring to take advantage of
one of the newer and flashier techniques that are now available (such as user controls, server
controls, and custom templating methods). However, server-side includes are just as useful in
ASP.NET as they are in “classic” ASP. They are also more efficient than in ASP because ASP.NET
pages are compiled into an assembly the first
time they are referenced, and this assembly is
then cached and reused automatically until
the source changes.
As long as none of the files on which an
assembly is dependent change (this applies to
things like other assemblies and user controls
as well as to server-side include files), the
page will not be recompiled. This means that
the include process will be required only the
first time the ASP.NET page is referenced, and
it will not run again until recompilation is
required. The content of the include file
becomes just a part of the assembly.
5
Creating Reusable Content
156
Using Server-Side Include Files to Insert
Code Functions
Remember that you aren’t limited to just
using text and HTML in a server-side include
file. You can place client-side and server-side
code into it and, in fact, you can put in it any
content that you can use in an ASP.NET page.
This means you can, for example, place just
code routines into a server-side include file
and then call those functions and subroutines
from other code in the main hosting page, or
you can even call them directly from control
events. However, you can only include files
that are located within the same virtual appli-
cation as the hosting page.
08 0672326744 CH05 5/4/04 12:26 PM Page 156
Please purchase PDF Split-Merge on www.verypdf.com to remove this watermark.
157
Techniques for Creating Reusable Content
Of course, the same include file is likely to be used in more than one page. Any change to that
file will therefore cause all the assemblies that depend on it to be recompiled the next time they
are referenced. This makes include files extremely useful for items of text or declarative HTML
that are reused on many pages but that change rarely. An example is a page footer containing
the Webmaster’s contact details and your copyright statement.
Including Dynamic Text Files in an ASP.NET Page
Another area where server-side include files are useful is where you have some dynamically
generated text or HTML content that you want to include in a Web page.
One particular example we use ourselves is to remotely monitor the output generated by a
custom application that executes on the Web server. It generates a disk-based log file as it runs
and allows the name and location of the log file to be specified. We place the log file in a folder
that is configured as a virtual Web application root and then insert it into an empty ASP.NET
page by using a server-side include statement (see Listing 5.1).
LISTING 5.1 Including a Log File in an ASP.NET Page
<%@Page Language=”VB” %>
<html>
<body>
<pre>
<!-- #include file=”myappruntime.log” -->
</pre>
</body>
</html>
Downsides of the Server-Side Include Technique
Although server-side includes are useful, there are at least a couple issues to be aware of with
them. The first is one that has long annoyed users of classic ASP. The filename and path of the
include file cannot be accessed or changed dynamically as the page executes. This is because the
#include
directive is processed before ASP.NET gets to see the page. You can’t decide, for
example, which file to include at runtime.
However, you can change the content of the section of the page that is generated from a server-
side include file at runtime by including ASP.NET control declarations within the file and setting
the properties of these controls at runtime. For example, if the include file contains the code
shown in Listing 5.2, you can make the Webmaster’s email address visible or hide it by setting
the
Visible
property of the
Panel
control at runtime, as shown in Listing 5.3.
LISTING 5.2 Server-Side Include Files Containing ASP.NET Server Controls
©2004 Yoursite.com - no content reproduction without permission
<asp:Panel id=”WebmasterPanel” runat=”server”>
<a href=”mailto:”></a>
</asp:Panel>
08 0672326744 CH05 5/4/04 12:26 PM Page 157
Please purchase PDF Split-Merge on www.verypdf.com to remove this watermark.