Tài liệu PHP and script.aculo.us Web 2.0 Application Interfaces- P2 pptx
Bạn đang xem bản rút gọn của tài liệu. Xem và tải ngay bản đầy đủ của tài liệu tại đây (1.21 MB, 30 trang )
Chapter 2
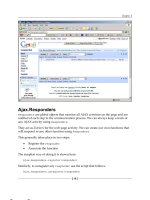
Ajax.Responders
Responders are global objects that monitor all AJAX activities on the page and are
notified of each step in the communication process. We can always keep a track of
any AJAX activity using Responders.
They act as listeners for the web page activity. We can create our own functions that
will respond to any other function using Responders.
This generally takes place in two steps:
•
Register the responder
•
Associate the function
The simplest way of doing it is shown here:
Ajax.Responders.register(responder)
Similarly, to unregister any responder use the script that follows:
Ajax.Responders.unregister(responder)
[ 19 ]
This material is copyright and is licensed for the sole use by Richard Ostheimer on 18th June 2009
Please purchase PDF Split-Merge
2205 hilda
on www.verypdf.com
ave., , missoula, , 59801to remove this watermark.
Exploring Client-side Techniques with Prototype
Now, let's quickly look at a simple example of how we can use Responders in
web applications.
Ajax.Responders.register({
onCreate:callsomeFunction,
onComplete: RemoveFunction
});
This means whenever an AJAX request is created, our Responders will automatically
call the function callsomeFunction and once that particular request is completed,
we will call RemoveFunction.
We have understood all the three major objects provided by Prototype for adding
AJAX to our web applications. Here's a quick look at the terms that we should
always keep in mind:
•
Ajax.Request: This helps and supports the communication between the
•
Ajax.Updater or Ajax.PeriodcialUpdater: This helps in updating specific
parts of the web page without refreshing the whole page
•
Ajax.Responders: This helps in responding or reacting to other functions
inside the web page when triggered using AJAX calls
server and the client while taking care of cross-browser handling
Hands-on examples
Enough said! Now let's see something working. Working code is not only an
inspiration, but a motivation too.
Username availability script using Ajax.Request
Talking about dynamic web sites and not mentioning username scripts doesn't
sound good. So, let's hack a simple Ajax.Request script. (And yes, once it is done,
don't forget to impress your friends.)
Let's fire up our browser and see the application module.
type="text/javascript"
type="text/javascript"
type="text/javascript"
type="text/javascript"
src="prototype.js"></script>
src="Scripts.js"></script>
src="src/scriptaculous.js"></script>
src="src/effects.js"></script>
<link rel="stylesheet" href="style.css" >
<head>
<title>Check Username Script</title>
</head>
<body onload="JavaScript:init();">
[ 20 ]
This material is copyright and is licensed for the sole use by Richard Ostheimer on 18th June 2009
Please purchase PDF Split-Merge
2205 hilda
on www.verypdf.com
ave., , missoula, , 59801to remove this watermark.
Chapter 2
<form class="login-form">
Username:onblur="CheckUsername();">
<div class="yes" id="yes">
Username Available
</div>
<div class="no" id="no">
Username NOT Available
</div>
Password: <input type="text" name="password" id="password">
<input type="submit" name="submit" value="Join" id="password">
</form>
</body>
</html>
It creates a simple user interface layout for us.
We are also creating two <div>s to hold and show data whether a username is
available or not. The <div>s are hidden in the web page using the init() function
on load.
Let's add some spicy JavaScript to this code and make it more interactive.
function init() {
$('no').style.display='none';
$('yes').style.display='none';
}
function CheckUsername() {
var pars = 'username='+$F('username');
var url = 'checkusername.php';
new Ajax.Request(url, {
method: 'get',
parameters:pars,
onSuccess: showResult,
onFailure:showError
});
}
function showError() {
alert("Something Went Wrong");
}
function showResult(ServerResponse) {
var response = ServerResponse.responseText;
if(response=="available"){
[ 21 ]
This material is copyright and is licensed for the sole use by Richard Ostheimer on 18th June 2009
Please purchase PDF Split-Merge
2205 hilda
on www.verypdf.com
ave., , missoula, , 59801to remove this watermark.
Exploring Client-side Techniques with Prototype
$('no').style.display='none';
$('yes').style.display='';
}
else {
$('no').style.display='';
$('yes').style.display='none';
}
}
Now, let's see the application module.
We also create a simple server URL called checkusername.php.
$usernames = array('sam', 'me', 'prototype', 'sri');
if(in_array($_GET['username'], $usernames))
echo 'unavailable';
else
echo 'available';
?>
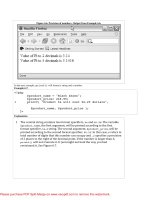
That's pretty much the simplest way of checking the username. ��������������������
The important thing
to note here is that we are using the Ajax.Request object for this example�.
When you try to enter the data that is already present in the array, you will get a
message as shown in the following screenshot:
[ 22 ]
This material is copyright and is licensed for the sole use by Richard Ostheimer on 18th June 2009
Please purchase PDF Split-Merge
2205 hilda
on www.verypdf.com
ave., , missoula, , 59801to remove this watermark.
Chapter 2
Display username availability script using Ajax.Updater
We have seen how we can implement the username-checking script
using Ajax.Request.
Maybe it's now a good idea to implement the same using Ajax.Updater.
For this example, the scripts and the code would also be on the similar lines but with
a little variation.
Let's explore some new ways.
<script type="text/javascript" src="prototype.js"></script>
<script type="text/javascript" src="Scripts.js"></script>
<script type="text/javascript" src="src/scriptaculous.js"></script>
<script type="text/javascript" src="src/effects.js"></script>
<link rel="stylesheet" href="style.css" >
<head>
<title>Check Username Script</title>
</head>
<body>
<form class="login-form">
Username:onblur="CheckUsername();">
<div class="result" id="result" ></div>
Password: <input type="text" name="password" id="password">
<input type="submit" name="submit" value="Join" id="password">
</form>
</body>
</html>
As you can see, we have removed the <div>s for each response and have introduced
only a single result <div> that would generate our response from server.
The server-side script file checkusername.php remains the same for this example.
After all, we are playing with the client-end scripts, right?
OK, so here are the modifications we need to do for the JavaScript code:
function CheckUsername() {
var pars = 'username='+$F('username');
var url = 'checkusername.php';
new Ajax.Updater('result','checkusername.php', {
method: 'get',
[ 23 ]
This material is copyright and is licensed for the sole use by Richard Ostheimer on 18th June 2009
Please purchase PDF Split-Merge
2205 hilda
on www.verypdf.com
ave., , missoula, , 59801to remove this watermark.
Exploring Client-side Techniques with Prototype
parameters:pars
});
}
function showError() {
alert("Something Went Wrong");
}
We are passing the result <div> as a container that would store the result sent by
the server.
Finally, it's time to see the application up and running.
If the Username is already in use, the message will be displayed. Check out the
following screenshot:
[ 24 ]
This material is copyright and is licensed for the sole use by Richard Ostheimer on 18th June 2009
Please purchase PDF Split-Merge
2205 hilda
on www.verypdf.com
ave., , missoula, , 59801to remove this watermark.
Chapter 2
Event handling
We may find ourselves typing some of the code repetitively. That's where Prototype
comes in handy for us.
Simple utility functions, a clean way of reading values, adding elements on the fly
just about anything and everything can be handled by Prototype—and you thought
magicians were rare.
Description
Events are a core part of web applications. Another way of saying this could be
Events talk to our users on behalf of us. They interact, and hence are close to users.
Let's explore the power of events and of course the ease with which we can use
them, using Prototype. By using events, we can handle a lot of functionality at the
client end rather than making it heavily dependent on the server-side scripts.
Let's quickly dive into the methods supported by Prototype for handling Events. We
have divided them into three basic categories for easy understanding.
•
•
•
Handling general events
Handling mouse events
Handling keyboard events
Handling general events
Handling general events becomes easy using the following methods:
•
Element: This returns the DOM element on which the event occurred.
•
Extend: Developers are given the freedom to create and extend the
Events.Methods class.
•
findElement: This helps us in finding the element with a specific tag name.
•
Observe: This method helps in registering an element for event handling.
•
•
•
For example, if a particular link was registered, we would be able to trace
how many times it was clicked on, and so on.
Stop: We have control over the flow of events. We can stop the events action
by calling this method.
StopObserving: Like we registered an event to observe, we can also
unregister it by calling the StopObserving method.
unloadedCache: If you are using Prototype versions less than 1.6, you will
not find this. But for those of you working with versions above 1.6, it's
already there.
[ 25 ]
This material is copyright and is licensed for the sole use by Richard Ostheimer on 18th June 2009
Please purchase PDF Split-Merge
2205 hilda
on www.verypdf.com
ave., , missoula, , 59801to remove this watermark.
Exploring Client-side Techniques with Prototype
Syntax
The basic syntax for working with events would be like this:
Event.observe(element, name, observer);
We will now define the observe method for the event on an element when it
is clicked.
Event.observe('ElementID', 'click', function(event)
{ alert('Element Was Clicked');});
Simple? OK, let's try some more examples with key press and mouse events:
Event.observe('ElementID', 'keypress', function(event)
{ alert('Key Was Pressed');});
Event.observe('ElementID', 'mousemove', function(event)
{ alert('clicked!');});
What if we were to handle the onload function in the window? You think it is
tough? No, it is not.
Event.observe(window, 'onload', function(event){ alert('Loaded');});
Now, what if we wanted to stop some particular event? This is simple too.
Event.stop(event);
Having spoken about the events, now let's find the element on which the event
occurred. Interesting? It sure is.
var myElement = Event.element(e);
Handling mouse events
Dealing with the mouse becomes painless with these methods:
•
PointerX: It returns the horizontal position of the mouse event
•
PointerY: It returns the vertical position of the mouse event
•
isLeftClick: It is self-explanatory; returns with the left-click of the mouse
Handling keyboard events
Prototype has native support for the following keyboard event handlers. All these
are pretty straightforward. We handle key-press events and detect which of these
events were fired.
•
Event.KEY_BACKSPACE
•
Event.KEY_TAB
[ 26 ]
This material is copyright and is licensed for the sole use by Richard Ostheimer on 18th June 2009
Please purchase PDF Split-Merge
2205 hilda
on www.verypdf.com
ave., , missoula, , 59801to remove this watermark.
Chapter 2
•
Event.KEY_RETURN
•
Event.KEY_ESC
•
Event.KEY_LEFT
•
Event.KEY_UP
•
Event.KEY_RIGHT
•
Event.KEY_DOWN
•
Event.KEY_DELETE
•
Event.KEY_HOME
•
Event.KEY_END
•
Event.KEY_PAGEUP
•
Event.KEY_PAGEDOWN
•
Event.KEY_INSERT
So now let's look at how we can use these events in our application. A simple basic
syntax will look like the code shown here:
$(element).observe('keyup',function);
A quick example can be written as follows:
<input type="text" id="ourElement" />
<script type="text/javascript">
$('ourElement').observe('keyup',onKeyUp);
Function onKeyUp(e) {
If(e.keyCode==Event.KEY_RIGHT)
{
alert("Well, you pressed the RIGHT key button");
}
}
</script>
Now that you have got a clear picture on how we can use the keyboard events, try
out the rest of the keyboard events. I will give you a simple example about the same
in the next chapter.
Hands-on examples
In this section we will try out hands-on exercises related to keyboard and mouse
events handling using Prototype.
[ 27 ]
This material is copyright and is licensed for the sole use by Richard Ostheimer on 18th June 2009
Please purchase PDF Split-Merge
2205 hilda
on www.verypdf.com
ave., , missoula, , 59801to remove this watermark.
Exploring Client-side Techniques with Prototype
Handling the keyboard events example
Let's see how the following piece of code, involving events handling, will look like
when we fire it in a browser:
<html>
<head>
<title> determining which key was pressed</title>
<script type="text/JavaScript" src="prototype.js"></script>
</head>
<body>
<div>
<input type="text" id="myelement" />
</div>
<script type="text/javascript">
function onKeyup(e) {
var element = Event.element(e);
if(e.keycode == Event.ESC) {
alert("Clicked");
}
}
$('myelement').observe('keyup', onKeyup);
</script>
</body>
</html>
We invoked a simple function, onKeyup, whenever you press a key in the input
textbox. We are comparing the keycode of the entered input with the keyboard
events. If the condition is satisfied, we display an alert for that.
[ 28 ]
This material is copyright and is licensed for the sole use by Richard Ostheimer on 18th June 2009
Please purchase PDF Split-Merge
2205 hilda
on www.verypdf.com
ave., , missoula, , 59801to remove this watermark.
Chapter 2
Handling mouse event example
This is a simple example, but it's important for us to understand how it works, as we
will explore the drag and drop feature of script.aculo.us later. So here we go.
Let's take a pretty straightforward approach. We create a region or a simple term
<div>, which acts as an area in which we read the coordinates when the mouse
enters. When the mouse is rolled over it, we display the change of coordinates.
<html>
<head>
<title>X and Y coordinates of the mouse</title>
<script type="text/javascript" src="prototype.js"></script>
</head>
<body>
<div id="myMouse">
Dare You Drag The Mouse Here!!!!!
</div>
<script type="text/javascript">
function onMouseMove(e)
{
var element = Event.element(e);
element.update(Event.pointerX(e) + 'x'
+ Event.pointerY(e));
}
$('myMouse').observe('mousemove', onMouseMove);
</script>
</body>
</html>
Want to see what it looks like when we are done? Let's have a look at the screenshot
that follows:
[ 29 ]
This material is copyright and is licensed for the sole use by Richard Ostheimer on 18th June 2009
Please purchase PDF Split-Merge
2205 hilda
on www.verypdf.com
ave., , missoula, , 59801to remove this watermark.
Exploring Client-side Techniques with Prototype
Redefining forms with Prototype
Forms are an integral part of the Web and web applications. In this section we will
explore how to redefine the forms using Prototype's features. Prototype has native
support for reading values, adding elements, and changing the style properties
inside the forms. So let's get started and redefine our forms.
Introduction
Forms are the epicenter of any web application. For end users, they are the product.
So how can we explore and make our forms beautiful? In this section we will try to
make our forms interactive as well as eye-candy.
Prototype provides us with the form as a namespace that encapsulates everything
related to form handling, manipulation, and serialization.
Description
The form module of Prototype comes with the following methods that handle the
biggest pain that the developers face—cross-browser scripting with forms.
All these methods may not seem very powerful at first, but trust me that they take all
the pain of doing the same things time and again.
We will quickly run through all these methods.
•
Disable: Calling this method will help us disable the form. The form and the
corresponding form elements will be visible, but users will not be able to edit
them. Imagine a simple comment form. If a user is logged in, comments can
be written; otherwise they cannot edit anything.
•
Enable: Using this method we can dynamically make the form and its
•
findFirstElement: Using this method we can find the first non-hidden,
elements active. All the form elements can be made completely or
partially active.
non-disabled element in the form.
•
focusFirstElement: This method enables the keyboard to focus on the first
•
getElements: Using this method we get a collection of all the elements in
•
getInputs: Calling this method will return the values from all the input
elements from the form.
element of the form.
the form.
[ 30 ]
This material is copyright and is licensed for the sole use by Richard Ostheimer on 18th June 2009
Please purchase PDF Split-Merge
2205 hilda
on www.verypdf.com
ave., , missoula, , 59801to remove this watermark.
Chapter 2
•
Request: Now I am sure this would catch your attention. The request
method is used to submit the form to the server using Ajax.Request.
•
Reset: Using this method we can reset the form to its default values.
•
serialize: This method is called when we need to serialize the data
coming from the form, and we need to pass it as parameters to the
Ajax.Request method.
For example, to pass two variables to server we need to create our URL to
look like this:
someform.php?id=1&username="proto"
Instead of creating the URLs ourselves, we just pass the variables in the form
of inputs. Prototype's serialize function would automatically create the query
string, which we can just pass to our server.
•
serializeElements: This is the same as the serialize method. But here
you select which elements are to be read from an array, and pass them to
the Ajax.Request method.
Usage
Now that we have seen all the form methods that our library Prototype provides, we
shall learn how to use them in our code.
Try this simple method. All you have to do is pass the ID of the form and you can
find the form being disabled. OK, one more piece of advice. Don't try to disable a
form before you read the values, otherwise it would result in an empty return.
$('formID').disable();
//again enabling the form
$('formID').enable();
Got it? Wasn't it fun? So why not try some more methods and get into the flow?
These methods are pretty much self-explanatory. We are trying to get the elements,
values of input elements, values for a specific input element, placing the keyboard
focus on to the first element of the form and reset the form to default values.
var myElements = Form.getElements($('formID'));
var myInputs = Form.getInputs('formID');
var firstName = Form.getInputs('formID', 'firstName');
Form.focusFirstElement('formID');
Form.reset('formID');
[ 31 ]
This material is copyright and is licensed for the sole use by Richard Ostheimer on 18th June 2009
Please purchase PDF Split-Merge
2205 hilda
on www.verypdf.com
ave., , missoula, , 59801to remove this watermark.
Exploring Client-side Techniques with Prototype
While we are at it, let's see a trickier one.
var params = $('myFormId').serialize();
Imagine that we have a form with five input elements. Reading the values and
passing them to the server would be a real pain. But using the method serialize,
we leave everything to Prototype to make our values ready to be sent or used as
POST or GET in Ajax.Request.
Hands-on examples
Now that we are well-versed with the concepts of playing and making our forms
intuitive, let's have some fun clubbing all the methods and features of the form
together to get a clear picture of how it works in an actual web page.
Here we go:
type="text/javascript"
type="text/javascript"
type="text/javascript"
type="text/javascript"
src="prototype.js"></script>
src="Scripts_old.js"></script>
src="src/scriptaculous.js"></script>
src="src/effects.js"></script>
<link rel="stylesheet" href="style.css" >
<head>
<title>Playing With Forms</title>
</head>
<body>
Playing with Forms is Fun!!!!
<form name="addForm" class="addForm" id="addForm">
<table class="FormTable">
<tr>
<td>First Name</td>
<td>size="35">
</td>
</tr>
<tr>
<td>Last Name</td>
<td>size="35">
</td>
</tr>
<tr>
<td>Gender</td>
<td>
[ 32 ]
This material is copyright and is licensed for the sole use by Richard Ostheimer on 18th June 2009
Please purchase PDF Split-Merge
2205 hilda
on www.verypdf.com
ave., , missoula, , 59801to remove this watermark.
Chapter 2
<select id="gender" name="gender">
<option>Male</option>
<option>Female</option>
<option>Not Sure</option>
</select>
</td>
</tr>
<tr>
<td></td>
<td><input type="submit" value="Test Submit"><td>
</tr>
</table>
</form>
<div class="links">
<a href="javascript:disableForm();">Disable The Form</a>
<a href="javascript:enableForm();">Enable The Form</a>
<a href="javascript:findFirstElement();">Find The First Element of
Form</a>
<a href="javascript:readAllElements();">Read All Elements</a>
<a href="javascript:readInputElements();">Read Only Input Elements
Value</a>
<a href="javascript:serializeForm();">Serialize The Form</a>
<a href="javascript:FocusOnFirstElement();">Focus On The First
Element of Form</a>
<a href="javascript:resetForm();">Reset The Form</a>
</div>
</body>
</html>
The code we just saw is in plain HTML, which would create a simple user interface
for us to play with and test all our methods. When you open the file in the browser,
the web page now gets a new look.
[ 33 ]
This material is copyright and is licensed for the sole use by Richard Ostheimer on 18th June 2009
Please purchase PDF Split-Merge
2205 hilda
on www.verypdf.com
ave., , missoula, , 59801to remove this watermark.
Exploring Client-side Techniques with Prototype
Check it out yourself.
Now that we have our skeleton ready, let's add some life to it with JavaScript�.
function disableForm(){
$("addForm").disable();
}
function enableForm(){
$("addForm").enable();
}
function findFirstElement() {
myElement = Form.findFirstElement("addForm");
alert(myElement.value);
}
function readAllElements() {
var myElements = Form.getElements('addForm');
for(i = 0; i < myElements.length; i++) {
alert(myElements[i].value);
}
}
function readInputElements() {
var myInputs = Form.getInputs('addForm');
for(i = 0; i < myInputs.length; i++) {
alert(myInputs[i].value);
[ 34 ]
This material is copyright and is licensed for the sole use by Richard Ostheimer on 18th June 2009
Please purchase PDF Split-Merge
2205 hilda
on www.verypdf.com
ave., , missoula, , 59801to remove this watermark.
Chapter 2
}
}
function serializeForm() {
myForm = Form.serialize("addForm");
alert(myForm);
}
function resetForm() {
myForm = Form.reset("addForm");
}
function FocusOnFirstElement() {
Form.focusFirstElement('addForm');
}
I know you are eager to click on one of those links as quickly as you can. So what
are you waiting for? We click on the Serialize The Form link and it creates a string
which is ready to be passed to the AJAX objects.
It reads each of the form elements one by one and converts them into
ready-to-use parameters.
Go ahead and try clicking on some more links. You will get a clear picture as to
what and how the form methods will actually work. And yes, imagination has
no boundaries.
[ 35 ]
This material is copyright and is licensed for the sole use by Richard Ostheimer on 18th June 2009
Please purchase PDF Split-Merge
2205 hilda
on www.verypdf.com
ave., , missoula, , 59801to remove this watermark.
Exploring Client-side Techniques with Prototype
Getting more hands-on
After exploring Prototype's features, which we can implement in our applications,
in this section we will learn how to interact with the server using Prototype through
the AJAX calls.
Hands-on example: How to use XML to read
data from the server using Prototype
By now, you are loaded with theory and have been through a simple hands-on. It's
now time for us to get into a real application module.
The module we will be working with is from the fully featured project in Chapter 10,
the Tadalist.
This module plays the most important role in an application. Using this module,
we can add items in our page dynamically and put them back to the page without
refreshing the page.
Let's quickly get the user interface part done with the following piece of code and
save the file as add.php.
type="text/javascript"
type="text/javascript"
type="text/javascript"
type="text/javascript"
src="prototype.js"></script>
src="Scripts.js"></script>
src="src/scriptaculous.js"></script>
src="src/effects.js"></script>
<link rel="stylesheet" href="style.css" >
<head>
<title>Adding New Items</title>
</head>
echo '<div id="ShowAddItem" class="ShowAddItem">action="additem.php" method="post" onsubmit="return false;">';
echo '
Enter a New Item to this List
';
echo 'size="25"/>
';
echo 'onclick="Javascript:AddItem()">';
echo '</form></div>';
echo '
';
echo '<div id="ItemTree" class="ItemTree">';
?>
[ 36 ]
This material is copyright and is licensed for the sole use by Richard Ostheimer on 18th June 2009
Please purchase PDF Split-Merge
2205 hilda
on www.verypdf.com
ave., , missoula, , 59801to remove this watermark.
Chapter 2
The code is pretty self-explanatory, but we will quickly run through it. We are
including all the required JavaScript files such as prototype, scriptaculous, and
Scripts.�����������������������������������������������������������������������
When we open the file in the browser we should able to find something
similar to the next screenshot:
Simple isn't it? I can see you smiling.
Now it's time to add some power functionality to make our add.php module
exciting. We have called a function AddItem() on the Submit button, so let's
implement it�.
function AddItem() {
var input = 'myinput='+$F('myinput');
var pars = input;
new Ajax.Request(
'additem.php',
{
asynchronous:true,
parameters:pars,
onComplete: ShowData
}
);
$('myform').reset();
$('myinput').activate();
return false;
}
[ 37 ]
This material is copyright and is licensed for the sole use by Richard Ostheimer on 18th June 2009
Please purchase PDF Split-Merge
2205 hilda
on www.verypdf.com
ave., , missoula, , 59801to remove this watermark.
Exploring Client-side Techniques with Prototype
As discussed earlier, we are making use of the utility functions such as $F() to read
the value from the input textbox. Above all, we are making use of Ajax.Request and
Two interesting
passing our parameters to the utility functions in the form of pars. ����������������
things to note here are:
1. AddItem.php is the server-side URL we are passing our parameters to.
This URL would also return the response which would be handled by the
ShowData() function.
2. We are calling the ShowData() function on the successful completion of the
request. This helps us in reading the response from the server and displaying
it back on our page.
Let's quickly get these two things ready.
Here is the code for AddItem.php:
mysql_connect("localhost", "root", "") or die(mysql_error());
//connects to the mysql db or outputs an error
mysql_select_db("test") or die(mysql_error());
// selects the database from the choosen server or outputs an
error
header("Content-Type: text/xml");
print'<?xml version="1.0" encoding="UTF-8" standalone="yes"?>';
$the_name = $_POST['myinput'];
$sql = "INSERT INTO items (ItemID,ItemName) VALUES
(NULL,'$the_name')";
$result = mysql_query($sql);
$rowID = mysql_insert_id();
if (!$result) {
echo 'Could not run query: ' . mysql_error();
exit;
}
else {
$sql = "SELECT ItemName from items where ItemID=".$rowID;
$result = mysql_query($sql);
$row = mysql_fetch_row($result);
$itemValue = $row[0];
echo '<response>';
echo '<ItemID>'.$rowID.'</ItemID>';
echo '<ItemName>'.$itemValue.'</ItemName>';
echo '</response>';
}
?>
Scared? Don't be; it's as simple as noodles.
Before I explain further, why don't we quickly get a simple database up and running
to save all our items?
[ 38 ]
This material is copyright and is licensed for the sole use by Richard Ostheimer on 18th June 2009
Please purchase PDF Split-Merge
2205 hilda
on www.verypdf.com
ave., , missoula, , 59801to remove this watermark.