Tài liệu PHP and script.aculo.us Web 2.0 Application Interfaces- P4 doc
Bạn đang xem bản rút gọn của tài liệu. Xem và tải ngay bản đầy đủ của tài liệu tại đây (1.16 MB, 30 trang )
Chapter 4
Playing sounds with script.aculo.us
Hey, what is your best friend's favorite song? Wouldn't it be great if you could
surprise him/her by playing his/her favorite song from the browser (copyright
issues notwithstanding)? Let's see how.
script.aculo.us provides us with the sounds.js file through which we can play any
song with just one line of code. It is dead simple to play a song from the browser
using JavaScript.
Types of sounds
Not to mention, most of us are bitten by music bugs—especially if you like to work
late nights with your favorite music playing. Here is a simple tutorial section to
quickly create your own playlist and share it with others too. Using this module,
we can play music through the browser. Let's see it in action.
[ 79 ]
This material is copyright and is licensed for the sole use by Richard Ostheimer on 18th June 2009
Please purchase PDF Split-Merge hildawww.verypdf.com to remove this watermark.
2205 on ave., , missoula, , 59801
Adding Effects and Multimedia to User Interface Design
MP3 sounds
MP3s are supported only in the sounds.js file from script.aculo.us 1.8 onwards.
This feature is not available in version 1.6. Here are some of the methods we can
use while trying to play sounds with script.aculo.us.
•
play: When this method is invoked, the MP3 file starts playing
•
disable: We can disable the MP3 playback using this option
•
enable: The MP3 playback can be enabled using this option
You might want to use this feature for critical events when something goes wrong
(maybe introduce a beep). Alternatively, a more positive sound could be played
that lets the user know something successful has happened.
Code usage
The syntax for using this feature is pretty simple. But before we get started, let's get
all of the necessary files included in a single file and save it as song.html.
<script src="../../lib/prototype.js" type="text/javascript"></script>
<script src="../../src/scriptaculous.js" type="text/javascript">script>
<script src="../../src/sounds.js" type="text/javascript"></script>
OK, so now quickly add this piece of JavaScript code into the page:
play sound (parallel)</a>
A hands-on example
A simple example is demonstrated here.
To play a song we need to create a link that, on clicking, should play the song.
Play Song</a>
The song path can be on our server side. Alternatively, we can even pass the
complete and correct URL of the location of the song.
We can have the MP3 song residing on our own server space, or
we can specify a path for the song. But generally it would require
much more engineering work to make the application work fast
in a multiuser environment.
[ 80 ]
This material is copyright and is licensed for the sole use by Richard Ostheimer on 18th June 2009
Please purchase PDF Split-Merge hildawww.verypdf.com to remove this watermark.
2205 on ave., , missoula, , 59801
Chapter 4
To disable the sound being played, we define the following code:
<a href="#" onclick="Sound.disable(); return false">Mute</a>
Again, to enable the sound we use:
<a href="#" onclick="Sound.enable(); return false">Enable</a>
Simple? OK. Now that we have our basics ready, let's see the action.
" /><html xmlns=" xml:lang="en" lang="en">
<head>
<title>Let The Music PLay, baby!!!</title>
<style type="text/css">
.toolbar {
background:#FFFFCC;
}
</style>
<meta http-equiv="content-type" content="text/html; charset=utf-8" />
type="text/javascript"></script>
type="text/javascript"></script>
type="text/javascript"></script>
type="text/javascript"></script>
</head>
<body>
Let The Music Play, baby!!!
<div class="toolbar">
Play Song</a>
Change The Next Song</a>
Mute</a>
Enable sounds</a>
</div>
</body>
</html>
[ 81 ]
This material is copyright and is licensed for the sole use by Richard Ostheimer on 18th June 2009
Please purchase PDF Split-Merge hildawww.verypdf.com to remove this watermark.
2205 on ave., , missoula, , 59801
Adding Effects and Multimedia to User Interface Design
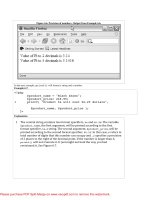
When you run the script, you should be able to see the following screenshot and hear
the song when you click on the Play Song link:
Summary
So far, we have covered various multimedia effects using script.aculo.us.
In this chapter we learned:
•
To use different types of effects such as morph, highlight, fade, blinddown,�
and many more
•
About the options available with effects
•
How to use sounds, and play songs using script.aculo.us from any browser
•
To have fun while working with the hands-on examples
In the next chapter, we shall have loads of fun learning to implement the drag and
drop functionality using script.aculo.us. Play on!
[ 82 ]
This material is copyright and is licensed for the sole use by Richard Ostheimer on 18th June 2009
Please purchase PDF Split-Merge hildawww.verypdf.com to remove this watermark.
2205 on ave., , missoula, , 59801
AJAX Drag and Drop Feature
using script.aculo.us
In Chapter 4 we saw the various effects provided by the script.aculo.us visual
library. At the end of Chapter 4, I also gave you a hands-on task. How did you
do it? The solution to the task that combines all the effects in one go,is as follows:
type="text/javascript"></script>
type="text/javascript"></script>
type="text/javascript"></script>
type="text/javascript"></script>
</head>
<body>
<div class="toolbar">
Fade</a>
SlideUp</a>
SlideDown</a>
Puff</a>
DropOut</a>
Shake</a>
Pulsate</a>
Squish</a>
This material is copyright and is licensed for the sole use by Richard Ostheimer on 18th June 2009
Please purchase PDF Split-Merge hildawww.verypdf.com to remove this watermark.
2205 on ave., , missoula, , 59801
AJAX Drag and Drop Feature using script.aculo.us
Shrink</a>
RESET</a>
BlindUp</a>
SwitchOff</a>
Fold</a>
Grow</a>
Multiple</a>
Opacity</a>
Morph</a>
Highlight</a>
Scale</a>
</div>
<div class="mydiv" id="mydiv" >
<img src="wallpaper2.bmp" width="450">
</div>
<div class="mydiv1" id="mydiv1" style="background:#DFEDFD;">
This is some random Text to make u smile. Please say Cheese :)
</div>
[ 84 ]
This material is copyright and is licensed for the sole use by Richard Ostheimer on 18th June 2009
Please purchase PDF Split-Merge hildawww.verypdf.com to remove this watermark.
2205 on ave., , missoula, , 59801
Chapter 5
Here is the screenshot for how it should look:
I am sure you got it right in one go!
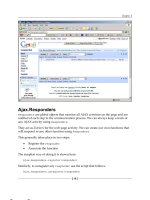
Let's move on to yet another appealing Web 2.0-ish feature—Drag and drop using
script.aculo.us. In this chapter we will learn the following:
•
Drag and drop—an introduction and explanation
•
The functionality of code usage
•
Getting started quickly with an example
•
Creating a multifunctional drag and drop application
[ 85 ]
This material is copyright and is licensed for the sole use by Richard Ostheimer on 18th June 2009
Please purchase PDF Split-Merge hildawww.verypdf.com to remove this watermark.
2205 on ave., , missoula, , 59801
AJAX Drag and Drop Feature using script.aculo.us
Introduction to the drag and drop feature
We all have used the drag and drop feature many times. Let me give you some
examples. If you've used any of the applications such as iGoogle, Blogger,
Wordpress, Backpackit, and Yahoo Mail, then chances are you will have come across
drag and drop. See the next screenshot taken from the iGoogle application where
we can drag various widgets provided by Google. We can also customize the whole
layout and rearrange the whole user interface as we want.
You will find that we can do a lot just by dragging the widgets into a certain portion
on the interface, and the application's behaviour changes with it. As the name
suggests, we can make the elements of the page draggable and apply functionality
to the behavior.
Explanation of the drag and drop feature
We can easily make any element draggable just by creating a draggable class
instance from the drag and drop module of the script.aculo.us library. We can also
add various options to the element that we want to make draggable, to add greater
interactivity as well as functionality.
[ 86 ]
This material is copyright and is licensed for the sole use by Richard Ostheimer on 18th June 2009
Please purchase PDF Split-Merge hildawww.verypdf.com to remove this watermark.
2205 on ave., , missoula, , 59801
Chapter 5
A simple way of initializing the draggable element is shown here:
new Draggable(element, options );
Some of the available options that we can explore with drag and drop are:
•
revert: When set to true, the element returns to the original position when
•
snap: This is used to form a draggable area or grid. It constrains the
•
ghosting: When you are dragging the element, a clone of the original
element will be in the starting position until the drag ends.
•
constraint: Using this option we can restrict the movement of the element
•
handle: Using this option, we can handle the movement and drag of an
•
startEffect: This option changes the behavior of the element on the user
•
endEffect: This option defines what effects should be shown when the drag
ends in the page.
•
revertEffect: This option is valid only with the revert feature. When an
element is applied with the revert option, this particular revertEffect is
the drag ends. By default, this is set to false.
movement of the element.
on horizontal and vertical planes.
element using some other element. This is rarely used because of the fact that
every draggable element will have its own handle by default.
interface when the drag begins. We can change opacity, colors, and so on to
make flexible user interface changes.
called. When the drag action ends, the effect changes (reverts) to the initial
effect, or the default effect, specified.
There are various callback options that we can use along with drag and drop:
•
onStart: This is called when a drag is initiated
•
onDrag: This is called while the drag is in progress, with every
•
change: This is the same as the onDrag callback option, but is used mostly
•
onEnd: This is called when a drag is ended
������������������������������
mouse movement
with every ���������������
mouse movement
We have learned about dragging things in the page, but hang on—where
are we going to drop them? Yes, this is yet another interesting feature with
script.aculo.us—Droppables.
[ 87 ]
This material is copyright and is licensed for the sole use by Richard Ostheimer on 18th June 2009
Please purchase PDF Split-Merge hildawww.verypdf.com to remove this watermark.
2205 on ave., , missoula, , 59801
AJAX Drag and Drop Feature using script.aculo.us
Droppables is a namespace where we can drop the dragged element by making a
call to the add() method inside this namespace. The droppables namespace has two
methods to work with:
•
Add: Calling this will add the dragged and dropped element to the target area
•
Remove: Calling this will remove the element from the target area
This namespace also comes with certain useful callbacks. They are:
•
onHover: When the mouse is rolled over the target area and its elements
•
onDrop: When a particular element is dropped inside the target area
If you feel this was a heavy dose of theory, just relax! We will see in detail each and
�������������������������������
every option mentioned above in the next section of code usage�
.
Code usage of the drag and drop feature
To get started with drag and drop, the obvious thing to do is to include the drag
and drop module. We will also include the effects module to add more beauty to
our user interface.
<script type="text/javascript" src="src/scriptaculous.js"></script>
<script type="text/javascript" src="src/effects.js"></script>
<script type="text/javascript" src="src/dragdrop.js"></script>
We know that to initialize the draggable element we have to call the instance of the
draggable class:
new Draggable(element,options );
The first parameter is the ID of the element which we want to make draggable������
. The
other parameters are optional, like fading effect, revert, and the others that we have
covered above�
.
Now, let's learn to add different options step-by-step.
•
Add the revert option
new Draggable(element,{revert:true} );
•
Add the snap option
new Draggable(element,
{
revert:true,
snap: [x,y]
} );
[ 88 ]
This material is copyright and is licensed for the sole use by Richard Ostheimer on 18th June 2009
Please purchase PDF Split-Merge hildawww.verypdf.com to remove this watermark.
2205 on ave., , missoula, , 59801
Chapter 5
•
Add the ghosting option
new Draggable(element,
{
revert:true,
snap: [x,y],
ghosting:true
} );
•
Add the constraint option
new Draggable(element,
{
revert:true,
snap: [x,y],
ghosting:true,
constraint:"horizontal"
} );
•
Add the handle option
new Draggable(element,
{
revert:true,
snap: [x,y],
ghosting:true,
constraint:"horizontal",
handle: 'dragHandle'
} );
•
Add the startEffect option
new Draggable(element,
{
revert:true,
snap: [x,y],
ghosting:true,
constraint:"horizontal",
handle: 'dragHandle',
startEffect: CallFunction('element')
} );
•
Add the endEffect option
new Draggable(element,
{
revert:true,
snap: [x,y],
ghosting:true,
constraint:"horizontal",
[ 89 ]
This material is copyright and is licensed for the sole use by Richard Ostheimer on 18th June 2009
Please purchase PDF Split-Merge hildawww.verypdf.com to remove this watermark.
2205 on ave., , missoula, , 59801
AJAX Drag and Drop Feature using script.aculo.us
handle: 'dragHandle',
startEffect: CallFunction('element'),
endEffect: EndcallFunction('element')
} );
•
Add the revertEffect option
new Draggable(element,
{
revert:true,
snap: [x,y],
ghosting:true,
constraint:"horizontal",
handle: 'dragHandle',
startEffect: CallFunction('element'),
endEffect: EndcallFunction('element'),
revertEffect:callrevertFunction('element')
} );
Well, this was all about the draggable options. Let's quickly define the callback
functions (in one go) as well.
new Draggable(element,
{
onStart: callFunctionOnStart(),
onDrag: callFunctionOnDrag(),
onEnd: callFunctionOnEnd()
});
Now, let's not forget the droppables. After all, that's where we're going to drop
things, right? As mentioned before, droppables mainly has two methods:
•
Adding a new element in the target area
Droppables.add(element, options );
•
Removing an element from the target area
Droppables.remove(element);
When we drop elements in the droppable area, they become a part of the new
droppable section. Hence, we can add a couple of callbacks and functions within
the same.
Let's add some callback functions to the droppables.
Droppables.add(
element,
{
onDrop:callDropFunction
}
);
[ 90 ]
This material is copyright and is licensed for the sole use by Richard Ostheimer on 18th June 2009
Please purchase PDF Split-Merge hildawww.verypdf.com to remove this watermark.
2205 on ave., , missoula, , 59801
Chapter 5
We have approached things differently in this section, adding options
step-by-step to make it clear that we can actually do a lot of things with the drag
and drop functionality. Having said that, let's move on and play with some code.
Again, we shall start with the simplest possible example and convert it step-by-step
into a monster.
Hands-on example: Creating a drag and
drop sample in one line of code
We can achieve the drag and drop functionality in just one line of JavaScript code.
That's how simple script.aculo.us makes it for us.
All we did above was—we created a simple <div> and added some text to it. As
suggested earlier, let's also add the required .js files of script.aculo.us.
<script type="text/javascript" src="src/prototype.js"></script>
<script type="text/javascript" src="src/scriptaculous.js"></script>
<script type="text/javascript" src="src/dragdrop.js"></script>
Let's quickly add some flesh in our HTML code.
<body>
This part wont move..come what may!!!!
<div id="myDiv">
Drag me to Next level...
And, Next level is where you drag me
</div>
</body>
Now comes the magic scripting part of JavaScript.
window.onload = function() {
new Draggable('myDiv');
}
And we are done! The next screenshot shows what the application looks like:
[ 91 ]
This material is copyright and is licensed for the sole use by Richard Ostheimer on 18th June 2009
Please purchase PDF Split-Merge hildawww.verypdf.com to remove this watermark.
2205 on ave., , missoula, , 59801
AJAX Drag and Drop Feature using script.aculo.us
You will have to figure out what the <div> box does here. OK, so now that you have
learned the art of moving elements in the page, it's our duty as well to send it back to
the original place. So, let's modify the above JavaScript code and send the <div> box
back to the original place using the revert option. The updated script is shown here:
window.onload = function() {
new Draggable('myDiv',{revert:true});
}
When you drag the <div> box and then release the mouse (that is, when a drag is
complete), the <div> box goes back to the original place.
I am sure loads of ideas are running around in your mind about all the possibilities
of using the drag and drop feature. Let's walk through some of them. While dragging
the element from the page, why not show a clone of the original in its place (and yes,
doing it many times results in chaos)?
window.onload = function() {
new Draggable('myDiv',{ghosting:true});
}
[ 92 ]
This material is copyright and is licensed for the sole use by Richard Ostheimer on 18th June 2009
Please purchase PDF Split-Merge hildawww.verypdf.com to remove this watermark.
2205 on ave., , missoula, , 59801
Chapter 5
This is how it might look. Oops! Does it look ugly? You can see why people
call it ghost!
Hands-on example: Advanced drag and
drop tutorial
Now that the concepts of drag and drop are clear, we are well set to work out an
advanced drag and drop module. Imagine a product cart. As users, we need to
select products and then check out. Wouldn't it be simple if a user can just drag the
products (s)he wants to buy, drop them in the selected cart, and then check out?
On top of that, we will try to keep our user interface pretty neat and clean.
Let's get started with the code. First, add the script.aculo.us libraries to our code in
the <head> section.
type="text/javascript"
type="text/javascript"
type="text/javascript"
type="text/javascript"
src="src/prototype.js"></script>
src="src/scriptaculous.js"></script>
src="src/effects.js"></script>
src="src/dragdrop.js"></script>
[ 93 ]
This material is copyright and is licensed for the sole use by Richard Ostheimer on 18th June 2009
Please purchase PDF Split-Merge hildawww.verypdf.com to remove this watermark.
2205 on ave., , missoula, , 59801
AJAX Drag and Drop Feature using script.aculo.us
We will add some effects to our module. We will also need to add some products.
For now we are just creating <div>s. But in the later part of the book, we will create
the same module through a database-driven module too.
Let's create a simple <div> and give some name to the product.
<div id="myProduct1" align="center">
iPhone
</div>
Similarly, let's add a few more <div>s and (to give a neat user interface) embed them
inside a table. The code now looks like this:
<div id="container">
Select products and just drag them!!!
<table>
<tr>
<td>
<div id="myProduct1" align="center">
iPhone
</div>
</td>
<td>
<div id="myProduct2" align="center">
Ipod Nano
</div>
</td>
<td>
<div id="myProduct3" align="center">
MacPro Airbook
</div>
</td>
</tr>
</table>
</div>
<div id="myDiv">
Drag Some products to my menu
</div>
<div id="note">
</div>
We need to keep our user informed as to what is happening in the module.
Therefore, we have added a <div> with id=note. We will use this to update
the user with whatever is happening on the page.
[ 94 ]
This material is copyright and is licensed for the sole use by Richard Ostheimer on 18th June 2009
Please purchase PDF Split-Merge hildawww.verypdf.com to remove this watermark.
2205 on ave., , missoula, , 59801
Chapter 5
Now moving on to coding, let's first initialize the draggables and droppables
of the page.
window.onload = function() {
new Draggable('myProduct1',{revert:true});
new Draggable('myProduct2',{revert:true});
new Draggable('myProduct3',{revert:true});
Droppables.add(
'myDiv',
{
onDrop: addItem
}
);
Droppables.add(
'container',
{
onDrop: removeItem
}
);
}
We have added all three product <div>s as draggable. We have added our
myDiv <div> as a droppable, as we're dragging the products from the container to
myDiv. Similarly, we have also added container as droppables, since we want the
user to remove the products as well if (s)he wants to.
We learned about the callbacks in the previous hands-on section. Let's make use of
them. We are calling the function addItem and removeItem for the onDrop event.
This means when a user drags the product <div> and drops it in the droppable
area, the functions get called. Now, let's define the functionality for addItem and
removeItem. In addItem, we are simply appending the draggable elements to myDiv.
function addItem(draggable) {
myDiv.appendChild(draggable);
$('note').innerHTML="Added"+draggable.innerHTML;
new Effect.Highlight($('note'));
}
In removeItem, we are appending the draggable elements back to our container.
function removeItem(draggable, droppable) {
container.appendChild(draggable);
$('note').innerHTML="Removed"+draggable.innerHTML;
new Effect.Highlight($('note'));
}
We are also adding the product name to the <div> note along with the Highlight
effect to help the user understand what is happening on the screen.
[ 95 ]
This material is copyright and is licensed for the sole use by Richard Ostheimer on 18th June 2009
Please purchase PDF Split-Merge hildawww.verypdf.com to remove this watermark.
2205 on ave., , missoula, , 59801
AJAX Drag and Drop Feature using script.aculo.us
Now, a little bit of CSS styling for our application. This is how it looks when we add
colors to our module:
When we drag a product to our menu, we get the following screenshot of
the application:
[ 96 ]
This material is copyright and is licensed for the sole use by Richard Ostheimer on 18th June 2009
Please purchase PDF Split-Merge hildawww.verypdf.com to remove this watermark.
2205 on ave., , missoula, , 59801
Chapter 5
We have also added some effects to the module. Let's see how they look in
the application�
:
The idea of using Highlight here is to showcase that we can use our own creativity
and the power of AJAX functionality on the page. We are updating the status
without refreshing the page. We can do a lot of things such as fetching data
from server or passing data to the server on every event.
Summary
With this happy, clean, and beautiful user interface we come to the end of the drag
and drop section. So far we have learned:
•
Drag and drop—an introduction and explanation
•
Code usage
•
Various options and hands-on examples
•
Advanced drag and drop module to get comfortable with AJAX
In the next chapter we will learn everything about in-place editing using
script.aculo.us. By the way, what is your favourite color? You will need it in
the next chapter.
[ 97 ]
This material is copyright and is licensed for the sole use by Richard Ostheimer on 18th June 2009
Please purchase PDF Split-Merge hildawww.verypdf.com to remove this watermark.
2205 on ave., , missoula, , 59801
This material is copyright and is licensed for the sole use by Richard Ostheimer on 18th June 2009
Please purchase PDF Split-Merge hildawww.verypdf.com to remove this watermark.
2205 on ave., , missoula, , 59801
In-place Editing using
script.aculo.us
In Chapter 5 we learned about the drag and drop features of the script.aculo.us
library. We created elements, which we could move around the page, and also
tried adding some AJAX functionality to them.
In this chapter, we will learn about editing the content in the page without moving,
dragging, or dropping it. This feature is called in-place editing. The key topics that
we are going to explore in this chapter are:
•
Introduction to in-place editing
•
In-place editing: Definition and attributes
•
Code usage in examples
•
Tips and tricks involving in-place editing
•
Hands-on example: Handling at the server-side
•
Hands-on with InPlaceCollectionEditor
An introduction to the in-place
editing feature
In-place editing means making the content available for editing just by clicking on it.
We hover on the element, allow the user to click on the element, edit the content, and
update the new content to our server.
This material is copyright and is licensed for the sole use by Richard Ostheimer on 18th June 2009
Please purchase PDF Split-Merge hildawww.verypdf.com to remove this watermark.
2205 on ave., , missoula, , 59801
In-place Editing using script.aculo.us
Sounds complex? Not at all! It's very simple. Check out the example about
www.netvibes.com shown in the following screenshot. You will notice that
by just clicking on the title, we can edit and update it.
Now, check out the following screenshot to see what happens when we click on
the title�
.
[ 100 ]
This material is copyright and is licensed for the sole use by Richard Ostheimer on 18th June 2009
Please purchase PDF Split-Merge hildawww.verypdf.com to remove this watermark.
2205 on ave., , missoula, , 59801
Chapter 6
In simple terms, in-place editing is about converting the static content into an
editable form without changing the place and updating it using AJAX.
Getting started with in-place editing
Imagine that we can edit the content inside the static HTML tags such as a simple
or even a complex <div>.
The basic syntax of initiating the constructor is shown as follows:
New Ajax.InPlaceEditor(element,url,[options]);
The constructor accepts three parameters:
•
element: The target static element which we need to make editable
•
url: We need to update the new content to the server, so we need a URL to
handle the request
options: Loads of options to fully customize our element as well as the
in-place editing feature
•
We shall look into the details of element and url in the next section. For now,
let's learn about all the options that we will be using in our future examples.
The following set of options is provided by the script.aculo.us library. We can use
the following options with the InPlaceEditor object:
•
•
•
•
•
•
•
okButton: Using this option we show an OK button that the user clicks on
after editing. By default it is set to true.
okText: With this option we set the text value on the OK button. By default
this is set to true.
cancelLink: This is the button we show when the user wishes to cancel the
action. By default it's set to true.
cancelText: This is the text we show as a value on the Cancel button. By
default it's set to true.
savingText: This is the text we show when the content is being saved. By
default it's set to Saving. We can also give it any other name.
clickToEditText: This is the text string that appears as the control tooltip
upon mouse-hover.
rows: Using this option we specify how many rows to show to the user. By
default it is set to 1. But if we pass more than 1 it would appear as a text area,
or it will show a text box.
[ 101 ]
This material is copyright and is licensed for the sole use by Richard Ostheimer on 18th June 2009
Please purchase PDF Split-Merge hildawww.verypdf.com to remove this watermark.
2205 on ave., , missoula, , 59801
In-place Editing using script.aculo.us
•
•
•
•
•
cols: Using this option we can set the number of columns we need to show
to the user.
highlightColor: With this option we can set the background color of
the element.
highlightendColor: Using this option we can bring in the use of effects.
Specify which color should be set when the action ends.
loadingText: When this option is used, we can keep our users informed
about what is happening on the page with text such as Loading or
Processing Request.
loadTextURL: By using this option we can specify the URL at the server
side to be contacted in order to load the initial value of the editor when it
becomes active.
We also have some callback options to use along with in-place editing.
•
onComplete: On any successful completion of a request, this callback option
enables us to call functions.
•
onFailure: Using this callback option on a request's failure, we can make a
•
Callback: This option calls back functions to read values in the text box, or
call to functions.
text area, before initiating a save or an update request.
We will be exploring all these options in our hands-on examples.
Code usage of the in-place editing
features and options
Now things are simple from here on. Let's get started with code.
First, let's include all the required scripts for in-place editing:
type="text/javascript"
type="text/javascript"
type="text/javascript"
type="text/javascript"
src="src/prototype.js"></script>
src="src/scriptaculous.js"></script>
src="src/effects.js"></script>
src="src/controls.js"></script>
Once this is done, let's create a basic HTML page with some
and <div> elements,
and add some content to them.
<body>
<div id="myDiv">
First move the mouse over me and then click on ME :)
</div>
</body>
[ 102 ]
This material is copyright and is licensed for the sole use by Richard Ostheimer on 18th June 2009
Please purchase PDF Split-Merge hildawww.verypdf.com to remove this watermark.
2205 on ave., , missoula, , 59801
Chapter 6
In this section we will be learning about the options provided
with the in-place editing feature. In the hands-on section we will be
working with server-side scripts of handling data.
Now, it's turn to add some spicy JavaScript code and create the object for
InPlaceEditor.
In the following piece of code we have passed the element ID as myDIV, a fake URL,
and two options okText and cancelText:
Function makeEditable() {
new Ajax.InPlaceEditor(
'myDIV',
'URL',
{
okText: 'Update',
cancelText: 'Cancel',
}
);
}
We will be placing them inside a function and we will call them on page load. So the
complete script would look like this:
<script>
function makeEditable() {
new Ajax.InPlaceEditor(
'myDIV',
'URL',
{
okText: 'Update',
cancelText: 'Cancel'
}
);
}
</script>
<body onload="JavaScript:makeEditable();">
<div id="myDiv">
First move the mouse over me and then click on ME :)
</div>
</body>
[ 103 ]
This material is copyright and is licensed for the sole use by Richard Ostheimer on 18th June 2009
Please purchase PDF Split-Merge hildawww.verypdf.com to remove this watermark.
2205 on ave., , missoula, , 59801